
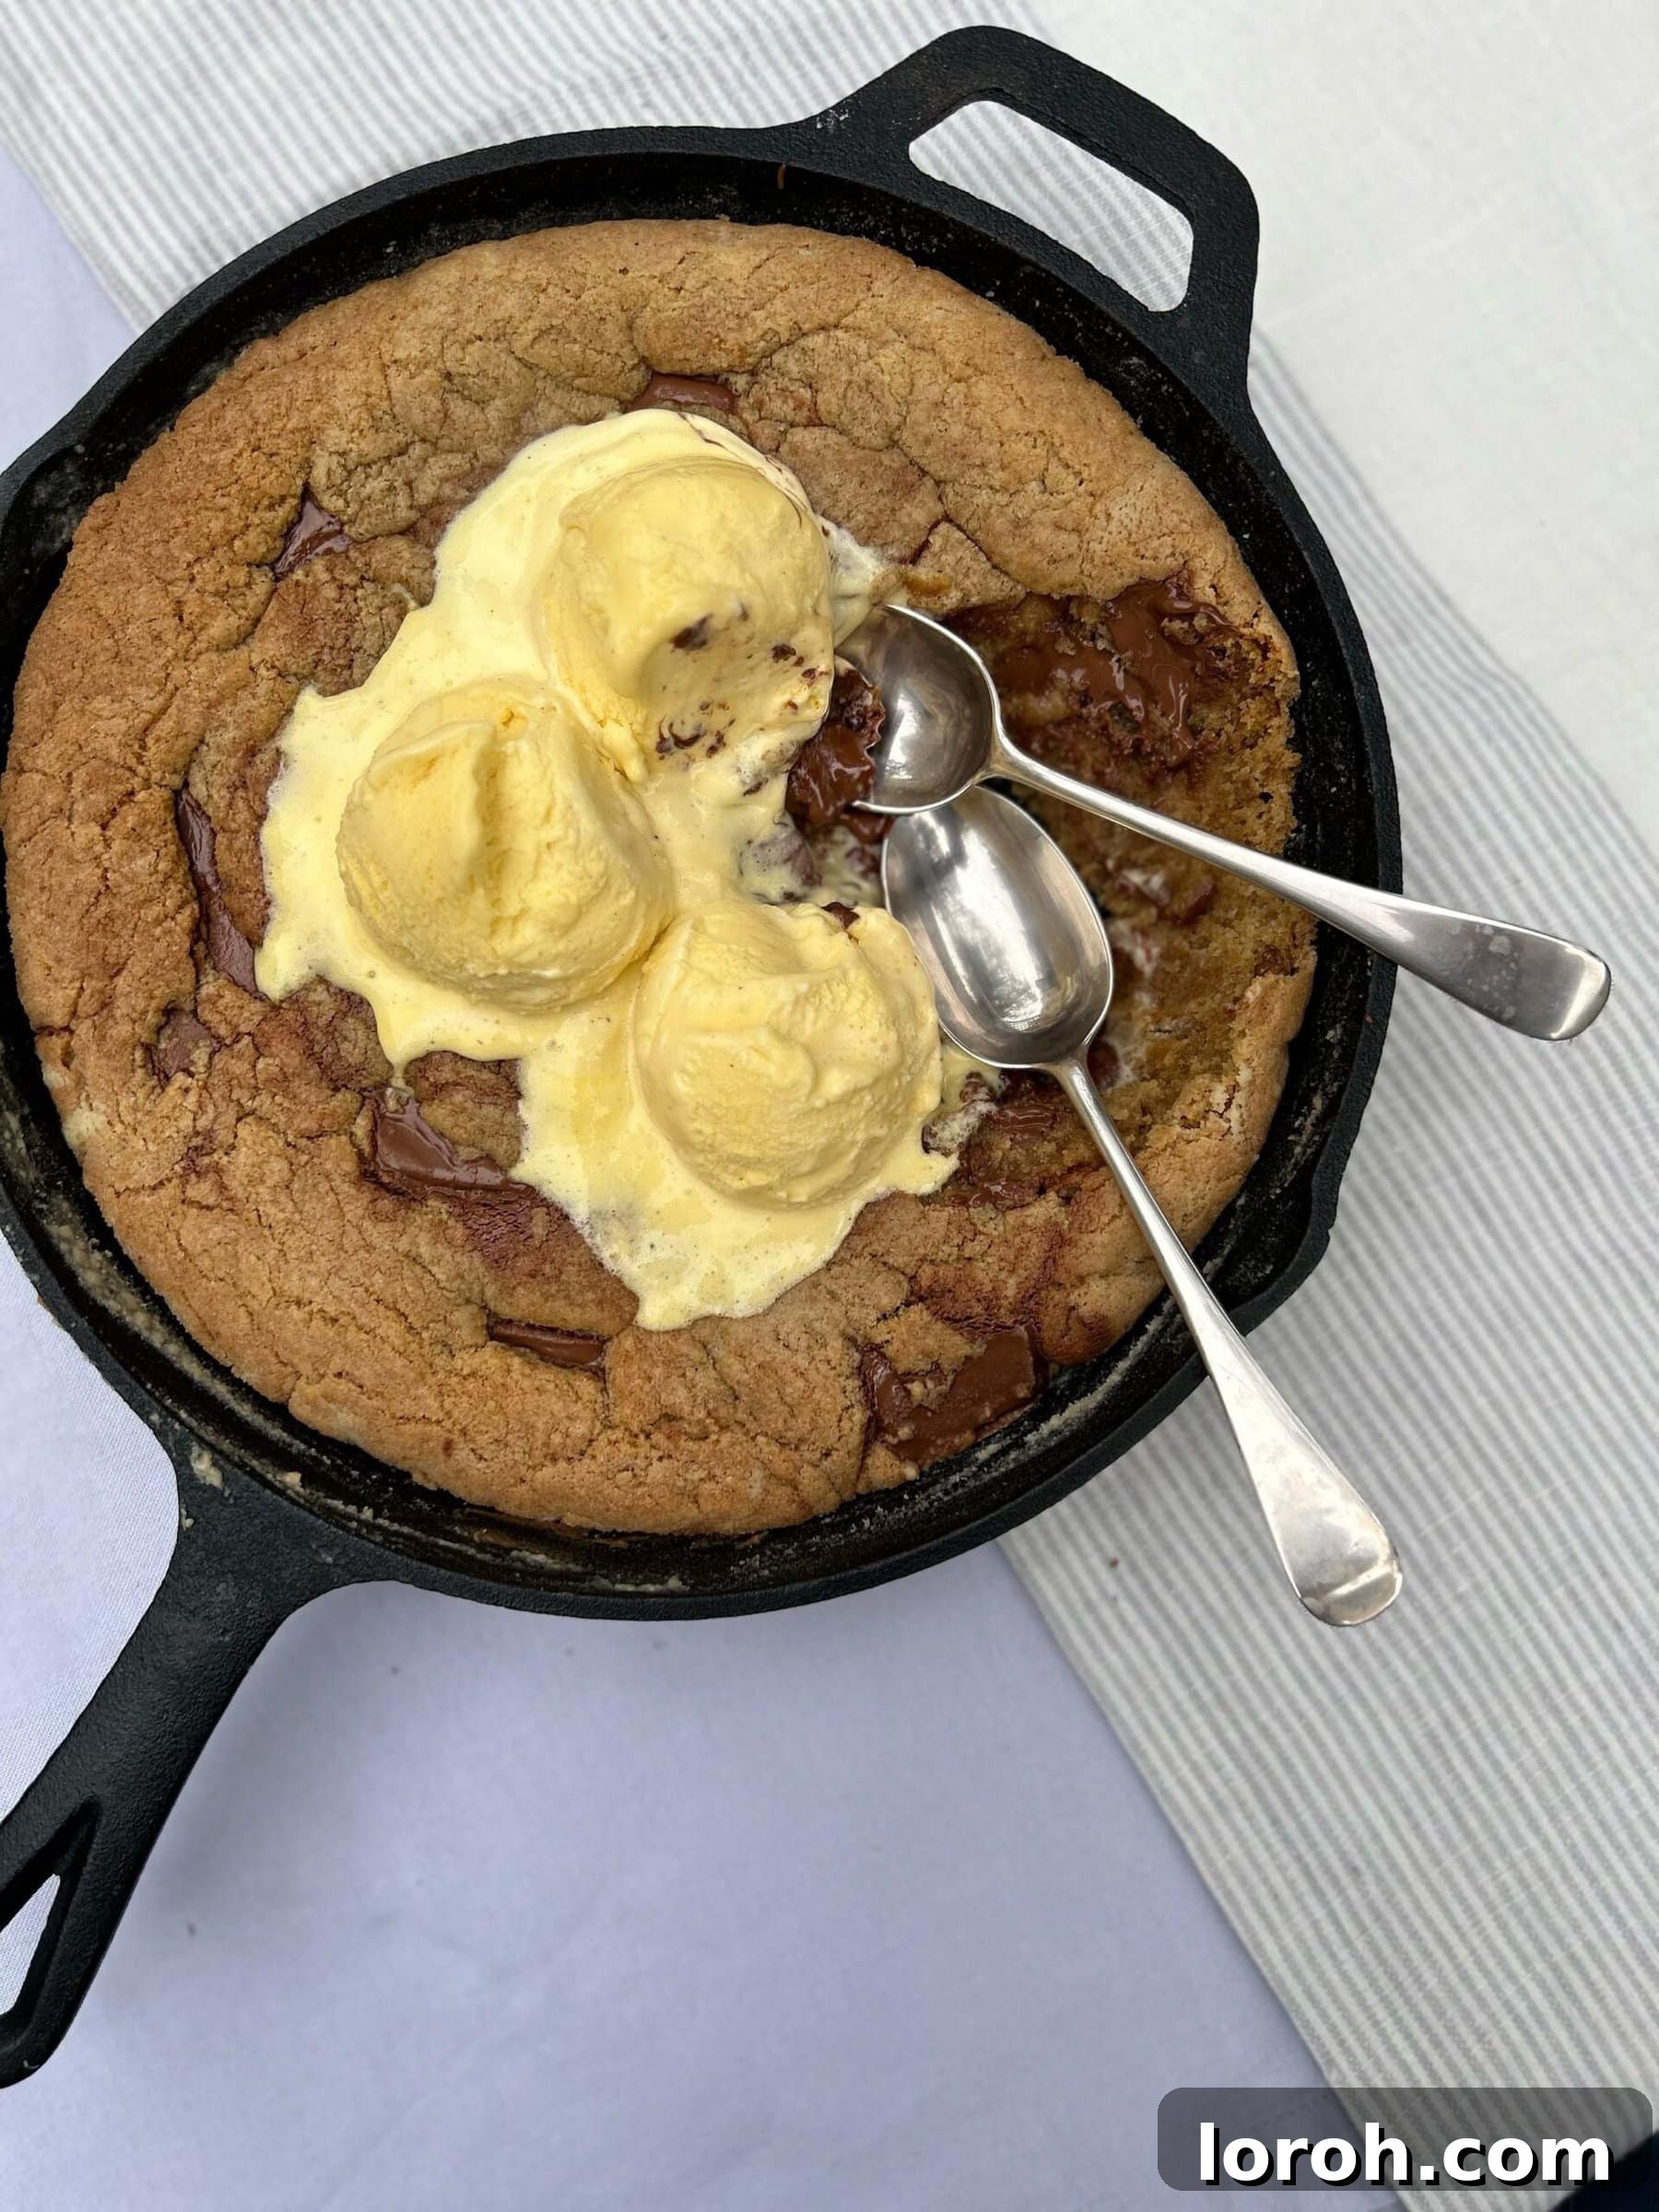

The Ultimate Brown Butter Chocolate Chip Skillet Cookie
Prepare to be amazed by our ultimate Brown Butter Chocolate Chip Skillet Cookie! This isn’t just any cookie; it’s a culinary masterpiece baked directly in a cast-iron skillet, resulting in a warm, impossibly gooey center, perfectly crispy edges, and an incredibly rich, nutty flavor from the browned butter. It’s the ideal easy dessert when entertaining friends or simply craving something extraordinary, served hot from the oven with generous scoops of premium vanilla ice cream melting gloriously over its surface. Alternatively, if you possess incredible willpower, you can let it cool for a perfectly soft and chewy cookie that’s delightful sliced and shared. This recipe promises a truly irresistible treat that will undoubtedly become a cherished favorite in your dessert repertoire!
15 minutes
25 minutes
6 generous servings
Rate Recipe
Print Recipe
Never Lose This Recipe!
Want to keep this amazing recipe handy? Bookmark this page in your browser or subscribe to our newsletter to receive weekly recipe updates and special tips directly to your inbox. Make sure you don’t miss out on more delicious creations!
Ingredients for Your Skillet Cookie Masterpiece
Crafting the perfect skillet cookie starts with the right ingredients. We recommend using high-quality components to ensure the best flavor and texture. Pay special attention to having your eggs at room temperature; this seemingly small detail significantly aids in creating a smooth, perfectly emulsified dough.
-
250 g dark chocolate, cut into generous chunks
(Opt for a good quality dark chocolate, ideally 60-70% cacao. Cutting it into varied chunks rather than using pre-made chips creates delightful gooey pockets of melted chocolate throughout the cookie as it bakes.)
-
1 cup soft brown sugar
(This ingredient is crucial for the cookie’s signature chewiness and imparts a rich, caramel-like, molasses flavor that beautifully complements the browned butter notes.)
-
2/3 cup caster sugar (superfine granulated sugar)
(Caster sugar adds essential sweetness and contributes to achieving those highly desirable, slightly crispy edges that contrast wonderfully with the soft interior.)
-
160 g unsalted butter
(The star ingredient for browning! Using unsalted butter allows you to control the overall saltiness, and the browning process unlocks a deep, complex, nutty aroma and flavor.)
-
½ teaspoon Maldon salt or other flaky sea salt
(A touch of quality flaky salt is a secret weapon here. It magically balances the sweetness, amplifies the chocolate and brown butter flavors, and adds a subtle textural crunch. Don’t be tempted to skip this!)
-
2 large eggs, at room temperature
(Room temperature eggs are vital as they emulsify much better with the butter and sugar, resulting in a smoother, more homogenous cookie dough and a superior final texture.)
-
1½ teaspoons vanilla paste or extract
(Vanilla is a cornerstone flavor in any excellent chocolate chip cookie, providing warmth and depth that perfectly complements the richness of chocolate and the nutty tones of browned butter.)
-
2 cups all-purpose flour (plain flour)
(This forms the structural foundation of our cookie. For best results, measure flour accurately, ideally by weight using a kitchen scale.)
-
¼ teaspoon baking soda (bicarbonate of soda)
(A small amount of baking soda acts as a leavening agent, helping the cookie to spread slightly and achieve that wonderfully soft, chewy texture we’re aiming for.)
-
Additional Flaky sea salt
(For a final flourish! A sprinkle on top before baking adds a beautiful aesthetic and another layer of flavor complexity to the finished skillet cookie.)
Step-by-Step Instructions for Your Skillet Cookie
Creating this spectacular skillet cookie is surprisingly straightforward, but paying close attention to each step, especially the browning of the butter, will guarantee an absolutely delicious result. Follow these detailed instructions to bake your perfect cookie.
-
Step 1: Preheat Your Oven and Prepare Your Skillet
Start by preheating your oven to 190°C (375°F). This ensures a consistent baking temperature from the moment your cookie enters the oven. While your oven heats, make sure your cast-iron skillet (or another oven-safe, heavy-bottomed pan of similar size, ideally 9-10 inches in diameter) is clean and ready. There’s generally no need for extensive greasing, as the butter in the cookie dough will naturally prevent sticking, especially in a well-seasoned cast iron skillet. -
Step 2: Master the Art of Browning the Butter
This is the magical step that defines the flavor of this cookie! Place your measured unsalted butter into the skillet over medium heat. Allow the butter to melt completely, then continue to cook it, stirring frequently to ensure even browning. You’ll observe the butter bubbling and foaming. As it cooks, the milk solids within the butter will separate and begin to sink to the bottom of the pan. Keep a vigilant eye on these solids; they will gradually transform from white to a beautiful golden brown, releasing an intoxicating, nutty aroma that smells almost like toasted hazelnuts or caramel. The goal is a rich, amber-colored butter with deep golden-brown bits at the bottom. As soon as this desirable color and aroma are achieved, immediately remove the skillet from the heat to prevent burning. Carefully pour the browned butter, including all the delightful browned bits, into a large, heat-proof mixing bowl. Let it cool slightly for about 5 to 10 minutes. Once it has cooled a bit but is still warm, stir in both the soft brown sugar and the caster sugar, along with the ½ teaspoon of Maldon salt. Mix vigorously until everything is well combined and the sugars begin to dissolve into the warm, nutty butter. -
Step 3: Incorporate Wet Ingredients and Dry Mix
Before proceeding, ensure your brown butter and sugar mixture has cooled sufficiently – it should be warm to the touch, but not hot. This is critical to prevent “scrambling” your eggs when they are added. Once cooled, whisk in the room temperature eggs, one at a time, ensuring each egg is fully incorporated before adding the next. Follow this by stirring in the vanilla paste or extract. Continue mixing until the mixture appears smooth, glossy, and well emulsified. In a separate bowl, briefly whisk together your all-purpose flour and bicarbonate of soda. Now, gradually add the dry flour mixture to the wet ingredients. Mix gently with a spatula or wooden spoon until the dough just comes together. Be careful not to overmix at this stage; overworking the gluten in the flour can lead to a tougher, less tender cookie. Stop mixing as soon as you no longer see any dry streaks of flour. -
Step 4: Fold in the Chocolate and Prepare for Baking
It’s time for the chocolate! Gently fold three-quarters of your luscious dark chocolate chunks into the cookie dough. Mix just enough so that the chocolate is evenly distributed throughout the dough. Reserve the remaining one-quarter of the chocolate for sprinkling on top; this ensures beautiful, enticing pools of melted chocolate on the surface of your baked cookie. Transfer the prepared cookie dough back into your skillet. Using the back of a spoon or your hands, press the dough evenly into the bottom of the skillet, ensuring it covers the entire surface. Scatter the reserved chocolate chunks generously over the top of the cookie dough, gently pressing some of them into the surface. Finally, give it a final, delicate sprinkle of additional flaky sea salt for an exquisite visual appeal and a delightful pop of salty flavor that complements the sweetness. -
Step 5: Bake to Perfection and Serve Your Masterpiece
Carefully transfer the skillet to your preheated oven. Bake for approximately 20–25 minutes. The cookie is perfectly done when its outer edges are beautifully golden brown and appear slightly puffed up, while the center still looks a little soft, gooey, and perhaps slightly underbaked. Remember, the cookie will continue to “carry over” cook from the residual heat of the skillet once it’s removed from the oven, reaching perfect doneness. For the ultimate warm dessert experience, serve it immediately, straight from the skillet, with generous scoops of your favorite vanilla bean ice cream or a luxurious dollop of fresh whipped cream. The contrast of the warm, melting cookie and cold, creamy topping is simply unparalleled! If you prefer a firmer, more sliceable cookie (and can somehow resist the immediate temptation), allow it to cool in the skillet for at least 1 hour before cutting it into wedges. Enjoy your phenomenal homemade skillet cookie!
Watch the Recipe Video
Sometimes, seeing is believing! A visual guide can be incredibly helpful for mastering new techniques like browning butter or achieving the perfect cookie texture. While there isn’t an embedded video here currently, you can often find a recipe reel or video demonstrating each step, from initial preparation to the final sprinkle of salt, on our social media channels or linked here when available. Visual cues can truly help you perfect this delicious skillet cookie!
Watch the Recipe Reel on Instagram Here!
Pro Tips for the Perfect Skillet Cookie Every Time
Even though this recipe is straightforward, a few expert tips can elevate your skillet cookie from great to absolutely extraordinary:
- Embrace the Brown Butter Process: This is the soul of the cookie. Don’t rush it! Stir frequently, observe the color changes from pale yellow to golden amber, and let that nutty aroma guide you. The tiny browned bits are full of flavor, so be sure to scrape them into your mixing bowl.
- Temperature Matters for Eggs: Cold eggs can cause the butter mixture to seize and become clumpy. Always use room temperature eggs, which will emulsify smoothly with the butter and sugar, creating a uniform, velvety dough.
- The Danger of Overmixing: Once you add the flour, mix only until just combined. Overmixing develops the gluten in the flour, which can lead to a tough, dry cookie. A few dry streaks are better than an overmixed dough.
- Invest in Quality Chocolate: The type and quality of chocolate make a significant difference. High-quality dark chocolate (60-70% cacao) chunks melt beautifully, creating pools of rich, decadent flavor throughout your cookie.
- Don’t Skimp on the Salt: Flaky sea salt, like Maldon, is a game-changer. It doesn’t just add saltiness; it enhances all the other flavors, particularly the chocolate and the subtle nuttiness of the brown butter, creating a harmonious taste experience.
- Know Your Oven’s Personality: Every oven is unique. Keep a close eye on your cookie during the last few minutes of baking. It should be golden brown around the edges and slightly puffed, with a center that still looks a bit soft and gooey. Trust your senses more than the clock alone.
- Chilling the Dough (Optional): While not strictly necessary for this recipe, chilling the dough for 30 minutes to an hour can deepen the flavors and result in a slightly chewier cookie. This is especially useful if your kitchen is warm.
Delicious Variations and Customizations to Explore
While the classic Brown Butter Chocolate Chip Skillet Cookie is phenomenal on its own, don’t hesitate to get creative with these delightful variations:
- Nutty Indulgence: Add ½ cup of chopped toasted pecans, walnuts, or almonds along with the chocolate chips for an extra layer of crunch and earthy flavor.
- S’mores Skillet Cookie: During the last 5 minutes of baking, sprinkle a handful of mini marshmallows and crushed graham cracker pieces over the top. Bake until the marshmallows are golden and toasted.
- Caramel Swirl Delight: Before baking, swirl a few tablespoons of homemade or good quality store-bought caramel sauce into the cookie dough. You can also drizzle more on top before serving.
- White Chocolate & Macadamia: Swap the dark chocolate for creamy white chocolate chunks and add ½ cup of chopped macadamia nuts for a different, yet equally satisfying, classic cookie combination.
- Peanut Butter Lover’s Dream: Swirl 2-3 tablespoons of creamy peanut butter into the cookie dough, or incorporate peanut butter chips alongside the chocolate chunks for an irresistible nutty twist.
- Seasonal Spices: Add ½ teaspoon of ground cinnamon or a pinch of nutmeg to the dry ingredients for a warm, spiced version, especially wonderful during cooler months.
Elevate Your Dessert: Serving Suggestions
The beauty of a skillet cookie lies in its versatility and impressive presentation. While best served warm, straight from the oven, there are many ways to enjoy and enhance this incredible treat:
- Classic A La Mode: The most popular and arguably the best way to enjoy it! Top generous wedges with scoops of premium vanilla bean ice cream. The contrasting temperatures and textures are pure bliss. Other ice cream flavors like salted caramel, coffee, or even a rich chocolate can also be fantastic pairings.
- Whipped Cream & Fresh Berries: For a lighter, yet still decadent option, add a dollop of fresh, lightly sweetened whipped cream. Garnish with a handful of fresh berries such as strawberries, raspberries, or blueberries for a burst of freshness and color.
- Drizzled with Sauce: Elevate the experience with a warm chocolate fudge sauce, a homemade salted caramel sauce, or even a tangy raspberry coulis drizzled over the top.
- Coffee or Milk Companion: Allow the cookie to cool slightly, then cut into wedges. This makes for an exquisite treat to enjoy with your afternoon coffee, a cup of tea, or a tall, cold glass of milk.
- Dessert Bar Centerpiece: For gatherings, place the warm skillet cookie in the center of a dessert bar, surrounded by various toppings like sprinkles, chopped nuts, mini marshmallows, extra chocolate sauces, and different ice cream flavors, allowing guests to customize their own portion.
- Beyond Dessert: We won’t tell anyone if you enjoy a cooled slice of this cookie for a luxurious breakfast or an indulgent afternoon snack. It’s truly that good at any time of day!
Loved this recipe? Share your thoughts below!
We always appreciate your feedback, questions, and comments. Let us know how your Brown Butter Chocolate Chip Skillet Cookie turned out and what variations you tried!