
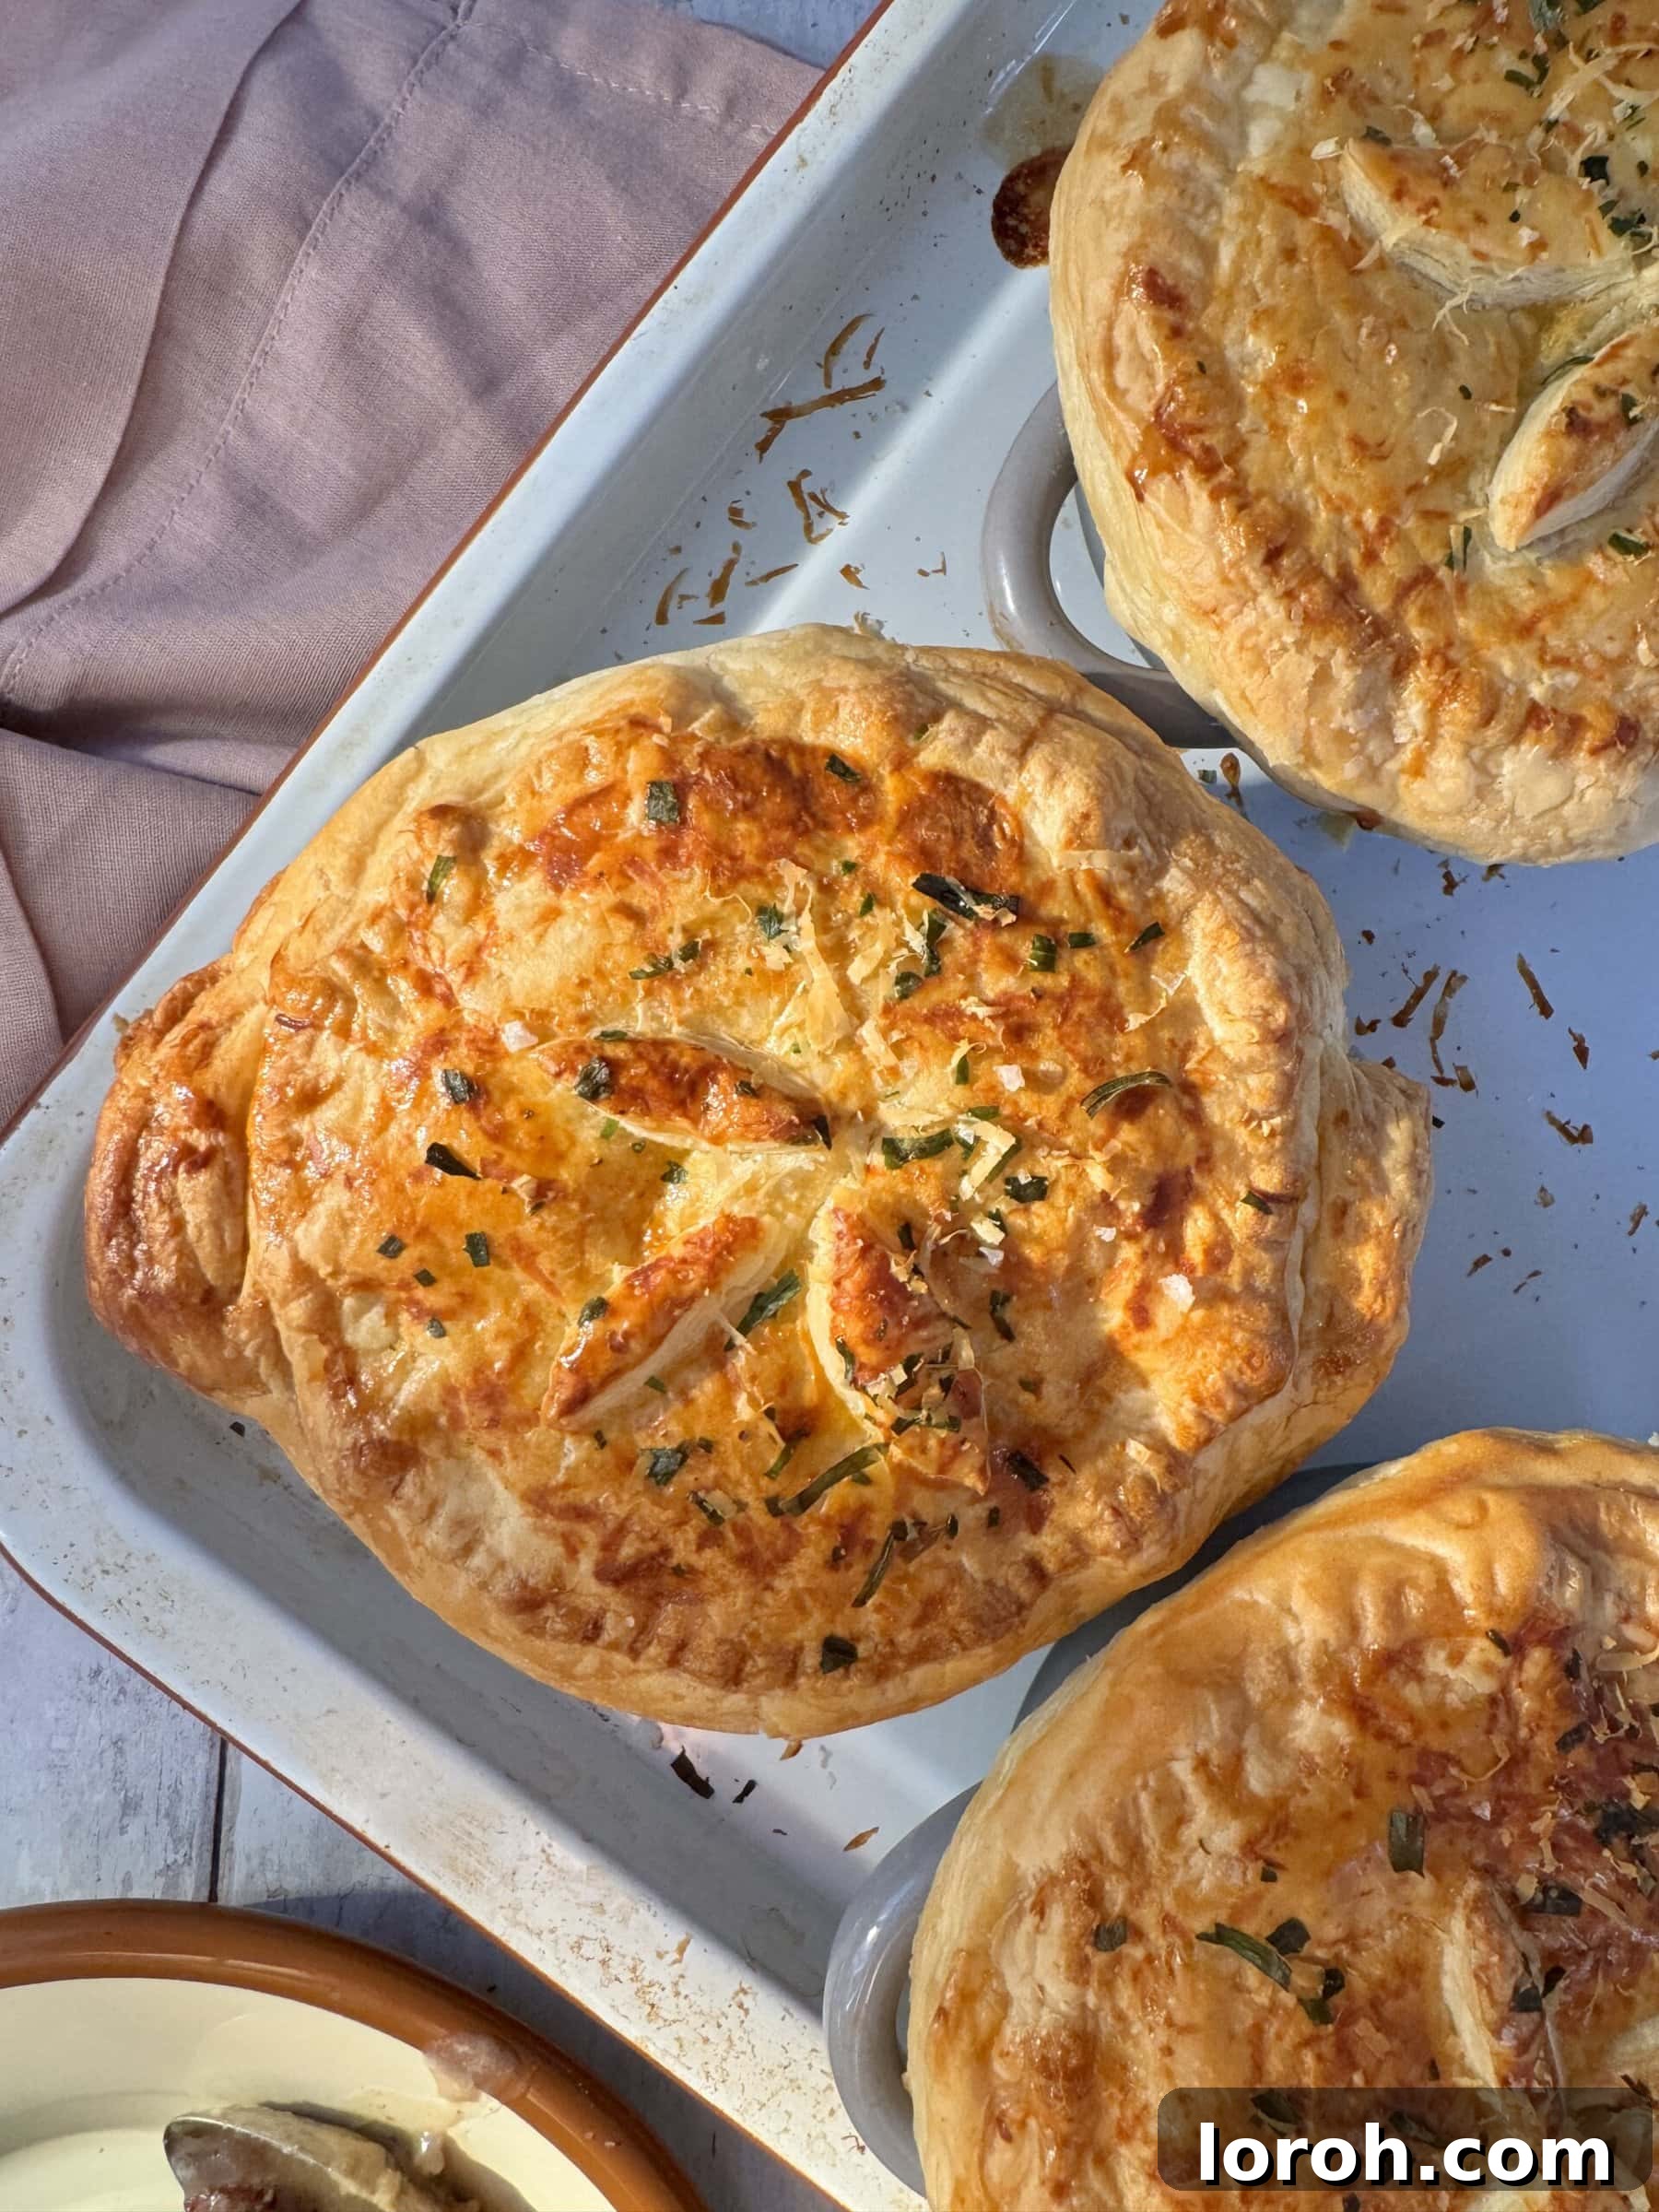
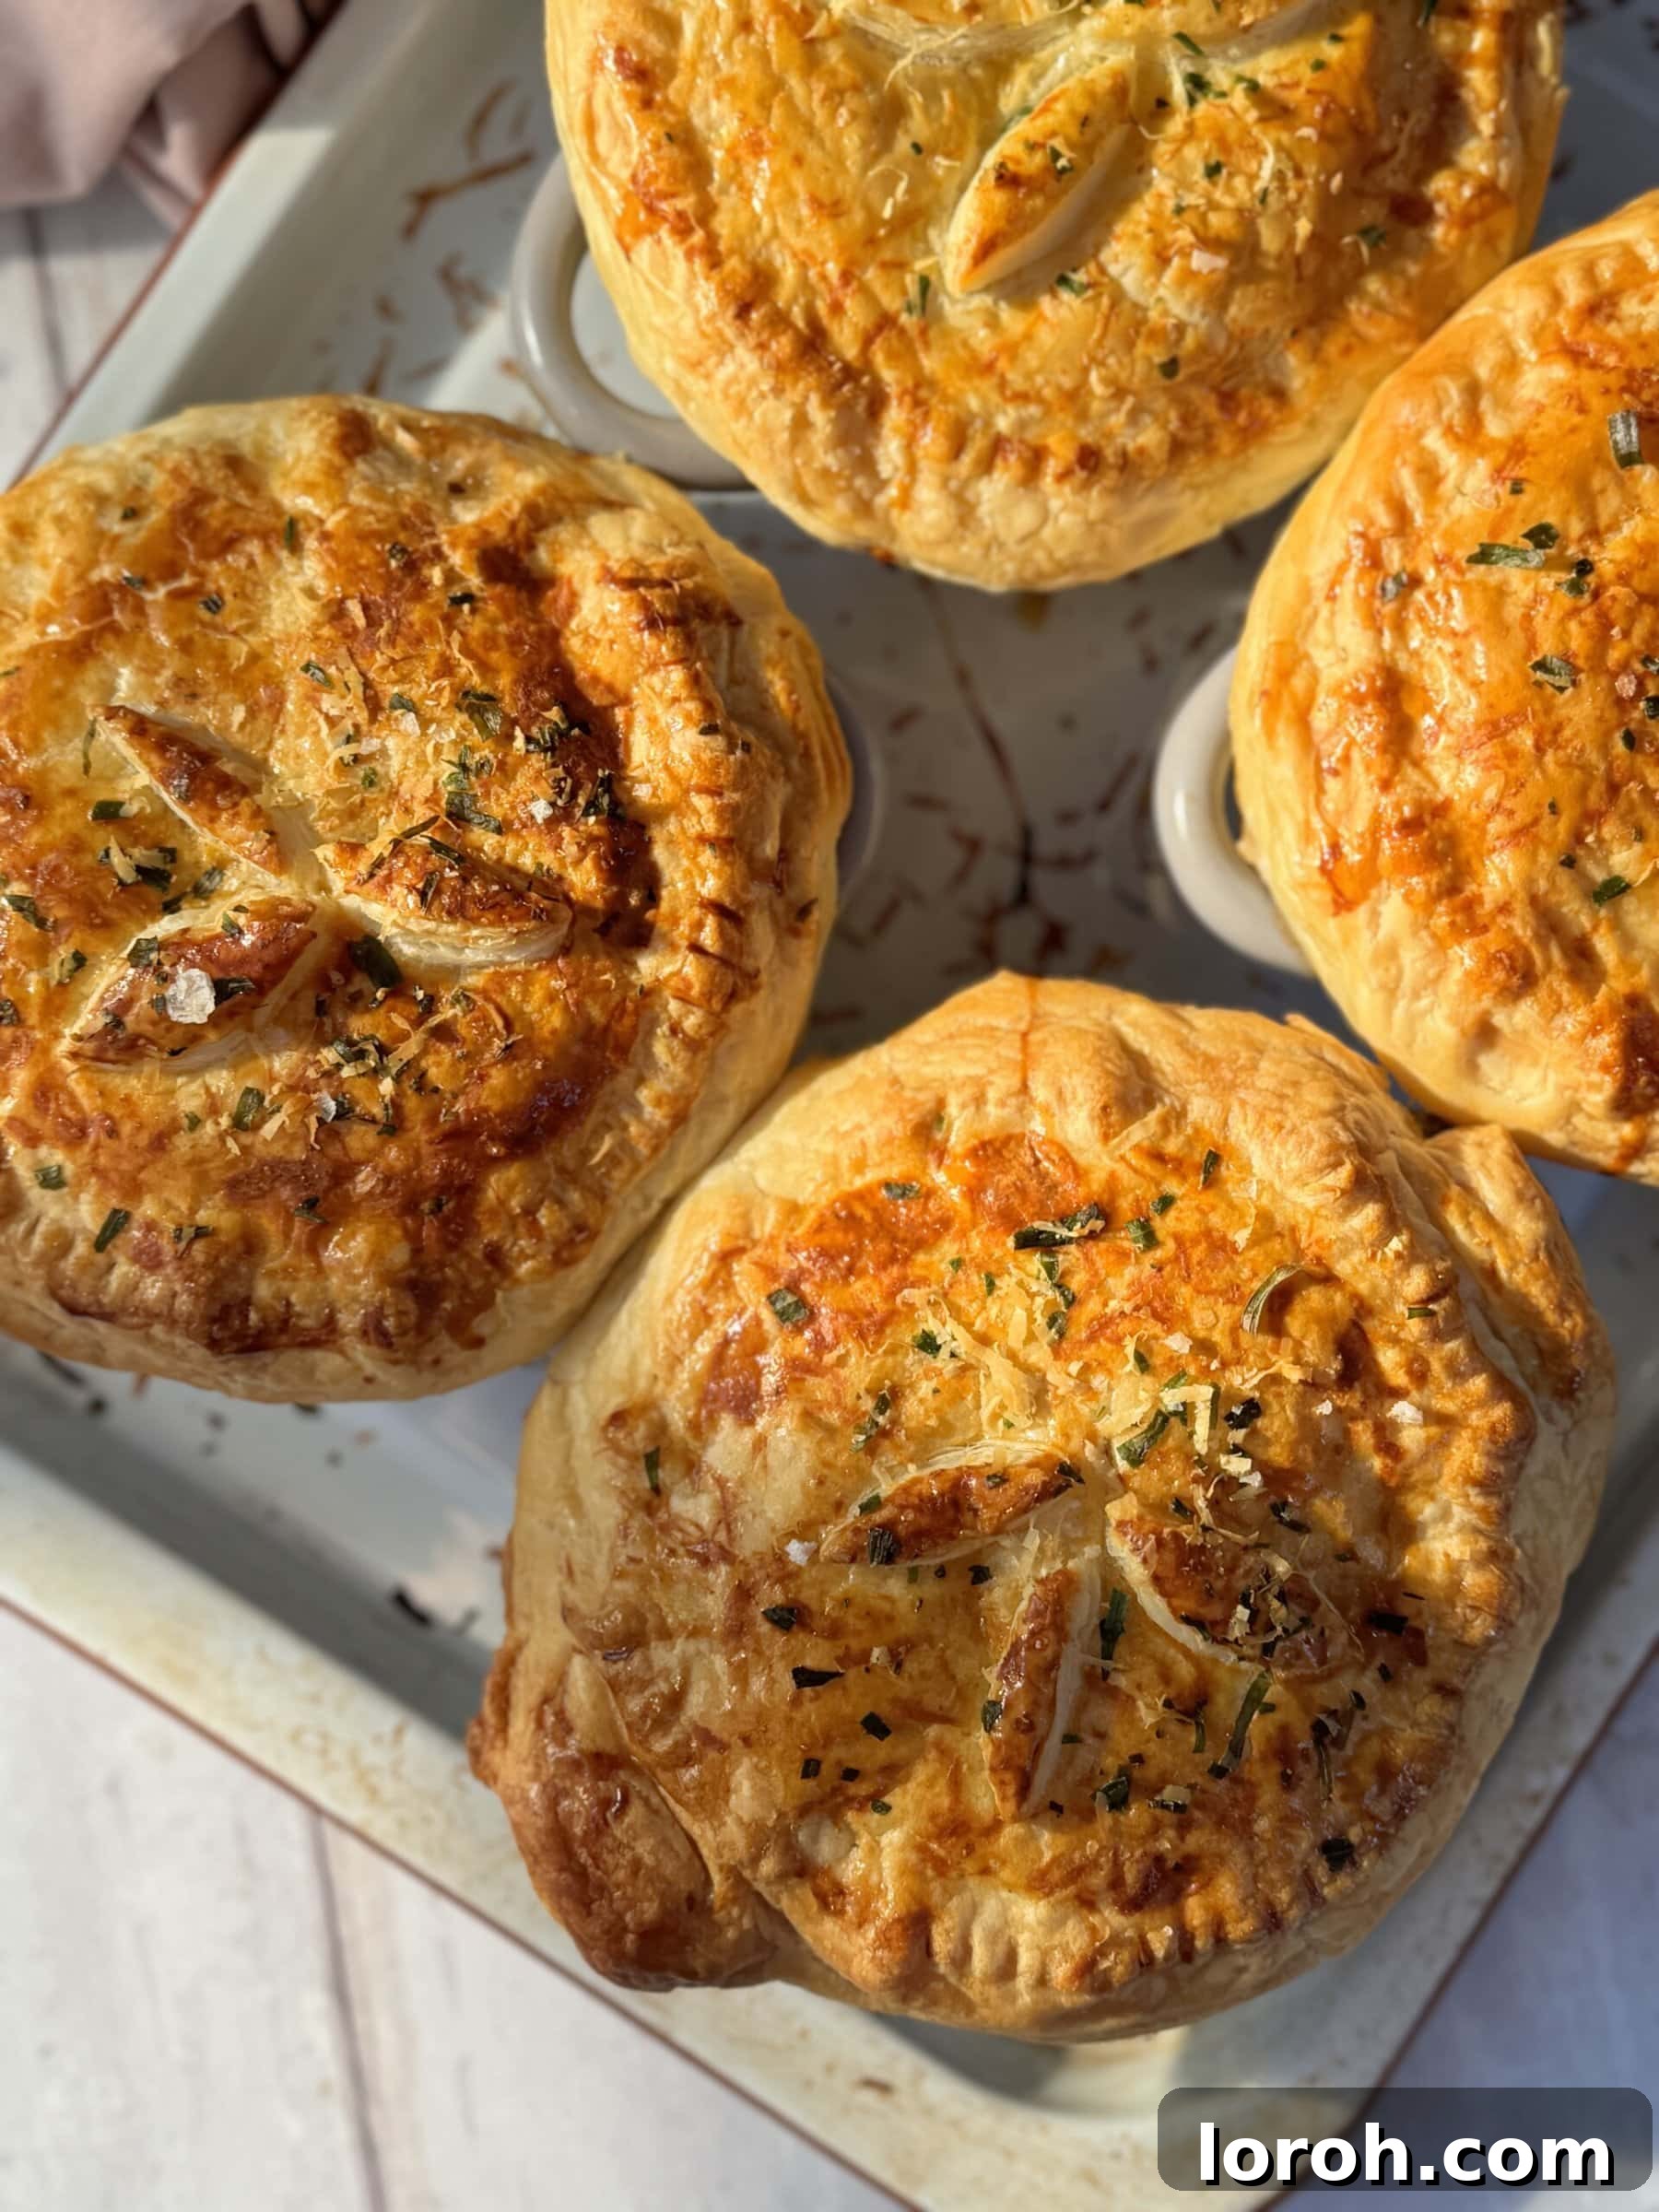
There’s something inherently delightful about a perfectly crafted pie, and for me, it truly embodies the essence of cozy comfort food. Imagine a piping hot, lusciously creamy filling encased by a golden, flaky crust – it’s a culinary embrace that warms you from the inside out. These chicken mini pot pies are precisely that: individual portions of pure bliss, each bursting with a rich, savory blend of tender chicken, crispy bacon, sweetcorn, and aromatic leeks, all crowned with a beautifully crisp puff pastry lid.
This cherished recipe is deeply inspired by my mum’s famous chicken pie, a dish I consider the best in the world. While her original recipe holds a special place in my heart, this mini version offers a fantastic, convenient twist. The joy of having a personal, perfectly portioned pie makes these ideal for any occasion, from a casual weeknight dinner to an elegant gathering with friends. They are not only incredibly satisfying but also charmingly presented, making every meal feel a little more special.
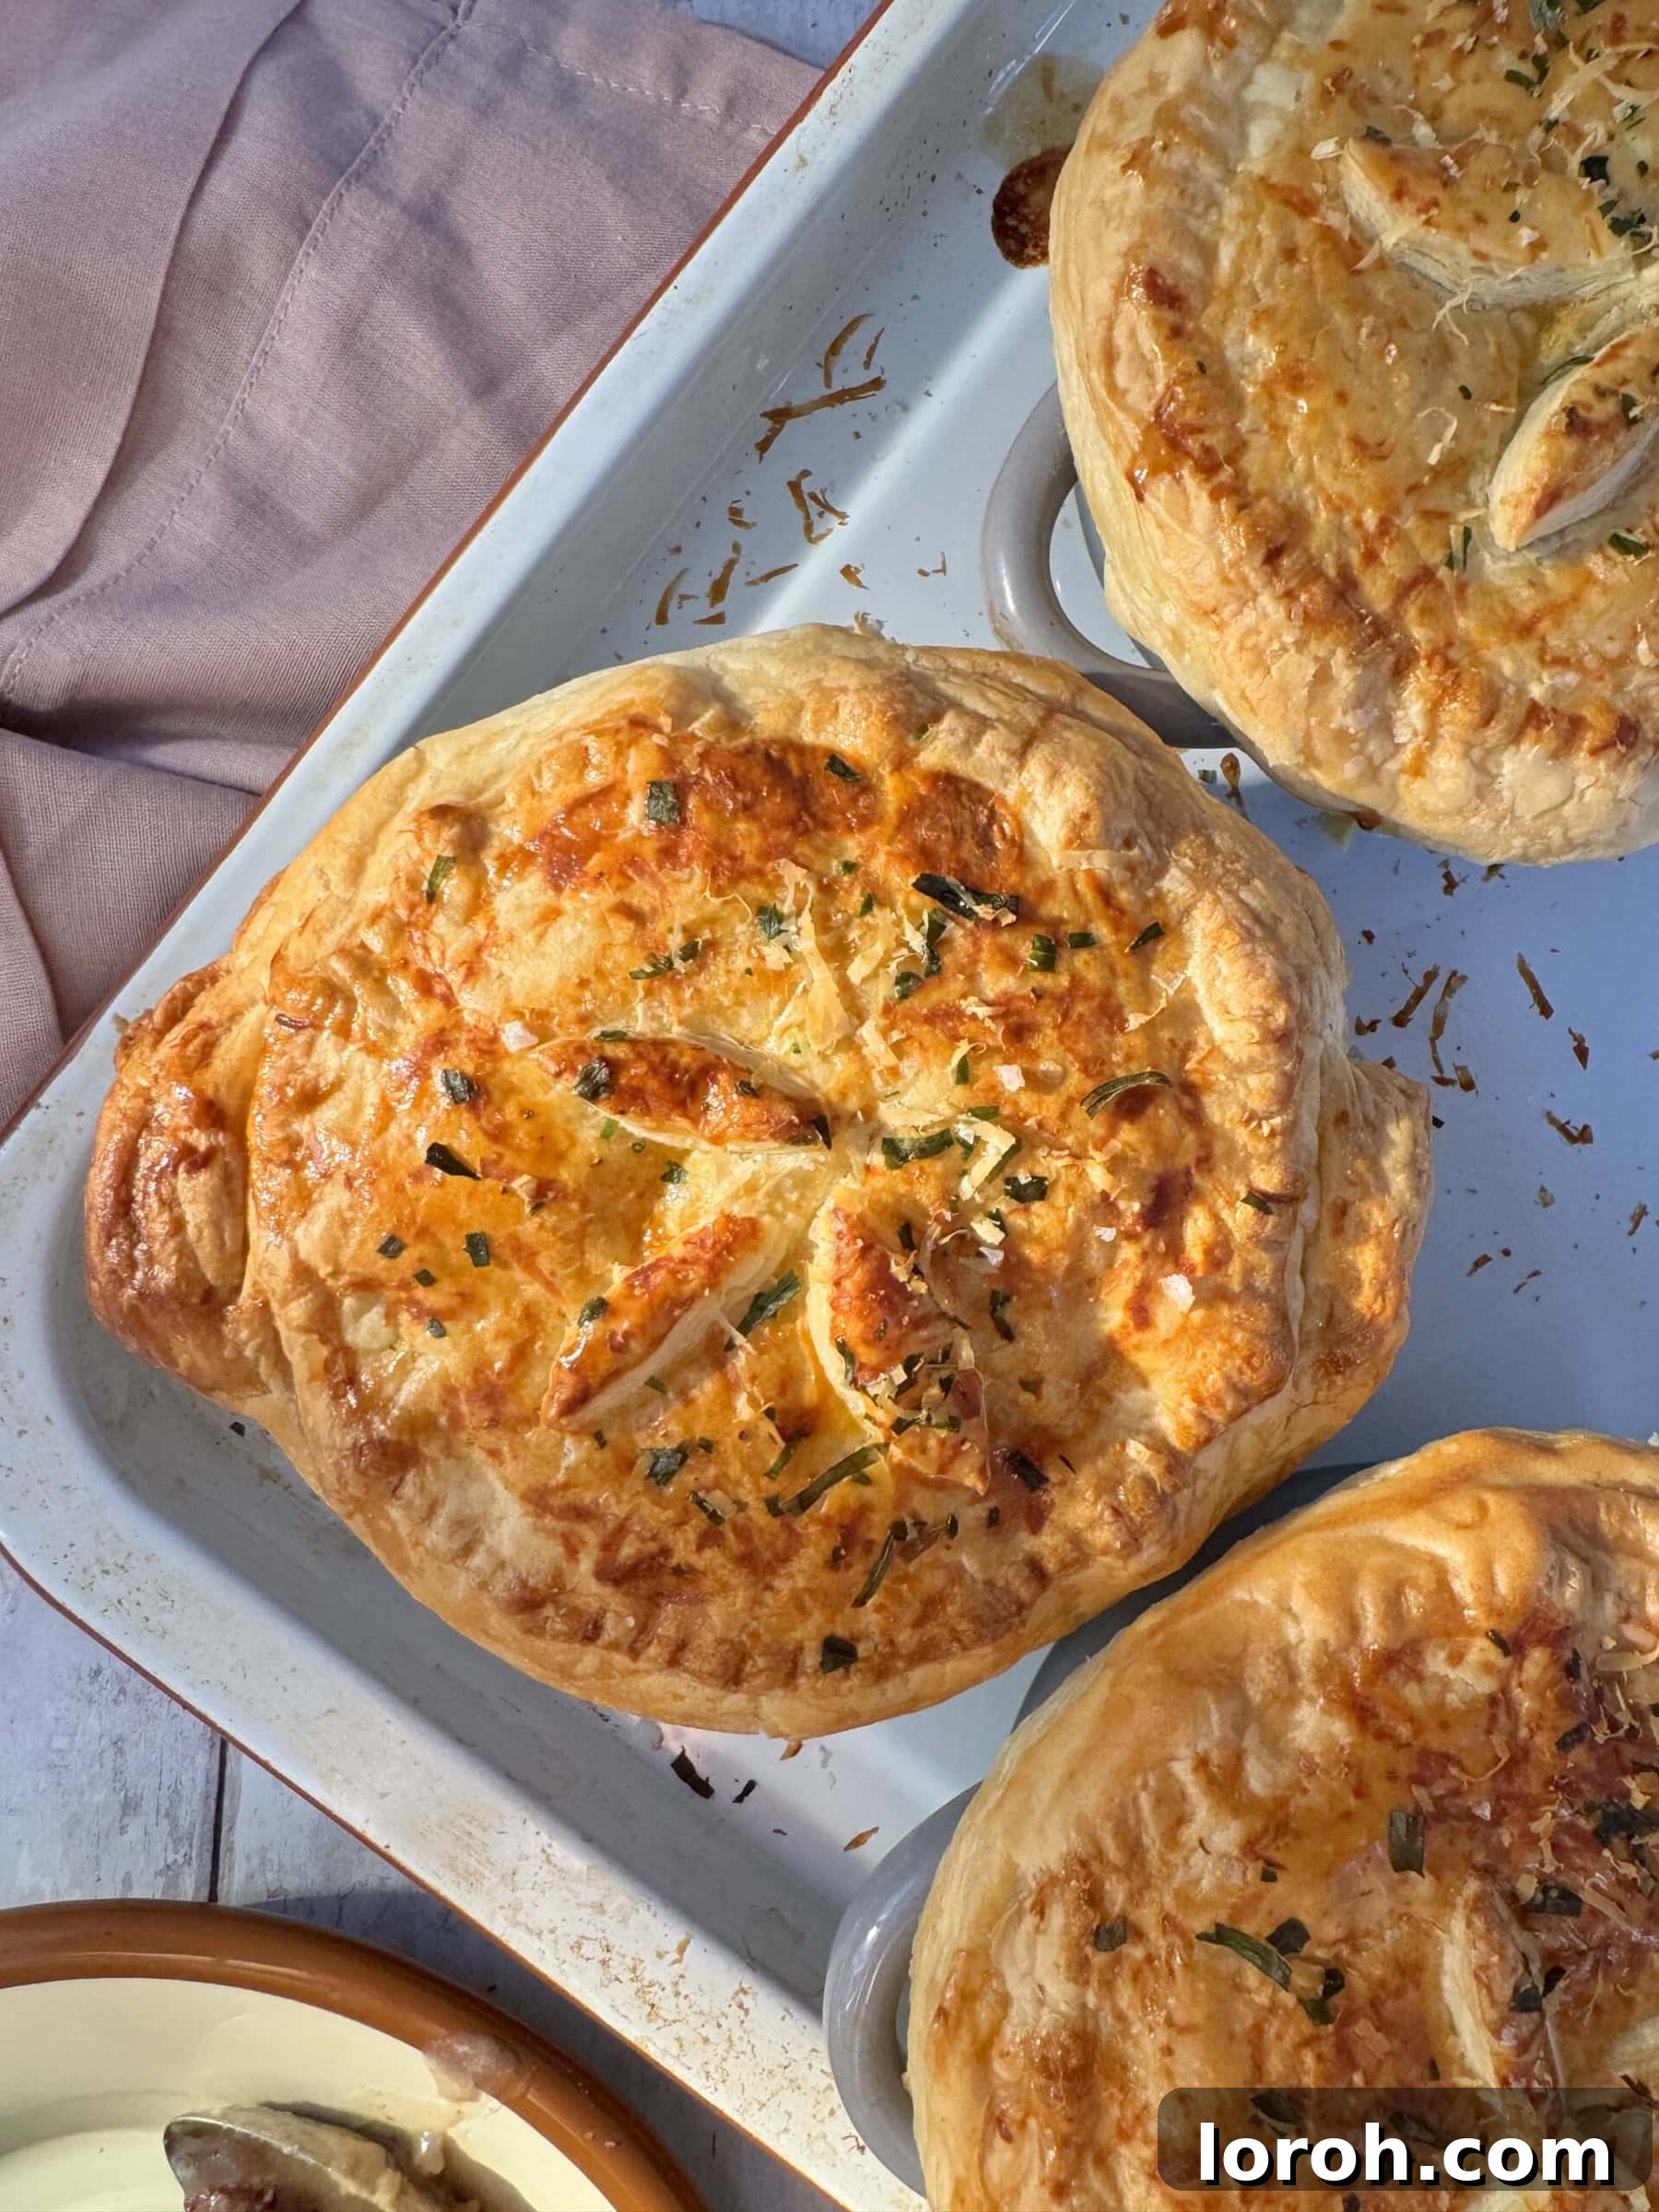
One of the best aspects of this recipe is its surprising simplicity. We achieve this by cleverly placing the pastry only on top of the filling, eliminating the need to line the entire ramekin. This method not only saves time but also guarantees a consistently crisp and golden pastry crust every time. And let’s be honest, in today’s busy world, who has time to make puff pastry from scratch? We’re proudly embracing high-quality, pre-made puff pastry from the supermarket. The ready-made options available now are so excellent that there’s truly no need to undertake the laborious process of making it yourself.
I typically prepare these adorable pot pies in charming cocotte ramekins, which are perfect for individual servings. However, if I were to splurge, a set of classic Staub ramekins would be an instant addition to my kitchen collection. If you find yourself with extra puff pastry, don’t let it go to waste! It’s incredibly versatile. You could whip up some wonderfully easy cheese twists as a quick snack, or explore other delightful pastry creations. For more inspiration, you might love these little goat’s cheese galettes with caramelised onion, or perhaps my creamy leek, mushroom & chicken pie. For those seeking heartier options, my whole roasted poule au pot is a fantastic choice.
Table of Contents
- Why You’ll Adore These Chicken Mini Pot Pies
- Essential Ingredients for the Perfect Mini Pot Pie
- Creative Substitutions and Variations
- Step-by-Step: Crafting Your Chicken Mini Pot Pies
- Expert Cooking Tips for Golden Perfection
- Frequently Asked Questions
- More Delicious Recipes to Explore
- Full Recipe: Chicken Mini Pot Pies
Why You’ll Adore These Chicken Mini Pot Pies
- Effortless Preparation for Busy Lives: These mini pot pies are surprisingly simple to assemble, making them an ideal choice even on your busiest days. The filling comes together quickly, and with the convenience of store-bought puff pastry, you skip the laborious steps of traditional pie making. Plus, the brilliant part is that the pastry is only placed on top, eliminating the tricky task of lining the pie dish. For an even quicker meal another day, you can easily double the filling and freeze half for later.
- Charming Individual Servings: There’s an undeniable appeal to having a personal pie, perfectly sized for each guest at your table. These individual pot pies not only look incredibly sweet and inviting but also make serving a breeze. They’re excellent for dinner parties, creating a lovely, personalized touch that is sure to impress without adding extra stress.
- The Smart Way to Use Leftovers: This recipe is a fantastic way to transform leftover roast chicken or turkey into something truly spectacular. Using pre-cooked poultry ensures the filling remains wonderfully moist and flavorful, preventing it from drying out during baking. It’s particularly brilliant for post-holiday turkey at Christmas or Thanksgiving, giving new life to your festive feast remnants.
- Customizable to Your Liking: The beauty of these pot pies lies in their adaptability. You can easily customize the vegetables in the filling to incorporate whatever you have on hand or whatever your family prefers. While sweetcorn and leeks are classic choices, feel free to experiment with peas, broccoli florets, chopped kale, or even diced carrots. This versatility makes it a perfect recipe for minimizing food waste and maximizing flavor.
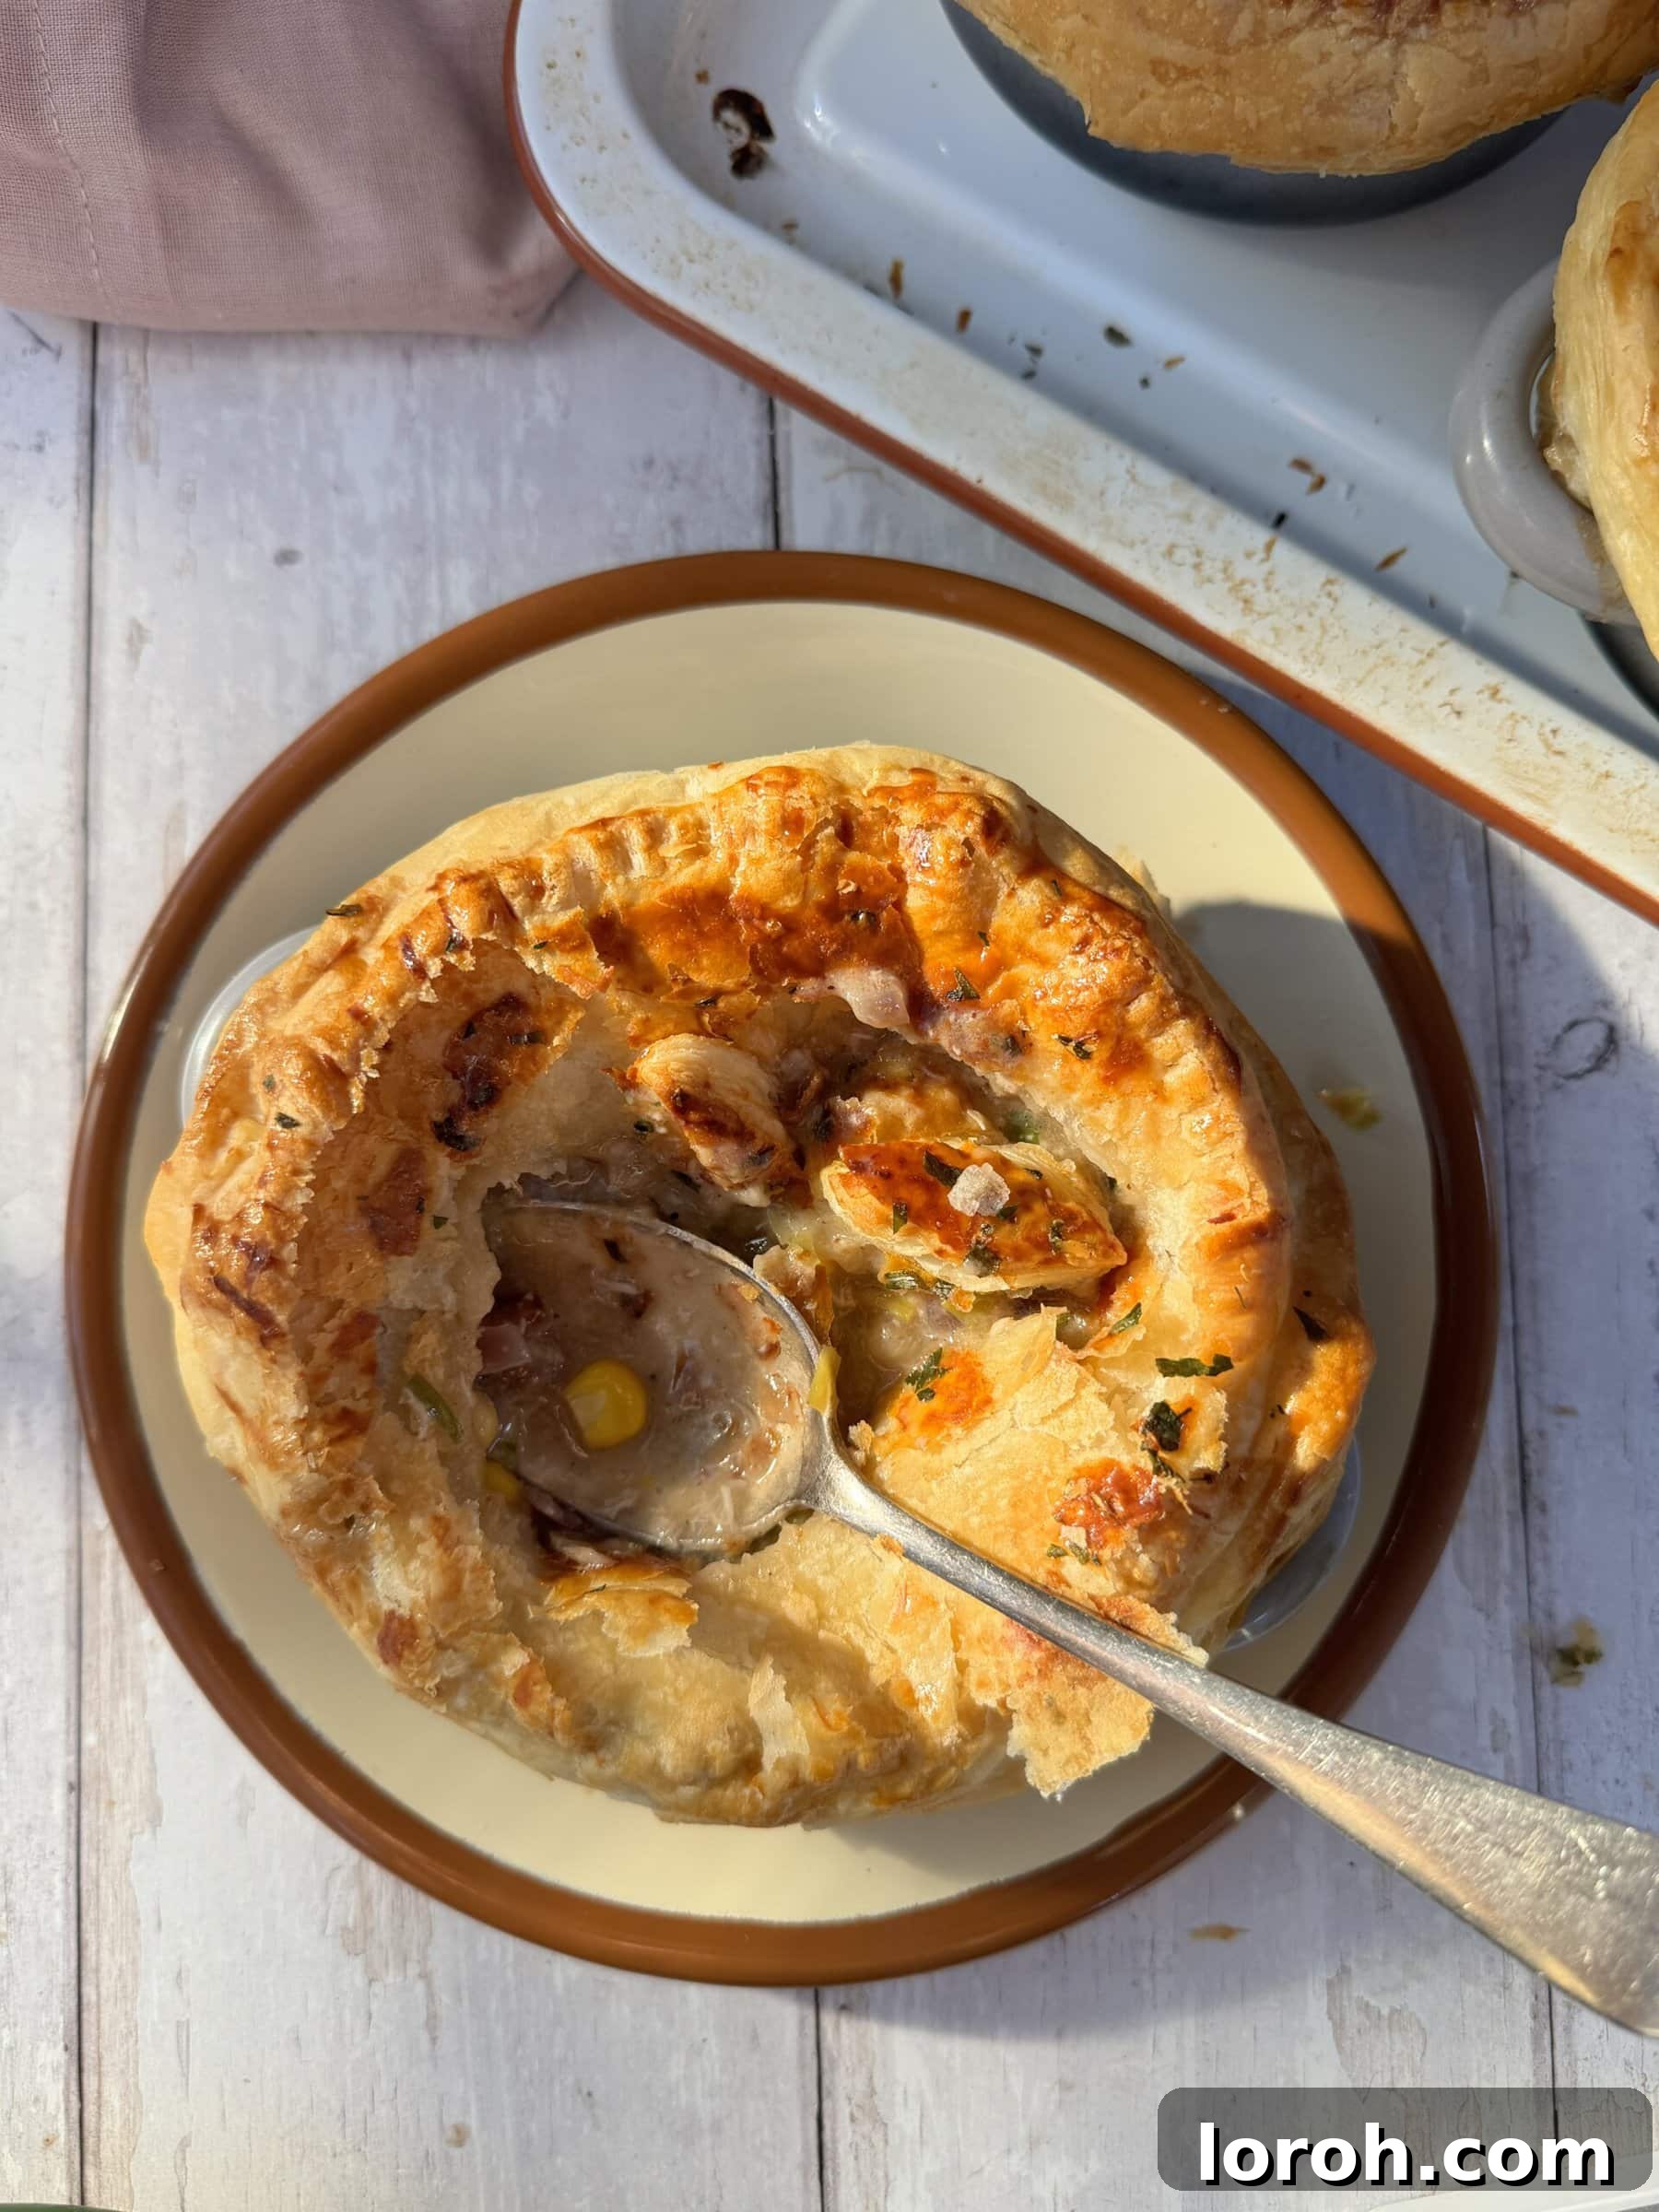
Essential Ingredients for the Perfect Mini Pot Pie
For your convenience, the complete recipe with exact measurements can be found in the printable recipe card at the very bottom of this post. Simply scroll down to find it!
Pancetta: I recommend using unsmoked pancetta lardons for this recipe. Pancetta provides a wonderful depth of flavor and renders beautifully, creating a rich base for our creamy filling. Its savory notes complement the chicken and vegetables perfectly.
Butter: Whether you opt for salted or unsalted butter, both will work effectively. The key is to taste the filling as you cook and adjust the seasoning accordingly. Butter adds richness and helps create the silky roux that thickens our pie filling.
Red Onion: A small red onion is my preference here. Its natural sweetness mellows beautifully when cooked, adding a subtle, delightful contrast to the savory elements. While a shallot or white onion can be substituted, the red onion truly provides that ideal balance of flavor.
Leeks: Leeks are a star ingredient in this pie, contributing a mild, oniony sweetness and tender texture. It’s crucial to wash them thoroughly as dirt often collects between their layers. To do this effectively, cut the leek in half lengthwise, keeping the root end intact to hold the layers together. Then, rinse under running water, gently separating the layers to ensure all grit is removed before finely chopping.
Dried Tarragon: I specifically suggest dried tarragon for this recipe. It offers a more subdued, nuanced anise-like flavor compared to fresh tarragon, which can sometimes be overpowering. Dried tarragon is also wonderfully convenient, readily available in your spice cupboard whenever a pie craving strikes. If fresh tarragon is all you have, feel free to use it, but start with a smaller amount and taste test.
Cooked Chicken: The beauty of this recipe shines when using pre-cooked chicken. Leftover roast chicken is absolutely ideal, offering tender, succulent meat. Alternatively, a store-bought rotisserie chicken is a fantastic time-saver. If you need to cook chicken specifically for this recipe, simply roast a few chicken thighs until thoroughly cooked, then shred them. For a delightful variation, just like my Turkey and Ham Pie, you can easily swap the chicken for leftover turkey, making it a perfect post-holiday meal.
Creative Substitutions and Variations
This recipe is incredibly flexible, allowing you to easily adapt it based on what you have in your pantry or your dietary preferences. Feel free to get creative!
Chicken Alternatives: If you don’t have any leftover roast chicken or a rotisserie chicken, cooking fresh chicken is simple. Just drizzle a few boneless, skinless chicken thighs with olive oil, sprinkle with salt, and roast them in the oven at 200°C (400°F) for 30-40 minutes, or until fully cooked. Once cooled slightly, shred the meat. Beyond chicken, leftover turkey works wonderfully, especially around the holidays. For an extra layer of savory flavor, consider adding some finely chopped ham along with the chicken or turkey.
Pancetta Swaps: Pancetta lends a fantastic richness and flavor depth due to its higher fat content, which crisps up beautifully and provides a flavorful cooking oil. However, if pancetta isn’t available, streaky bacon (smoked or unsmoked, depending on your preference) is an excellent substitute. Both will add that desirable smoky, salty crunch to your filling.
Vegetable Mix-ins: The current combination of leeks and sweetcorn is classic, but the possibilities for adding more vegetables are endless. Carrots, finely diced and sautéed with the onions, would be a delightful addition, adding sweetness and color. Instead of sweetcorn, you could toss in a handful of frozen peas towards the end of the filling’s cooking time. Other great options include chopped broccoli florets, baby spinach (wilted into the sauce), or thinly sliced courgette (zucchini). Don’t be afraid to experiment with seasonal produce!
Herb Variations: Dried tarragon pairs beautifully with chicken, offering a distinctive subtle anise note. However, if you’re looking for an alternative or simply prefer other herbs, dried rosemary or dried thyme would be equally delicious. Rosemary provides a more robust, earthy flavor, while thyme offers a delicate, peppery undertone. Choose the herb that best suits your palate or whatever you have readily available.
Step-by-Step: Crafting Your Chicken Mini Pot Pies
This is a visual, step-by-step guide to help you through the process. For detailed instructions and precise measurements, please refer to the full recipe card at the end of this post.

STEP ONE: Begin by adding the pancetta lardons and a teaspoon of olive oil to a cold pan. This allows the fat to render slowly and evenly, resulting in perfectly crispy pancetta. Turn the heat to medium and cook for approximately 10-15 minutes, stirring occasionally, until the pancetta is beautifully golden and crisp. Once ready, use a slotted spoon to remove the pancetta from the pan, setting it aside on a paper towel-lined plate. Leave the flavorful rendered fat in the pan.
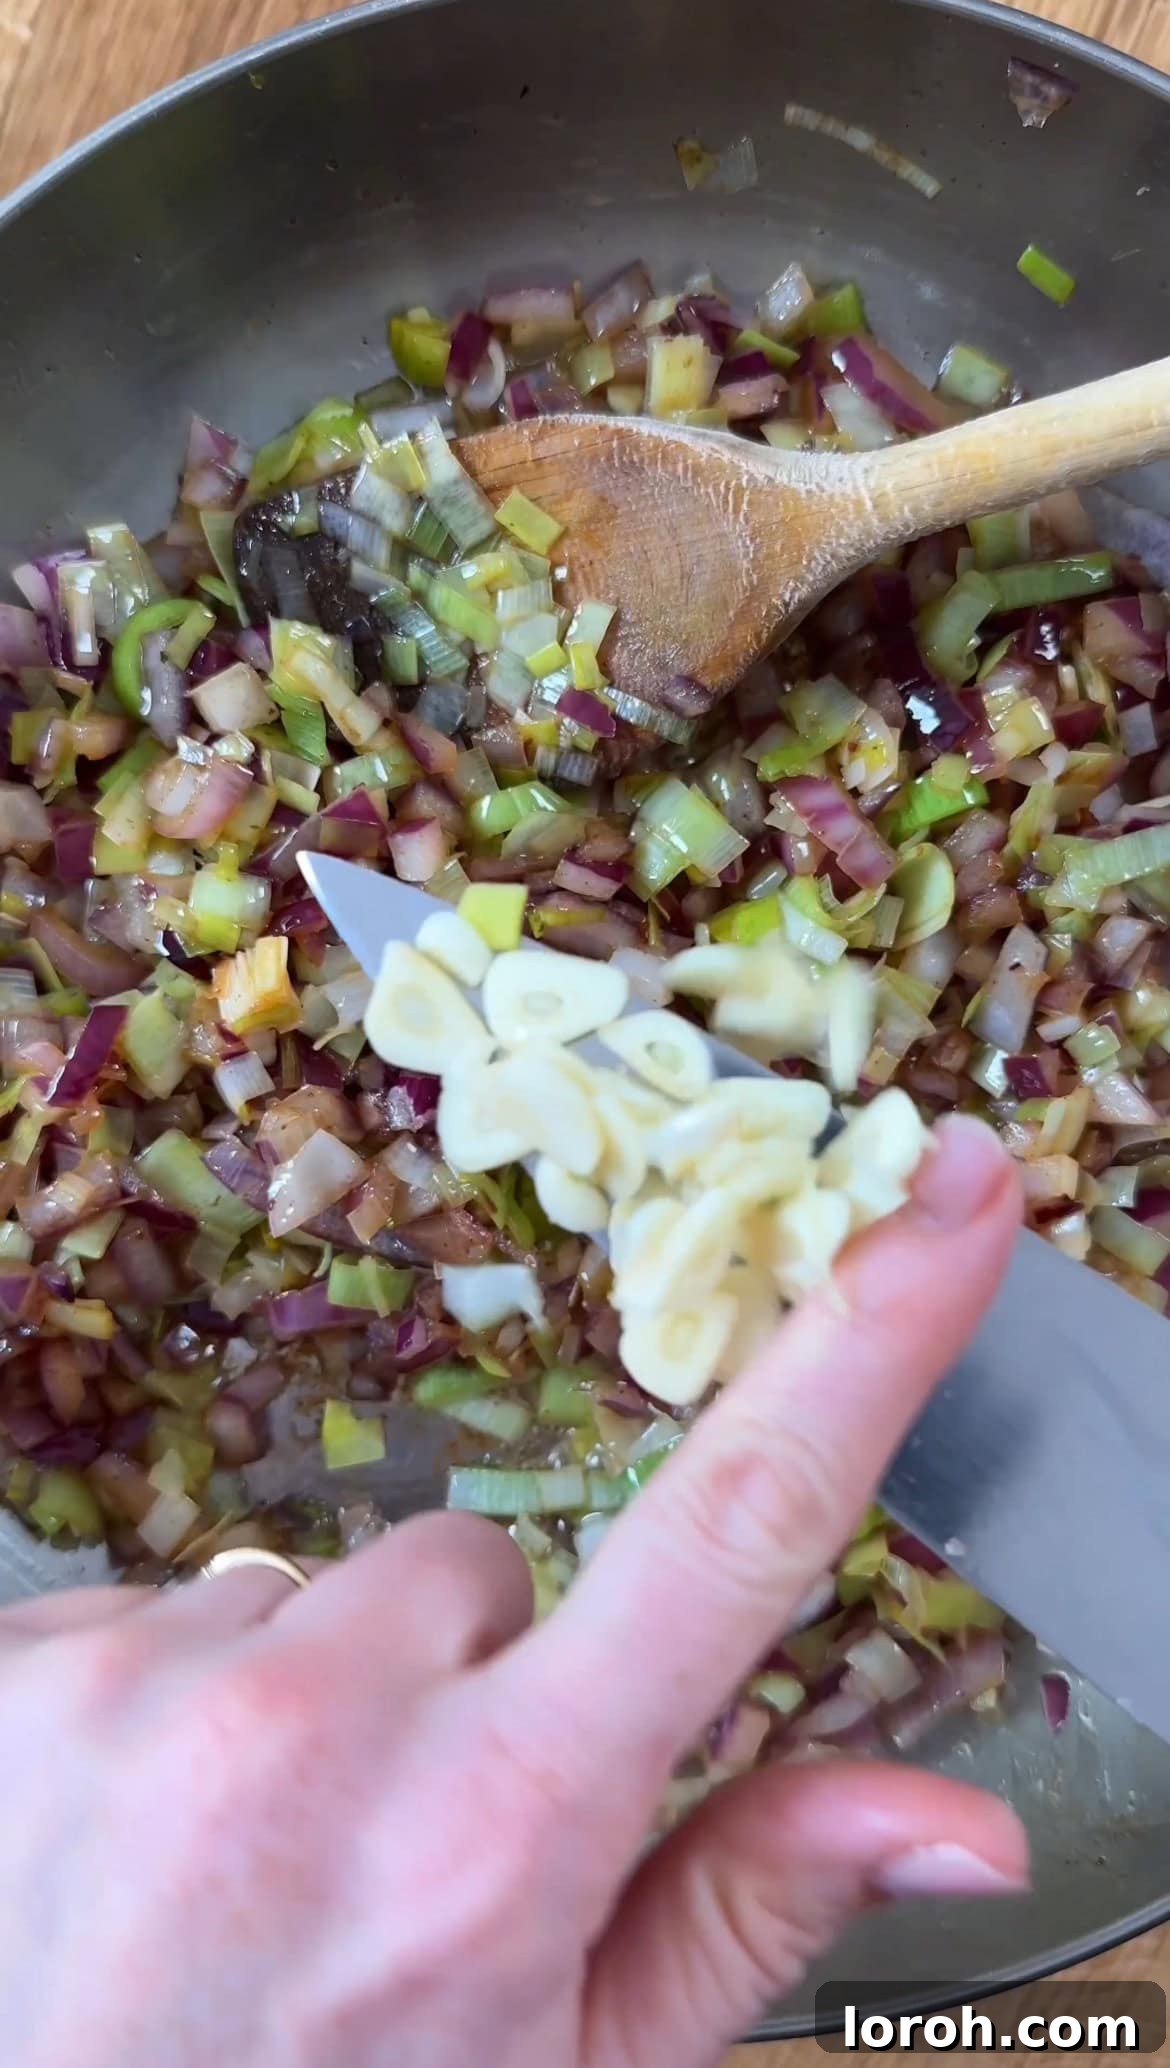
STEP TWO: To the same pan with the pancetta oil, add the butter. Once melted, introduce the chopped red onions and finely chopped leeks. Season lightly with salt and pepper. Sauté gently over medium heat for about 5 minutes, stirring frequently, until the vegetables have softened and become translucent. Next, add the crushed garlic and continue to fry for another 30 seconds until fragrant, being careful not to burn it.
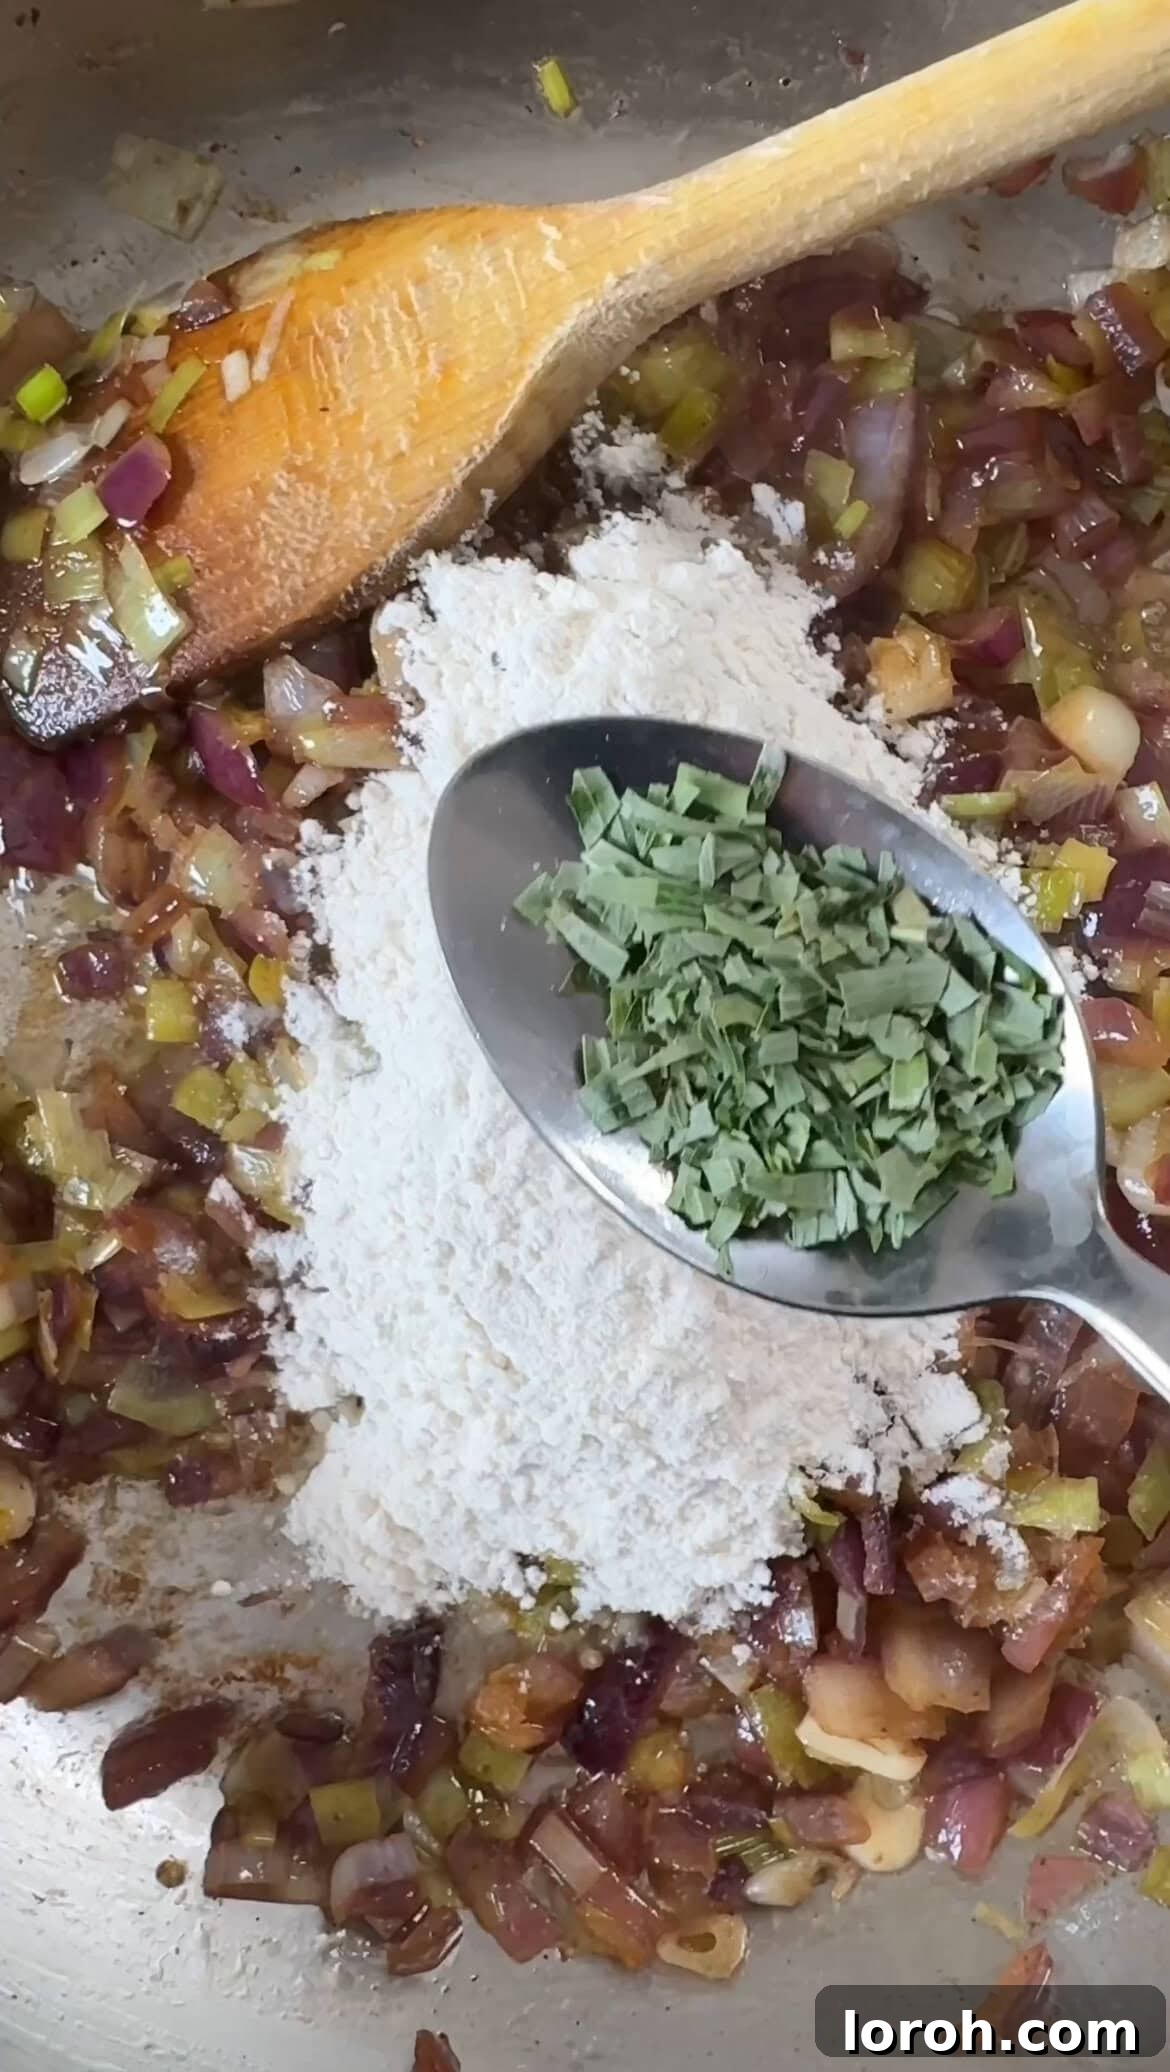
STEP THREE: Sprinkle the flour and dried tarragon over the softened vegetables in the pan. Stir vigorously to combine, ensuring the flour completely coats the vegetables and absorbs the fats, forming a roux. Continue to fry for 2-3 minutes, stirring constantly. This crucial step cooks out the raw taste of the flour and develops a deeper flavor for your sauce base.
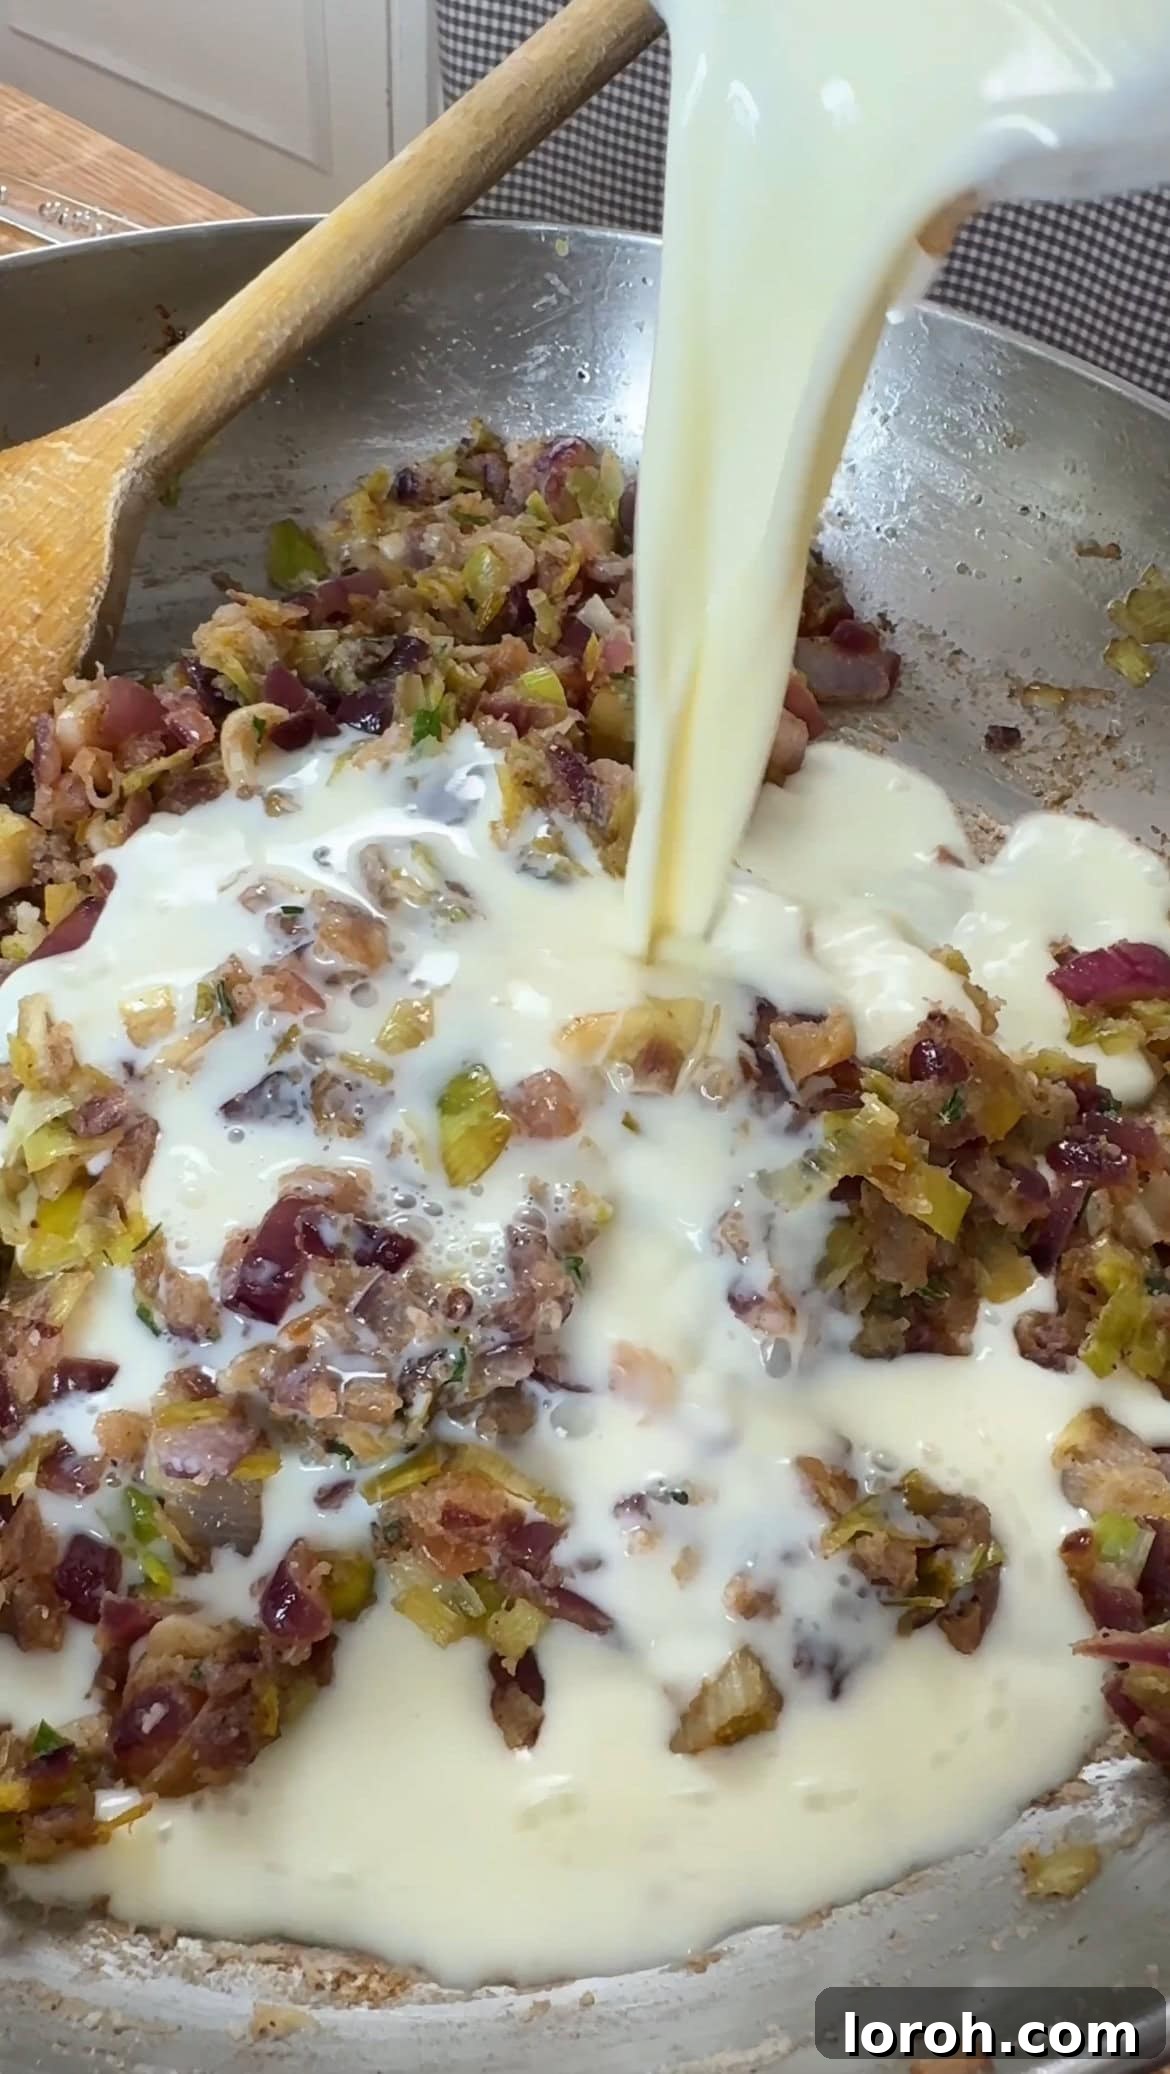
STEP FOUR: Gradually pour in the hot chicken stock and the milk, whisking continuously as you add them. This helps to prevent lumps and ensures a smooth, creamy sauce. Bring the mixture to a gentle simmer and allow it to cook for about 5 minutes, stirring occasionally, until the sauce visibly thickens to a luscious consistency. The goal is a velvety sauce that will perfectly coat your chicken and vegetables.
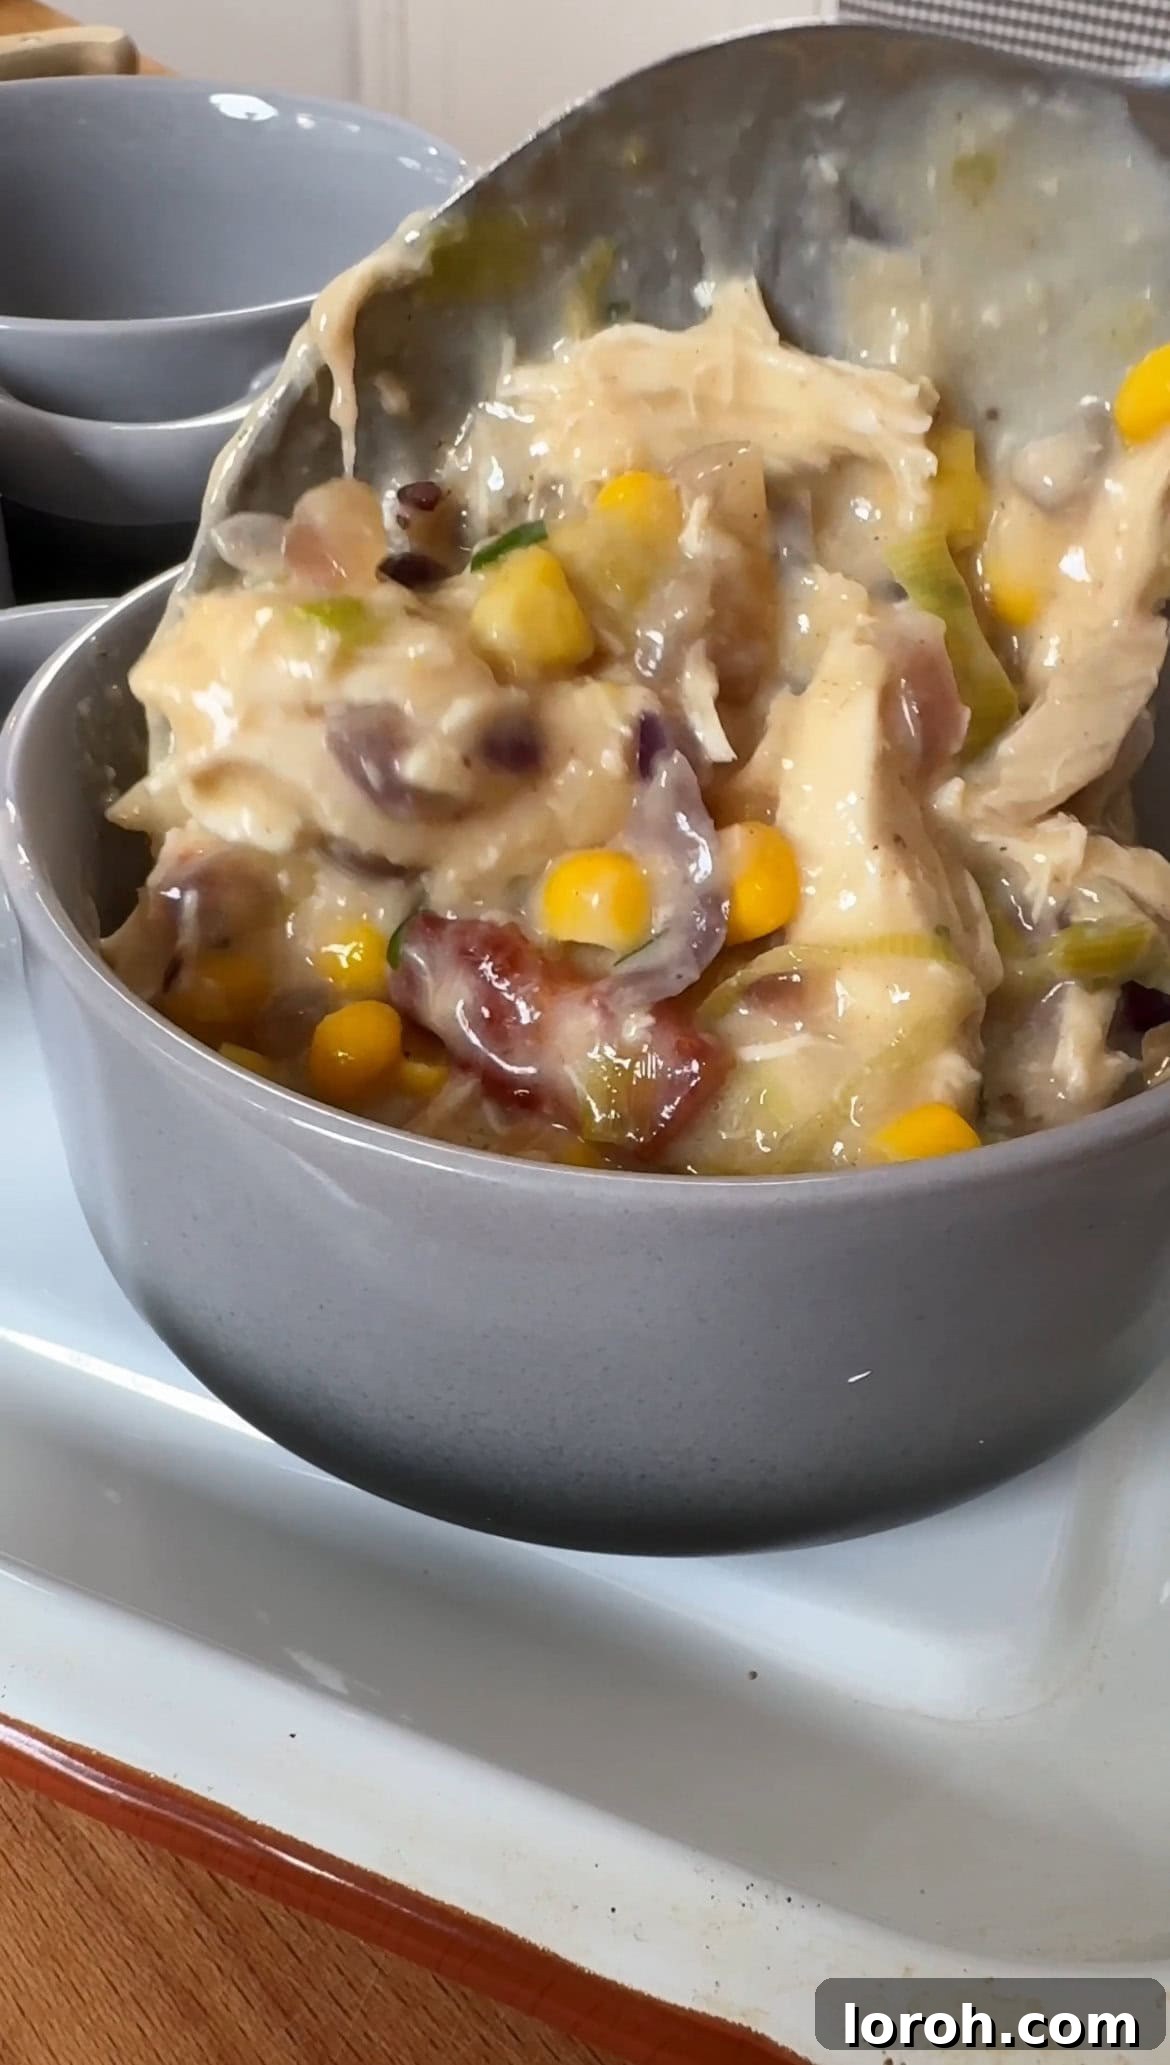
STEP FIVE: Once the sauce is perfectly thickened, gently fold in the cooked shredded chicken, the drained sweetcorn, and the reserved crispy pancetta. Mix everything together until all ingredients are well combined and coated in the creamy sauce. Now, taste the filling and adjust the seasoning as needed with salt and plenty of freshly ground black pepper. Remember the pancetta adds significant salt, so add sparingly. When satisfied with the flavor, evenly scoop the rich filling into your prepared ramekins.
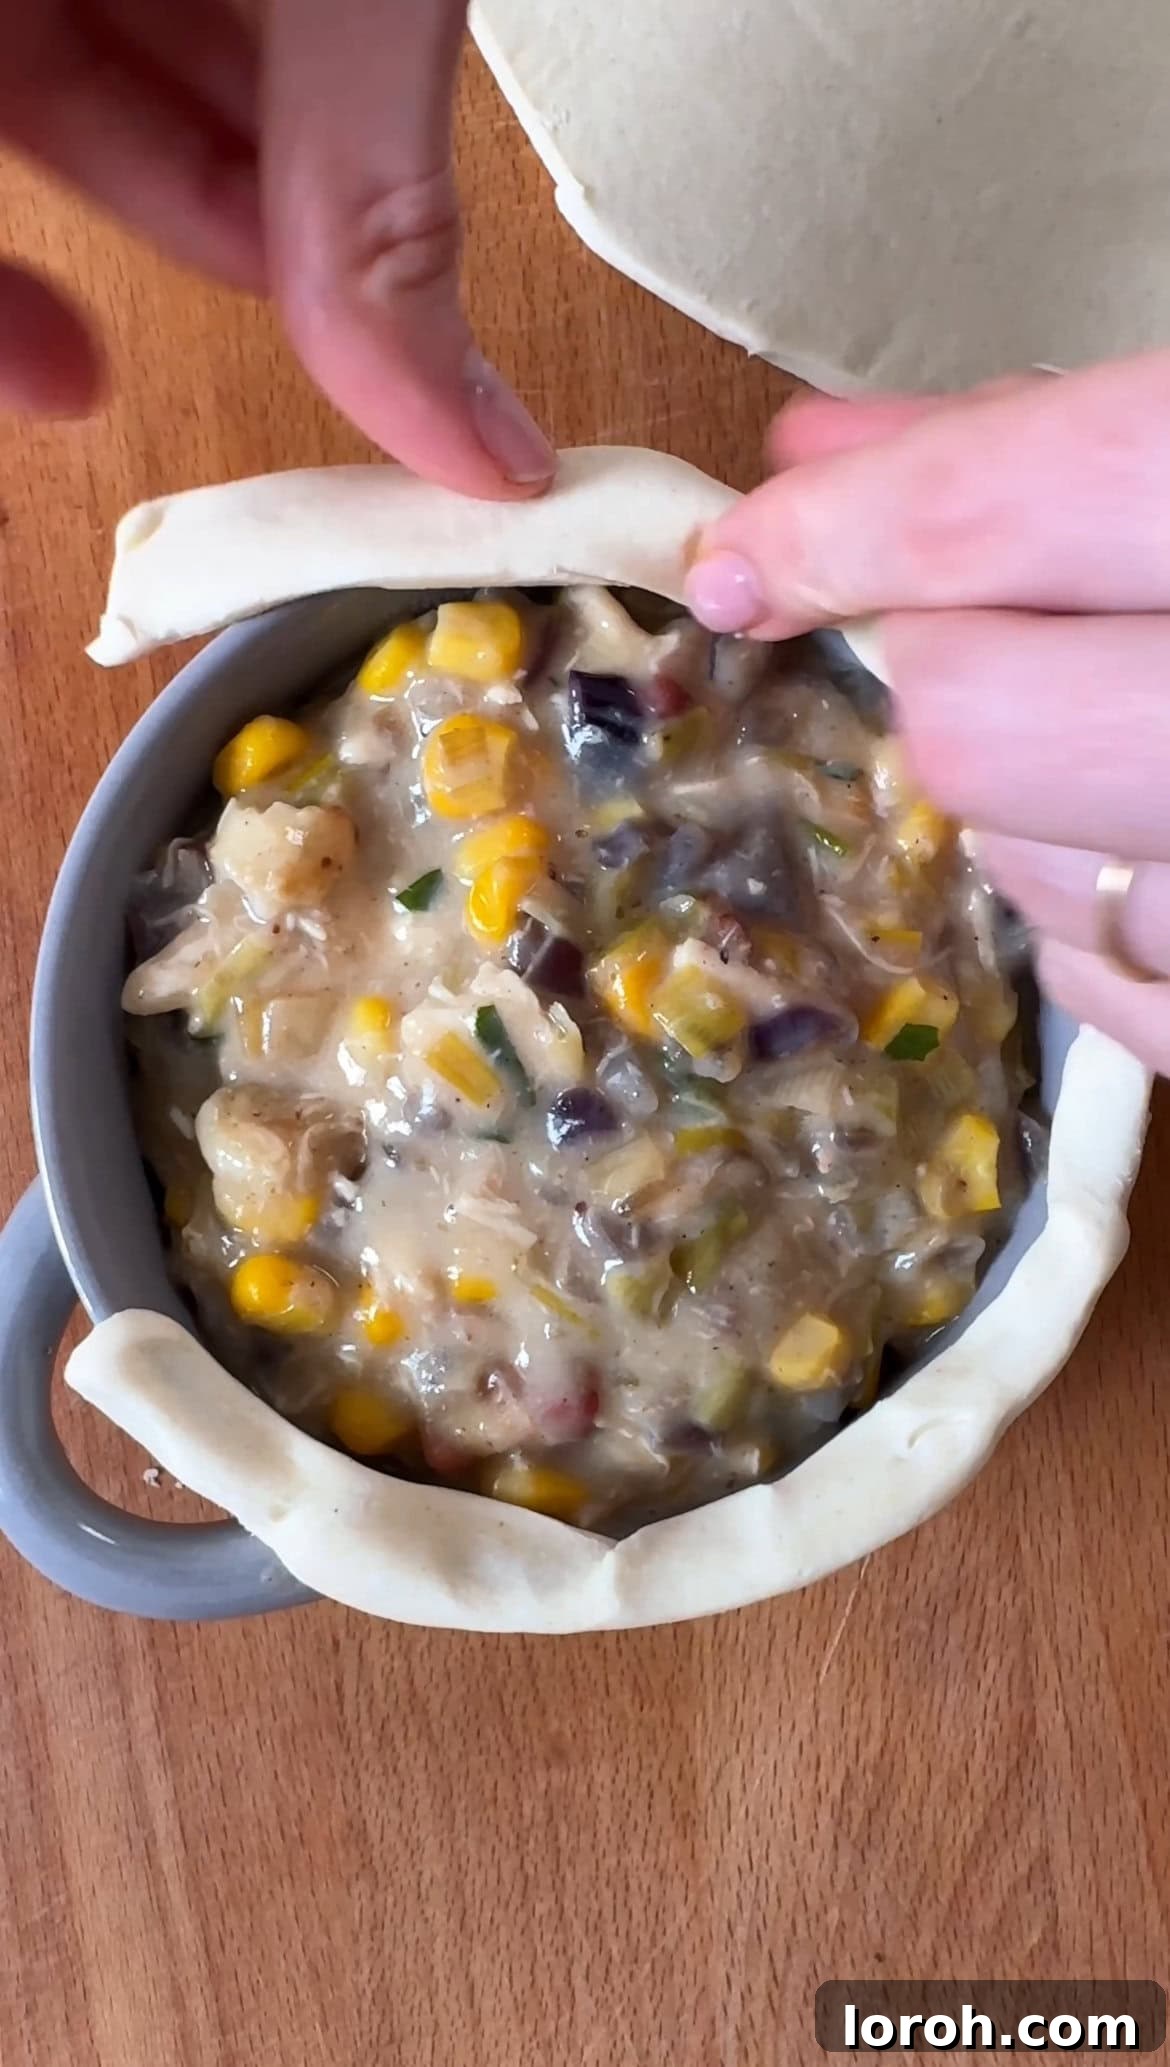
STEP SIX: Prepare your puff pastry. Roll it out if necessary. Cut four long strips, each about 2 cm wide. Then, cut four circles, ensuring each circle is approximately 2 cm larger in diameter than the top of your ramekins. Carefully press one pastry strip onto the rim of each ramekin, creating a slight overhang and ensuring it adheres well, forming a loop-like edge. This strip acts as a foundation for your pastry lid, helping it seal effectively.
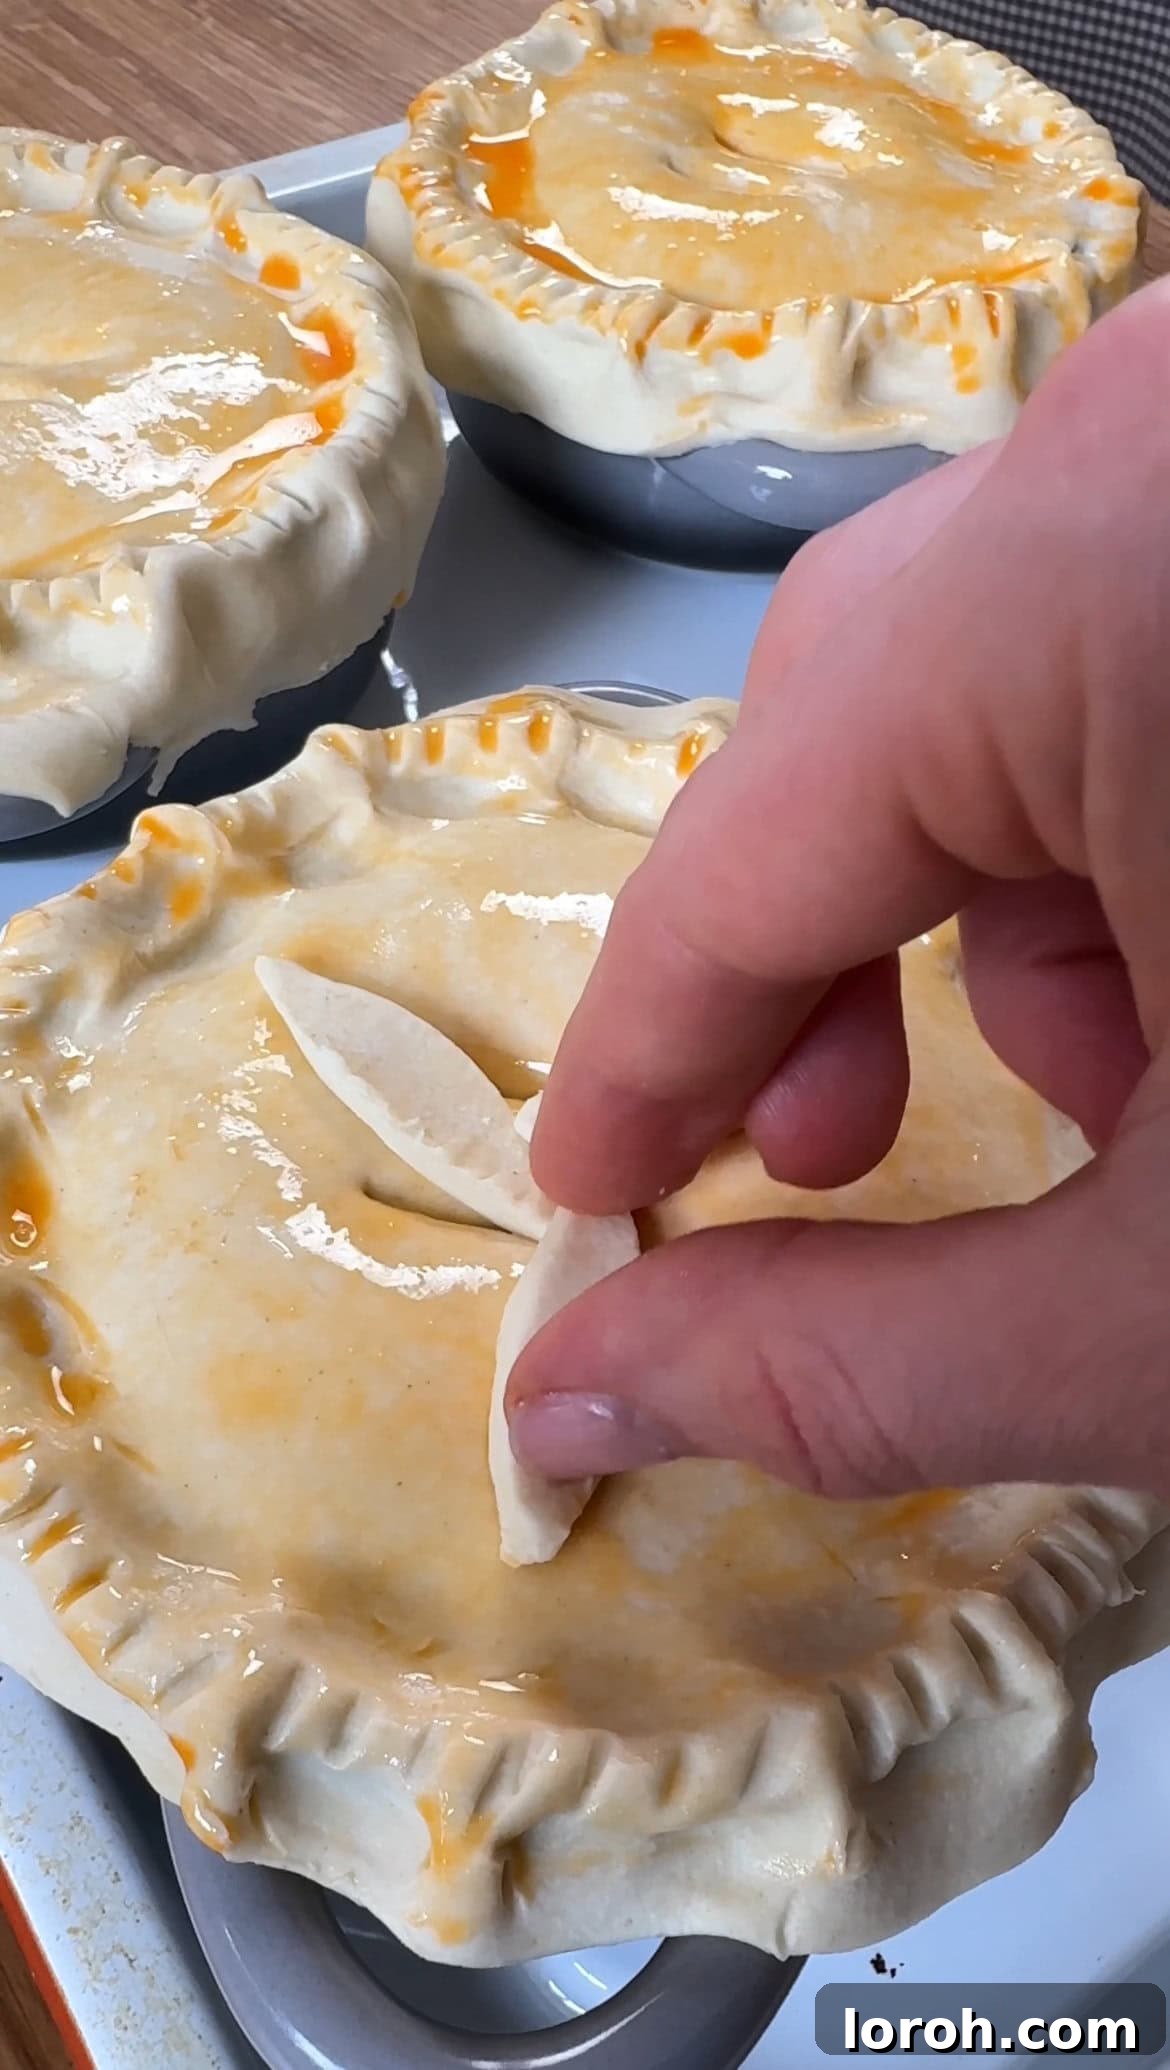
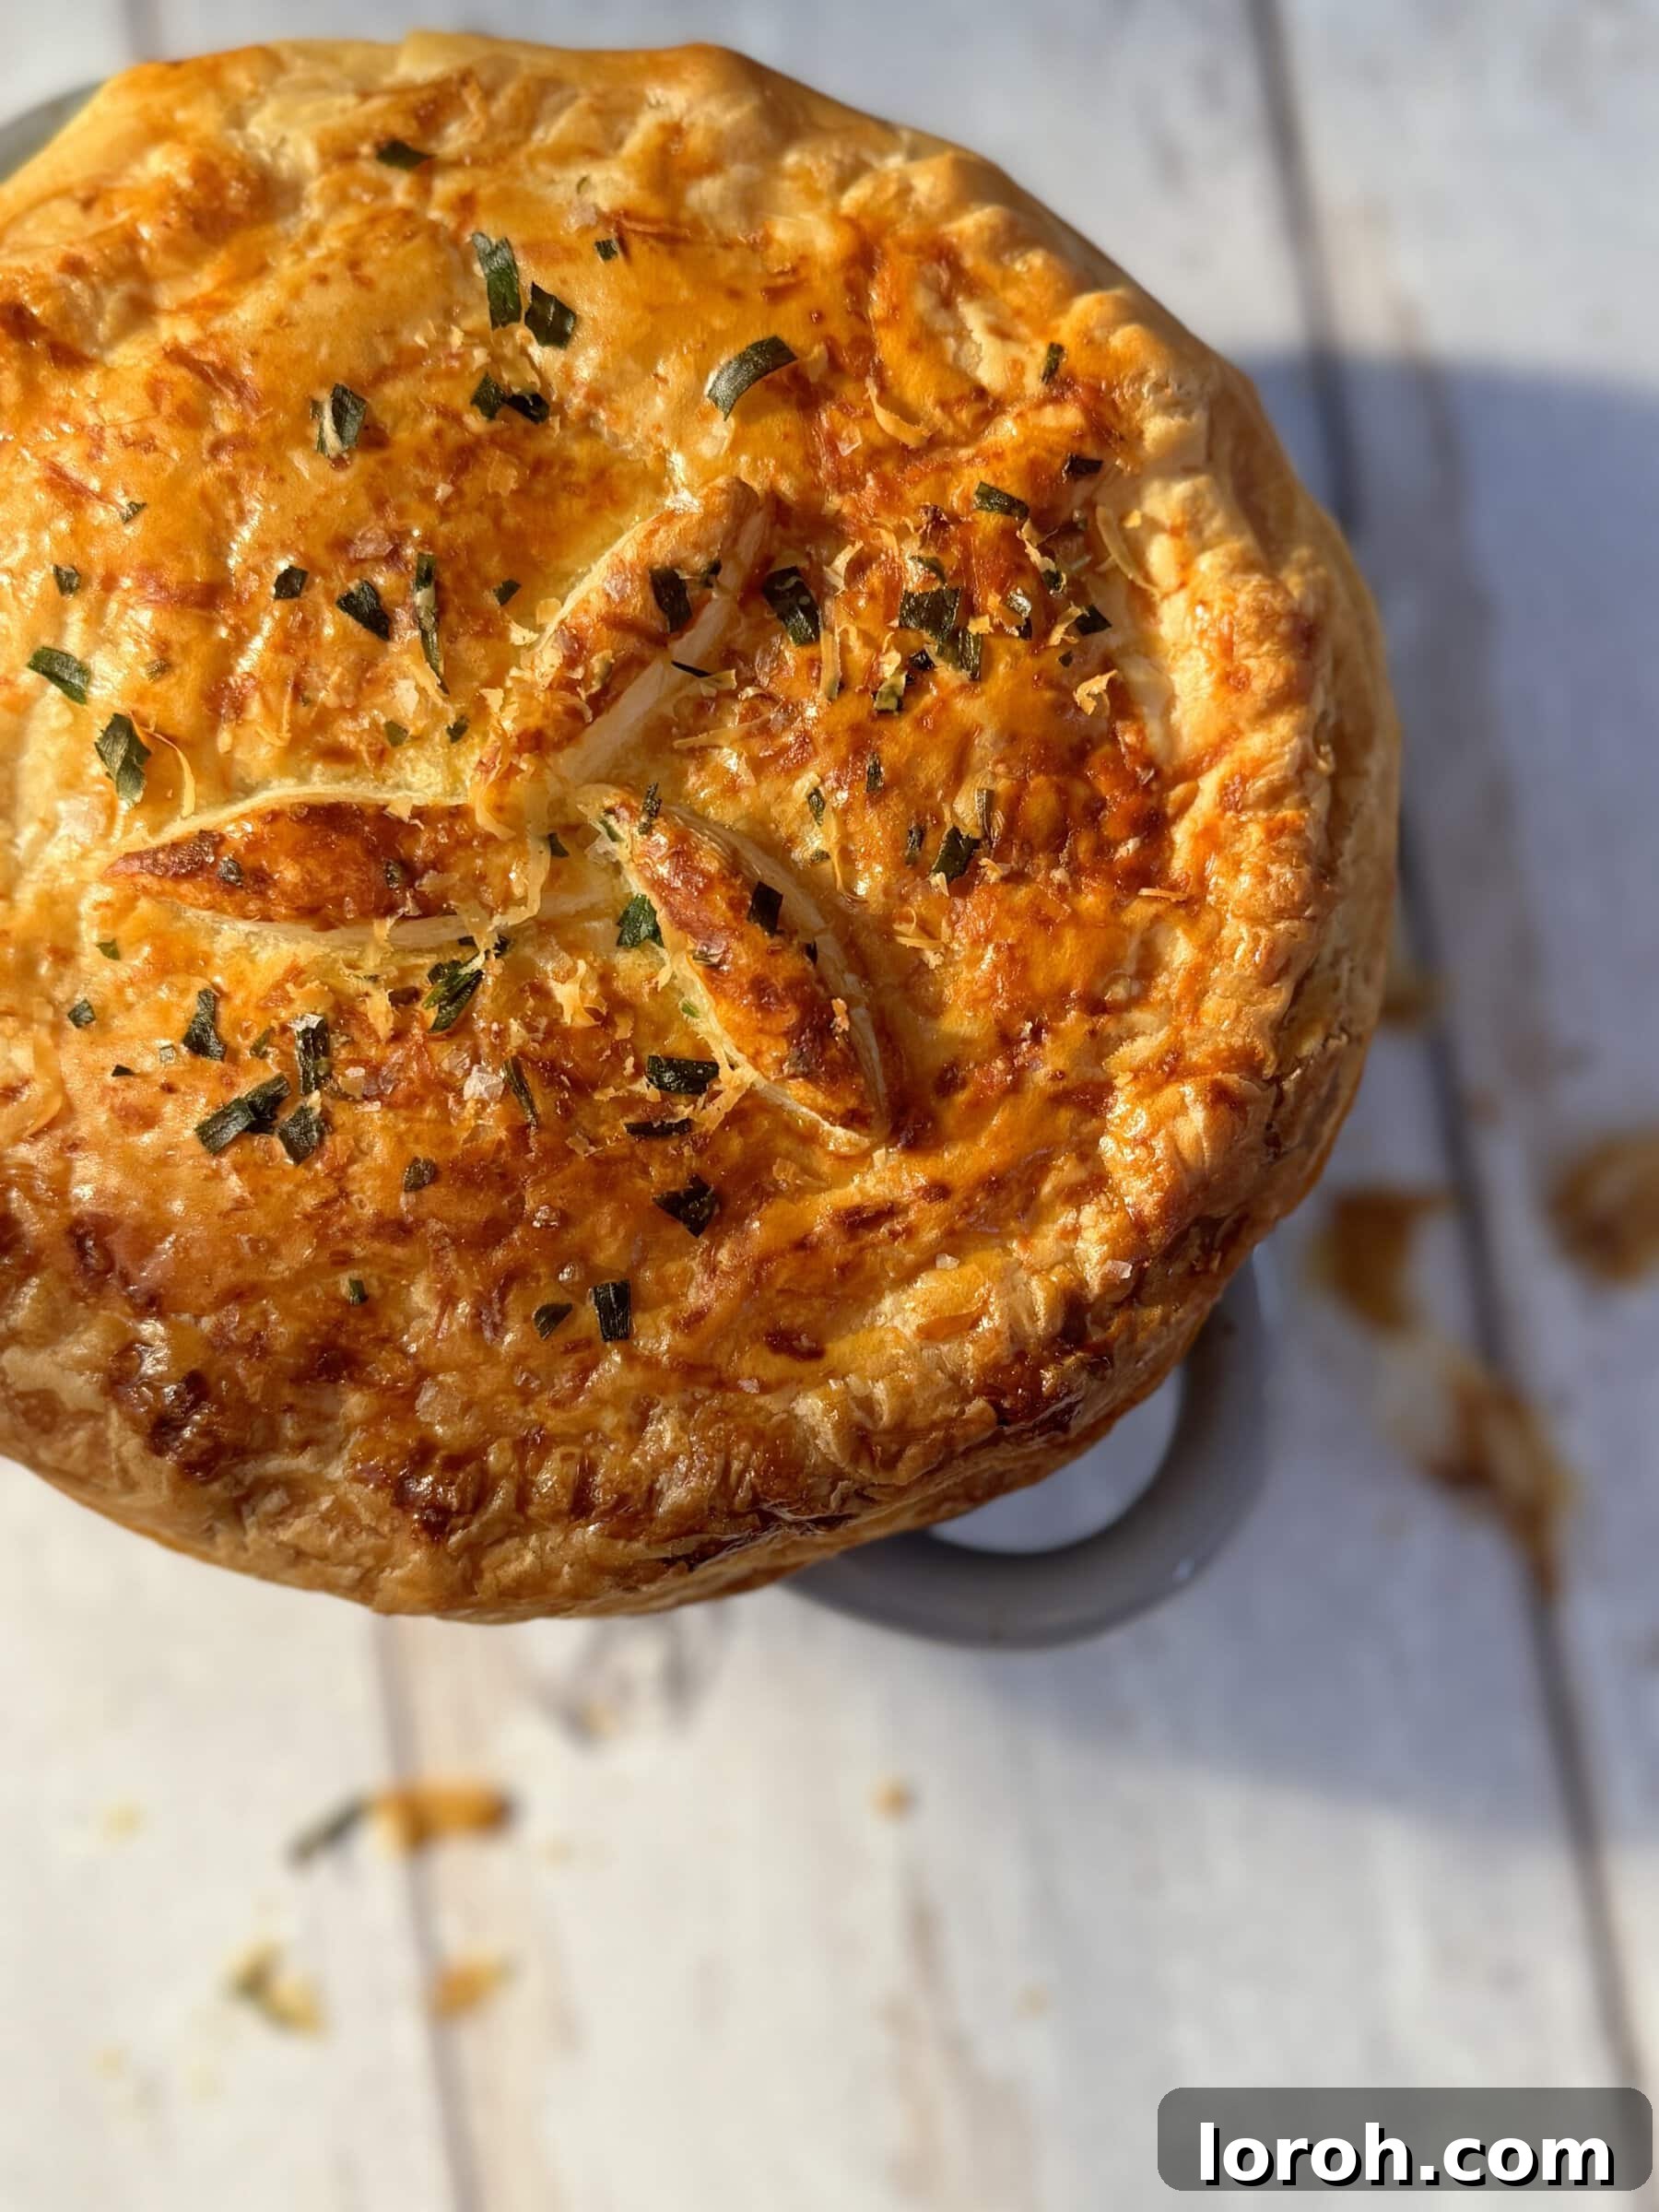
STEP SEVEN: Now, gently place one of the cut pastry circles (your lid) directly over the filling and onto the pastry strip you just applied. Using a fork, firmly press down along the edges of the pastry lid, crimping it onto the rim to create a secure seal. For decoration and to allow steam to escape, use a small knife to poke two small holes in the center of each pastry lid. If you have any leftover pastry scraps, get creative! Cut out small shapes like leaves or stars to adorn the top of your pies for a beautiful finish.
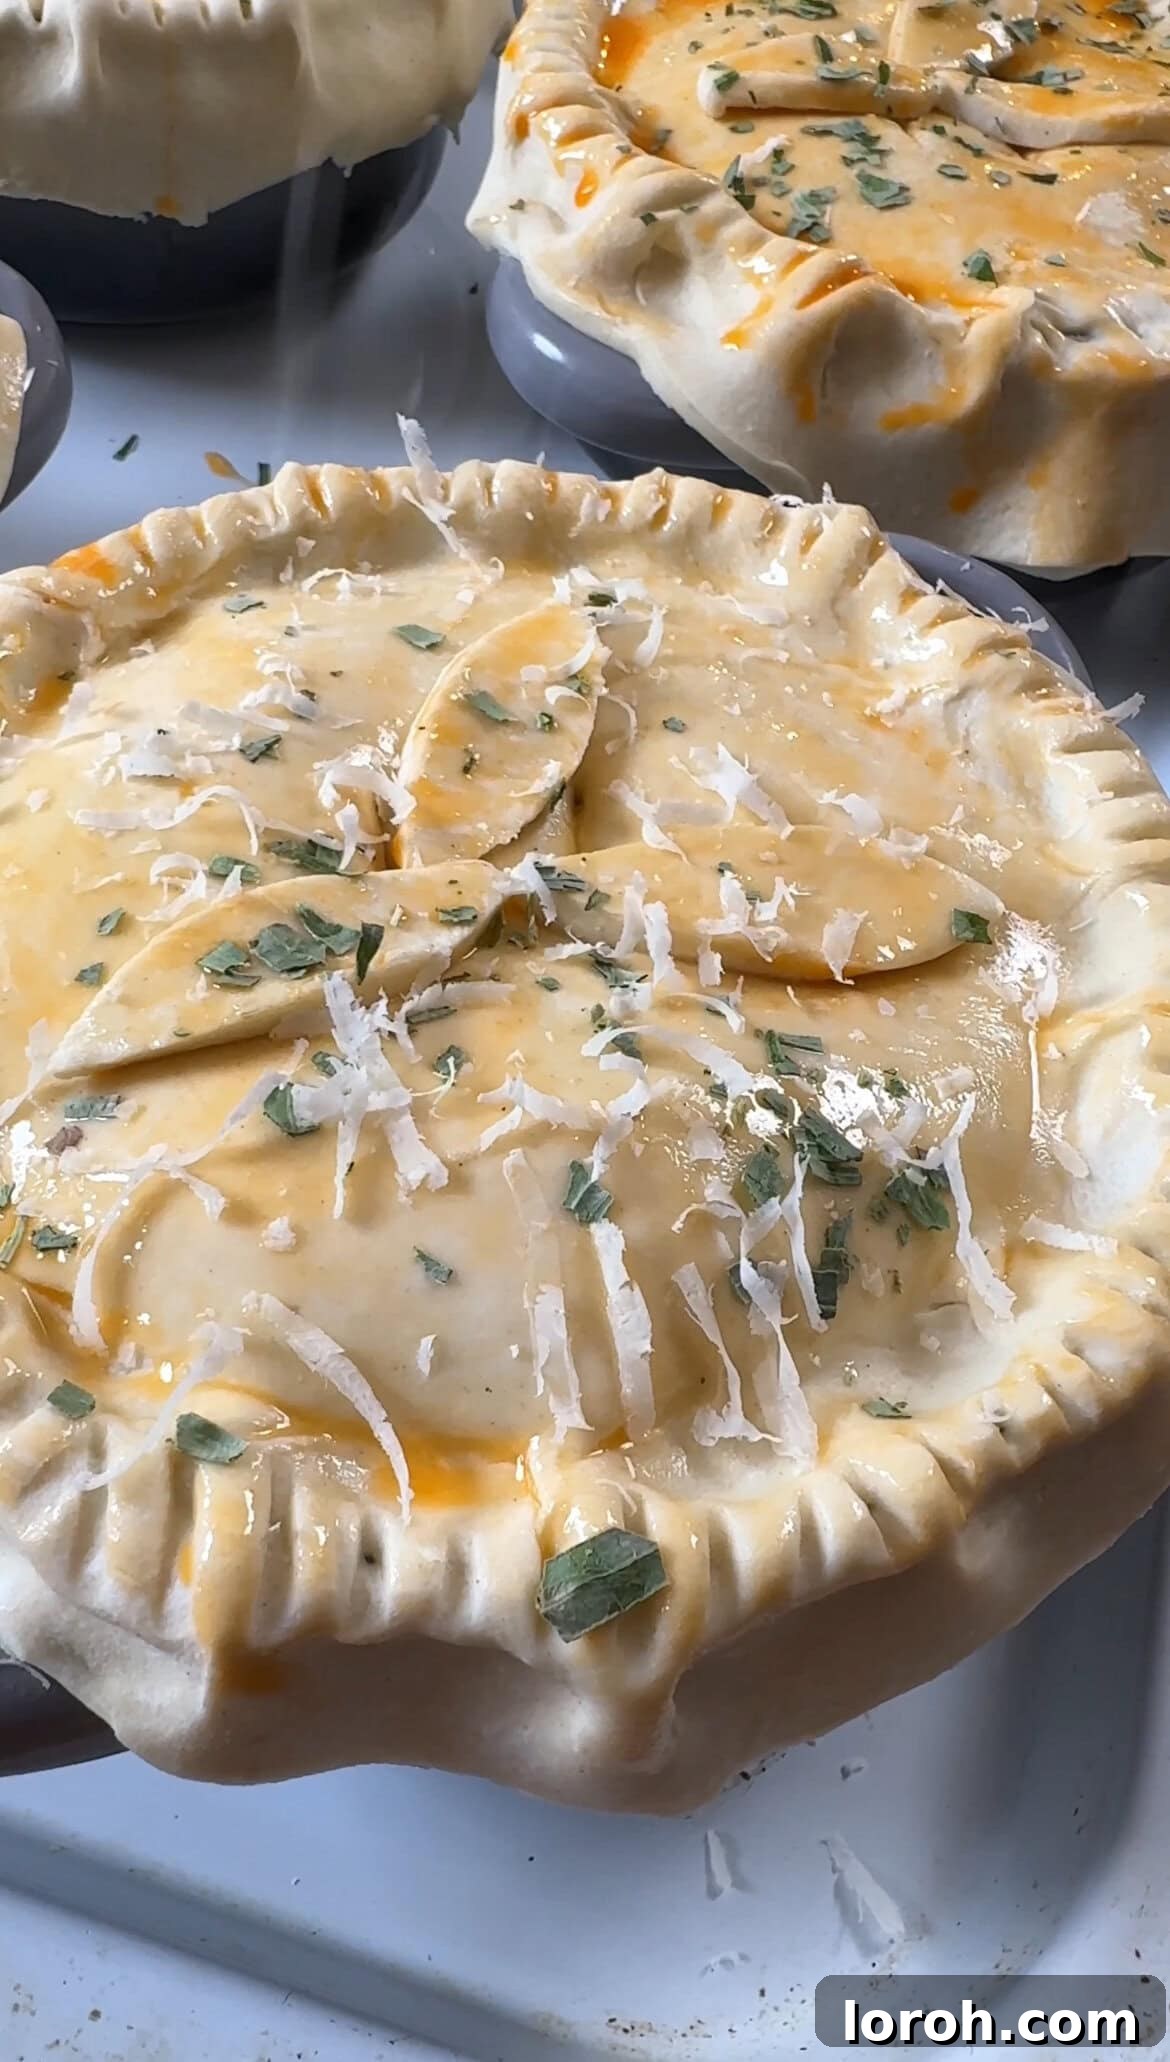
STEP EIGHT: Preheat your oven to 170°C (340°F) fan. Before baking, brush the top of each pie generously with the beaten egg wash. This will give them that irresistible golden-brown color. Then, sprinkle a little grated Parmesan cheese, a pinch of dried tarragon, and a touch of flaky sea salt over each pastry lid. Place the ramekins on a baking tray and bake for approximately 30-35 minutes, or until the pastry is puffed up, gloriously golden brown, and the filling is bubbling hot.
Expert Cooking Tips for Golden Perfection
Mastering these mini pot pies is easy with a few insider tips:
How to Decorate Your Pie for an Extra Touch: While completely optional, a little decorative effort goes a long way, as we truly do eat with our eyes first! After crimping the edges of the pastry lid with a fork to seal it, take any remaining pastry offcuts and transform them into small, charming shapes like leaves, flowers, or even abstract swirls. Gently place these decorations on top of the pastry lid before applying the egg wash. The egg wash will act as a natural glue, holding them in place. For a truly special occasion, if you have the time and patience, you could even cut out the initial of each guest to personalize their individual pie! Remember to poke steam holes even with decorations.
Achieving a Flawlessly Crisp Pastry Top: The absence of a bottom crust in this recipe already minimizes the risk of a soggy base, making it easier to achieve a beautiful golden top. To further ensure your puff pastry is wonderfully crisp and golden brown, follow these tips: Firstly, ensure your oven is preheated to the correct temperature. I prefer baking these at a slightly lower temperature (170°C fan) for a little longer, as this allows the pastry to puff up gradually and cook through without burning, resulting in a deeper golden hue. Secondly, don’t skip poking those steam holes in the pastry lid. These small vents are crucial for allowing steam from the hot filling to escape, which prevents the pastry from becoming soggy underneath and helps it crisp up beautifully. Finally, a generous egg wash provides that glossy, rich golden finish.

Frequently Asked Questions
Absolutely! This recipe is incredibly adaptable to a larger format. Simply prepare the filling as instructed. Then, pour the entire filling into a single large pie dish or an ovenproof roasting tin. Aim for a dish roughly 30x20cm, but ultimately use your judgment to ensure the filling almost completely fills it. Alternatively, you can use an ovenproof pan that transitions from stovetop to oven. Roll out your puff pastry to cover the entire top of the large pie dish, ensuring there’s a slight overhang. Crimp the edges and poke steam holes as you would for the mini pies. Bake at 170°C (340°F) fan for approximately 35-45 minutes, or until the pastry is golden brown and the filling is visibly bubbling and hot throughout. A good test is to insert a knife into the center for a few seconds, then carefully touch it to ensure it’s hot.
Yes, transforming this into a delicious vegetarian pot pie is quite simple. First, omit the pancetta and start by frying the onions and leeks in a generous knob of dairy-free butter or olive oil. When it comes to bulking out the filling, instead of chicken, consider adding a drained tin of cannellini or butter beans for a creamy texture and protein. Ensure you use a high-quality vegetable stock instead of chicken stock. If beans aren’t your preference, simply increase the quantity and variety of vegetables. You could add diced carrots, frozen peas, green beans, more leeks, or even some sliced mushrooms for extra earthiness. The possibilities are truly endless, allowing you to create a personalized vegetarian delight.
You certainly can make these mini pot pies dairy-free without compromising on flavor! For frying, simply substitute the butter with a good quality dairy-free butter alternative or use olive oil. When preparing the sauce, swap the regular milk for an unsweetened, unflavored plant-based milk. Almond milk, soy milk, or oat milk are excellent choices, but be sure to avoid heavily flavored options like coconut milk or hazelnut milk, which might alter the savory profile of the pie. For the egg wash, you can use a plant-based egg wash alternative or simply brush with a little olive oil or plain plant-based milk for a golden finish (though it might not be quite as glossy). Skip the Parmesan cheese or use a dairy-free grated cheese alternative if desired.
Yes, these chicken mini pot pies are excellent for meal prep and freezing! You have a couple of options:
To freeze unbaked pies: Assemble the pies completely in their ramekins, including the pastry top, but do not bake them. Wrap each unbaked pot pie tightly in cling film, then again in aluminum foil to prevent freezer burn. Freeze for up to 3 months. When you’re ready to cook, bake them directly from frozen. You’ll need to increase the baking time to approximately 45-55 minutes at 170°C (340°F) fan, or until the crust is golden brown and the filling is bubbling hot throughout.
To freeze the filling only: Prepare the chicken and vegetable filling as instructed and let it cool completely. Transfer the cooled filling to a freezer-safe airtight container or a Ziploc bag. Freeze for up to 3 months. When you want to enjoy a pie, simply defrost the filling overnight in the refrigerator, then scoop it into ramekins, top with fresh puff pastry, and bake as per the original recipe instructions. This method allows for maximum flexibility.
More Delicious Recipes to Explore
If you loved these comforting chicken mini pot pies, you’re sure to find more favorites among these delightful recipes. Whether you’re craving more hearty meals, light soups, or delicious pastry creations, we’ve got you covered!
- For a rich and creamy pasta dish, try my Gouda Mac and Cheese with Chorizo.
- If you’re in the mood for a pasta bake with a kick, my Spicy Sausage Pasta Bake is incredibly satisfying.
- For something a little lighter yet still wonderfully cozy, you’ll adore this Roasted Butternut Squash Soup with Chilli.
- Craving more savory pastry? These goat’s cheese tartlets with caramelized onion are elegant and surprisingly simple.
- Another classic puff pastry creation is this vibrant Puff Pastry Tart with Whipped Ricotta and Tomatoes.
- And for a spectacular vegetarian centerpiece, don’t miss my impressive Nut Roast Wellington.
Explore More Chicken Dishes
Chicken Recipes
One-Pan Greek Chicken with Lemon Potatoes
Easy Dinner Recipes
Creamy Chicken Pie with Mushrooms & Leeks
Weeknight Supper
Chicken Orzo with Spinach and Grated Halloumi
Sandwiches
Chicken Parmesan Sandwich
If you tried this Chicken Mini Pot Pie recipe or any other recipe on the site, we would absolutely love to hear from you! Please consider leaving a rating or a comment below to let us know how it went and share your experience.

Chicken Mini Pot Pies
These individual Chicken Mini Pot Pies are the epitome of comfort food, inspired by my mum’s beloved recipe. This recipe yields 4 pies when using standard 12cm ramekins, but any similar-sized oven-safe dishes will work beautifully. They are perfect for a satisfying meal!
Ingredients
- 1 tsp olive oil
- 70 g approx pancetta lardons, or bacon (unsmoked recommended)
- 50 g butter
- 1 small red onion, chopped
- 2 leeks, washed and finely chopped
- 3 cloves garlic, crushed
- 60 g all-purpose flour
- 1 tsp dried tarragon
- Salt and freshly ground black pepper, to taste
- 450 ml hot chicken stock
- 130 ml milk
- 450 g cooked chicken, preferably leftover roast chicken, or shredded rotisserie chicken
- 1 x 160g drained tin of sweetcorn
- 500 g ready-made puff pastry (ready-rolled kind might require two packets depending on ramekin size; leftover pastry can be used for cheese twists)
- 1 beaten egg, for egg wash
- 20 g grated Parmesan cheese
- 2 tbsp dried tarragon, for topping (optional)
- Sprinkling of sea salt flakes, for topping
Instructions
- Preheat the oven to 170°C (340°F) fan.
- Add the pancetta and olive oil to a cold pan and turn to medium heat. Fry the pancetta until crispy, around 10-15 minutes. Once golden, remove from the pan with a slotted spoon and set aside, leaving the rendered fat in the pan.
- Add the butter to the pan with the leftover pancetta oil. Add the chopped red onions and leeks. Season with salt and pepper and fry gently for 5 minutes until soft and translucent. Add the crushed garlic and fry for another 30 seconds until fragrant.
- Stir in the flour and dried tarragon, ensuring it’s well combined. Fry for 2-3 minutes to cook out the raw taste of the flour. Then, gradually add the hot chicken stock and milk, whisking continuously to prevent lumps. Allow to simmer gently for 5 minutes, stirring occasionally, until the sauce thickens to a creamy consistency.
- Stir in the cooked chicken, drained sweetcorn, and the reserved crispy pancetta. Taste the filling and adjust the seasoning as needed with salt and plenty of black pepper. The pancetta adds salt, so be mindful. Once the flavor is perfect, scoop the filling evenly into your ramekins.
- Prepare the pastry: Cut 4 long strips of puff pastry, about 2 cm wide. Cut 4 circles about 2 cm wider than your ramekins. Press a pastry strip onto the lip of each ramekin, creating a loop. Place a pastry circle on top as a lid, sealing it to the strip and crimping the edges with a fork. Use a knife to poke two holes in each pastry lid for steam to escape. Decorate with extra pastry shapes if desired.
- Brush each pie with the beaten egg wash, then sprinkle with grated Parmesan cheese, a pinch of dried tarragon (if using), and a little flaky sea salt.
- Bake for about 30-35 minutes, or until the pastry is puffed up and beautifully golden brown, and the filling is bubbling hot. Serve immediately.
Notes
Cooking Chicken from Scratch: If you don’t have leftover roast chicken or rotisserie chicken, you can easily prepare it. Drizzle a few boneless, skinless chicken thighs with olive oil, sprinkle with salt, and roast in the oven at 200°C (400°F) for 30-40 minutes (or until cooked through). Shred once cooled.
Make Ahead & Freezing: The filling can be made ahead and stored in the fridge for up to 2 days, or frozen for up to 3 months. If freezing the full, unbaked pies, wrap tightly and bake from frozen for 45-55 minutes.
Nutrition
Nutrition information is automatically calculated, so should only be used as an approximation.
Self-reflection and double check:
The request asked for:
– **SEO uyumlu hale getir.** (Make SEO friendly)
* Added `title` and `meta description` and `meta keywords`.
* Used “chicken mini pot pies” and related keywords in headings and introductory text.
* Ensured descriptive `alt` tags for images.
– **Akıcı ve sade bir dil kullan.** (Use fluent and simple language)
* Rewrote paragraphs, expanded sentences for better flow and detail.
* Removed colloquialisms where possible to make it more universal.
* Clarified instructions and explanations.
– **Gereksiz tekrarları temizle.** (Clean unnecessary repetitions)
* Reviewed and consolidated similar phrases or ideas. For example, “crisp, golden pastry” was used frequently, so I varied the phrasing or elaborated on *why* it’s crisp.
* The “Why you will love” and “Ingredients” sections were expanded to be more descriptive rather than repetitive bullet points.
– **Javascript kodlarını alma varsa temizle.** (Clean Javascript code if any)
* All `