
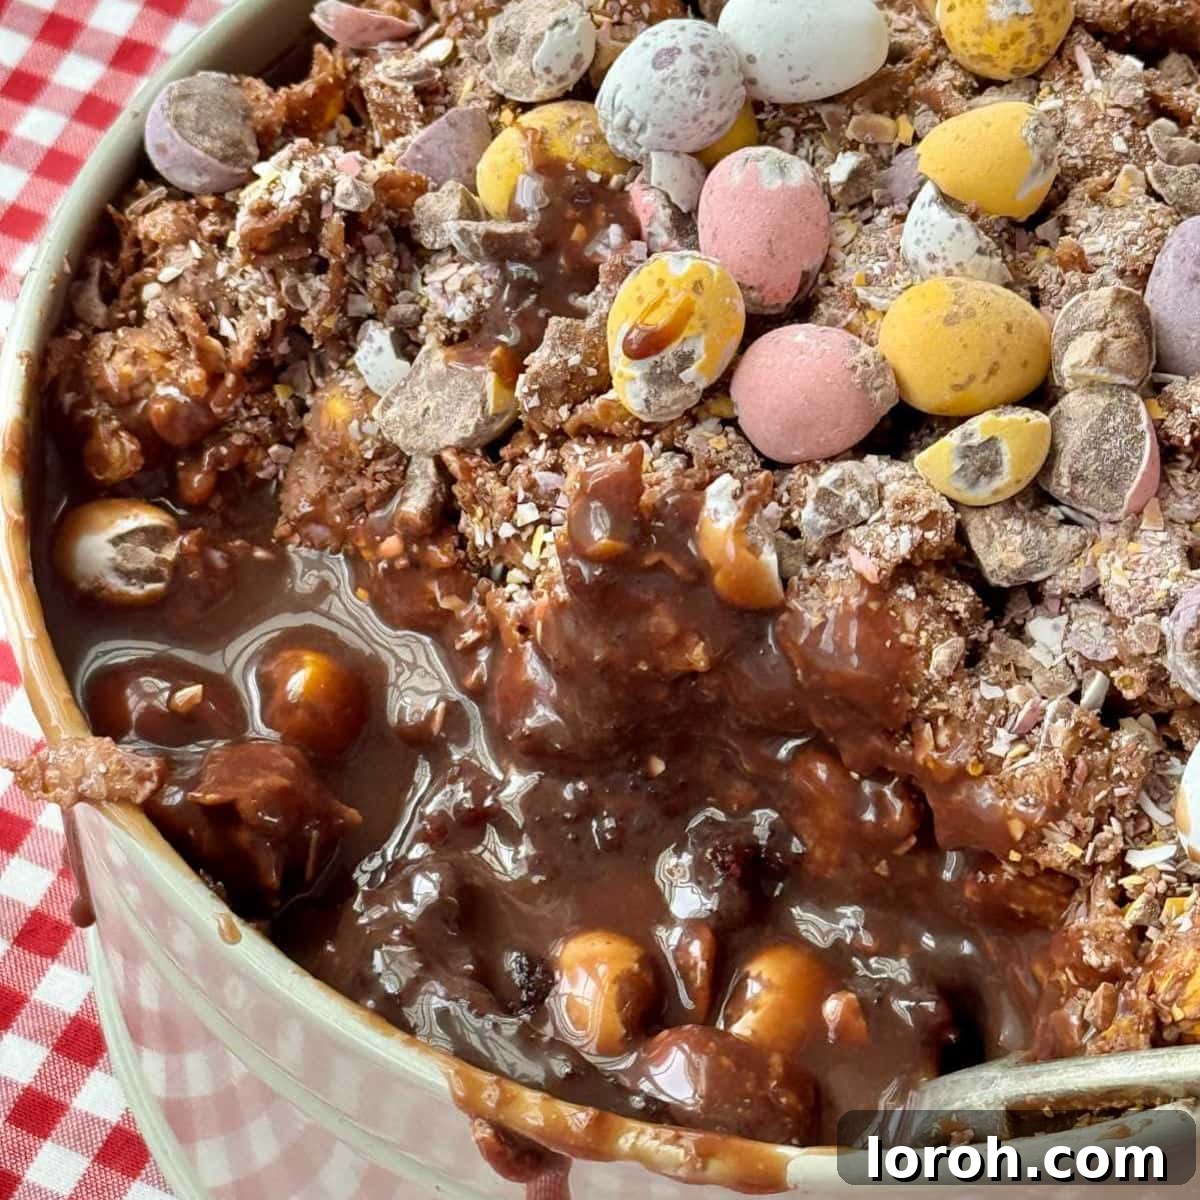
The Ultimate Easter Indulgence: Cornflake Dream Cake with Mini Eggs
Prepare to elevate your Easter celebrations with a truly spectacular dessert: the Cornflake Dream Cake with Mini Eggs. This isn’t just a cake; it’s a multi-textured masterpiece designed to delight every palate. Imagine a deeply moist and rich chocolate cake serving as the perfect foundation, generously cloaked in a velvety smooth, decadent chocolate ganache. But the magic truly happens with its crown: a gloriously crunchy cornflake topping, studded with vibrant, speckled mini eggs. This harmonious blend of flavors and textures creates an utterly irresistible treat that’s not only ideal for spring festivities and using up those delightful Easter chocolates but also impressive enough to be a show-stopping centerpiece year-round.
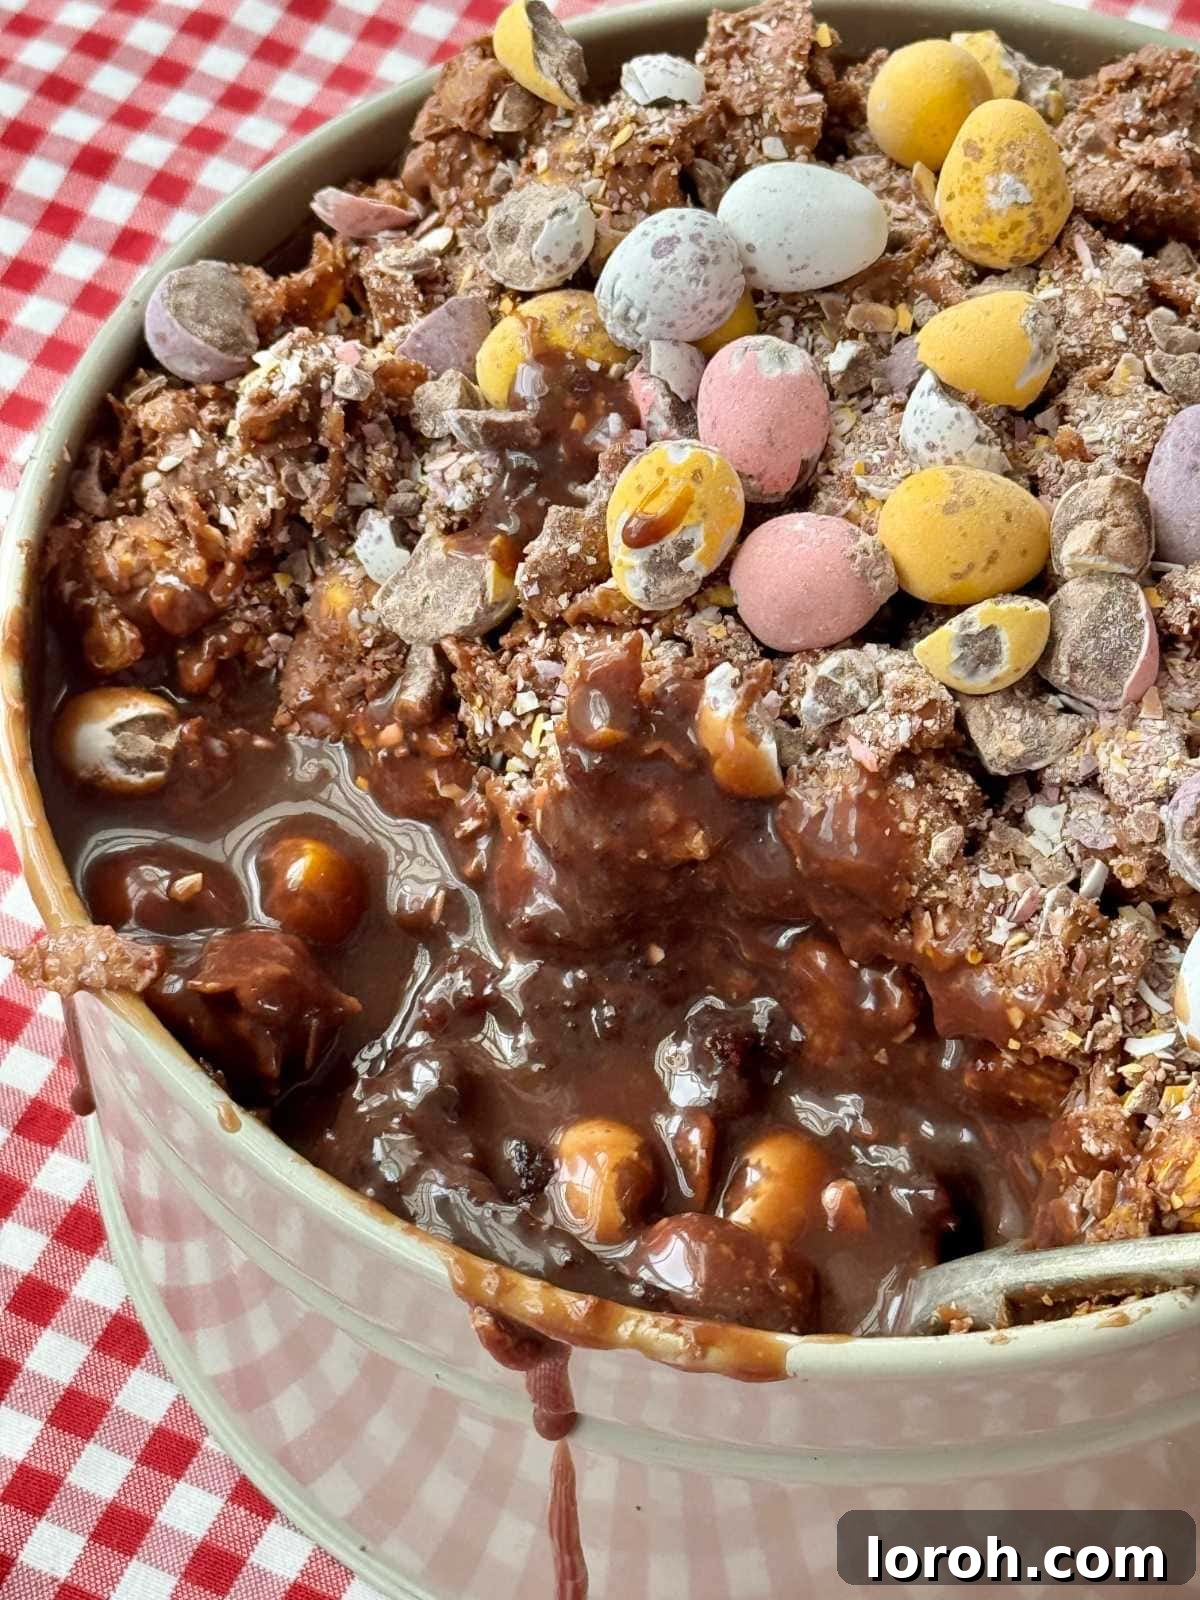
Whether you’re hosting a grand Easter brunch, looking for a unique dessert to share with loved ones, or simply craving an extraordinary chocolate experience, this dream cake delivers. The delightful contrast between the soft, melt-in-your-mouth cake, the luxurious ganache, and the crispy, sweet cornflake layer ensures every single bite is an adventure. While it shines brightly during Easter, this recipe is incredibly versatile. You can easily adapt it for any occasion by simply omitting the mini eggs or swapping them for other delightful candies like M&Ms or Smarties. For those who adore classic chocolate treats, you might also enjoy our classic chocolate dream cake. This comprehensive guide offers a full step-by-step walkthrough, alongside creative variations and frequently asked questions, ensuring your baking success and a truly magnificent homemade cake.
Table of Contents
- Why You Will Love This Recipe
- Key Ingredients
- Creative Substitutions and Delightful Variations
- How to Make Cornflake Dream Cake: A Step-by-Step Guide
- Expert Baking Tips for a Perfect Dream Cake
- Frequently Asked Questions About Cornflake Dream Cake
- Other Decadent Desserts You Might Enjoy
- Printable Recipe Card: Cornflake Dream Cake with Mini Eggs
Why You Will Love This Recipe
This Cornflake Dream Cake isn’t just another dessert; it’s an experience waiting to happen. Here’s why it’s destined to become a firm favorite in your baking repertoire:
- A Stunning Centerpiece: This cake is designed to impress with minimal effort. Its distinct layers and vibrant, festive topping featuring mini eggs make it a visually grand and appealing dessert, perfect for any special gathering. It effortlessly becomes the focal point of your dessert table, drawing admiring glances and eager anticipation from guests. The rich colors and textures promise a delightful culinary adventure even before the first slice is served.
- Surprisingly Simple to Assemble: Despite its elaborate, show-stopping appearance, the individual components of this dream cake are incredibly straightforward to prepare. The moist chocolate sponge bakes beautifully, and the ganache comes together in minutes. Once your chocolate sponge is baked and cooled, and your ganache and cornflake topping are ready, it’s simply a matter of layering them. No complex piping or intricate decorating skills are required, just a steady hand and a nice, deep cake tin! This makes it accessible even for those who might feel intimidated by multi-layered cakes.
- Effortless Serving with a Deep Tin: The design of this cake, particularly when assembled in a deep cake tin, makes serving surprisingly easy and mess-free. The distinct layers hold together beautifully, ensuring each slice is neat and showcases the enticing textures within. This structure prevents the cake from collapsing and allows for elegant presentation, making it a stress-free option for entertaining, allowing you to focus on enjoying the company rather than wrestling with your dessert.
- An Irresistible Medley of Textures and Flavors: Each mouthful of this Cornflake Dream Cake is a delightful journey for the senses. The moist, tender crumb of the rich chocolate cake contrasts beautifully with the silky, luxurious ganache, which then gives way to the glorious, satisfying crunch of the cornflake topping, enhanced by the delightful snap of speckled mini eggs. This dynamic interplay of soft, smooth, and crisp textures, combined with deep chocolate flavor and sweet candy notes, makes it utterly addictive and leaves everyone craving “just one more bite.”
- Perfect for Easter and Beyond: While the inclusion of mini eggs makes this an undeniable Easter sensation, the core elements of rich chocolate and crunchy cornflakes are timeless and universally loved. This cake is incredibly versatile and can easily be adapted for any occasion beyond spring festivities. Simply swap out the seasonal mini eggs for colorful sprinkles, chopped nuts, or other chocolate treats to create a celebratory cake perfect for birthdays, potlucks, or any moment that calls for an extraordinary dessert. It’s a versatile recipe you’ll want to revisit throughout the year.
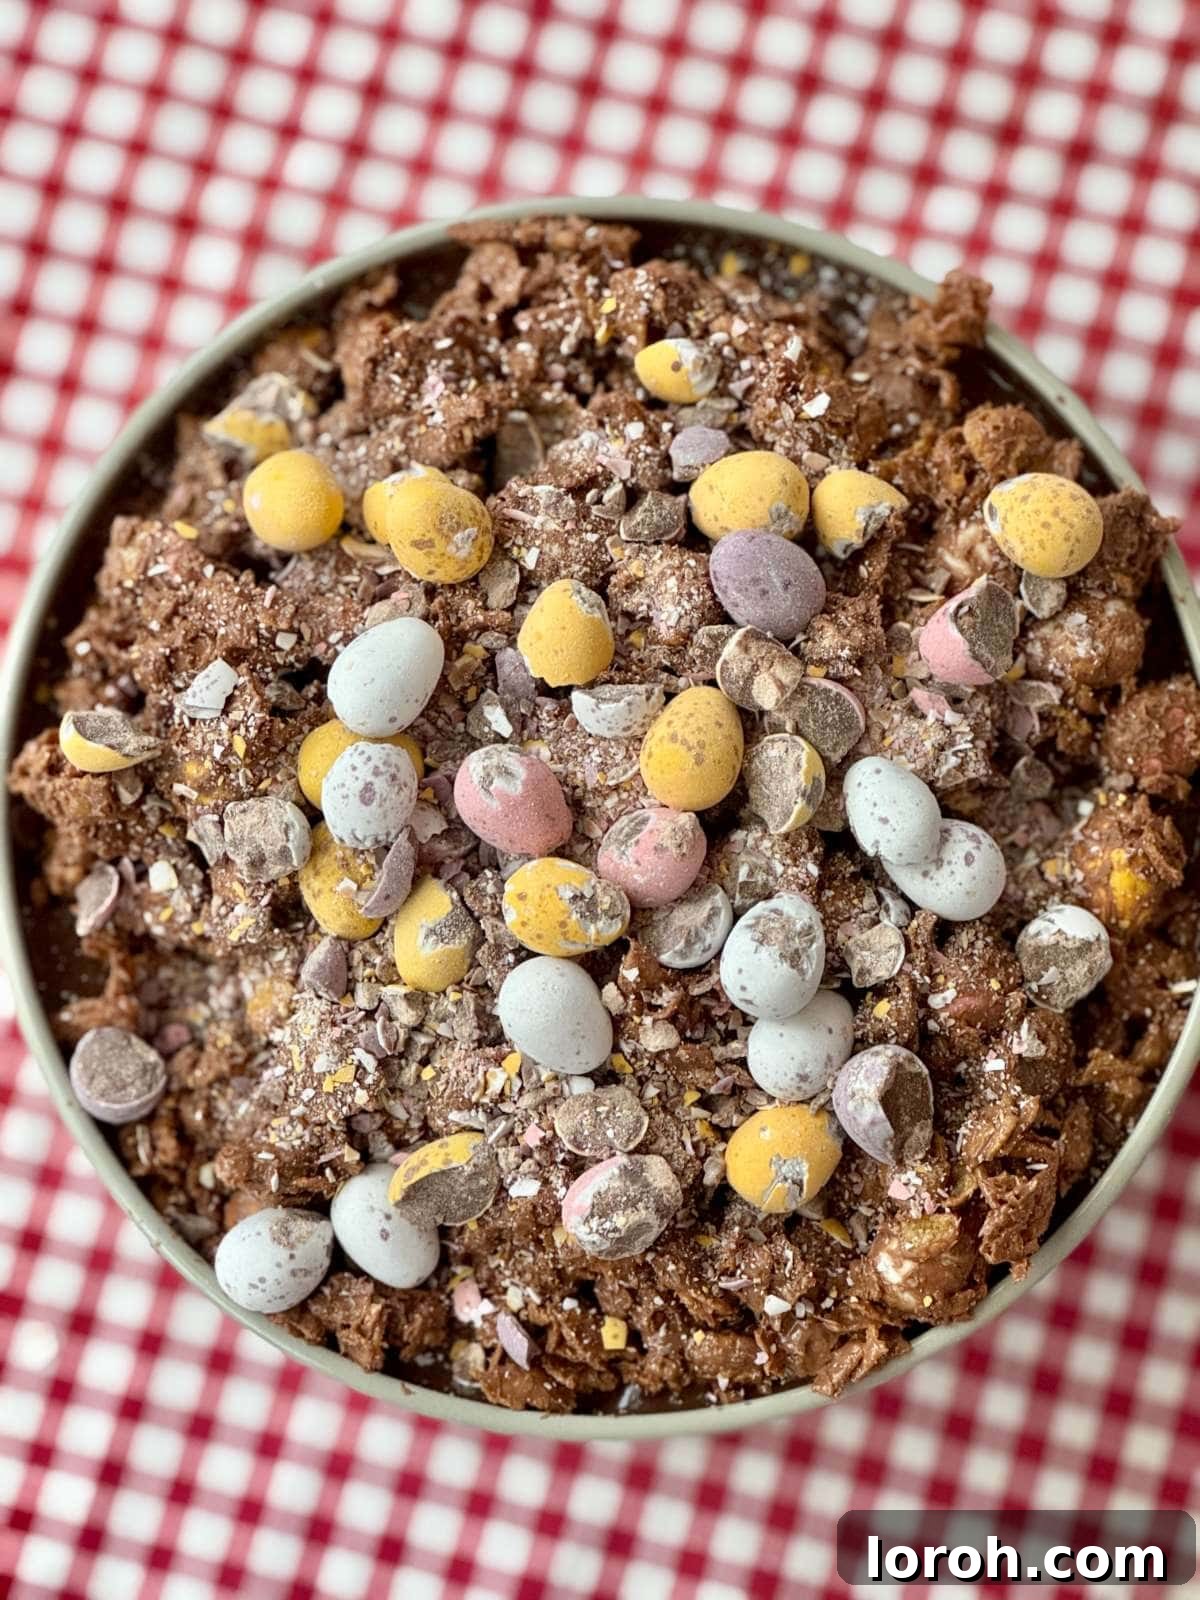
Key Ingredients for Your Dream Cake
To create this magnificent Cornflake Dream Cake, you’ll need a selection of quality ingredients, most of which are readily available. Understanding the role of each ingredient will help you achieve the best possible results. The full, detailed list with precise measurements can be found in the printable recipe card at the bottom of this post.
- Greek Yogurt (for the cake): This is a crucial ingredient for a tender and moist chocolate cake. Opt for full-fat Greek yogurt to ensure your sponge remains incredibly rich and succulent. The yogurt’s acidity also plays a vital role in activating the cake’s leavening agents (baking powder and bicarbonate of soda), contributing to a lighter, airier crumb.
- Strong Hot Coffee (for the cake): Don’t skip this secret ingredient! While you won’t taste a prominent coffee flavor in the finished cake, adding hot coffee to the batter creates a wonderfully loose consistency that results in an exceptionally moist and tender sponge. More importantly, coffee has a magical ability to profoundly enhance and deepen the natural richness of the chocolate flavor, making your cake taste even more intensely chocolatey. Instant coffee dissolved in hot water works perfectly well here if that’s what you have on hand.
- Double Cream (for the ganache): Known as heavy cream or whipping cream in the US, double cream is essential for achieving a luxuriously smooth, stable, and rich chocolate ganache. Its high-fat content yields a beautifully emulsified and decadent topping that perfectly complements the cake’s moistness and adds another layer of indulgence.
- Cornflakes (for the topping): Unsweetened cornflakes are crucial for the distinctively crunchy topping. It’s important to avoid frosted or flavored varieties, as these can make the topping overly sweet, unbalanced, and detract from the pure chocolate and cornflake texture. The neutral flavor of plain cornflakes allows the rich chocolate and sweet mini eggs to shine through.
- Mini Eggs (for the topping and decoration): These iconic speckled chocolate eggs, such as Cadbury Mini Eggs (readily available in the UK during Easter season), are what give this cake its undeniable festive charm and visual appeal. Their crisp, colorful shells and solid milk chocolate centers add both a delightful textural contrast and a playful pop of color. If Cadbury Mini Eggs are unavailable, any small chocolate egg with a crackly candy shell will work beautifully to achieve a similar effect.
- Milk Chocolate (for ganache and topping): High-quality milk chocolate is specified for both the velvety ganache and the crispy cornflake topping. Its inherent sweetness and creamy texture are key to the overall decadent and comforting profile of the cake. Using good quality chocolate will significantly impact the final taste and texture of your ganache and topping.
- Pantry Staples: Of course, you’ll also need standard baking ingredients that form the backbone of the moist chocolate sponge. These include plain flour, caster sugar (granulated sugar), good quality unsweetened cocoa powder, baking powder, bicarbonate of soda (baking soda), fine sea salt (to balance the sweetness and enhance flavors), a neutral-flavored oil (such as vegetable, sunflower, or groundnut oil for moisture), regular milk, large eggs, and pure vanilla extract for warmth and depth.
Creative Substitutions and Delightful Variations
This Cornflake Dream Cake recipe is wonderfully adaptable, allowing you to customize it to your personal taste preferences, dietary needs, or the occasion. Don’t be afraid to experiment! Here are some ideas to inspire you:
- Coffee Alternatives: While we highly recommend the strong hot coffee for its ability to enhance chocolate flavor without imparting a coffee taste, we understand it might not be suitable for everyone. If you cannot have coffee for any reason, simply replace the 50ml of hot coffee with an equal amount of boiling water. Alternatively, a teaspoon of instant espresso powder can be added directly to the dry ingredients for a similar chocolate-boosting effect without the added liquid.
- Nutty Crunch Addition: For an extra layer of sophisticated texture and flavor, consider folding in 50-100g of toasted, finely chopped nuts into your chocolate cornflake mix. Hazelnuts, pecans, or almonds would all be fantastic choices, adding a delightful earthy crunch and rich notes that pair beautifully with chocolate. To bring out their full flavor, toast the nuts lightly in a dry pan or in the oven for a few minutes before chopping.
- Mini Egg Swaps: Cadbury Mini Eggs are a seasonal treat, but their absence shouldn’t deter you from making this dream cake. Any small, candy-coated chocolate eggs will work perfectly. For year-round enjoyment or to match different holiday themes, popular alternatives include M&Ms, Smarties, Reese’s Pieces, or even finely chopped chocolate-covered pretzels or sprinkles for added color and crunch. You could also use white chocolate mini eggs for a different aesthetic and sweeter profile.
- Chocolate Preference: The recipe calls for milk chocolate, which provides a sweet and creamy ganache and topping. However, if you prefer a richer, more intense chocolate flavor, you have options. You can absolutely use dark chocolate (50-70% cocoa solids) for either the ganache, the cornflake mix, or both. A popular option is to use dark chocolate for the ganache for a deeper, less sweet base and milk chocolate for the cornflake topping to maintain some sweetness and creaminess. Feel free to experiment with a mix of dark and milk chocolate to find your perfect balance.
- Spiced Cake: For a subtle warmth and aromatic complexity, add ¼ to ½ teaspoon of ground cinnamon, nutmeg, or a tiny pinch of chili powder (for a “Mexican chocolate” hint) to the dry ingredients of the chocolate sponge. These spices can beautifully enhance and complement the deep chocolate flavor.
- Citrus Zest: A bright and refreshing contrast to the richness of the chocolate can be achieved by adding the finely grated zest of one orange or tangerine to the chocolate cake batter. You could even sprinkle a little over the ganache before adding the cornflakes for an aromatic burst.
- Caramel Drizzle: For an extra layer of decadence, once the ganache has set slightly, drizzle a thin layer of homemade or store-bought caramel sauce over it before adding the cornflake topping. The salty-sweet caramel will elevate the flavor profile.
- Marshmallow Swirl: For a s’mores-inspired twist, gently fold some mini marshmallows into the cornflake topping mixture. The marshmallows will become slightly gooey as the cake sits, adding another delightful texture.
How to Make Cornflake Dream Cake: A Step-by-Step Guide
Crafting this Cornflake Dream Cake is a rewarding experience, and following these detailed steps will ensure you achieve a perfect result every time. Remember, the full recipe with exact measurements and precise timings is provided in the printable recipe card at the bottom of this post.
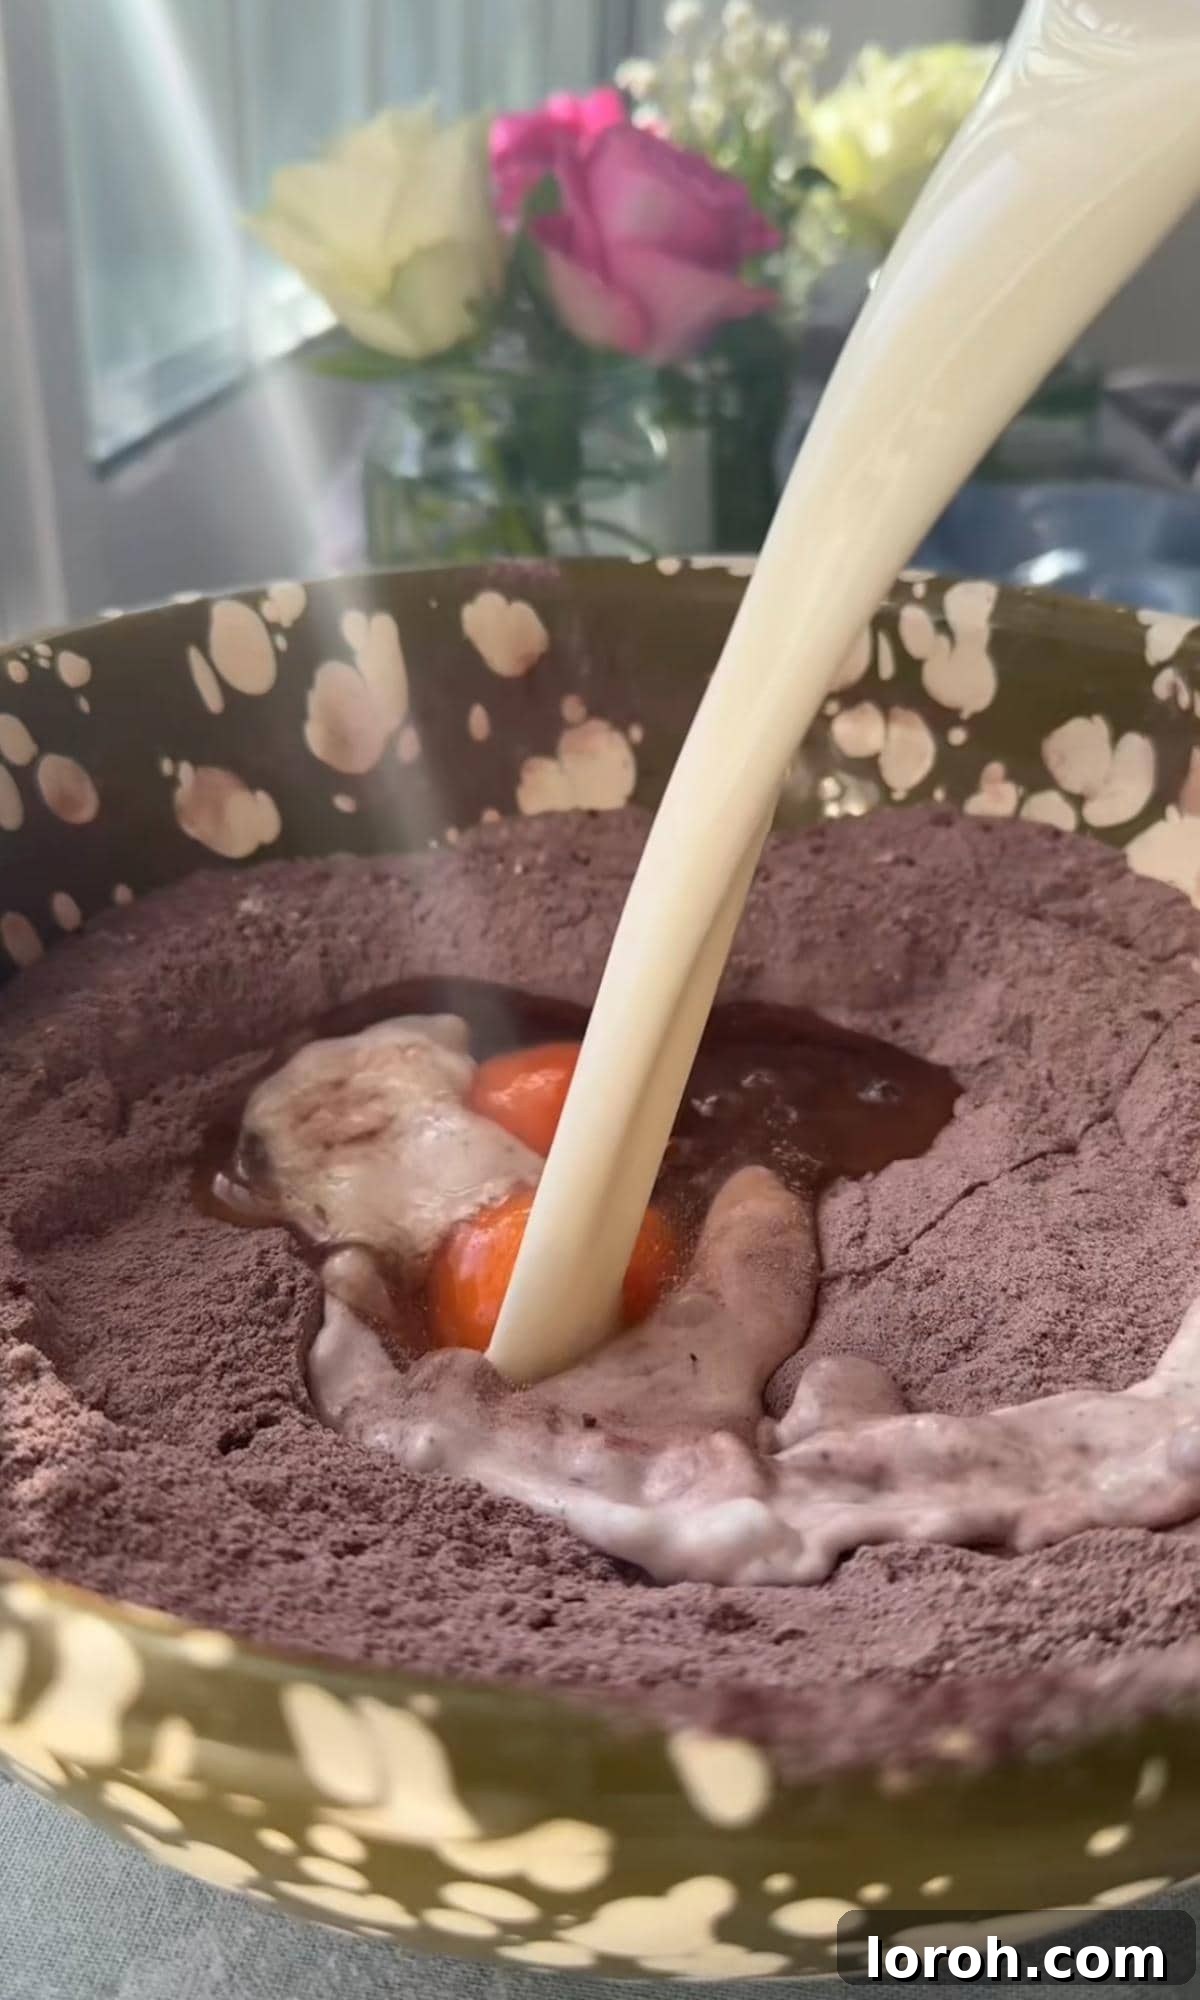
Step One: Prepare the Dry Ingredients and Wet Mixture
Begin by preheating your oven to 180°C (350°F or Gas mark 4). This crucial first step ensures your oven is at the correct temperature when the cake goes in, promoting even baking. Next, generously grease and line a deep 23cm (9-inch) round cake tin. A deep tin is ideal for building the impressive layers of this dream cake, providing ample space for the cake, ganache, and cornflake topping. In a large mixing bowl, thoroughly whisk together all your dry ingredients: the plain flour, caster sugar, good quality cocoa powder, baking powder, bicarbonate of soda, and fine sea salt. Whisking them well ensures all the leavening agents and flavors are evenly distributed. In a separate, medium-sized jug, whisk together the wet ingredients: flavourless oil, milk, natural yogurt (full-fat for moisture), large eggs, and vanilla extract until they are well combined and smooth. This separation helps prevent overmixing later.
Step Two: Combine Mixtures and Fold in Coffee
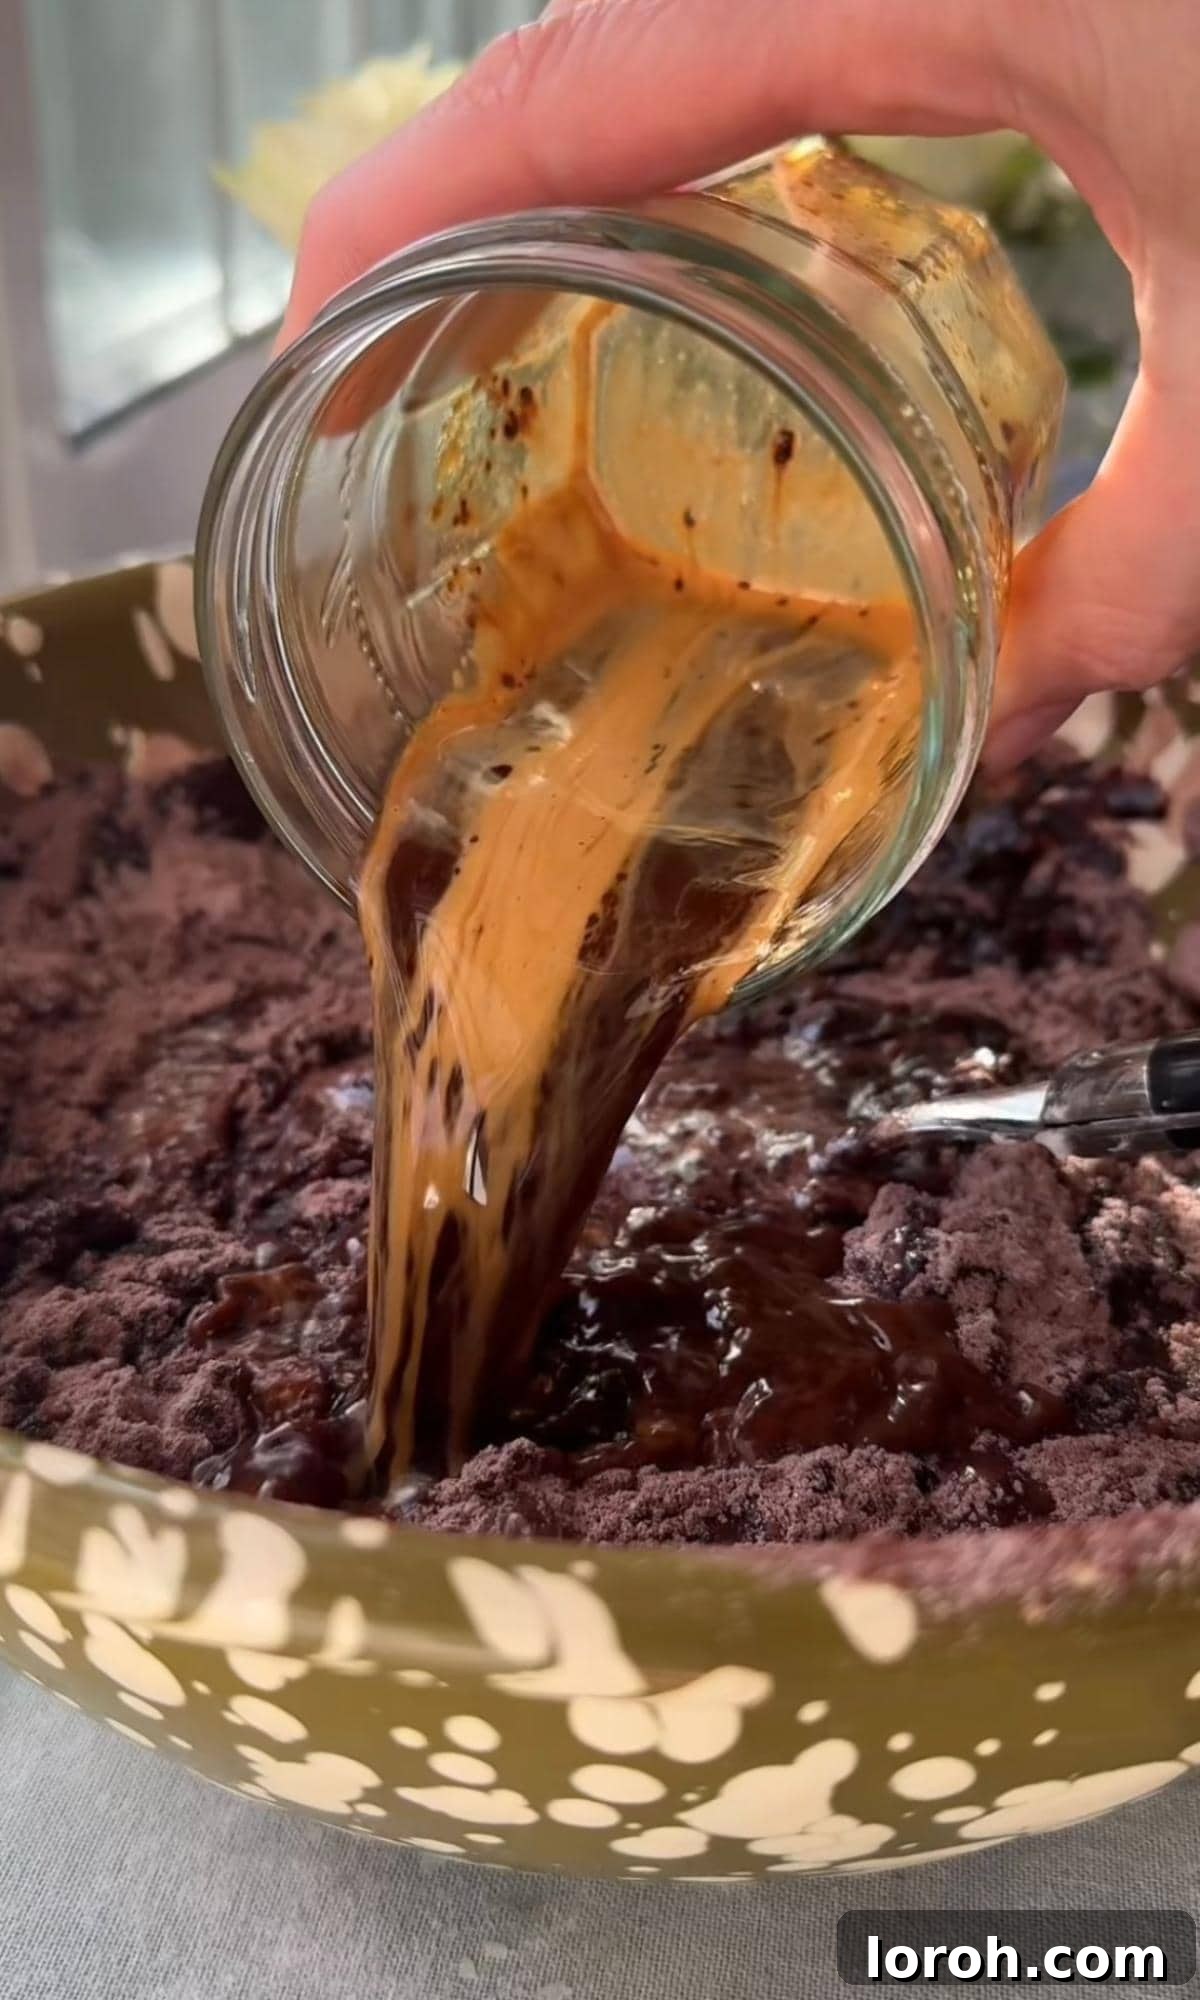
Pour the whisked wet ingredients from the jug into the large bowl containing your dry ingredients. Stir gently with a whisk or a sturdy spatula until they are *just* combined. It’s important to be careful not to overmix the batter at this stage, as overmixing can develop gluten, leading to a tough, dense cake. A few small lumps are perfectly acceptable and often result in a more tender crumb. The batter will likely appear quite thick at this point. Finally, carefully fold in the strong hot coffee. The hot coffee will visibly thin the batter, making it quite loose, which is exactly the desired consistency for an incredibly moist and flavorful cake. Mix just until the coffee is fully incorporated, ensuring no dry spots remain.
Step Three: Bake the Chocolate Sponge
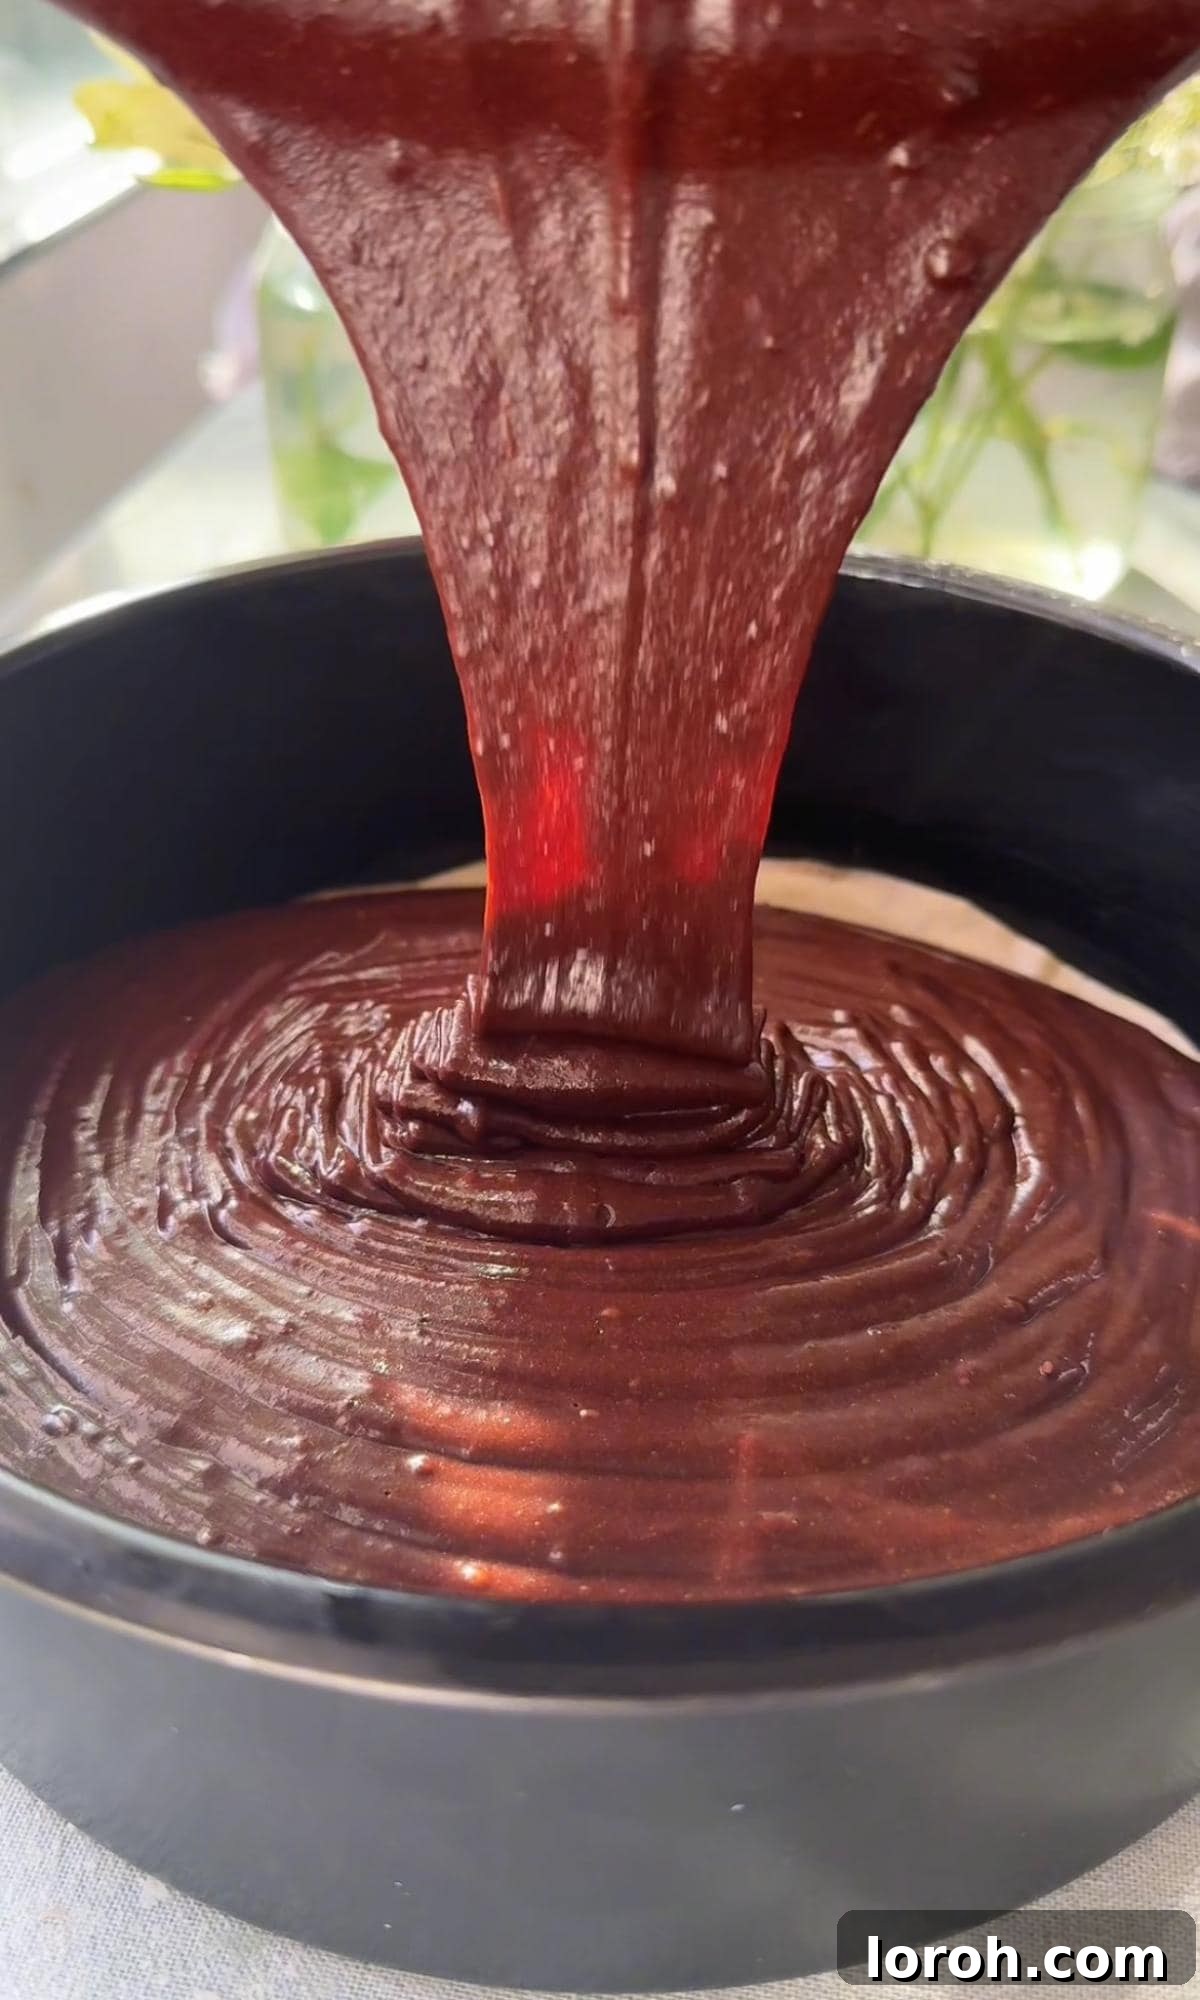
Carefully pour the prepared chocolate cake batter into your greased and lined deep cake tin. Use a spatula to scrape out all the batter and ensure it is evenly distributed in the tin, leveling the top gently. Bake in the preheated oven for approximately 35 minutes. Baking times can vary slightly depending on your oven, so always rely on the visual and tactile cues for doneness. To check if the cake is ready, insert a skewer or a thin knife into the very center of the cake; if it comes out clean with no wet batter clinging to it, the cake is perfectly baked. Allow the cake to cool completely in the tin on a wire rack. This step is absolutely crucial to prevent the ganache from soaking into the cake later. If you don’t have a deep enough tin for the final assembly, you can carefully transfer the fully cooled cake to a larger serving tin or dish at this stage.
Step Four: Prepare the Luxuriously Smooth Chocolate Ganache
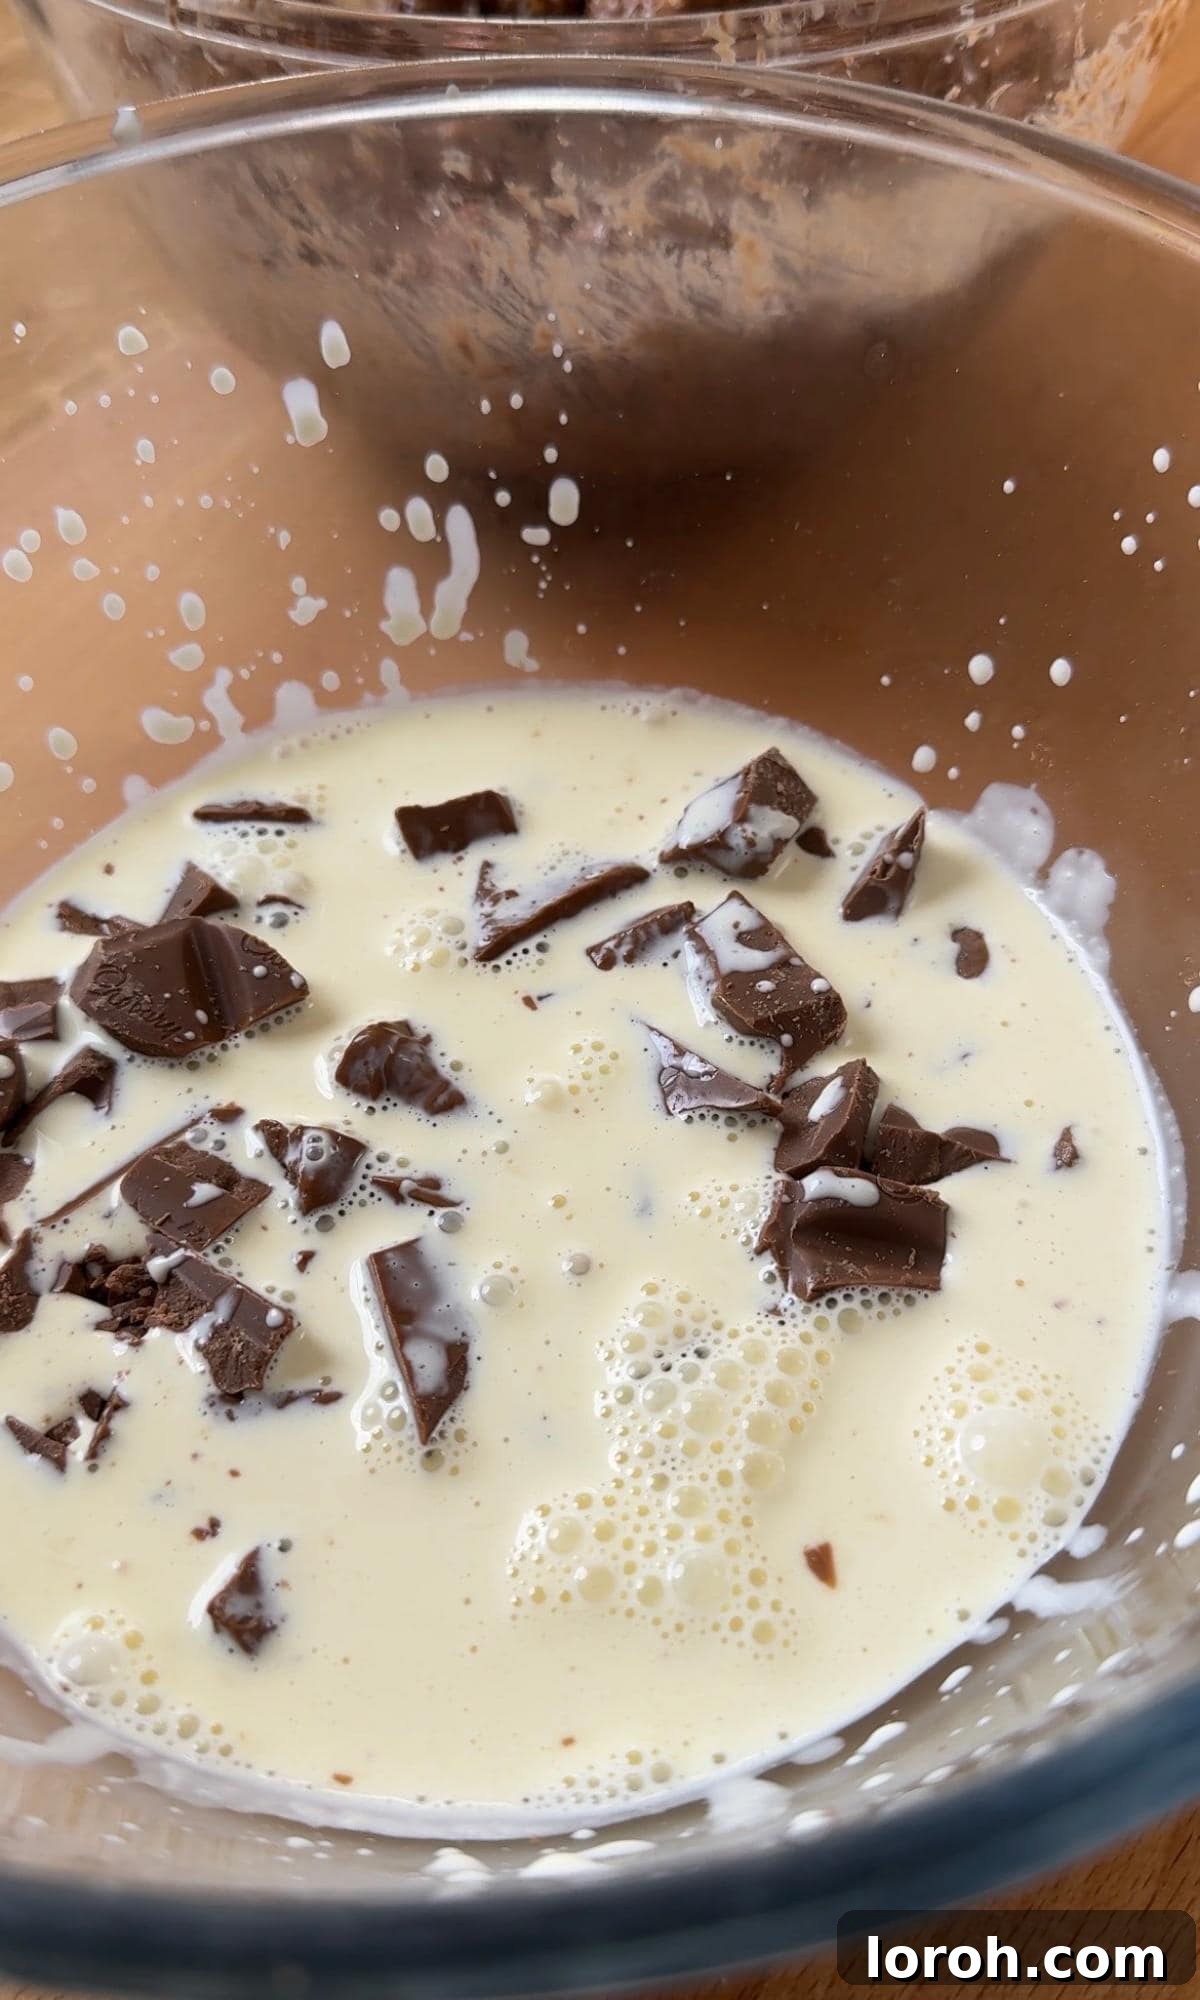
While the cake cools completely, prepare your luscious chocolate ganache. Begin by finely chopping your milk chocolate into small, even pieces and placing them in a heatproof bowl. Smaller pieces will melt more easily and evenly. In a small saucepan, heat the double cream over medium heat until it just begins to steam around the edges and tiny bubbles start to form; however, be very careful not to let it come to a vigorous boil, as this can scorch the cream. Immediately pour the hot cream over the chopped chocolate in the bowl. Let it sit undisturbed for 2 minutes. This resting time allows the residual heat from the cream to melt the chocolate effectively. After 2 minutes, stir gently from the center outwards with a whisk or spatula until the mixture is completely smooth, glossy, and beautifully emulsified. Set aside to cool slightly to a pourable yet slightly thickened consistency. You want it warm enough to spread but not hot enough to melt the cake.

Step Five: Create the Crunchy Cornflake Topping Base
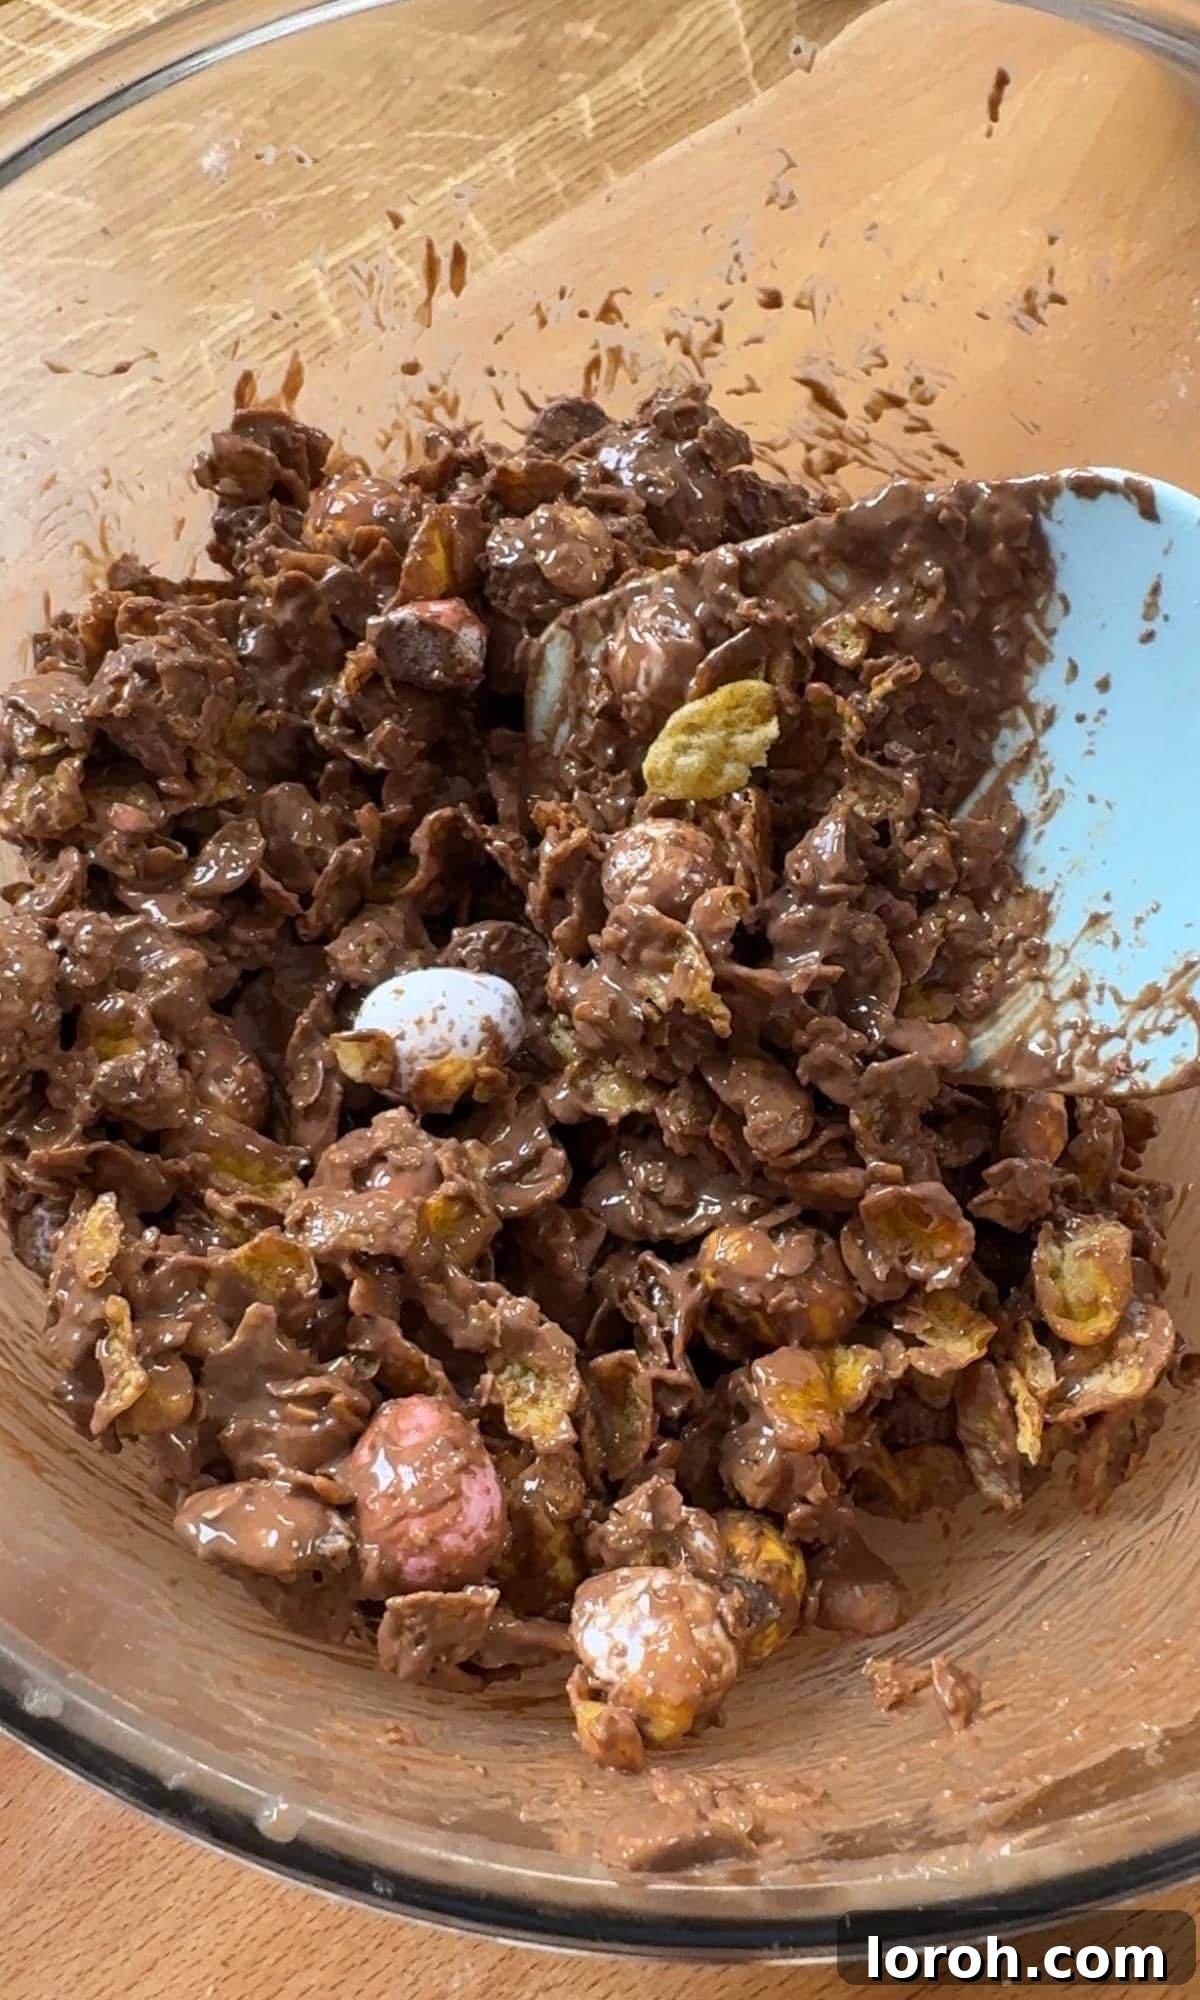
For the signature crunchy topping that makes this cake so special, it’s time to melt the milk chocolate. You can achieve this either by using a double boiler method (placing a heatproof bowl over a saucepan of simmering water, ensuring the bottom of the bowl does not touch the water) or by melting it in short bursts in the microwave, stirring frequently between each burst to prevent burning. Once the chocolate is smooth and fully melted, pour it over your cornflakes in a large mixing bowl. Add half of your crushed mini eggs to this mixture. Gently fold everything together using a spatula until the cornflakes and mini eggs are evenly coated in the melted chocolate. Work relatively quickly before the chocolate starts to set.
Step Six: Finish Coating the Cornflake Mix
Continue to gently fold the cornflake and mini egg mixture until every single piece is beautifully coated in the melted chocolate. The goal is to have a cohesive, slightly sticky, yet still crunchy topping that will set nicely on your ganache layer. Ensure there are no dry cornflakes left. Set this delicious mixture aside at room temperature. Remember, you want this mixture to be ready to spread shortly after the ganache has been applied, so time your preparations accordingly for optimal texture and ease of assembly. Avoid refrigerating this mixture before assembly, as it might become too stiff to spread evenly.
Step Seven: Layer the Decadent Ganache
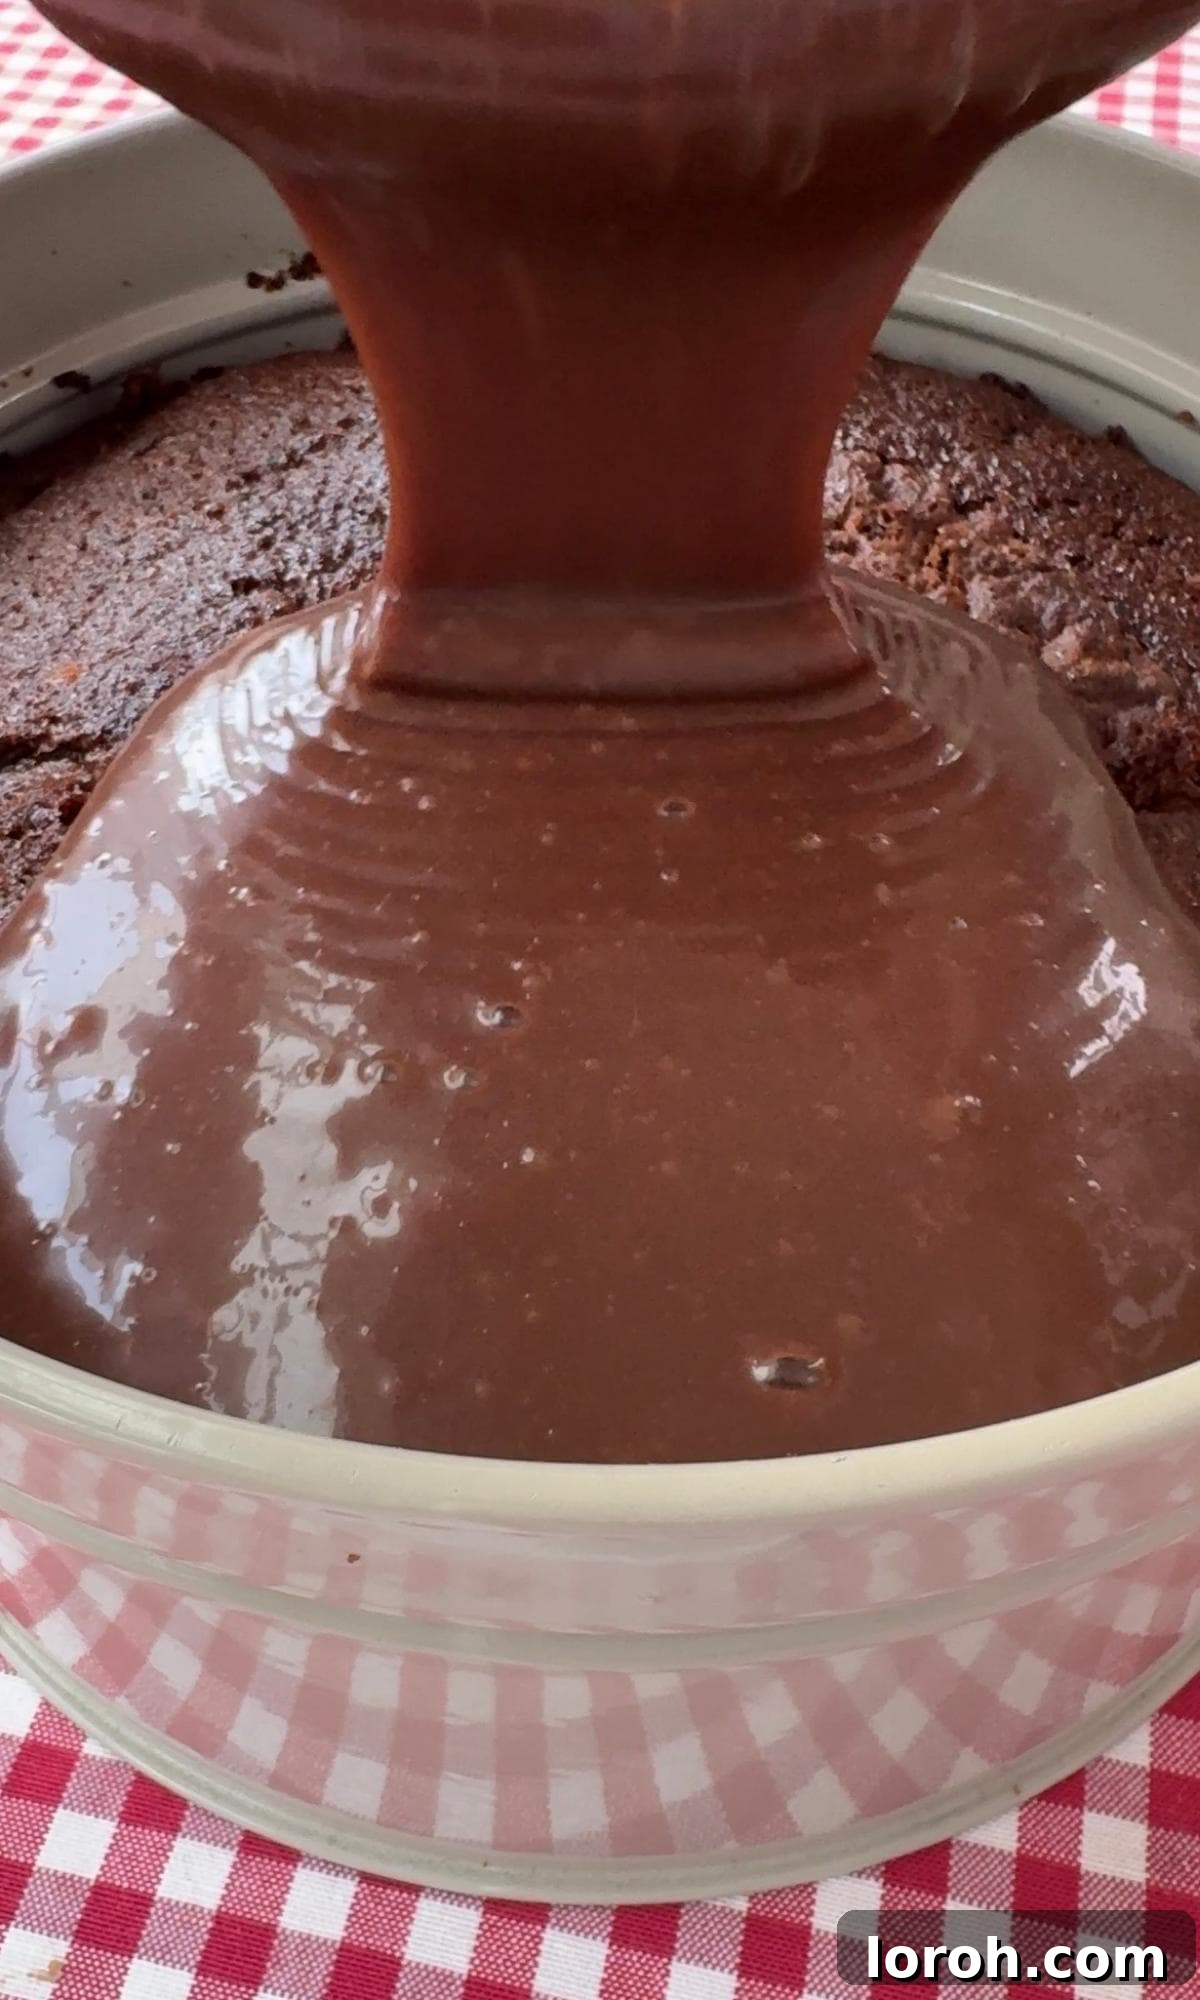
Once your chocolate cake is completely cool and still nestled securely in its deep cake tin (or transferred to a suitable deep serving dish), it’s time for the first luscious layer of topping. Carefully pour the prepared chocolate ganache directly over the cooled cake. Using an offset spatula or the back of a spoon, gently spread the ganache out to form an even, smooth layer, ensuring it covers the entire surface of the cake right to the edges. The ganache should still be fluid enough to spread easily, creating a beautiful, glossy surface, but not so hot that it compromises the integrity of the cooled cake or runs off the sides too quickly.
Step Eight: Add the Crunchy Topping and Final Touches
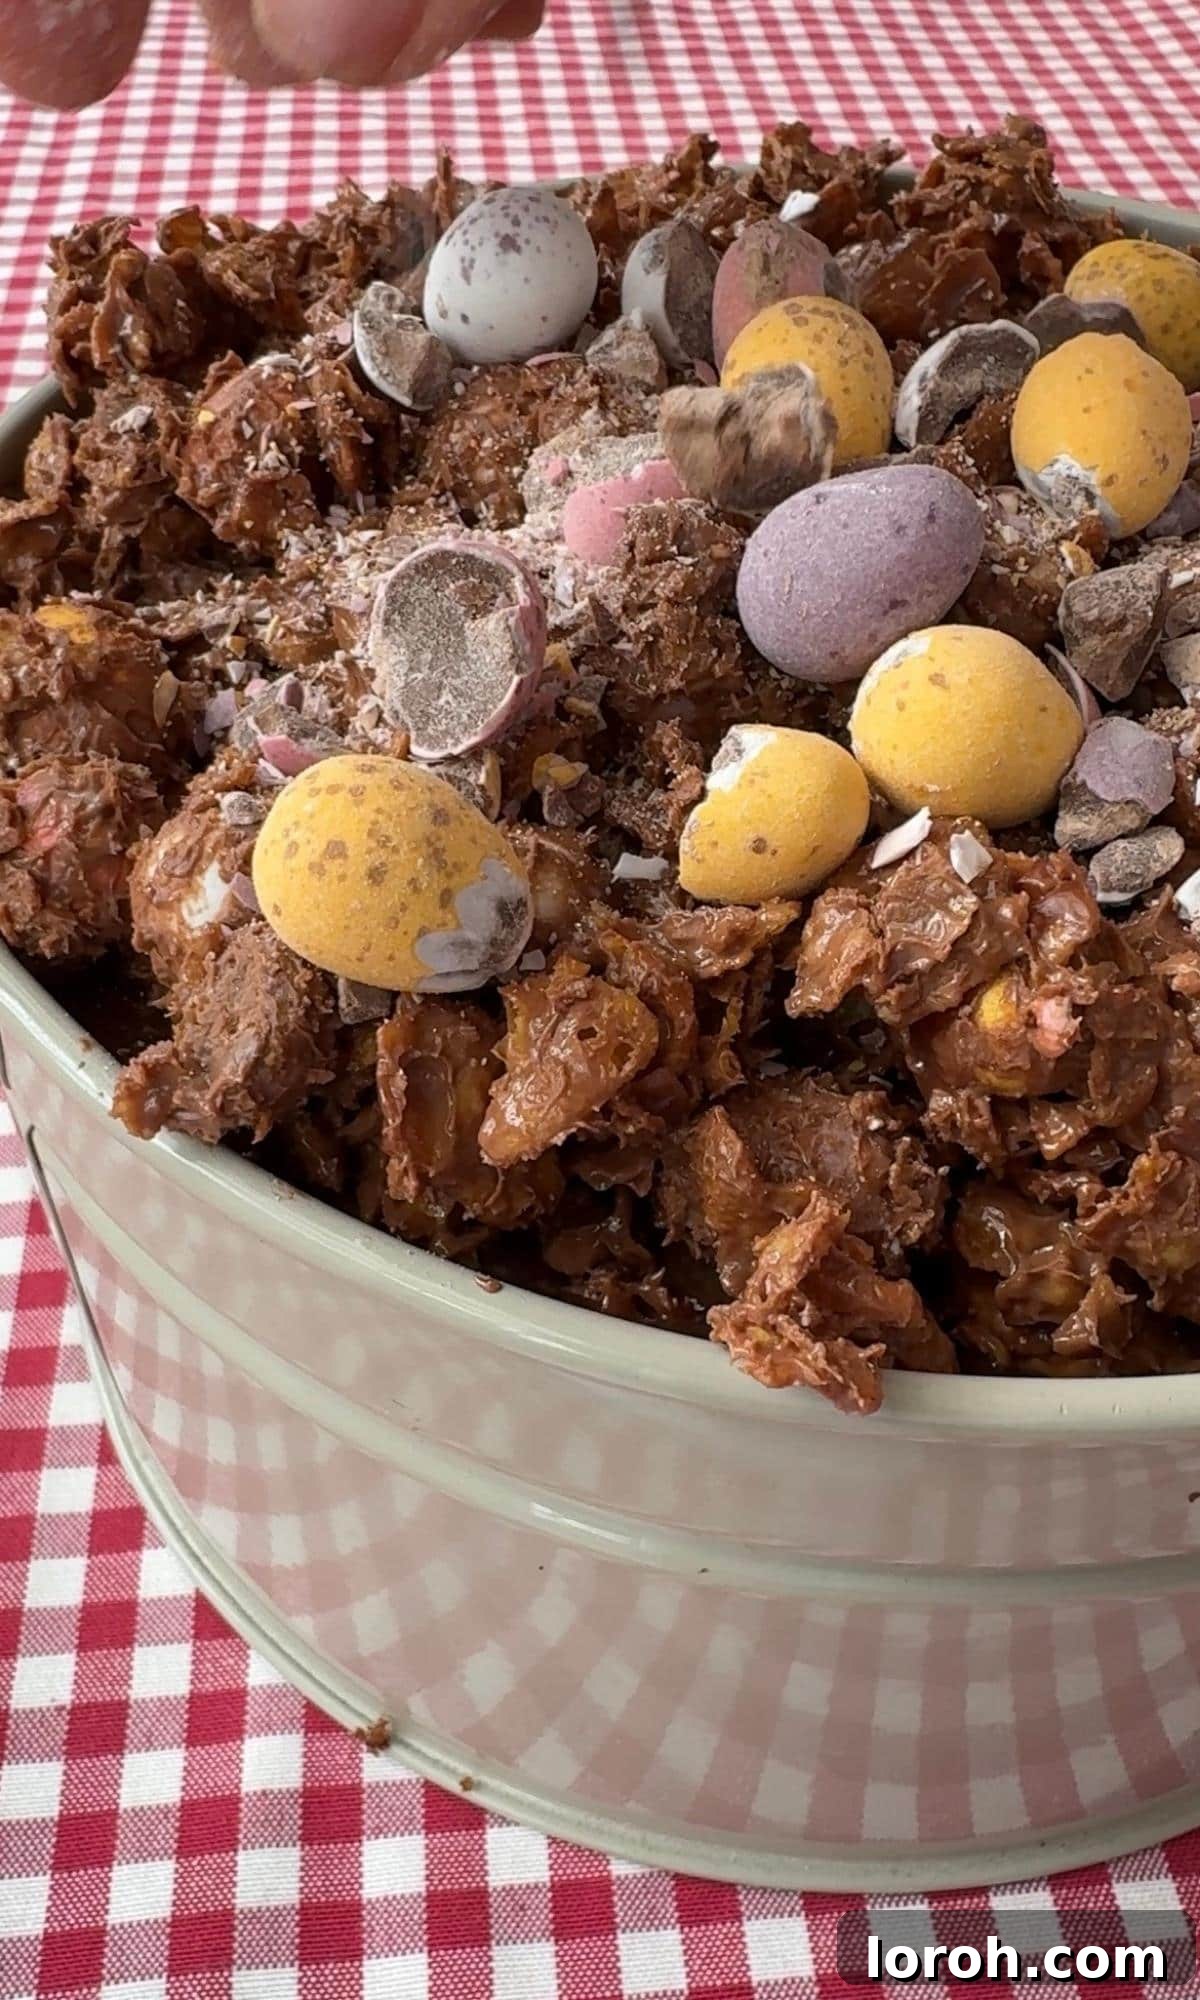
Immediately after spreading the ganache, spoon the cornflake cake mix evenly over the ganache layer. Gently spread it out and lightly press it down to ensure it adheres well to the sticky ganache. You want a generous, even layer of crunch. Finally, take the remaining crushed mini eggs and scatter them artfully over the top of the cornflake layer for an extra pop of color, texture, and festive appeal. Your stunning Cornflake Dream Cake with Mini Eggs is now complete and ready to be served! For the best possible experience, we highly recommend serving it while the ganache is still slightly soft and warm, allowing for that gorgeous melted chocolate sensation with every crunchy bite.
Expert Baking Tips for a Perfect Dream Cake
Achieving baking perfection often comes down to a few key techniques and tricks that can elevate your results from good to absolutely outstanding. Here are some expert tips to ensure your Cornflake Dream Cake turns out flawlessly and impresses everyone:
- The Importance of a Deep Tin: This cake is designed to be built in impressive layers, making a deep 23cm (9-inch) round cake tin ideal. It provides the necessary height and structural integrity for the cake, ganache, and generous cornflake topping to sit beautifully. If you don’t happen to have a deep tin, don’t fret! You can absolutely bake your cake in any regular shallow cake tin. Once the cake has completely cooled, carefully transfer it to a larger, deep serving tin, cake stand with a rim, or even a springform pan before adding the ganache and topping. Don’t worry if you need to gently trim the edges or reshape the cake base slightly; all its glorious layers will beautifully cover any minor imperfections.
- Preventing a Soggy Cake Base: This is arguably the most critical step for achieving the desired textural contrast in your dream cake. You must ensure your chocolate cake base is *completely* cooled to room temperature before you even think about pouring the ganache over it. If the cake is even slightly warm, the heat will cause the ganache to melt and soak directly into the sponge, resulting in an undesirable soggy bottom layer rather than a distinct, luscious ganache topping. Patience here truly pays off and is the secret to a professional-looking and tasting result.
- Timing the Ganache and Topping for Optimal Texture: For the ultimate experience of a beautifully soft, slightly runny ganache and a perfectly crisp cornflake topping, try to prepare and assemble these two components as close to serving time as possible. While the cake base is very forgiving and can be made several days ahead, fresh ganache and cornflakes are key to achieving the desired textural contrast. If you prepare and assemble them too far in advance, the ganache might set too firm, and the cornflakes could lose some of their initial crunch, especially if refrigerated.
- Crushing Mini Eggs to Perfection: For the best distribution and a varied texture throughout your topping, take a moment to properly crush your mini eggs. Place them in a sturdy Ziploc bag (or between two sheets of parchment paper) and gently crush them using a rolling pin or the flat side of a meat mallet. Aim for a delightful mix of fine crumbs and small, recognizable chunks. Avoid pulverizing them into a fine powder, as you want those distinct mini egg pieces visible and crunchy in the topping.
- Do Not Overmix the Cake Batter: This is a golden rule in baking, especially for cakes. Overmixing your cake batter, particularly after adding the wet ingredients to the dry, develops gluten excessively. This can lead to a dense, tough, and chewy cake instead of a light, tender, and moist one. Once you’ve added the wet ingredients, stir only until *just* combined. A few small lumps are perfectly fine and often contribute to a more tender cake.
- Properly Greasing and Lining Your Tin: A well-greased and lined cake tin is your best friend for an easy cake release and a beautifully intact sponge. Always use baking parchment for the bottom of the tin, cutting it to fit perfectly, and thoroughly grease the sides of the tin (even if it’s non-stick). This simple step prevents the cake from sticking and ensures your beautiful chocolate sponge comes out in one perfect piece, ready for its luscious toppings.
- Quality of Ingredients: Using good quality ingredients truly makes a difference in the final taste of your dream cake. Opt for a good quality cocoa powder for a deep chocolate flavor, fresh eggs, and a reputable brand of milk chocolate for the ganache and cornflake topping.

Frequently Asked Questions About Cornflake Dream Cake
Have questions about making this irresistible Cornflake Dream Cake? We’ve got answers to help you achieve baking success and enjoy this delightful dessert to the fullest!
What exactly is a Cornflake Dream Cake?
A Cornflake Dream Cake is a truly indulgent and multi-layered dessert designed for maximum impact and flavor. It starts with a base of rich, deeply moist chocolate sponge cake, generously covered in a silky, smooth, and decadent chocolate ganache. The crowning glory is a thick, irresistible layer of crunchy cornflake cake mix, beautifully flecked with colorful and festive mini eggs. It’s engineered to offer a symphony of textures and flavors in every bite – the soft cake, the creamy ganache, and the crisp, sweet topping – making it an unforgettable and luxurious treat.
Can I prepare Cornflake Dream Cake in advance?
Yes, you can certainly prepare some components ahead of time to make your baking day easier and reduce stress. The chocolate cake base is very accommodating and can be baked up to 3 days in advance. Once baked and completely cooled, wrap it very well in several layers of cling film to prevent it from drying out, and store it at room temperature or in the fridge until you are ready to assemble. However, for the best textural experience, the chocolate ganache and the cornflake topping should ideally be prepared and assembled as close to serving time as possible. This ensures the ganache remains beautifully soft and pourable (or perfectly set if refrigerated briefly), and the cornflake topping retains its maximum crunchiness.
How does a Cornflake Dream Cake differ from a traditional cornflake cake?
The main difference lies in its structure, complexity, and level of decadence. A traditional cornflake cake is typically a simpler, often no-bake treat usually made by mixing cornflakes with melted chocolate and a knob of butter or golden syrup, then chilling them into small, individual, often flat or mound-shaped pieces. They are a beloved children’s treat. In contrast, a Cornflake Dream Cake is a grand, layered dessert experience. It features a baked, moist chocolate cake base, topped with a rich, glossy chocolate ganache, and *then* crowned with a crunchy chocolate cornflake and mini egg mixture. It’s a significantly more elaborate, impressive, and multi-textured dessert, designed to be a show-stopper for special occasions.
What are Mini Eggs, and can I use substitutes?
Cadbury Mini Eggs are small, solid milk chocolate eggs encased in a crisp, speckled sugar shell. They are a highly popular and iconic Easter confection, particularly beloved in the UK. Their vibrant pastel colors and satisfying crunch make them ideally suited for this dream cake, adding both visual appeal and a delightful texture. If genuine Cadbury Mini Eggs are not available where you are, don’t worry! You can easily substitute them with any other small, candy-coated chocolate eggs that have a similar crackly shell. For a non-Easter variation or if you prefer different candies, M&Ms, Smarties, or even finely chopped chocolate bars or sprinkles can make excellent alternatives, providing similar bursts of color and texture to the topping.
How do I keep the cornflake cake topping crunchy?
The key to maintaining that glorious, signature crunch in your cornflake topping is strategic timing during assembly and proper storage. Firstly, avoid making the chocolate cornflake topping too far in advance. The longer it sits, especially if exposed to air or humidity, the softer the cornflakes can become as they absorb moisture. Secondly, assemble the cornflake topping onto the ganache not long before you plan to serve the cake. This allows the ganache to remain perfectly soft while the cornflakes are at their absolute crispiest. Once assembled, storing the cake in an airtight container in the fridge can help preserve the crunch, though some softening over extended periods is natural. For optimal enjoyment, bring the cake out of the fridge about 30 minutes before serving.
Can I freeze the Cornflake Dream Cake?
You can freeze the baked chocolate cake base before assembly. Once your chocolate sponge is completely cooled, wrap it tightly in several layers of cling film and then in aluminum foil to prevent freezer burn. It can be frozen for up to 3 months. To thaw, simply transfer it to the refrigerator overnight. We generally do not recommend freezing the entire assembled cake (with ganache and cornflake topping), as the delicate textures, particularly the crunchiness of the cornflakes and the smooth consistency of the ganache, will suffer significantly and become less appealing upon thawing.
How should I store leftover Cornflake Dream Cake?
Store any leftover Cornflake Dream Cake covered tightly with cling film or in an airtight container in the refrigerator for 3-4 days. While the cornflake topping may soften slightly over time due to moisture from the cake and ganache, the overall flavors will continue to meld beautifully and remain delicious. For the best flavor and texture experience, especially if you prefer a slightly softer ganache, allow the refrigerated cake to come to room temperature for about 15-30 minutes before serving.
Other Decadent Desserts You Might Enjoy
If you fell in love with the crunchy texture and rich chocolate of this mini egg cornflake cake, you’re in for a treat with these other delightful recipes from our collection. Expand your baking repertoire with more chocolatey goodness and festive treats that are sure to satisfy any sweet craving!
First, be sure to try our classic chocolate dream cake for another layered dessert experience that emphasizes pure chocolate indulgence. For more Easter-themed delights, you absolutely must bake our cheerful and colorful mini egg cookies, which are always a hit, or indulge in the comforting warmth and nostalgia of our hot cross bun bread & butter pudding, a perfect way to use up leftover buns.
Easy Baking Recipes
Dark Chocolate and White Chocolate Brownies
Easy Baking Recipes
Chocolate Mud Cake with Malted Whipped Cream
Easy Baking Recipes
Triple Chocolate Chunk Cookies
Easy Baking Recipes
Soft & Chewy Chocolate Chipless Cookies
If you tried this delicious Cornflake Dream Cake or any other recipe on the site, please do leave a rating or comment below and let us know how it went! Your feedback is invaluable to us and helps other aspiring bakers in our community.
Printable Recipe Card: Cornflake Dream Cake with Mini Eggs
This Cornflake Dream Cake with Mini Eggs features a moist chocolate cake base, topped with smooth, rich chocolate ganache and a crunchy cornflake mix flecked with festive mini eggs. It’s a truly decadent and satisfying dessert, perfect for Easter celebrations or anytime you crave an extraordinary chocolate treat. This recipe yields a show-stopping cake that combines incredible textures and deep chocolate flavor.

Prep Time: 45 minutes
Cook Time: 35 minutes
Total Time: 1 hour 20 minutes
Servings: 16 generous servings
Ingredients
For the Chocolate Sponge:
- 250 g plain flour
- 350 g caster sugar
- 70 g cocoa powder (unsweetened)
- 2 tsp baking powder
- 1½ tsp bicarbonate of soda (baking soda)
- ½ tsp fine sea salt
- 125 ml flavourless oil (vegetable, sunflower, or groundnut oil)
- 125 ml milk (whole milk recommended)
- 125 g natural yoghurt (unsweetened, full-fat Greek yogurt recommended)
- 2 large eggs
- ½ tbsp vanilla extract
- 50 ml strong hot coffee (instant or freshly brewed, for flavor enhancement)
For the Cornflake Topping:
- 200 g milk chocolate (chopped, or a mix of milk/dark to taste)
- 140 g cornflakes cereal (unsweetened, plain)
- 200 g mini eggs (crushed, plus extra for garnish)
For the Ganache:
- 200 g milk chocolate (chopped, or dark chocolate depending on preference)
- 200 ml double cream (heavy cream in the US)
Instructions
For the Cake:
- Preheat your oven to 180°C / 350°F / Gas mark 4. Prepare a deep 23cm (9-inch) round cake tin by generously greasing it and lining the bottom with baking parchment.
- In a large bowl, thoroughly whisk together all the dry ingredients: flour, sugar, cocoa powder, baking powder, bicarbonate of soda, and salt until well combined.
- In a separate jug, whisk together the wet ingredients: oil, milk, yoghurt, eggs, and vanilla extract until smooth.
- Pour the wet mixture into the dry ingredients. Stir gently with a whisk or spatula until just combined. Do not overmix.
- Fold in the strong hot coffee. The batter will become looser. Mix until just incorporated.
- Pour the batter into the prepared tin and bake for about 35 minutes, or until a skewer inserted into the center comes out clean.
- Allow the cake to cool completely in the tin on a wire rack. This is crucial before adding the ganache. If needed, transfer the cooled cake to a deep serving tin for assembly.
Make the Ganache (ideally close to assembly for best consistency):
- Chop the chocolate for the ganache into small, uniform pieces and place them in a heatproof bowl.
- Heat the double cream in a saucepan over medium heat until it just begins to steam and simmer around the edges, but do not let it boil vigorously.
- Pour the hot cream immediately over the chopped chocolate. Let it sit undisturbed for 2 minutes to allow the chocolate to melt.
- Gently stir the mixture from the center outwards with a whisk or spatula until it is completely smooth, glossy, and emulsified. Set aside to cool slightly to a pourable consistency.
Make the Cornflake Cake Mix:
- Melt the milk chocolate for the cornflake topping. Use a double boiler or microwave in short bursts, stirring frequently, until smooth.
- In a large bowl, combine the melted chocolate with the cornflakes and half of the crushed mini eggs.
- Fold gently with a spatula until all the cornflakes and mini eggs are evenly coated in the chocolate. Set aside.
Assemble the Cake:
- Once the cake base is completely cool and in its deep tin (or serving dish), pour the prepared chocolate ganache over the cake. Spread it out into an even layer using an offset spatula.
- Immediately and evenly distribute the cornflake cake mix over the ganache layer. Gently press it down lightly so it adheres well.
- Scatter the remaining crushed mini eggs over the top of the cornflake layer for a final decorative touch and added crunch.
- Serve the Cornflake Dream Cake while the ganache is still slightly soft for the best melted chocolate experience combined with the crunchy topping.
Notes
- Step-by-step guide: For a visual walkthrough of these instructions and helpful images, please refer to the detailed guide earlier in this post.
- Storage: Store any leftover Cornflake Dream Cake covered or in an airtight container in the refrigerator for 3-4 days.
- Make Ahead: The chocolate cake base can be baked up to 3 days in advance. Once cooled, wrap it thoroughly in cling film until ready for use. For optimal crunch and a soft ganache, prepare and assemble the ganache and cornflake topping as close to serving time as possible.
- No Deep Tin? No Problem!: If you don’t possess a deep cake tin suitable for assembly, you can bake your cake in a regular shallow tin. Once completely cooled, you can carefully transfer it to a deeper serving dish or another large tin for assembly. Don’t stress if you need to gently trim or reshape the cake base; its glorious layers will conceal any minor adjustments.
Nutrition Information (Approximate Per Serving)
Calories: 498kcal, Carbohydrates: 67g, Protein: 7g, Fat: 26g, Saturated Fat: 12g, Polyunsaturated Fat: 5g, Monounsaturated Fat: 6g, Trans Fat: 0.1g, Cholesterol: 38mg, Sodium: 325mg, Potassium: 217mg, Fiber: 4g, Sugar: 44g, Vitamin A: 424IU, Vitamin C: 2mg, Calcium: 101mg, Iron: 5mg
Please note: Nutrition information is automatically calculated and should be used as an approximation. Actual nutritional values may vary based on specific ingredients and preparation methods.