
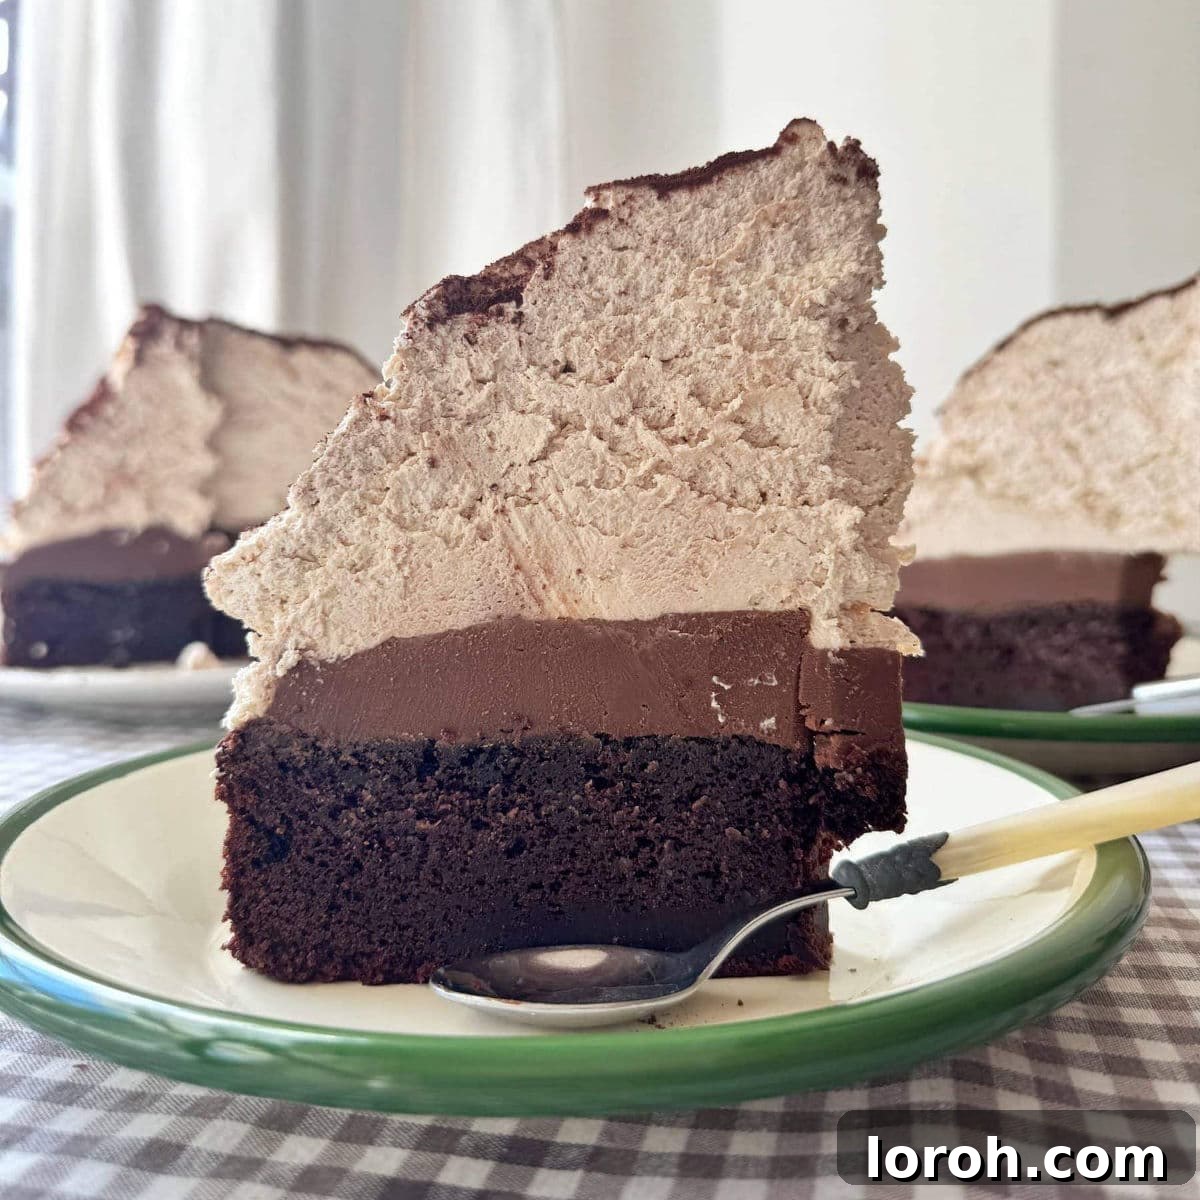
Ultimate Chocolate Mud Cake with Malted Whipped Cream
Chocolate mud cake stands out as a true confectionary masterpiece – a dessert you might reserve for special occasions, but one that instantly reminds you of its sheer perfection with every decadent bite. Unlike a light and airy sponge cake, chocolate mud cakes are celebrated for their distinctive density and moist crumb, achieved through a “low and slow” baking process. Cooked at a gentler oven temperature over several hours, this method allows the chocolate flavors to deepen and the texture to become incredibly rich and fudgy.
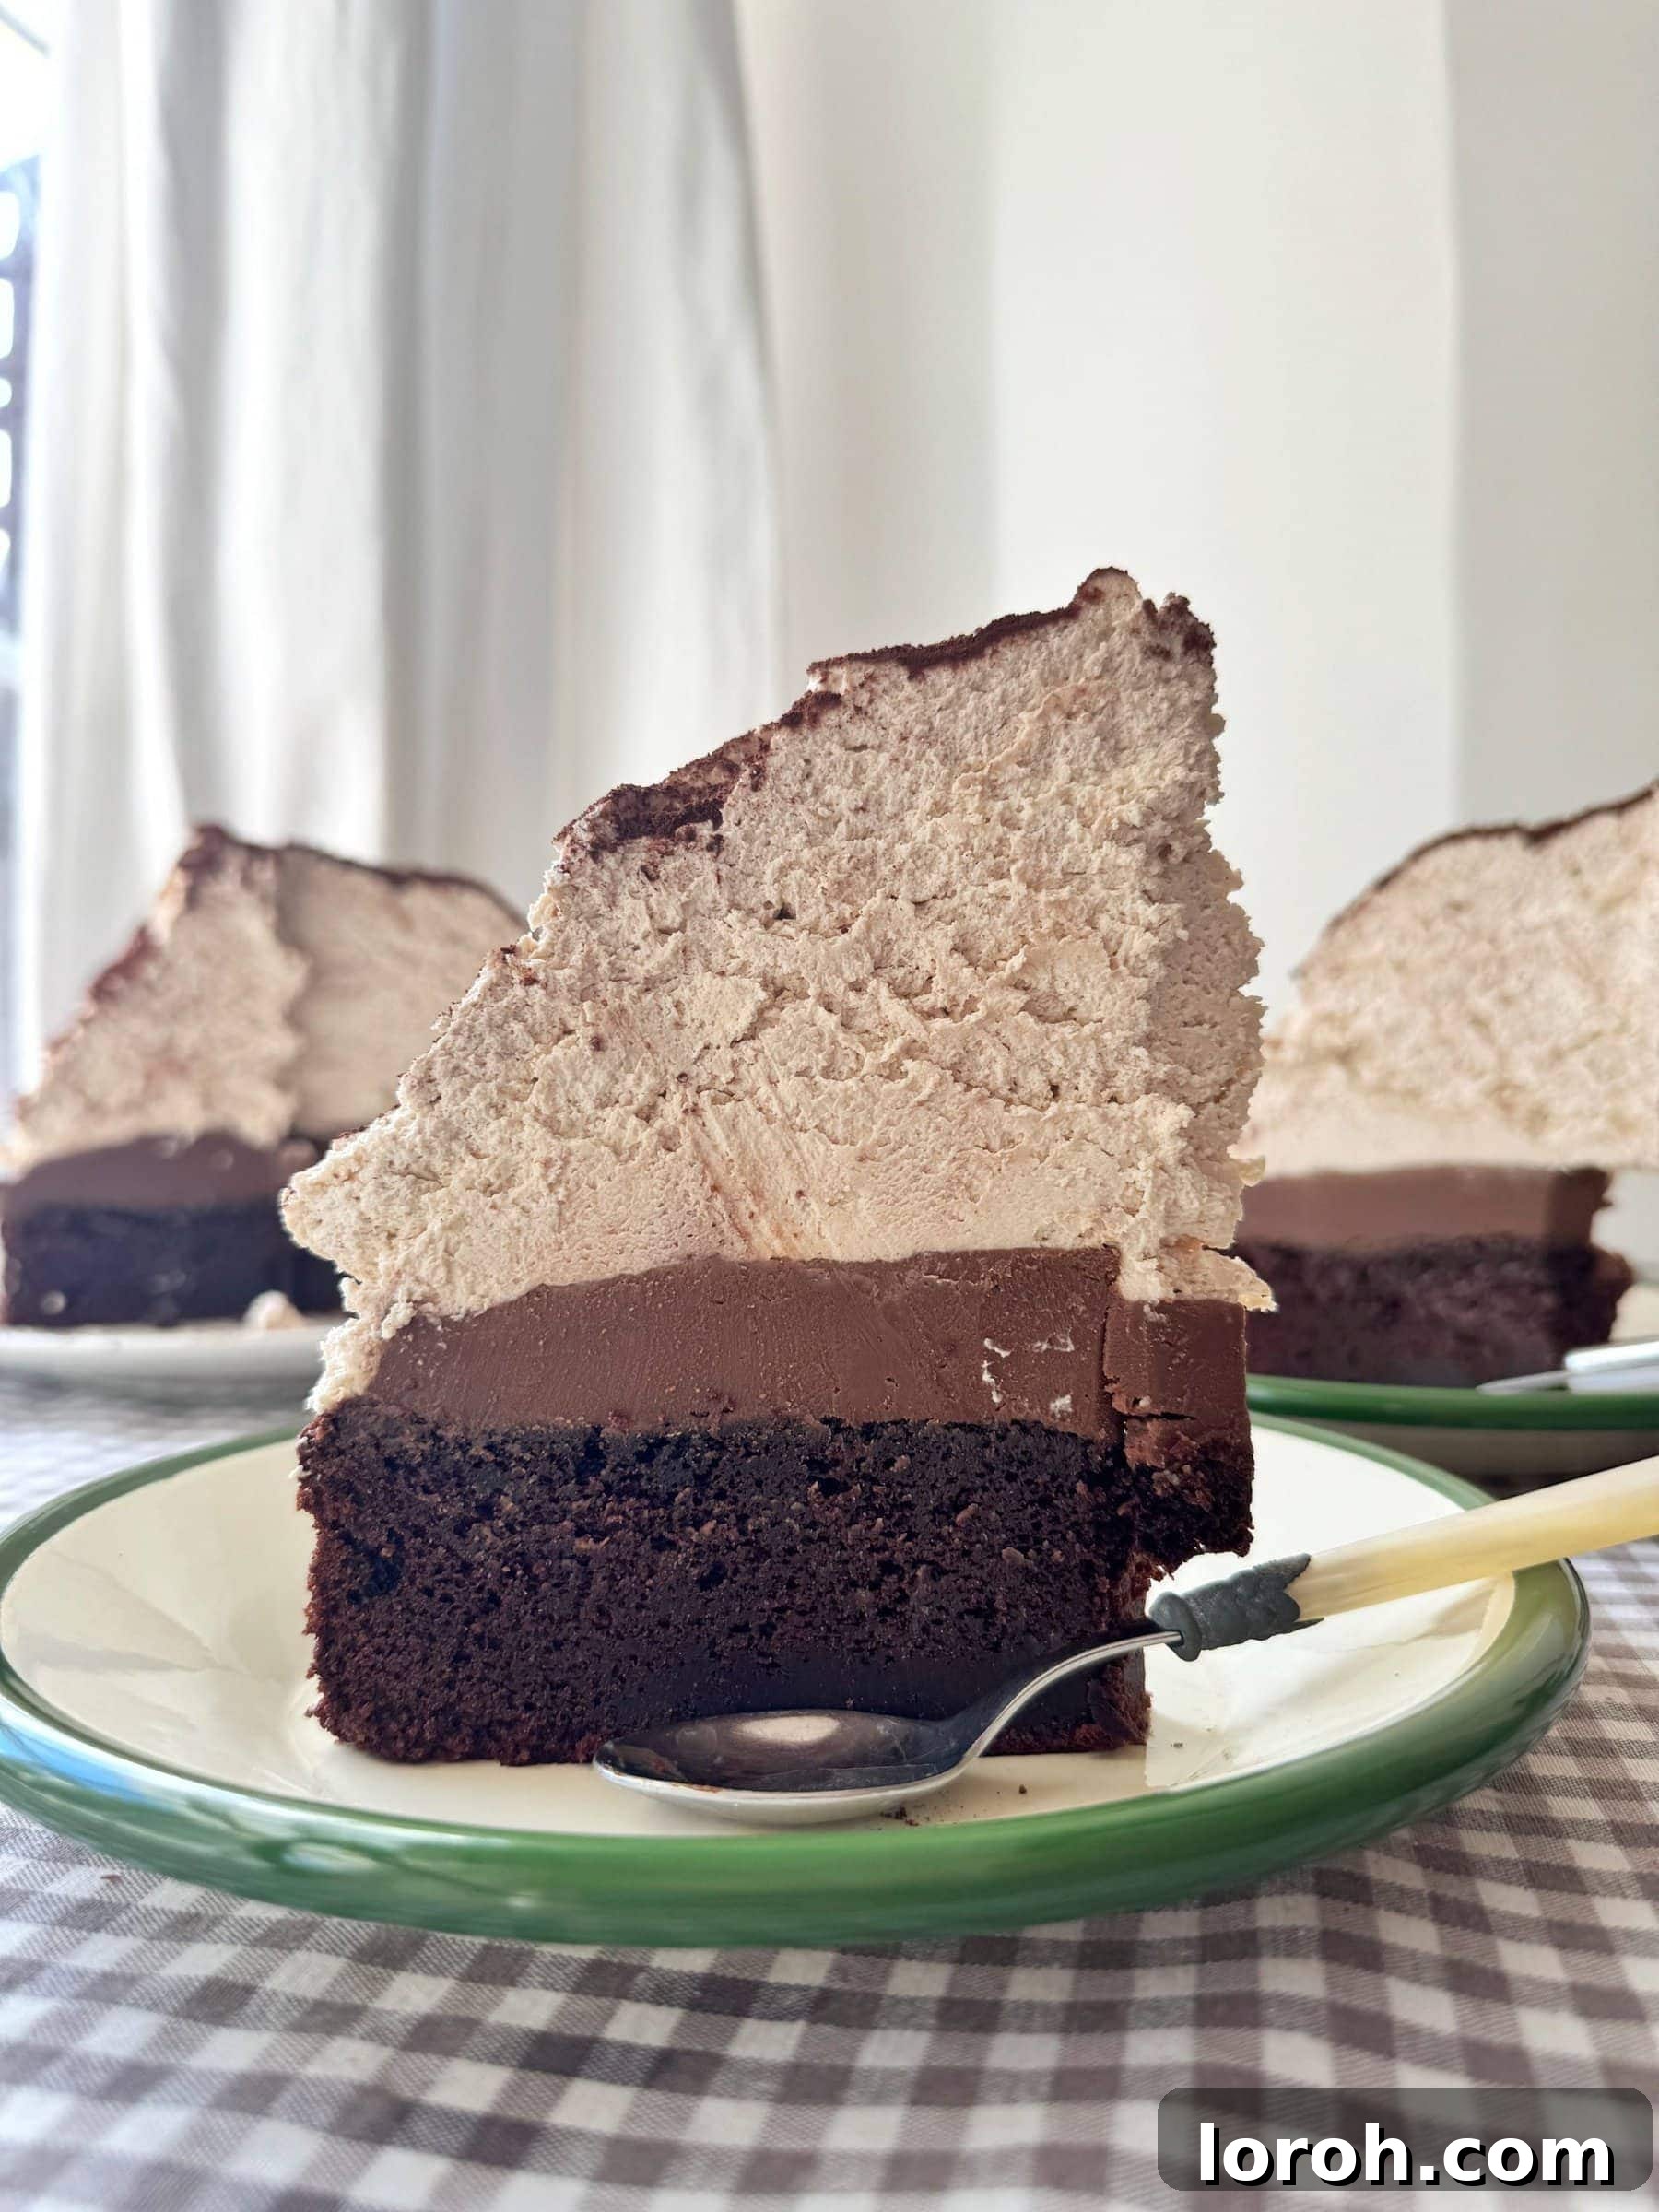
While this magnificent cake is utterly delightful simply adorned with its smooth chocolate ganache, the addition of the malted whipped cream elevates it to an entirely new realm of spectacular. We’ve layered a generous amount, as you’ll discover in the detailed recipe, but you are free to customize the quantity to your preference. The cream is delicately whisked with just a touch of icing sugar – enough to sweeten without overpowering – and then a delightful sprinkle of malt powder. This secret ingredient infuses the cream with a nostalgic flavor, reminiscent of the beloved Malteser chocolate, delivering a truly unique and addictive taste experience.
For an extra layer of sophistication and warmth, consider adding a splash of Baileys Irish Cream to the whipped topping. This delightful variation has been tried and tested, proving to be an exceptionally delicious enhancement that complements the rich chocolate beautifully.
Table of Contents
- Why You’ll Adore This Recipe
- Key Ingredients for Success
- Customizing Your Mud Cake: Substitutions & Variations
- Step-by-Step Guide: Crafting Your Chocolate Mud Cake
- Expert Baking Tips for a Flawless Mud Cake
- Frequently Asked Questions
- Discover More Delectable Recipes
- Chocolate Mud Cake with Malted Whipped Cream Recipe Card
Why You’ll Adore This Recipe
This Chocolate Mud Cake isn’t just a dessert; it’s an experience. Here’s why it’s destined to become your new favorite:
- Unrivaled Richness and Decadence: Prepare for an intensely chocolatey experience. This cake boasts a moist, dense (in the most delightful way) interior, generously piled high with silky-smooth ganache and a cloud of irresistible malted cream. It’s a symphony of textures and flavors that will satisfy even the most fervent chocolate cravings.
- The Epitome of a Celebration Cake: With its impressive height and a luxurious crowning of whipped cream, this cake makes a stunning centerpiece for any special occasion. Whether it’s a birthday, anniversary, or simply a weekend indulgence, its visual appeal is matched only by its incredible taste. If you enjoy celebratory bakes, you’ll also love our Easy Dark Chocolate Cake.
- Versatile Topping Options: The inherent chocolate flavor of the mud cake is so profound that it shines beautifully on its own. However, this recipe offers incredible flexibility. Choose to top it with just the luxurious ganache, a simple dollop of whipped cream, or embrace both for an unforgettable presentation. The choice is yours to tailor it to your preferences!
- Effortlessly Simple Preparation: Despite its impressive appearance, this recipe is surprisingly straightforward to assemble. Requiring just one mixing bowl, a whisk, and a single baking tin, it streamlines the baking process, making it accessible even for novice bakers. It’s proof that extraordinary results don’t always demand complex methods.
Key Ingredients for Success
For a comprehensive list of quantities and detailed instructions, please refer to the printable recipe card located at the bottom of this page.
Plain Flour (All-Purpose Flour): This recipe specifically calls for plain (or all-purpose) flour. Unlike self-raising flour, plain flour contains no leavening agents, which is crucial for achieving the signature dense and moist texture of a mud cake. We want minimal rise to maintain that rich, fudgy consistency, making it distinctly different from a light sponge.
High-Quality Cocoa Powder: The quality of your cocoa powder directly impacts the depth of flavor in your mud cake. Opt for a brand with high cocoa solids for the best results. Both natural and Dutch-processed cocoa powders work well here; natural cocoa provides a slightly fruitier, more acidic note, while Dutch-processed offers a smoother, less bitter, and darker chocolate flavor. Either choice will contribute significantly to the cake’s decadent taste.
Caster Sugar (Superfine Sugar): While granulated sugar can be used, caster sugar is preferred due to its finer texture. This allows it to dissolve more quickly and evenly into the batter, contributing to a smoother crumb and consistent sweetness throughout the cake. In the US, it’s commonly known as superfine sugar.
Vegetable Oil: The choice of vegetable oil over butter is intentional and plays a significant role in defining this cake’s unique characteristics. Oil contributes to an unparalleled moisture level and a desirable density, ensuring your mud cake remains incredibly moist and rich, distinguishing it from butter-based cakes which can sometimes yield a drier crumb.
Strong Coffee (Espresso): Don’t skip this ingredient, even if you’re not a coffee enthusiast! About one shot of espresso or an equivalent amount of strong brewed coffee is vital. Coffee doesn’t make the cake taste like coffee; instead, it dramatically enhances and deepens the chocolate flavor, making it taste even more intensely chocolatey without any discernible coffee notes. It’s a secret weapon for amplifying chocolate’s richness.
Customizing Your Mud Cake: Substitutions & Variations
This versatile mud cake recipe offers plenty of room for creative twists. Feel free to experiment with these ideas to make it truly your own:
- Sugar Alternatives: While caster sugar is recommended, granulated sugar can be used as a direct substitute. However, it’s best to avoid brown sugar in the cake batter itself, as its molasses content can alter the cake’s texture and overall flavor profile in a way that deviates from a traditional mud cake.
- Neutral Oils: Any neutral-flavored oil will work beautifully in this recipe. Sunflower oil or rapeseed (canola) oil are excellent alternatives to vegetable oil, maintaining the desired moisture and density without imparting unwanted flavors.
- Creative Toppings: The beauty of this cake lies in its adaptability.
- Simplify: You could opt for just the whipped cream for a lighter finish or solely the rich chocolate ganache for pure indulgence.
- Alternate Frostings: For a delightful contrast, consider a different frosting. A luscious white chocolate icing would add a sweet, creamy balance to the dark chocolate cake. You could also try a cream cheese frosting for a tangy touch, or a salted caramel drizzle for an irresistible sweet and savory combination.
- Add Crunch: Sprinkle with chopped nuts, chocolate shavings, mini chocolate chips, or even crushed malt biscuits for added texture.
- Fruity Flair: Fresh berries like raspberries or strawberries provide a lovely tartness that cuts through the richness of the chocolate.
- Liqueur Infusion: Beyond Baileys, consider a splash of Kahlua, Grand Marnier, or even a hint of rum or brandy in the whipped cream or brushed onto the cooled cake layers for an adult-friendly twist.
- Chocolate Type: While milk chocolate is specified, you can certainly experiment with dark chocolate (60-70% cocoa solids) for an even more intense, less sweet chocolate flavor in both the cake and ganache. Ensure the dark chocolate is of good quality.
- Spice It Up: A pinch of cinnamon, a dash of chili powder, or a hint of orange zest can add intriguing layers of flavor to the chocolate.
Step-by-Step Guide: Crafting Your Chocolate Mud Cake
This visual guide provides a concise overview. For comprehensive, detailed instructions and precise measurements, please refer to the complete recipe card at the bottom of the page.
Follow these steps to create your perfectly rich and moist chocolate mud cake:
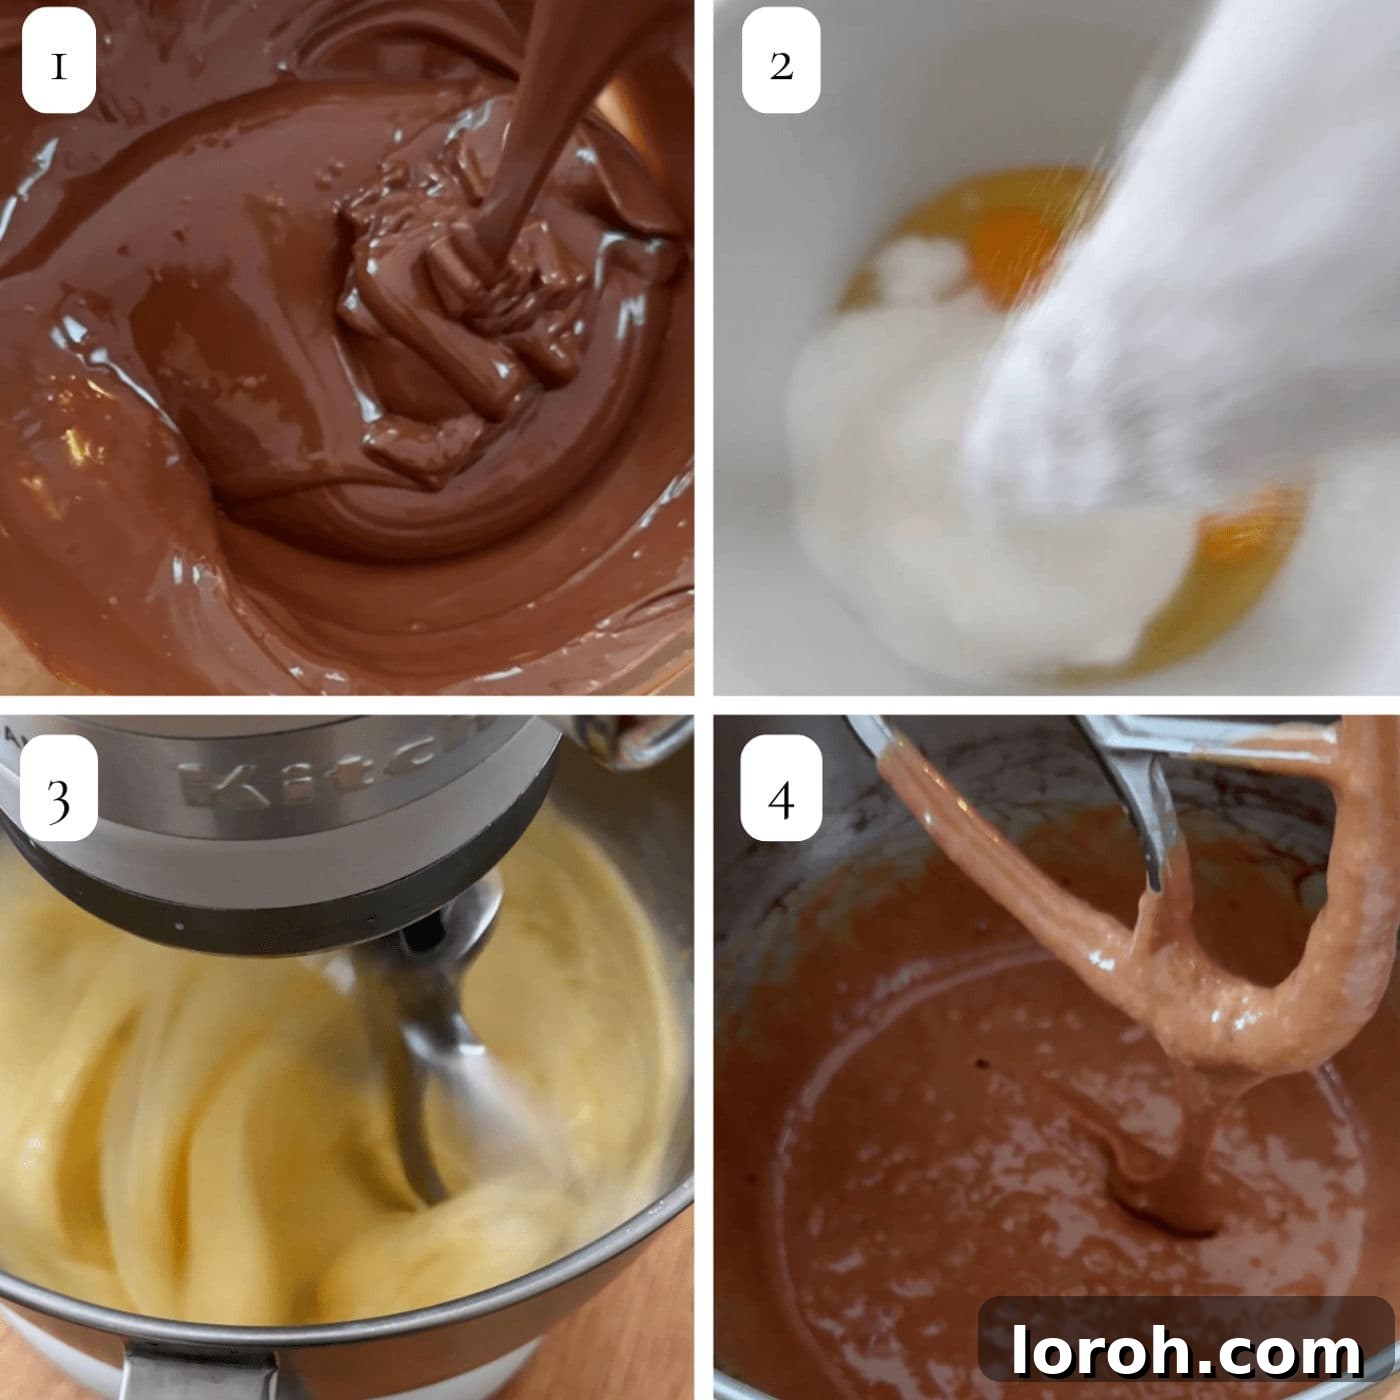
- Melt the Chocolate: Gently melt the milk chocolate using short bursts in the microwave. It’s crucial to go slowly and use a low temperature to prevent burning or seizing. Alternatively, a double-boiler method over simmering water works equally well, offering more controlled melting.
- Whip Eggs and Sugar: In a large mixing bowl, combine the eggs and both caster and soft brown sugars. Use an electric whisk to beat them until the mixture becomes light, thick, and foamy, almost like a pale ribbon when lifted. This step incorporates air, contributing to the cake’s unique texture.
- Combine Wet Ingredients: Gradually pour the cooled melted chocolate into the egg and sugar mixture, continuing to whisk until it’s fully incorporated and smooth. Next, slowly add the vegetable oil, ensuring it’s thoroughly blended into the chocolatey base.
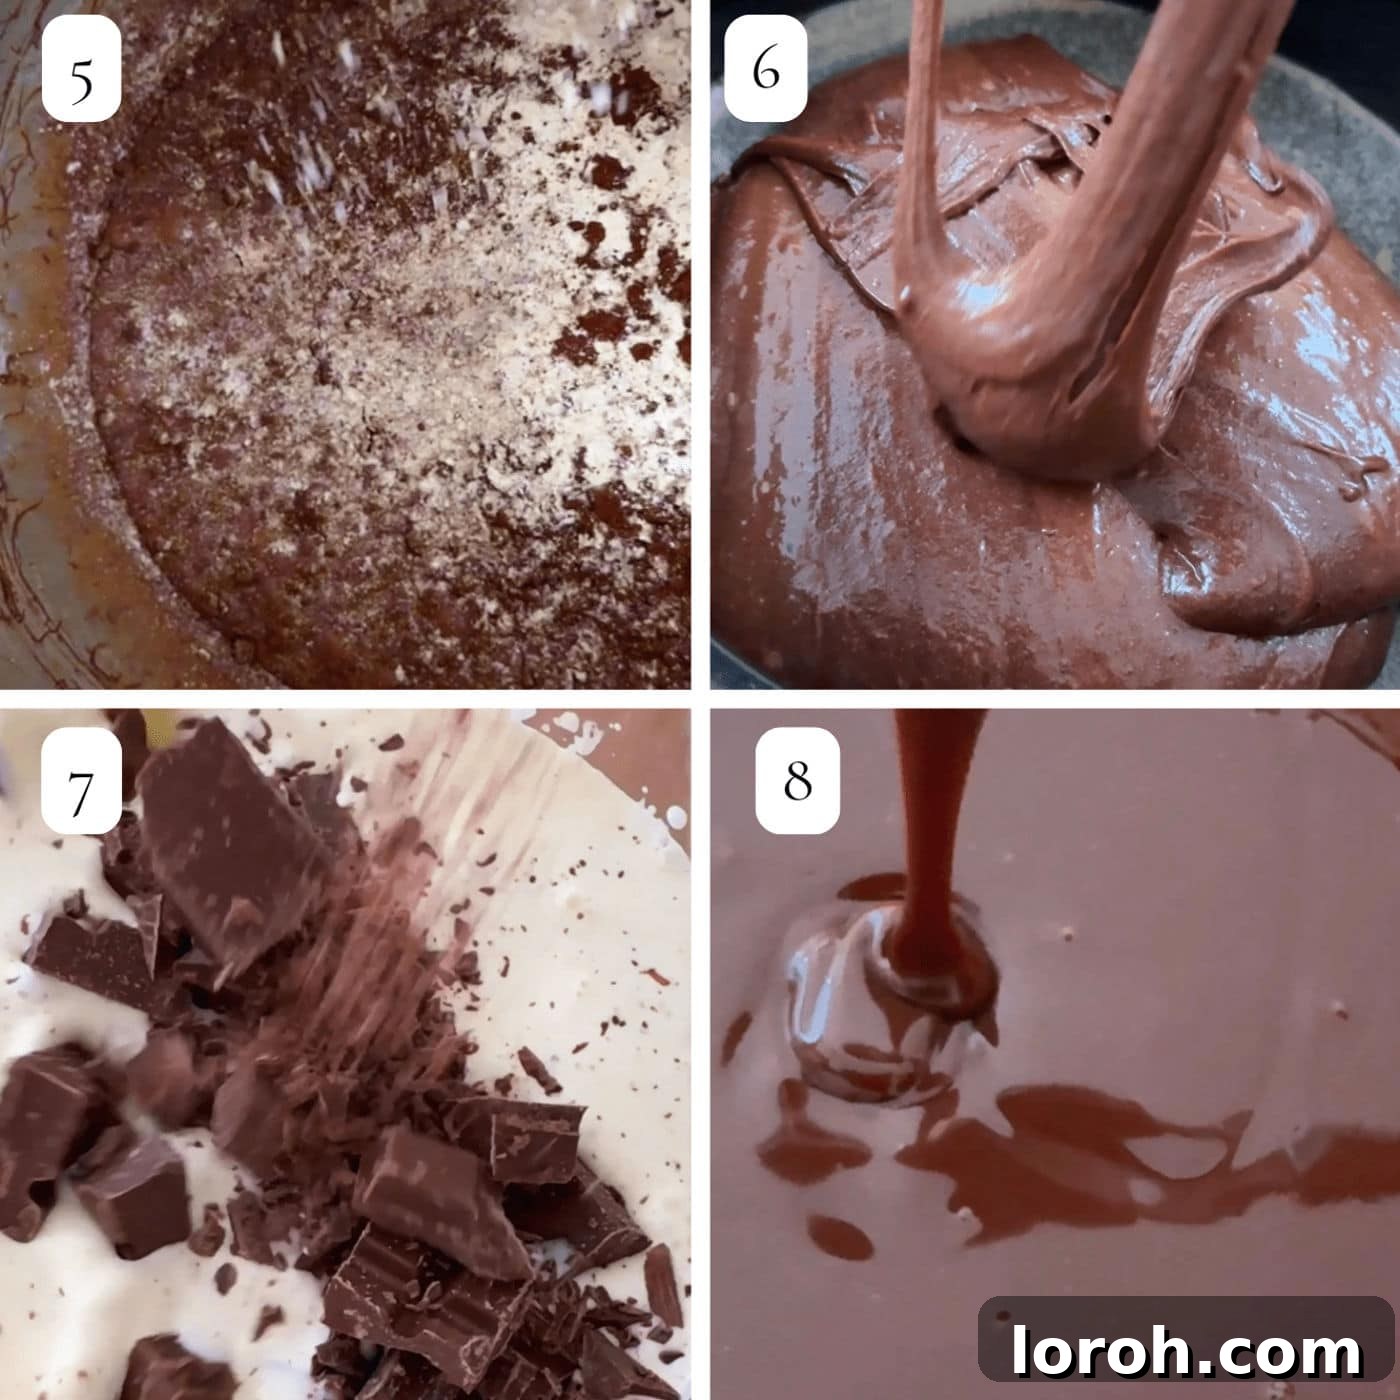
- Add Dry & Liquid Ingredients: Sift in the plain flour, cocoa powder, bicarbonate of soda, and salt directly into the wet mixture. Then, pour in the water and the strong cooled coffee. Mix thoroughly but gently until all ingredients are just combined and no streaks of flour remain. Be careful not to overmix, as this can develop gluten and toughen the cake.
- Bake the Cake: Pour the smooth batter evenly into your prepared 8-inch round cake tin (greased and lined with parchment paper). Bake in a preheated oven at 150°C (fan-assisted) for approximately 1 hour to 1 hour and 15 minutes. To check for doneness, insert a skewer into the center of the cake; it should come out clean, without any wet batter attached. If crumbs are present, return the cake to the oven for a few more minutes.
- Prepare the Ganache: While the cake cools, prepare the ganache. Heat the double cream in a saucepan over medium heat until it shimmers and just begins to steam, but do not let it boil. Remove from heat and immediately stir in the finely chopped milk chocolate. Continue to whisk gently until all the chocolate has melted and the mixture is completely smooth and glossy. Allow the ganache to cool and thicken at room temperature until it reaches a spreadable consistency.
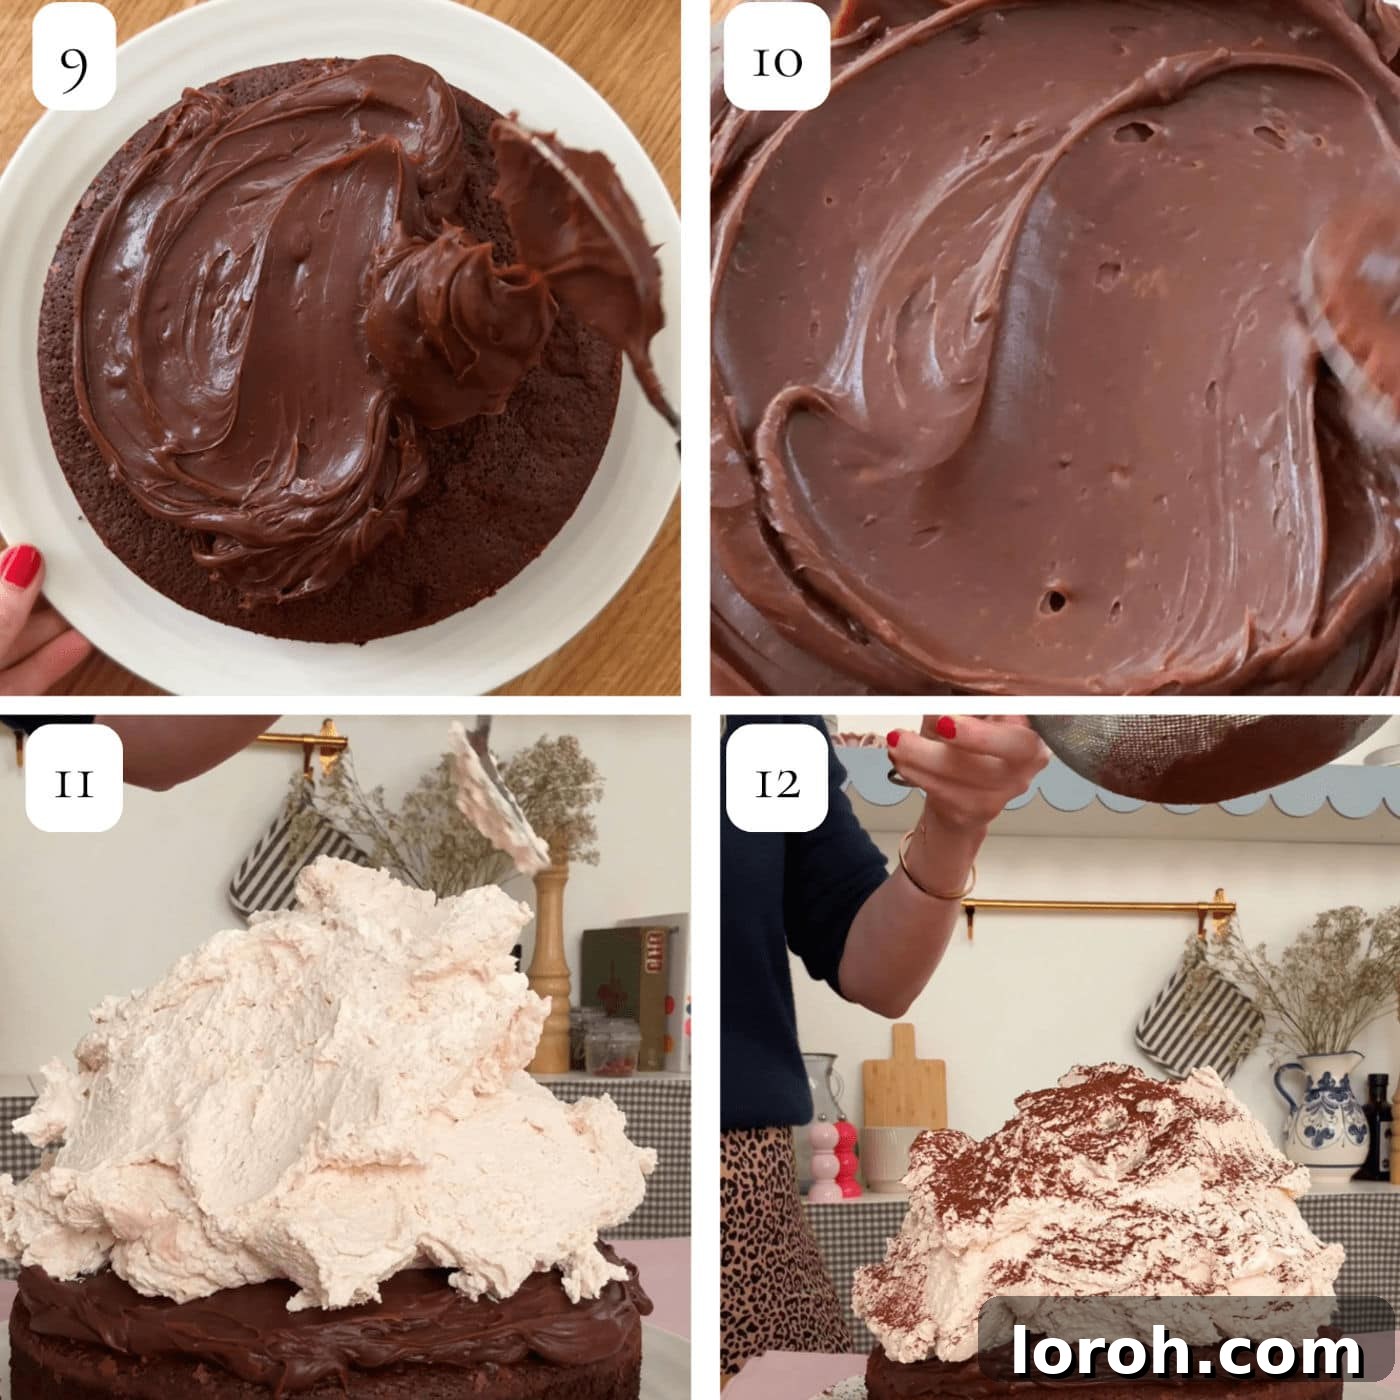
- Apply Ganache: Once the cake has cooled completely to room temperature, carefully remove it from the tin. Pour the now spreadable chocolate ganache over the top.
- Smooth the Ganache: Use an offset spatula or the back of a spoon to gently smooth the ganache, allowing some to elegantly drip down the sides of the cake for a rustic yet sophisticated finish.
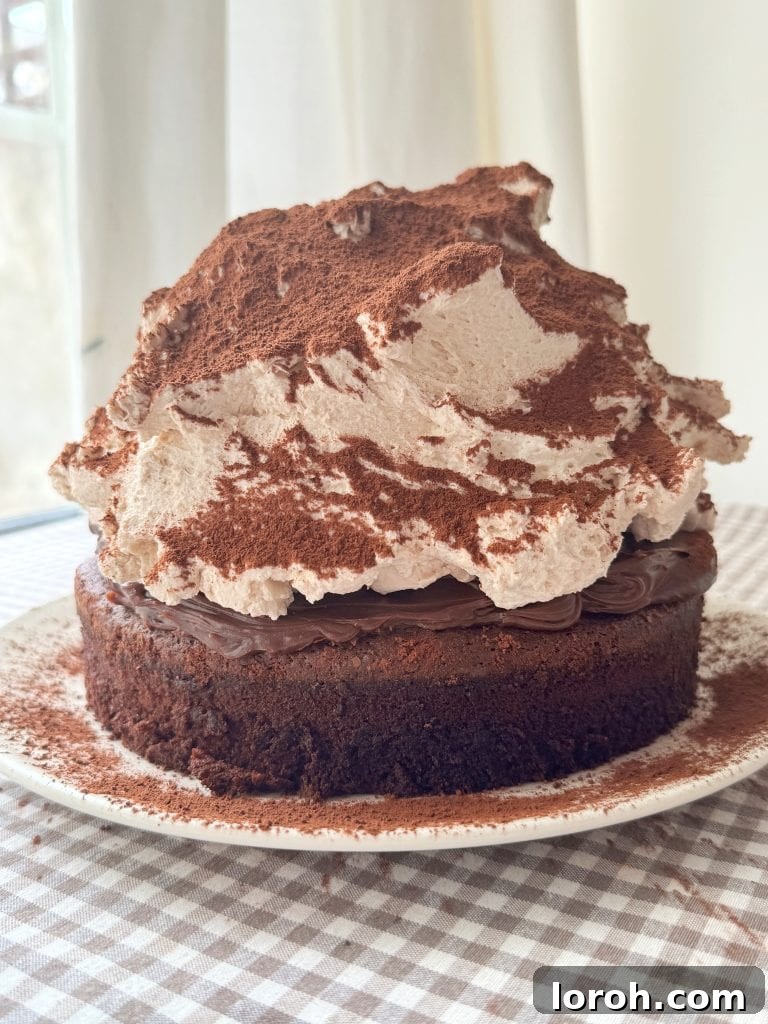
- Add Whipped Cream: Prepare the malted whipped cream by whisking cold double cream with icing sugar and malt powder until soft peaks form. Pile a generous “tower” of this luscious cream on top of the ganache-covered cake, arranging it artistically as desired.
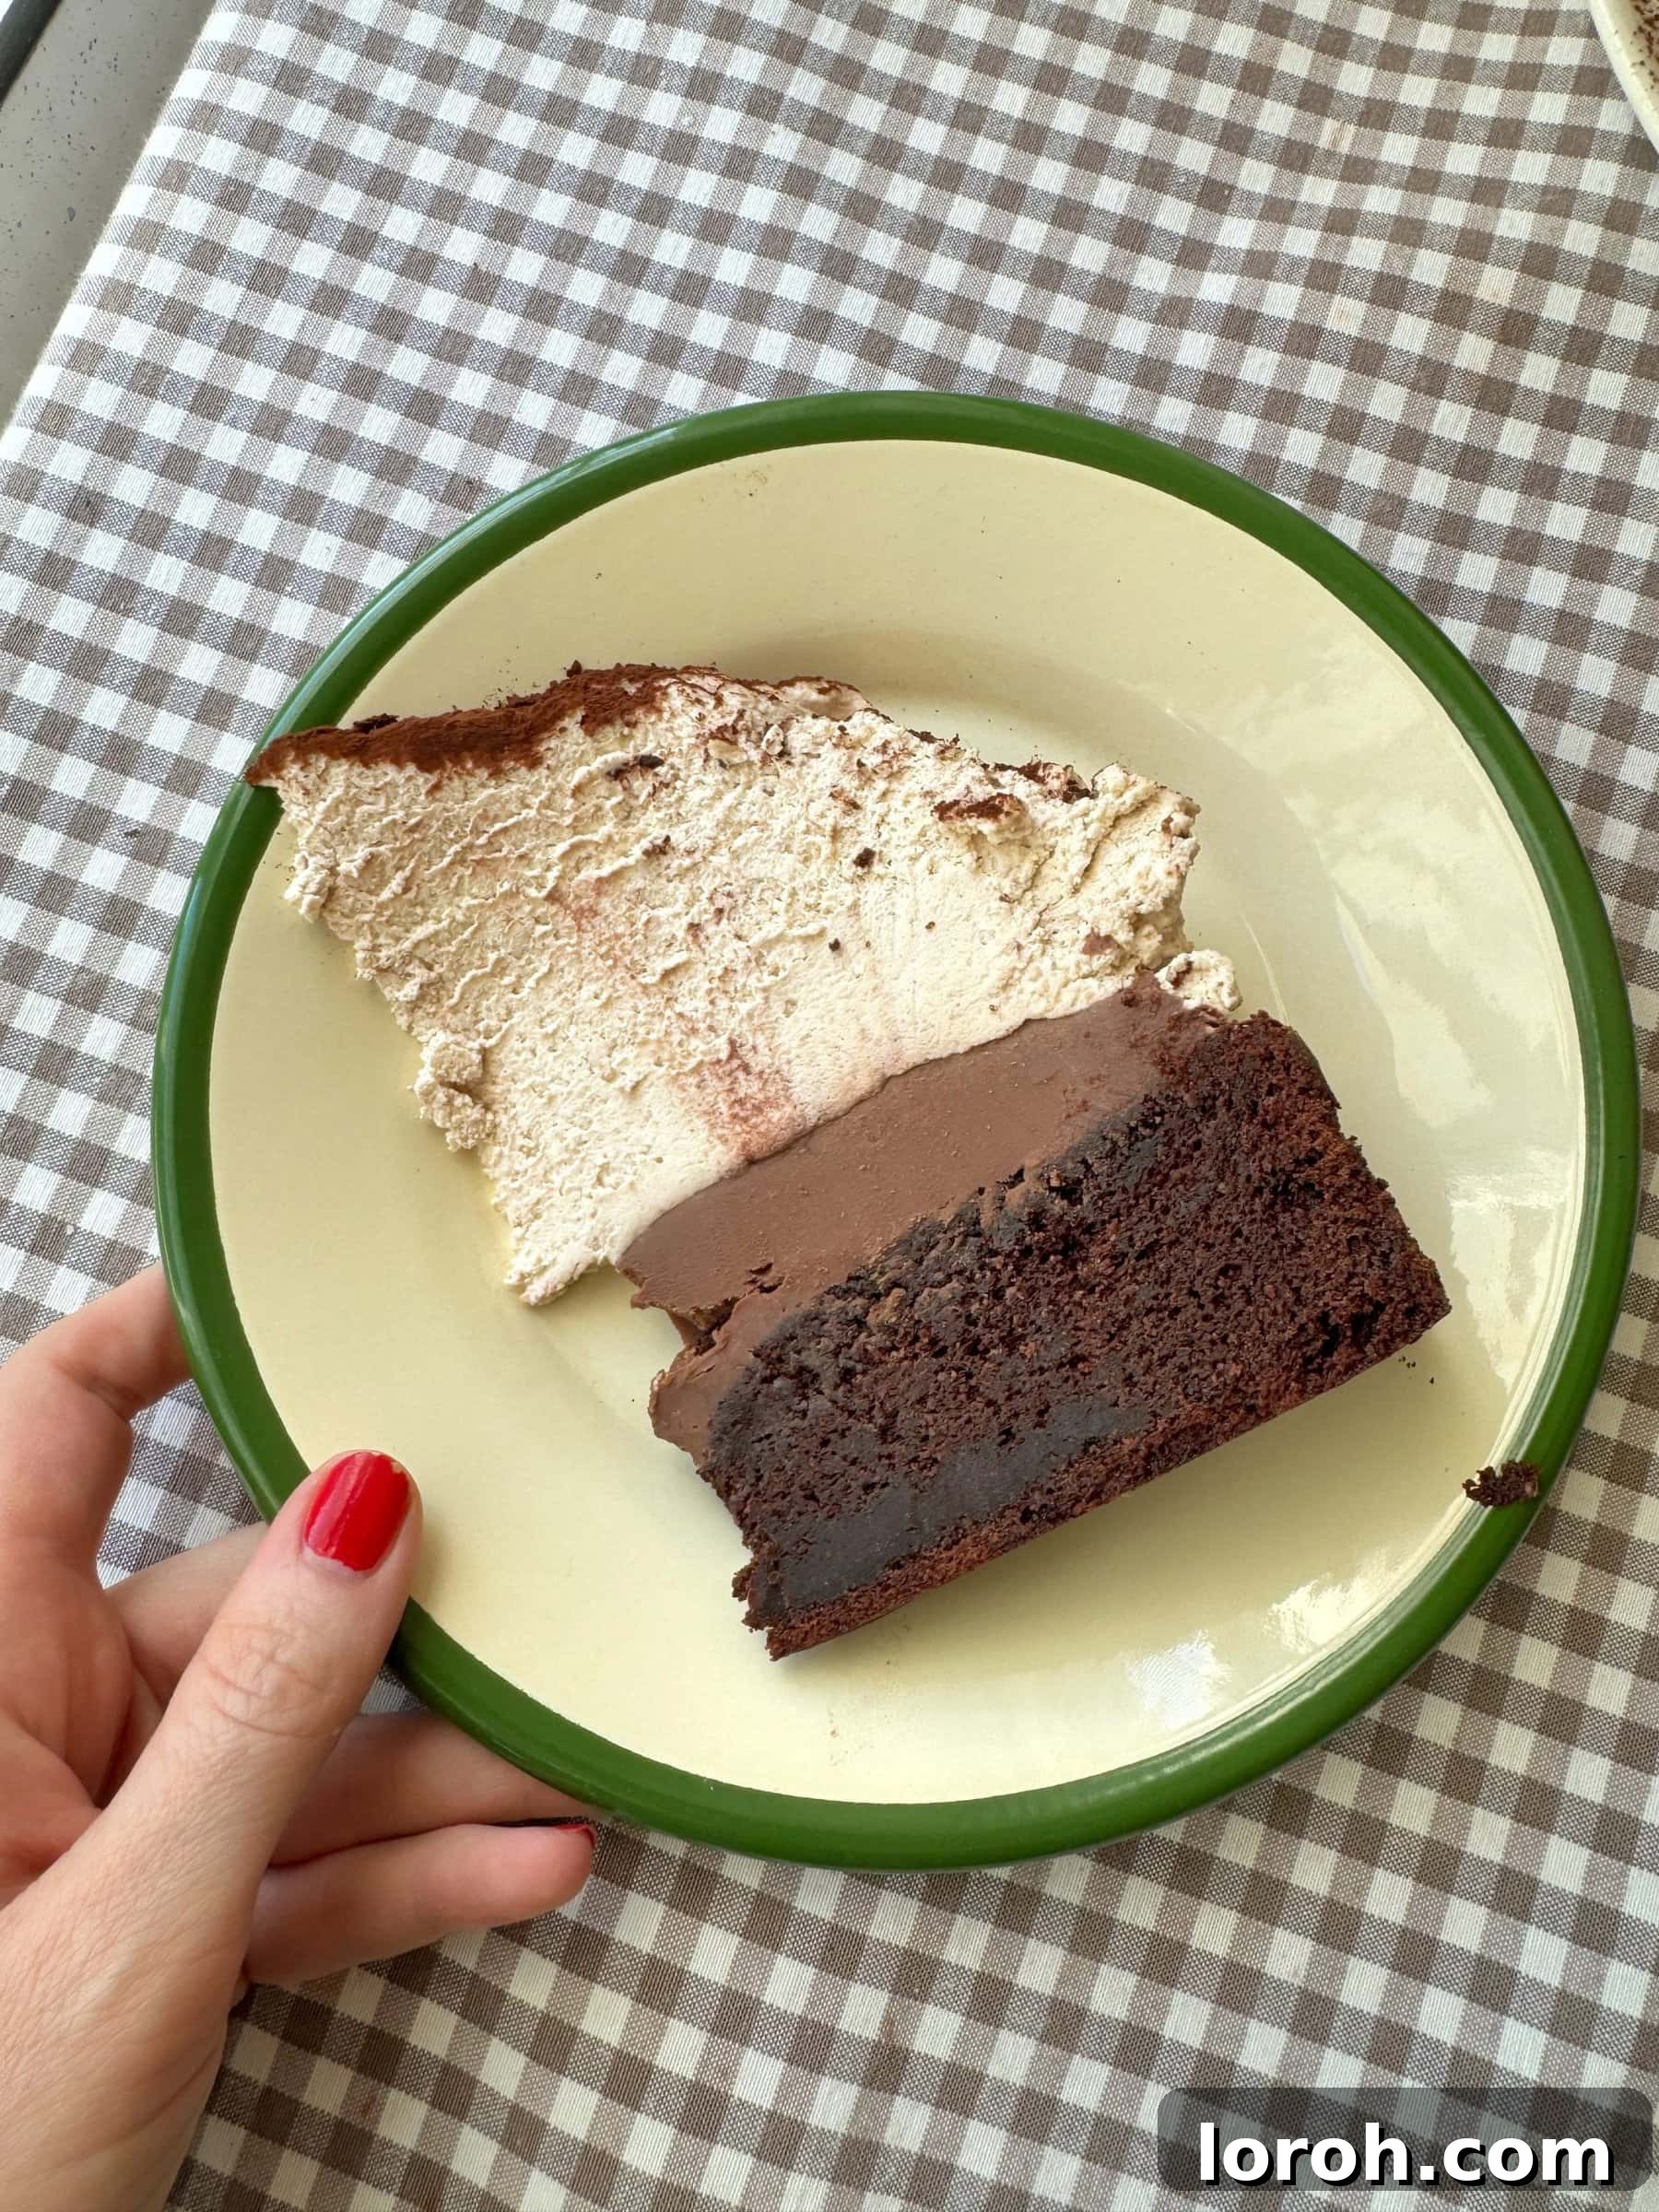
- Chill and Finish: Refrigerate the assembled cake for at least a few hours to allow the ganache and cream to set, making it easier to slice. Before serving, dust generously with cocoa powder or add chocolate shavings for a final flourish.
Expert Baking Tips for a Flawless Mud Cake
Achieving the perfect chocolate mud cake is simple with these expert tips:
- Mastering the Baking Time: As a dense and incredibly rich cake, ensuring it’s thoroughly cooked through is paramount. Unlike brownies where a slightly underbaked center can be desirable, a mud cake requires full cuisson. Err on the side of caution with baking time; an underbaked mud cake can result in a stodgy, raw center once it cools and settles. The cake should not jiggle at all in the center when gently shaken, and a skewer inserted into the deepest part should emerge perfectly clean, indicating complete doneness. Oven temperatures can vary, so monitor your cake closely and adjust baking time as needed.
- The Importance of Cooling in the Tin: Patience is a virtue, especially with mud cakes. Allowing the cake to cool completely, undisturbed, within its baking tin is a crucial step for achieving the best, fudgiest, and most stable texture. This slow cooling process helps the cake to set properly, intensify its moisture, and prevents it from crumbling when handled. If time permits, we highly recommend this cooling method for an undeniably superior result.
- Proper Pan Preparation: For easy release and a perfectly shaped cake, always grease your cake tin thoroughly and line the bottom with parchment paper. For an 8-inch round tin, this prevents sticking and ensures your beautiful mud cake comes out intact.
- Room Temperature Ingredients: Ensure your eggs and any other dairy ingredients (if using butter, though oil is preferred here) are at room temperature. This allows them to emulsify more effectively with other ingredients, creating a smoother, more uniform batter and a better overall texture.
- Don’t Overmix the Batter: Once you add the flour and cocoa, mix just until the dry ingredients are incorporated. Overmixing can develop the gluten in the flour, leading to a tougher, less tender cake, which is the opposite of the desired fudgy mud cake texture.
- The Coffee Secret: Reiterate the power of coffee. Even a small amount of strong, cooled coffee dramatically enhances the chocolate flavor without making the cake taste like coffee. It’s a flavor booster you won’t want to skip!
Frequently Asked Questions
A chocolate mud cake is renowned for its intense richness, deep chocolate flavor, and exceptionally dense, moist texture. The name “mud cake” playfully refers to its dark, compact, and often fudgy consistency, which is far from light and airy. Unlike a regular sponge cake, which is typically baked at higher temperatures (around 180-190°C or 350-375°F) for a shorter duration to encourage a significant rise and an open, airy crumb, a mud cake is baked “low and slow” – at a lower temperature for a longer period. This gentle baking method is key to its tight, fine crumb and its signature fudgy, incredibly rich outcome. It’s a cake designed for indulgence, not lightness.
While the full combination of luscious chocolate ganache and fluffy malted whipped cream creates a truly show-stopping dessert, it’s not strictly mandatory to use both. The mud cake is incredibly delicious with just the ganache, which provides a rich, smooth topping that perfectly complements the cake’s density. However, the malted whipped cream truly elevates the cake to the next level, adding a contrasting texture, a delightful malt flavor, and an impressive visual appeal that makes it a spectacular centerpiece. We highly recommend using both for the ultimate experience, but feel free to choose based on your preference or available time.
The charmingly unconventional name “mud cake” comes from its signature characteristics: its deep, dark brown color, its incredibly moist, dense, and fudgy texture, which is often likened to rich, thick mud. While perhaps not the most appetizing comparison initially, it perfectly encapsulates the cake’s wonderfully indulgent and satisfyingly heavy quality, a stark contrast to lighter, airier cakes.
Absolutely! Mud cakes are fantastic for making ahead, as their flavor and fudgy texture often improve over a few days. We recommend baking the cake a day in advance and allowing it to cool completely in its tin. This process contributes significantly to its superb fudgy texture. You can then decorate the cake on the day you plan to serve it. If you need to store the undecorated cake for longer than one night, ensure it’s tightly wrapped in cling film or stored in an airtight container to maintain freshness and moisture.
To keep your mud cake fresh, cover it tightly or transfer it to an airtight container. If topped with whipped cream, store it in the refrigerator for up to 3 days. Without the whipped cream (just the cake with ganache, or the plain cake), it can last longer, typically up to 5 days in the fridge. For the best texture when there’s no ganache or cream, we prefer to store the plain mud cake at room temperature, provided your kitchen isn’t excessively warm.
Yes, you can successfully freeze the mud cake, but it’s best to do so without the ganache and whipped cream. Once the cake is completely cooled, wrap it tightly first in cling film, then in a layer of aluminum foil. It can be frozen for up to 3 months. To defrost, simply transfer it to the refrigerator overnight, or leave it at room temperature until fully thawed. Once thawed, you can proceed with making and adding the ganache and whipped cream.
This recipe is designed for an 8-inch (20cm) round cake tin. Using a tin of this size will yield the ideal cake height and baking time as specified in the instructions. Ensure your tin is at least 3 inches (7.5cm) deep to accommodate the batter and its slight rise.
Absolutely! If you prefer a more intense, less sweet chocolate flavor, you can substitute dark chocolate (around 60-70% cocoa solids) for the milk chocolate in both the cake batter and the ganache. Just be aware that the final cake will be richer and less sweet, which many chocolate lovers adore. Ensure the dark chocolate is of good quality for the best results.
To achieve a perfectly smooth, lump-free ganache, two key tips are essential. Firstly, ensure your chocolate is finely chopped before adding the hot cream. Smaller pieces melt more quickly and evenly. Secondly, after pouring the hot cream over the chocolate, let it sit undisturbed for 5-7 minutes. This allows the heat from the cream to thoroughly melt the chocolate. After this resting period, gently whisk from the center outwards until completely smooth and glossy. Avoid vigorous whisking immediately, which can incorporate air and make it less smooth.
Discover More Delectable Recipes
If you’re enchanted by the rich flavors of my Chocolate Mud Cake, you’re sure to fall in love with these other irresistible dessert recipes from my kitchen:
- My Moist Chocolate Chip Banana Bread for a comforting classic.
- A unique Chocolate Chunk Banana Bread Loaf for a delightful twist.
- The magical Matilda’s Chocolate Cake, a true literary-inspired treat.
- A decadent No-Bake Biscoff Cheesecake for an easy, no-bake indulgence.
- Or try my luxurious No-Bake Chocolate Cheesecake for another crowd-pleasing dessert.
More Chocolate Delights to Explore
Easy Dessert Recipes
Homemade Chocolate Marshmallows
Easy Dessert Recipes
Chocolate Cake with Chocolate Mousse
Easy Dessert Recipes
Chocolate Brownie Trifle
Easy Baking Recipes
Chocolate and Pear Cake
If you’ve tried this magnificent Chocolate Mud Cake with Malted Whipped Cream or any other recipe from our site, please don’t hesitate to leave a comment below! We love hearing how your culinary adventures turn out.
Chocolate Mud Cake with Malted Whipped Cream Recipe
Prep Time: 30 mins
Cook Time: 1 hr 15 mins
Total Time: 1 hr 45 mins
Servings: 12 servings
This recipe delivers an incredibly rich chocolate mud cake, generously frosted with a decadent milk chocolate ganache and crowned with a tower of irresistible malted whipped cream. It’s the ultimate showstopper dessert!
Ingredients
For the cake:
- 3 medium eggs
- 140 g caster sugar (superfine sugar)
- 100 g soft brown sugar
- 180 g milk chocolate, chopped
- 100 ml vegetable oil (or sunflower/rapeseed oil)
- 150 g plain flour (all-purpose flour)
- 45 g high-quality cocoa powder
- ¼ tsp bicarbonate of soda (baking soda)
- ½ tsp salt
- 180 ml water
- 20 ml strong coffee, cooled (a shot of espresso or strong instant coffee works best; this enhances chocolate flavor without making it taste like coffee)
For the milk chocolate ganache:
- 300 g milk chocolate, roughly chopped
- 300 ml double cream (heavy cream)
For the malted whipped cream (this makes a generous tower; use 500ml cream for a standard layer):
- 1200 ml double cream (heavy cream)
- 1 tbsp icing sugar (powdered sugar), sifted
- 1 tbsp malt powder (such as Horlicks or Ovaltine, optional for malt flavor)
- A dusting of cocoa powder or chocolate shavings to finish
Instructions
To make the mud cake:
- Preheat your oven to 150°C (300°F) fan. Grease an 8-inch (20cm) round cake tin and line the bottom with parchment paper.
- Gently melt the milk chocolate in short bursts in the microwave until smooth, stirring between bursts. Alternatively, use a double-boiler over simmering water. Allow to cool slightly.
- In a large bowl, using an electric whisk, beat the eggs and both sugars until the mixture is light, pale, thick, and foamy (this may take a few minutes).
- Slowly pour the cooled melted chocolate into the egg mixture while continuing to whisk until fully incorporated. Then, gradually add the vegetable oil, mixing until smooth.
- Sift the plain flour, cocoa powder, bicarbonate of soda, and salt into the wet ingredients. Add the water and the strong cooled coffee. Mix gently with a whisk or spatula until just combined and smooth, taking care not to overmix.
- Pour the batter into your prepared cake tin. Bake for 1 hour, then check for doneness. It may take up to 1 hour and 15 minutes. The cake is ready when a skewer inserted into the center comes out clean. If crumbs are attached, return to the oven for several more minutes.
- Once baked, remove the cake from the oven and leave it to cool completely in the tin on a wire rack. This is crucial for its fudgy texture and stability.
For the milk chocolate ganache:
- Heat the double cream in a saucepan over medium heat until it shimmers and just begins to steam, but do not let it boil. Remove from the heat.
- Add the roughly chopped milk chocolate to the hot cream. Let it sit undisturbed for 5-7 minutes to allow the chocolate to melt.
- Gently whisk the mixture until all the chocolate has melted and the ganache is completely smooth and glossy. Set aside at room temperature to cool and thicken to a spreadable consistency (this may take 1-2 hours depending on room temperature).
For the malted whipped cream:
- In a clean, cold bowl, add the double cream, sifted icing sugar, and malt powder (if using).
- Whisk with an electric mixer until the cream is thickened and forms soft, airy peaks. Be careful not to over-whisk, or it may become grainy.
To assemble the cake:
- Once the cake is completely cool, carefully remove it from the tin. You may level the top with a serrated knife if desired, but it’s often not necessary for this recipe.
- Spread a generous layer of the room-temperature chocolate ganache over the top of the cake, letting some gracefully drip down the sides.
- Pile the malted whipped cream high on top of the ganache, arranging it artistically.
- For best results, chill the assembled cake in the fridge for a few hours to allow the toppings to set.
- Remove the cake from the fridge about 20 minutes before serving (unless it’s a very warm day, in which case keep it chilled). Dust generously with cocoa powder or chocolate shavings, then slice and enjoy your magnificent creation!
Notes
- For a visual step-by-step guide with images, please scroll up this page.
- Storage: Store covered or in an airtight container in the fridge for up to 3 days if topped with whipped cream. Without whipped cream (just ganache or plain cake), it can last up to 5 days in the fridge. For the best texture of a plain mud cake, store at room temperature.
- Freezing: The mud cake freezes exceptionally well without the ganache and cream. Wrap it tightly in cling film, then in a layer of foil, and freeze for up to 3 months. Thaw overnight in the refrigerator or at room temperature until completely defrosted before decorating.
- Make Ahead: This cake is perfect for making ahead as its flavor and texture often improve over a day or two. Bake the cake one day in advance and let it cool completely in the tin for a fantastic fudgy texture. Decorate on the day you plan to serve. If storing for more than one night, ensure the undecorated cake is well-wrapped in cling film or in an airtight container.
- Cooking Time: Given its density, ensuring the cake is fully cooked is crucial. Do not underbake like you might a brownie. The center should not jiggle, and a skewer inserted should come out totally clean.
- Cooling in the Tin: Allowing the cake to cool completely in its baking tin ensures the fudgiest texture and prevents it from breaking. This step is highly recommended.
Nutrition
Calories: 849kcal, Carbohydrates: 60g, Protein: 9g, Fat: 69g, Saturated Fat: 39g, Polyunsaturated Fat: 7g, Monounsaturated Fat: 18g, Trans Fat: 0.1g, Cholesterol: 183mg, Sodium: 182mg, Potassium: 337mg, Fiber: 4g, Sugar: 45g, Vitamin A: 1909IU, Vitamin C: 1mg, Calcium: 114mg, Iron: 3mg
Nutrition information is automatically calculated and should only be used as an approximation.
Enjoyed this recipe? Share your thoughts in the comments below!