

Homemade Granola Butter: Your Ultimate Guide to a Delicious, Nut-Free Spread
Step into a world of creamy, spiced indulgence with **homemade granola butter**! Often overshadowed by its nut-based counterparts, this delightful spread is a true hidden gem, offering a unique texture and a symphony of warm, comforting flavors. If you’re a fan of peanut butter, almond butter, or cashew butter, prepare to fall in love with this wholesome alternative. Crafted from a simple blend of toasted oats, aromatic coconut, and a medley of warming spices, granola butter transforms into a velvety smooth, utterly irresistible spread that will quickly become a pantry staple.
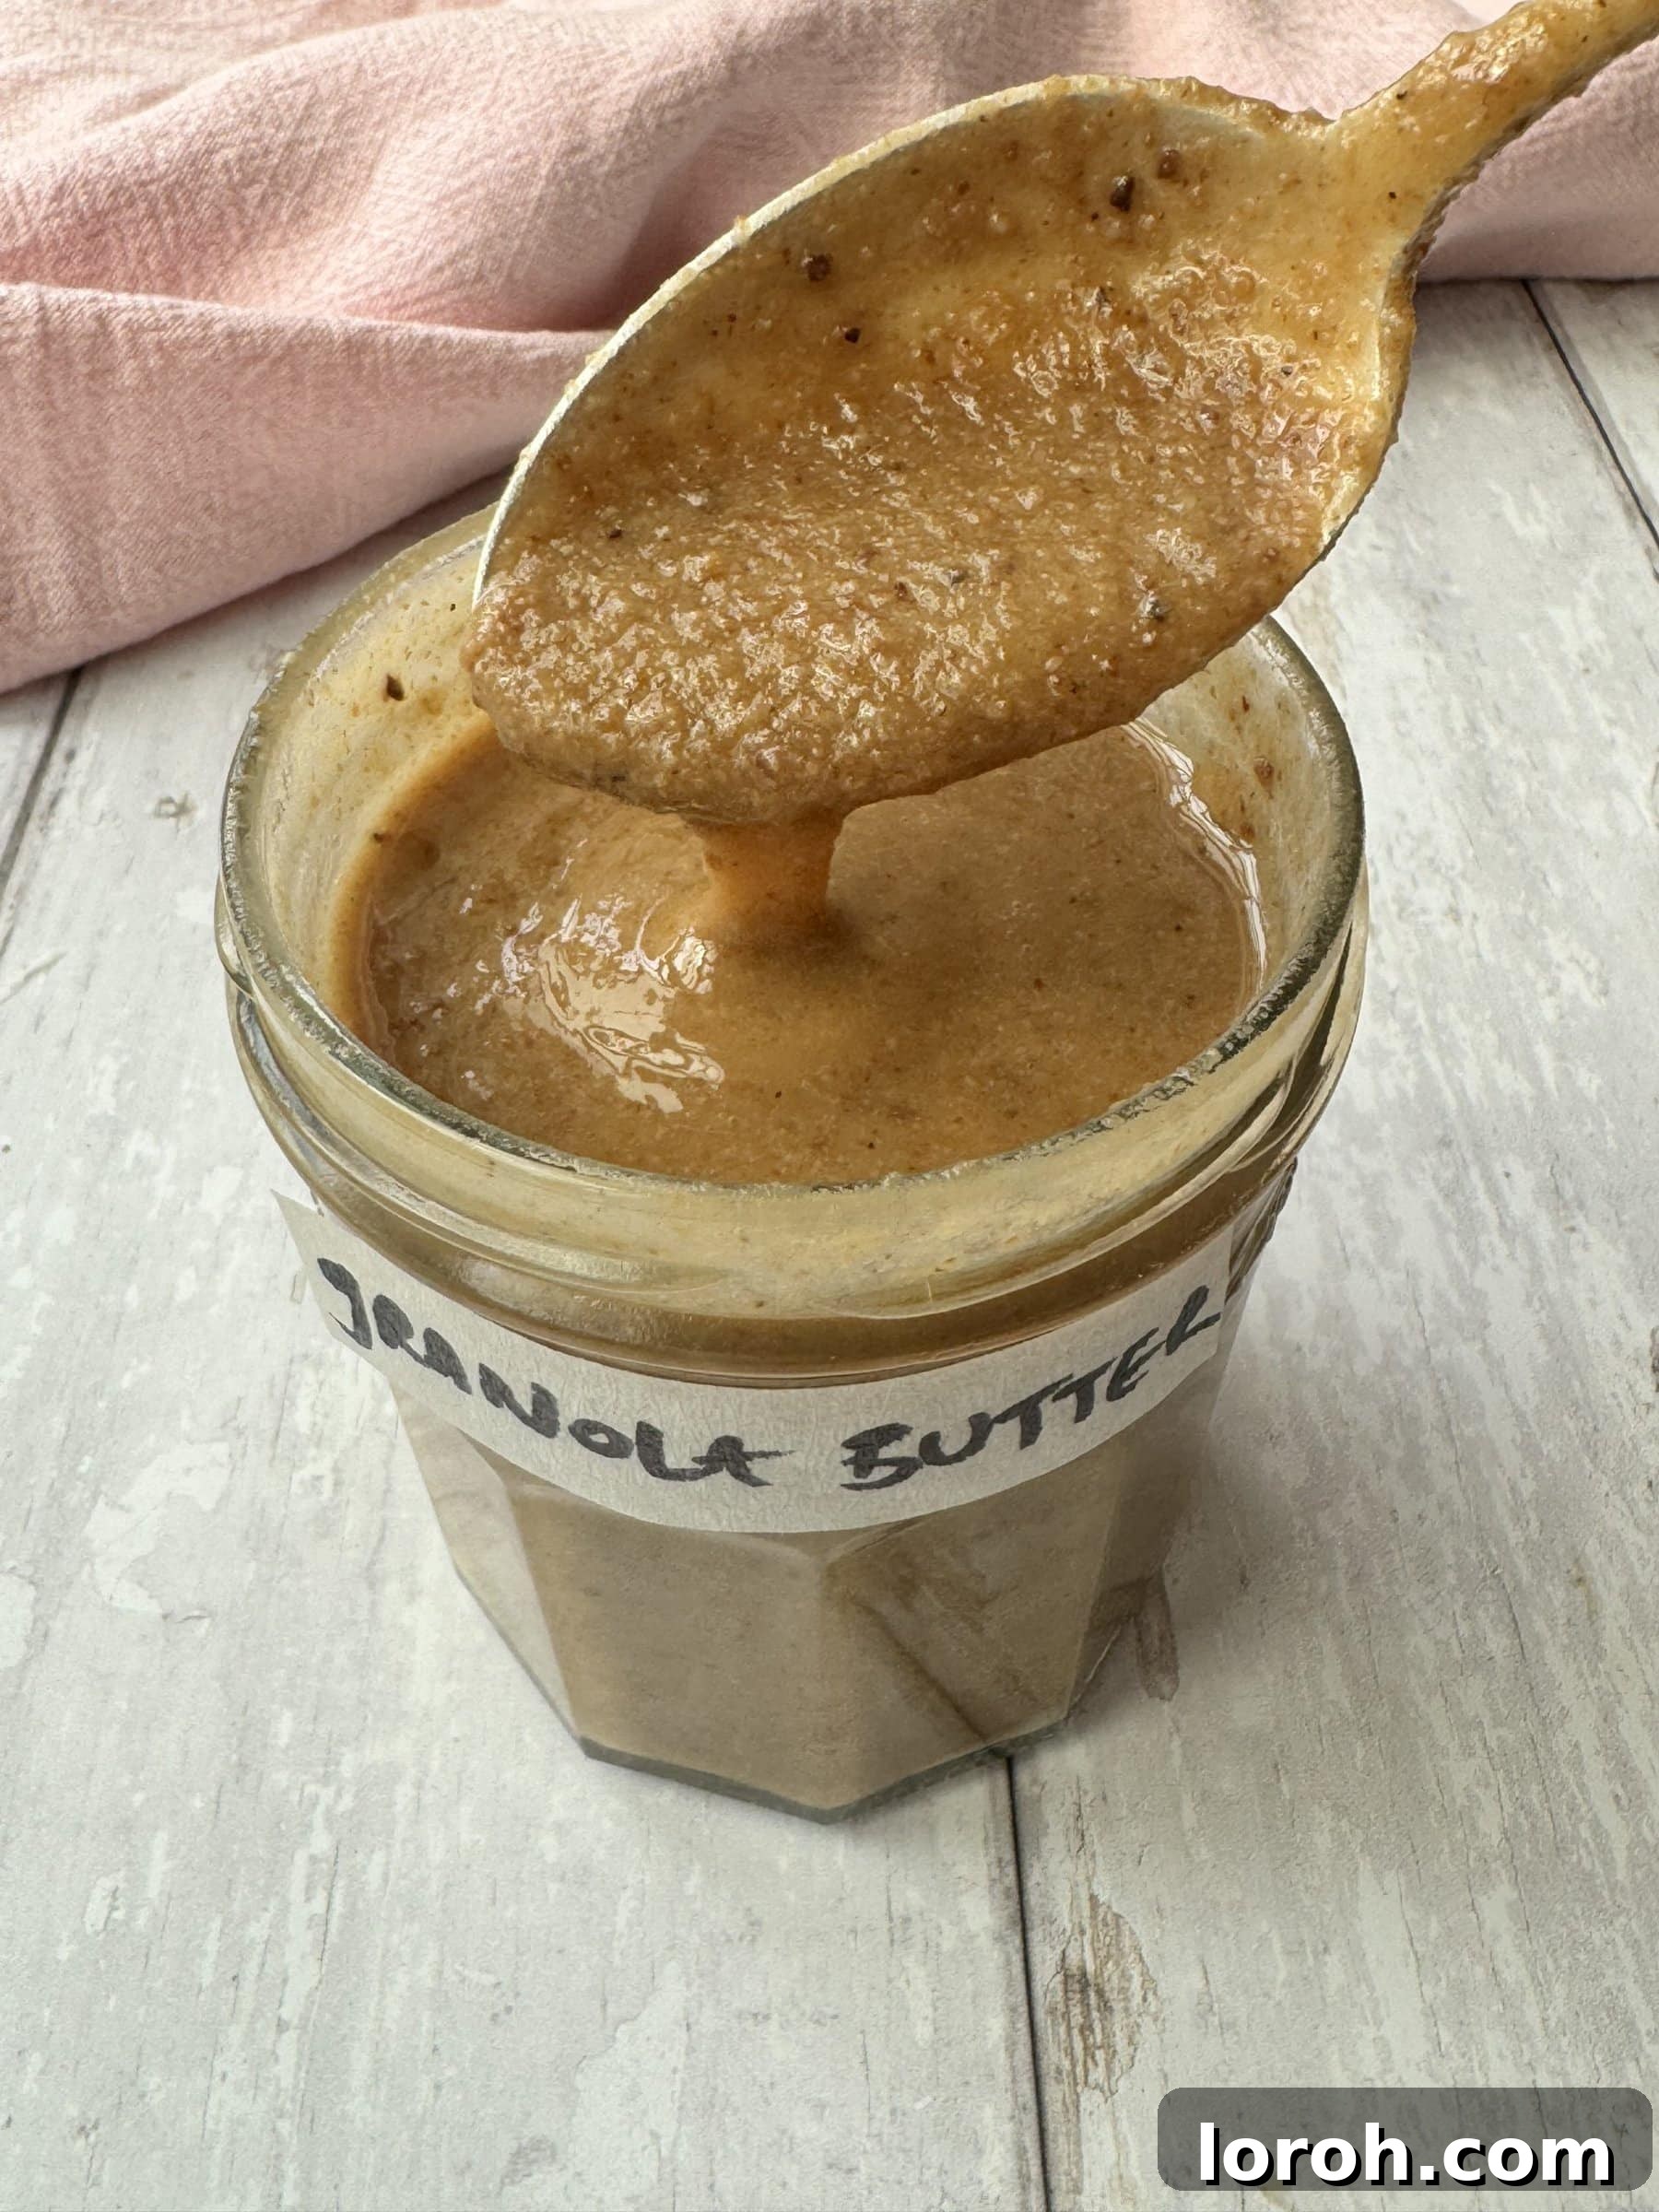
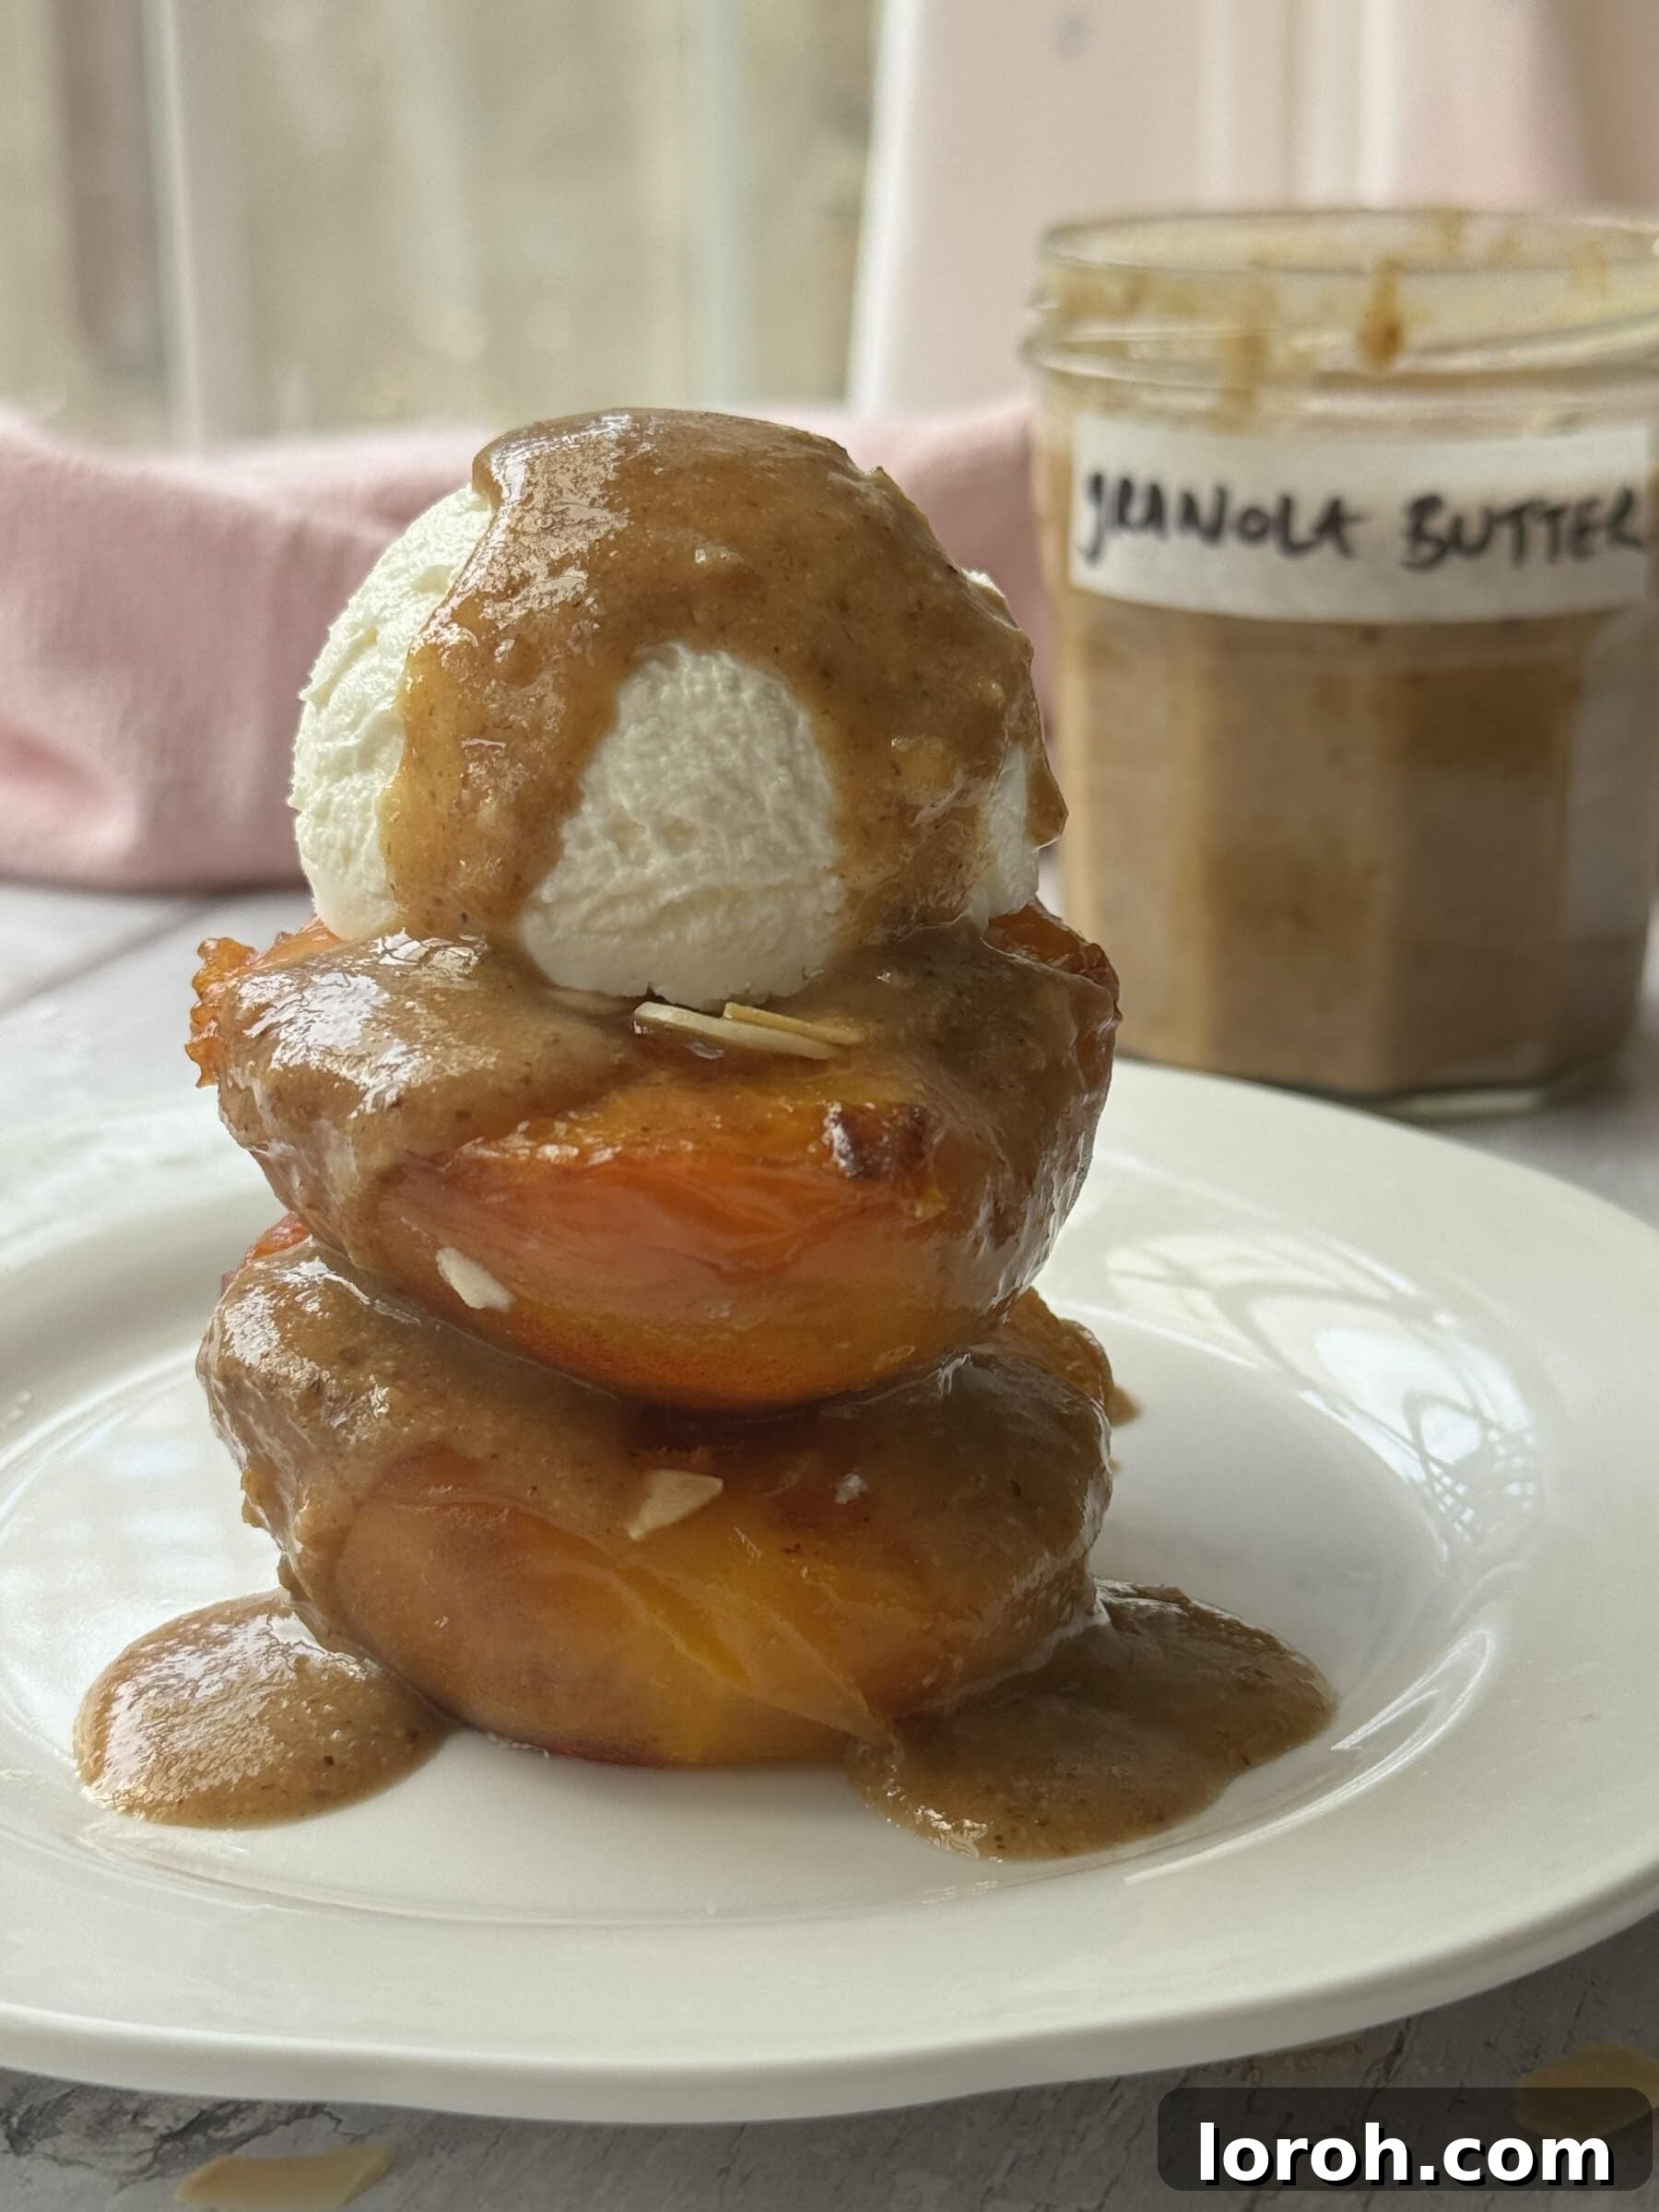
This vibrant spread isn’t just for breakfast; its versatility knows no bounds. I love it generously drizzled over warm toast and even on a scoop of vanilla ice cream for a surprisingly delightful dessert. However, the absolute best way to savor its magic is paired with sweet, roasted peaches and a dollop of creamy vanilla ice cream. It’s a dessert experience you won’t soon forget! Beyond its incredible taste, homemade granola butter shines as an excellent alternative to traditional nut butters, making it a fantastic choice if there are any nut allergies in your household. But even without allergy concerns, it’s simply a delicious and uniquely flavored drizzling sauce that elevates so many dishes. You can also incorporate it into your favorite breakfast bowls, much like this Peanut Butter Yogurt Bowl, for an exciting twist.
Table of Contents
- Why You’ll Adore This Granola Butter
- The Simple Yet Flavorful Ingredients
- Customizing Your Granola Butter: Substitutions and Variations
- Step-by-Step Guide: How to Make Granola Butter
- Expert Cooking Tips for Perfect Granola Butter
- Frequently Asked Questions About Granola Butter
- Serving Suggestions: Beyond the Basics
- Storage and Freezing Tips
- More Recipes You Might Love
- Granola Butter Recipe Card
Why You’ll Adore This Homemade Granola Butter
There are countless reasons to add this incredible granola butter to your culinary repertoire. It’s more than just a spread; it’s a versatile ingredient that caters to various dietary needs and preferences, all while delivering exceptional flavor. Here’s why this recipe stands out:
- A Delicious Nut-Free Alternative: For those managing nut allergies, finding a safe and equally satisfying spread can be a challenge. This granola butter provides a fantastic solution, offering a similar creamy texture and rich flavor profile without any nuts, making it a worry-free option for many households.
- Warm & Inviting Spiced Flavors: The blend of toasted oats, sweet coconut, and aromatic spices like cinnamon creates a deeply warming and comforting flavor that pairs beautifully with an array of foods, from fresh fruit to baked goods.
- Effortlessly Easy to Prepare: You don’t need to be a gourmet chef to whip up this spread. With minimal ingredients and just a food processor, it comes together quickly and easily, proving that homemade doesn’t have to be complicated.
- Incredibly Versatile: From breakfast to dessert, and even as a snack component, granola butter can elevate nearly any dish. Its unique texture and flavor make it a dynamic ingredient in your kitchen.
- Control Over Ingredients: Making your own means you control exactly what goes in. You can adjust the sweetness, choose organic ingredients, and avoid artificial additives often found in store-bought alternatives.
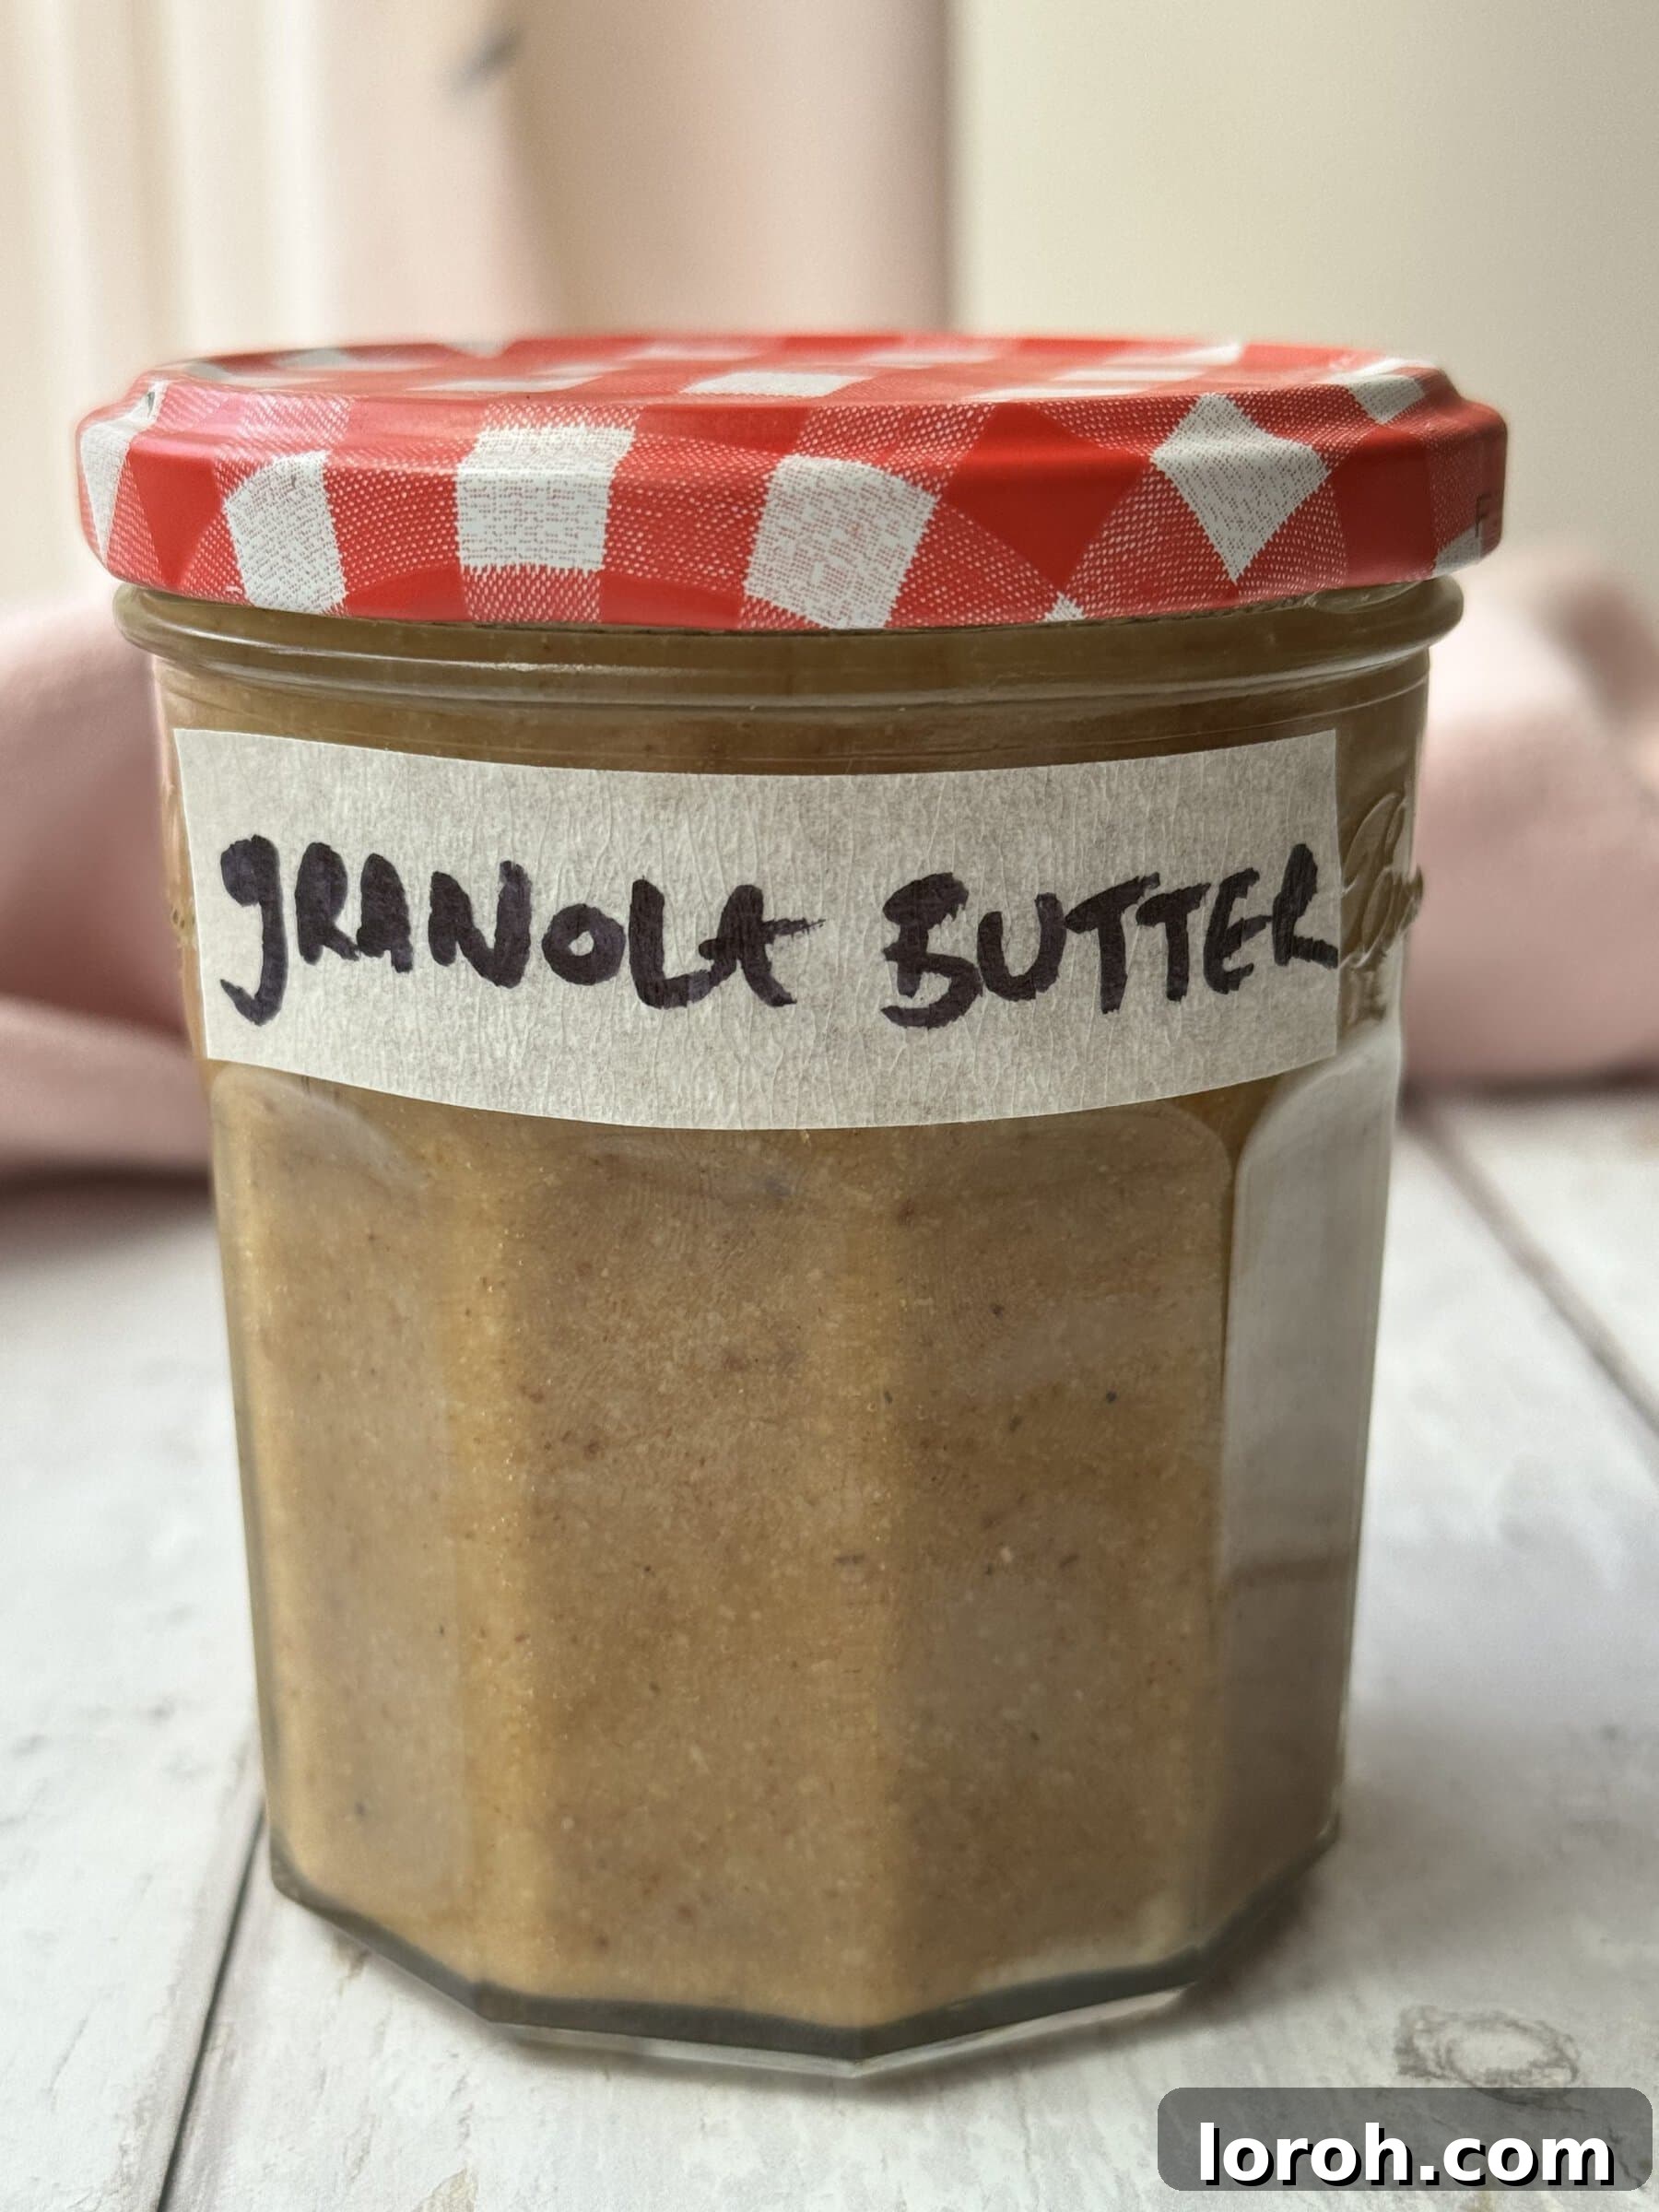
The Simple Yet Flavorful Ingredients for Granola Butter
For precise measurements and detailed instructions, please refer to the complete printable recipe card located at the very bottom of this post.
Crafting the perfect granola butter starts with high-quality, simple ingredients. Each component plays a crucial role in achieving that delightful texture and depth of flavor:
Oats: The Creamy Base
Oats form the fundamental base of this luscious spread. We recommend using either **rolled oats** or **old-fashioned oats** as they provide the ideal texture once blended. Quick-cooking oats will grind slightly easier, yielding a potentially smoother butter more quickly, while old-fashioned oats might offer a slightly coarser, more rustic texture if you prefer. Oats are not only versatile but also packed with fiber, making this spread a wholesome choice.
Coconut Flakes: For Flavor and Texture
Unsweetened **coconut flakes** are essential for adding a fantastic depth of flavor and a subtle chewiness that toasts beautifully. Using unsweetened flakes allows you to control the overall sweetness of your granola butter, ensuring it’s just right for your palate. When toasted, they release their natural oils and become wonderfully fragrant, contributing significantly to the butter’s rich profile.
Coconut Oil: The Golden Binder
**Melted coconut oil** serves a dual purpose in this recipe. Initially, it coats the oats and coconut flakes, helping them to toast to a beautiful golden brown and develop that desirable crunch. Later, it acts as a crucial binding agent during the blending process, aiding in the transformation of the toasted ingredients into a smooth, creamy spread. Its healthy fats also contribute to the richness and texture of the final product.
Maple Syrup: Natural Sweetness
Pure **maple syrup** provides a wonderful, natural sweetness that complements the warming spices. Its rich, earthy notes enhance the overall flavor profile without being overly saccharine. We suggest starting with 4 tablespoons, which typically offers a balanced sweetness, but you can easily adjust this amount to suit your personal taste preferences. Feel free to add more for a sweeter spread or reduce it if you prefer a less sweet option.
Cinnamon Powder: The Core Spice
Ground **cinnamon powder** is the star spice of this granola butter, lending its classic warm and inviting aroma. It provides that comforting, familiar flavor that makes the spread so appealing. Ensure your cinnamon is fresh for the best results, as older spices tend to lose their potency.
Sea Salt: Flavor Enhancer
Just a touch of **sea salt** is vital. It acts as a flavor enhancer, balancing the sweetness of the maple syrup and deepening the natural flavors of the oats and coconut. Don’t skip it, as it truly makes all the other flavors sing!
Vanilla Extract: Aromatic Depth
A teaspoon of **vanilla extract** adds a lovely aromatic depth to the granola butter, rounding out the flavors and contributing to its overall deliciousness. Use a good quality pure vanilla extract for the best results.
Customizing Your Granola Butter: Substitutions and Variations
One of the joys of homemade recipes is the ability to adapt them to your liking. Here are some ideas for customizing your granola butter:
Experiment with Spices: While cinnamon provides a classic warmth, don’t hesitate to explore other fragrant spices. Consider adding a pinch of ground **cloves**, **nutmeg**, **ginger**, or **allspice** for an even richer, more complex flavor profile. A combination of these autumnal spices can create a “pumpkin spice” granola butter, perfect for fall! Adjust quantities to your preference, starting with a quarter teaspoon and adding more as desired.
Sweetener Swaps: If maple syrup isn’t readily available or you prefer a different flavor, feel free to use **honey** or **agave syrup** as alternatives. Both will provide similar sweetness and a delightful texture. Remember that sweetness is highly personal; the suggested 4 tablespoons of maple syrup offer a balanced sweetness, but you might find you prefer more or less. Taste as you go and adjust accordingly.
Add a Nutty Flavor (If No Allergies): If you don’t have nut allergies, you could toast a small handful of cashews or almonds along with the oats for a nuttier undertone. Be mindful that this will change its status as a “nut-free” spread.
Seed Power: For extra nutrients and a different flavor, try adding a tablespoon of chia seeds, flax seeds, or hemp seeds to the mixture before blending. They will add thickness and an earthy note.
Chocolate Drizzle: For a decadent treat, once your granola butter is made, melt some dark chocolate and swirl it through, or drizzle it over the top before storing.
Step-by-Step Guide: How to Make Granola Butter
This detailed guide provides step-by-step instructions. For a concise, printable version with exact measurements, please scroll down to the full recipe card at the bottom of the page.
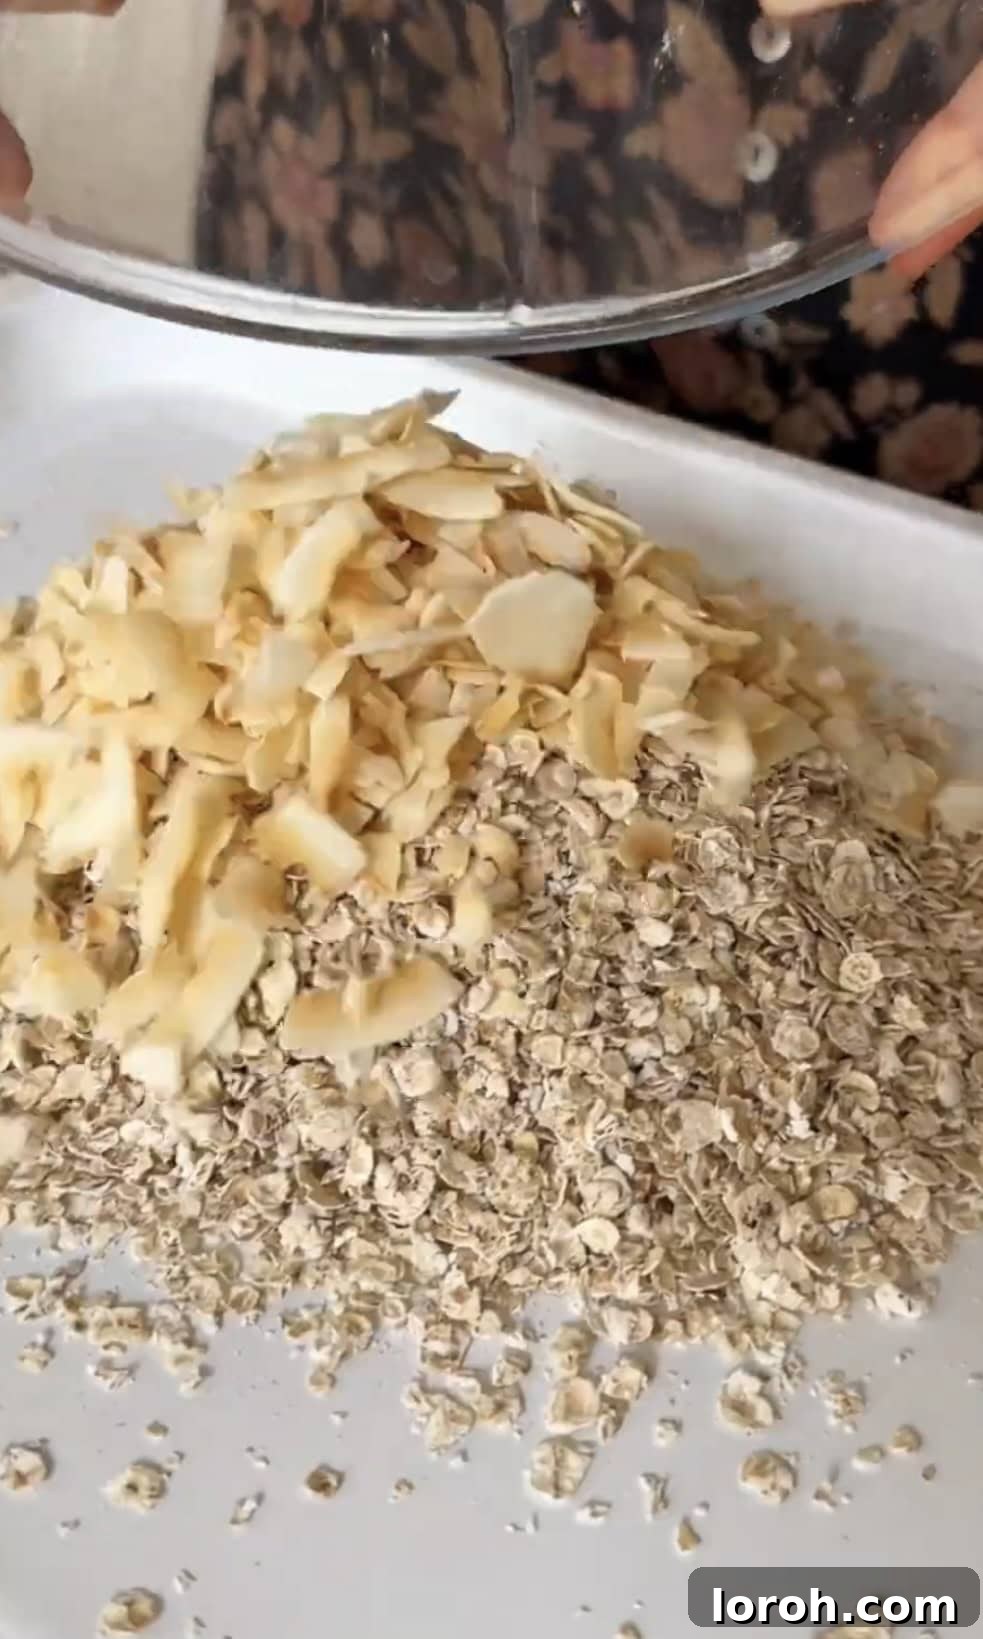
ONE: Prepare for Toasting. Begin by preheating your oven to a moderate 180°C (350°F). On a large baking tray, combine the rolled oats, unsweetened coconut flakes, cinnamon powder, and a pinch of sea salt. Ensure these dry ingredients are well mixed and spread evenly across the tray.
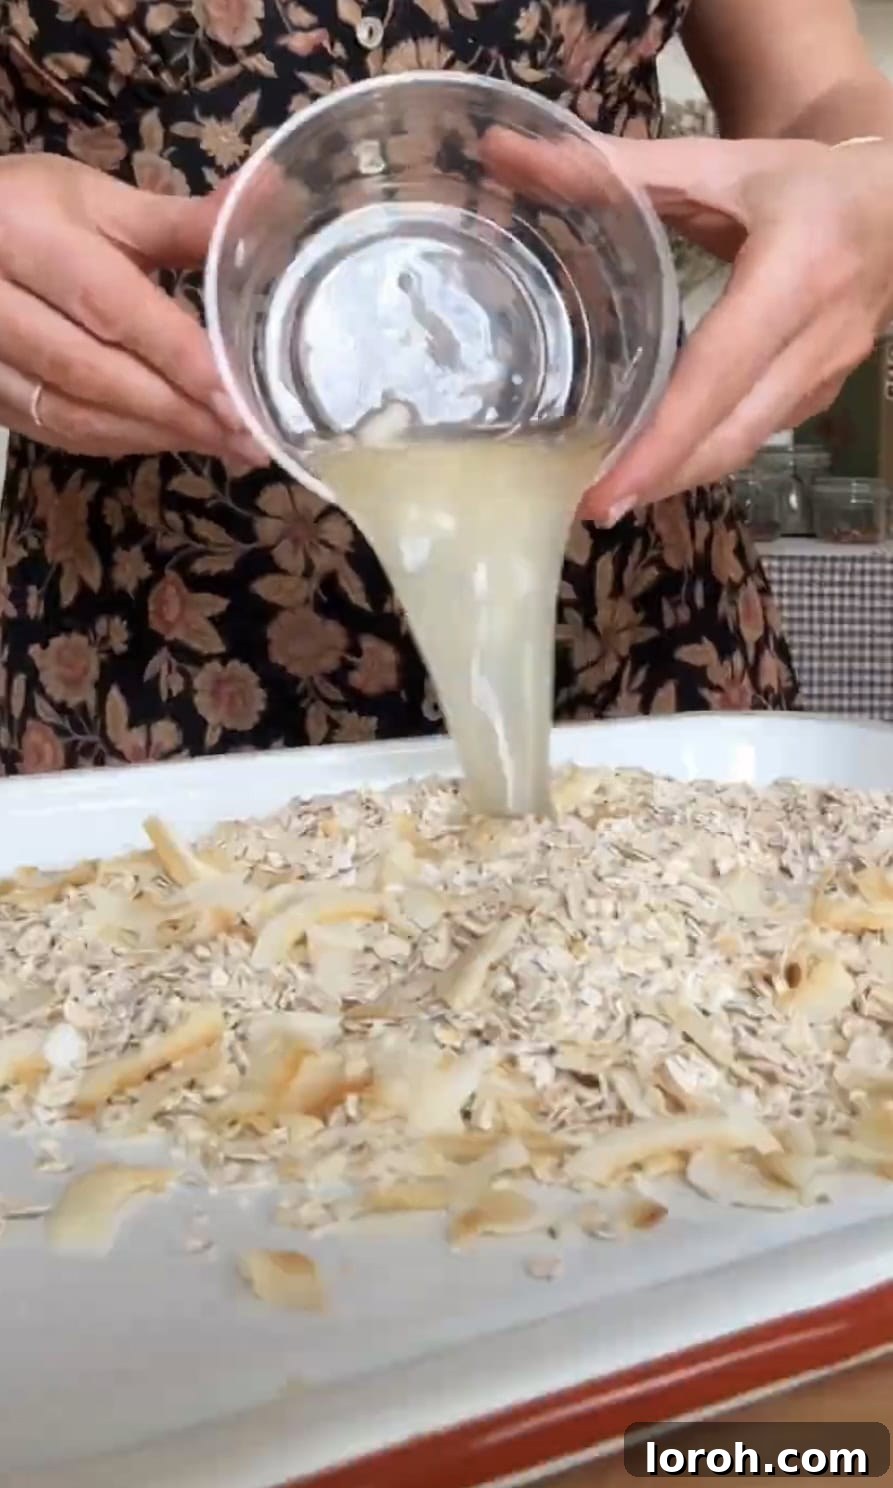
TWO: Coat and Spread. Take half of the melted coconut oil and drizzle it generously over the mixture on the baking sheet. Use a spatula or your hands (once the oil has cooled slightly) to thoroughly mix everything together, ensuring all the oats and coconut flakes are evenly coated. Spread the mixture back out into a single, uniform layer on the tray.
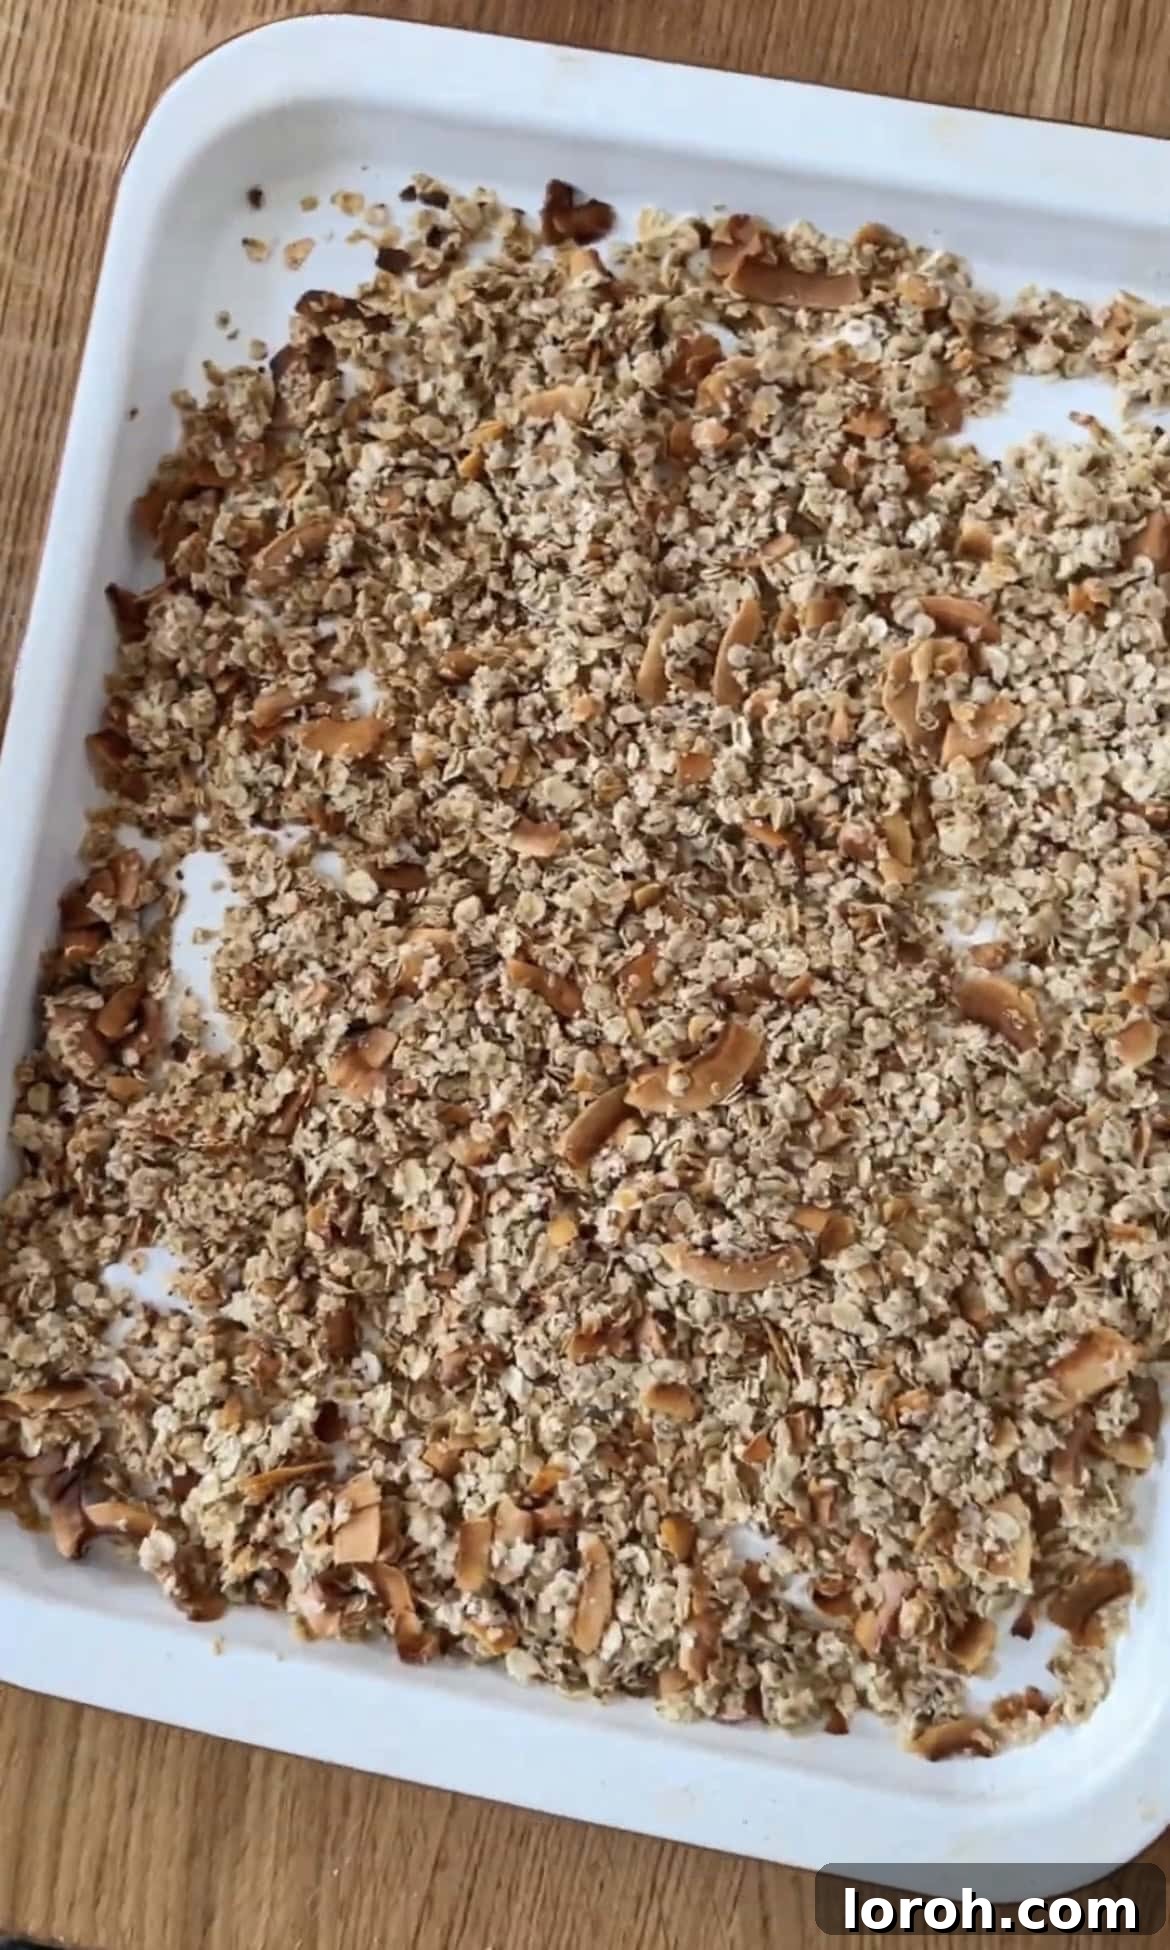
THREE: Bake to Golden Perfection. Place the baking tray in the preheated oven and bake for approximately 15 to 20 minutes. The goal is a crunchy, golden-brown granola. Be vigilant and check on it halfway through the baking time, giving it a good stir to ensure even toasting. Coconut flakes can burn quickly, so keep a close eye to prevent bitterness.
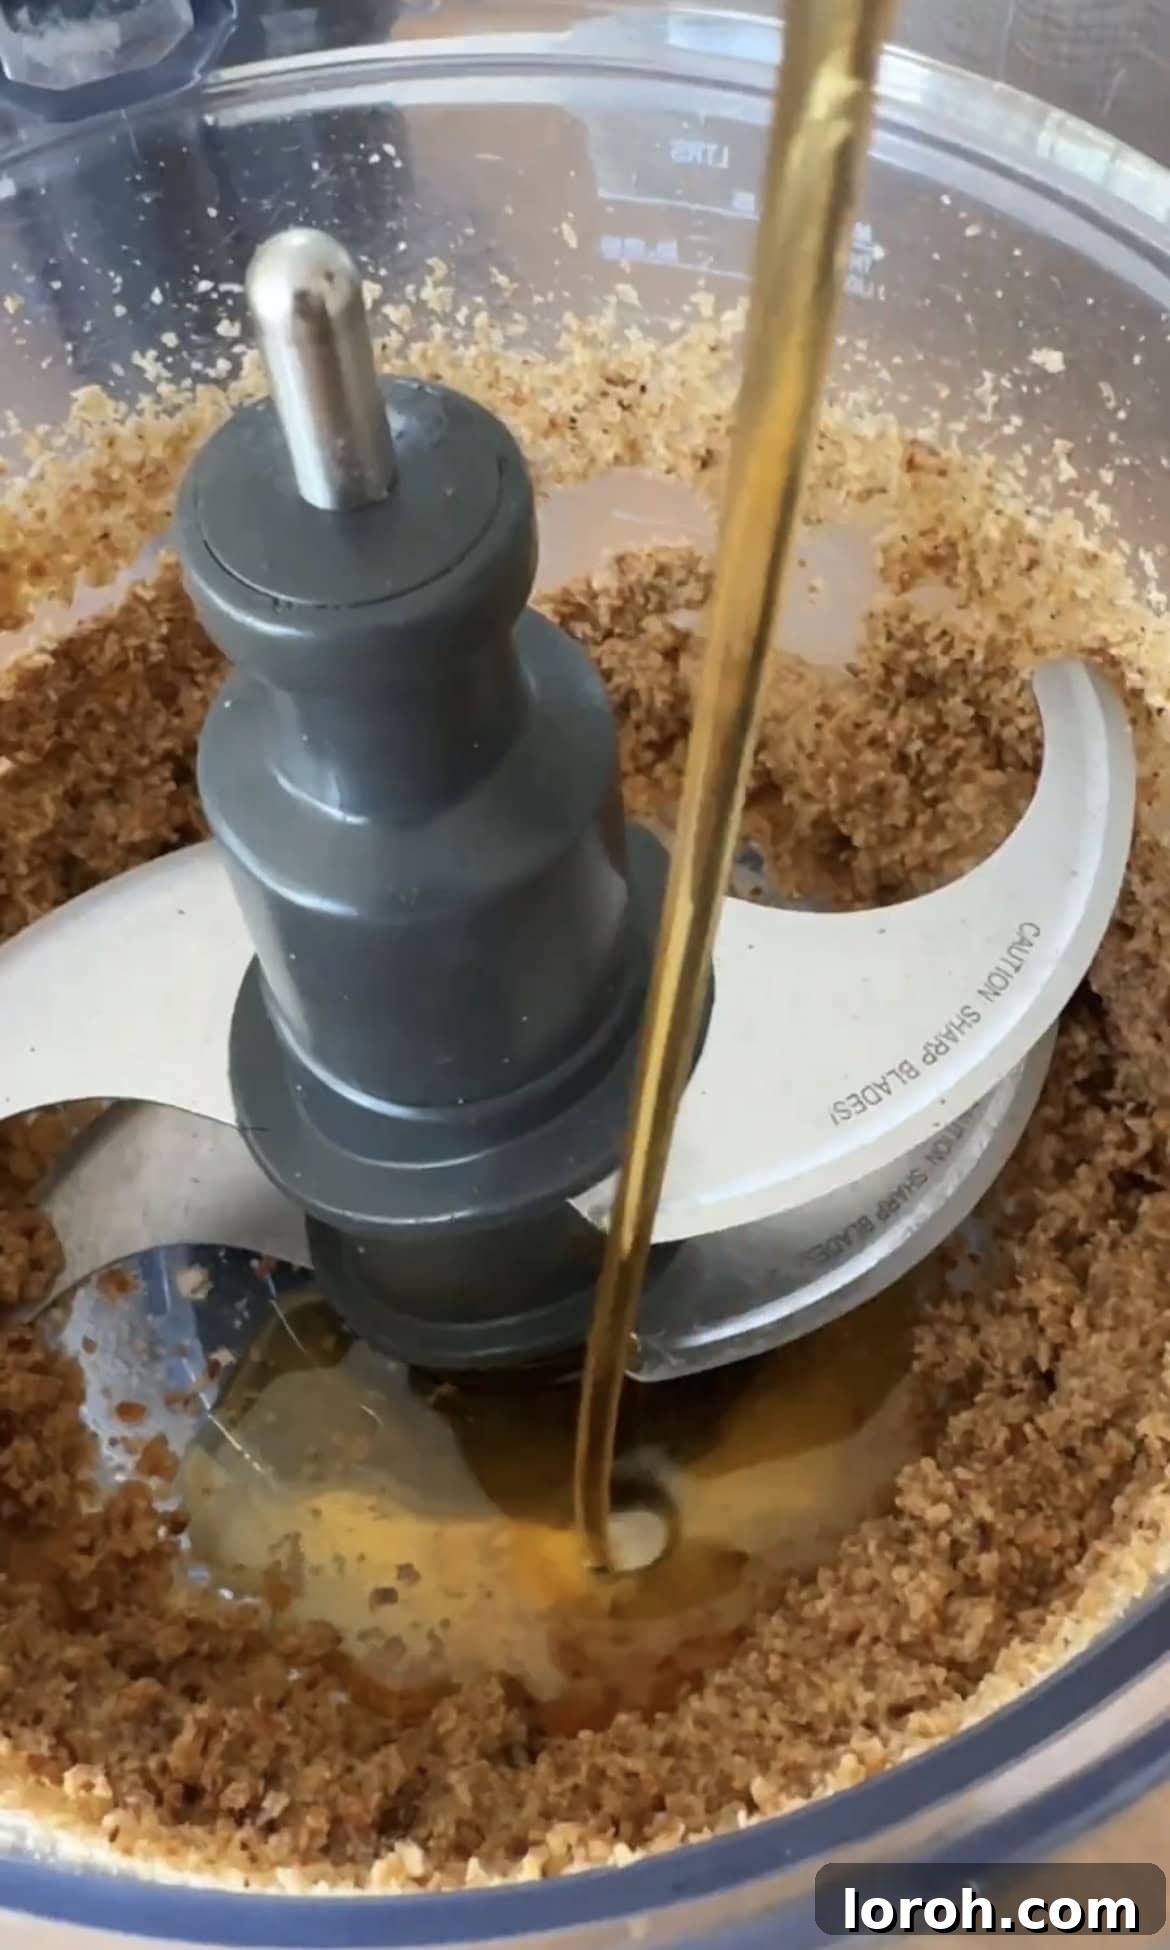
FOUR: Begin Blending. Once baked, remove the granola from the oven and allow it to cool completely on the baking tray. This step is crucial for achieving the right texture. Once cooled, transfer the toasted granola into a sturdy food processor. Pulse for about a minute until the mixture resembles coarse breadcrumbs. Now, add the maple syrup, vanilla extract, and the remaining half of the melted coconut oil. Continue to blend.
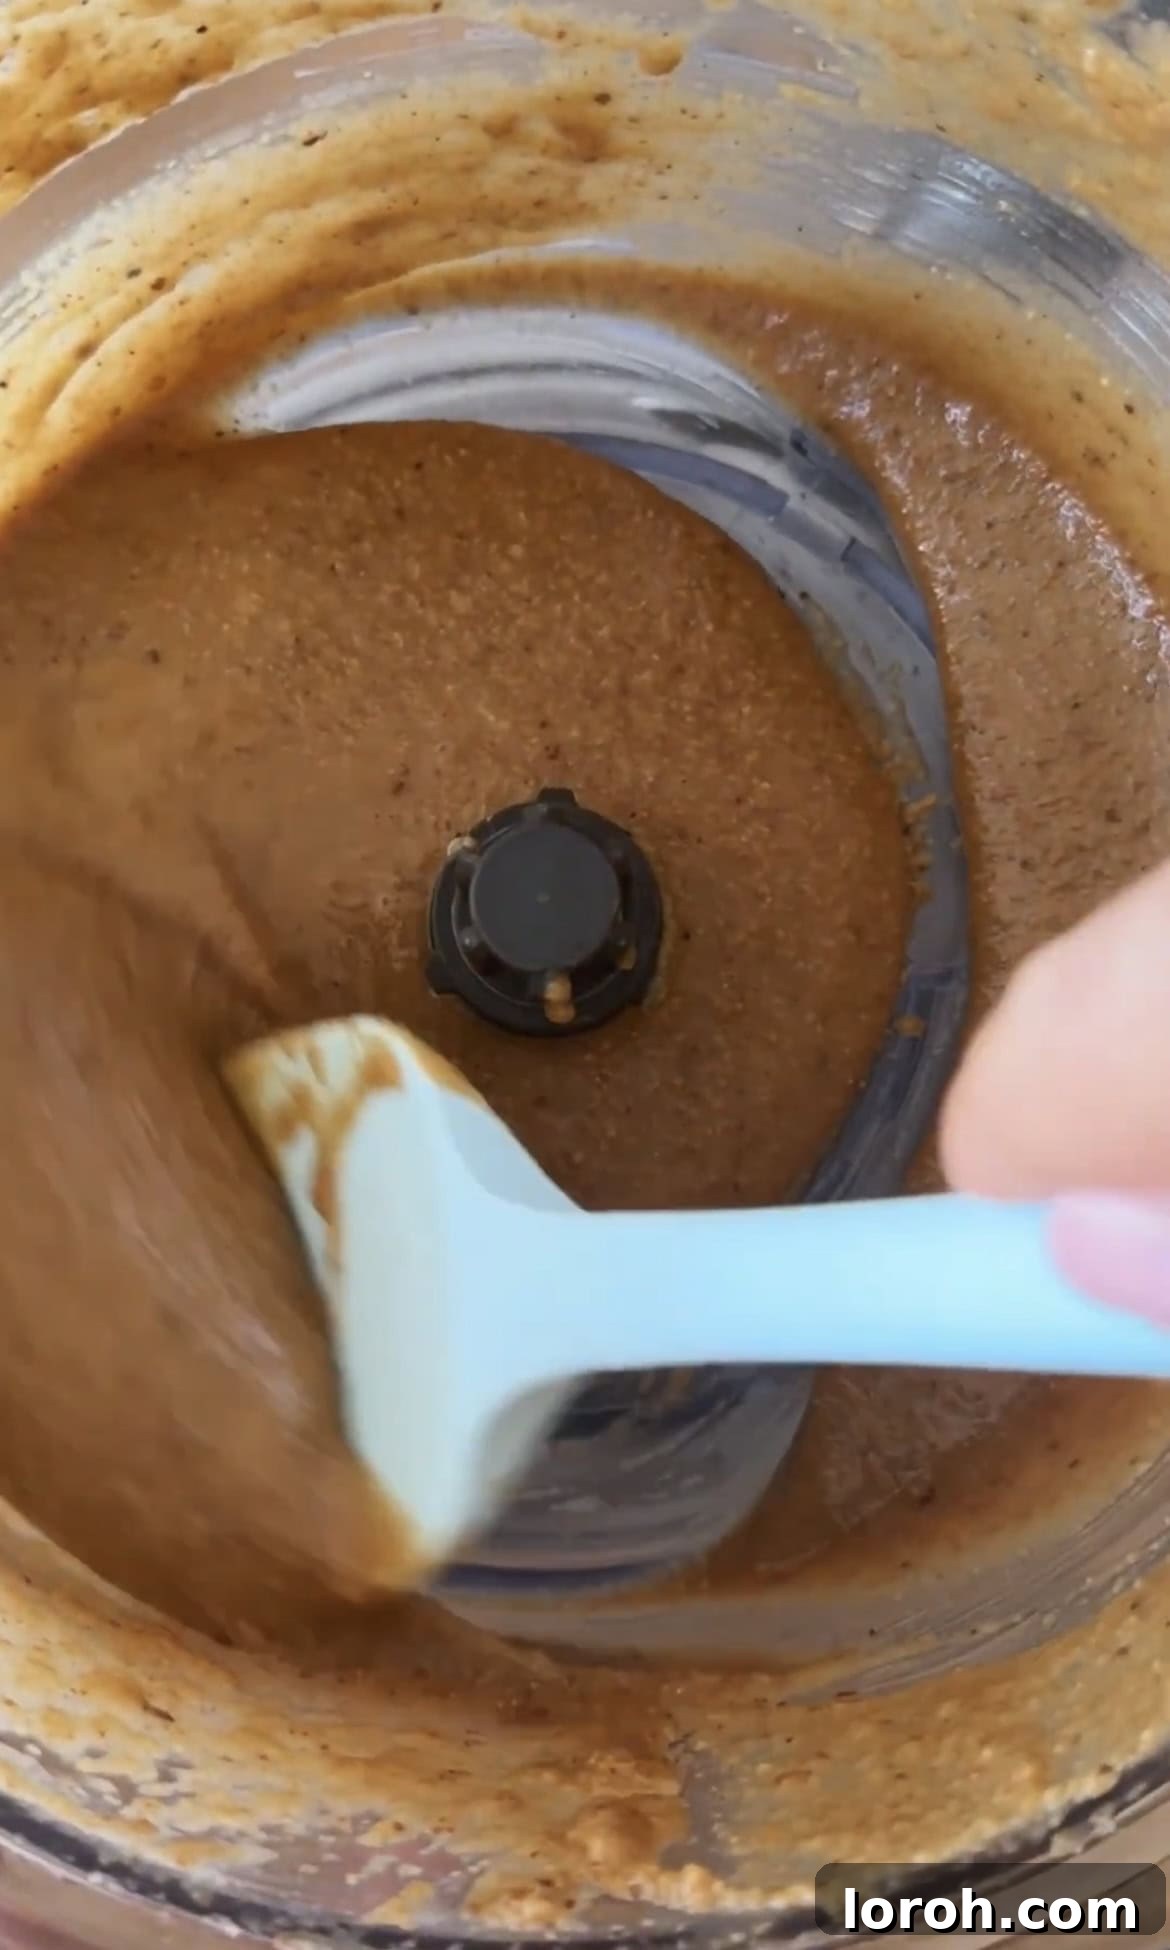
FIVE: Achieve Creamy Smoothness. Continue blending the mixture, stopping every few minutes to scrape down the sides of the food processor bowl. This ensures all ingredients are fully incorporated and helps the mixture emulsify. Keep blending and scraping until you achieve a beautifully smooth, creamy consistency similar to a thick nut butter. Patience is key here; it might take longer than you expect. If it’s still too thick, you can add a tiny bit more melted coconut oil, one teaspoon at a time, until the desired texture is reached.
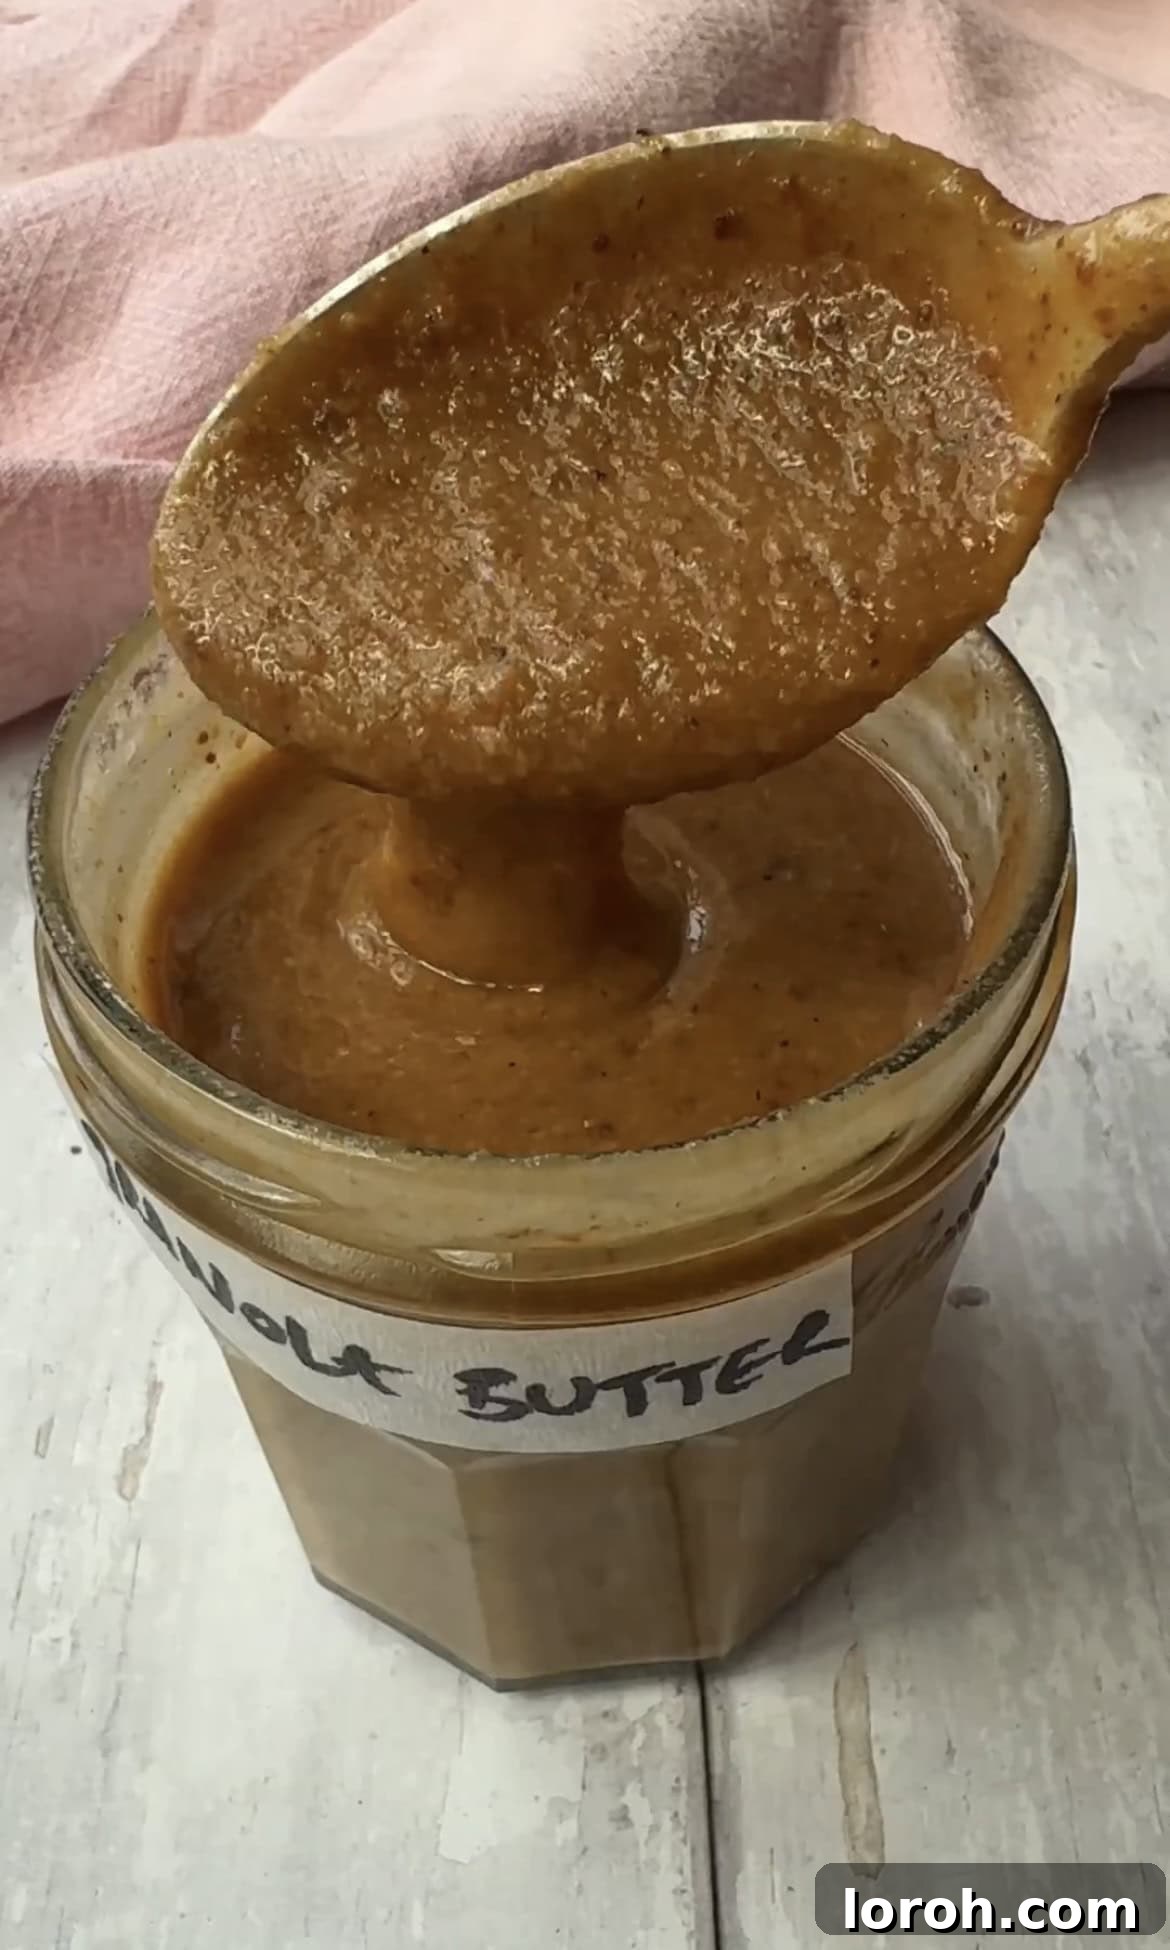
SIX: Store and Enjoy. Once your granola butter is perfectly smooth, transfer it into a clean, airtight jar or container. Label it for easy identification. Store this delicious homemade spread in the refrigerator for up to two weeks. Before serving, allow it to come to room temperature for the best spreadable consistency.
Expert Cooking Tips for Perfect Granola Butter
To ensure your homemade granola butter turns out perfectly every time, keep these valuable tips in mind:
Give Your Food Processor a Break: Blending granola into a smooth butter requires significant energy from your food processor. It’s common for the motor to heat up. To prevent overheating and potential damage, give your appliance periodic breaks. Let it cool down for a few minutes before continuing to blend. This patience will be rewarded with a super smooth and creamy result.
Don’t Burn the Granola: This is perhaps the most crucial tip! Keep a very close eye on the granola while it’s roasting in the oven. Coconut flakes, in particular, can go from perfectly golden to burnt in a matter of seconds. Burnt granola will impart a strong, bitter, and unpleasant taste to your entire batch of granola butter, which is impossible to fix. Set a timer, and even then, check frequently, especially during the last few minutes of baking. Stirring it halfway through helps ensure even toasting and reduces the risk of burning.
Cool Completely Before Blending: Resist the urge to blend the granola while it’s still warm. Allowing the toasted oats and coconut to cool completely helps them firm up and become perfectly crisp, which is essential for achieving that fine, powdery texture before the oils are released. Blending warm ingredients can sometimes lead to a less stable or grainy butter.
Achieving the Right Consistency: The blending process requires patience. Initially, the mixture will look like coarse crumbs, then wet sand, and eventually, the oils will begin to release, transforming it into a thick, paste-like consistency, and finally, a smooth butter. If after prolonged blending and scraping it’s still too thick or crumbly, add very small amounts (1 teaspoon at a time) of additional melted coconut oil. Continue blending until you reach your desired smoothness.
Scrape Down the Sides Regularly: As the granola blends, ingredients tend to stick to the sides of the food processor bowl. Stop frequently to scrape these down, pushing everything back towards the blades. This ensures even blending and helps achieve a uniform, creamy texture.
Frequently Asked Questions About Granola Butter
Granola butter is incredibly versatile and delicious on so many things! Its creamy texture and warm, spiced flavor make it a fantastic addition to both sweet and savory dishes. Here are some of my favorite ways to enjoy it:
– Drizzled generously over a yogurt bowl, layered with fruit and a sprinkle of nuts (if no allergies).
– A luxurious topping for fluffy pancakes, crisp waffles, or warm, crusty toast.
– Served with tender peaches and cream, perhaps with some toasted flaked almonds for added texture.
– As a wholesome and flavorful dip for fresh apple slices, banana coins, or pear wedges, just like you would with peanut butter.
– Swirled into hot oatmeal or overnight oats for an extra boost of flavor and richness.
– As a secret ingredient in your favorite energy balls or homemade granola bars.
– Spread onto rice cakes or crackers for a quick, satisfying snack.
Yes, you absolutely can use store-bought granola to make granola butter, though I personally prefer making it from scratch. Crafting it yourself allows for complete control over the flavors, spice levels, and crucially, the sugar content, as many commercial granolas tend to be quite high in added sugars. If you do opt for store-bought, choose a granola that is primarily oat-based and free from chunky additions like large dried fruits (e.g., raisins) or chocolate chips. These can result in a more chunky, less smooth texture for your butter. A simple, plain granola will work best.
To maintain its freshness and quality, store your homemade granola butter in an airtight container, such as a clean old jar, in the refrigerator for up to 2 weeks. It might even last longer than this – always use your common sense! If it looks okay, smells okay, and tastes okay, it’s generally good to use for up to a month. Be aware that the granola butter will solidify and become quite firm when chilled due to the coconut oil. For the best spreadable consistency, remove it from the fridge about 30 minutes to an hour before using, allowing it to come to room temperature and liquify again. You can also give it a quick stir to re-emulsify if any separation occurs.
Absolutely! Granola butter freezes beautifully. Transfer it into an airtight, freezer-safe container. It can be stored in the freezer for up to 3 months. When you’re ready to enjoy it again, simply thaw it overnight in the refrigerator or at room temperature until it softens back to its original consistency. Give it a good stir before serving.
Serving Suggestions: Beyond the Basics
While we’ve touched on a few ways to enjoy granola butter, its versatility truly shines when you get creative in the kitchen. Here are even more ideas to inspire you:
- Breakfast Power-Up: Swirl a generous spoonful into your morning smoothie for a creamy, spiced boost. It also makes an excellent topping for smoothie bowls, adding texture and flavor alongside fresh fruit, seeds, and extra granola.
- Baking Ingredient: Replace some of the fat in cookie or muffin recipes with granola butter for a unique flavor profile. You can also use it as a filling for tarts or crepes.
- Energy Bites: Combine granola butter with additional oats, chia seeds, a bit more maple syrup, and perhaps some dried fruit for no-bake energy bites perfect for on-the-go snacking.
- Dessert Enhancer: Beyond ice cream and roasted peaches, try drizzling it over baked apples, warm brownies, or even a simple rice pudding. It adds a gourmet touch to everyday desserts.
- Sweet & Savory Pairings: While primarily sweet, a thin layer on a cracker with a slice of cheese could be an adventurous treat!
Storage and Freezing Tips for Granola Butter
Ensuring your homemade granola butter stays fresh and delicious is key to enjoying it for as long as possible. Here’s a detailed guide to storing and freezing:
Refrigeration for Freshness: Due to the natural oils and lack of preservatives, homemade granola butter should always be stored in the refrigerator. An airtight jar or container works best to prevent it from absorbing odors or drying out. In the fridge, it will last comfortably for up to two weeks, and often even longer—up to a month—if stored properly and it passes the smell and visual test.
The Coconut Oil Factor: Be aware that granola butter will firm up significantly when cold, thanks to the coconut oil. This is completely normal! If you prefer a more pourable or easily spreadable consistency, simply remove it from the refrigerator about 30 minutes to an hour before you plan to use it. This allows it to soften naturally at room temperature. If you’re in a hurry, you can gently warm a small portion in the microwave for a few seconds until it reaches your desired texture, but be careful not to overheat it.
Stir Before Using: Over time, some slight oil separation might occur. This is natural with homemade spreads. A quick stir with a spoon will easily re-emulsify the granola butter, bringing it back to its smooth, uniform consistency.
Freezing for Long-Term Storage: Granola butter is an excellent candidate for freezing. If you’ve made a large batch or want to prepare it far in advance, freezing is a great option. Transfer the butter into an airtight, freezer-safe container. You can even freeze it in smaller portions using an ice cube tray, then transfer the frozen cubes to a freezer bag for easy access. It will keep well in the freezer for up to three months.
Thawing Process: To thaw, simply move the frozen granola butter from the freezer to the refrigerator overnight. Once thawed, let it sit at room temperature for a bit to soften, then give it a good stir before enjoying.
More Delicious Recipes You Might Enjoy
If you’ve fallen in love with this versatile granola butter recipe, you’ll surely appreciate these other delightful creations from my kitchen. They are perfect for drizzling, dipping, or simply enjoying as a sweet treat!
- For perfect vehicles for your new granola butter, try my fluffy British Pancakes or this Easy Pancake Recipe Without Baking Powder.
- If you enjoy dipping, these easy Sfingi Doughnuts or my sweet Apple Beignets are irresistible.
- Pair your granola butter with this rich Caramelised Date Sauce (Date Caramel) for an even more indulgent experience.
- Another great sweet and fruity option are these Easy Glazed Applesauce Fritters.
Breakfast & Brunch
Caramelised Date Sauce (Date Caramel)
Breakfast & Brunch
Easy Pancake Recipe Without Baking Powder
Less Than 20 Minutes
Peanut Butter and Yogurt Bowl with Date Caramel
Easy Dessert Recipes
Easy Glazed Applesauce Fritters
If you tried this delicious **Granola Butter** recipe or any other recipe on the site, please do leave a comment and let us know how it went! Your feedback is always appreciated.
★
★
★
★
Homemade Spiced Granola Butter
Margie
20
20
40
1 large jar
Rate Recipe
Print Recipe
Ingredients
- 120 g rolled oats, quick cooking will be easier to grind, but old fashioned will work too
- ½ teaspoon ground cinnamon
- ¼ tsp sea salt
- 50 g unsweetened coconut flakes
- 300 ml coconut oil, melted
- 1 tsp vanilla extract
- 4 tablespoons maple syrup
Instructions
-
Preheat your oven to 180°C (350°F). Line a large baking sheet with parchment paper for easy cleanup.
-
On the baking sheet, combine the oats, coconut flakes, cinnamon powder, and sea salt. Pour half of the melted coconut oil over the mixture. Mix thoroughly until all the dry ingredients are well coated in the oil. Spread the mixture out into an even, thin layer on the baking sheet.
-
Bake for 15-20 minutes, or until the granola is crunchy and golden brown. It’s essential to check on it halfway through baking and give it a good stir to ensure even toasting. Keep a watchful eye, as coconut flakes can burn quickly, which will impart a bitter flavor to your granola butter.
-
Once baked to a perfect golden color, remove the granola from the oven and allow it to cool completely on the baking sheet. This cooling step helps the granola achieve maximum crispness before blending.
-
Transfer the cooled granola into a sturdy food processor. Pulse the mixture for about a minute until it begins to resemble coarse breadcrumbs. Now, add the maple syrup, vanilla extract, and the remaining half of the melted coconut oil. Continue to blend, scraping the mixture from the sides of the food processor bowl several times. Blend until you achieve a smooth, creamy consistency, similar to a traditional nut butter. If it appears too solid or isn’t blending smoothly, you can add a tiny bit more melted coconut oil (1 teaspoon at a time) until it reaches the perfect consistency.
-
Your food processor will be working hard to achieve this creamy texture, so it’s a good idea to stop it occasionally and let the motor cool down. This prevents overheating and ensures a consistently smooth result. Continue blending and scraping until the granola butter is wonderfully smooth and free of large chunks.
-
Once smooth, transfer your homemade granola butter into a clean, airtight jar or container. Store it in the refrigerator for up to two weeks. Remember to allow it to come to room temperature before serving for the best spreadable consistency.
Video Guide
A video guide demonstrating the steps for making this delicious granola butter is available to assist you with this recipe.
Recipe Notes
**Storage:** Store in an airtight container (a clean jar works perfectly) in the fridge for up to 2 weeks. It might last longer, even up to a month, if it still looks, smells, and tastes good – always use your discretion. For easier spreading, remove it from the fridge to allow it to reach room temperature, which will soften it.
**Freezing:** Granola butter can be frozen in an airtight container for up to 3 months. Thaw it overnight at room temperature until soft again.
**Using Store-Bought Granola:** If you opt for pre-made granola, choose one that is predominantly oats and does not contain large additions like raisins or chocolate, as these can make the texture chunky and less smooth.
**Food Processor Care:** Blending can generate a lot of heat. Allow your food processor to rest and cool down periodically during the blending process to prevent overheating and achieve the smoothest consistency.
**Prevent Burning:** Coconut flakes are prone to burning quickly. Monitor your granola closely during the roasting stage; burnt granola will impart an undesirable bitter taste to your butter.
Nutrition Information
Calories: 3317kcal
,
Carbohydrates: 151g
,
Protein: 19g
,
Fat: 314g
,
Saturated Fat: 258g
,
Polyunsaturated Fat: 8g
,
Monounsaturated Fat: 21g
,
Sodium: 615mg
,
Potassium: 896mg
,
Fiber: 21g
,
Sugar: 53g
,
Vitamin A: 3IU
,
Vitamin C: 1mg
,
Calcium: 176mg
,
Iron: 7mg
Nutrition information is automatically calculated, so should only be used as an approximation. The calories listed here are for the entire jar, not a single serving.
Like this? Leave a comment below!