
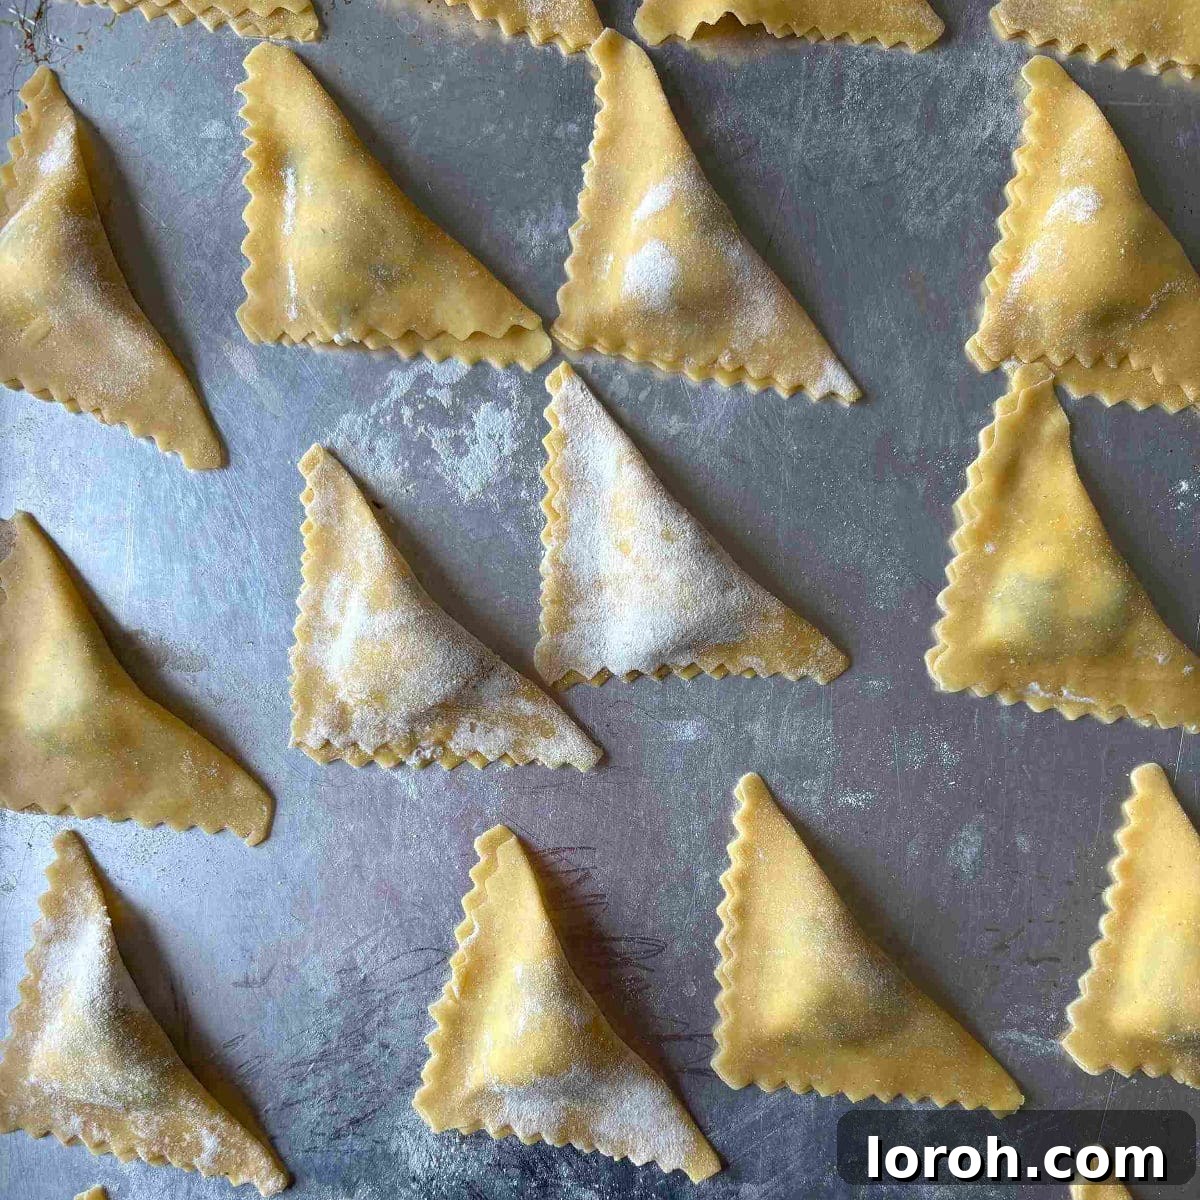
Mastering Homemade Spinach and Ricotta Triangoli with Zesty Lemon Butter & Sage
Embark on a culinary journey to Italy right from your kitchen! Learning how to make homemade pasta is a rewarding experience, and this recipe for spinach and ricotta triangoli with lemon butter and sage is the perfect starting point. Imagine delicate, triangular pockets of fresh pasta, generously filled with a creamy, vibrant blend of spinach, aromatic basil, and rich ricotta. Each bite is then perfectly complemented by a bright, zesty lemon butter sauce, all crowned with fragrant, crispy sage leaves. This dish isn’t just a meal; it’s an artful expression of Italian culinary tradition.
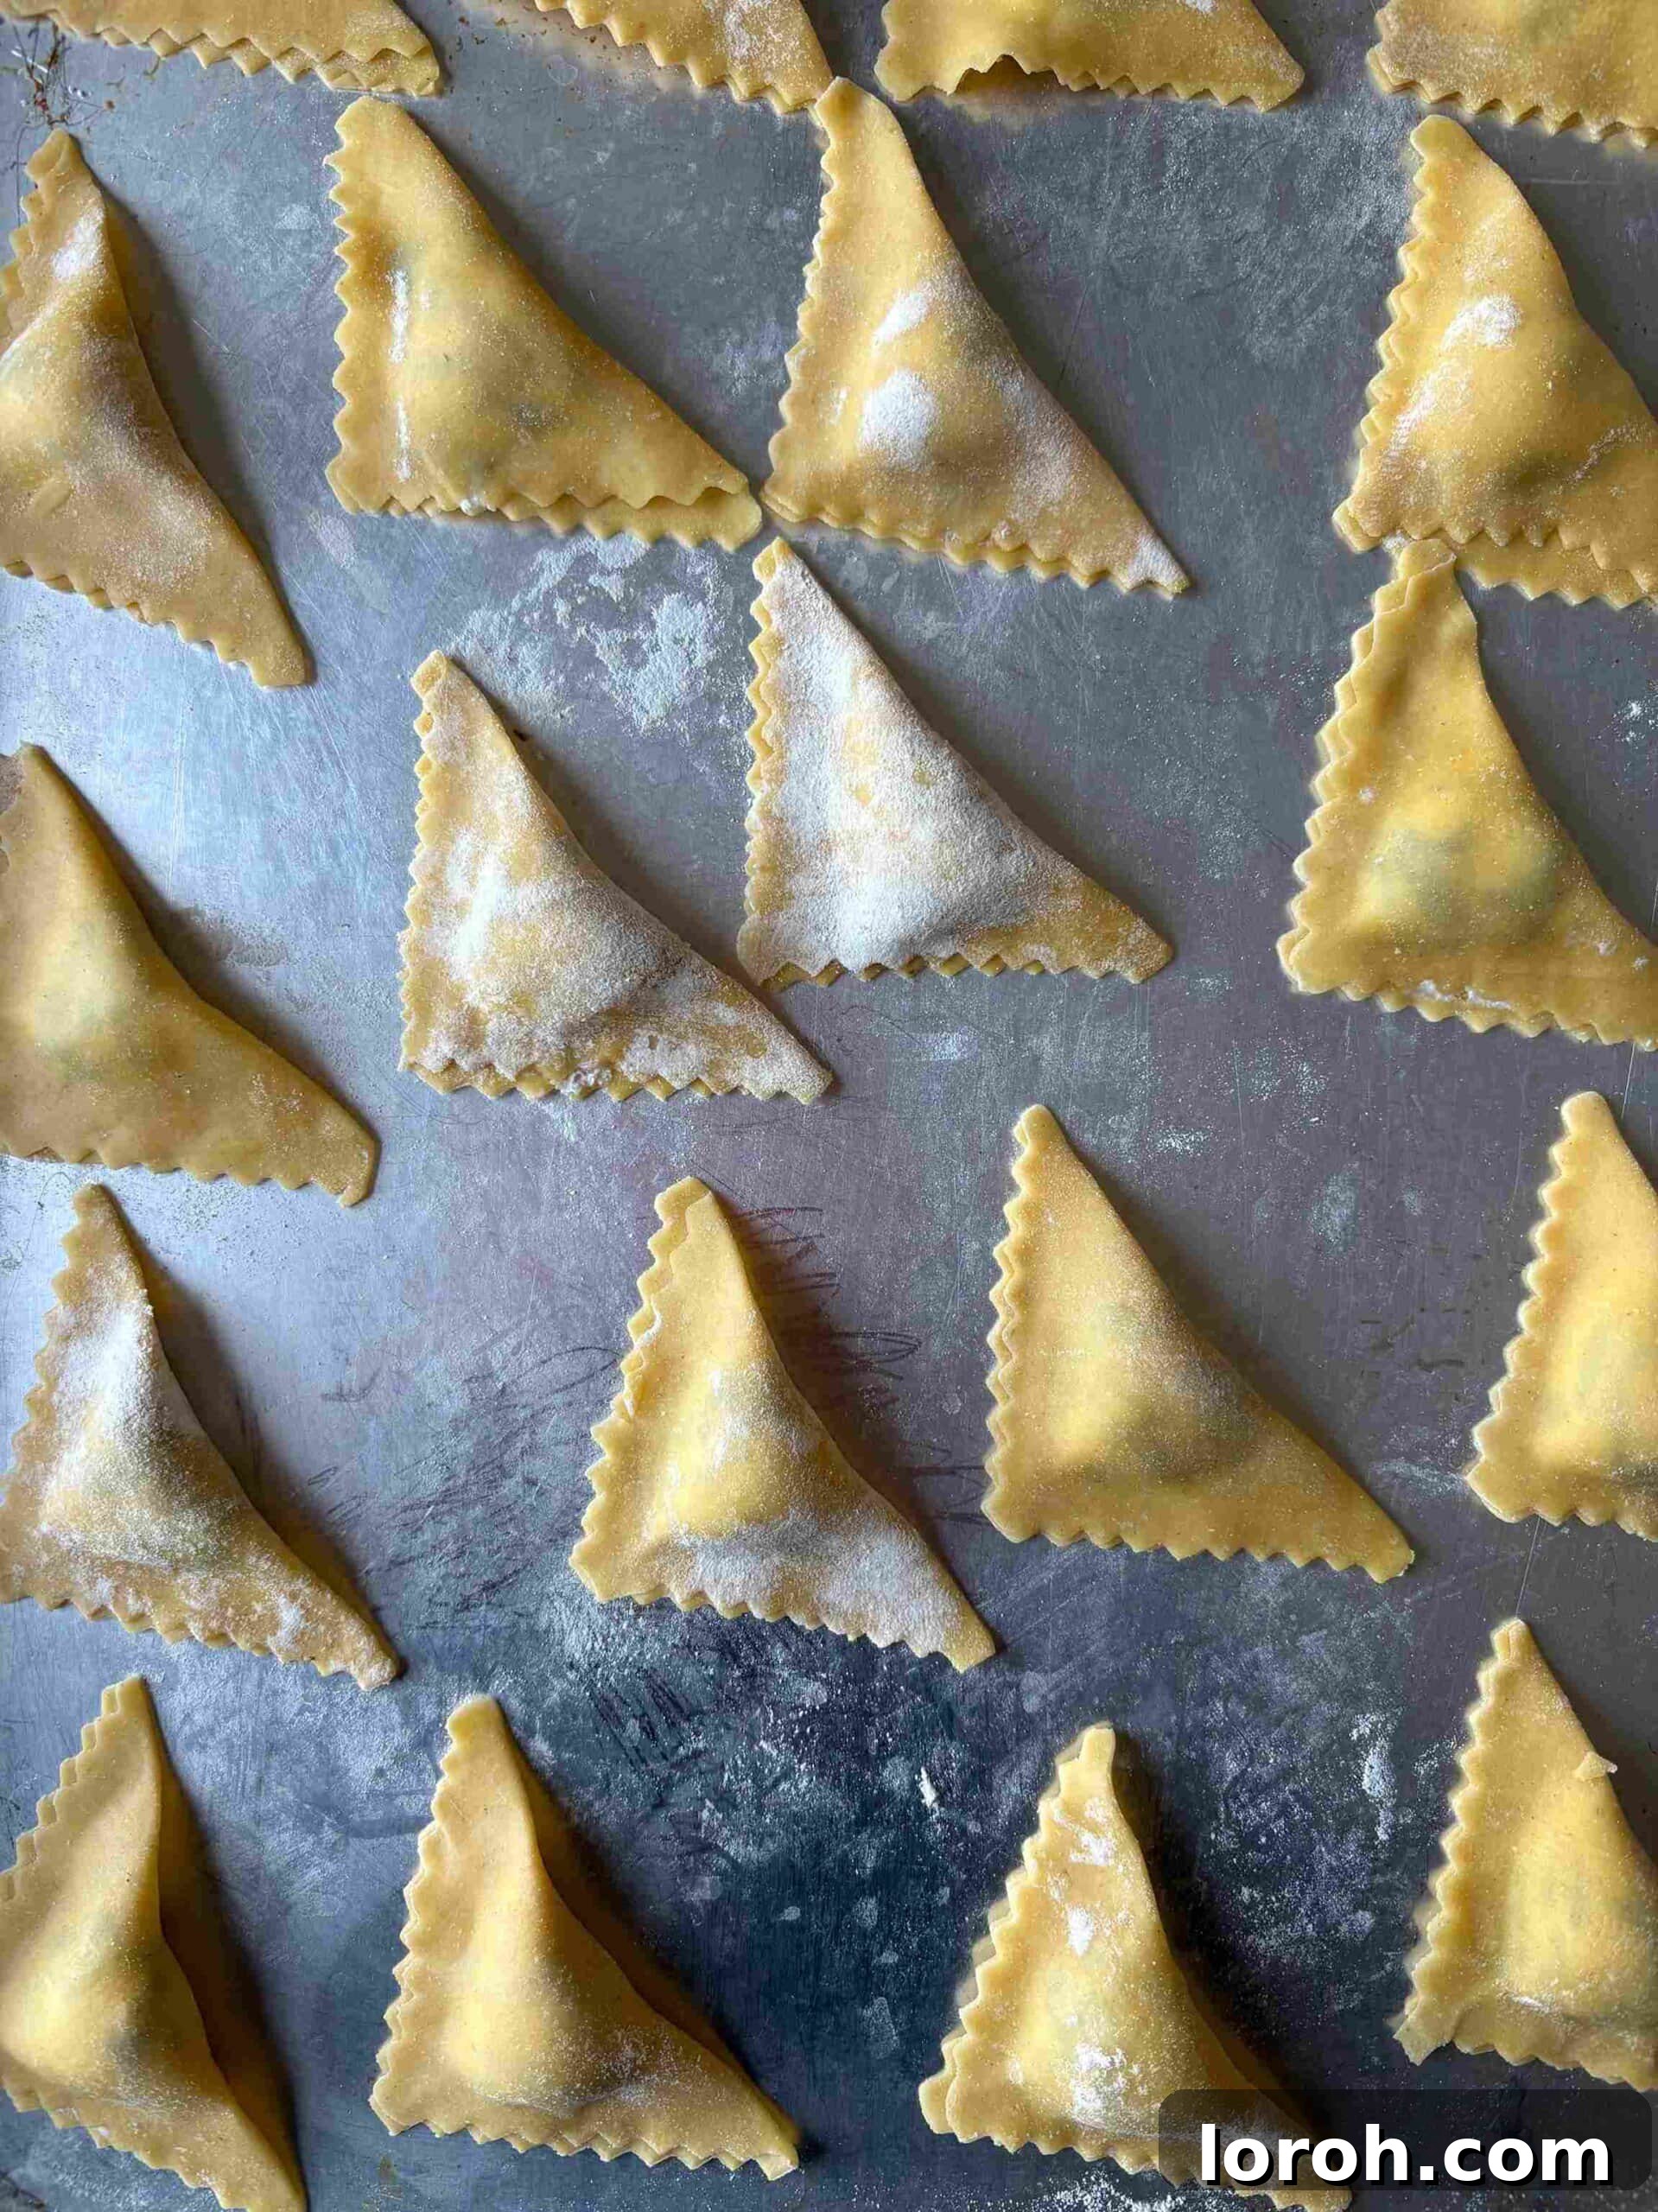
While many are familiar with ravioli, a popular square-shaped filled pasta widely available, triangoli offers a delightful twist. As its name suggests, triangoli are similar in concept but crafted into beautiful triangles. This unique shape, though beloved in Italy, remains a hidden gem in many parts of the world, including the UK and US. This recipe not only guides you through making these elegant pasta shapes but also includes instructions for a vibrant lemon butter sauce and crispy sage garnish that perfectly enhance the fresh flavors of the filling. While this pairing is exquisite, feel free to experiment! Sometimes, a simple toss with melted butter and a sprinkle of freshly grated Parmesan right after boiling is all you need to savor their authentic taste.
Table of Contents
- Why You Will Love This Triangoli Recipe
- Key Ingredients for Triangoli
- Essential Equipment for Pasta Making
- What Exactly is Triangoli Pasta?
- Step-by-Step Guide: Homemade Triangoli with Spinach & Ricotta Filling
- Expert Cooking Tips for Perfect Pasta
- Lemon Butter & Sage: The Perfect Serving Suggestion
- Frequently Asked Questions About Triangoli
- Other Homemade Pasta & Italian Recipes You Might Enjoy
- Full Recipe Card: Homemade Triangoli Pasta
Why You Will Love This Homemade Triangoli Recipe
Making fresh pasta at home can seem daunting, but this spinach and ricotta triangoli recipe proves it’s not only achievable but also incredibly enjoyable. Here’s why this dish will become a treasured addition to your culinary repertoire:
- Remarkably Simple and Confidence-Building: Despite its gourmet appearance, triangoli is one of the easiest filled pasta shapes to master. Its triangular form requires sealing only three edges, simplifying the process compared to its square cousin, ravioli. This makes it an ideal recipe for those looking to build their confidence in creating homemade pasta from scratch. You’ll be amazed at the professional-looking results you can achieve with minimal fuss.
- Incredibly Versatile for Endless Creations: The beauty of homemade spinach and ricotta triangoli lies in its versatility. While our suggested lemon butter and sage sauce is a match made in heaven, these delightful pasta pockets pair beautifully with a myriad of other sauces. Imagine them tossed in a rich, slow-simmered tomato sauce, a vibrant basil pesto, or even a simple brown butter with a hint of chili. Beyond sauces, you can also experiment with the filling itself—try roasted pumpkin, wild mushrooms, or a delicate blend of herbs and cheeses to continuously reinvent this classic.
- Convenient for Meal Prep and Batch Cooking: Life can get busy, but that shouldn’t stop you from enjoying authentic Italian cuisine. This triangoli recipe is perfect for prepping ahead. You can make the spinach and ricotta filling in advance, refrigerating it overnight. Once shaped and filled, the triangoli can be cooked within 24 hours or, even better, frozen for up to three months. This means you can batch make a large quantity, store it, and have a delicious, homemade gourmet meal ready in minutes on any weeknight. Simply drop the frozen pasta straight into boiling water – no defrosting required!
Key Ingredients for Homemade Spinach and Ricotta Triangoli
Find the comprehensive list of ingredients and precise measurements in the printable recipe card located at the very end of this article.
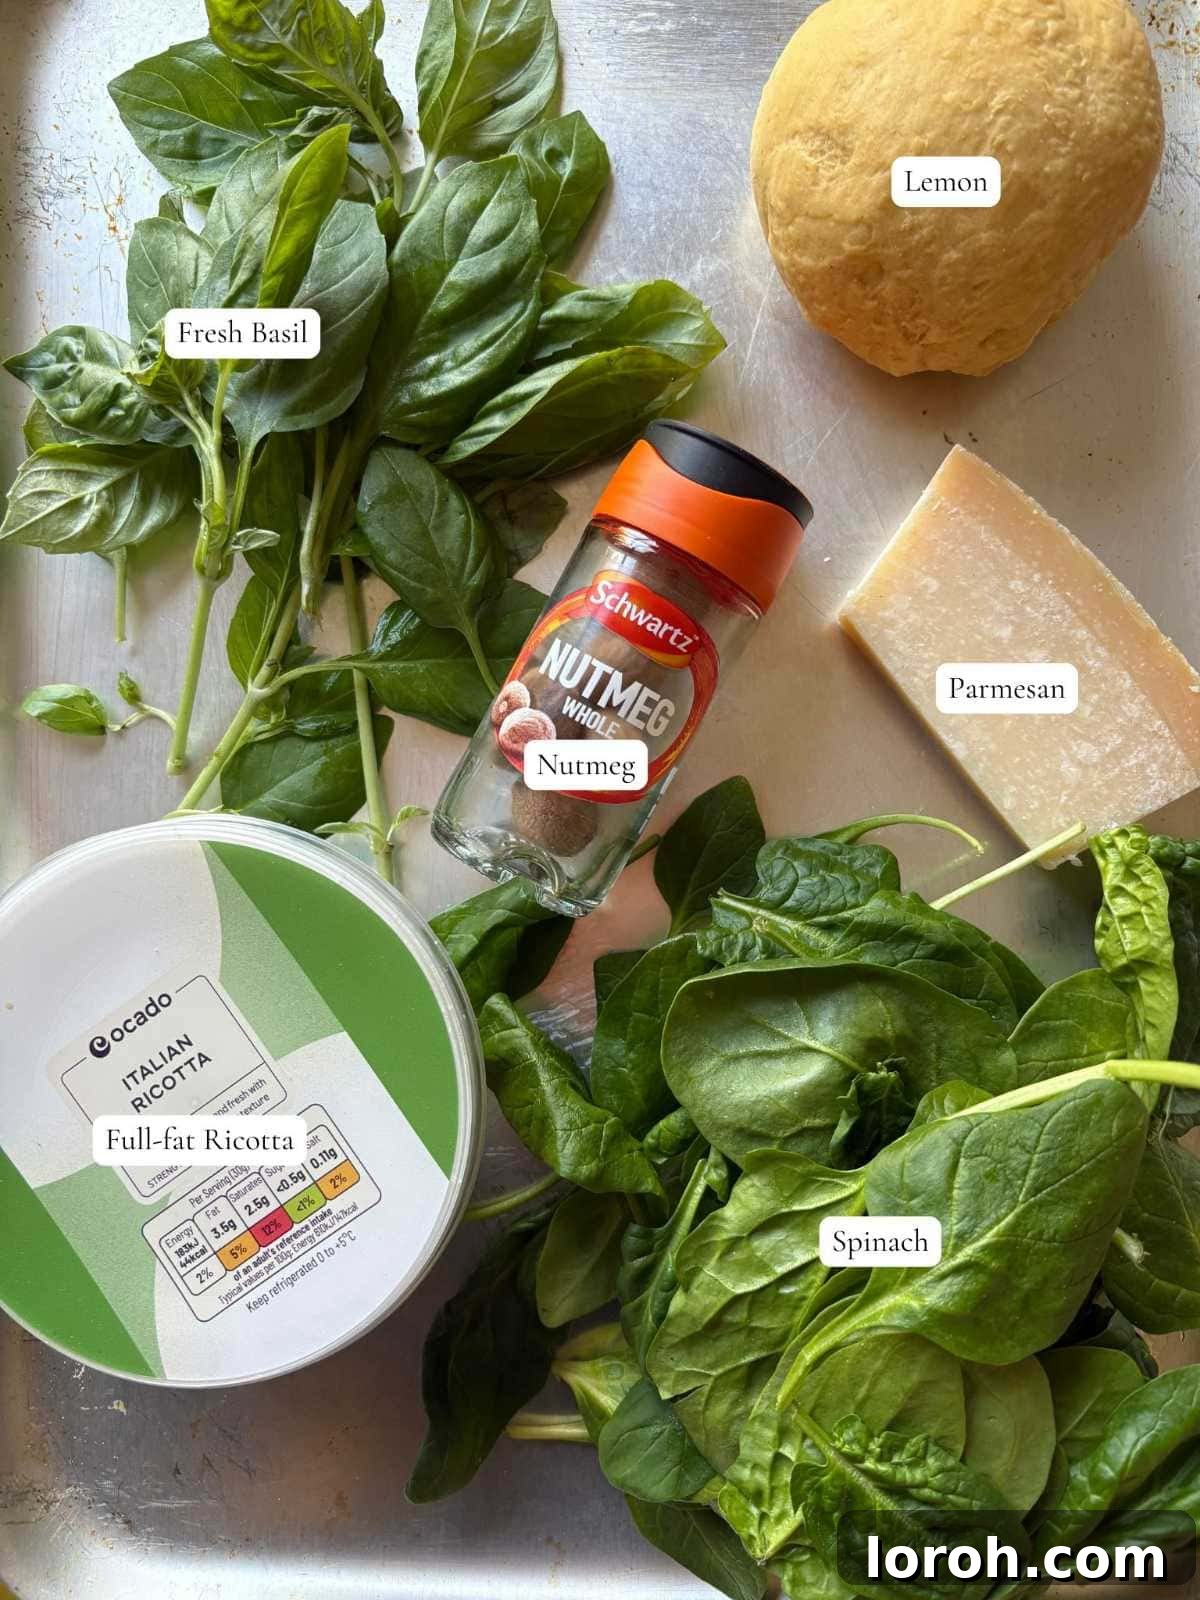
- Fresh Pasta Dough: The foundation of any great filled pasta. While store-bought fresh pasta sheets can be a shortcut, making your own pasta dough is genuinely simpler than you might imagine and yields unparalleled taste and texture. All you need are a few basic ingredients like ’00’ flour, eggs, and a little water, transforming into a silky, pliable dough that’s a joy to work with.
- Fresh Baby Spinach: The star of our filling. Using fresh baby spinach ensures a delicate flavor and vibrant green color. Blanching it quickly and then shocking it in ice water is key to preserving its vivid hue and preventing it from making the filling watery.
- Fresh Basil: Adds a fragrant, slightly sweet, and peppery note that beautifully complements the spinach and ricotta. Always opt for fresh basil over dried for the best results in this recipe.
- Ricotta: Choose a high-quality, full-fat ricotta cheese for the creamiest, most luxurious filling. The higher fat content contributes to a smoother texture and richer flavor, preventing the filling from becoming dry or crumbly inside the pasta.
- Parmesan Cheese: Freshly grated Parmesan adds a salty, umami depth to the filling, balancing the mildness of the ricotta and spinach. A good quality Parmesan makes all the difference.
- Freshly Grated Nutmeg: A small but mighty ingredient that magically enhances the flavor of spinach and ricotta fillings. Just a hint elevates the entire dish, providing a subtle warmth and complexity.
- Unsalted Butter & Olive Oil: These form the base of our exquisite lemon butter and sage sauce. Unsalted butter allows you to control the seasoning, while a touch of good quality olive oil helps prevent the butter from burning and adds a silky finish.
- Fresh Sage Leaves: When fried until crispy, sage leaves transform into a fragrant, earthy, and delightfully crunchy garnish. The frying process mellows their intensity, allowing them to perfectly harmonize with the delicate pasta and zesty butter.
- Lemon Juice: Freshly squeezed lemon juice is crucial for the zesty butter sauce. It cuts through the richness of the butter and cheese, adding a bright, refreshing finish that truly lifts the entire dish.
Essential Equipment for Homemade Pasta Making
While the idea of making pasta at home might conjure images of complex machinery, you might already own most of what you need. Besides basic kitchen essentials like a sharp knife, a sturdy chopping board, and a baking tray, here are some specialized tools that will make your triangoli-making experience seamless and enjoyable:
- Pasta Machine: This is arguably the most valuable tool for homemade pasta. While a rolling pin can be used, it requires significant effort and time to achieve the consistently thin sheets required for delicate filled pasta like triangoli. A manual pasta machine, with its metal crank and adjustable settings, allows you to effortlessly roll out dough to your desired thickness, ensuring even cooking and a tender bite. Consult my pasta dough recipe for detailed tips on using one effectively.
- Ravioli Stamp or Dough Cutter: This tool helps create perfectly shaped pasta pockets. While optional—as a sharp knife or even a fluted pastry wheel can certainly do the job—a ravioli stamp (or simply a knife to cut squares that you then fold) is fantastic. Stamps often have fluted edges, which not only look beautiful but also help seal the pasta more effectively, preventing the filling from escaping during cooking. For triangoli, you’ll initially cut squares before folding.
- Large Mixing Bowl: Essential for combining your ricotta and spinach filling ingredients.
- Piping Bag (or Ziploc Bag): While you can spoon the filling onto your pasta squares, a piping bag (or a simple Ziploc bag with a corner snipped off) makes the process much neater, quicker, and ensures an even distribution of filling, which is key for consistent triangoli shapes.
- Slotted Spoon or Spider Skimmer: Perfect for gently lifting the cooked triangoli from the boiling water to transfer them directly into your waiting sauce, minimizing breakage.
- Large Pot for Boiling: You’ll need a spacious pot to cook the pasta. Generous amounts of well-salted water are crucial for evenly cooked, flavorful pasta.
- Wide-Bottomed Pan: Ideal for making your lemon butter and sage sauce, allowing the sauce to coat the pasta evenly once added.
What Exactly is Triangoli Pasta?
Triangoli, meaning “triangles” in Italian, is a charming and often overlooked form of filled pasta that shares many similarities with the more famous ravioli. Both are types of pasta that encase a delicious filling, but their shapes are what set them apart. While ravioli are traditionally square, triangoli takes on an elegant, three-sided form.
This distinct shape isn’t just for aesthetics; it offers several practical advantages, especially for home cooks new to pasta making. Triangoli is one of the easiest filled pasta shapes to construct, making it perfect for beginners. Because it’s a triangle, you only have to worry about sealing three edges, compared to the four edges of a square ravioli. This reduces the chances of the filling escaping during cooking and generally makes the shaping process quicker and more forgiving. The resulting delicate pockets are not only beautiful on the plate but also perfectly proportioned to hold their luscious spinach and ricotta filling, providing an exquisite burst of flavor with every bite. Embracing triangoli is a fantastic way to expand your pasta-making skills and impress your guests with a truly authentic and visually appealing Italian dish.
Step-by-Step Guide: Homemade Triangoli with Spinach & Ricotta Filling
This detailed guide provides a visual step-by-step process. For the full, precise recipe with measurements, please refer to the recipe card at the bottom of this page.
Expert Cooking Tips for Perfect Homemade Pasta
Creating homemade pasta, especially filled varieties like triangoli, is a true labor of love. These tips will help you achieve perfect results every time, ensuring tender pasta and flavorful filling:
- The Importance of Ice Water for Greens: When blanching spinach and basil for the filling, immediately transferring them to a bowl of ice water is a critical step. This process, known as shocking, instantly halts the cooking, preserving the spinach’s vibrant green color and fresh flavor. More importantly, it ensures the greens cool rapidly, preventing them from melting the ricotta when mixed into the filling, which could lead to a watery and unappealing texture.
- Mastering the Seal: Sealing the triangoli correctly is paramount to prevent the delicious filling from escaping into the boiling water. Handle the thin pasta dough with care, as it’s prone to tearing. When pressing the edges, aim to squeeze out as much air as possible around the filling. Air pockets can cause the pasta to burst during cooking. If your dough feels a bit dry and isn’t sealing easily, a very light brush of water along the edges can act as a natural glue. Ensure a firm, complete seal all around the triangle.
- Achieving “Al Dente” Perfection: Homemade pasta cooks significantly faster than dried, store-bought varieties. Triangoli will typically cook in just 2-3 minutes. The goal is “al dente,” meaning “to the tooth.” This indicates pasta that is firm but still tender when bitten, with a slight resistance. Overcooked fresh pasta becomes gummy and loses its delightful texture. Remember, your triangoli will also have a final minute or so of cooking time as it’s gently tossed in the warm lemon butter sauce, so aim for slightly underdone when removing from the boiling water.
- Don’t Forget the Pasta Water: This is a chef’s secret weapon for emulsifying sauces. The starchy water leftover from boiling your pasta is liquid gold. A few splashes added to your butter sauce will help it thicken, bind beautifully to the pasta, and create a wonderfully glossy, luxurious consistency. Always reserve at least half a cup before draining your pasta.
- Keep Pasta Covered: As you work on shaping your triangoli, keep any unused pasta sheets or already-cut squares lightly covered with a clean kitchen towel or plastic wrap. This prevents the dough from drying out, which can make it difficult to seal and prone to cracking.
Lemon Butter & Sage: The Perfect Serving Suggestion
The full, detailed instructions for preparing this incredible sauce are included in the printable recipe card at the end of this article.
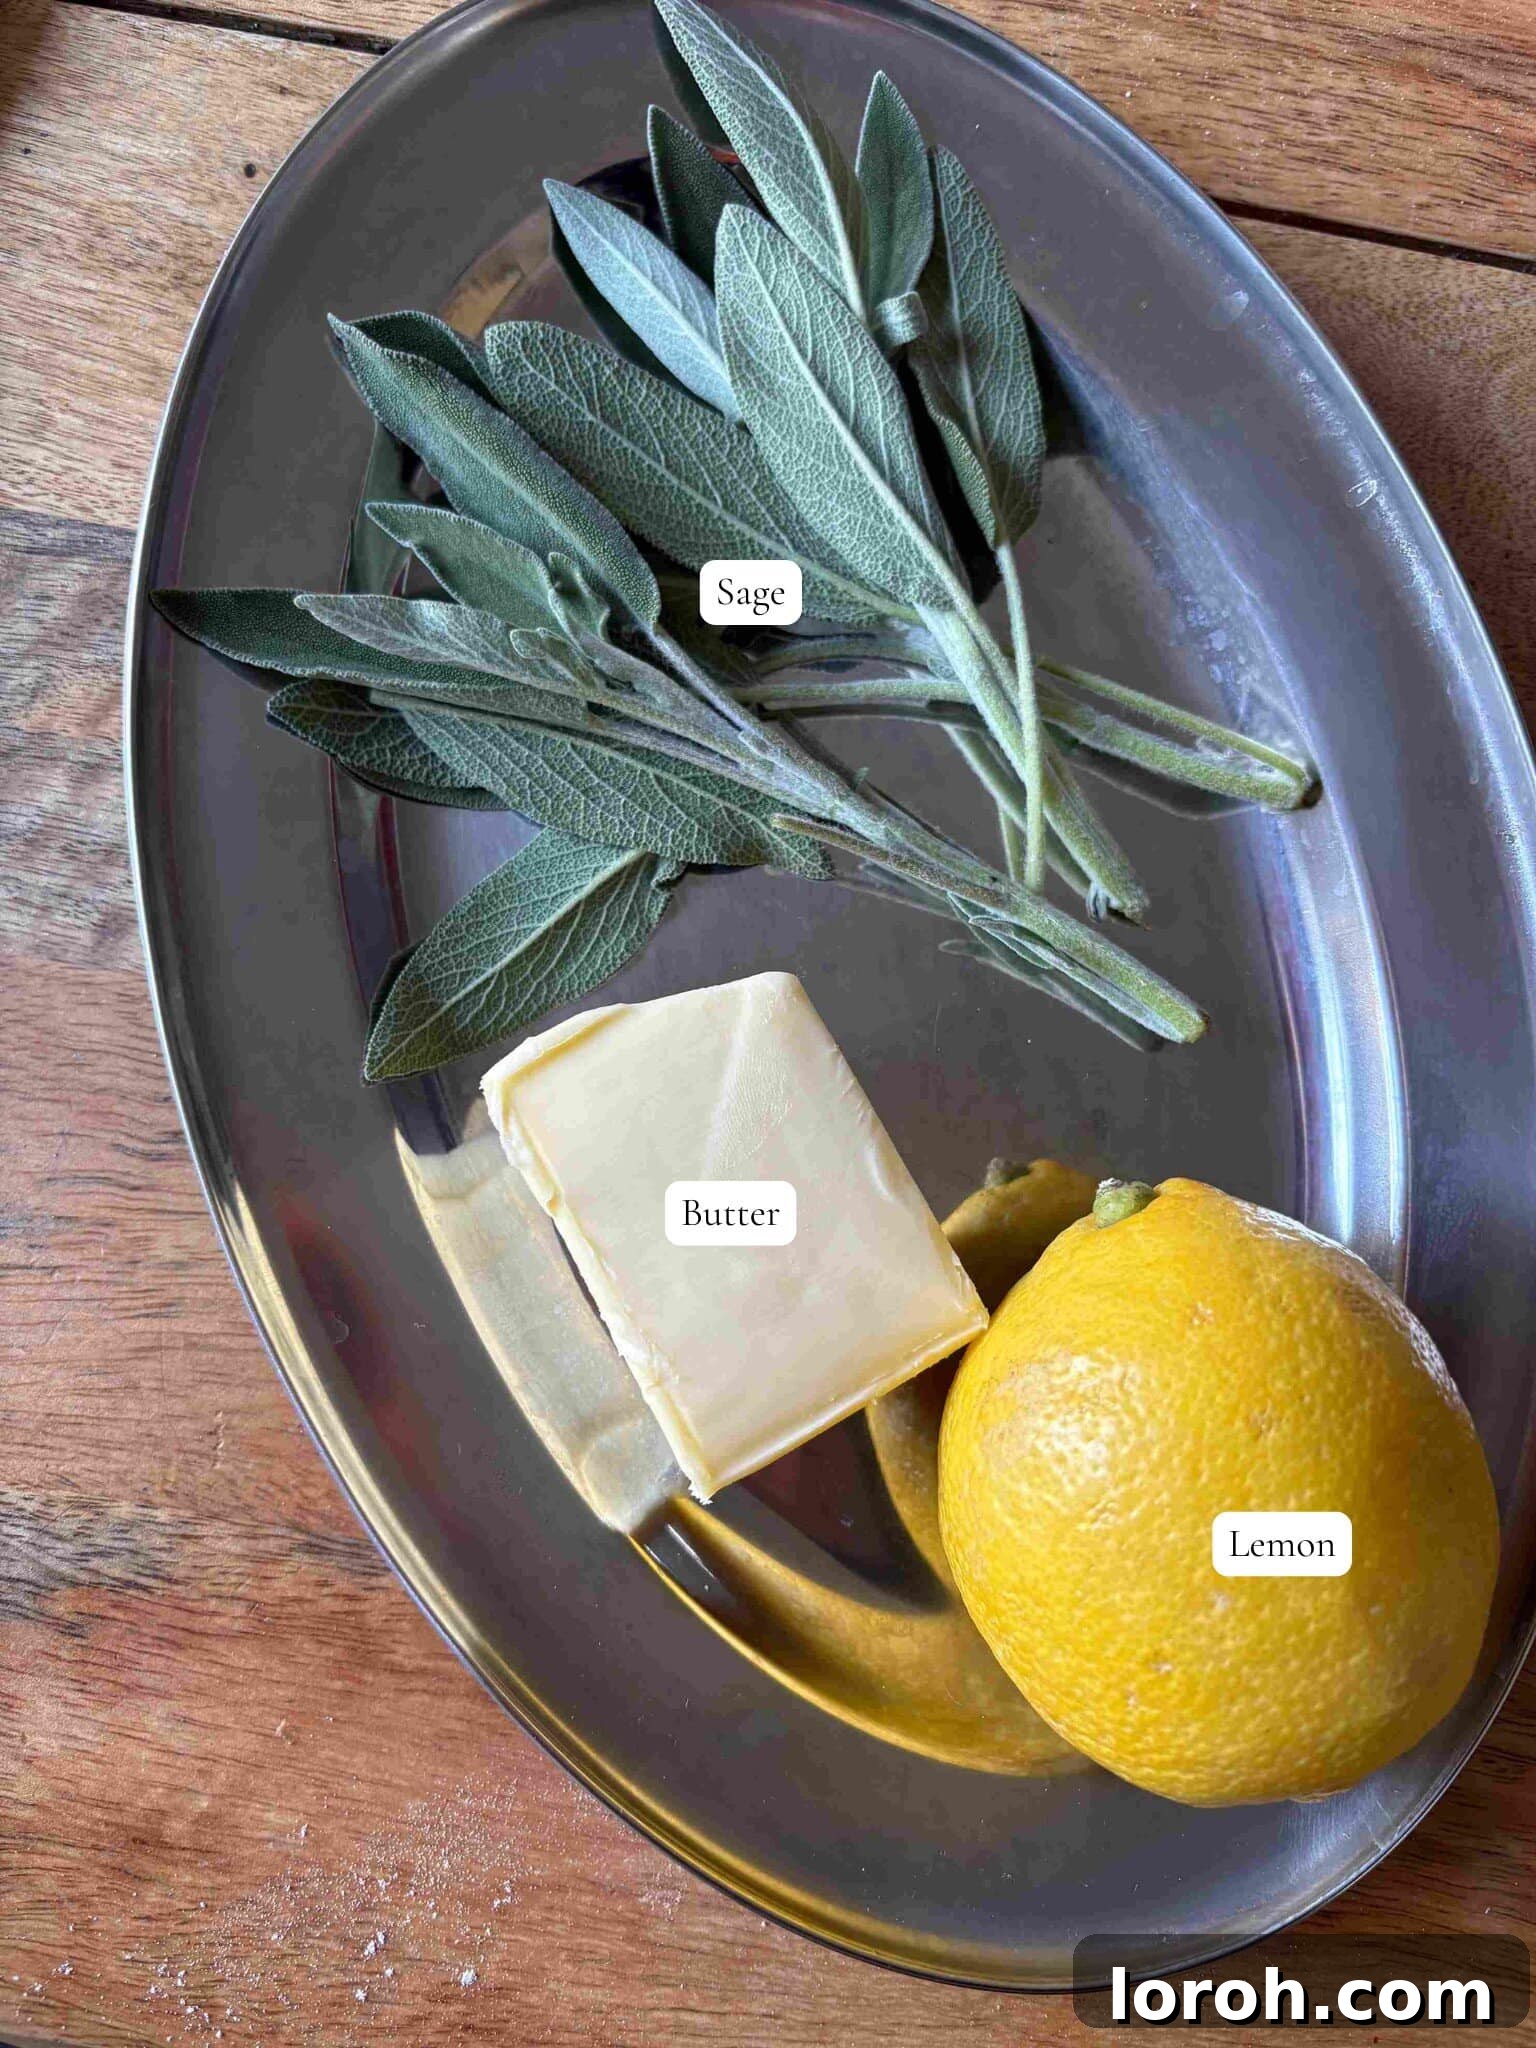
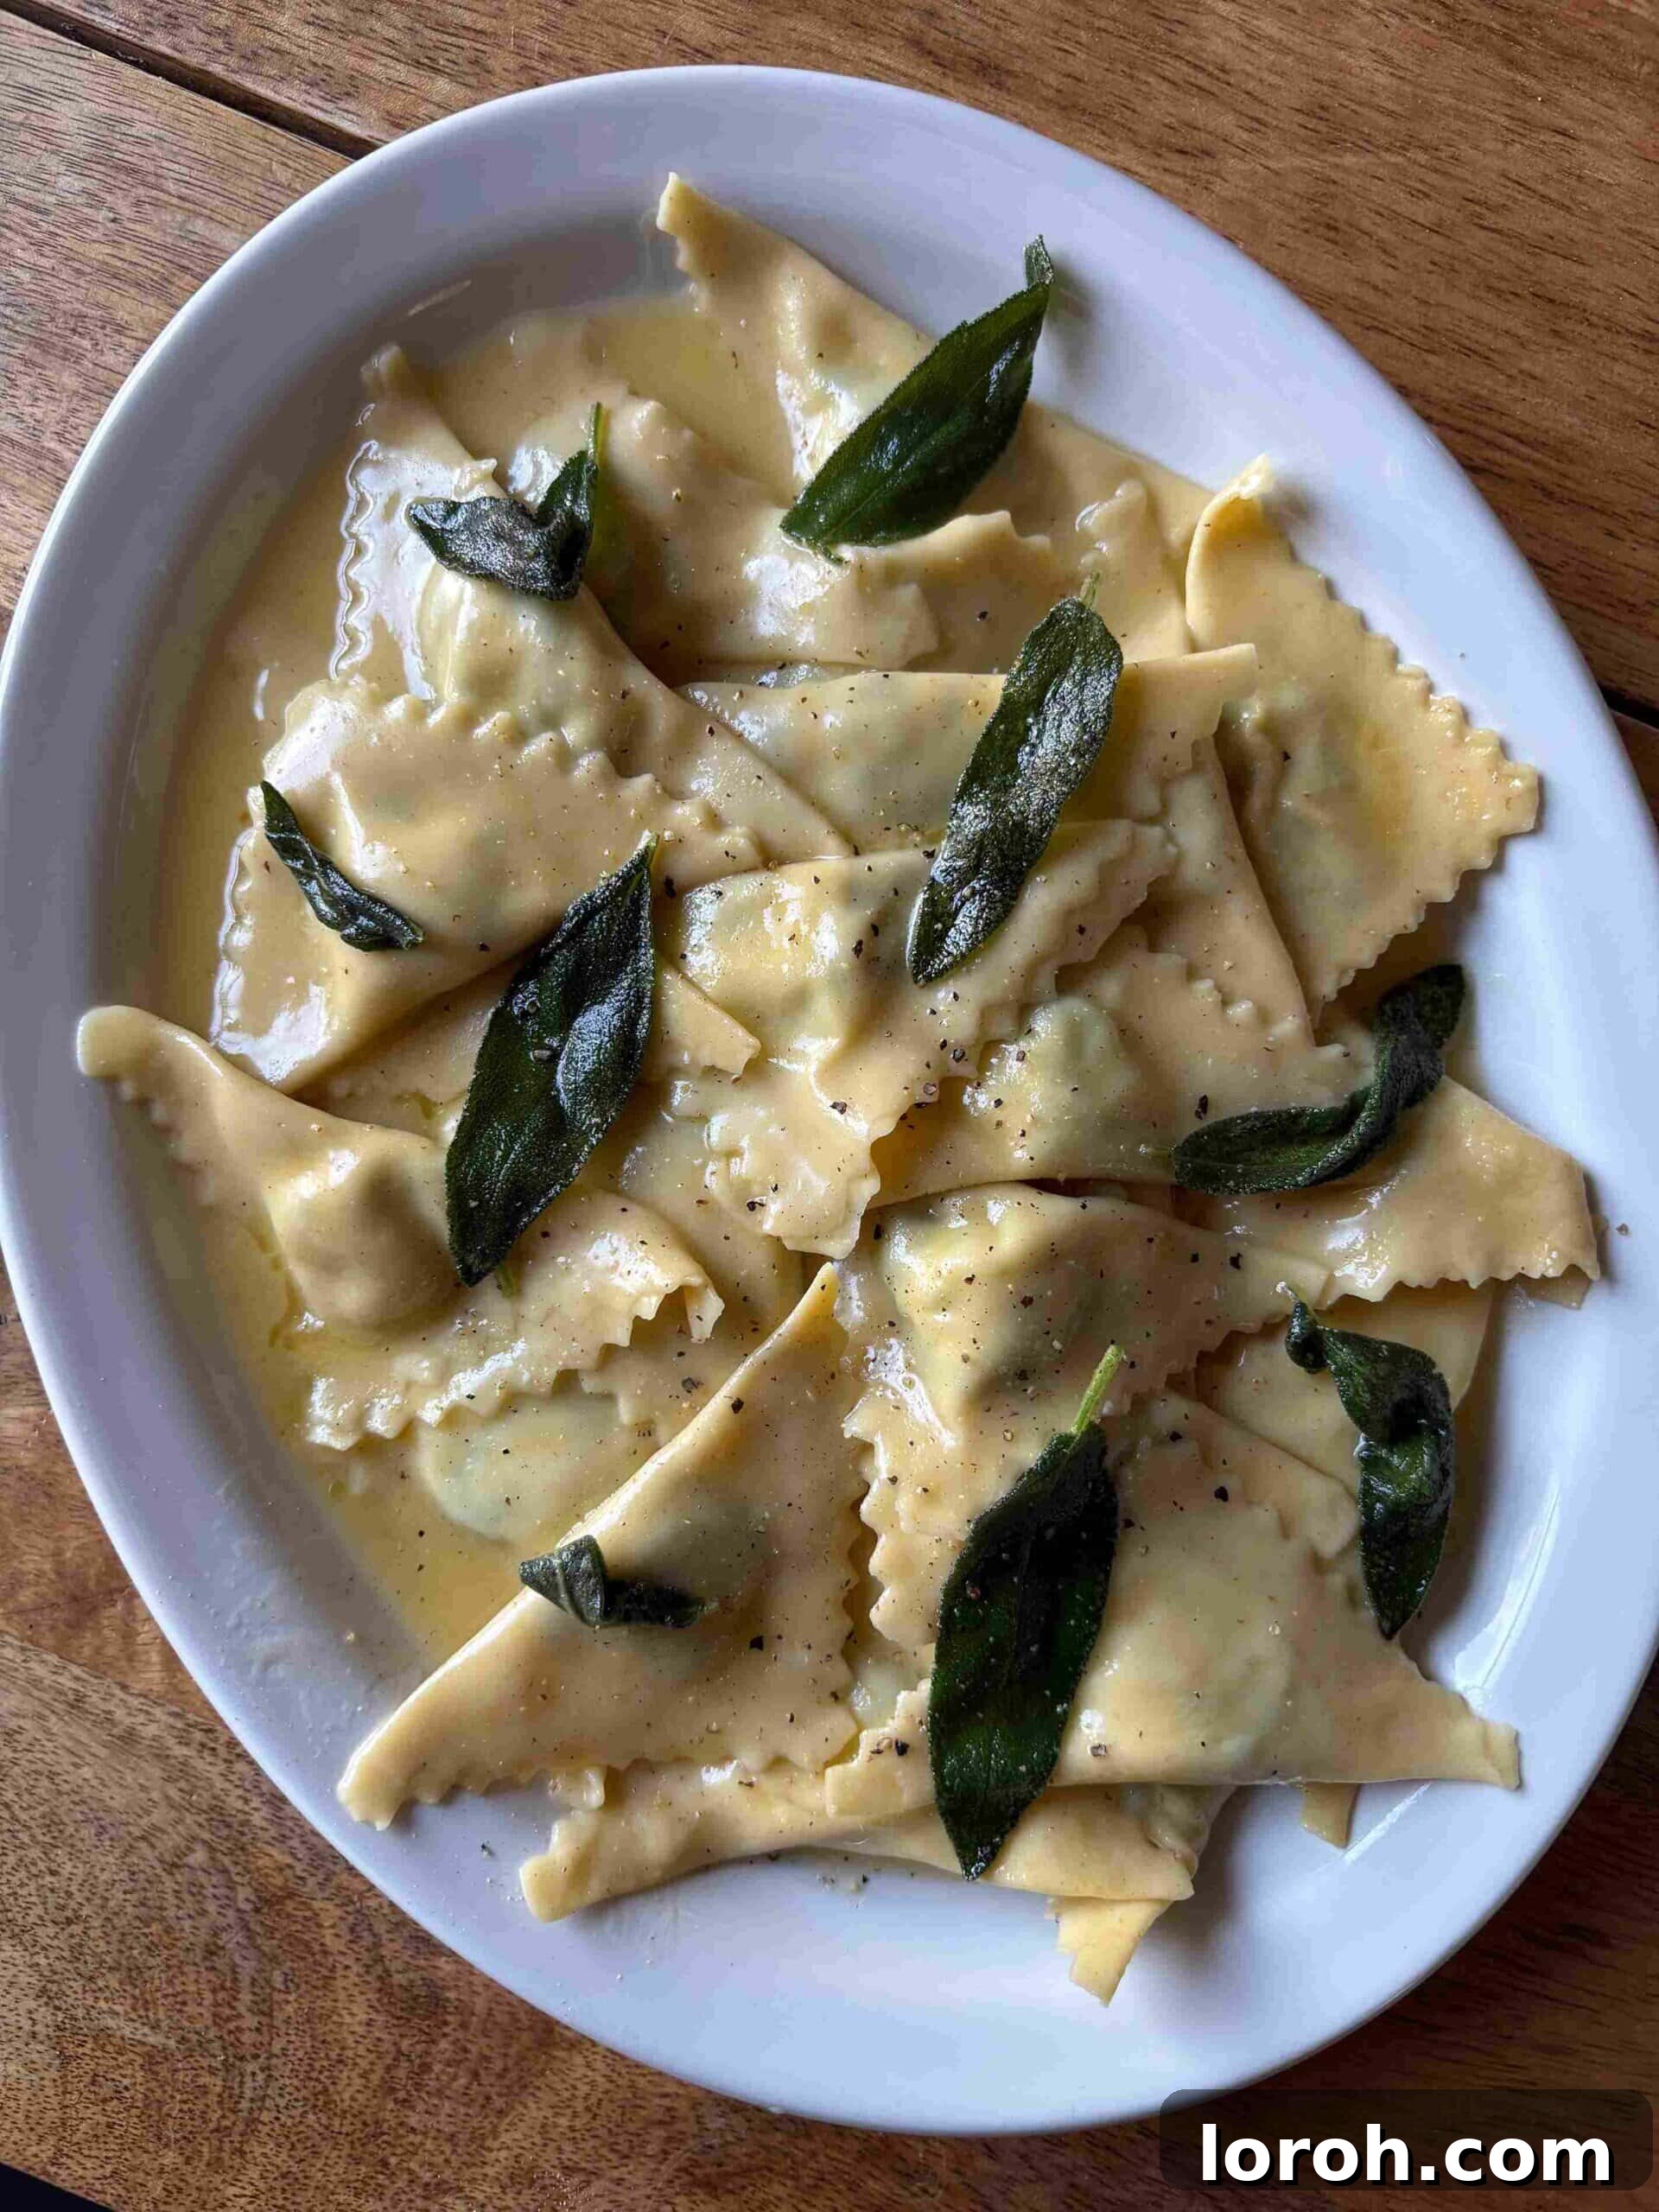
This simple yet sophisticated lemon butter and sage sauce is designed to complement, not overpower, the delicate flavors of the spinach and ricotta triangoli. The transformation of fresh sage leaves is key here. By gently frying them in a blend of olive oil and butter, they become wonderfully crispy and their potent, earthy flavor mellows, taking on a more subtle, aromatic quality. This crispy texture and refined taste create a fantastic counterpoint to the tender pasta and creamy filling. The addition of fresh lemon juice provides a bright, zesty finish that cuts through the richness of the butter, elevating the entire dish into a harmonious culinary experience. It’s a classic Italian pairing for a reason, promising a truly unforgettable meal.
Frequently Asked Questions About Triangoli Pasta
It’s pronounced tree-AHN-goh-lee. Practicing it a few times will make you sound like a true Italian chef!
Absolutely! This recipe is ideal for meal prepping. The filling can be prepared a day ahead; simply allow it to cool completely, then cover and chill it in the refrigerator overnight. Once the triangoli are shaped and filled, they are best cooked within 24 hours. Store them in a single layer on a semolina-dusted tray, covered tightly with plastic wrap, in the fridge. For longer storage, triangoli freeze exceptionally well for up to 3 months. The best part? You can cook them straight from frozen – no need to defrost, just add them directly to boiling water!
This is one of the most brilliant tricks in Italian cooking! As pasta cooks, it releases starch into the boiling water, creating a starchy, slightly cloudy liquid. When you add a splash of this “liquid gold” to your pasta sauces, it acts as a natural emulsifier and thickener. For buttery or oily sauces like our lemon butter, it helps them transform into a smooth, creamy, and non-greasy consistency that beautifully coats every strand or pocket of pasta. For tomato-based sauces, it helps loosen them and makes them wonderfully glossy. In short, reserving pasta water is key to achieving a perfectly cohesive, restaurant-quality sauce.
The uncooked, shaped triangoli are best cooked on the same day or frozen (see freezing instructions below). If you’ve prepared them more than an hour ahead, cover and chill them in the fridge and cook within 24 hours. The finished dish, once tossed in sauce, is always best enjoyed fresh. However, any leftovers can be stored in an airtight container in the refrigerator for up to 2 days. The pasta might soften slightly, but it will still be delicious.
While this dish truly shines when served immediately after cooking, if you do have leftovers and wish to avoid food waste, they can be reheated. The best method is typically a quick reheat in the microwave for 1-2 minutes, or gently warm them in a pan with a splash of water or broth to prevent drying out. Be mindful not to overcook, as fresh pasta can become gummy when reheated.
Yes, freezing is an excellent way to preserve your homemade triangoli for future enjoyment! To freeze, arrange the shaped (uncooked) triangoli in a single layer on a baking tray dusted with semolina flour. Place the tray in the freezer for about 20-30 minutes, or until the pasta pockets are firm. Once firm, transfer them to an airtight container or a freezer-safe bag. They will keep well for up to 3 months. When you’re ready to cook, simply drop the frozen triangoli directly into generously salted boiling water – there’s no need to defrost them first!
Other Homemade Pasta & Italian Recipes You Might Enjoy:
If you’ve fallen in love with the process and flavors of this spinach and ricotta triangoli, you’re in for a treat! Explore more delightful Italian-inspired dishes that are perfect for home cooks. You will surely enjoy my one-pan pasta with peas for a quick and comforting meal. Don’t miss out on my lemony chicken orzo with spinach and grated halloumi, a fresh and zesty option, or dive into the creamy goodness of my creamy mushroom and spinach pasta. Each recipe offers a unique flavor profile and the satisfaction of cooking from scratch.
Kitchen Basics Recipes
How To Make Perfect Pasta Dough
Recipes
Authentic Homemade Pici Pasta Recipe
Easy Pasta Recipes
How to Make Elegant Homemade Garganelli Pasta
Easy Pasta Recipes
Delightful Pasta with Fresh Cherry Tomato Sauce
If you tried this Homemade Triangoli recipe or any other recipe on the site, please do leave a comment and let us know how it went!
Homemade Spinach and Ricotta Triangoli Pasta Recipe
Margie Nomura
This exquisite spinach and ricotta triangoli, served with a vibrant lemon butter and crispy sage sauce, is surprisingly simple to create at home. Once the pasta is shaped, the entire dish comes together in mere minutes, promising a gourmet experience with homemade charm.
40 mins
15 mins
55 mins
4 servings
Ingredients
For the Spinach and Ricotta Filling:
- 80 g fresh baby spinach
- 20 g fresh basil leaves
- 250 g full-fat ricotta cheese
- 30 g Parmesan, freshly grated
- ½ tsp freshly grated nutmeg
- Salt and freshly ground black pepper, to taste
For the Triangoli Pasta:
- Semolina flour, for dusting
- 1 batch fresh pasta dough (see recipe here)
- ’00’ flour, for dusting work surface
For the Lemon Butter and Crispy Sage Sauce:
- 120 g unsalted butter, diced
- 1 tbsp olive oil
- Handful of fresh sage leaves (approx. 10-15 leaves)
- Juice of ½ lemon (freshly squeezed)
To Serve:
- Freshly grated Parmesan cheese
- Freshly ground black pepper, to taste
Instructions
To Make the Triangoli Filled with Spinach and Ricotta:
- First, prepare your fresh pasta dough following this recipe and allow it to rest as instructed.
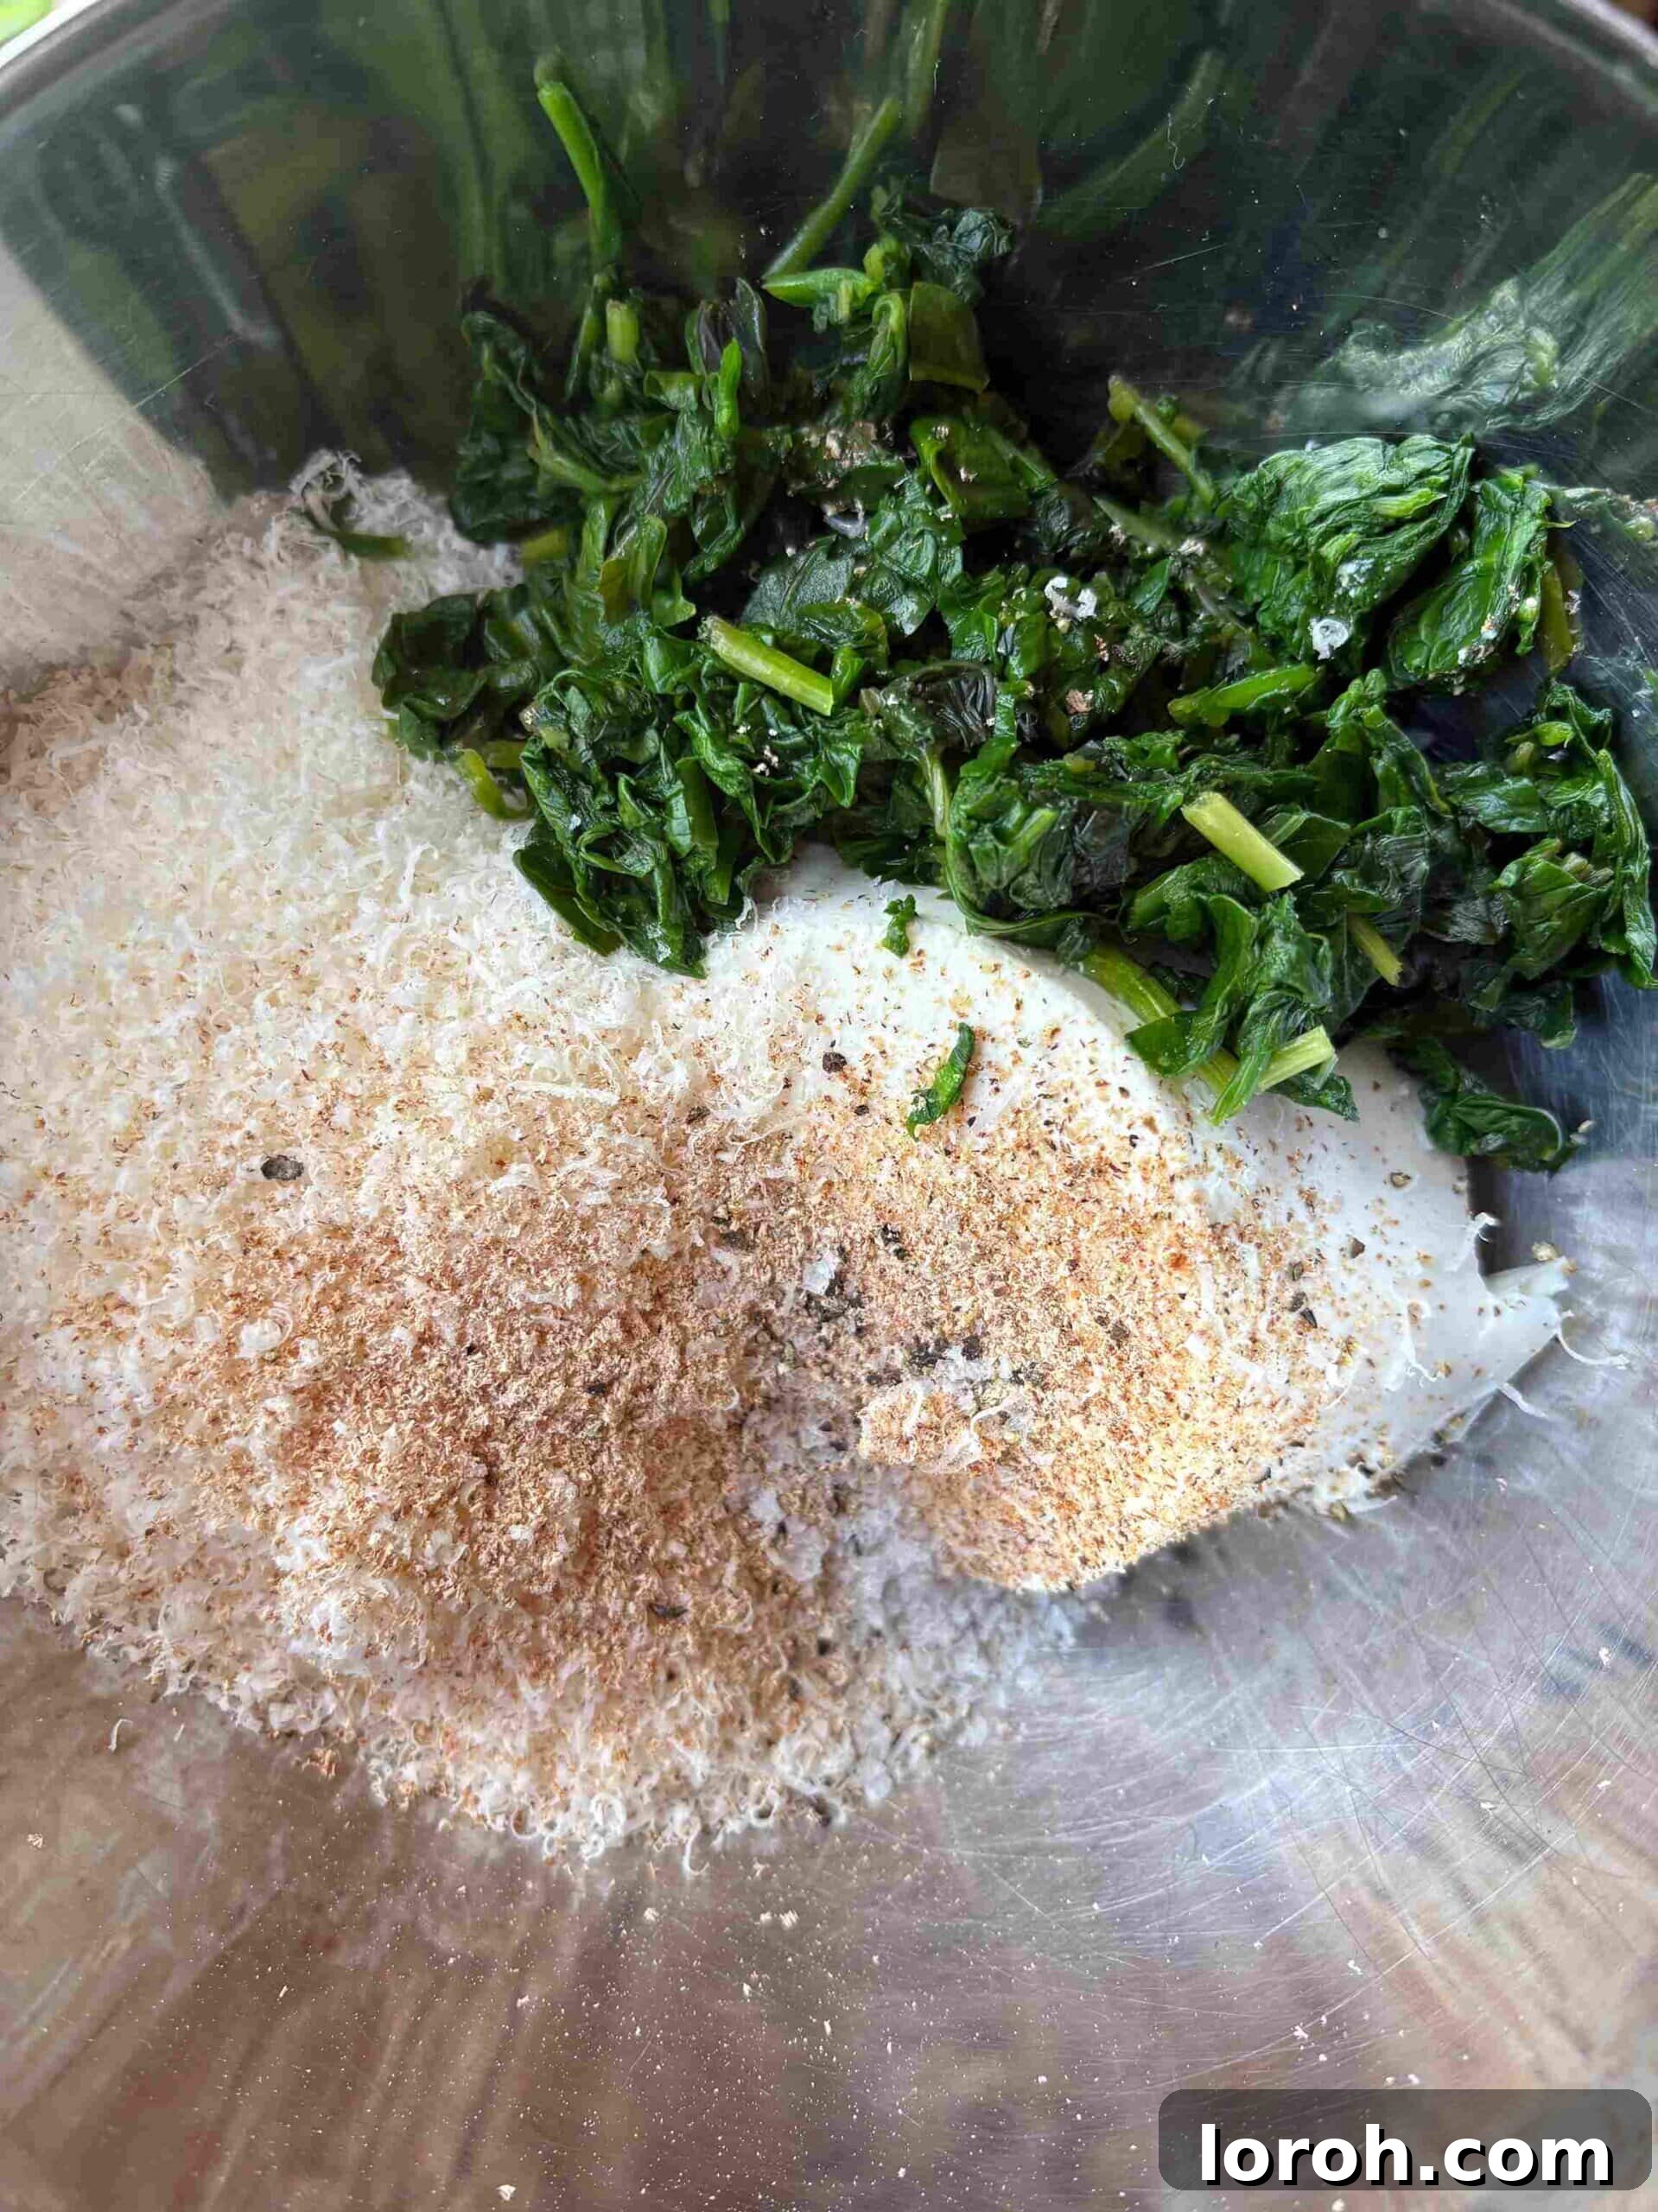
- While the dough rests, prepare the filling: Bring a large pan of water to a rolling boil. Simultaneously, prepare a large bowl of iced water. Add the baby spinach and basil leaves to the boiling water and blanch for approximately 30 seconds. Immediately remove them with a slotted spoon and plunge them into the bowl of icy water. This stops the cooking process and helps preserve their vibrant green color. Allow them to cool completely in the ice water for a few minutes.
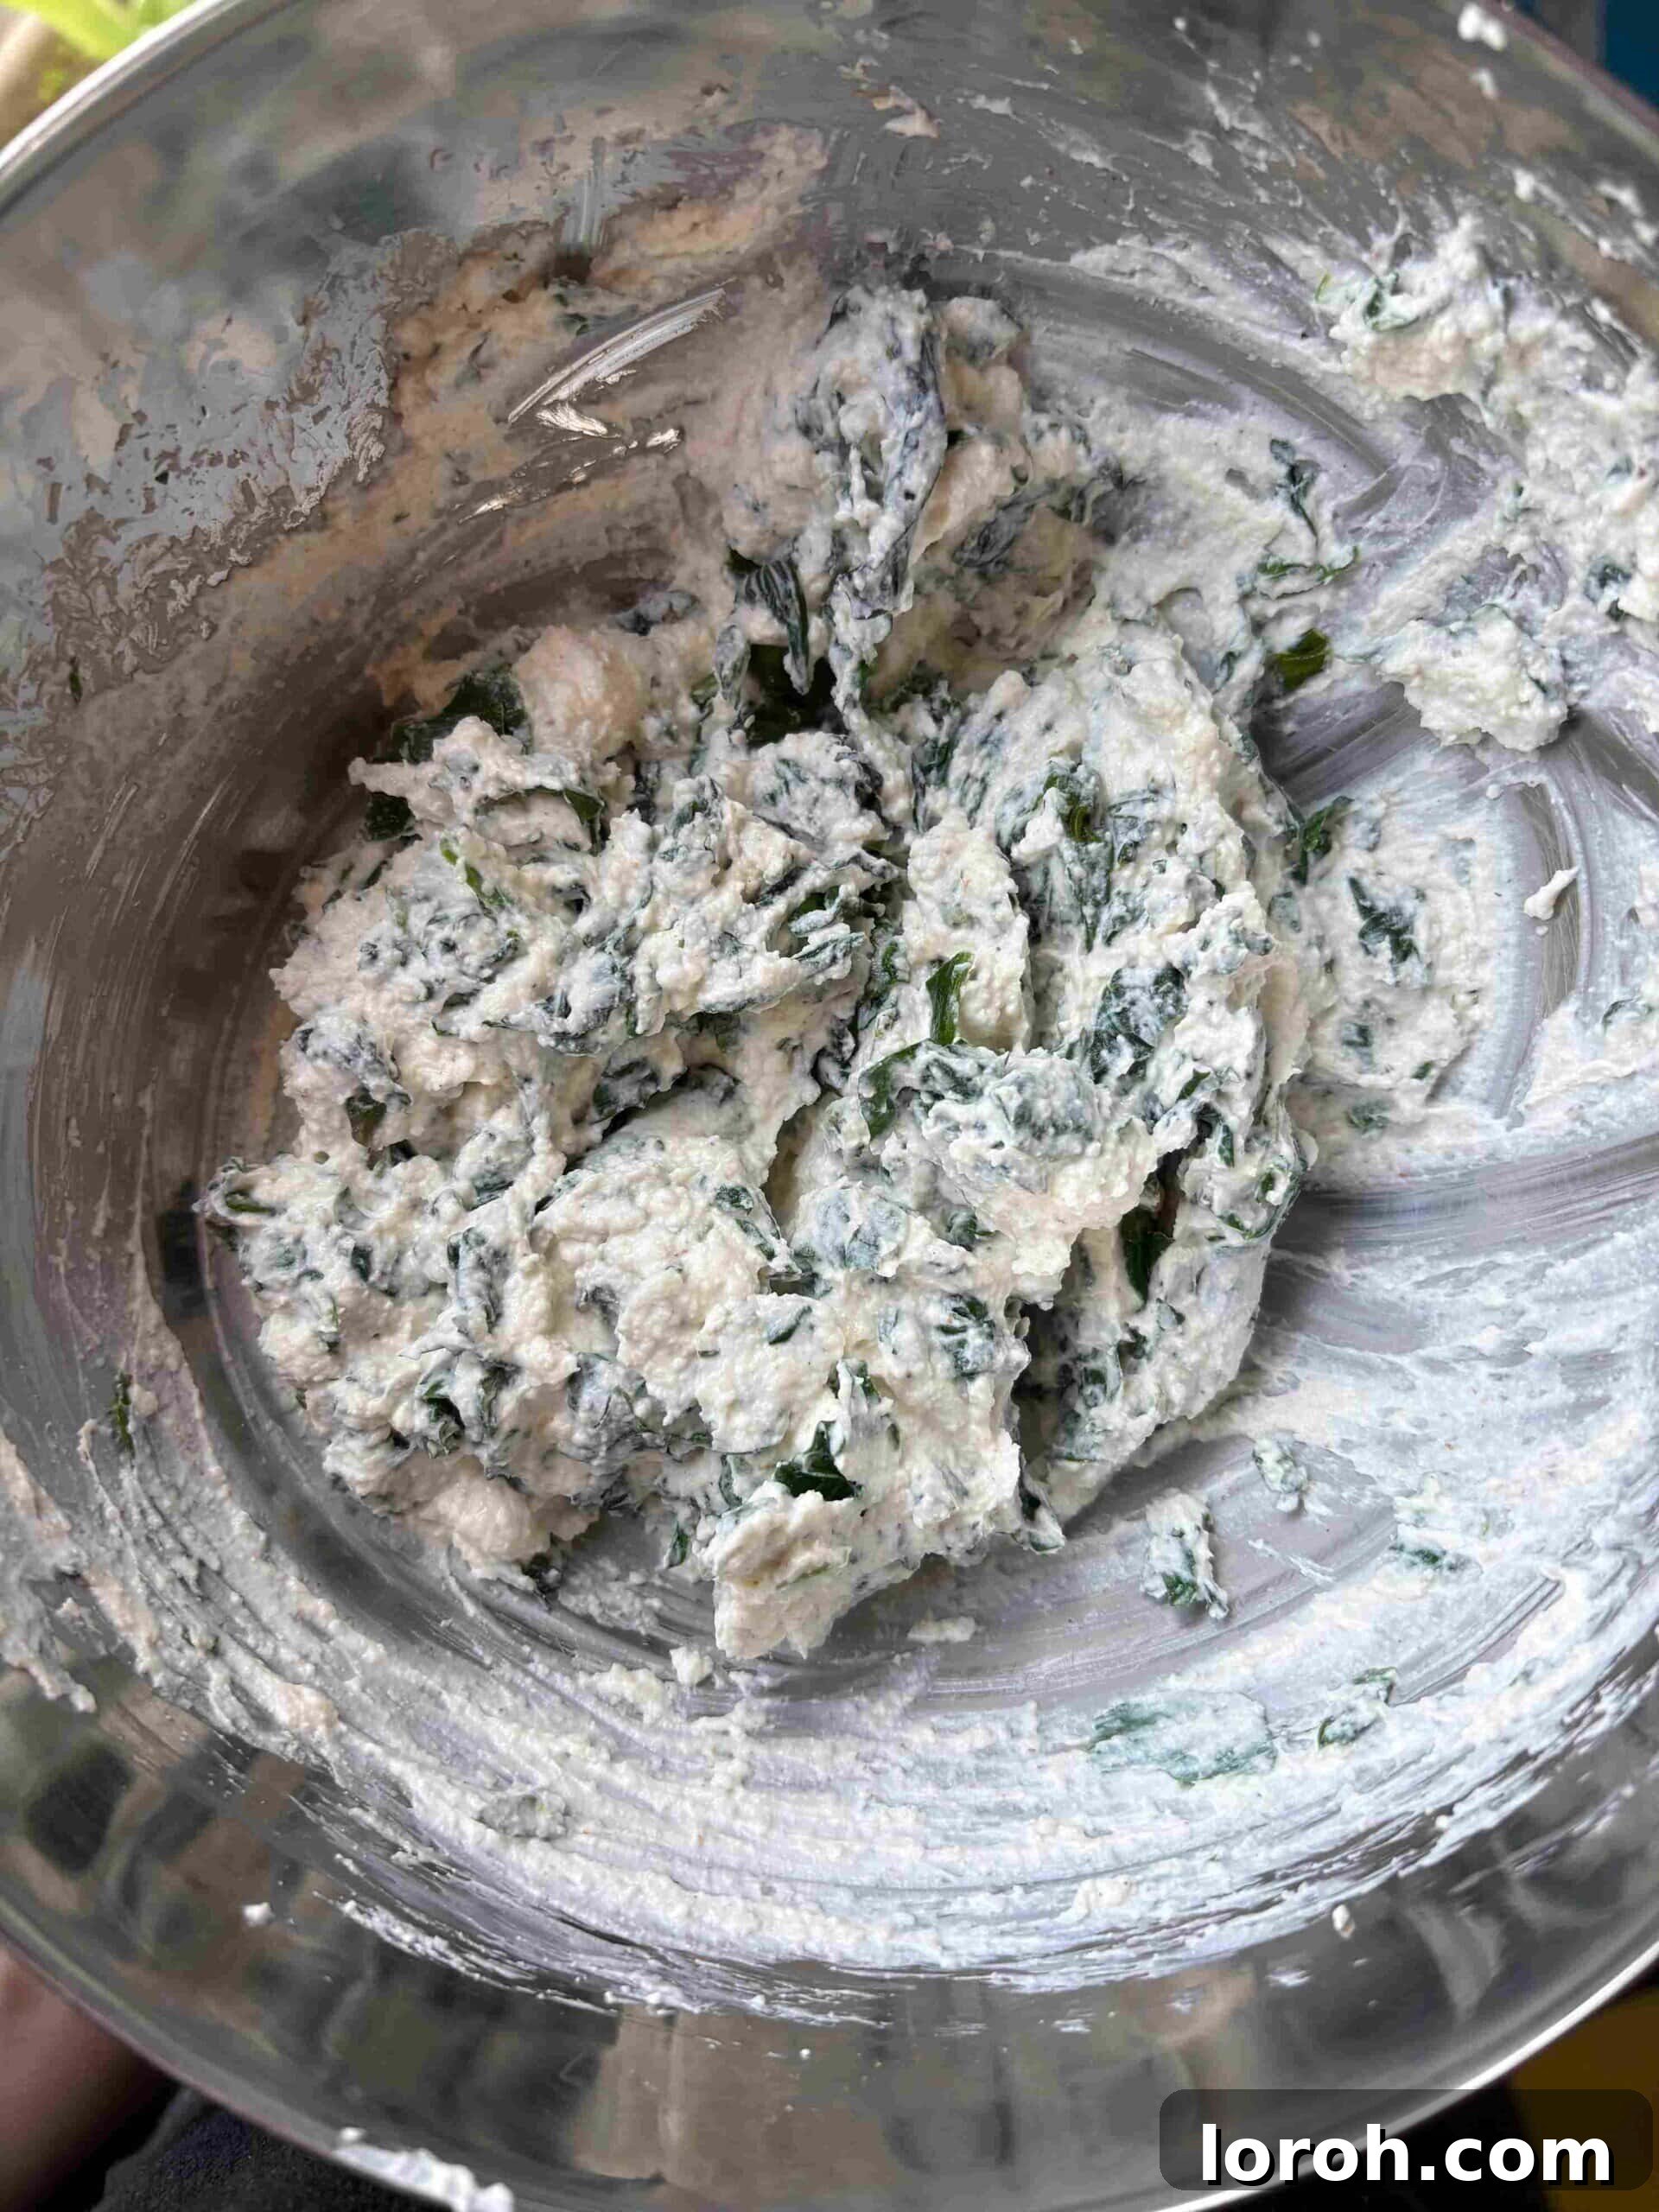
- Once cool, remove the spinach and basil from the ice water and squeeze out as much liquid as possible with your hands. The dryer, the better. Place the squeezed greens on a chopping board and finely chop them. Transfer the chopped greens to a large mixing bowl. Add the full-fat ricotta, freshly grated Parmesan, and nutmeg. Mix all the ingredients thoroughly until well combined and uniform. Season generously with salt and freshly ground black pepper to taste. Spoon the filling into a piping bag (or a sturdy sandwich bag with one corner snipped off).
- Lightly dust a couple of large baking sheets (or parchment-lined trays) and your clean work surface with semolina flour. This will prevent the fresh pasta from sticking.
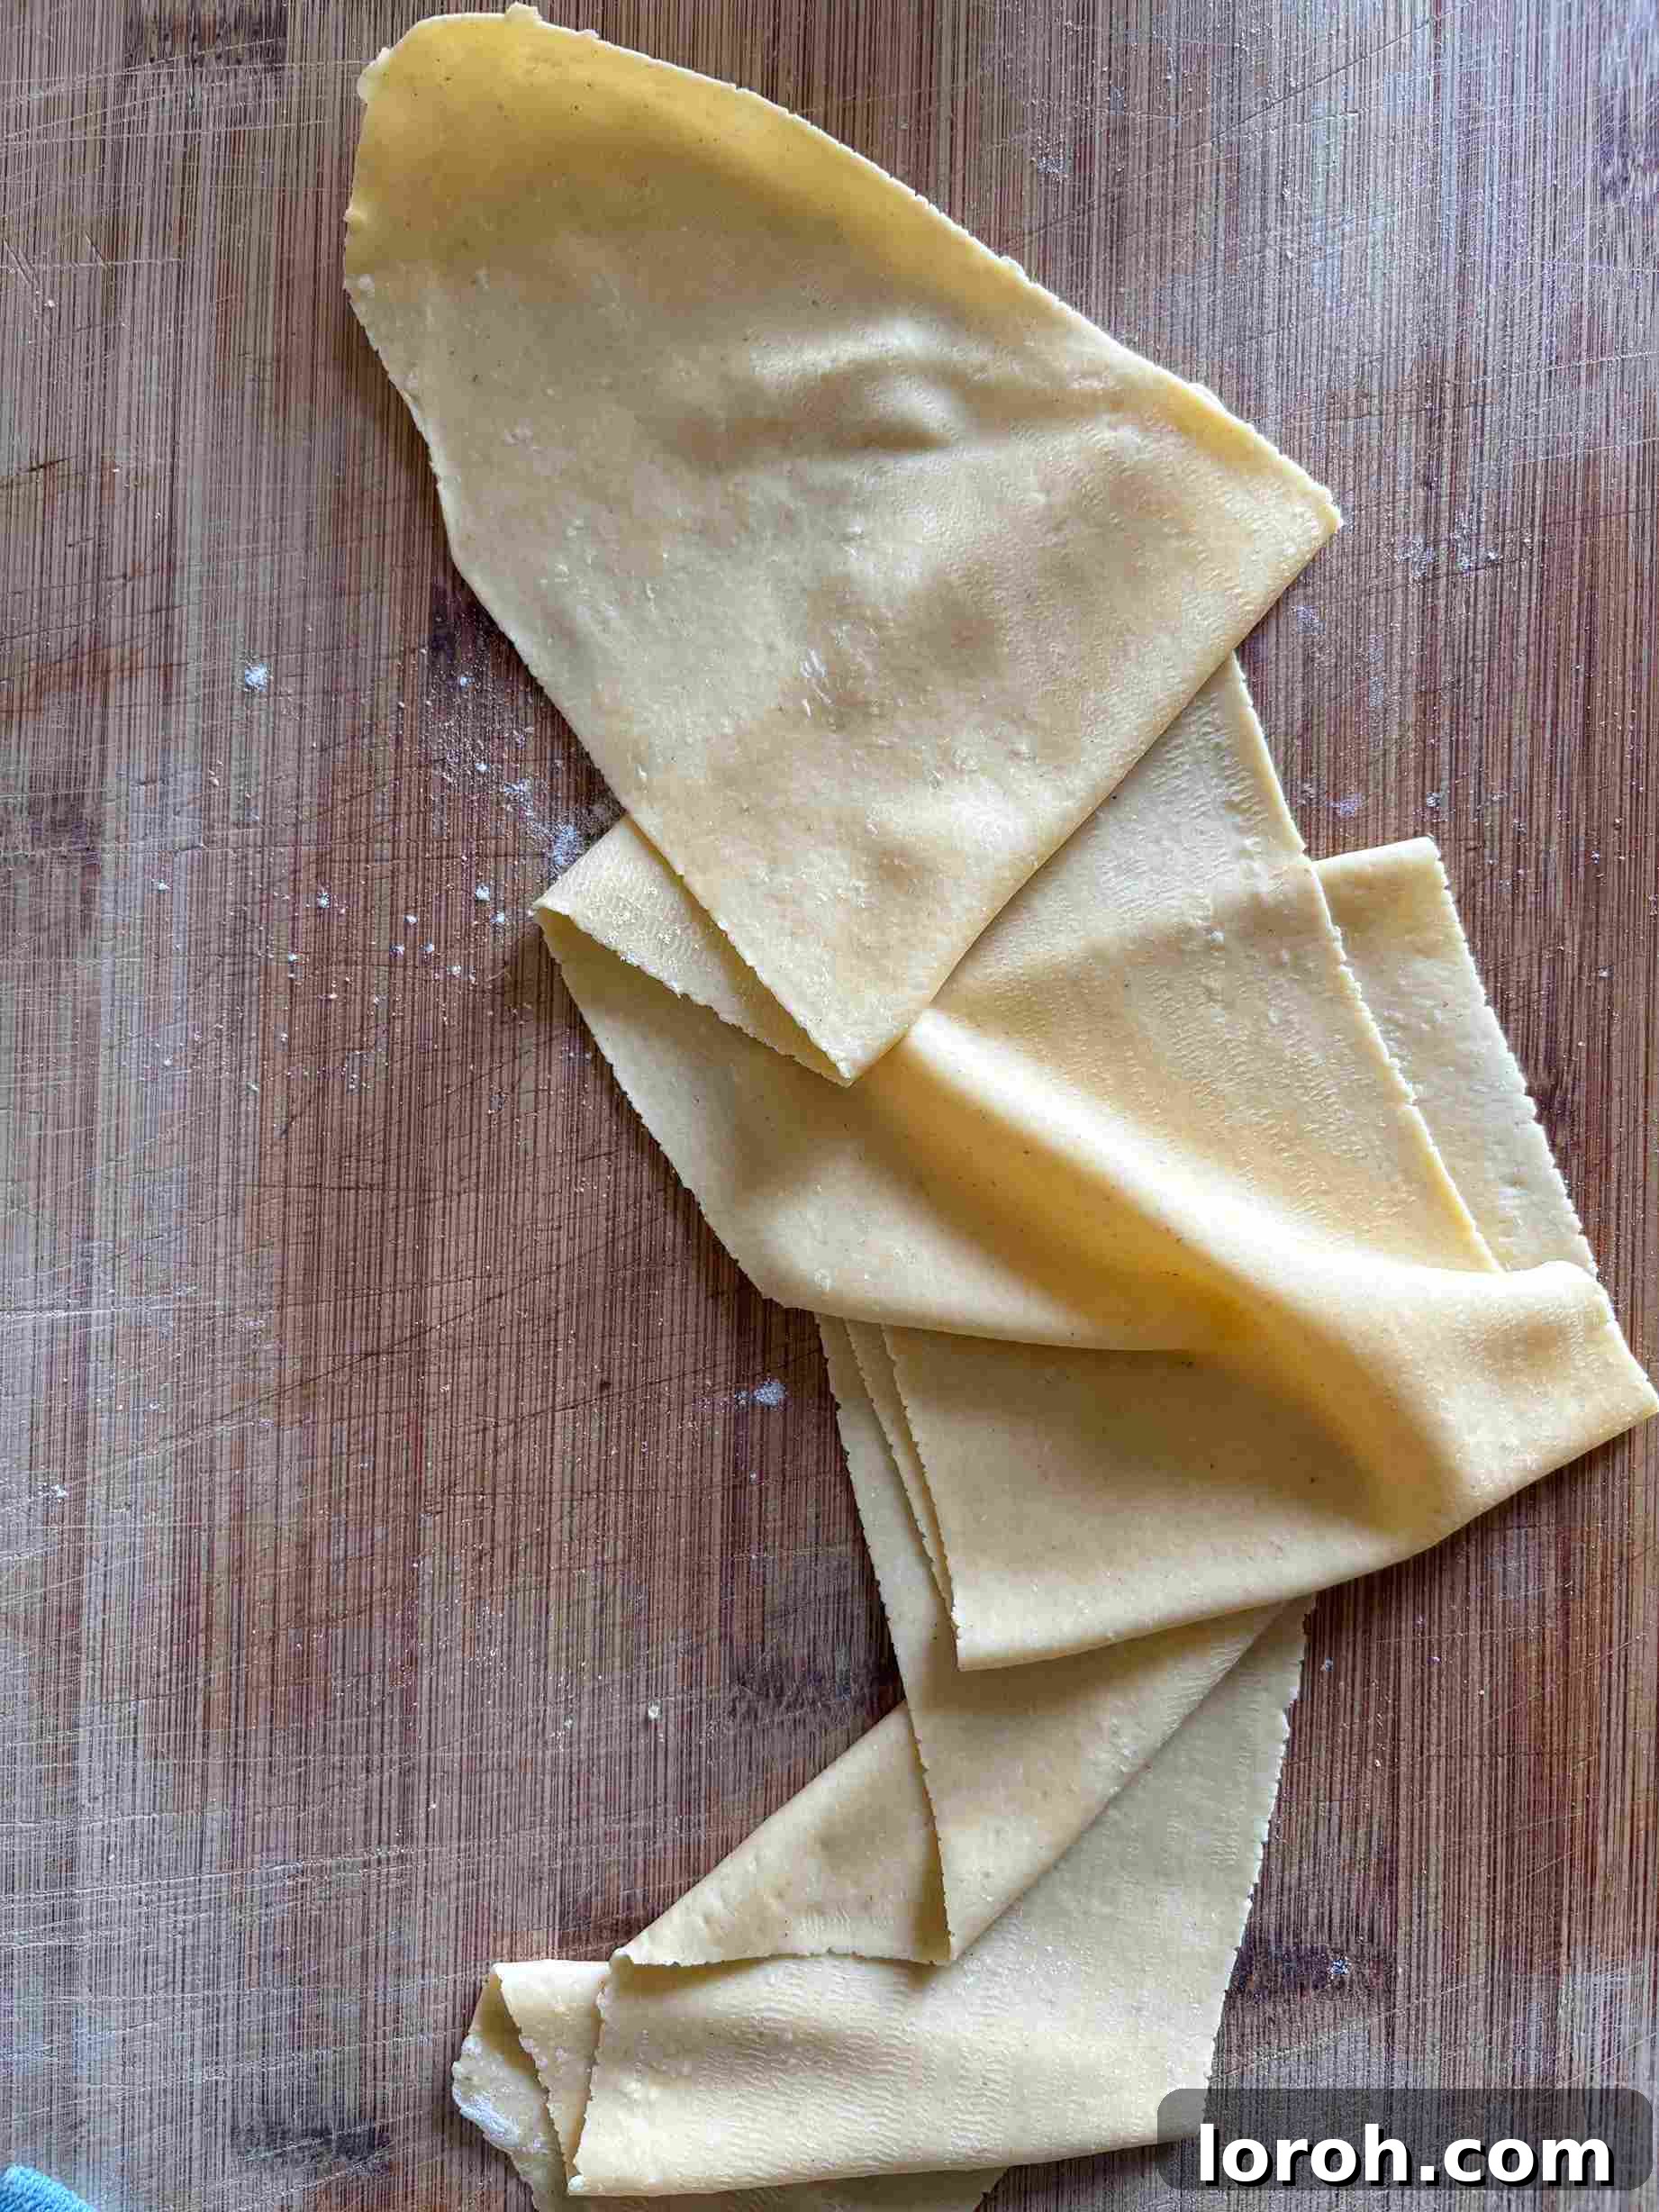
- Divide your rested pasta dough into four equal portions. Take one portion and, using a pasta machine, roll it out into a long, thin sheet. Aim for the second to last thinnest setting on your pasta machine to achieve the ideal delicate texture. Repeat with the remaining dough portions.
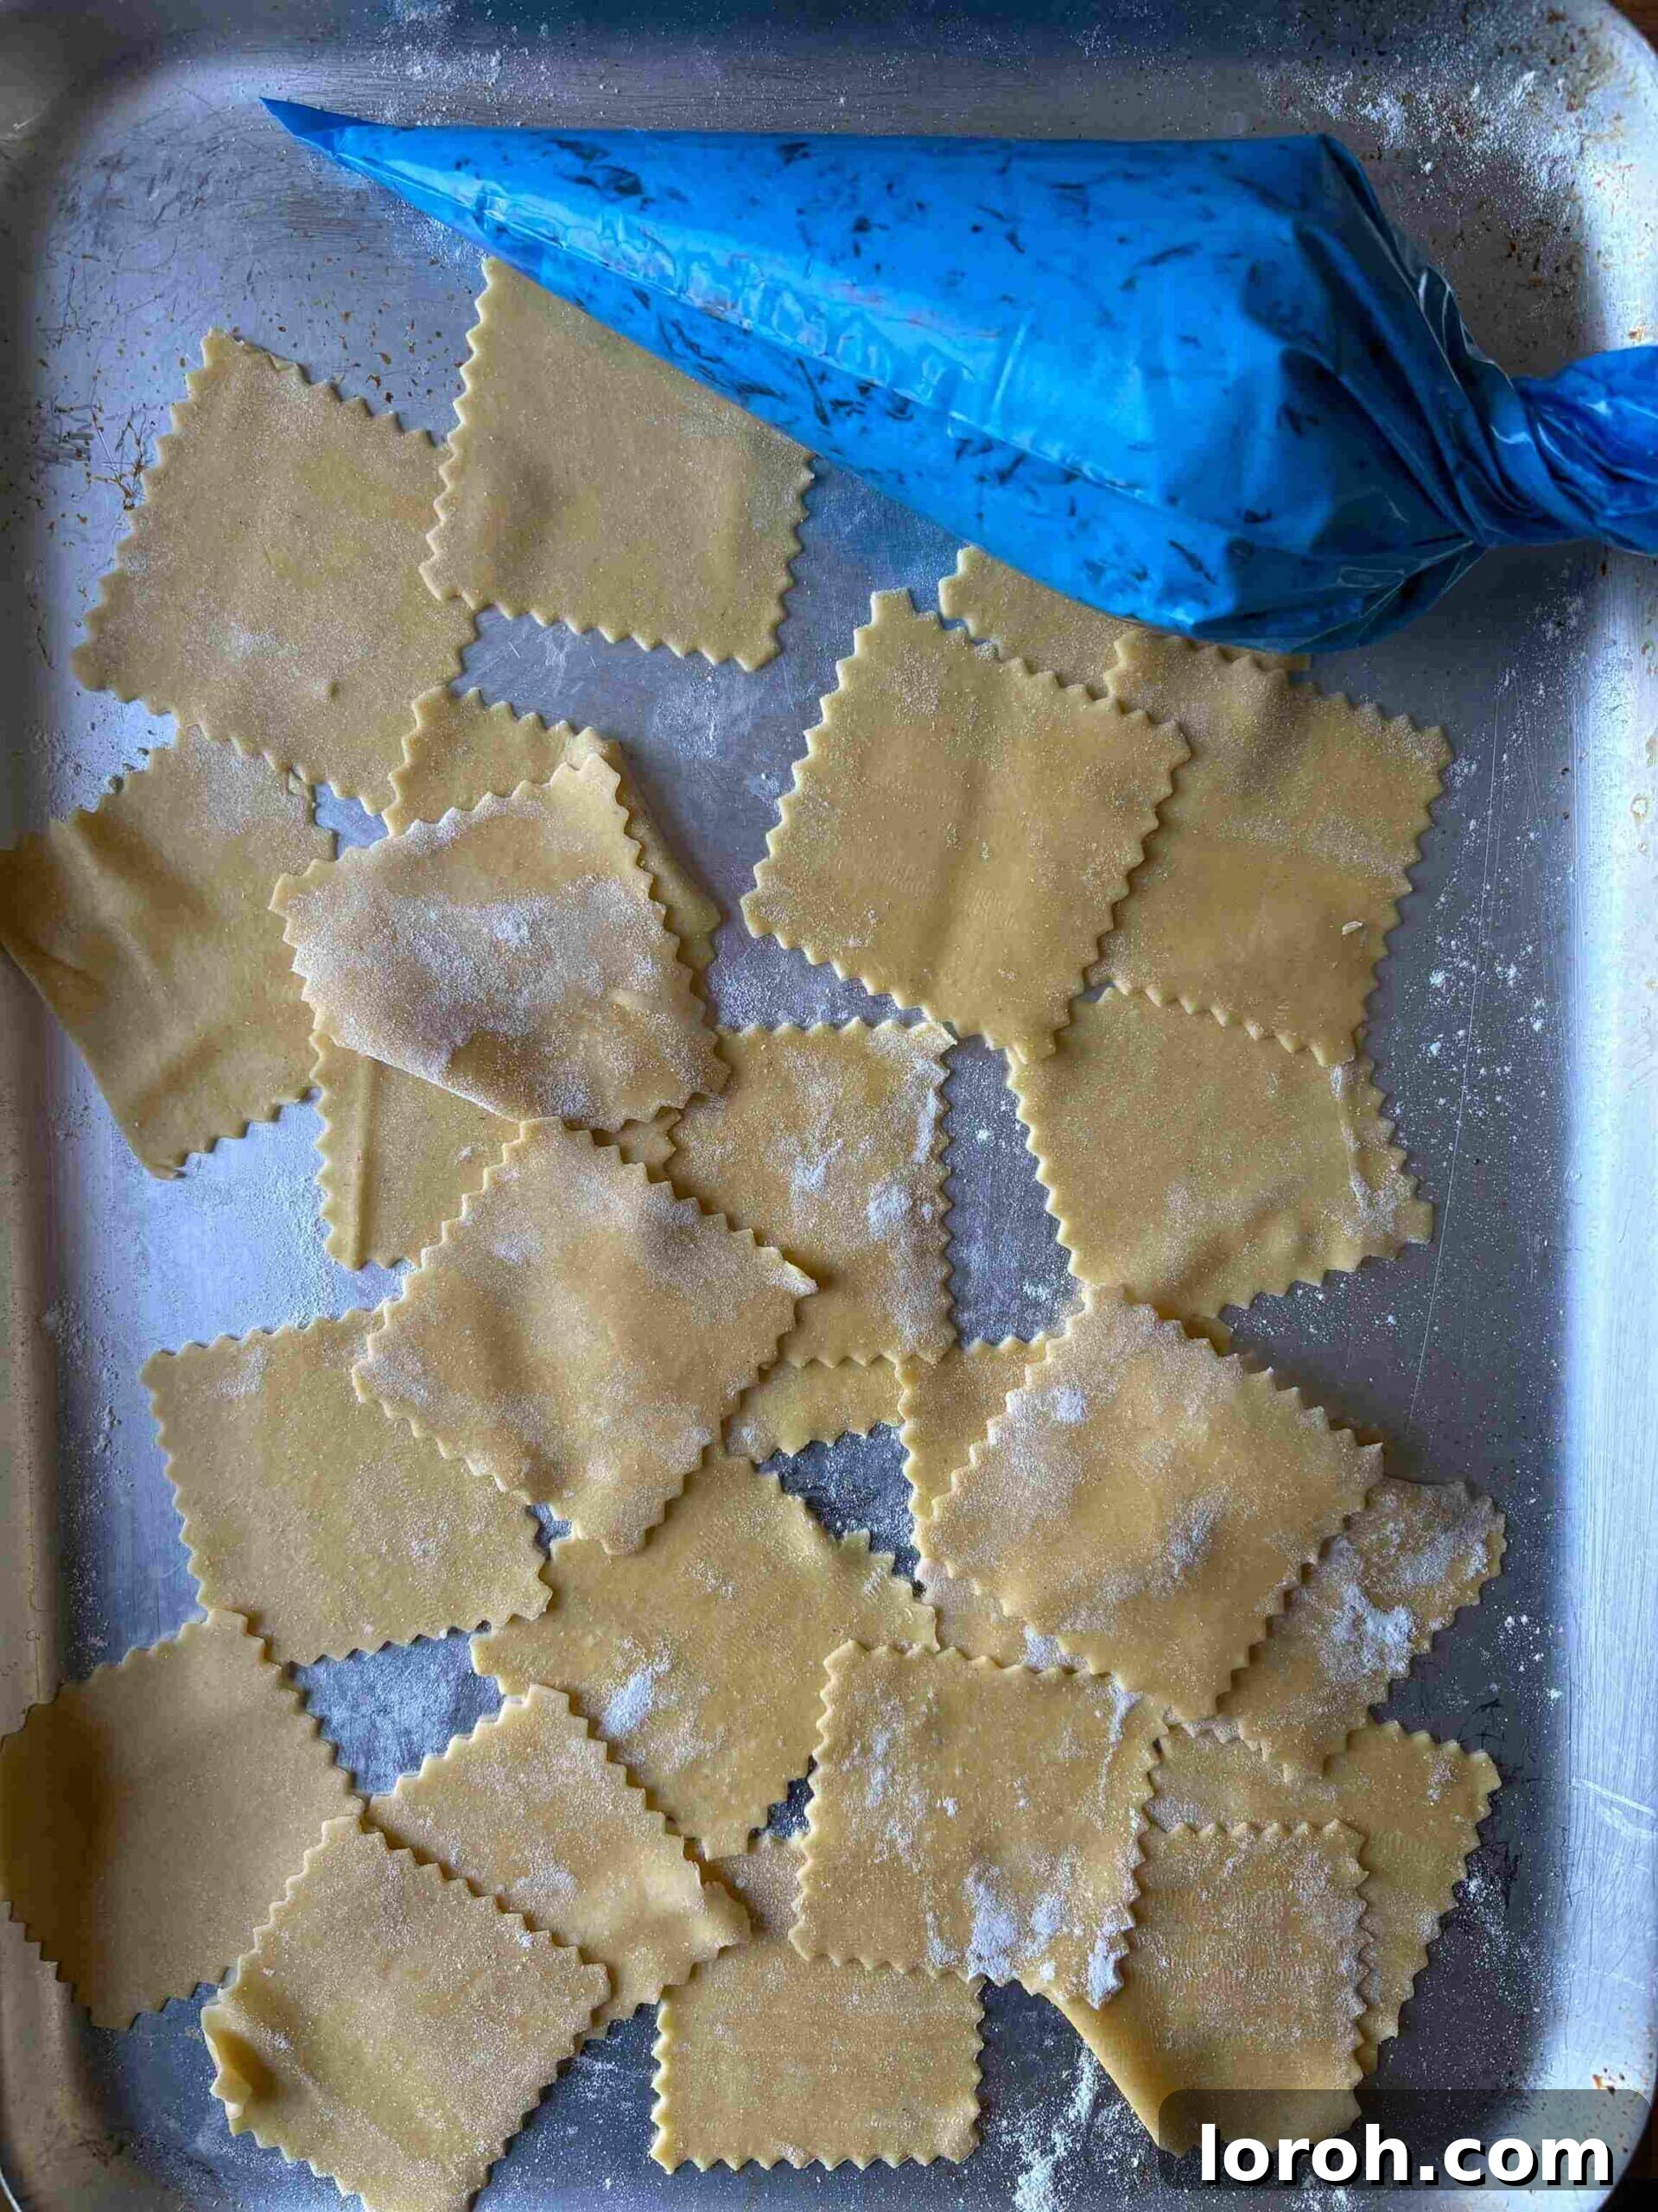
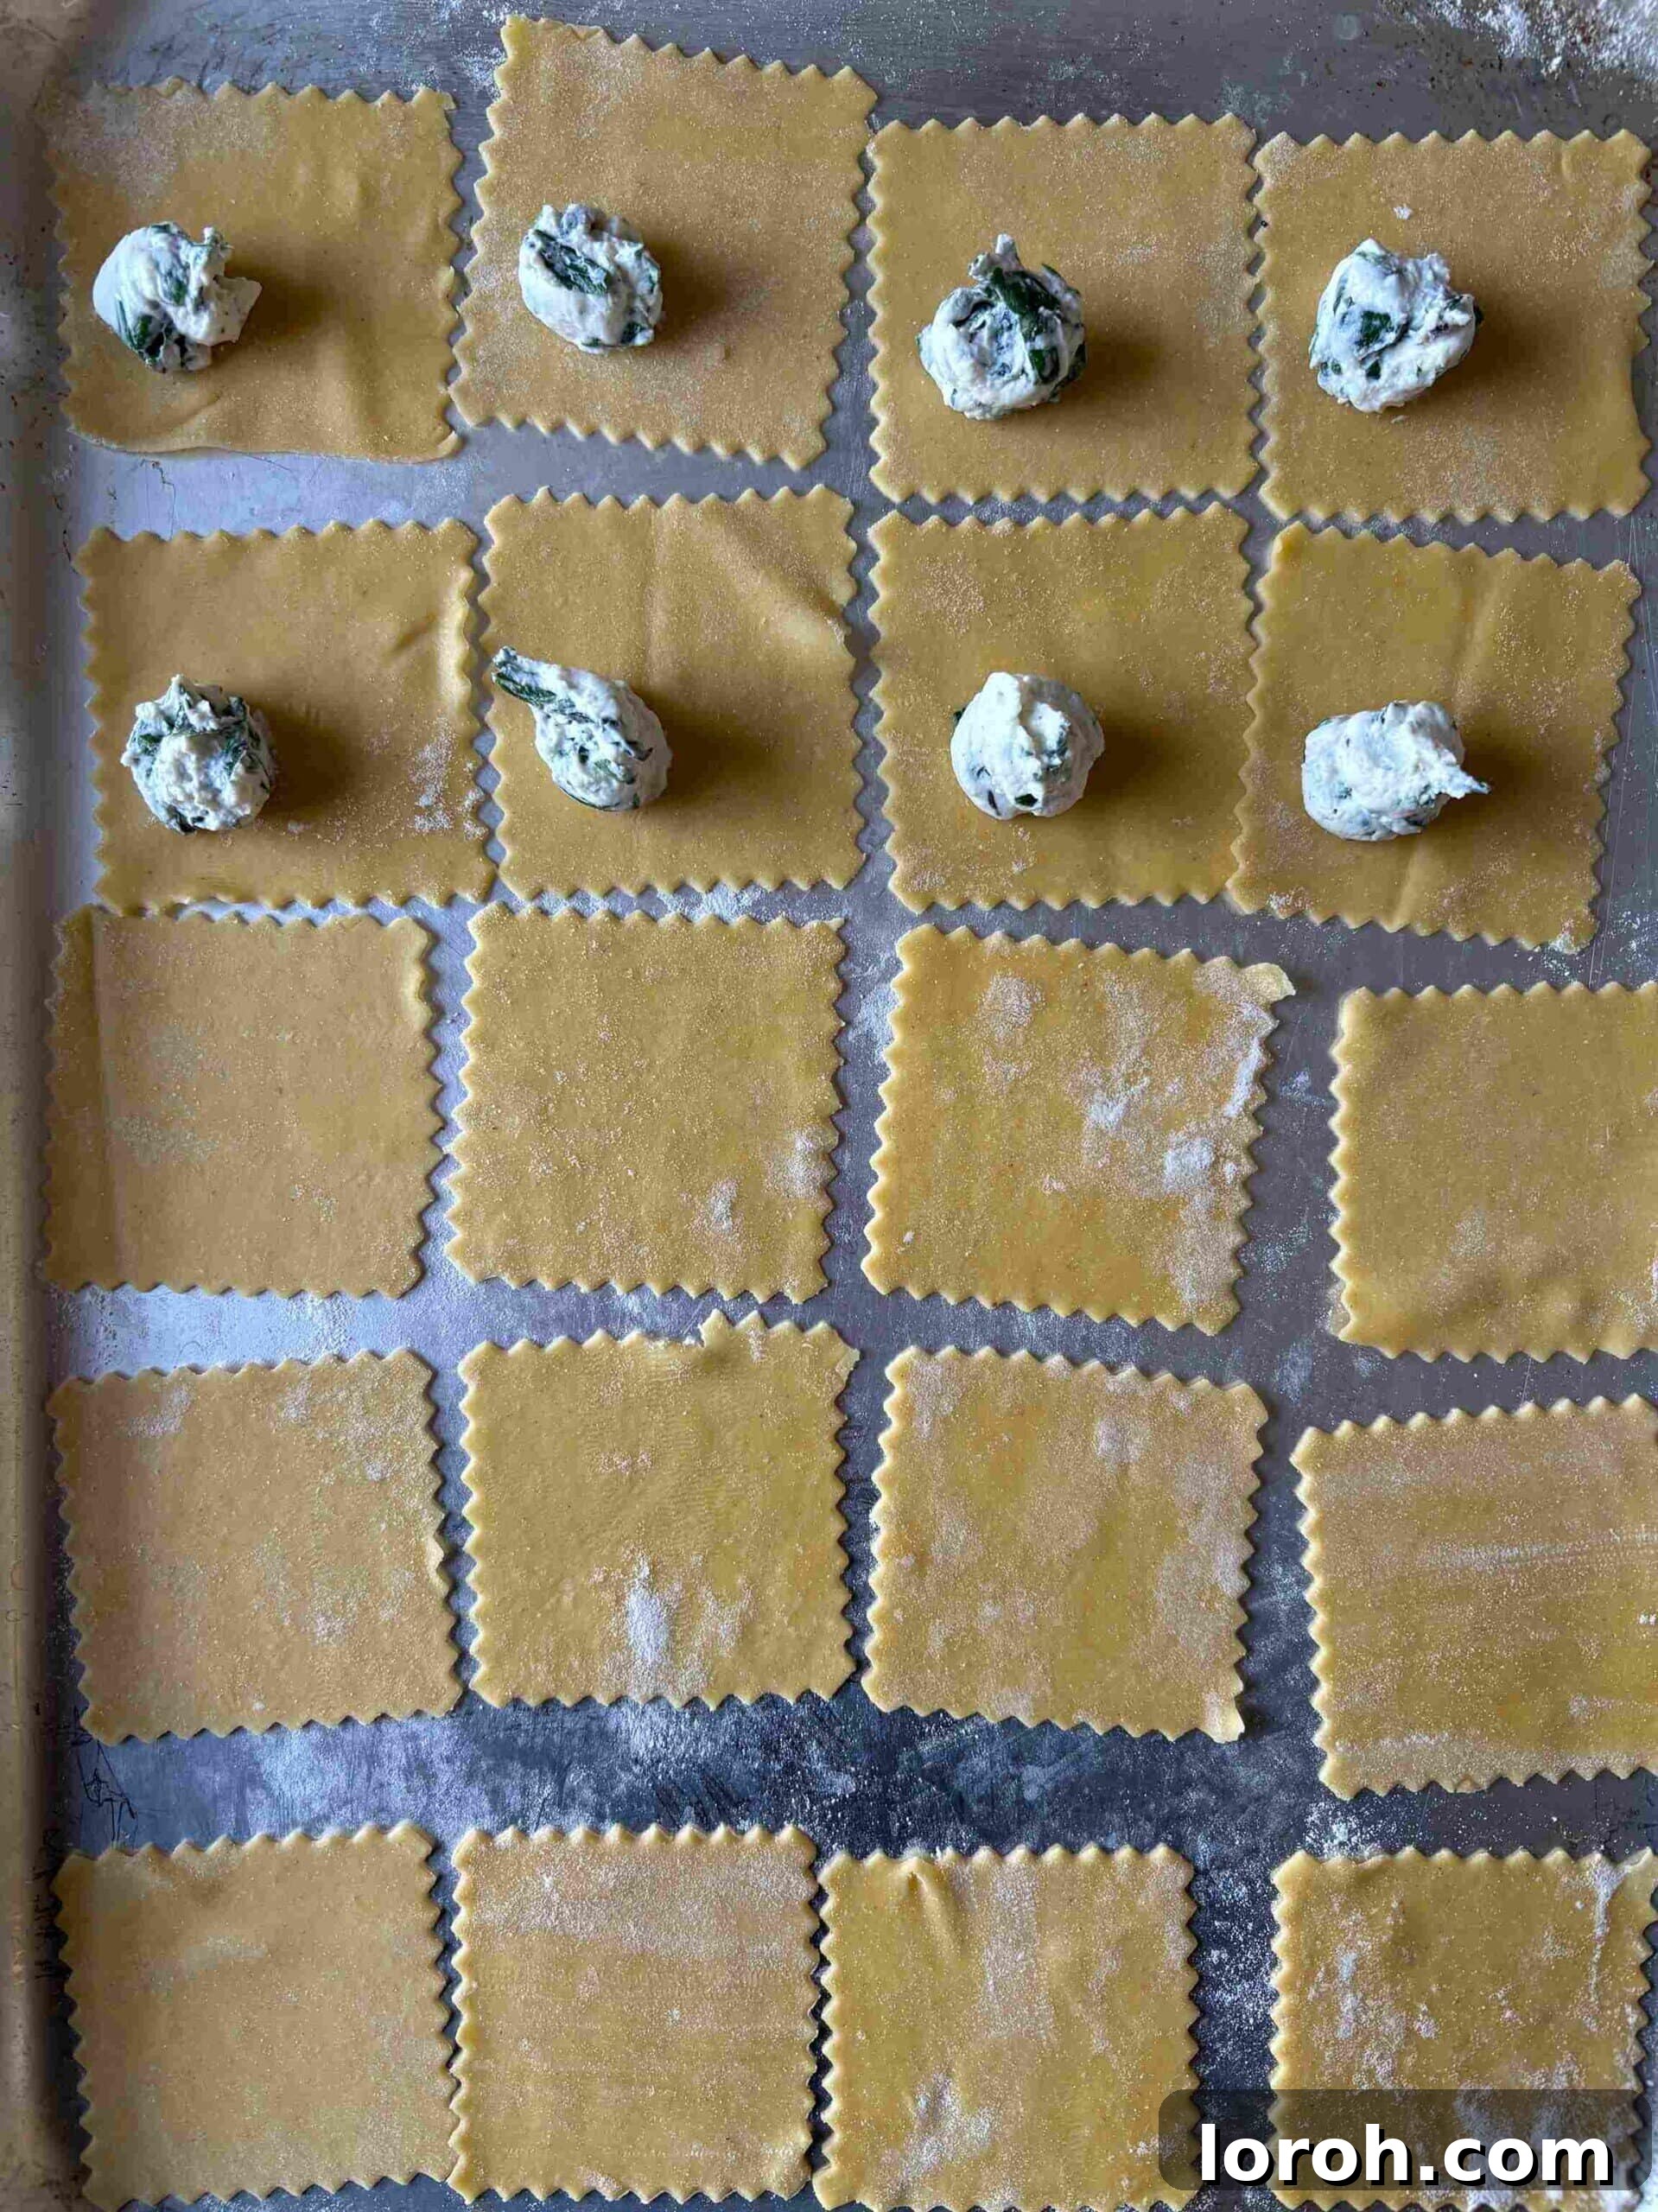
- Place one rolled pasta sheet onto your semolina-dusted work surface. Using a dough cutter, a sharp knife, or a ravioli stamp, cut out approximate 7 cm (2.75 inch) squares from the pasta sheet. As you cut them, carefully transfer the squares onto your prepared baking trays, ensuring they don’t overlap.
- Pipe about one teaspoon of the spinach and ricotta filling onto the center of each pasta square. Position the filling slightly towards one corner, just below where you will fold the pasta in half to form the triangle.
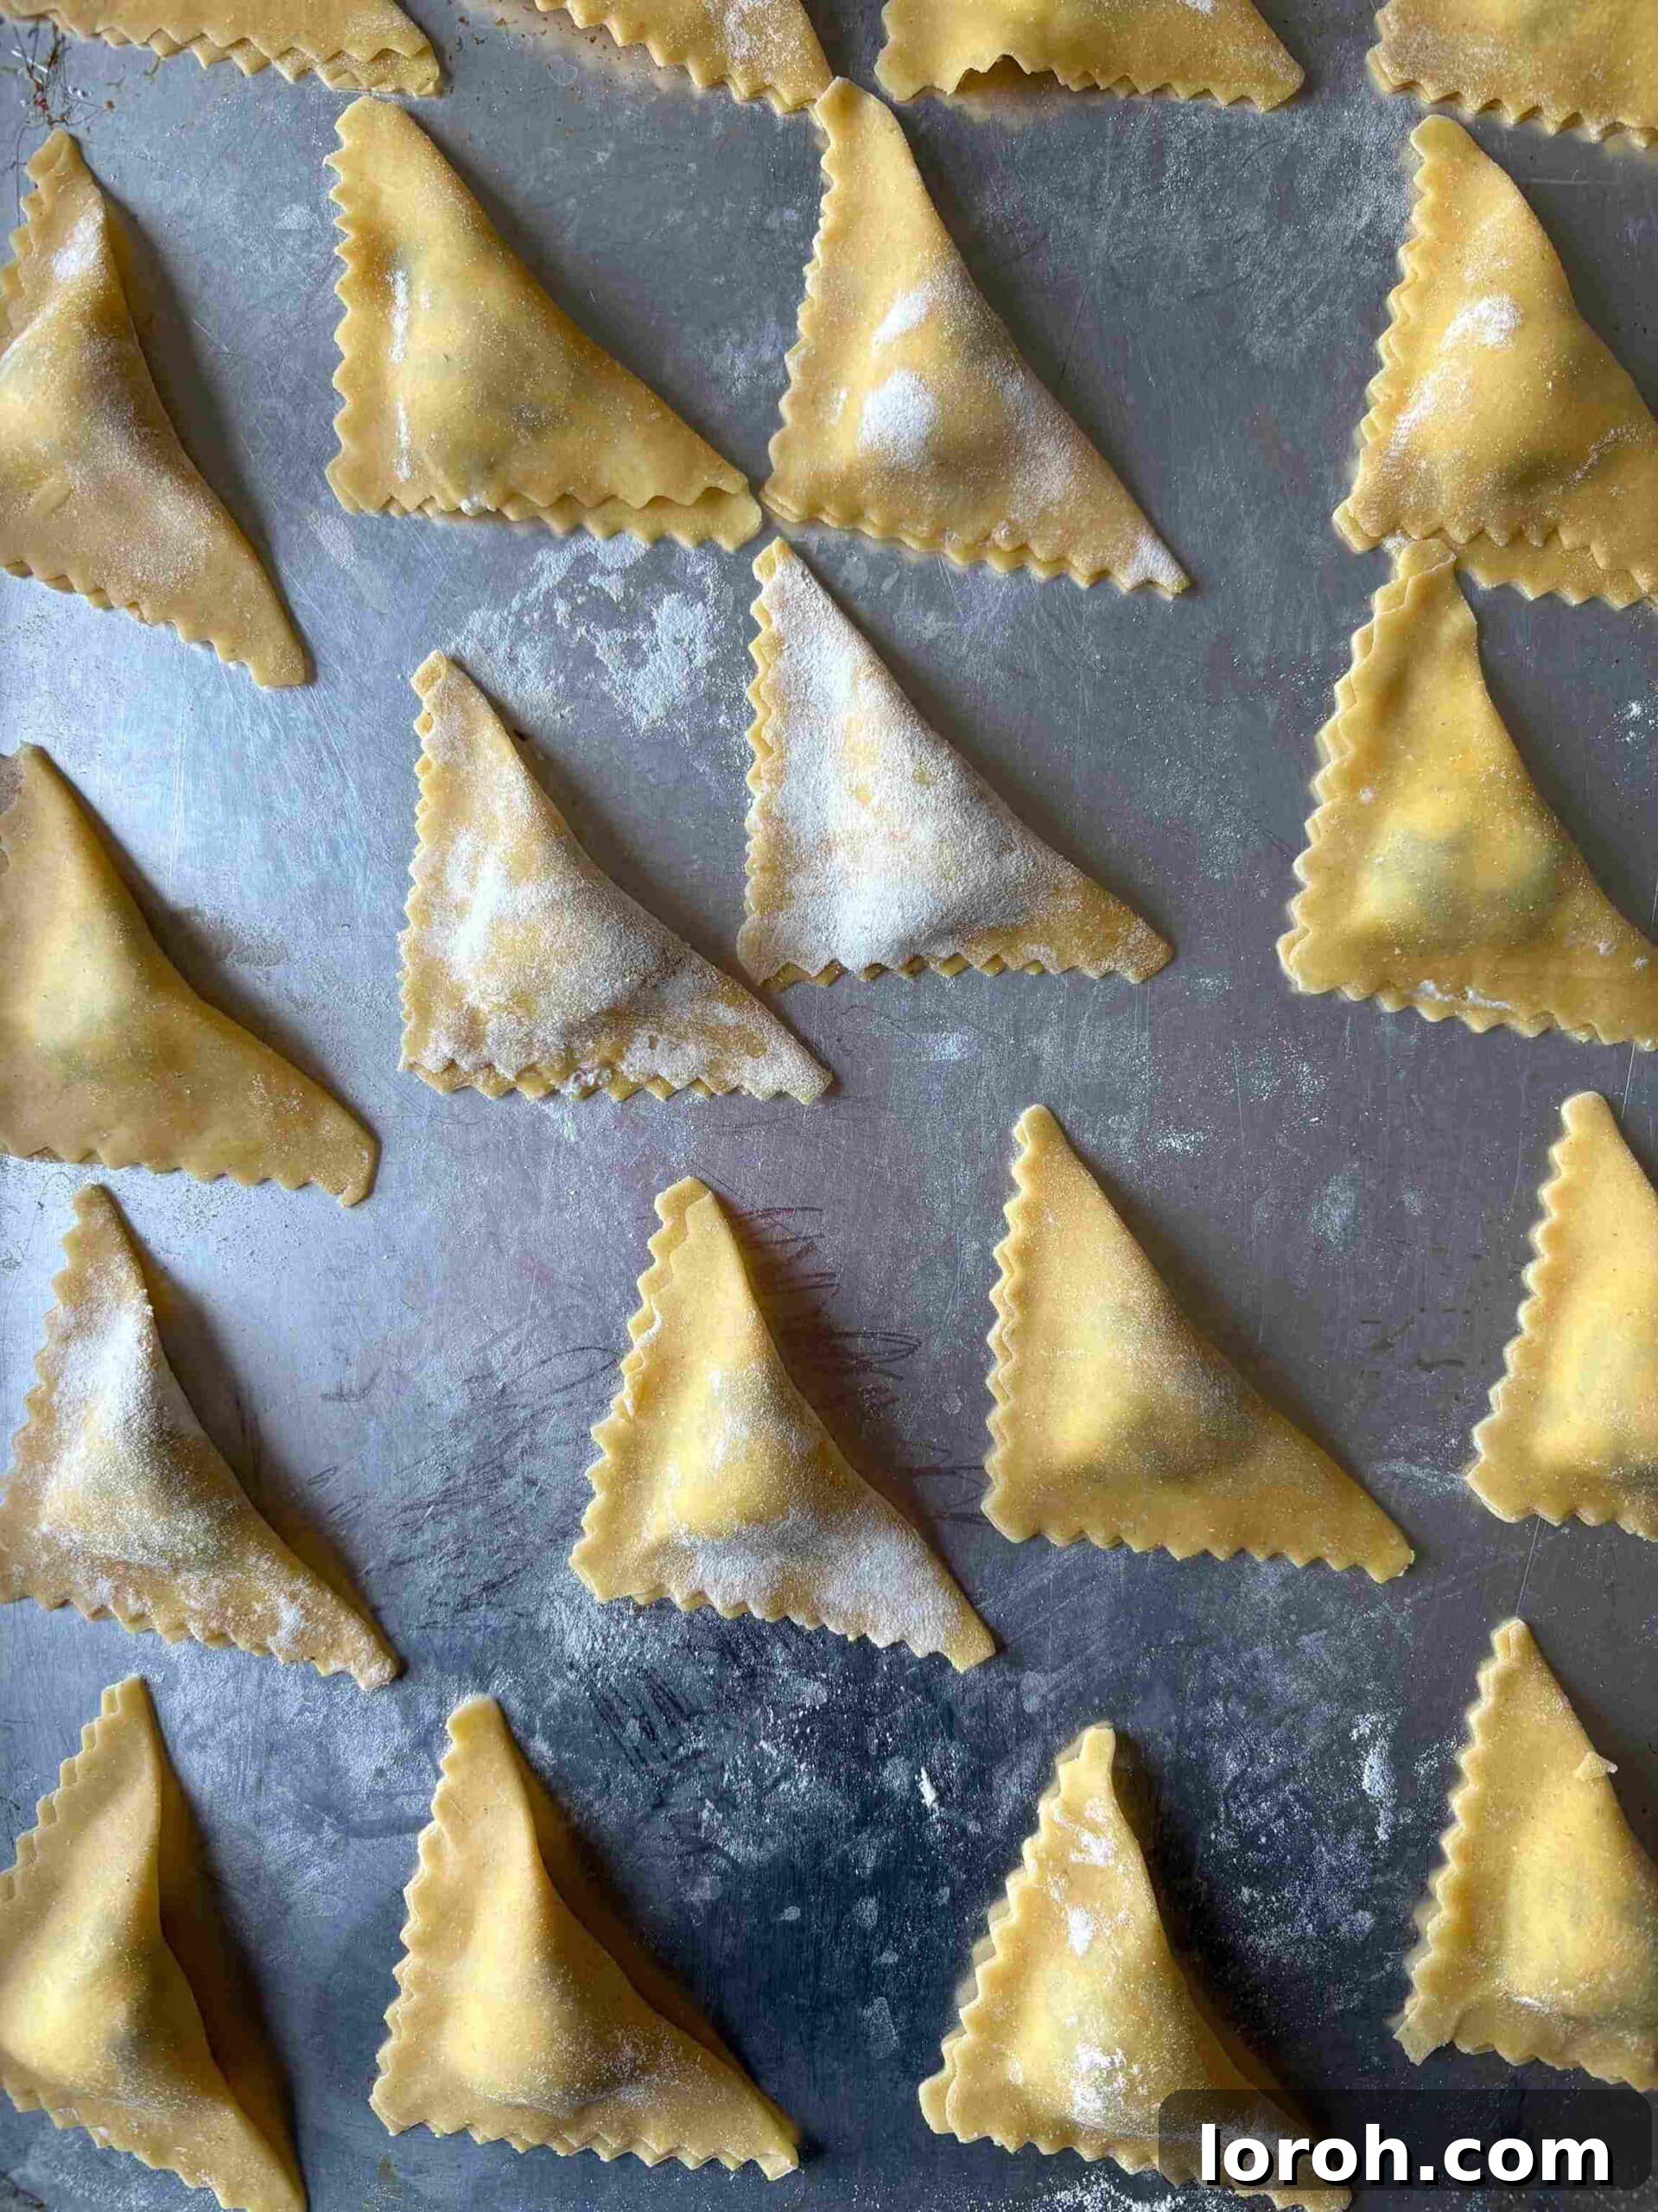
- To shape the triangoli: Working with one square at a time, gently lift one corner of the pasta over the top of the filling to meet the opposite corner, forming a perfect triangle. Carefully press along all the edges with your fingers, firmly sealing the pasta and expelling any trapped air around the filling. If the dough seems dry and isn’t sealing well, lightly moisten the edges with a fingertip dipped in water. Place the finished triangoli back onto the semolina-dusted baking tray. Continue this process until all pasta squares are filled and shaped.
- Once all the triangoli are shaped, bring a large pot of generously salted water to a rolling boil.
To Make the Lemon Butter & Sage Sauce:
- While the water for the pasta is heating, prepare the crispy sage. Add the olive oil to a shallow, wide-bottomed pan and set it over a medium heat. Once the oil is hot and shimmering, add the fresh sage leaves in a single layer. Fry them for about 3 minutes, or until they become beautifully crispy and fragrant. Remove the crispy sage leaves from the pan and place them on a sheet of kitchen paper to absorb any excess oil.
- Next, make the lemon butter sauce using the same pan (no need to clean it). Add the diced unsalted butter to the pan and place it over a low heat. Allow the butter to melt slowly, becoming a light golden color without browning too much.
- Once the water is boiling, carefully add the homemade triangoli to the pot. Cook for approximately 2-3 minutes. Fresh pasta cooks very quickly, so watch it closely. It should be “al dente” – firm to the bite.
- As soon as the butter has melted in the pan, add small splashes of the reserved pasta cooking water, stirring vigorously with a whisk or spoon. This will help emulsify the sauce into a smooth, creamy, and buttery consistency. Squeeze in a generous amount of fresh lemon juice.
- Using a slotted spoon, gently lift the cooked triangoli directly from the boiling water into the pan with the lemon butter sauce. Toss gently for about 1 minute, ensuring each triangoli is beautifully coated in the luscious sauce.
- Spoon the triangoli and sauce into individual bowls. Garnish generously with the crispy sage leaves you prepared earlier, a sprinkle of freshly grated Parmesan, and plenty of freshly ground black pepper. Serve immediately and enjoy your homemade Italian masterpiece!
Recipe Notes
Triangoli Shaping Guide: For a visual step-by-step guide on how to perfectly form your triangoli, please refer to the photos and instructions earlier in this article.
Storage Tips: The spinach and ricotta filling can be prepared up to a day in advance. Once made, let it cool completely, then cover and chill it overnight in the refrigerator. Shaped but uncooked triangoli are best cooked on the same day. If you make them more than an hour ahead, cover them tightly and chill for up to 24 hours. The finished dish, once sauced, is truly best served immediately.
Reheating Leftovers: Homemade fresh pasta dishes are notoriously tricky to reheat without losing their ideal texture. This dish is designed for immediate enjoyment. However, to avoid food waste, if you have leftovers, they can be gently warmed for 1-2 minutes in the microwave, or on a stovetop with a splash of water or broth, but be careful not to overcook them.
Freezing Instructions: To freeze uncooked triangoli, lay them in a single layer on a semolina-dusted baking tray and place in the freezer for about 20-30 minutes until firm. Once solid, transfer them to an airtight container or a freezer-safe bag. They can be stored in the freezer for up to 3 months. Cook them directly from frozen in boiling water; they may take a minute or two longer to cook than fresh.
The Magic of Pasta Water: Always get into the habit of reserving some of the starchy pasta cooking water. A few splashes added to your sauce at the end can transform its texture, creating a silky, cohesive sauce that clings perfectly to the pasta.
Texture Enhancements: The crispy sage leaves add a wonderful herby flavor and delightful crunch. For an extra layer of texture and nutty flavor, consider scattering some toasted nuts over the finished dish. Pine nuts, walnuts, almonds, or hazelnuts all work exceptionally well.
Serving Suggestions: This spinach and ricotta triangoli is a complete and satisfying meal on its own. For a heartier spread, serve it alongside some crusty garlic bread to soak up every drop of that delicious sauce, and a fresh, crisp green salad for balance.
Alternative Sauces: The versatile spinach and ricotta filling pairs beautifully with a variety of other sauces. A classic rich tomato sauce or a vibrant homemade basil pesto are fantastic alternatives if you want to experiment beyond the lemon butter and sage.
Nutrition
Calories: 796kcal, Carbohydrates: 75g, Protein: 23g, Fat: 38g, Saturated Fat: 22g, Polyunsaturated Fat: 2g, Monounsaturated Fat: 12g, Trans Fat: 1g, Cholesterol: 101mg, Sodium: 192mg, Potassium: 206mg, Fiber: 1g, Sugar: 0.3g, Vitamin A: 3226IU, Vitamin C: 7mg, Calcium: 254mg, Iron: 1mg
Nutrition information is automatically calculated and should be used as an approximation only.