
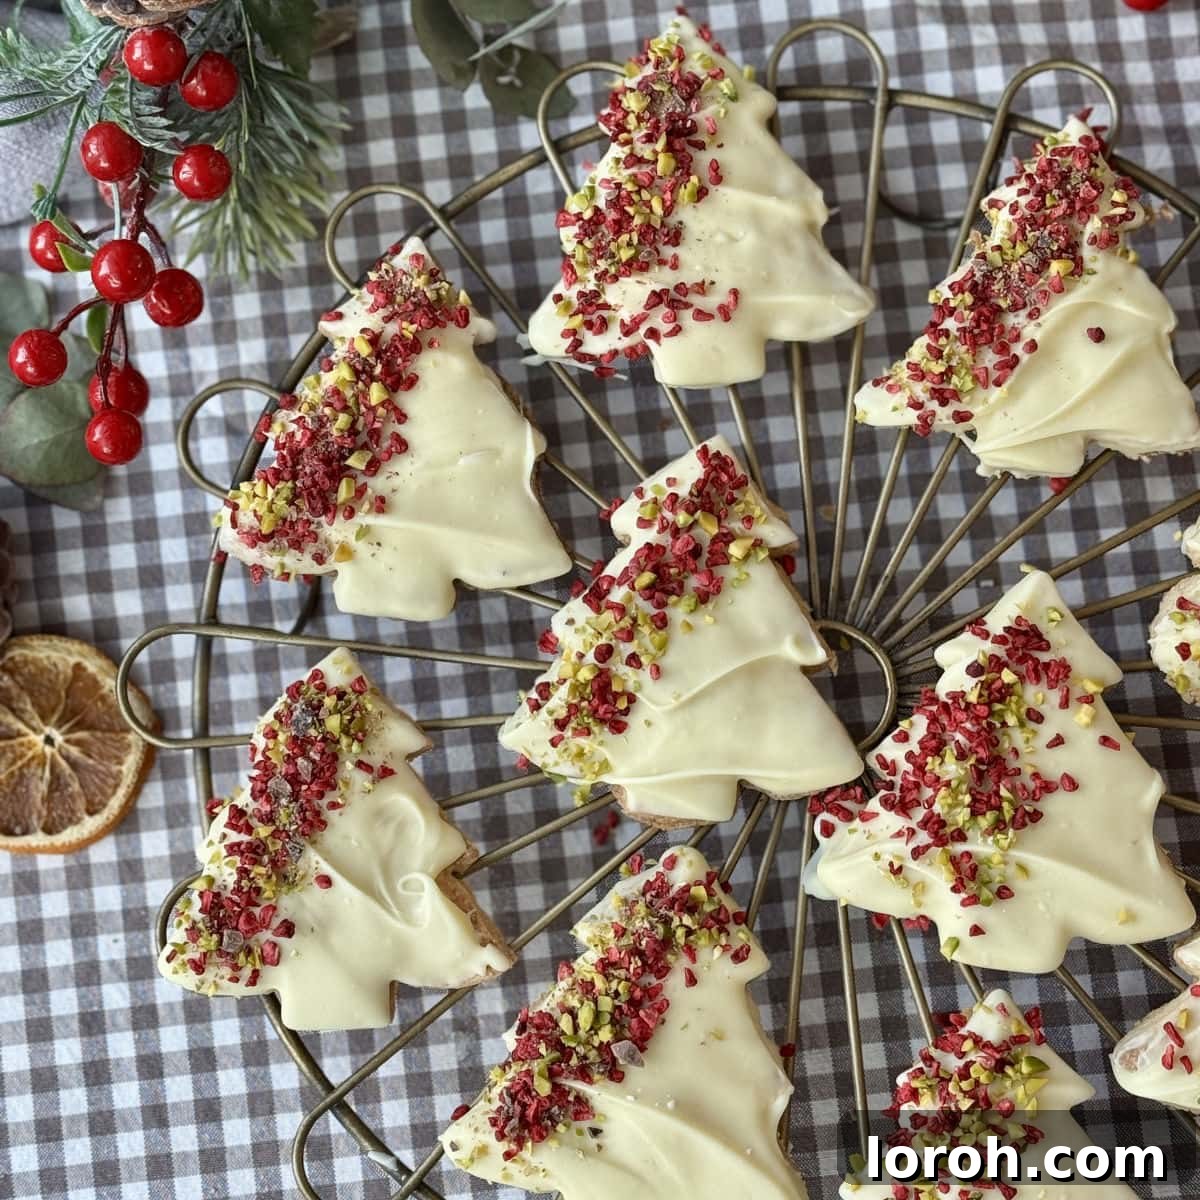
Embrace the magic of the festive season with these enchanting **Christmas tree cookies**. Imagine buttery shortbread that melts in your mouth, shaped into adorable Christmas trees, ready to be adorned with your favorite holiday decorations. This recipe is not just about taste; it’s about creating delightful memories and edible gifts that truly capture the spirit of Christmas. Using the classic, easy-to-remember 3:2:1 shortbread ratio (flour : butter : sugar), these cookies come together quickly in a food processor, minimizing effort while maximizing deliciousness.
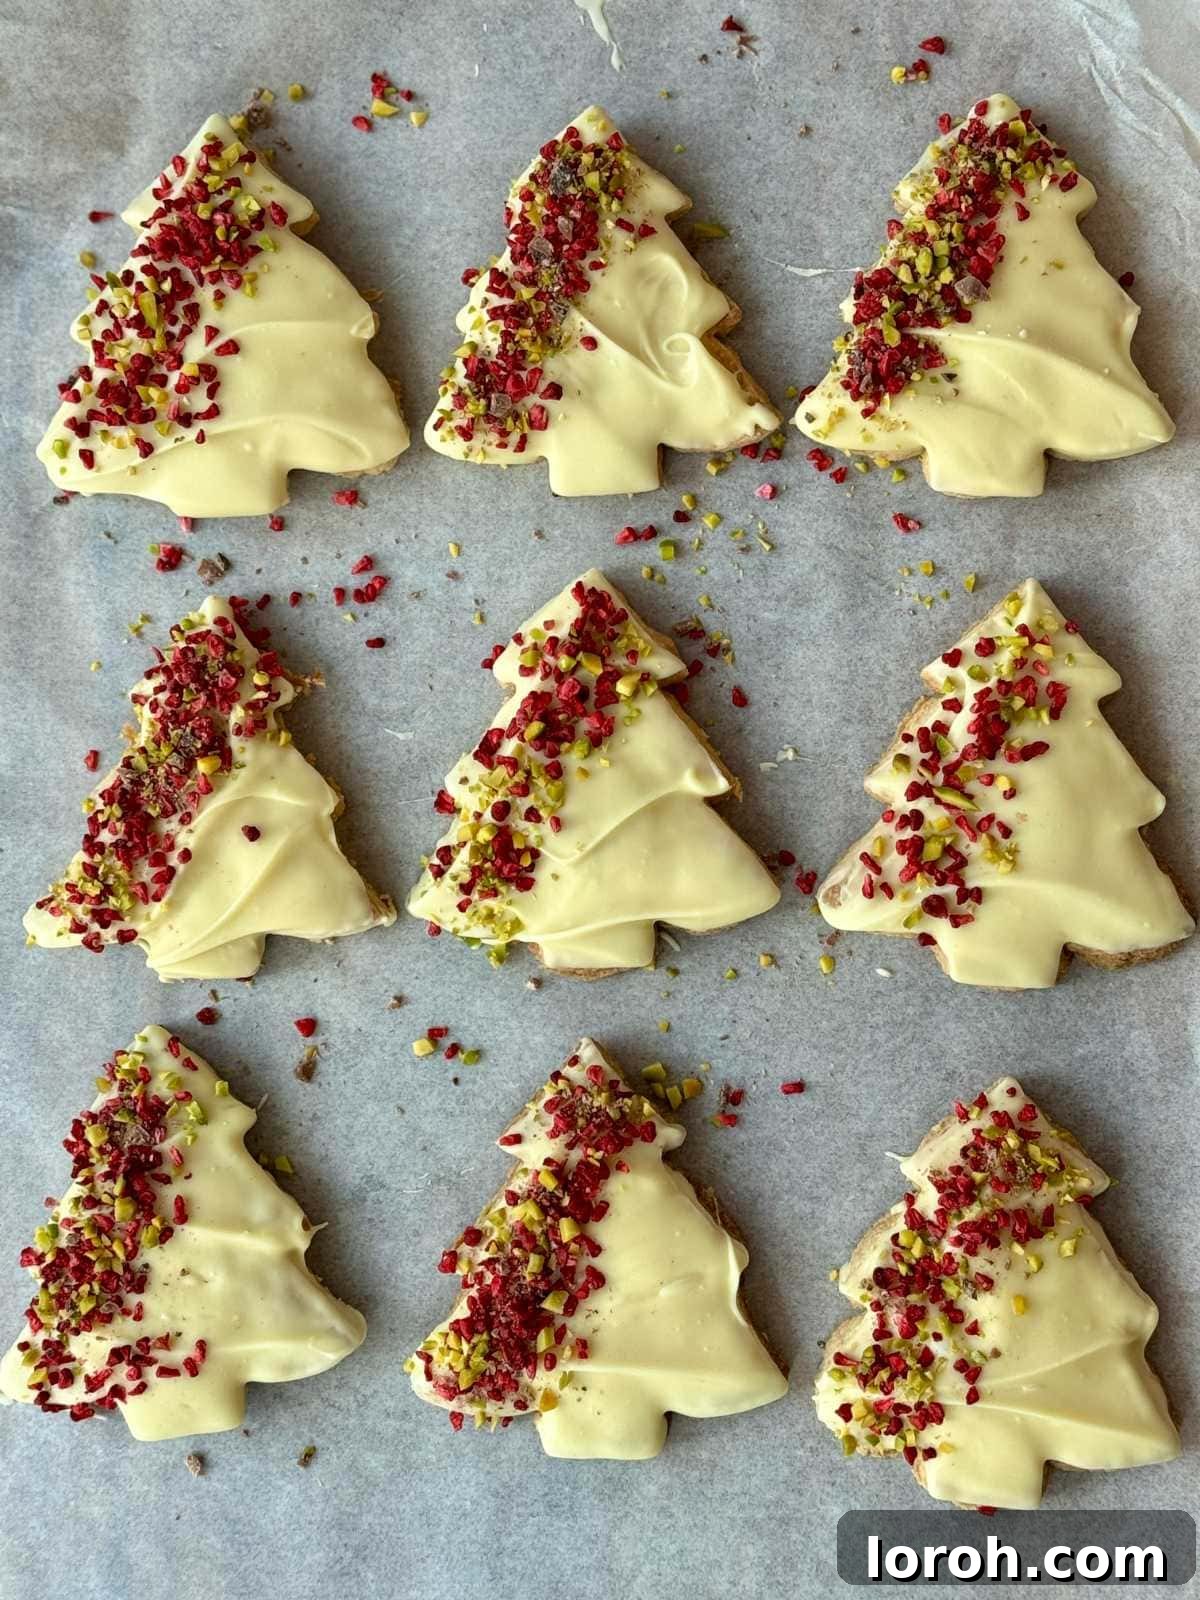
Whether you prefer them plain and simple, allowing their rich, buttery flavor to shine, or you choose to embellish them with a luxurious layer of white chocolate, a sprinkling of vibrant freeze-dried raspberries, and crunchy pistachios, these cookies are a showstopper. They are incredibly versatile, making them ideal for holiday parties, thoughtful edible gifts, or simply as a cozy companion to your afternoon cup of tea.
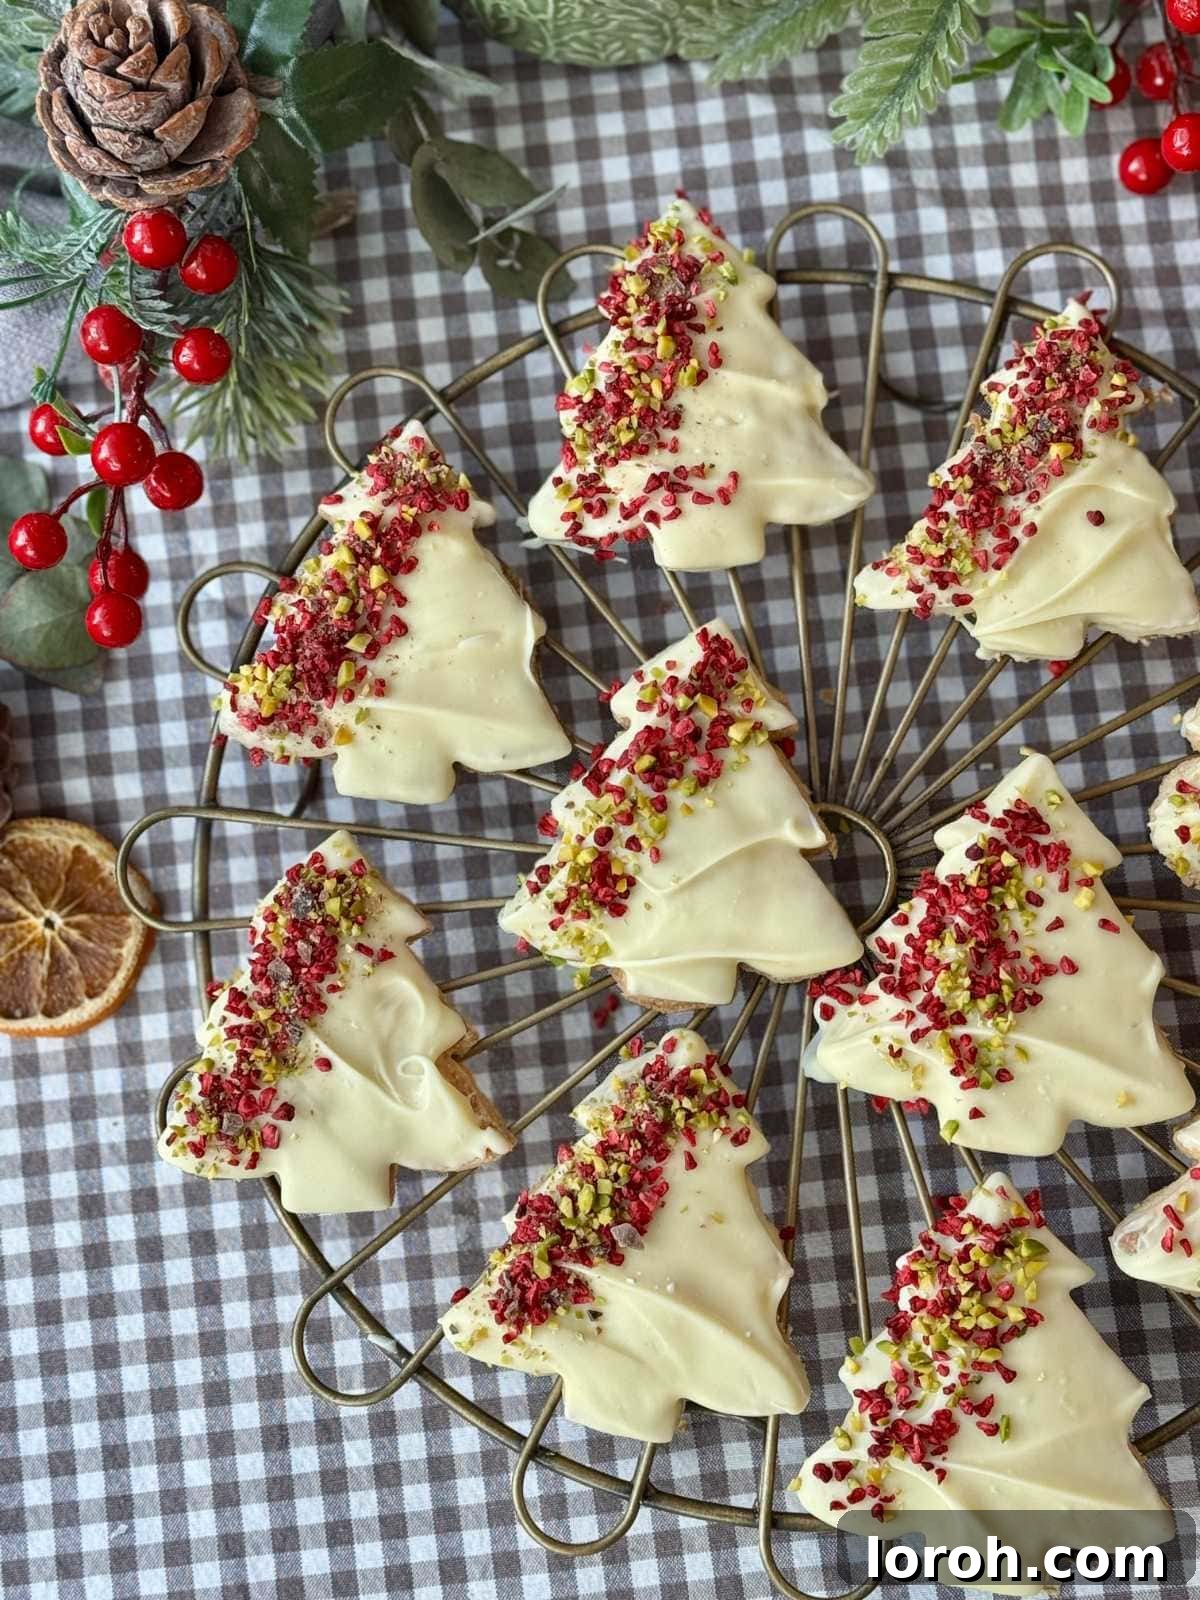
This foolproof shortbread Christmas tree cookie recipe is designed for bakers of all levels. The best part? You have complete creative freedom when it comes to decorating them! From simple glazes to elaborate sprinkles, your festive table will be graced with charming, personalized treats. Below, you’ll find comprehensive step-by-step instructions, essential dough tips, creative variations, common troubleshooting solutions, and a handy FAQ section. If you’re looking for more festive mini sweet treats, you might also enjoy our Nutella puff pastry tree or delightful jam tartlets.
Table of Contents
- Why You Will Love This Recipe
- Ingredients for Christmas Tree Shortbread
- Substitutions and Variations
- How to Make Christmas Tree Cookies
- Expert Baking Tips
- Frequently Asked Questions
- Other Festive Recipes You Might Enjoy
- Simple Christmas Tree Cookies Recipe Card
Why You Will Adore These Christmas Tree Cookies
There are countless reasons why these buttery shortbread Christmas tree cookies will become your go-to festive bake. They offer a delightful combination of ease, flavor, and visual appeal, making them perfect for busy holiday schedules.
- **Unforgettable Shortbread Texture:** Our recipe guarantees that classic, crumbly yet tender shortbread texture that melts in your mouth. This is achieved effortlessly thanks to the traditional 3:2:1 ratio of flour, butter, and sugar, a time-honored formula for perfect shortbread.
- **Stunning Festive Presentation:** Elevate your holiday spread with cookies that are as beautiful as they are delicious. The optional white chocolate dip, adorned with a sprinkle of vibrant freeze-dried raspberries and chopped pistachios, transforms these simple cookies into edible works of art that are sure to impress.
- **Effortless Food Processor Method:** Say goodbye to endless mixing! This recipe utilizes a food processor to bring the dough together in minutes, significantly reducing hands-on time and making holiday baking a breeze. Less time in the kitchen means more time enjoying the festivities.
- **Holds Shape Perfectly for Gifts and Parties:** One of the biggest challenges with cutout cookies is maintaining their intricate shapes. Our dough is designed to hold its Christmas tree form beautifully, even during baking. This makes them ideal for carefully arranged party platters or for packaging as charming homemade gifts that will be cherished by friends and family.
- **Versatile Decoration Options:** Beyond our suggested white chocolate and berry topping, these cookies are a blank canvas for your creativity. Explore various icing, sprinkles, and candies to match any holiday theme or personal preference.
Key Ingredients for Buttery Christmas Tree Shortbread
The full, detailed recipe with exact measurements can be found in the printable recipe card at the bottom of this post. Simply scroll down!
Creating perfect shortbread requires just a few high-quality ingredients. Here’s what you’ll need for these delightful Christmas tree cookies:
- **Plain Flour:** Also known as ‘all-purpose flour’ in North America. This provides the structure for your cookies. Do not use self-rising flour, as the leavening agents will change the classic shortbread texture.
- **Caster Sugar:** Often referred to as ‘superfine sugar.’ Its fine crystals dissolve easily into the butter, contributing to a smooth dough and a delicate crumb. While superfine sugar is preferred for the best texture, regular granulated sugar can be used if caster sugar is unavailable.
- **Unsalted Butter:** This is the star of shortbread! Using unsalted butter allows you to control the salt content precisely. Ensure it’s softened to room temperature for easier creaming with the sugar, which is crucial for the tender texture.
- **White Chocolate (for decoration):** Choose a good quality white chocolate for a smooth, creamy coating. This will be melted for dipping.
- **Freeze-Dried Raspberries (for decoration):** Crushed freeze-dried raspberries add a beautiful pop of red color and a tangy contrast to the sweet shortbread and white chocolate.
- **Pistachios (for decoration):** Finely chopped pistachios provide a lovely green hue and a subtle nutty crunch, mimicking festive ornaments.
The simplicity of these ingredients means that the quality of each one truly shines through, so opt for the best you can find for an unparalleled shortbread experience.
Creative Substitutions and Festive Variations
These Christmas tree cookies are incredibly adaptable, allowing you to customize them to your taste and holiday theme. Don’t be afraid to get creative with flavors and decorations!
**Delightful Decoration Ideas:**
- **Add a Touch of Sparkle:** For an extra magical touch, sprinkle edible glitter or shimmering dust over the white chocolate before it sets. Gold or silver sparkles can make your trees truly dazzling.
- **Chocolate Stars for the Top:** Mimic the star on a real Christmas tree by placing small chocolate stars or edible sugar stars at the top of each cookie while the chocolate is still wet.
- **Icing Glaze Alternative:** Instead of melted chocolate, create a simple powdered (icing) sugar glaze. Mix icing sugar with a spoonful of milk or water until you reach a smooth, pourable consistency. You can easily add a few drops of food coloring to create festive green, red, or even blue glazes.
- **Precision with Piping:** For intricate details like garlands, lights, or unique patterns, use a piping bag (or a freezer bag with a tiny corner snipped off) filled with icing. This allows for fine lines and personalized designs.
- **Colorful Candy Accents:** Brighten your cookies with small candies like Smarties, M&Ms, or mini sprinkles. These add a playful burst of color and a satisfying crunch.
- **Chocolate Swap:** White chocolate is festive, but feel free to swap it for melted milk chocolate or dark chocolate for a richer, deeper flavor profile.
- **Coconut Snow:** Dust your decorated cookies with shredded coconut for a charming “snow” effect.
**Flavor Enhancements for Your Shortbread:**
- **Vanilla Extract:** A teaspoon of good quality vanilla extract can be added to the dough along with the butter and sugar for a classic, comforting flavor.
- **Citrus Zest:** For a brighter, zesty twist, add the finely grated zest of half a lemon, orange, or lime to the dough. It pairs wonderfully with the buttery flavor.
- **Almond Extract:** A few drops of almond extract can give your shortbread a subtle, sophisticated nutty aroma.
- **Spices:** Introduce holiday spices like a pinch of cinnamon, nutmeg, or even a tiny amount of ground ginger to the flour mixture for warm, aromatic cookies.
Step-by-Step Guide: How to Bake Perfect Christmas Tree Cookies
Here’s a visual, step-by-step guide to help you along the way. For the full, detailed ingredient list and precise instructions, please refer to the recipe card at the bottom of the page.
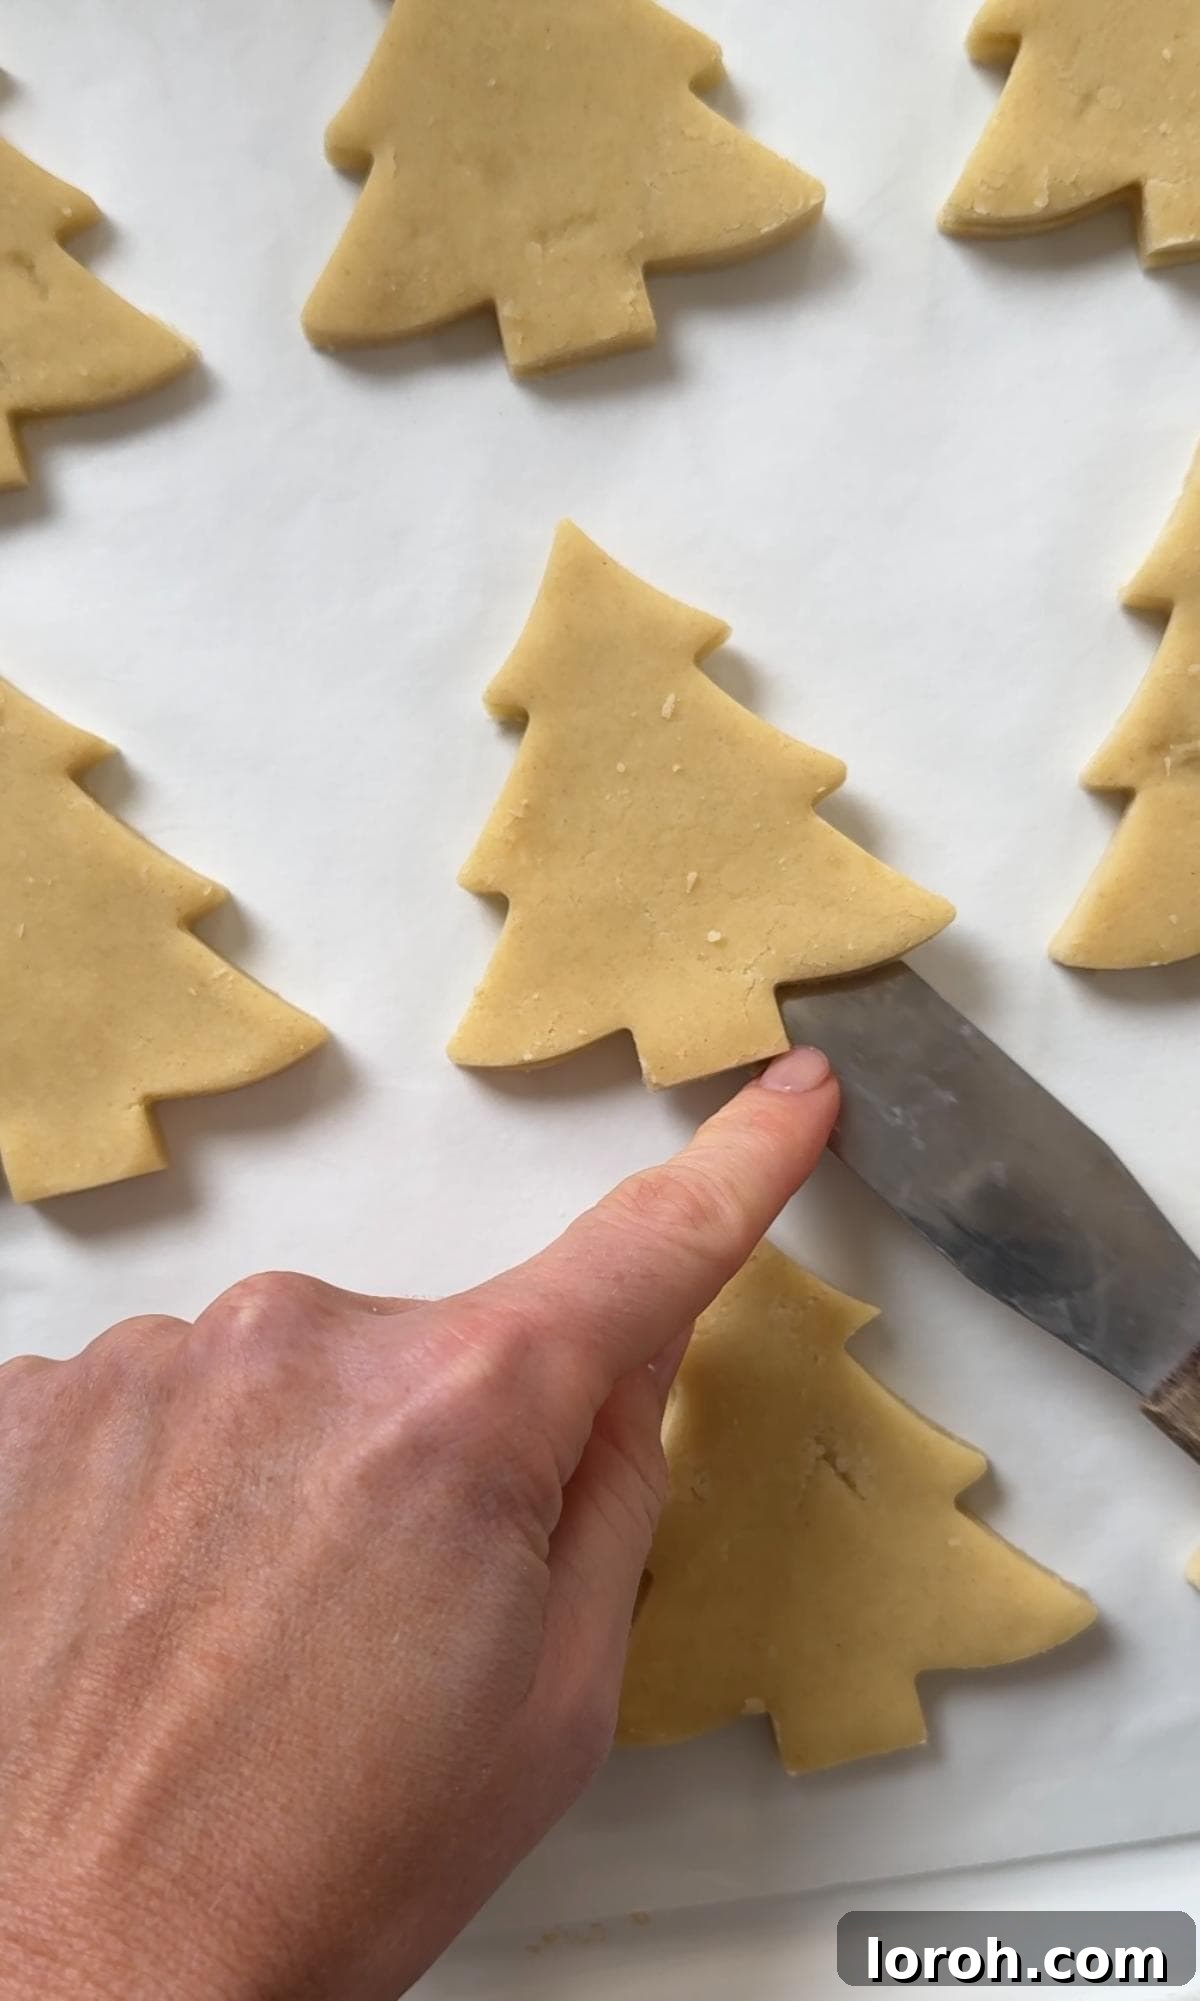
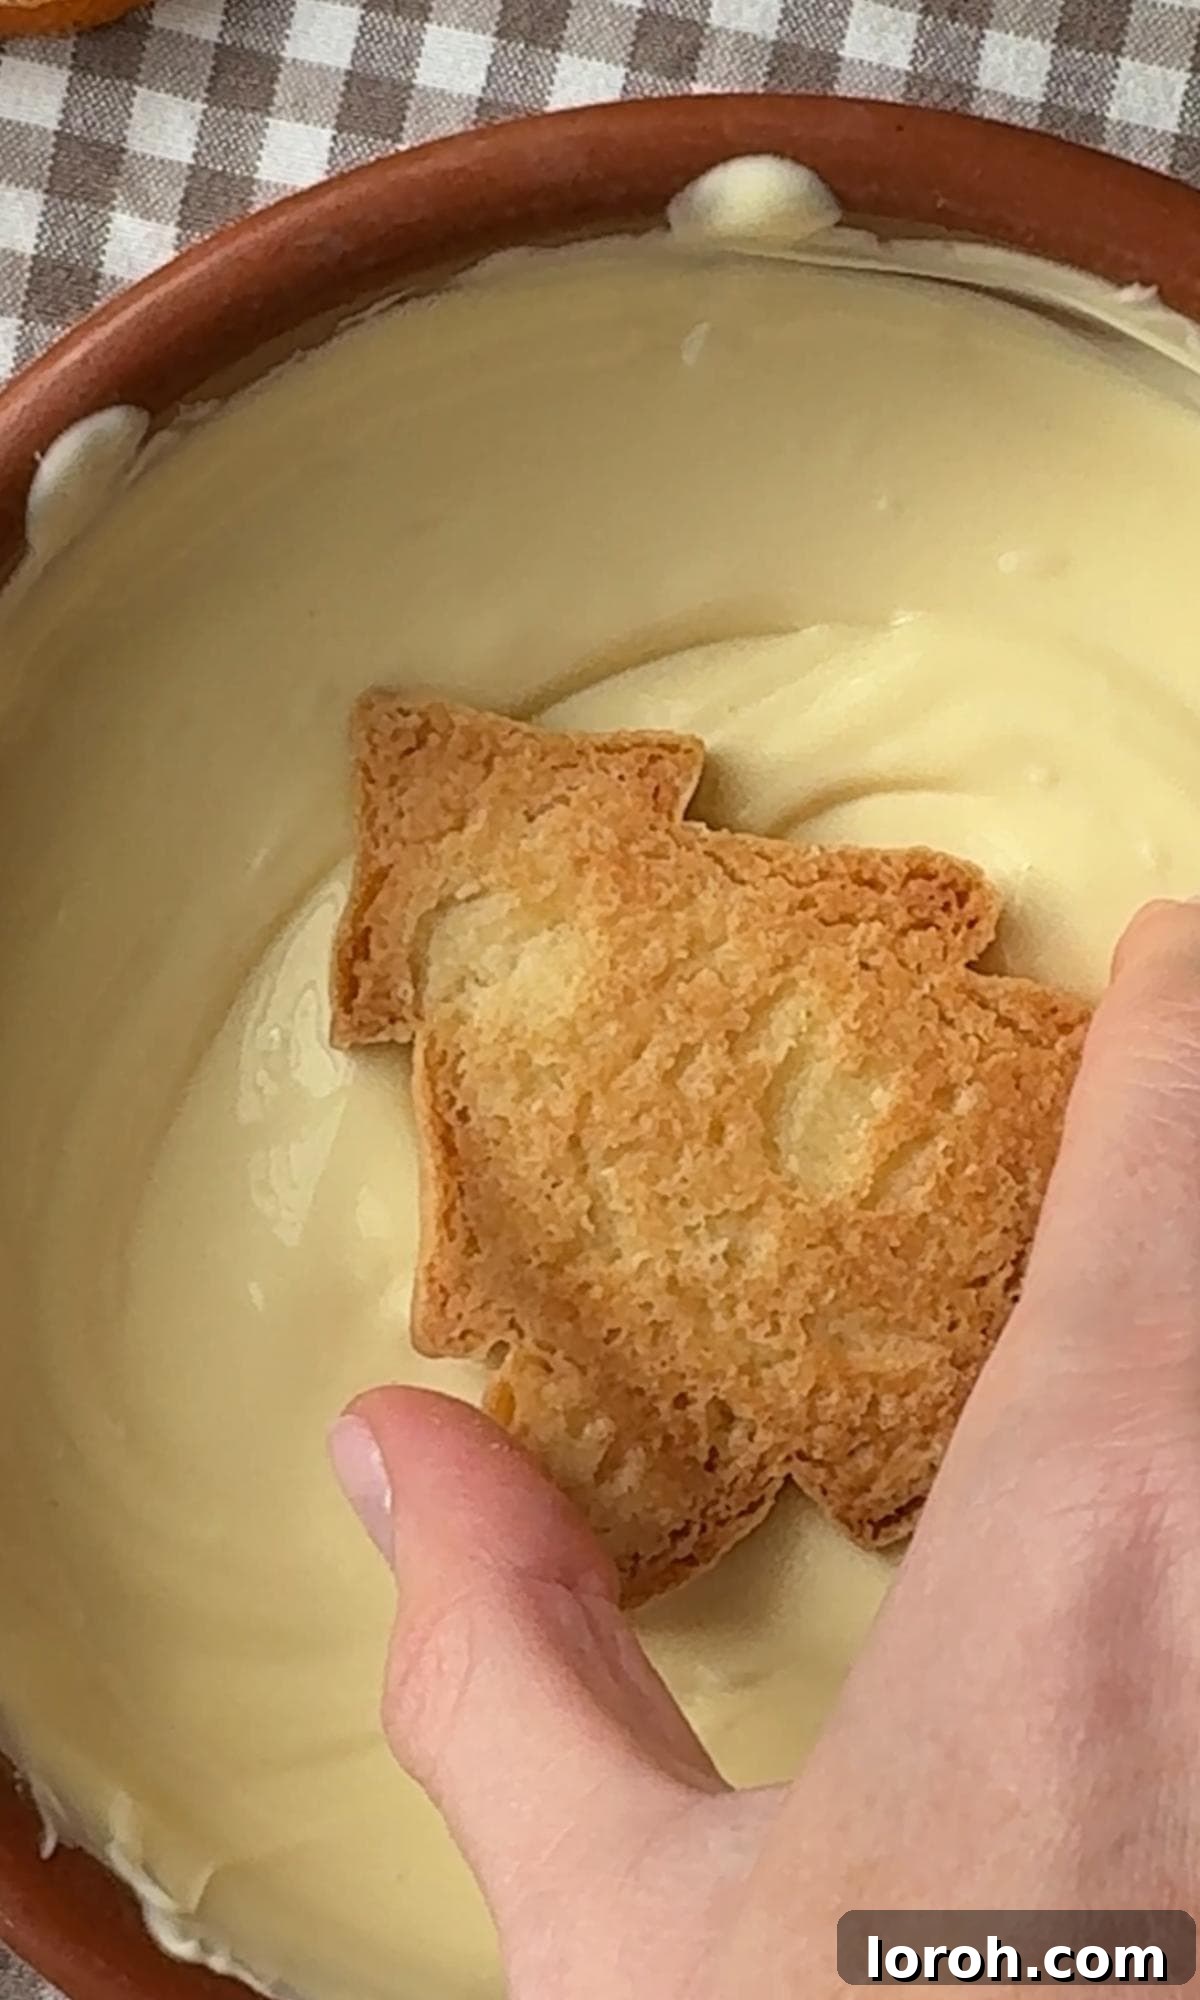
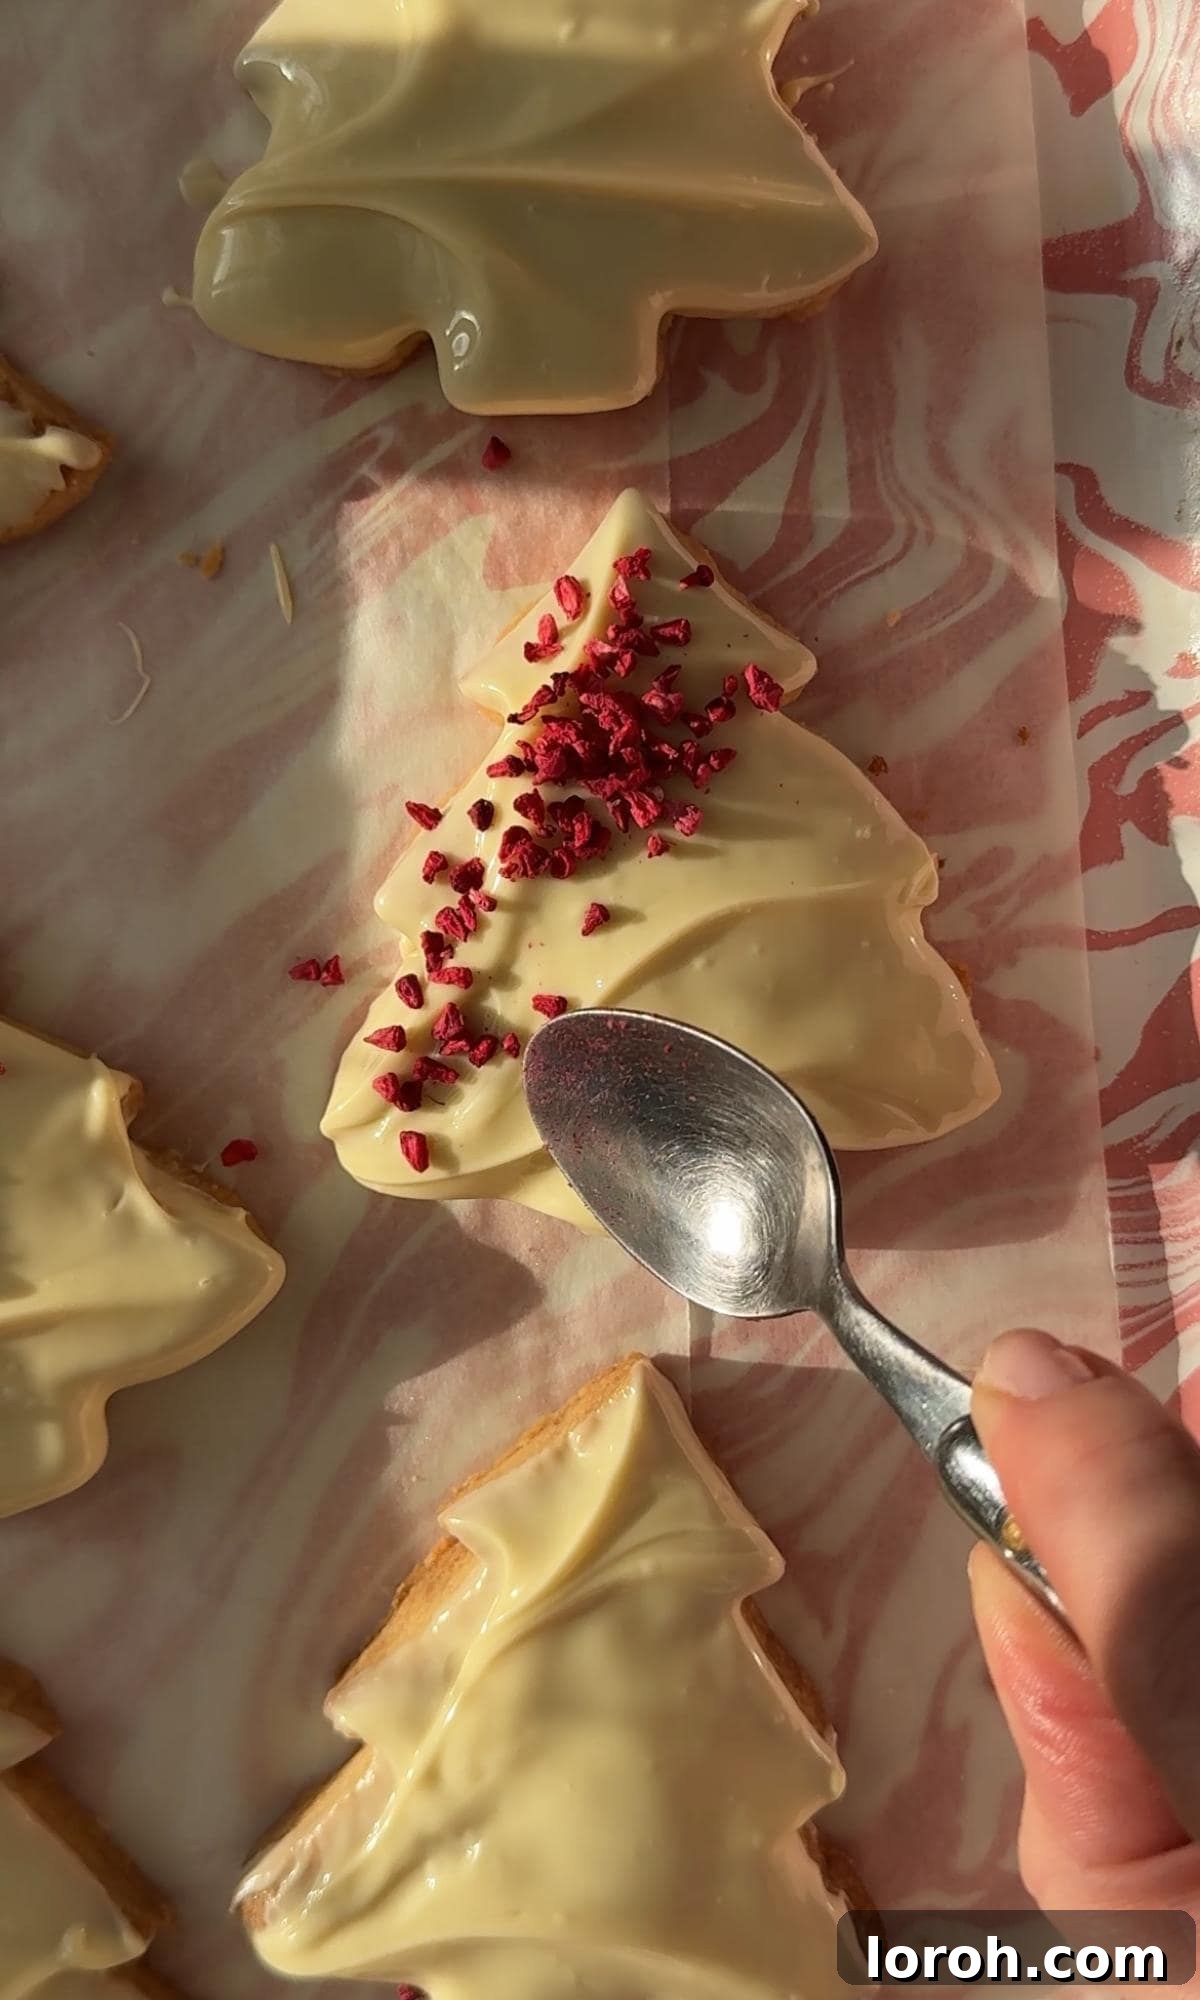
Expert Baking Tips for Flawless Christmas Tree Cookies
Achieving bakery-quality shortbread cookies at home is easier than you think with these professional tips and tricks:
**Maintaining Perfect Shapes: Chilling and Thickness**
- **The Chilling Advantage:** To ensure your delicate Christmas tree shapes remain crisp and defined, chilling the dough is paramount. A minimum of 20 minutes in the refrigerator before rolling helps firm up the butter, preventing the cookies from spreading too much in the oven. For even sharper edges, you can chill the cutout cookies on the baking sheet for 10-15 minutes before baking.
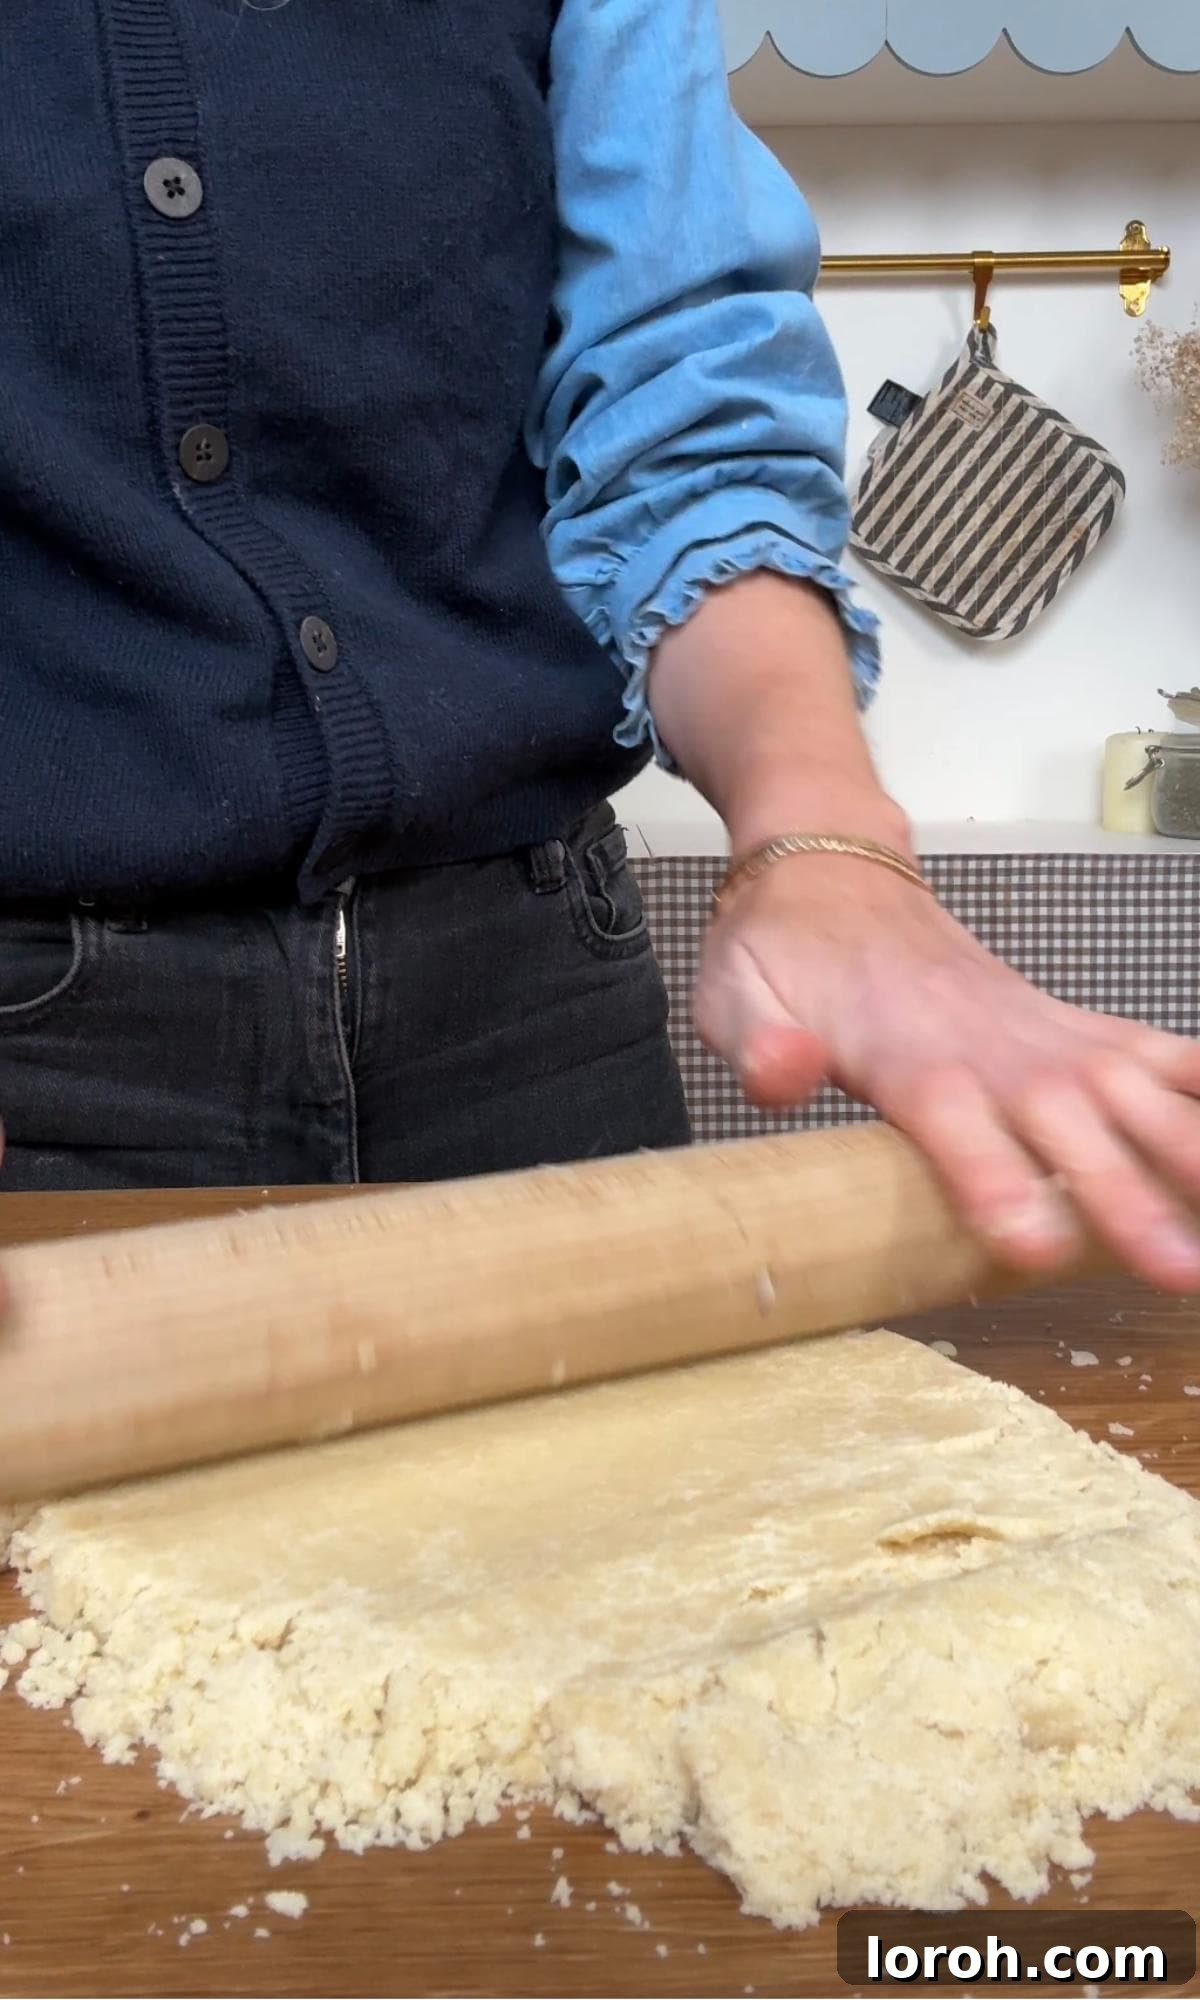
- **Optimal Dough Thickness:** Roll your dough out to an even thickness of about 1cm (just shy of half an inch). Rolling it too thin can make the cookies fragile and prone to breaking, while too thick might result in underbaked centers and a less crisp texture. Consistent thickness also ensures even baking.
**Mastering the Dough: Avoid Tough Shortbread**
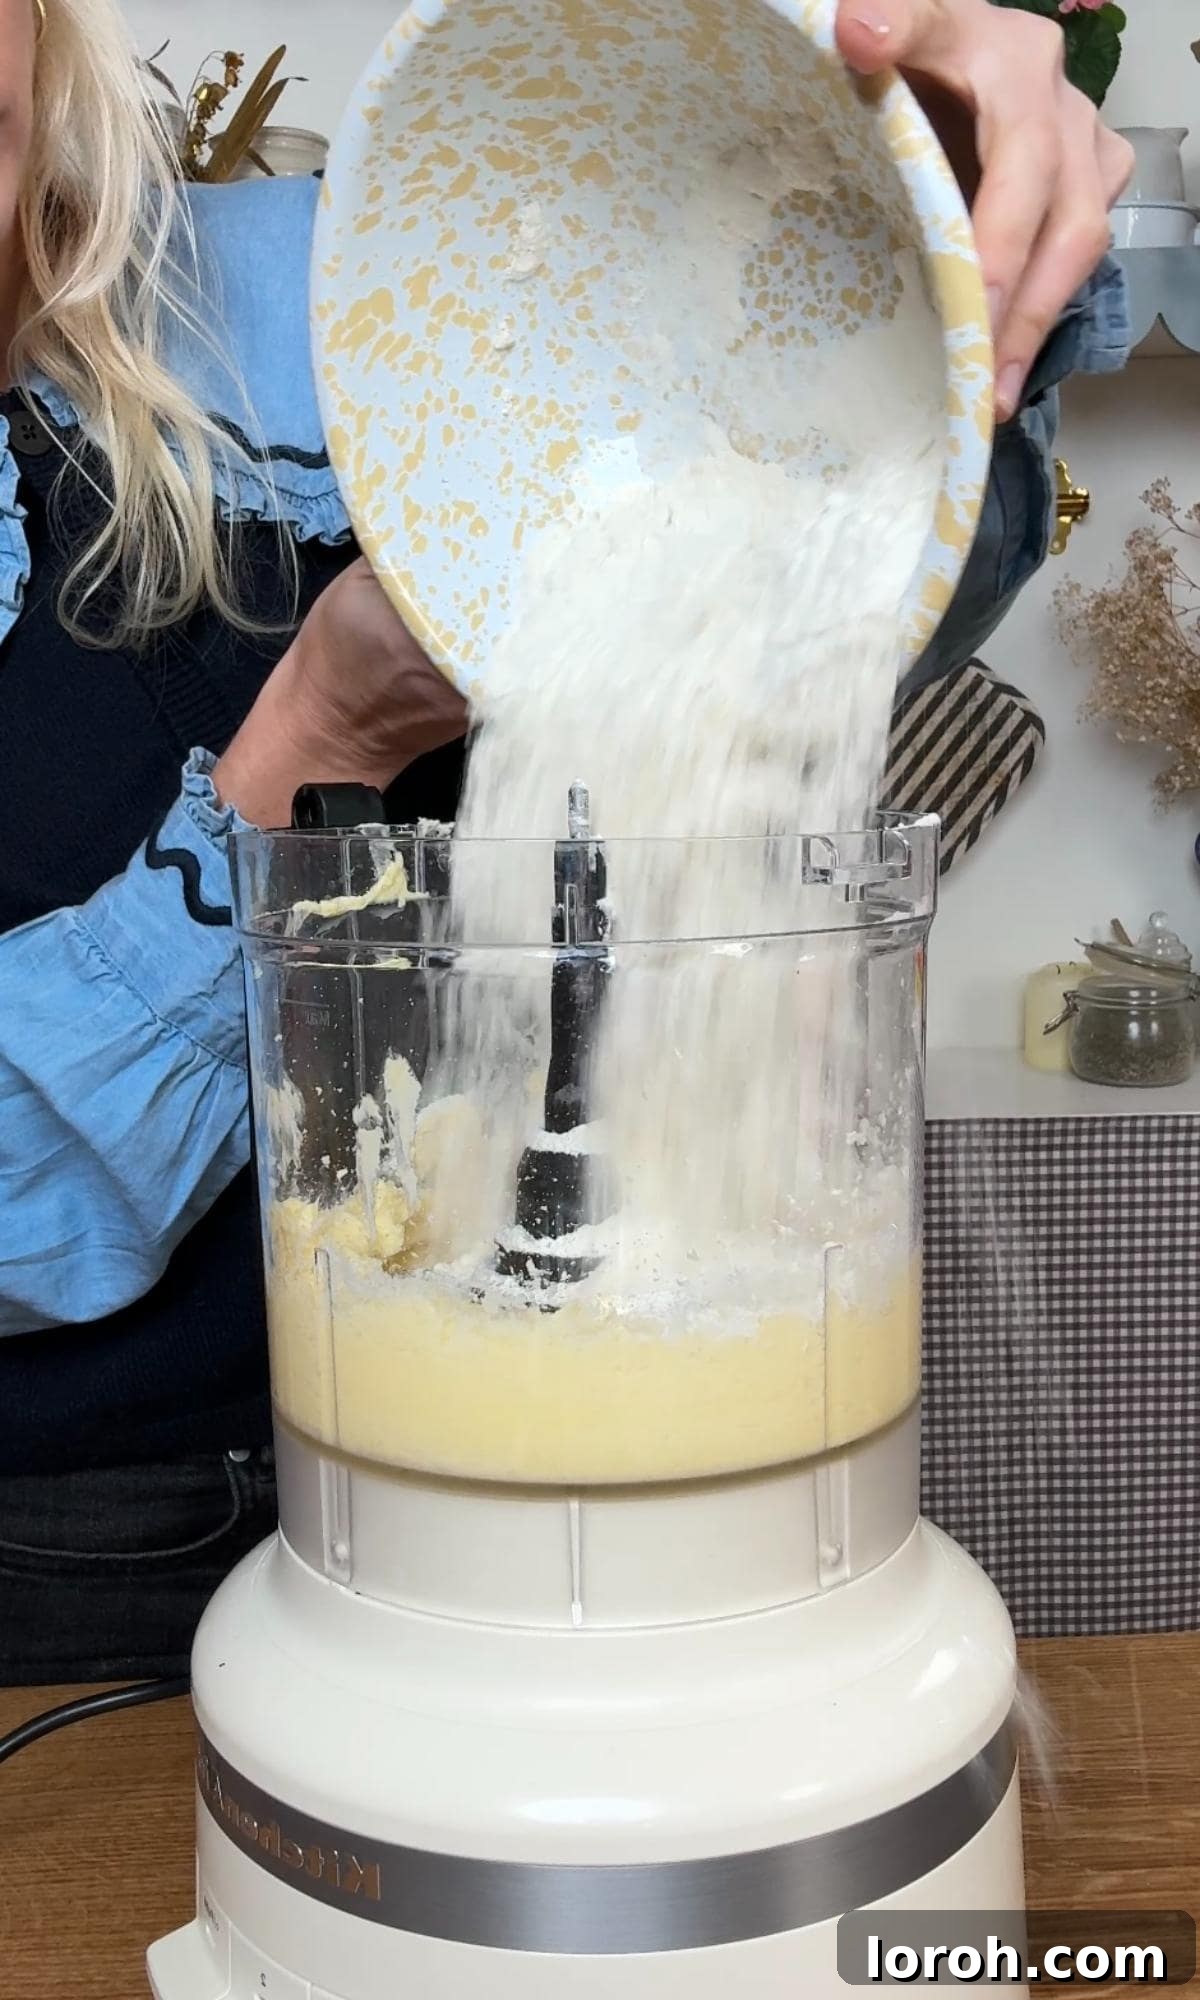
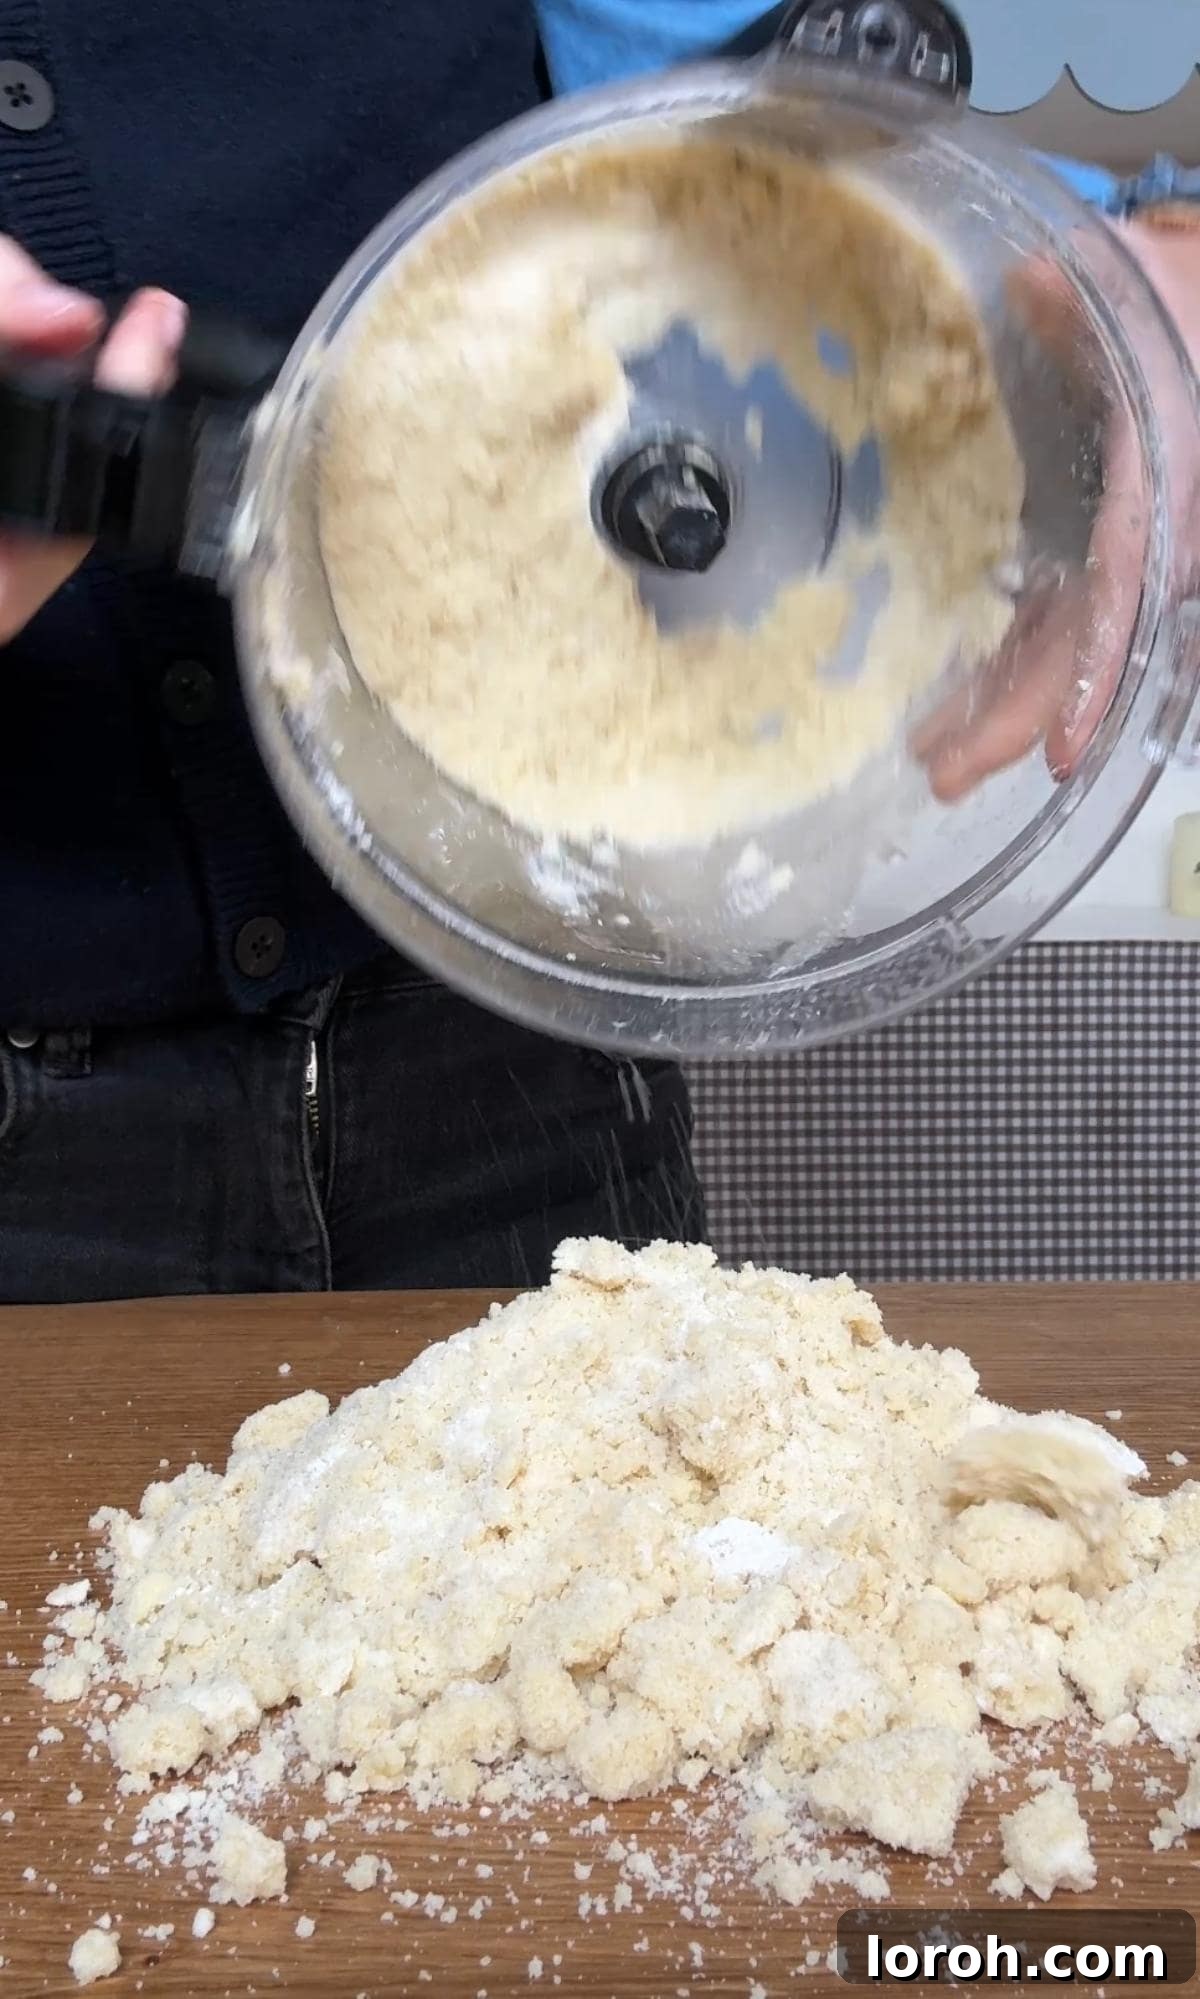
- **Gentle Mixing is Key:** The secret to tender, crumbly shortbread lies in not overworking the dough. Once the flour is added, mix it just until it comes together and resembles damp sand. Over-mixing develops gluten, which is desirable in bread but makes shortbread tough and chewy, instead of delightfully crumbly.
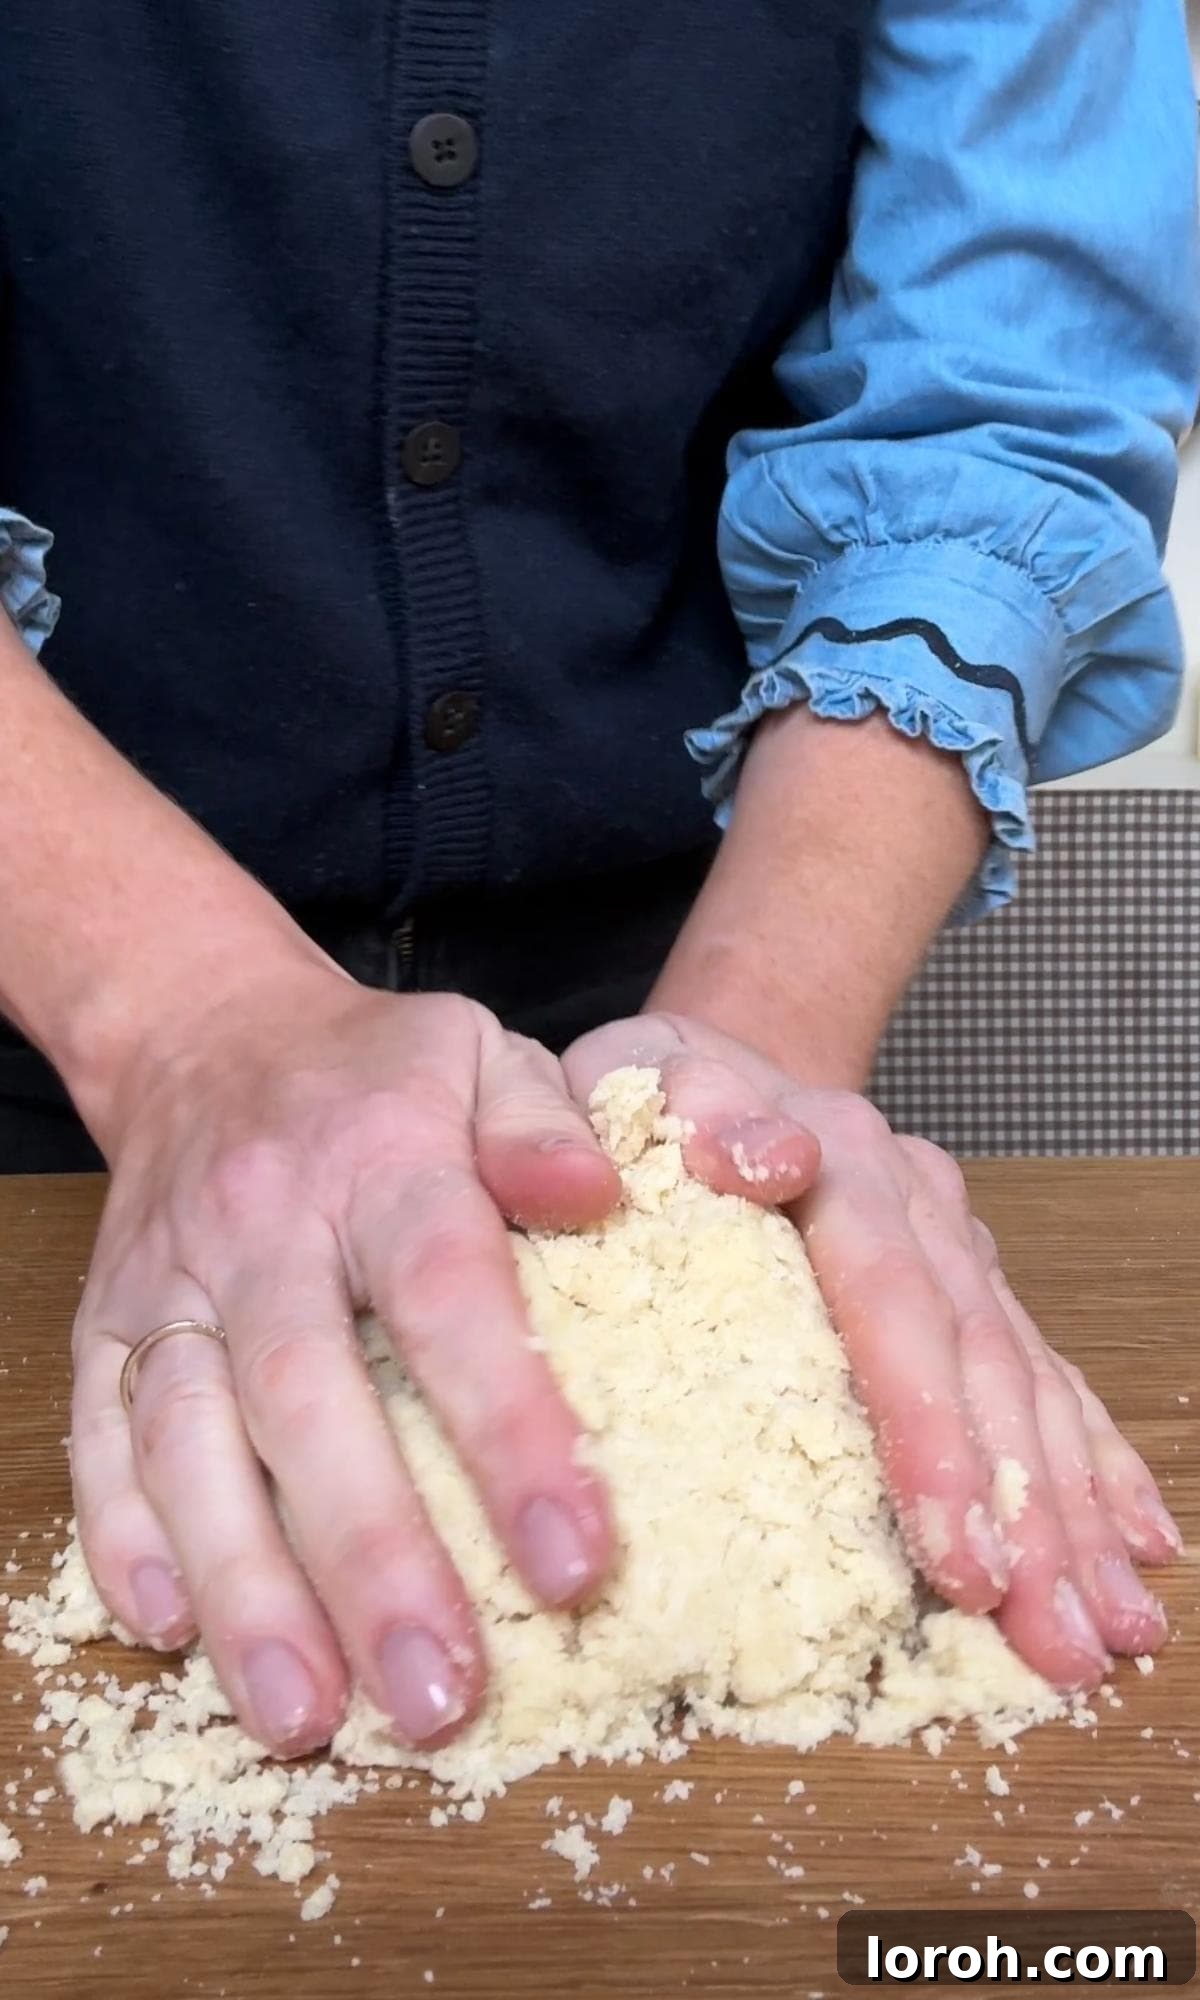
- **Hands-On (But Gentle) Approach:** When bringing the dough together from the food processor, use your hands to gently press it into a cohesive ball. Avoid vigorous kneading; the goal is simply to combine the ingredients without activating the gluten.
**Baking Times & Visual Cues**
- **Pale is Perfect:** Shortbread is traditionally pale. Don’t wait for your cookies to turn golden brown all over. You can remove them from the oven when the edges are just barely turning a pale golden hue. They may still seem slightly soft in the center, but shortbread continues to firm up and crisp as it cools on the baking sheet and then on a wire rack.
- **Oven Temperature Consistency:** Ensure your oven is accurately preheated to the correct temperature. An oven thermometer can be a valuable tool to verify accuracy, as inconsistent temperatures can affect cookie spread and texture.
**Flawless White Chocolate Dipping Tips**
- **Gentle Melting Methods:** White chocolate can be temperamental. Melt it gently either over a bain-marie (a heatproof bowl set over a pan of gently simmering water, ensuring the bowl does not touch the water) or in short, 20-30 second bursts in the microwave, stirring thoroughly after each interval. Avoid high heat, which can cause the chocolate to seize or burn.
- **Dipping or Drizzling:** You have options for applying the chocolate. For full coverage, dip the entire face of the cooled cookie directly into the melted chocolate. For a more delicate look, use a piping bag or a freezer bag with a tiny corner snipped off to drizzle elegant lines across the cookies.
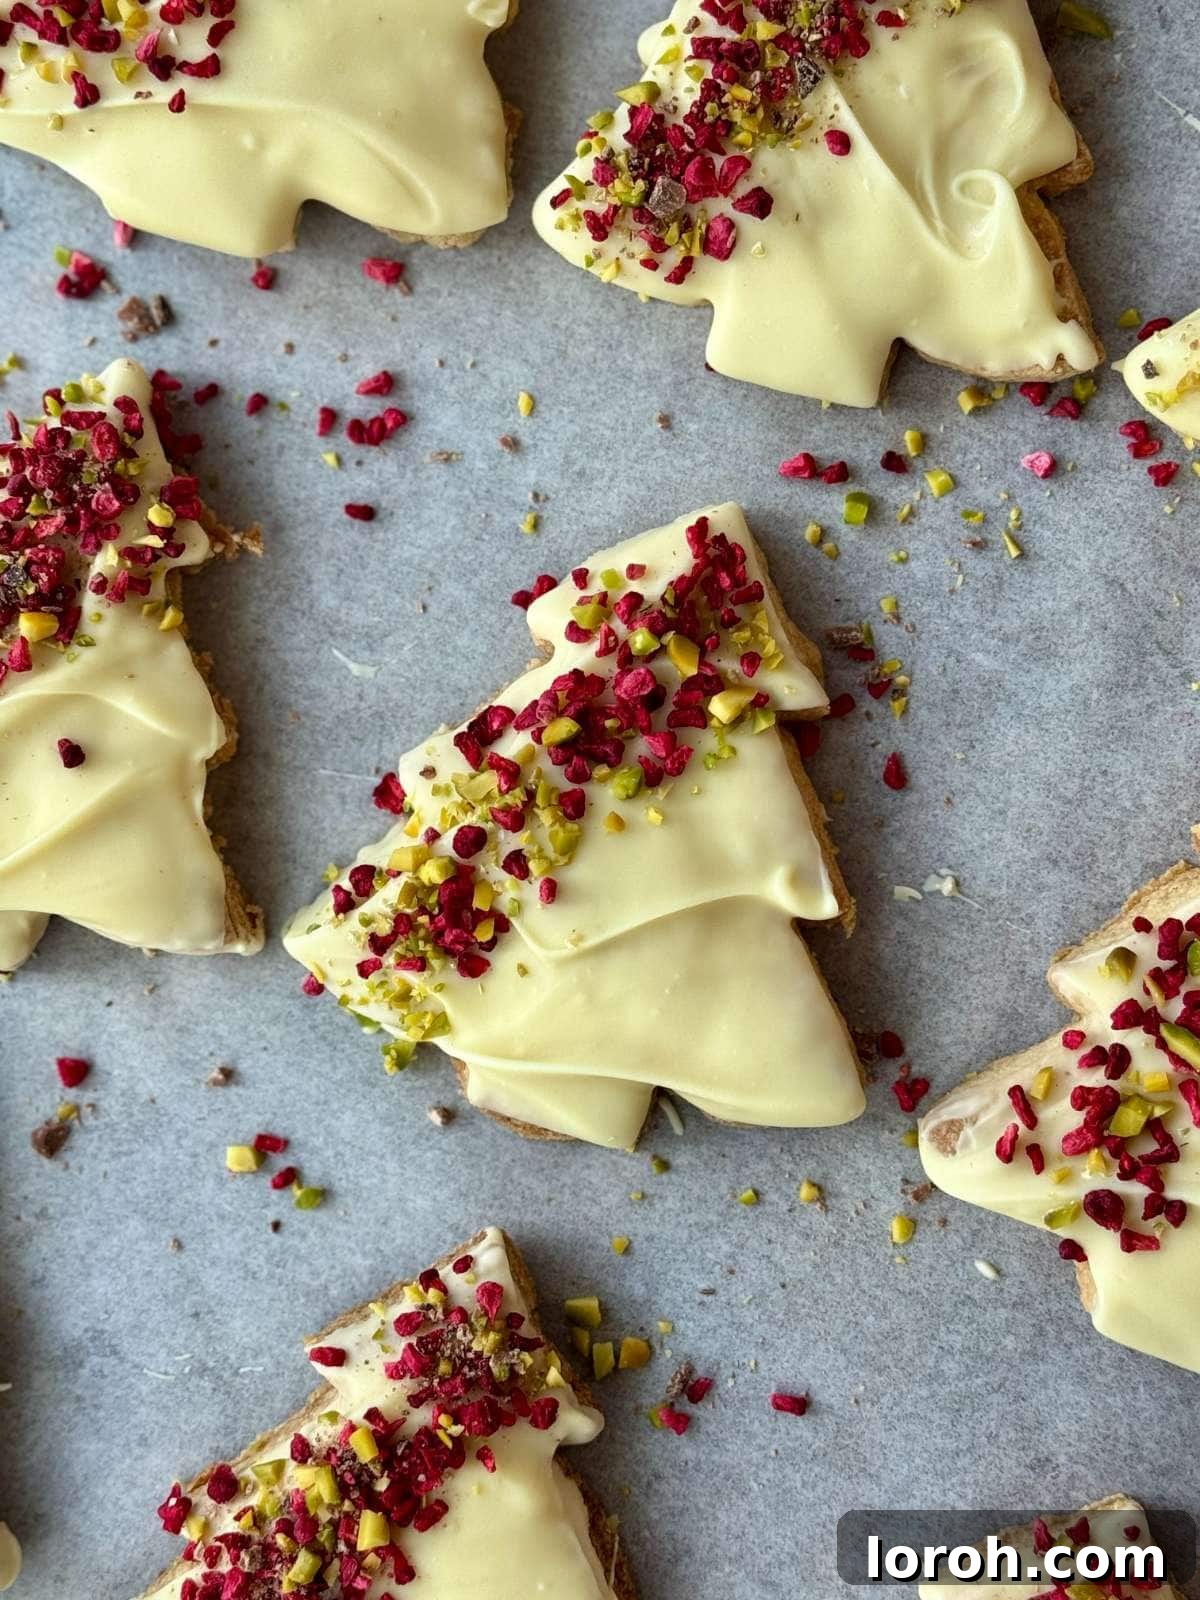
- **Timely Topping Application:** Once you’ve dipped or drizzled, sprinkle your chosen decorations (raspberries, pistachios, sprinkles) immediately while the chocolate is still wet. This ensures they adhere properly.
Frequently Asked Questions About Christmas Tree Cookies
**How do I stop Christmas tree cookies from spreading?**
To ensure your Christmas tree cookies maintain their distinct shape, several steps are crucial: always chill the dough for at least 20 minutes before rolling it out; avoid over-mixing the dough once the flour is added, as this develops gluten which causes spreading; and roll the dough to a consistent thickness of no more than 1cm. For extra insurance, resting the cut cookies on a chilled baking tray for 10-15 minutes before baking also helps firm up the butter and prevents spreading.
**Can I freeze Christmas tree shortbread dough?**
Absolutely! Shortbread dough freezes beautifully. Form the dough into a disc, wrap it tightly in plastic wrap, and then in foil, and it can be frozen for up to 3 months. To use, thaw the dough overnight in the refrigerator, then proceed with rolling and cutting as per the recipe. You can also freeze the fully baked (but undecorated) cookies. Store them in an airtight container or freezer bag for up to 1 month. Thaw at room temperature before decorating.
**Can I make Christmas tree cookies into different shapes?**
Yes, this versatile shortbread dough is perfect for any cookie cutter you have on hand! It’s a classic shortbread recipe, so it works wonderfully with stars, circles, squares, or even gingerbread men cutters. For a fun, alternative festive look, you could use a round cutter and decorate the cookies as colorful baubles for your tree, or as snowmen. The possibilities are endless!
**How long do these Christmas tree cookies last?**
When stored in an airtight container at room temperature, these Christmas tree shortbread cookies will stay fresh and delicious for up to one week. If you plan to make them several days in advance, consider decorating them closer to the serving date for the freshest appearance and taste.
**What’s the best type of butter to use for shortbread?**
For the best flavor and texture in shortbread, always opt for high-quality unsalted butter with a high fat content. European-style butters often have a higher fat percentage, resulting in a richer, more tender crumb. Ensure the butter is softened to room temperature, but not melted, for optimal mixing.
Other Delicious Recipes You Might Enjoy This Holiday Season
If you’re looking for more festive inspiration to round out your holiday menu, we have plenty of delightful recipes to explore:
- Brighten your dessert table with our stunning Christmas Pavlova Wreath.
- Indulge in the elegance of Poached Pear and Chocolate Pavlova.
- For a decadent and easy crowd-pleaser, try our Chocolate Brownie Trifle.
Easy Baking Recipes
Triple Chocolate Chunk Cookies
Easy Baking Recipes
Tiramisu Cookies
Easy Baking Recipes
Soft & Chewy Chocolate Chipless Cookies
Easy Baking Recipes
Chocolate Brownie Cookies
If you’ve tried this **Christmas Tree Cookies** recipe or any other delicious recipe on our site, we’d love to hear from you! Please consider leaving a rating or comment below to let us know how it went. Your feedback helps us improve and inspires other bakers!
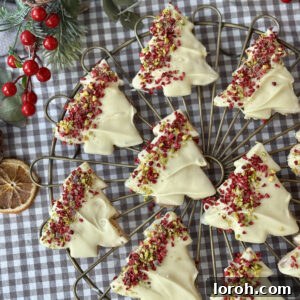
Simple Christmas Tree Cookies
These buttery Christmas tree cookies are simple to make, incredibly delicious, and offer a festive look that’s perfect for the holiday season. A classic shortbread recipe that’s easy to decorate and share!
Rate Recipe
Print Recipe
Ingredients
- 200 g unsalted butter, softened (7 oz)
- 100 g caster sugar (superfine sugar) (3½ oz)
- 300 g plain flour (all-purpose flour) (10½ oz)
- 150 g white chocolate, melted (5 oz)
- A handful of freeze-dried raspberries, crushed
- A handful of pistachios, very finely chopped
Instructions
To make the dough:
- Add the softened butter and caster sugar to a food processor. Pulse until it just comes together and is creamy.
- Tip in the flour and pulse again. As soon as the mixture resembles damp sand and is just starting to clump, stop the pulsing. (Over-mixing once the flour goes in can make the biscuits tough.)
- Tip the mixture onto the work surface and gently press it together into a smooth dough. Avoid kneading but just bring it together with your hands.
- Shape into a disc, wrap, and chill for 20 minutes (this is optional) but it helps the biscuits keep their shape later on.
- Preheat the oven to 170°C fan (190°C conventional / 375°F).
- On a lightly floured surface, roll the dough out to about 1cm/0.5 inch thick.
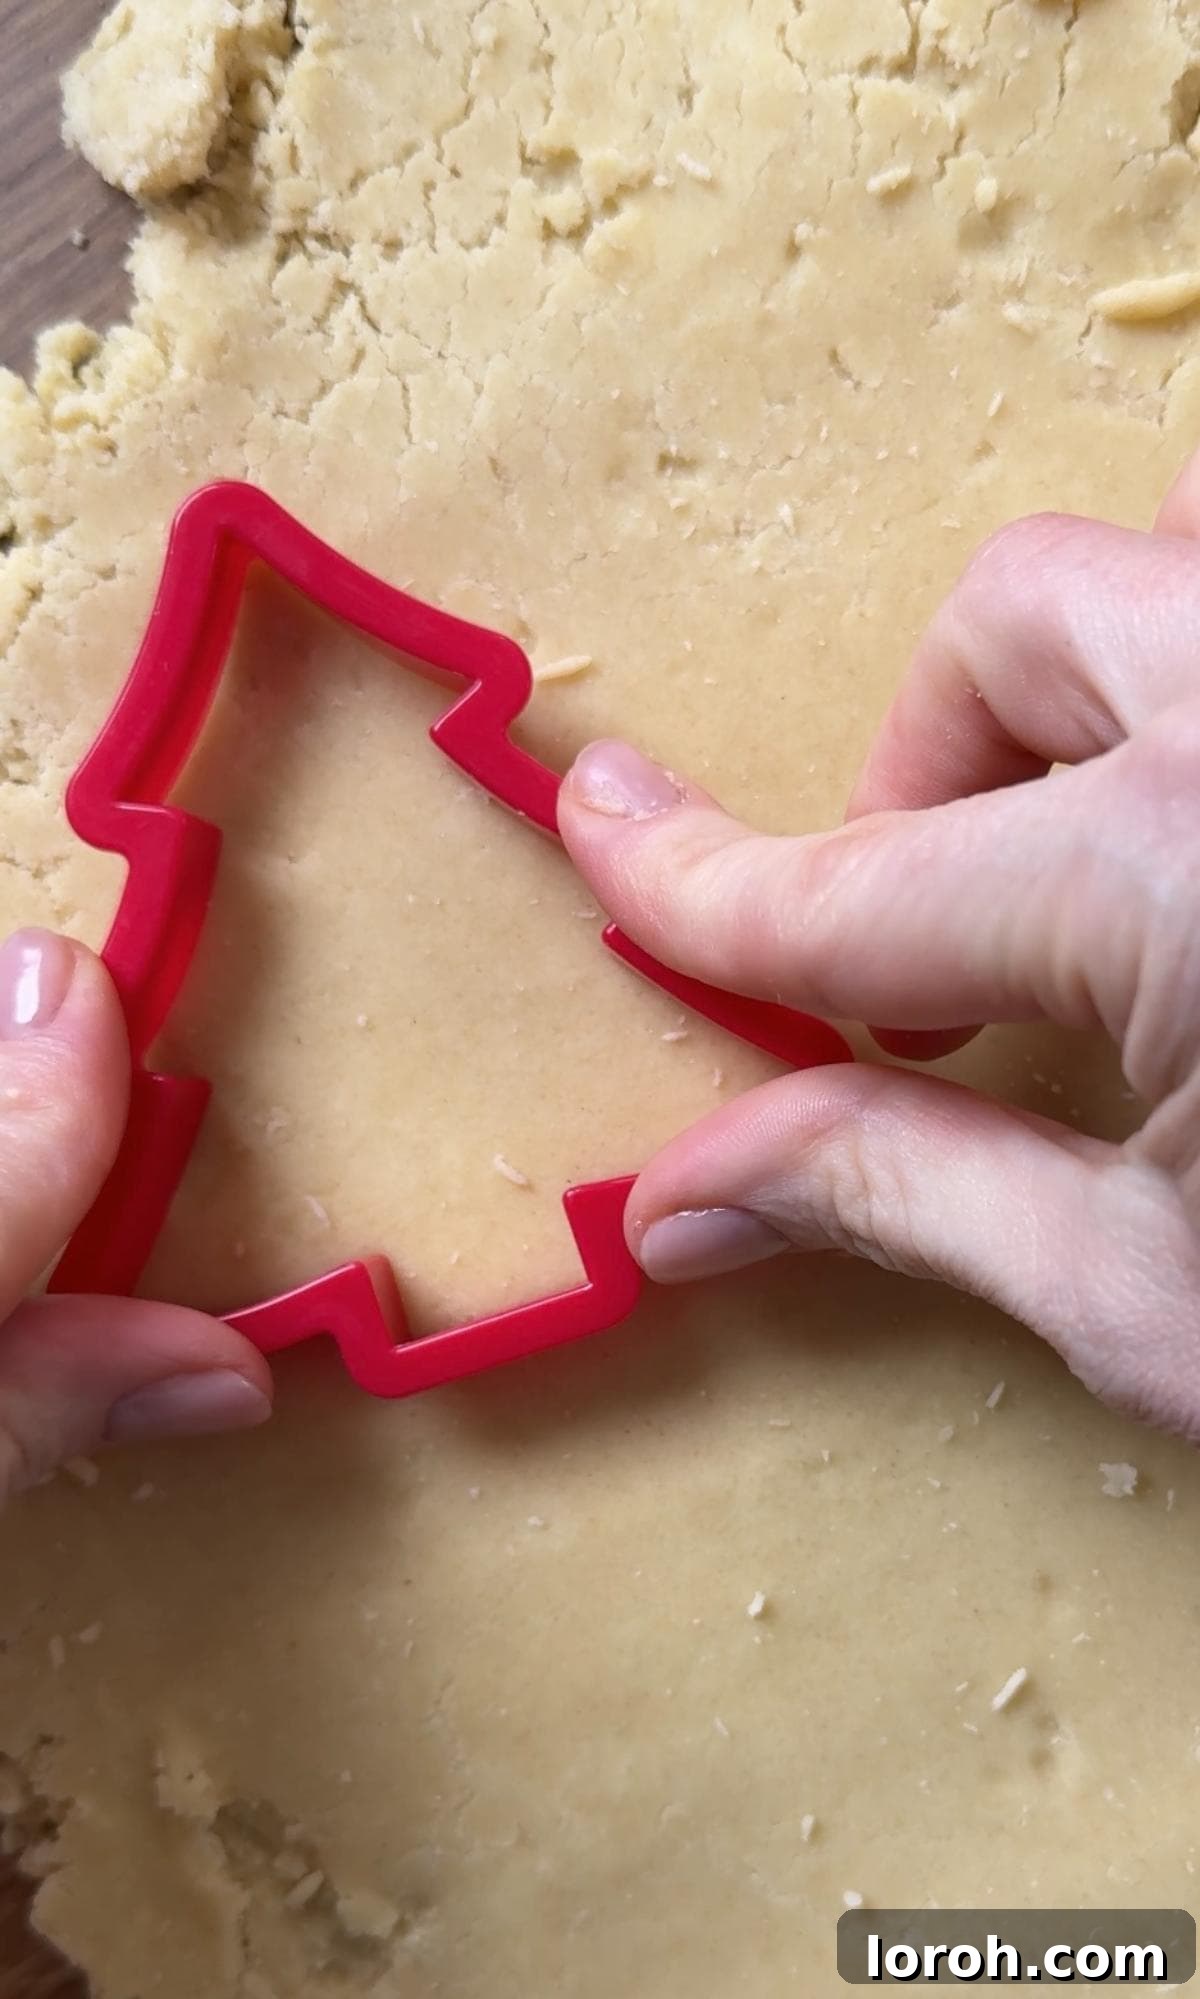
- Cut out Christmas tree shapes using a Christmas tree cookie cutter and place them on a lined baking tray.
- Bake for 15 minutes, or until the edges are just turning pale golden. Leave on the tray for 5 minutes, then transfer to a wire rack to cool completely.
To decorate:
- Melt the white chocolate in a heatproof bowl set over a pan of gently simmering water (or in short bursts in the microwave).
- Dip each cookie face into the chocolate, place back down on a tray lined with parchment paper, and sprinkle with crushed freeze-dried raspberries and finely chopped pistachio before the chocolate sets.
Notes
- Scroll up for a **step-by-step guide with images** to help you make these Christmas tree cookies.
- **To store:** The Christmas cookies will last for up to a week in an airtight container at room temperature.
- **To freeze:** You can freeze the dough as a wrapped disc for up to 3 months. Thaw overnight in the fridge, then roll and cut. Alternatively, you could freeze the baked (undecorated) cookies.
- **Make ahead:** For optimal freshness, these cookies are best enjoyed within 24 hours of decorating, but they can be made up to a week in advance and stored properly.
Nutrition
Nutrition information is automatically calculated and should only be used as an approximation.
Like this recipe? We’d love to hear from you!
Your feedback helps us create more delicious content. Please leave a comment or rating below to share your experience with these delightful Christmas Tree Cookies!