
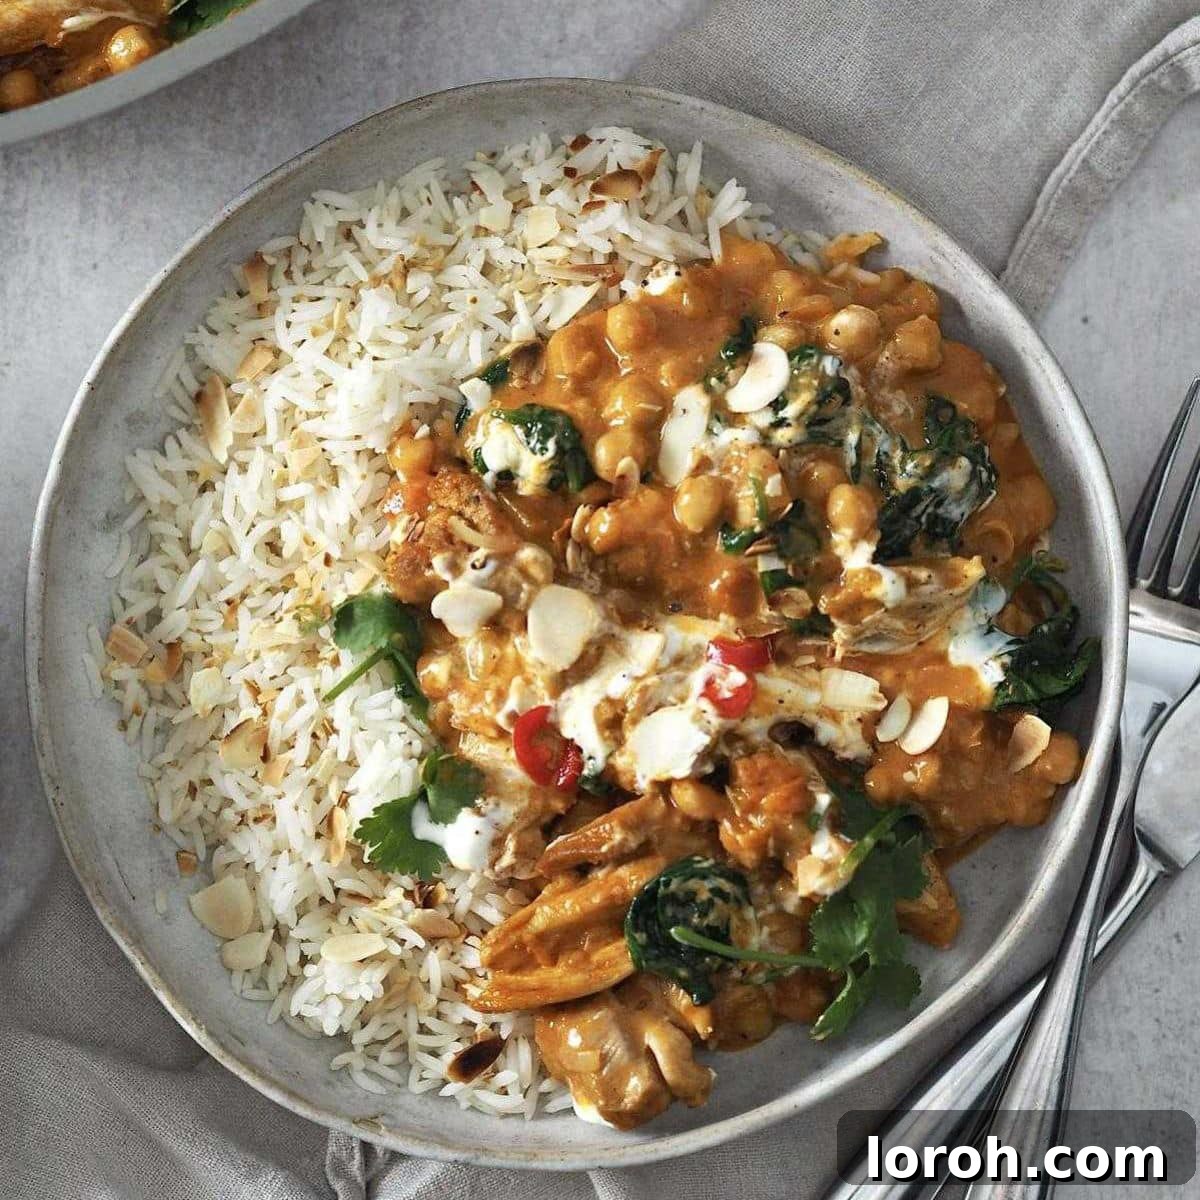
Craving a satisfying, flavorful meal that comes together with minimal effort and leaves you with hardly any washing up? This One-Pot Chicken and Chickpea Curry is the answer you’ve been looking for. It’s a true culinary gem, designed for simplicity, incredible taste, and ultimate convenience. Imagine succulent, tender chicken pieces and hearty chickpeas bathed in a rich, aromatic tomato and creamy coconut curry sauce – a symphony of flavors that will transport your taste buds. This dish isn’t just delicious; it’s a perfect solution for busy weeknights, effortless meal prep, and even freezes beautifully for future enjoyment. Get ready to add this amazing, healthy, and easy chicken chickpea curry to your regular cooking rotation!
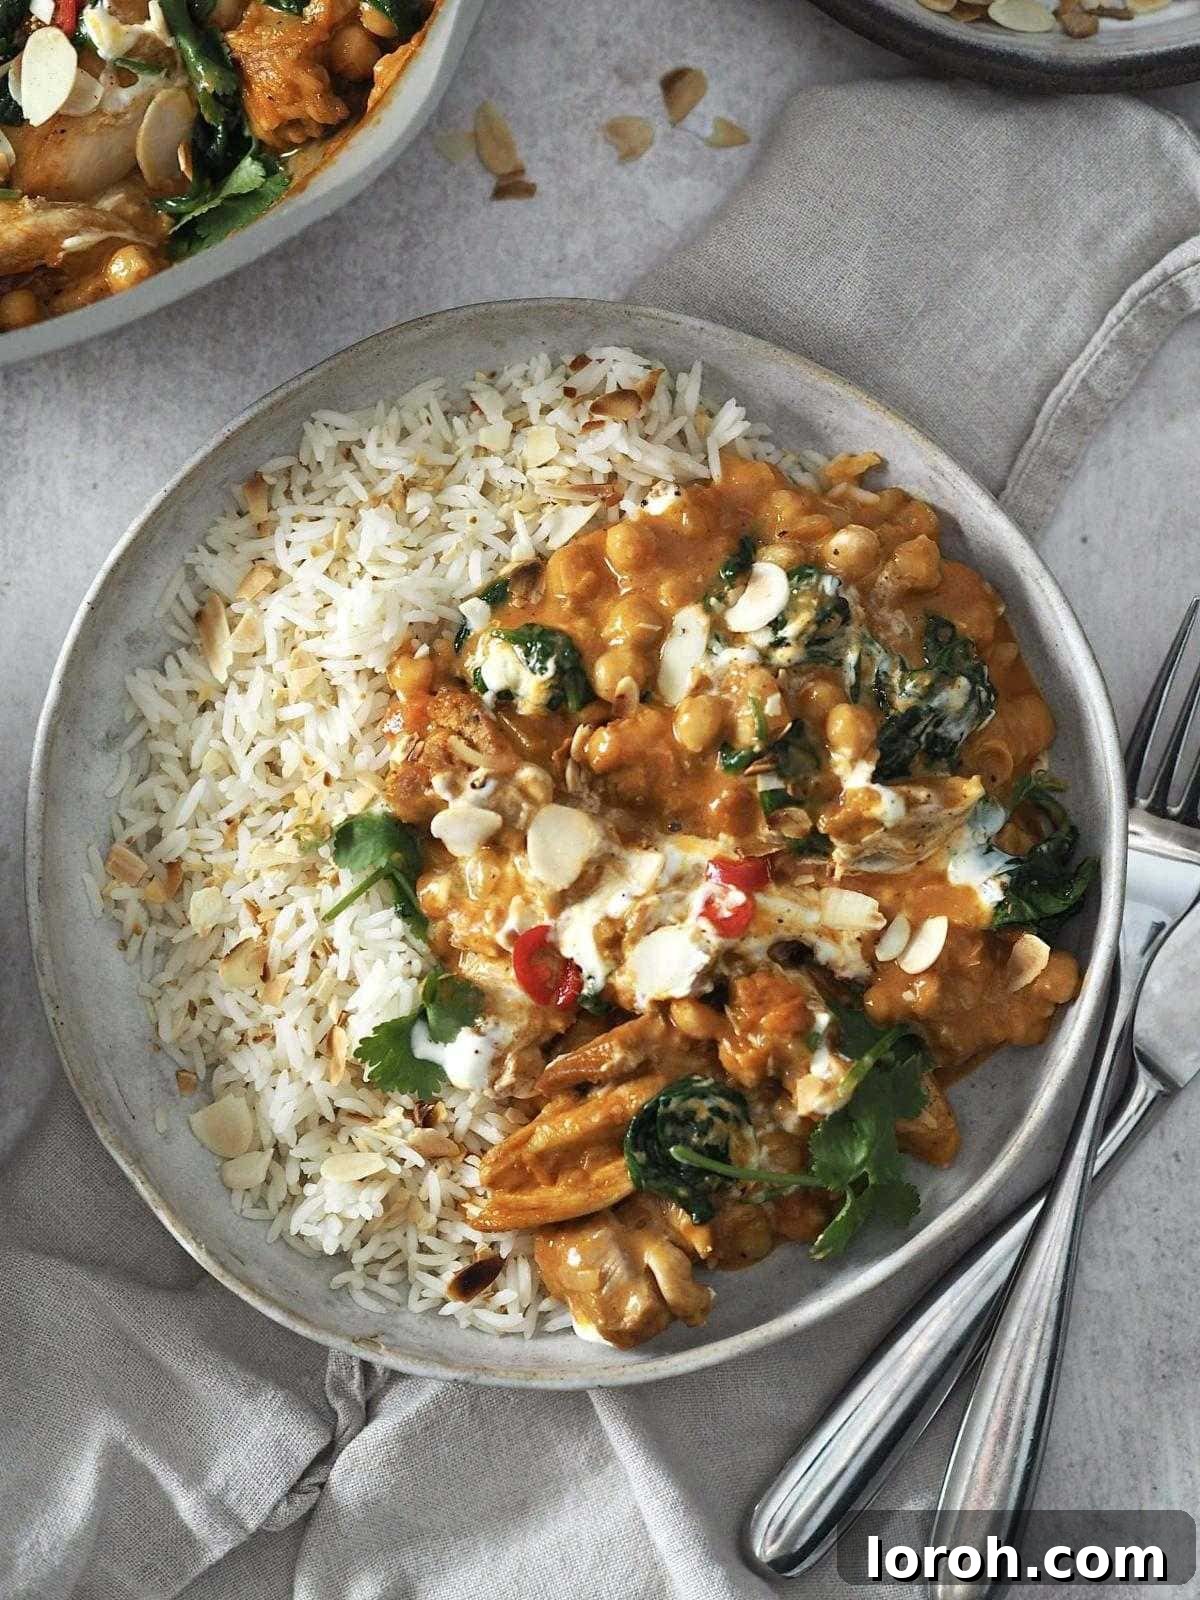
Curries are celebrated worldwide for their comforting flavors and remarkable versatility, making them ideal for quick and easy weeknight meals. While I cherish my Almond Butter Chicken Curry and my Quick Fish Curry with Coconut Milk and Lemongrass, this chicken and chickpea version stands out for its exceptional simplicity and efficiency. Cooked entirely in a single pan, it dramatically cuts down on cleanup time, making it a dream for busy cooks who want delicious homemade food without the hassle. Furthermore, its adaptable nature means you can effortlessly transform it into a delightful vegetarian or even vegan meal by simply swapping the chicken for ingredients like paneer or tofu. This recipe truly proves that incredibly tasty and wholesome food doesn’t have to be complicated.
Table of Contents
- Why You Will Love This One-Pot Chicken & Chickpea Curry
- Key Ingredients for a Perfect Chicken & Chickpea Curry
- Substitutions and Variations: Customize Your Curry
- Step-by-Step: How to Make One-Pot Chicken & Chickpea Curry
- Expert Cooking Tips for Your Best Curry Yet
- Frequently Asked Questions About Chicken & Chickpea Curry
- Other Delicious Curry Recipes You Might Enjoy
- More Mouthwatering Recipes to Try
- Printable Chicken and Chickpea Curry Recipe Card
Why You Will Love This One-Pot Chicken & Chickpea Curry
This isn’t just another curry recipe; it’s a culinary revelation designed for modern life. Here’s why this chicken and chickpea curry will quickly become a cherished favorite in your kitchen:
- Effortlessly Quick & Easy One-Pot Meal: As a true one-pot meal, it streamlines your cooking process by minimizing both equipment and steps. Everything cooks harmoniously in a single pan, which means less fuss during preparation and less time spent on washing up afterward. This incredible convenience makes it a lifesaver on even the most hectic evenings, proving that a wholesome, homemade meal doesn’t require a stack of dirty dishes.
- Dinner on the Table in Under an Hour: From the initial sauté to the final garnish, this flavorful curry can be ready to serve in just 45 minutes. This rapid cooking time makes it a fantastic option when you need a wholesome, homemade meal but are severely short on time. It’s faster than most takeaways and significantly healthier!
- Perfect for Meal Prep & Busy Weeknights: This easy chicken and chickpea curry is incredibly versatile for planning ahead. It can be made in advance and stores beautifully in the refrigerator for up to three days. In fact, its flavors often deepen and meld even more wonderfully overnight, making it perfect for your weekly meal prep or those inevitable busy weeknights when cooking from scratch seems impossible. Simply reheat and enjoy!
- Easily Adaptable for All Dietary Needs: Whether you’re cooking for vegetarians, vegans, or simply looking to incorporate more plant-based meals into your diet, this recipe is wonderfully flexible. You can effortlessly adapt it by swapping the chicken for various plant-based proteins, such as paneer or tofu, ensuring everyone at your table can enjoy a delicious and satisfying meal tailored to their preferences.
- Rich, Creamy & Satisfying Flavors: Despite its simplicity and quick preparation, this curry doesn’t compromise on taste. The combination of succulent chicken, tender chickpeas, creamy coconut milk, and aromatic spices creates a deeply satisfying dish that’s both comforting and exciting. It’s a mild yet flavor-packed experience that appeals to a wide range of palates.
Key Ingredients for a Perfect Chicken & Chickpea Curry
The full list of ingredients with precise measurements can be found in the comprehensive, printable recipe card located at the very bottom of this post – simply scroll down!
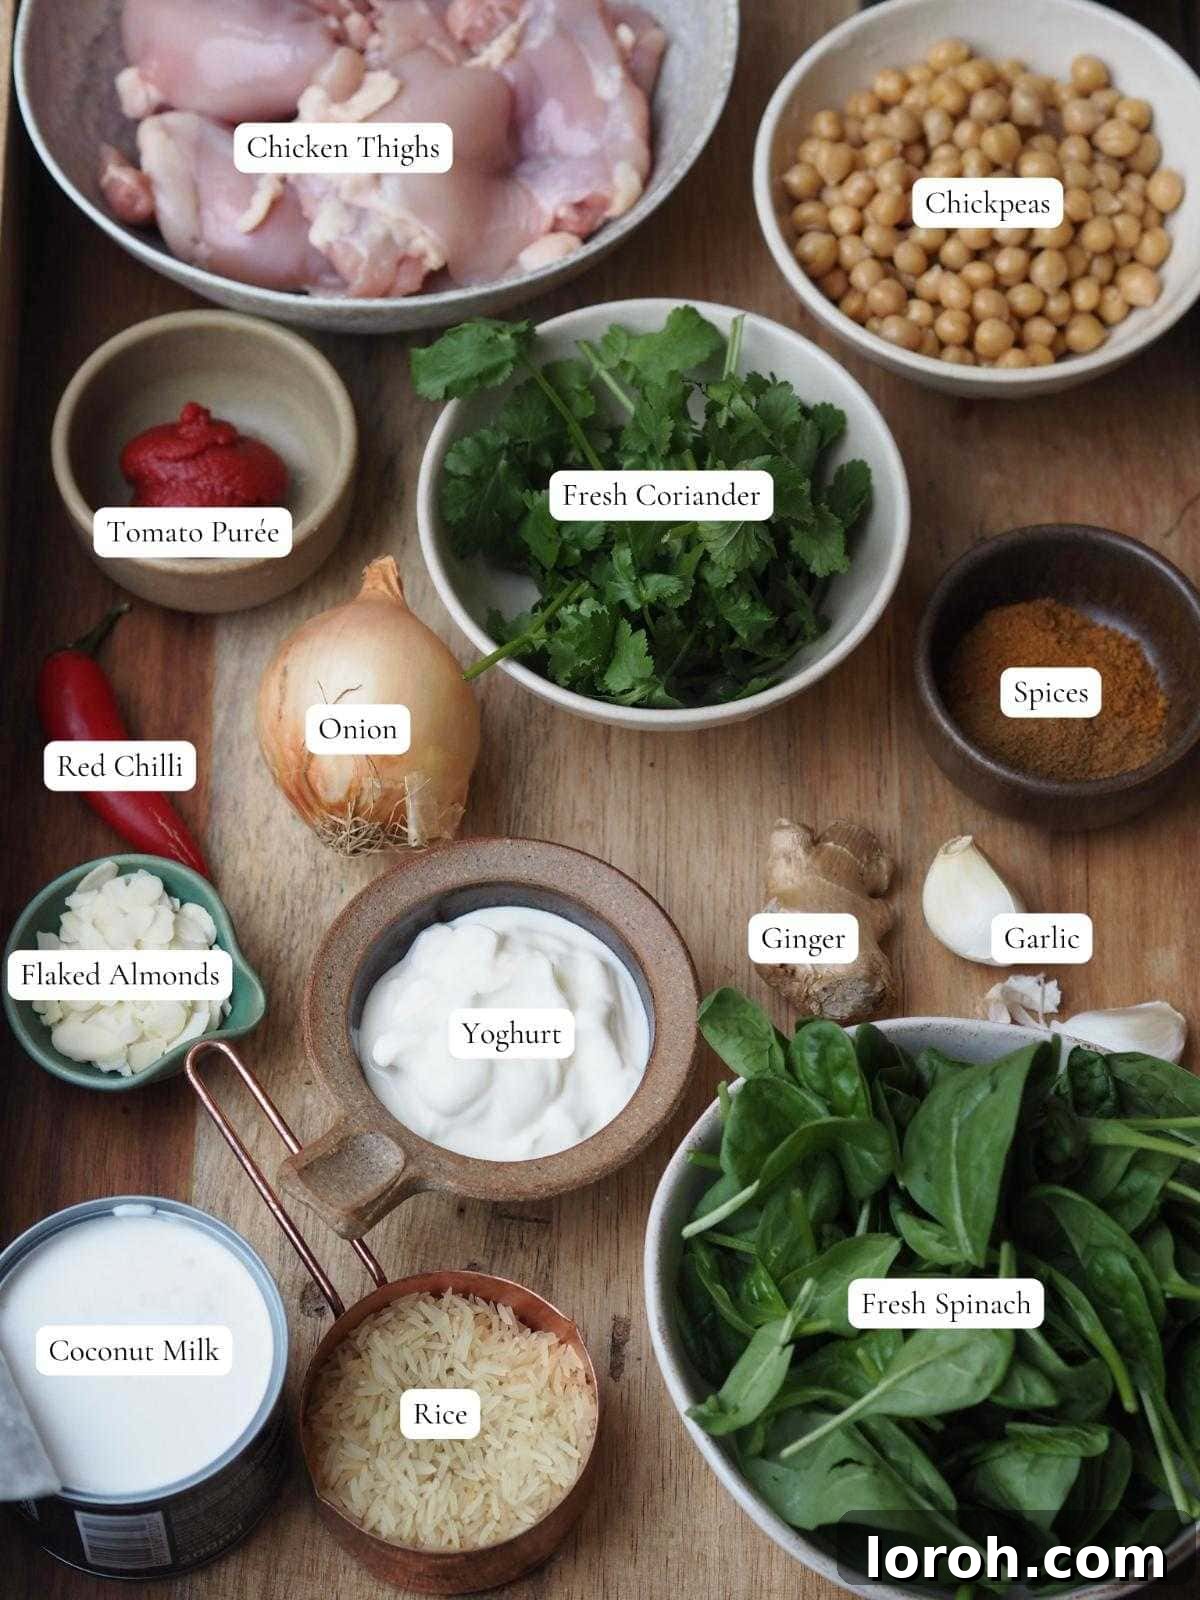
Crafting a truly delicious and aromatic curry starts with selecting the right ingredients. Here’s a closer look at what makes this chicken and chickpea curry so special and flavorful:
- Aromatic Spice Blend: The heart of any great curry lies in its well-balanced spice blend. Our recipe features a harmonious combination of fragrant garam masala and earthy ground cumin. Garam masala, a staple in Indian cuisine, brings warmth, depth, and a complex aroma with notes of cinnamon, cardamom, and cloves. Ground cumin adds an earthy, slightly nutty undertone, creating a wonderfully aromatic yet mild curry sauce that’s universally appealing and not overpowering.
- Chicken Thighs (Skinless & Boneless): For the most tender, juicy, and flavorful results, I highly recommend using free-range boneless and skinless chicken thighs. Thighs are naturally richer and more forgiving than breast meat, standing up beautifully to simmering without drying out. They are typically sliced into strips or bite-sized chunks, allowing them to cook evenly and absorb all the delicious curry flavors, ensuring every bite is succulent.
- Hearty Chickpeas: These humble legumes are a fantastic and essential addition to this curry! Economical and incredibly versatile, canned chickpeas (also known as garbanzo beans in the US) are a convenient way to bulk out the curry, adding a wonderful creamy texture and a significant boost of plant-based protein and fiber. They make this dish extra filling, wholesome, and nutritious.
- Full-Fat Coconut Milk: To achieve that luxurious, velvety texture and rich flavor that defines a comforting, indulgent curry, always opt for full-fat coconut milk. It provides a creamy consistency and a subtle natural sweetness that perfectly balances the savory spices and tangy tomato base, creating an irresistible sauce that coats every ingredient beautifully. While light coconut milk can be used for a lower-calorie option, be aware that the texture will be less decadent and rich.
- Fresh Aromatics: Don’t underestimate the foundational power of fresh ingredients like onion, garlic, and ginger. Sautéing a finely diced onion until it’s beautifully soft and translucent creates a sweet, aromatic base that’s crucial for depth of flavor. Freshly grated garlic and ginger infuse the curry with pungent, zesty, and warming notes that are absolutely fundamental to its vibrant flavor profile.
- Tomato Paste & Chopped Tomatoes: Tomato paste adds a concentrated umami depth and a robust richness when it’s cooked out in the pan, intensifying the overall flavor. Simultaneously, canned chopped tomatoes form the vibrant, tangy, and slightly sweet base of our curry sauce. Together, they create a perfectly balanced flavor profile that pairs beautifully with the creamy coconut milk.
- Fresh Spinach: A generous handful of fresh spinach stirred in at the very end of cooking wilts beautifully into the hot sauce. It adds a lovely touch of vibrant color, a fresh, slightly earthy taste, and an extra dose of essential nutrients without altering the curry’s core flavor profile, making the meal even more wholesome.
Substitutions and Variations: Customize Your One-Pot Chicken & Chickpea Curry
One of the best and most beloved aspects of this chicken and chickpea curry is its incredible flexibility. This recipe serves as a wonderful canvas for your culinary creativity, allowing you to tailor it to your specific taste preferences, dietary needs, or simply to utilize whatever ingredients you happen to have on hand. Don’t be afraid to experiment!
- Chicken Alternatives for Every Preference:
- Chicken Breast: If you prefer the leaner profile of white meat, diced chicken breast can be used instead of thighs. Just be mindful that breast meat can dry out more easily, so take care not to overcook it.
- Turkey: Diced turkey works exceptionally well as a substitute, offering a similar texture and mild flavor profile to chicken, making it an excellent choice for a change of pace.
- Leftover Cooked Chicken or Turkey: For an even quicker meal, make good use of pre-cooked, shredded roast chicken or turkey. Add it towards the end of the cooking process, along with the coconut milk, and simply heat through until piping hot. This is a fantastic and efficient way to utilize leftovers!
- Seafood Options: For a delightful seafood variation, consider adding firm white fish (like cod, haddock, or snapper) or shrimp in the last 5-10 minutes of simmering, until just cooked through. The delicate flavors of seafood pair wonderfully with the creamy curry sauce.
- Chickpea Swaps for Different Textures & Flavors:
- Other Legumes: While canned chickpeas offer ultimate convenience, you can absolutely swap them for a variety of other cooked tinned lentils and pulses. Great options include creamy butter beans, tender cannellini beans, or hearty brown/green lentils. Each will add a slightly different texture and nutritional profile to your curry.
- Dried Chickpeas: If you prefer to use dried chickpeas, remember they require some additional foresight and prep. You’ll need to soak them overnight (typically 8-12 hours) and then boil them until tender, which usually takes around an hour, depending on their freshness. Once cooked, they can be added to the recipe as you would canned chickpeas. Using canned is definitely the quickest route for this ‘easy one-pot’ recipe.
- Boost Your Veggies: Make it Even Healthier! This chicken and chickpea curry is a fantastic canvas for incorporating more vegetables into your diet, enhancing both nutrition and flavor.
- Bell Peppers: Add finely diced red, yellow, and/or orange bell peppers along with the onion for extra color, sweetness, and a boost of vitamins.
- Root Vegetables: Hearty chunks of roasted butternut squash or sweet potato can be added earlier in the cooking process (after the chicken is browned) to soften beautifully in the sauce, imparting a lovely natural sweetness and creamy texture.
- Leafy Greens: Beyond spinach, consider stirring in chopped kale or collard greens for extra fiber and nutrients. Add them towards the end, allowing them to wilt gently into the sauce.
- Other Vegetables: Fresh or frozen peas, chopped green beans, or even small cauliflower florets would also be delicious and easy additions.
- Adjust the Heat Level (Make it Spicy!):
- Fresh Chilli: For a noticeable and vibrant kick, add finely diced fresh red or green chilli with the onion and sauté until fragrant.
- Chilli Powder/Flakes: Alternatively, stir in a generous pinch of chilli flakes, chilli powder, or cayenne pepper when you add the other dry spices. Always start with a small amount and taste as you go to reach your desired level of spice.
- Spicy Garnish: For those who truly enjoy more heat, serve the curry with extra sliced fresh chillies on top, allowing individuals to customize their spice level.
- Enhance Creaminess or Flavor: While full-fat coconut milk provides ample creaminess, you can stir in a spoonful of cashew butter or almond butter for an even richer, nuttier flavor and a slightly thicker, more luxurious consistency. A squeeze of fresh lime juice at the end can also brighten all the flavors beautifully.
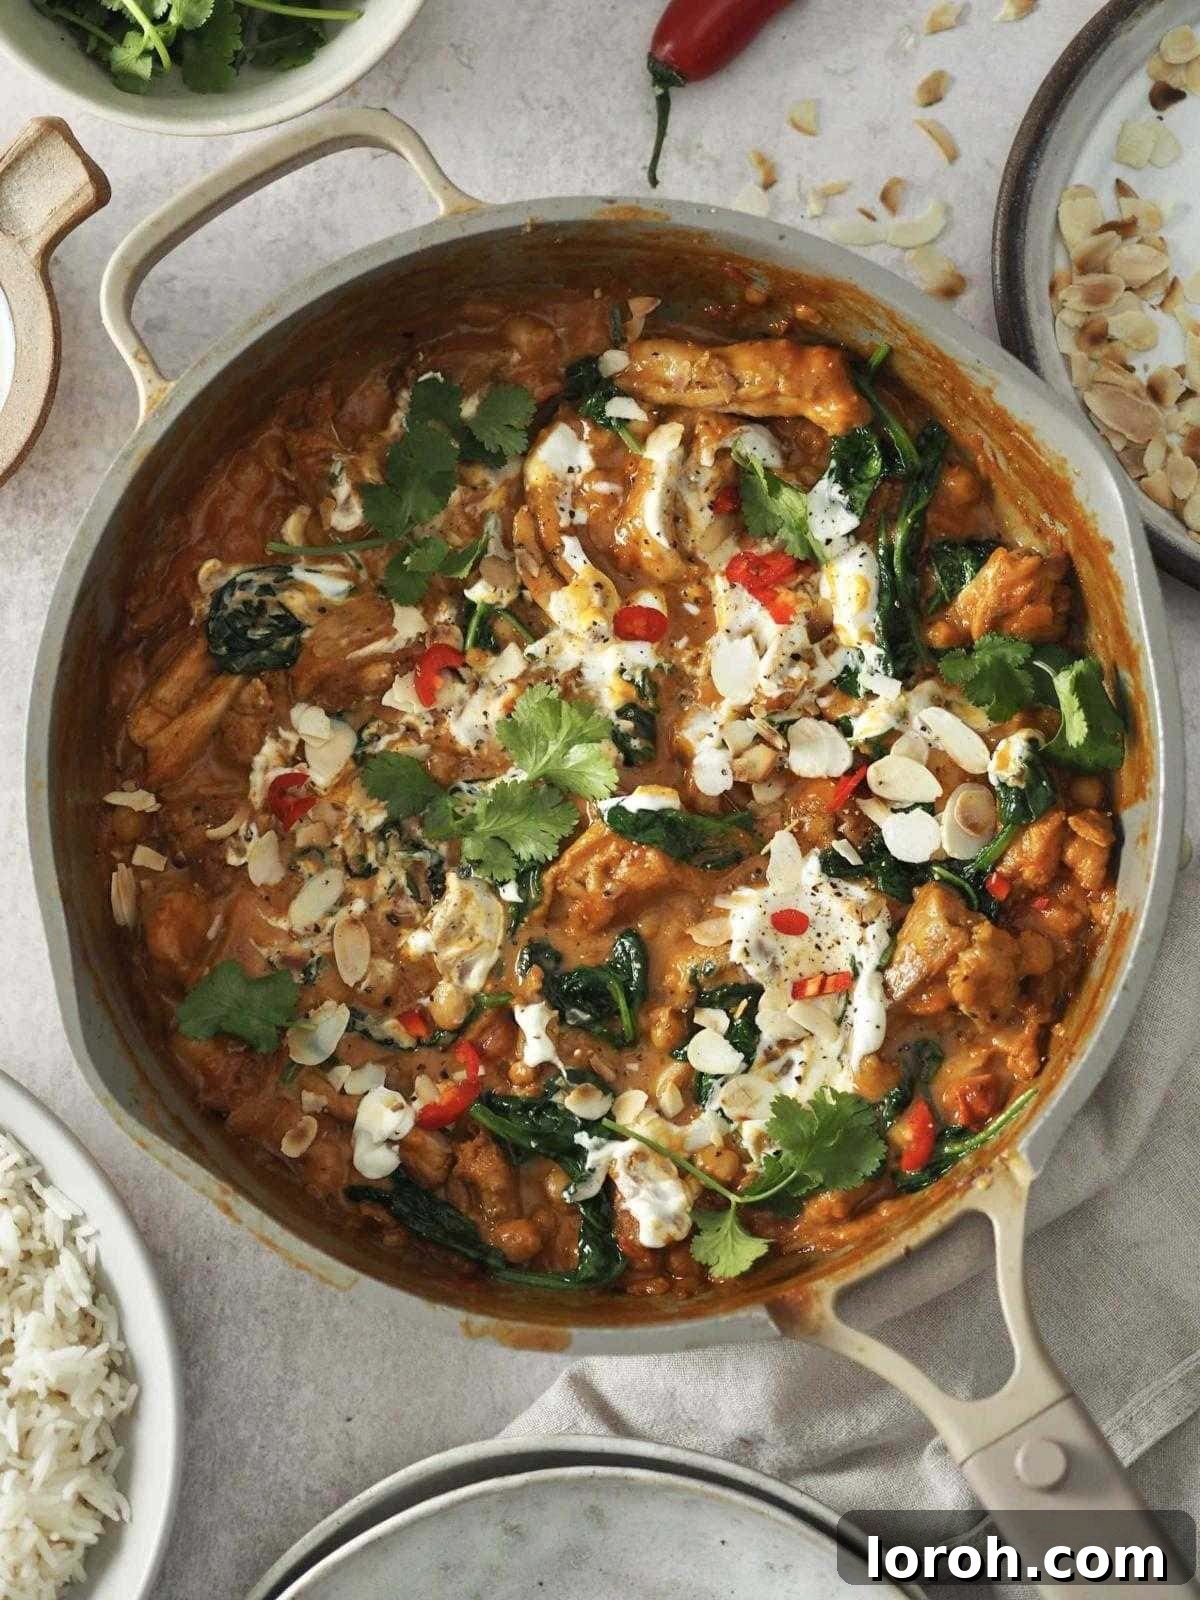
Step-by-Step: How to Make One-Pot Chicken & Chickpea Curry
This visual guide provides a clear overview of the cooking process. For detailed instructions, precise measurements, and ingredient notes, please refer to the complete printable recipe card below.
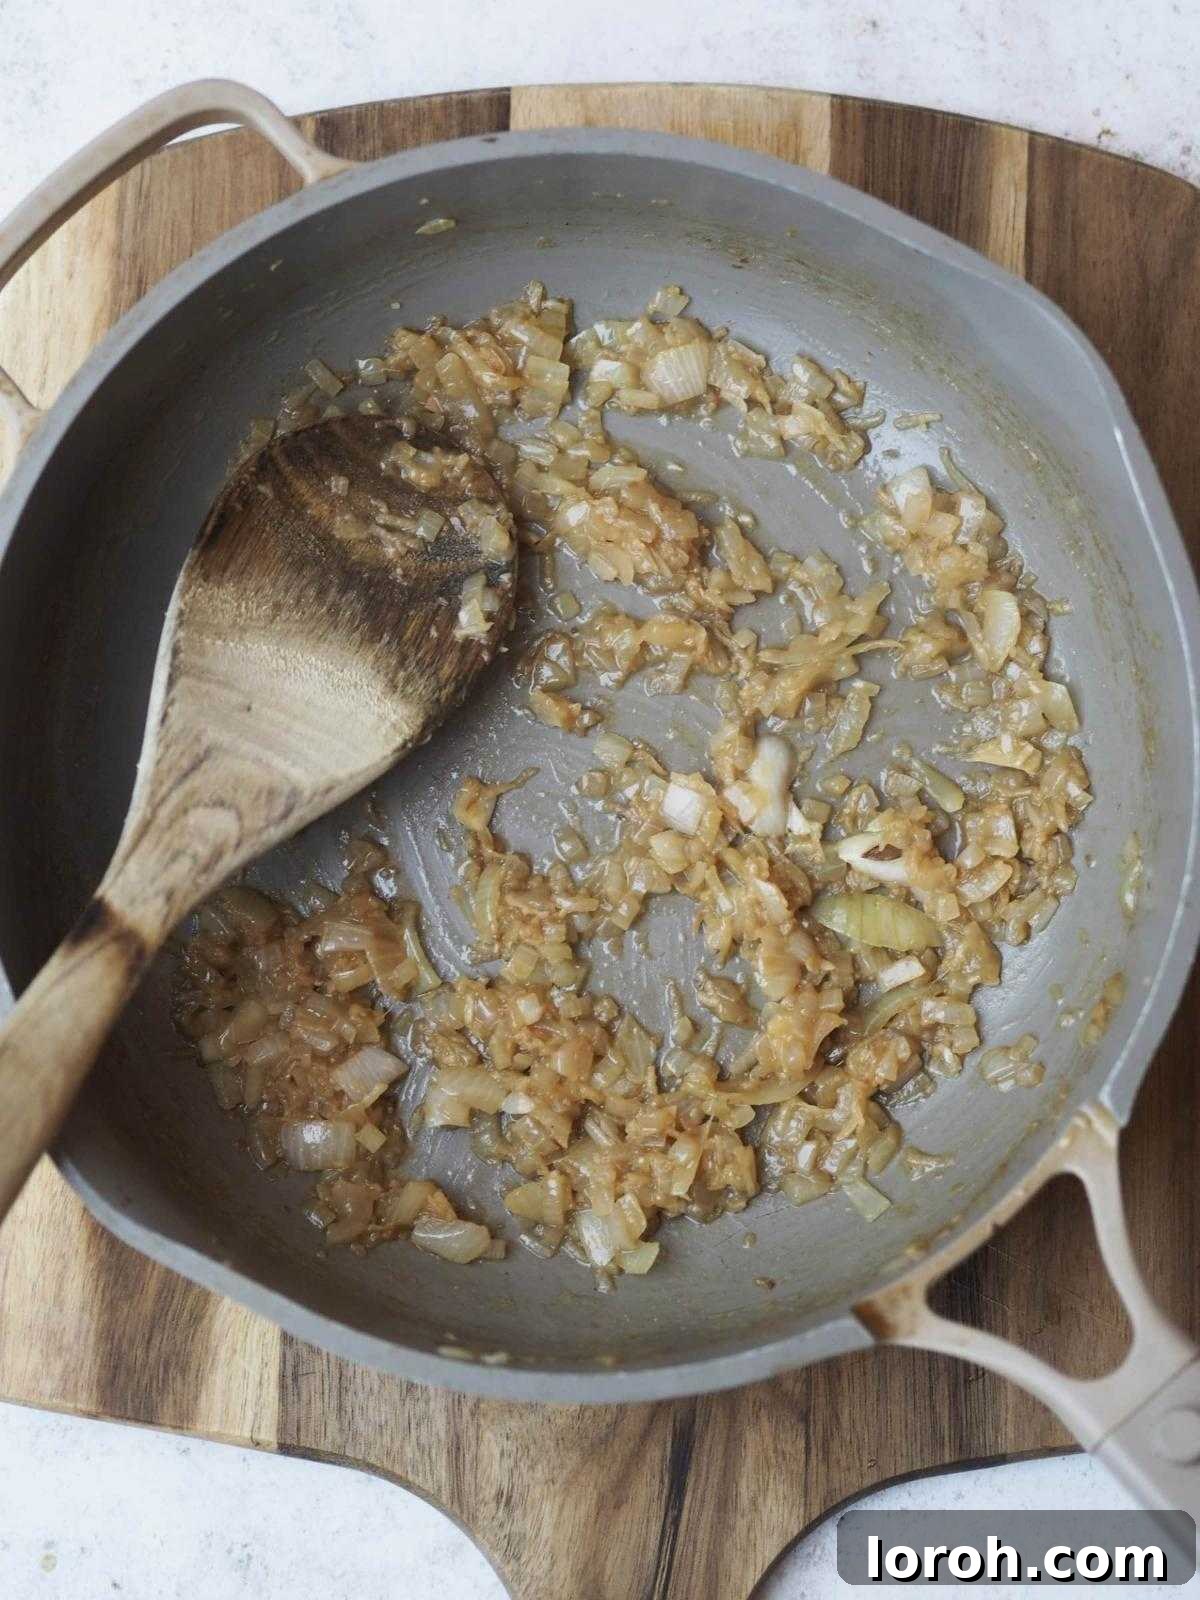
ONE: Soften the Onions. Begin by heating a drizzle of vegetable oil in a large, heavy-bottomed non-stick pan or Dutch oven set over low to medium heat. Add the finely diced onion and a generous pinch of salt. Sauté patiently for 10-12 minutes, stirring frequently, until the onions become beautifully translucent, deeply softened, and slightly caramelized. This crucial step is vital for building a sweet, aromatic, and deeply flavorful base for your curry, so don’t rush it.
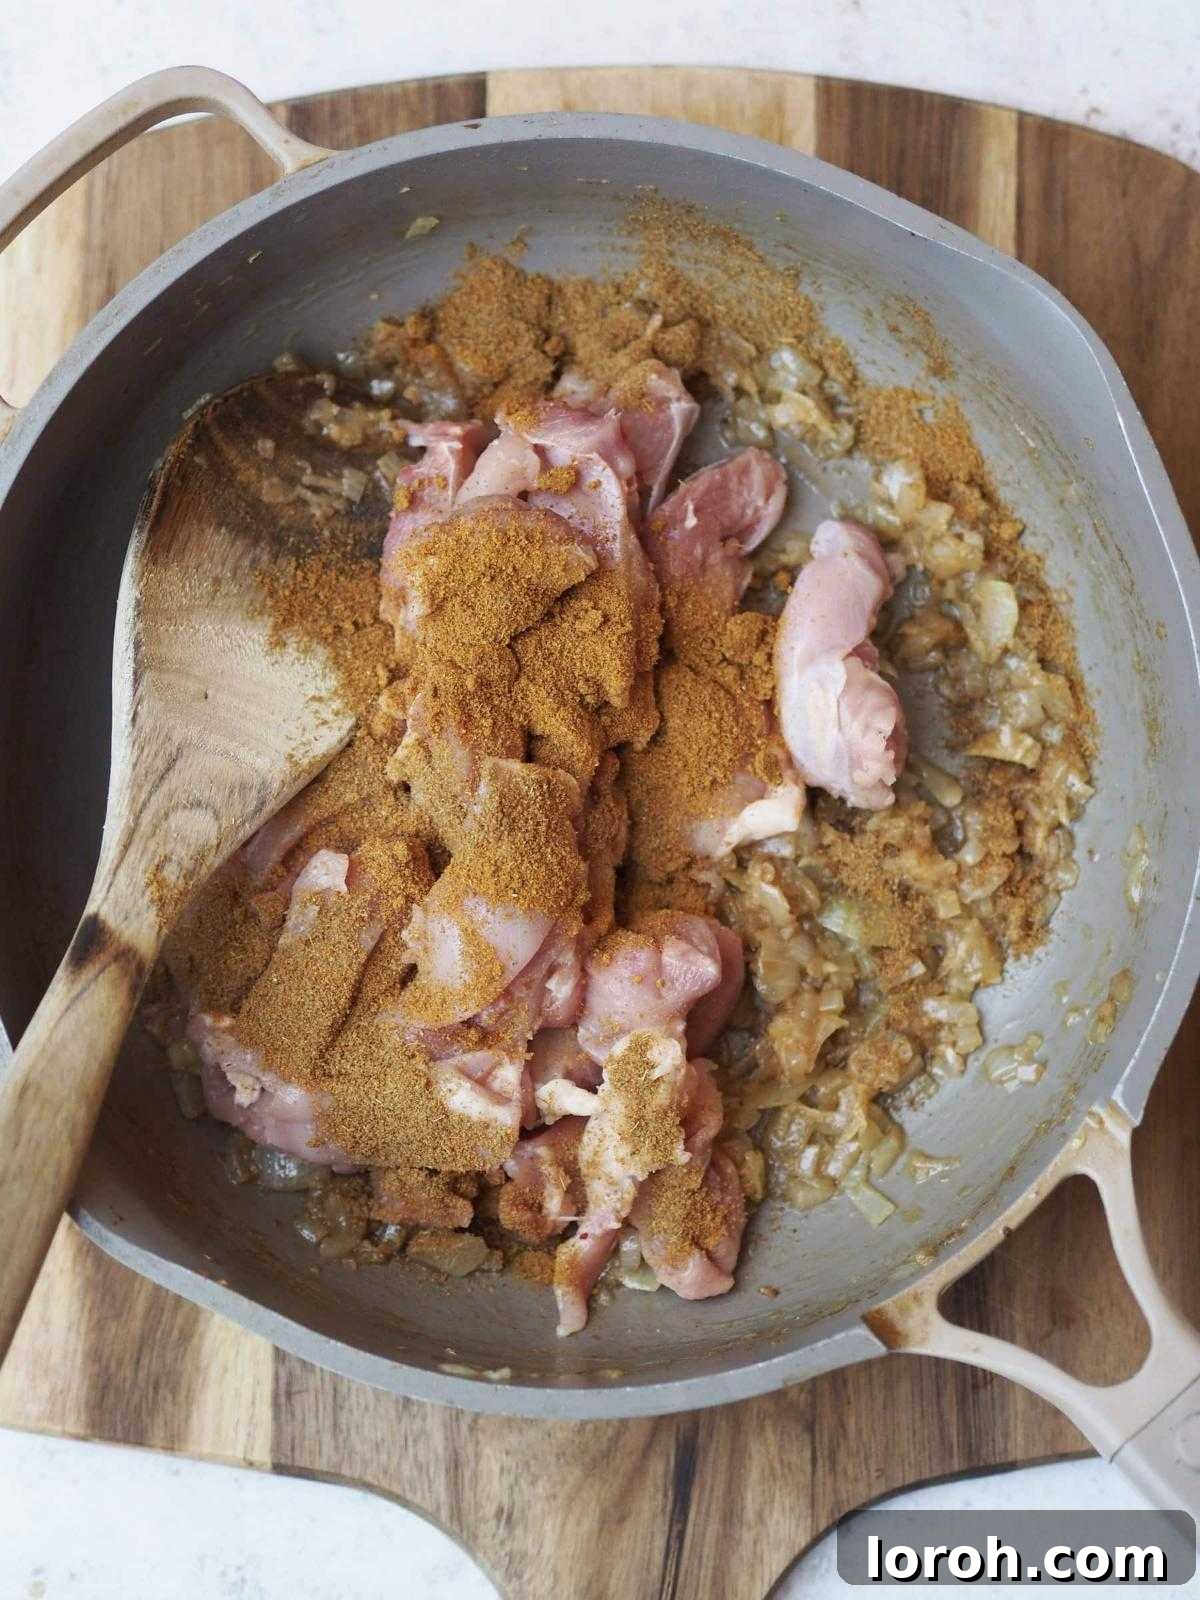
TWO: Add Aromatics and Spices. Stir in the freshly grated garlic and ginger and cook for just 1 minute until they become wonderfully fragrant, being careful not to let them burn, which can turn them bitter. Immediately follow by adding the garam masala and ground cumin. Continue to cook for another 1-2 minutes, stirring constantly, allowing the spices to lightly toast and release their full, complex aroma into the pan. Then, add the diced chicken thighs to the mixture.
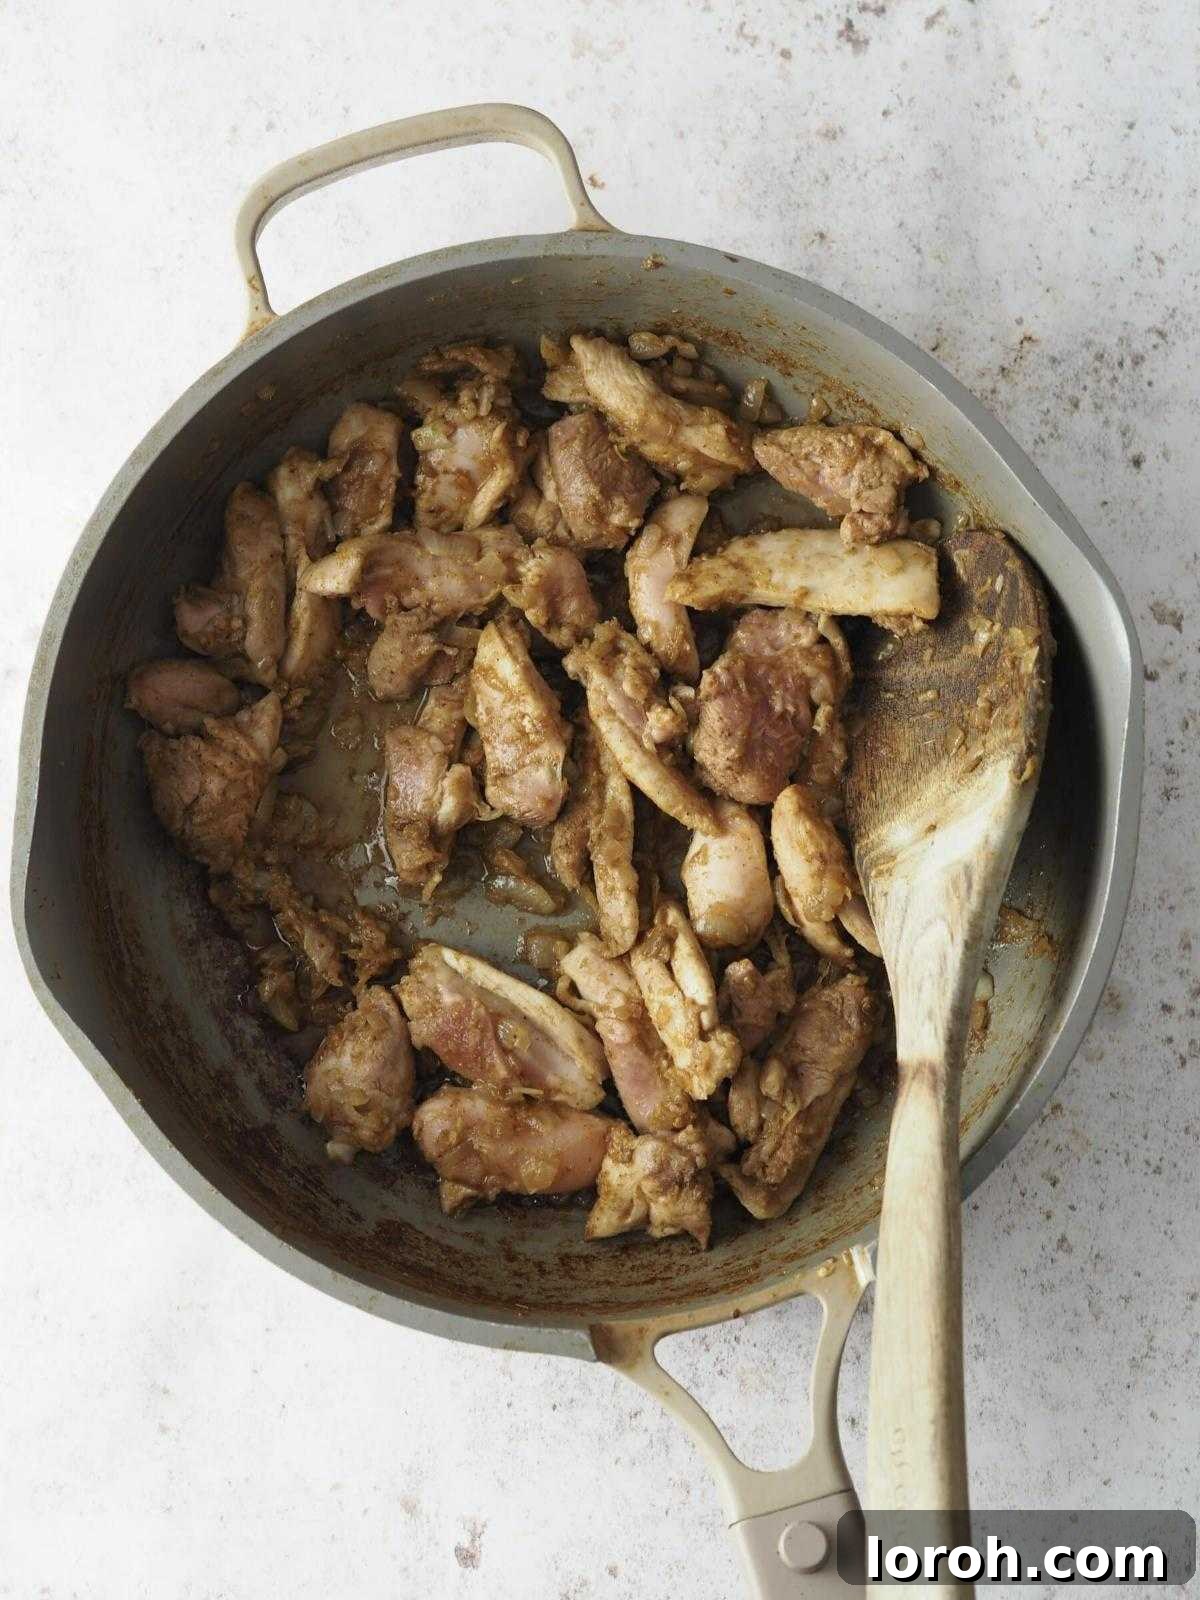
THREE: Brown the Chicken. Cook the chicken pieces for about 5-7 minutes, stirring occasionally, until they are beautifully golden brown on all sides. It’s important that the chicken doesn’t need to be fully cooked through at this stage; the goal is to sear and brown the exterior, which helps to seal in the juices and build a delicious depth of flavor (fond) on the bottom of the pan that will contribute richness to the finished curry sauce.
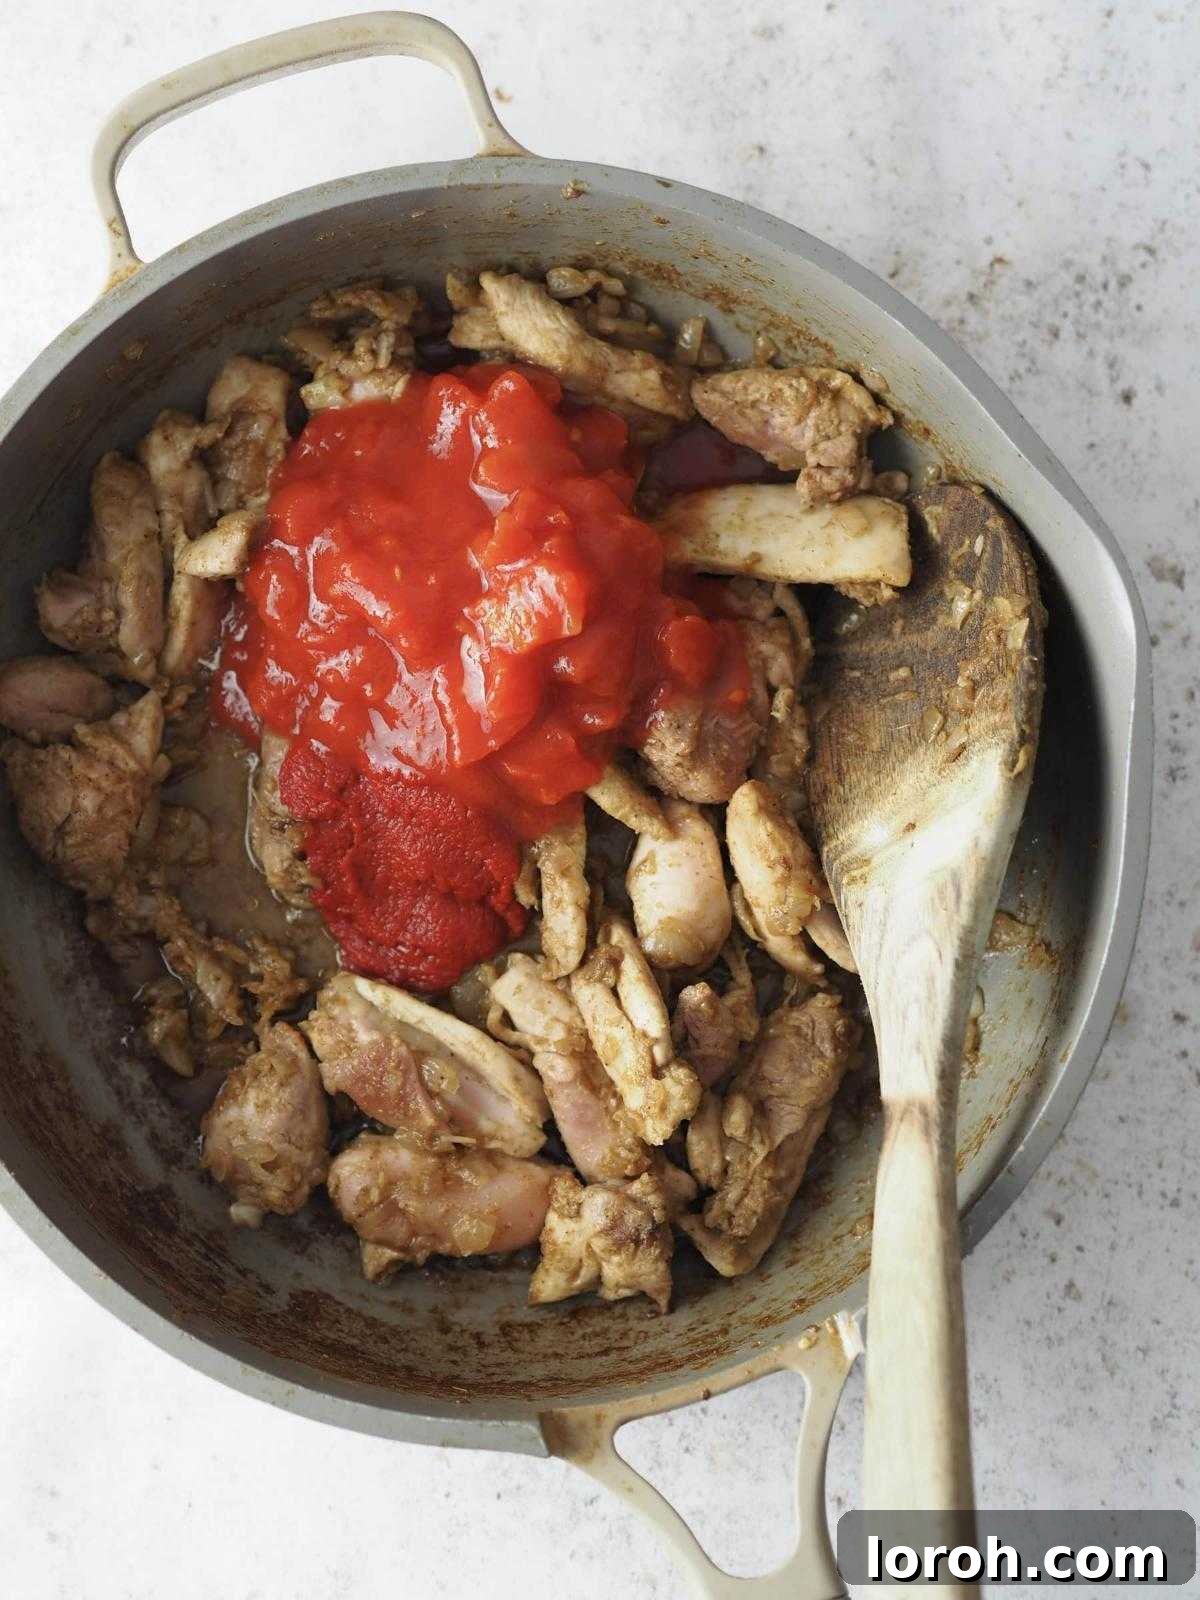
FOUR: Build the Sauce Base. Stir in the tomato purée and cook for 1 minute, ensuring it thoroughly coats all the chicken pieces and aromatic ingredients. Cooking the tomato purée briefly helps to deepen its flavor, removing any raw or metallic taste. Next, pour in the canned chopped tomatoes and gently bring the entire mixture to a soft, bubbling simmer, allowing all the rich flavors to begin melding together.
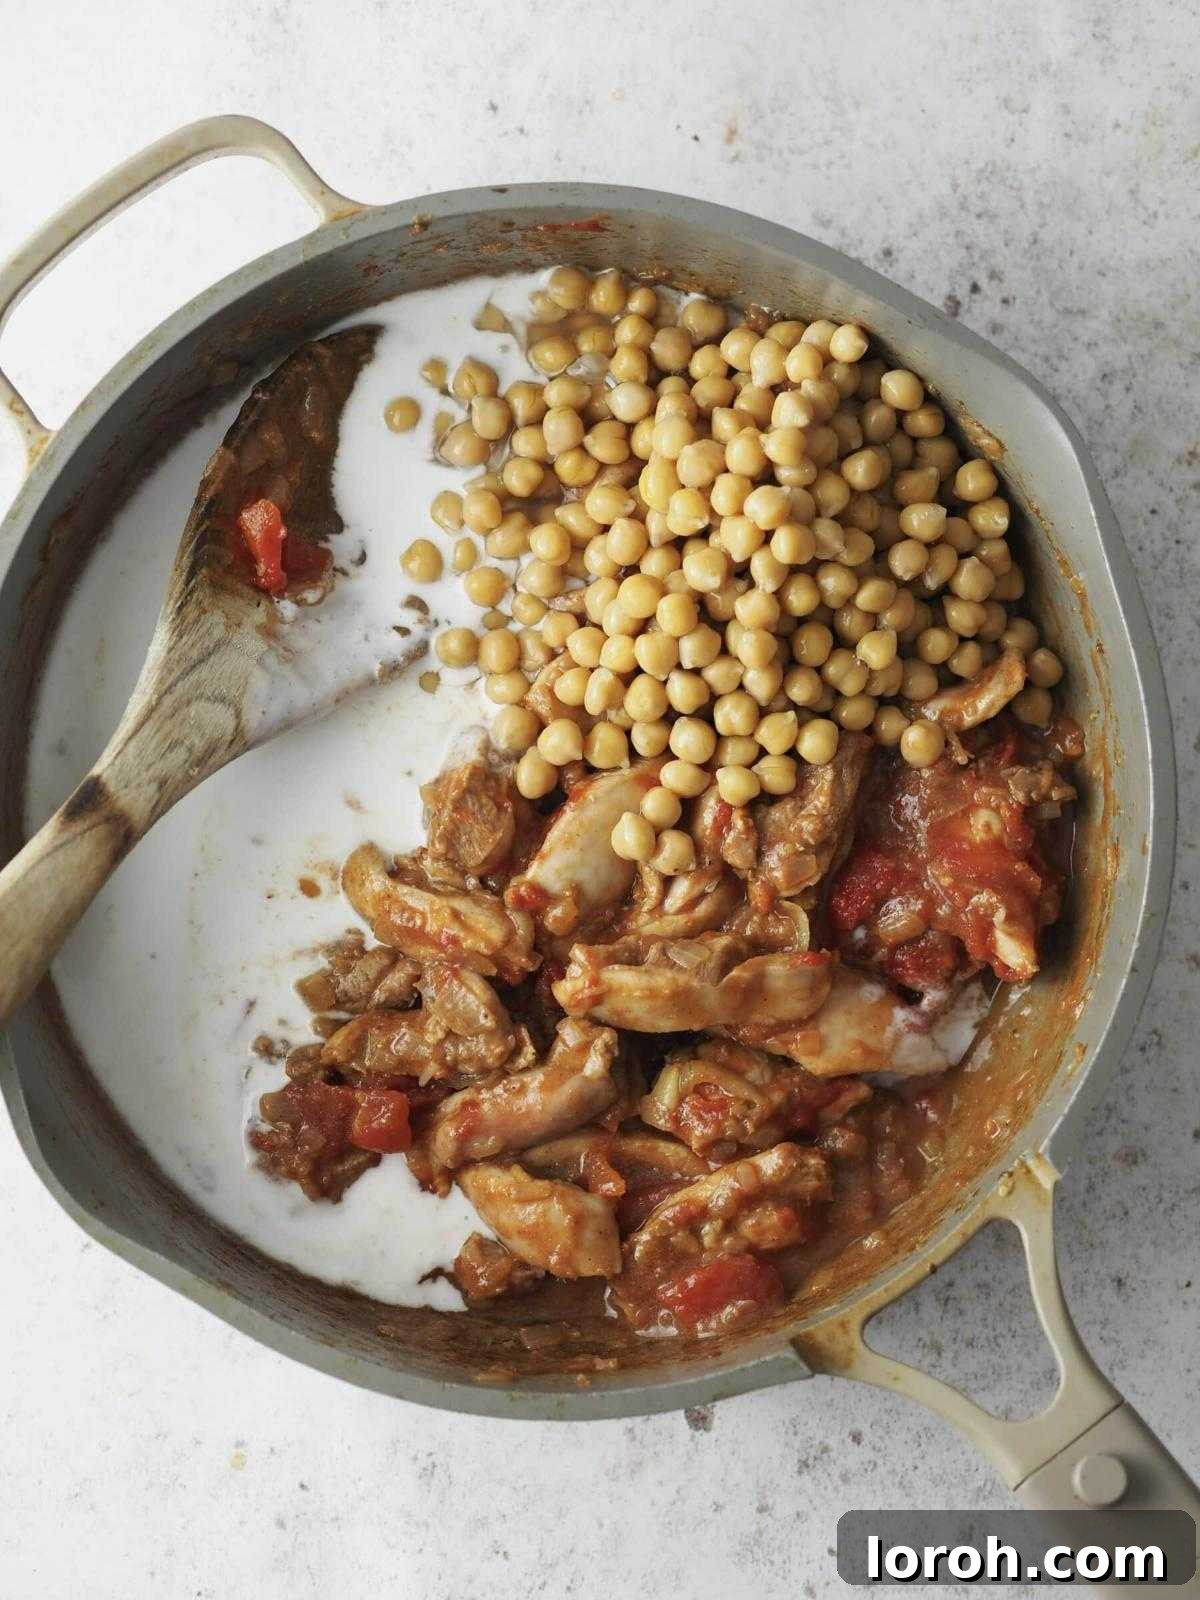
FIVE: Simmer and Combine. Let the curry simmer gently for another 2-3 minutes to allow the tomato base to reduce slightly and thicken, concentrating its flavors. Then, stir in the luscious, full-fat coconut milk and the drained, rinsed chickpeas. Mix everything thoroughly to combine all the ingredients in the creamy sauce. Reduce the heat to low and let it simmer gently for another 5 minutes, ensuring all the ingredients are warmed through and the delicious flavors are fully developed and integrated.
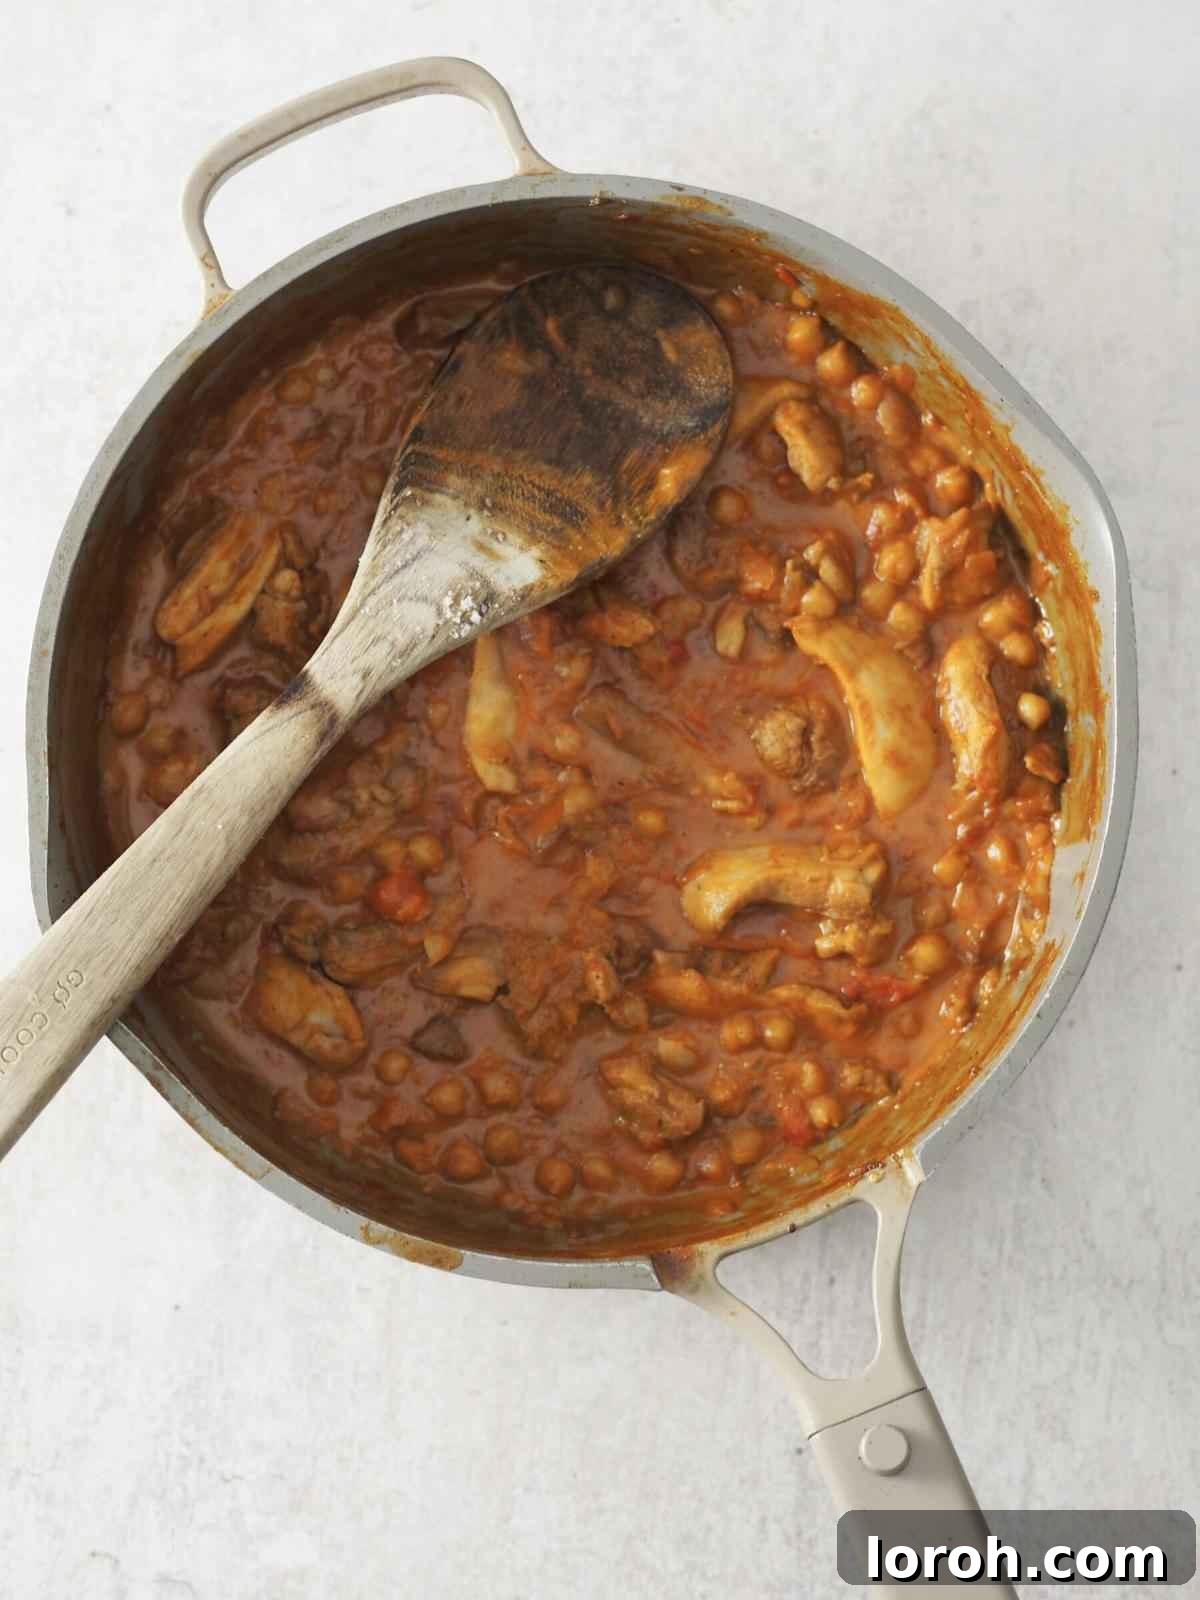
SIX: Finish and Serve. For the final 2 minutes of cooking, stir in the fresh spinach. It will gently wilt into the hot curry, adding a lovely touch of freshness, vibrant green color, and an extra boost of nutrients. Once the spinach has softened, your aromatic and incredibly satisfying chicken and chickpea curry is ready to be enjoyed! Serve it warm with fluffy basmati rice, and garnish generously with a dollop of cooling yogurt, crunchy toasted flaked almonds, freshly chopped coriander, and thinly sliced red chilli for a beautiful presentation and a touch of heat. Enjoy this delightful and easy one-pot meal!
Expert Cooking Tips for Your Best Curry Yet
Elevate your chicken and chickpea curry from great to truly extraordinary with these helpful cooking tips and tricks. Mastering these simple techniques can make a significant difference in the final taste and texture of your dish.
How to Toast Nuts for Maximum Flavor and Crunch
Toasted nuts are a simple yet incredibly impactful garnish that adds amazing flavor, a delightful crunch, and a layer of sophistication, taking virtually any dish, especially this creamy curry, to the next level. While you can certainly buy nuts pre-roasted, freshly toasted nuts offer a superior taste and a more vibrant aroma. It’s surprisingly easy to do yourself, and the payoff in flavor is immense!
How to Toast Nuts in the Oven:
- Preheat your oven to 180°C (160°C Fan / 350°F). Spread your chosen nuts (such as flaked almonds, as recommended for this curry) in a single, even layer on a non-stick baking tray. This ensures that they toast evenly and don’t steam.
- Bake for about 8 minutes. Halfway through the cooking time, give the tray a gentle shake or stir the nuts with a spatula to flip them and prevent any localized burning. They should turn a very light golden brown and become fragrant.
- Watch closely! Nuts can go from perfectly toasted to burnt very quickly. Start checking them after 6 minutes, especially smaller nuts, as they have less mass and will toast faster. Burnt nuts will have an unpleasant bitter taste, which you definitely want to avoid in your curry.
How to Toast Nuts in a Pan (Dry Frying):
- Start with a cold pan. Tip your nuts into a dry, non-stick pan large enough to hold them in a single layer without overcrowding. Starting with a cold pan helps them heat up gradually and toast more evenly, reducing the risk of scorching.
- Set over a low-medium heat and dry-fry the nuts. Stir or toss them frequently to ensure even toasting on all sides and prevent them from burning. The nuts are ready when they turn a golden-light brown and release a distinct, fragrant, nutty aroma.
- Timing is key: For smaller nuts like pistachios, flaked almonds, and pine nuts, this process will typically take around 3-5 minutes. Larger nuts such as pecans and walnuts may take approximately 8 minutes. Always keep a very close eye on them, as cooking times can vary depending on your pan type and heat intensity. As soon as they are done, remove them immediately from the hot pan to a plate or bowl to prevent any residual heat from overcooking them.
General Curry Making Tips:
- Layer Your Flavors Mindfully: Don’t rush the initial steps of the recipe. Sautéing onions until they are deeply softened and sweet, toasting your spices to release their essential oils, and browning the chicken are all crucial stages for developing deep, complex, and nuanced flavors in your curry. Each step builds upon the last, contributing to the richness of the final dish.
- Balance Sweetness and Acidity: The successful combination of tomatoes (which provide acidity) and coconut milk (offering sweetness and creaminess) is key to a well-rounded curry. Always taste your curry before serving and adjust as needed. A small squeeze of fresh lime juice or a splash of white vinegar can brighten flavors that feel a bit flat, while a tiny pinch of sugar can help balance out any excessive acidity.
- Adjust Consistency to Your Liking: If you find your curry is too thick, simply add a splash of water, vegetable broth, or even a little extra coconut milk to reach your desired consistency. Conversely, if it’s too thin, let it simmer gently, uncovered, for a few extra minutes to allow the sauce to reduce and thicken naturally.
- Don’t Skimp on the Garnish: Garnishes like fresh coriander (cilantro), crunchy toasted nuts, and a cooling dollop of yogurt aren’t just for aesthetics. They add crucial contrasting textures, a burst of freshness, and a balancing, cooling element that elevates the entire dining experience, making each spoonful more enjoyable.
Frequently Asked Questions About Chicken & Chickpea Curry
Absolutely, making this curry ahead of time is not only possible but often recommended, as the flavors tend to deepen and become even more delicious after a day or two. Simply follow the recipe instructions, allow the curry to cool completely to room temperature, then transfer it to an airtight container. It can be safely stored in the refrigerator for up to 3 days. When you’re ready to serve, reheat it gently on the stovetop over medium-low heat, stirring occasionally to prevent sticking, or in the microwave, until it’s piping hot throughout. You might want to add a splash of water or extra coconut milk if the sauce has thickened too much during storage.
Yes, this recipe is wonderfully easy to adapt for plant-based diets, making it suitable for both vegetarians and vegans! For a delicious vegetarian version, simply swap the diced chicken for pan-fried paneer or halloumi cheese, cooked until golden brown. For a fully vegan chicken chickpea curry, use pressed extra-firm tofu (cut into cubes and pan-fried until golden and crispy) as your main protein. Additionally, ensure you use a plant-based yogurt (such as coconut or soy yogurt) for garnish instead of traditional dairy yogurt. The chickpeas already provide a fantastic, hearty plant-based protein boost!
While canned chickpeas offer the ultimate convenience and speed for this ‘easy one-pot’ recipe, you can certainly use dried chickpeas if you prefer. However, this will require some additional foresight and preparation time. You’ll need to soak the dried chickpeas overnight (typically for 8-12 hours) and then boil them until they are fully tender, which usually takes around an hour, depending on their freshness and variety. Once cooked, they can be added to the recipe as instructed for canned chickpeas. For a quicker meal, canned remains the go-to option.
Making this delicious curry even healthier is simple with a few smart swaps and additions:
- Leaner Protein: Opt for skinless chicken breast instead of thighs to significantly reduce the fat content, while still providing ample protein.
- More Vegetables: Don’t hesitate to dramatically increase the amount and variety of vegetables in your curry. Add extra bell peppers, carrots, zucchini, green beans, or leafy greens like kale. The more vegetables, the more nutrients and fiber!
- Lighter Coconut Milk: Use light coconut milk if you want to further reduce calories and fat. Keep in mind, however, that this will result in a less creamy and slightly thinner sauce.
- Nutrient-Rich Sides: Instead of white rice, serve your curry with more nutrient-dense options like brown rice, quinoa, or cauliflower rice for added fiber, vitamins, and minerals.
- Reduce Sodium: Choose low-sodium canned tomatoes and chickpeas where possible, and be mindful of the amount of added salt during cooking to control your sodium intake.
This chicken and chickpea curry adapts beautifully to a slow cooker, making it a truly hands-off experience once the initial prep is done! Here’s how you can do it:
- Initial Sauté: Begin by performing steps 1-3 of the recipe (sautéing onions, garlic, ginger, spices, and browning the chicken) in a separate pan on the stovetop. This crucial step is vital for building immense depth of flavor that you won’t achieve by simply dumping all raw ingredients into the slow cooker.
- Combine in Slow Cooker: Once the chicken is beautifully browned and the aromatics are fragrant, transfer them to your slow cooker pot. Then, add the tomato purée, canned chopped tomatoes, full-fat coconut milk, and the drained chickpeas. Stir everything together thoroughly to combine.
- Slow Cook: Cook on the low setting for 6-8 hours or on the high setting for 3-4 hours, until the chicken is incredibly tender and the flavors have deeply melded together.
- Finish: Stir in the fresh spinach during the last 15-20 minutes of cooking, allowing it to gently wilt into the hot curry. Serve as usual with your favorite garnishes and enjoy your effortlessly made slow cooker chicken and chickpea curry!
This incredibly versatile curry pairs wonderfully with a variety of side dishes. Classic options include fluffy basmati rice, brown rice for extra nutrients, or even cauliflower rice for a low-carb alternative. Warm naan bread or soft roti are perfect for scooping up every last bit of the delicious, creamy sauce. For added freshness and balance, consider a simple side salad with a light vinaigrette or some steamed green vegetables like broccoli or green beans. And don’t forget the essential fresh garnishes such as chopped cilantro, a cooling dollop of yogurt, and crunchy toasted nuts!
Other Delicious Curry Recipes You Might Enjoy
If you’re a fan of the rich, aromatic, and comforting flavors of this one-pot chicken and chickpea curry, you’ll definitely want to explore more culinary delights from my kitchen. Be sure to try my unique Almond Butter Chicken Curry for a delightful nutty twist that’s unexpectedly delicious. And don’t miss out on my comforting and popular Chicken Katsu Curry or the wholesome, flavor-packed Tomato, Chickpea, and Spinach Curry for another fantastic plant-packed option. There’s a whole world of incredible curry flavors waiting for you to discover and enjoy!
More Mouthwatering Recipes to Try
Easy Healthy Recipes
Harissa Aubergine Curry with Chickpeas and Coconut
Chicken Recipes
Almond Butter Chicken Curry
Vegetarian Dishes
Feta Saganaki
Easy 30 Minute Meals
Quick Harissa Chicken and Couscous
If you tried this delightful One-Pot Chicken and Chickpea Curry or any other delicious recipe from our site, we would absolutely love to hear from you! Please take a moment to leave a comment below and let us know how it went, your tips, or any variations you tried. Your feedback helps us and other home cooks discover and create even more amazing meals!
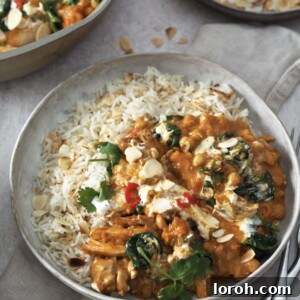
One-Pot Chicken and Chickpea Curry
Rate Recipe
Print Recipe
Ingredients
For the curry:
- 1 tbsp vegetable oil
- 1 onion, finely diced
- A pinch of salt
- 3 garlic cloves, grated
- 1 thumb size piece ginger, grated
- 2 tsp garam masala
- 1 tsp ground cumin
- 500 g skinless, boneless chicken thighs, diced into chunks
- 2 tbsp tomato paste
- ½ x 400g tin chopped tomatoes, 200g
- 1 x 400g tin chickpeas, drained
- 200 ml full-fat coconut milk
- Handful fully-prepared fresh spinach
To serve:
- Cooked basmati rice for 4 people, usually 75g uncooked per person or 2 microwavable pouches
- About 2 tbsp full-fat yogurt
- A handful of fresh coriander, roughly chopped
- About 2 tbsp toasted flaked almonds, for sprinkling
- 1 red chilli, sliced (deseeded, if desired)
Instructions
-
Heat a drizzle of vegetable oil in a large non-stick pan set over a low-medium heat. Add the diced onion and a pinch of salt and sauté for 10-12 minutes, stirring often, or until softened and translucent. This forms the flavorful base.
-
Add the grated garlic and ginger and cook for 1 minute, stirring constantly until fragrant. Immediately add the garam masala and ground cumin. Cook for a further 1-2 minutes, stirring to toast the spices, before adding the diced chicken.
-
Cook the chicken pieces for about 5-7 minutes, stirring occasionally, until they are beautifully golden on all sides. This browning step adds significant depth of flavor to the curry.
-
Stir in the tomato purée and cook for 1 minute, making sure to coat the chicken well. This step intensifies the tomato flavor. Pour in the chopped tomatoes and bring the mixture to a gentle simmer.
-
Simmer the curry for 2-3 minutes to allow the tomato base to thicken slightly. Then, add the full-fat coconut milk and the drained chickpeas. Stir everything thoroughly to combine. Reduce the heat and let it simmer gently for another 5 minutes, allowing all the ingredients to warm through and the flavors to fully meld. For the final 2 minutes, stir in the fresh spinach; it will gently wilt into the curry.
-
Serve warm with fluffy basmati rice. Garnish generously with a dollop of cooling yogurt, crunchy toasted flaked almonds, freshly chopped coriander, and thinly sliced red chilli for extra color and a hint of spice. Enjoy this incredibly satisfying one-pot meal!
Recipe Notes & Tips
To store leftovers: Any remaining curry can be stored in an airtight container (like Tupperware) in the refrigerator for up to 3 days. Its flavors may even improve overnight!
To reheat: Reheat the curry either in a saucepan on the stovetop over medium-low heat or in the microwave until it is piping hot all the way through, ensuring the chicken is thoroughly heated. You may need to add a splash of water or broth to loosen the sauce if it has thickened.
To freeze: This curry freezes exceptionally well, making it perfect for future meals. Allow it to cool completely after cooking, then transfer it to an airtight, freezer-safe container or a sturdy freezer bag. Freeze for up to 3 months. To enjoy, defrost it overnight in the refrigerator or for several hours at room temperature. Reheat in a saucepan on the hob until bubbling hot. A splash of water can be added if the sauce needs loosening.
Spice level: This recipe yields a mild curry. For those who enjoy more heat, feel free to leave the seeds in your red chilli garnish or add an extra pinch of chilli flakes during cooking.
Make ahead tips: As mentioned, this chicken and chickpea curry is fantastic for preparing in advance. Follow the recipe entirely, let it cool, then cover and chill for up to 3 days. Reheat gently until hot.
Make it plant-based: To adapt this recipe for vegetarians, substitute the diced chicken with paneer or halloumi, pan-fried until golden. For a vegan option, use pressed extra-firm tofu, also pan-fried, and swap the dairy yogurt for a plant-based alternative.
Nutrition
Carbohydrates: 9g,
Protein: 16g,
Fat: 17g,
Saturated Fat: 10g,
Polyunsaturated Fat: 3g,
Monounsaturated Fat: 2g,
Trans Fat: 0.03g,
Cholesterol: 65mg,
Sodium: 215mg,
Potassium: 511mg,
Fiber: 2g,
Sugar: 3g,
Vitamin A: 212IU,
Vitamin C: 10mg,
Calcium: 50mg,
Iron: 3mg
Nutrition information is automatically calculated, so should only be used as an approximation.