
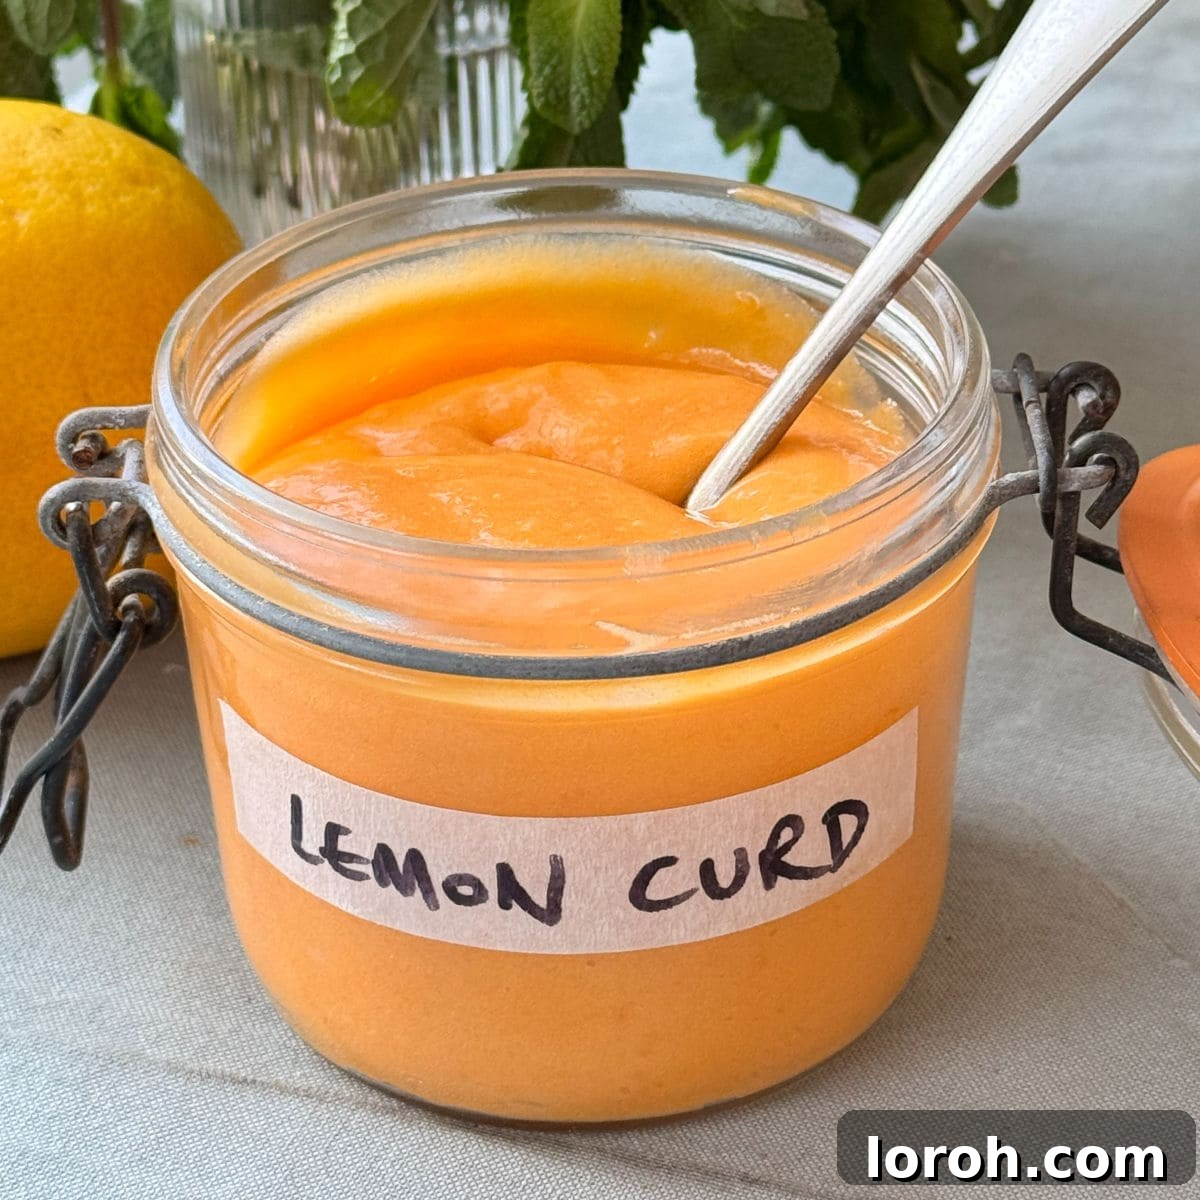
There’s nothing quite like the bright, zesty flavour of truly exceptional homemade lemon curd. Tangy, creamy, and utterly delicious, this classic kitchen staple is a revelation when made from scratch. Once you experience the vibrant taste and silky texture of your own freshly prepared lemon curd, you’ll likely never want to buy a jar from the shop again. Our meticulously crafted recipe promises a consistently brilliant, intensely lemony spread that adds a sophisticated, professional touch to all your bakes and treats. It’s a versatile delight that genuinely enhances everything it touches, from elaborate, show-stopping desserts to the simplest of morning toasts.
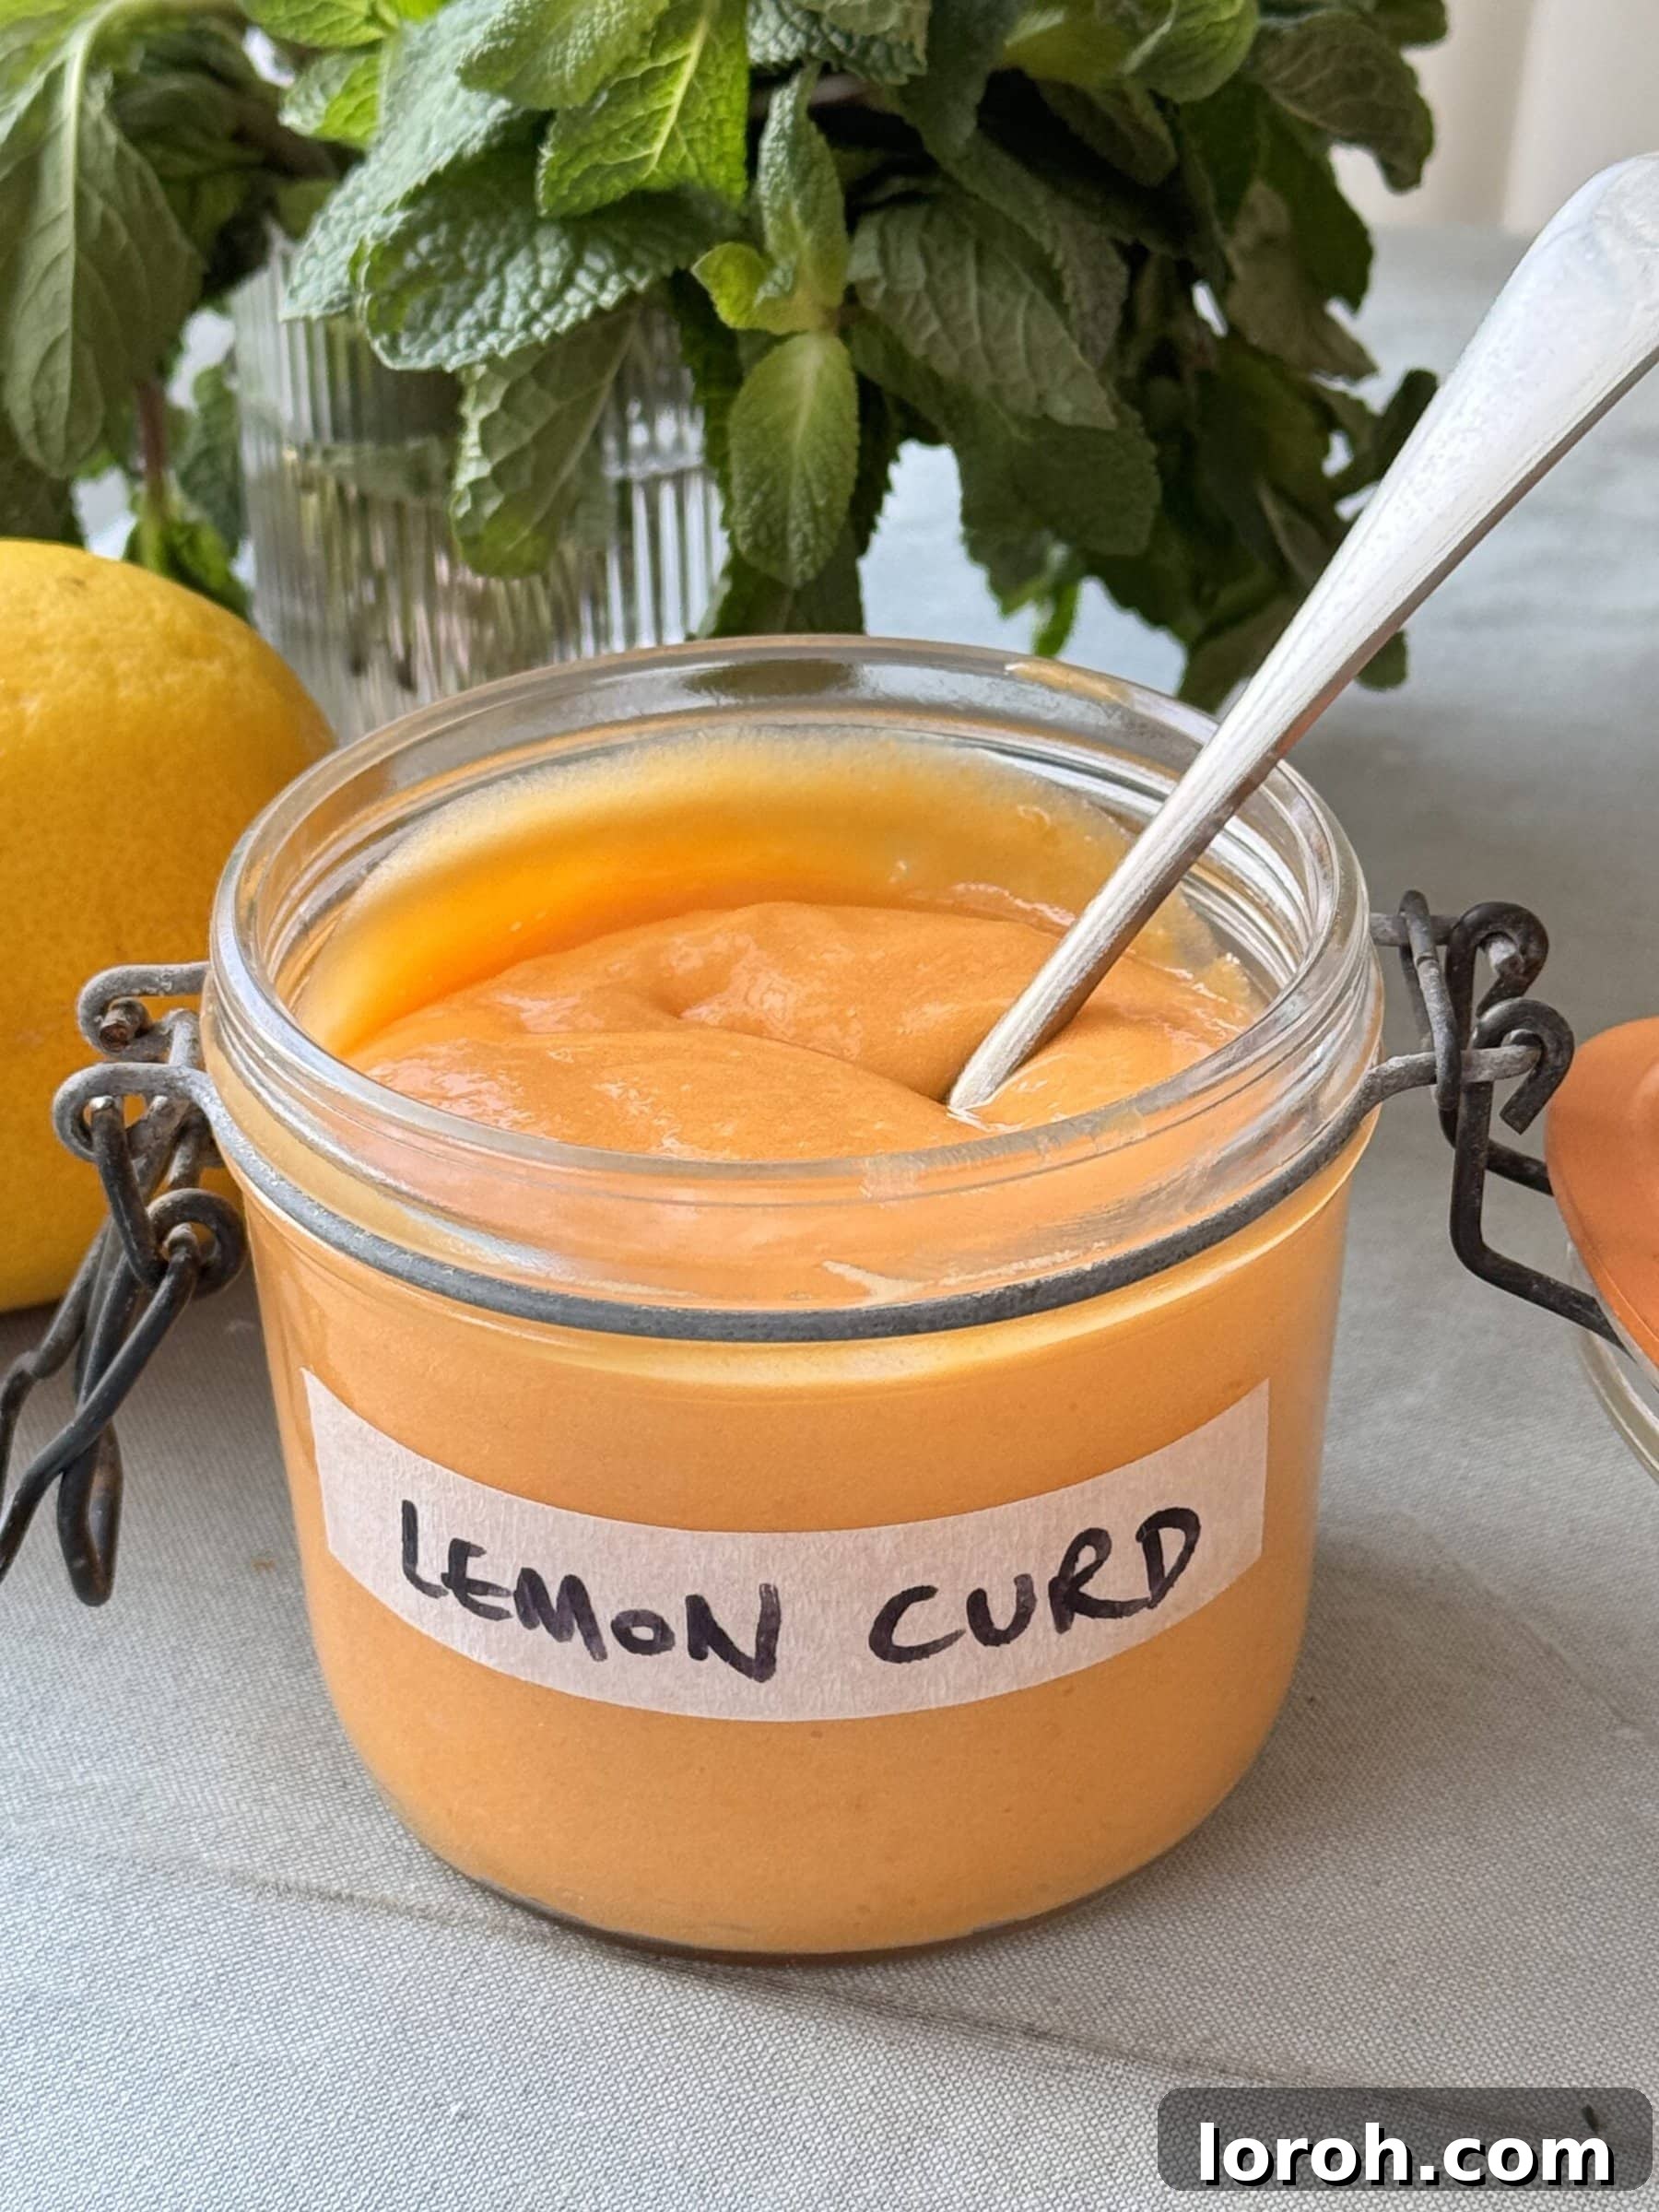
The profound beauty of a perfectly executed easy lemon curd recipe lies in its unparalleled freshness and depth of flavour. Unlike many commercially produced curds that can often be overly sweet, one-dimensional, or lack a genuine citrus punch, this recipe delivers a wonderfully sharp, invigorating tang that truly awakens the palate. It’s the ideal balance of sweet and tart, ensuring the natural zestiness of the lemons remains the star. This makes it an essential component for elevating a wide array of desserts, transforming them from merely good to truly unforgettable culinary experiences.
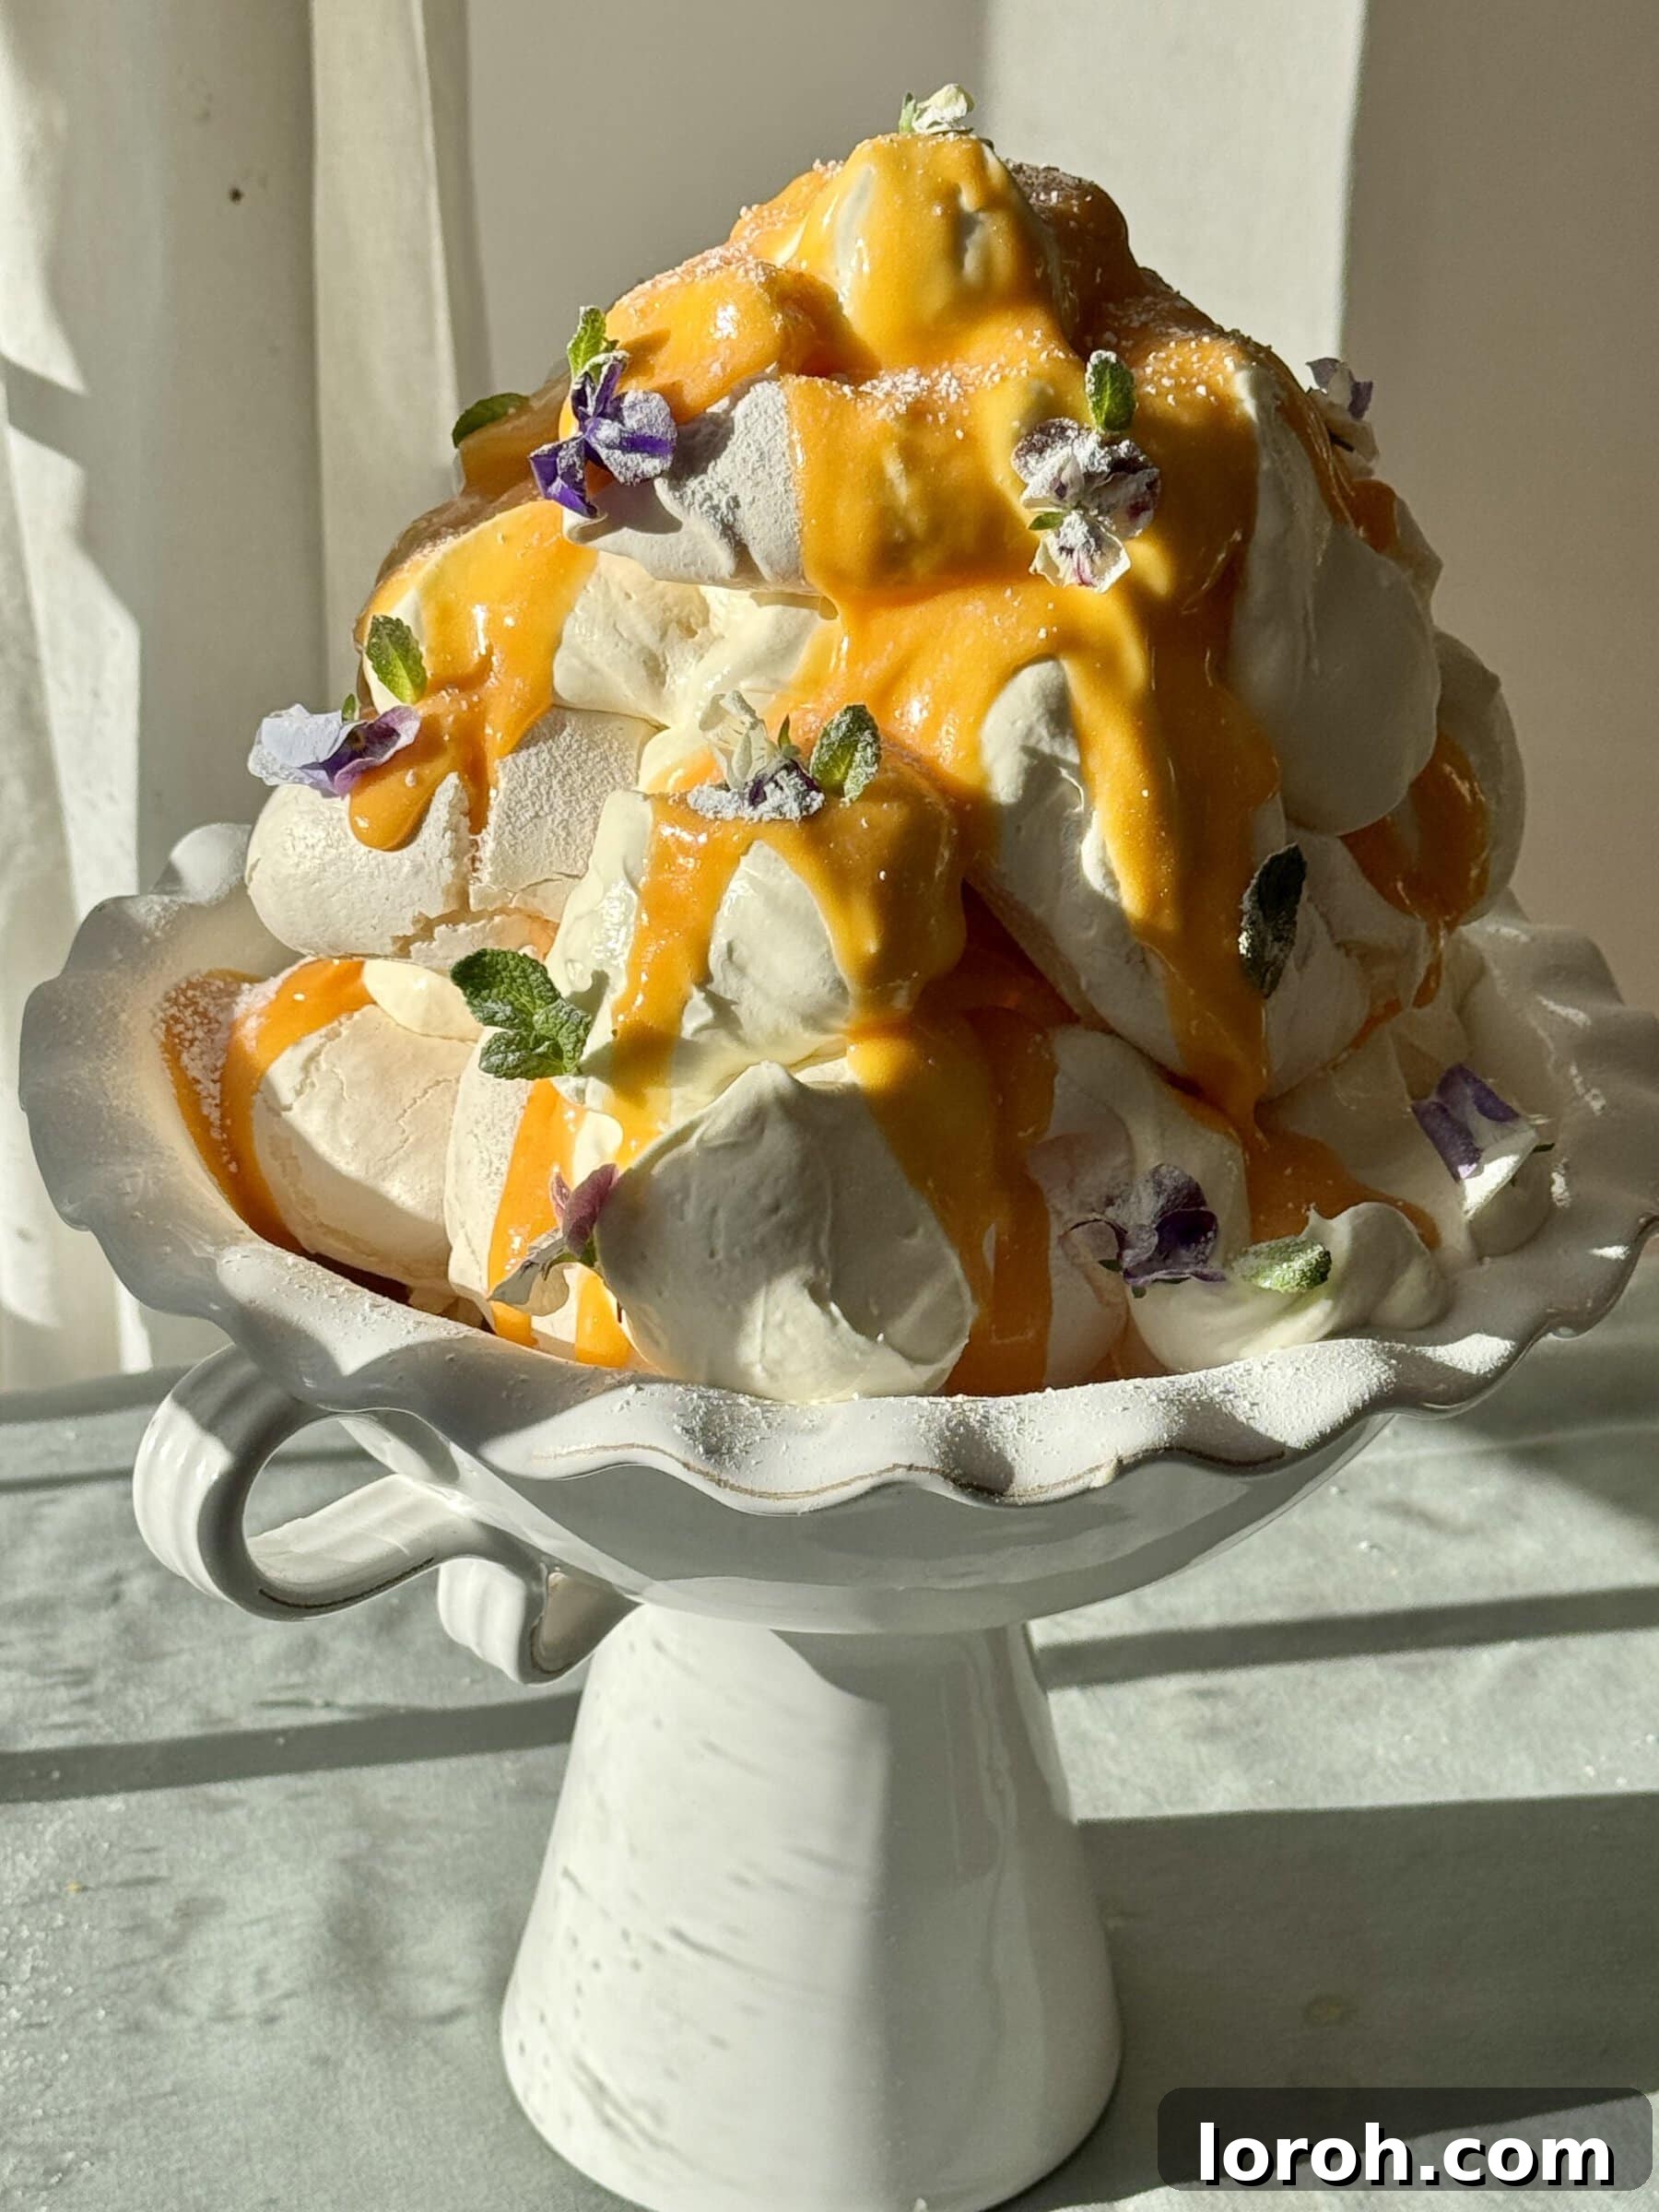
Imagine the culinary possibilities: a luxurious lemon meringue tower reaching skyward, brimming with your handcrafted curd; a rich and delicate lemon meringue tart, its filling shimmering with golden goodness; a moist and flavourful lemon curd cake, each bite a burst of citrus; or a creamy, dreamy lemon meringue cheesecake, where the curd provides that perfect zesty counterpoint. Beyond these elaborate desserts, its versatility truly shines in simpler, everyday applications. Slather it generously on fluffy, freshly baked scones, drizzle it lavishly over classic American or British pancakes, or even spread it thinly on a warm slice of toast for an instant pick-me-up on any given morning. A spoonful can also brighten up a plain bowl of porridge or yogurt, proving that this delightful creation has endless culinary possibilities, making every meal a little more special.
Despite its gourmet reputation and rich flavour, making your own easy homemade lemon curd is surprisingly straightforward and remarkably quick. The entire process typically involves just a few key steps that, once understood, become second nature, allowing you to whip up a batch whenever the craving strikes. You begin by gently whisking fresh egg yolks and caster sugar with aromatic lemon zest until the mixture becomes visibly pale, thick, and wonderfully fragrant. This initial step is crucial for incorporating air and creating a stable, emulsified base. Next, gently warmed lemon juice is slowly introduced, requiring quick and continuous stirring to ensure seamless incorporation and to temper the eggs gradually. The mixture then returns to a saucepan, where it’s carefully cooked over a gentle, consistent heat, gradually thickening to that coveted creamy, spoon-coating consistency. Finally, rich, unsalted butter is stirred in off the heat, melting effortlessly to create a glossy, luxurious finish that defines truly exceptional lemon curd. Each step is designed to build layers of exquisite flavour and achieve the perfect texture, guaranteeing a delightful result every single time you make it.
Mastering the Art of Homemade Lemon Curd: Essential Tips for Perfection
Creating the perfect batch of homemade lemon curd hinges on understanding a couple of crucial techniques and potential pitfalls that can make all the difference between a good curd and an outstanding one. These aren’t complicated culinary secrets, but they do require a little patience and attention to detail. By consciously following these pointers, you can confidently produce a silky, brilliantly flavourful lemon curd that will impress everyone who tastes it and leave them asking for your recipe.
The Golden Rule of Gentle Heat: Preventing Scrambled Eggs
Firstly, the paramount importance of cooking lemon curd over a gentle, consistent heat cannot be overstated. The delicate proteins within the egg yolks mean they can easily scramble if exposed to excessive heat too quickly or unevenly. Your ultimate goal is to slowly and patiently coagulate these egg proteins, allowing the mixture to thicken gradually into a smooth, luscious, and homogenous curd. This “low and slow” approach is vital; it ensures the eggs bind perfectly with the lemon juice and sugar, creating that desired creamy, custard-like texture without any unsightly lumps, graininess, or a split consistency. It’s a process that absolutely requires continuous stirring, reaching every corner of the pan, to prevent any part of the mixture from overheating at the bottom or sides. Think of it less as cooking and more as a gentle coaxing. If you find your curd is taking longer than expected to thicken, resist the strong urge to crank up the heat; true culinary patience is a definitive virtue in this endeavour. Rushing this step is the most common reason for curd failure, so take your time and trust the process.
Say No to Metal: Avoiding That Peculiar Metallic Taste
Secondly, have you ever noticed a faint, somewhat peculiar or unpleasant metallic aftertaste in some batches of lemon curd, even when using the freshest ingredients? This is a surprisingly common issue that can significantly detract from the otherwise bright and invigorating fresh flavour of the curd. The best and most effective way to circumvent this problem is to consciously avoid using metal kitchen equipment, especially reactive metals like aluminum or even some stainless steels, during the entire making process. The inherent acidity of the lemon juice can react with these metals, imparting that undesirable, off-putting flavour to your delicate curd. To ensure your lemon curd remains pristine, pure, and untainted in taste, always opt for non-reactive materials. This means reaching for a sturdy glass or ceramic bowl for mixing your ingredients, a heat-resistant silicone spatula or whisk for stirring (avoiding traditional metal whisks), and ideally, a heavy-bottomed enamel-coated saucepan or a well-seasoned cast iron pan for the cooking stage. These seemingly small adjustments truly make a significant and noticeable impact on the final taste profile, meticulously preserving the fresh, tangy, and clean notes you strive for in a perfect homemade lemon curd.
Why This Easy Lemon Curd Recipe Will Become Your New Favourite
This isn’t just another lemon curd recipe; it’s an invitation to unlock a world of culinary possibilities with minimal effort and maximum reward. Here’s why this particular recipe stands out from the rest and why you’ll undoubtedly find yourself turning to it again and again for that perfect tangy fix:
- Unbeatable Freshness and Exquisite Flavour in Just 20 Minutes: Prepare to redefine your expectations of lemon curd. Forget the bland, often overly processed, and artificial-tasting versions found on supermarket shelves. This homemade lemon curd takes a mere 20 minutes from the first zest to the final pour, yielding a product that is infinitely more delicious, vibrant, and bursting with authentic citrus flavour. The fresh, high-quality ingredients truly sing, offering a depth of flavour and a bright, clean taste that commercial curds simply cannot replicate.
- Perfectly Balanced: Sharp, Tangy, and Never Overly Sweet: A common complaint about many store-bought lemon curds is their tendency to err on the side of excessive sweetness, which can unfortunately overpower the delicate, nuanced citrus notes. Our recipe is meticulously balanced, employing just the right amount of sugar to complement rather than mask the lemon. The result is a wonderfully sharp and tangy profile that allows the natural zestiness and acidity of the lemons to shine through brilliantly. It’s the ideal counterpoint to rich desserts or a refreshing burst of flavour that can be enjoyed deliciously on its own.
- Infinitely Adaptable: Customise or Explore Other Citrus Varieties: This recipe provides a fantastic, robust foundation that you can effortlessly adapt to your personal taste preferences. Prefer your curd a little sweeter or perhaps even more tart? Simply adjust the sugar or lemon juice quantities slightly to achieve your desired balance. Even better, unleash your culinary creativity by swapping the lemons for other delightful citrus fruits! Experiment with making a bright and aromatic lime curd, a sweet and fragrant orange curd, or an intriguing, subtly bitter grapefruit curd. The possibilities for flavour exploration are truly endless, allowing you to tailor this classic to any occasion or preference. Even delicate mandarins or tangerines can be used for a particularly sweet and mellow curd.
- Incredibly Versatile: More Than Just a Dessert Filling: While this lemon curd excels as a luxurious filling for sophisticated tarts, elegant cakes, delicate pastries, and vibrant cupcakes, its utility extends far beyond the traditional dessert realm. It’s equally delicious and wonderfully versatile as a topping for a wide array of breakfast items like crisp toast, fluffy pancakes, warm scones, or a dollop swirled into your morning porridge or yogurt for an invigorating start to the day. Its bright, acidic flavour can even enhance certain savoury dishes when used sparingly, offering a surprising and delightful twist to glazes for poultry or dressings. This truly is a multi-purpose culinary gem!
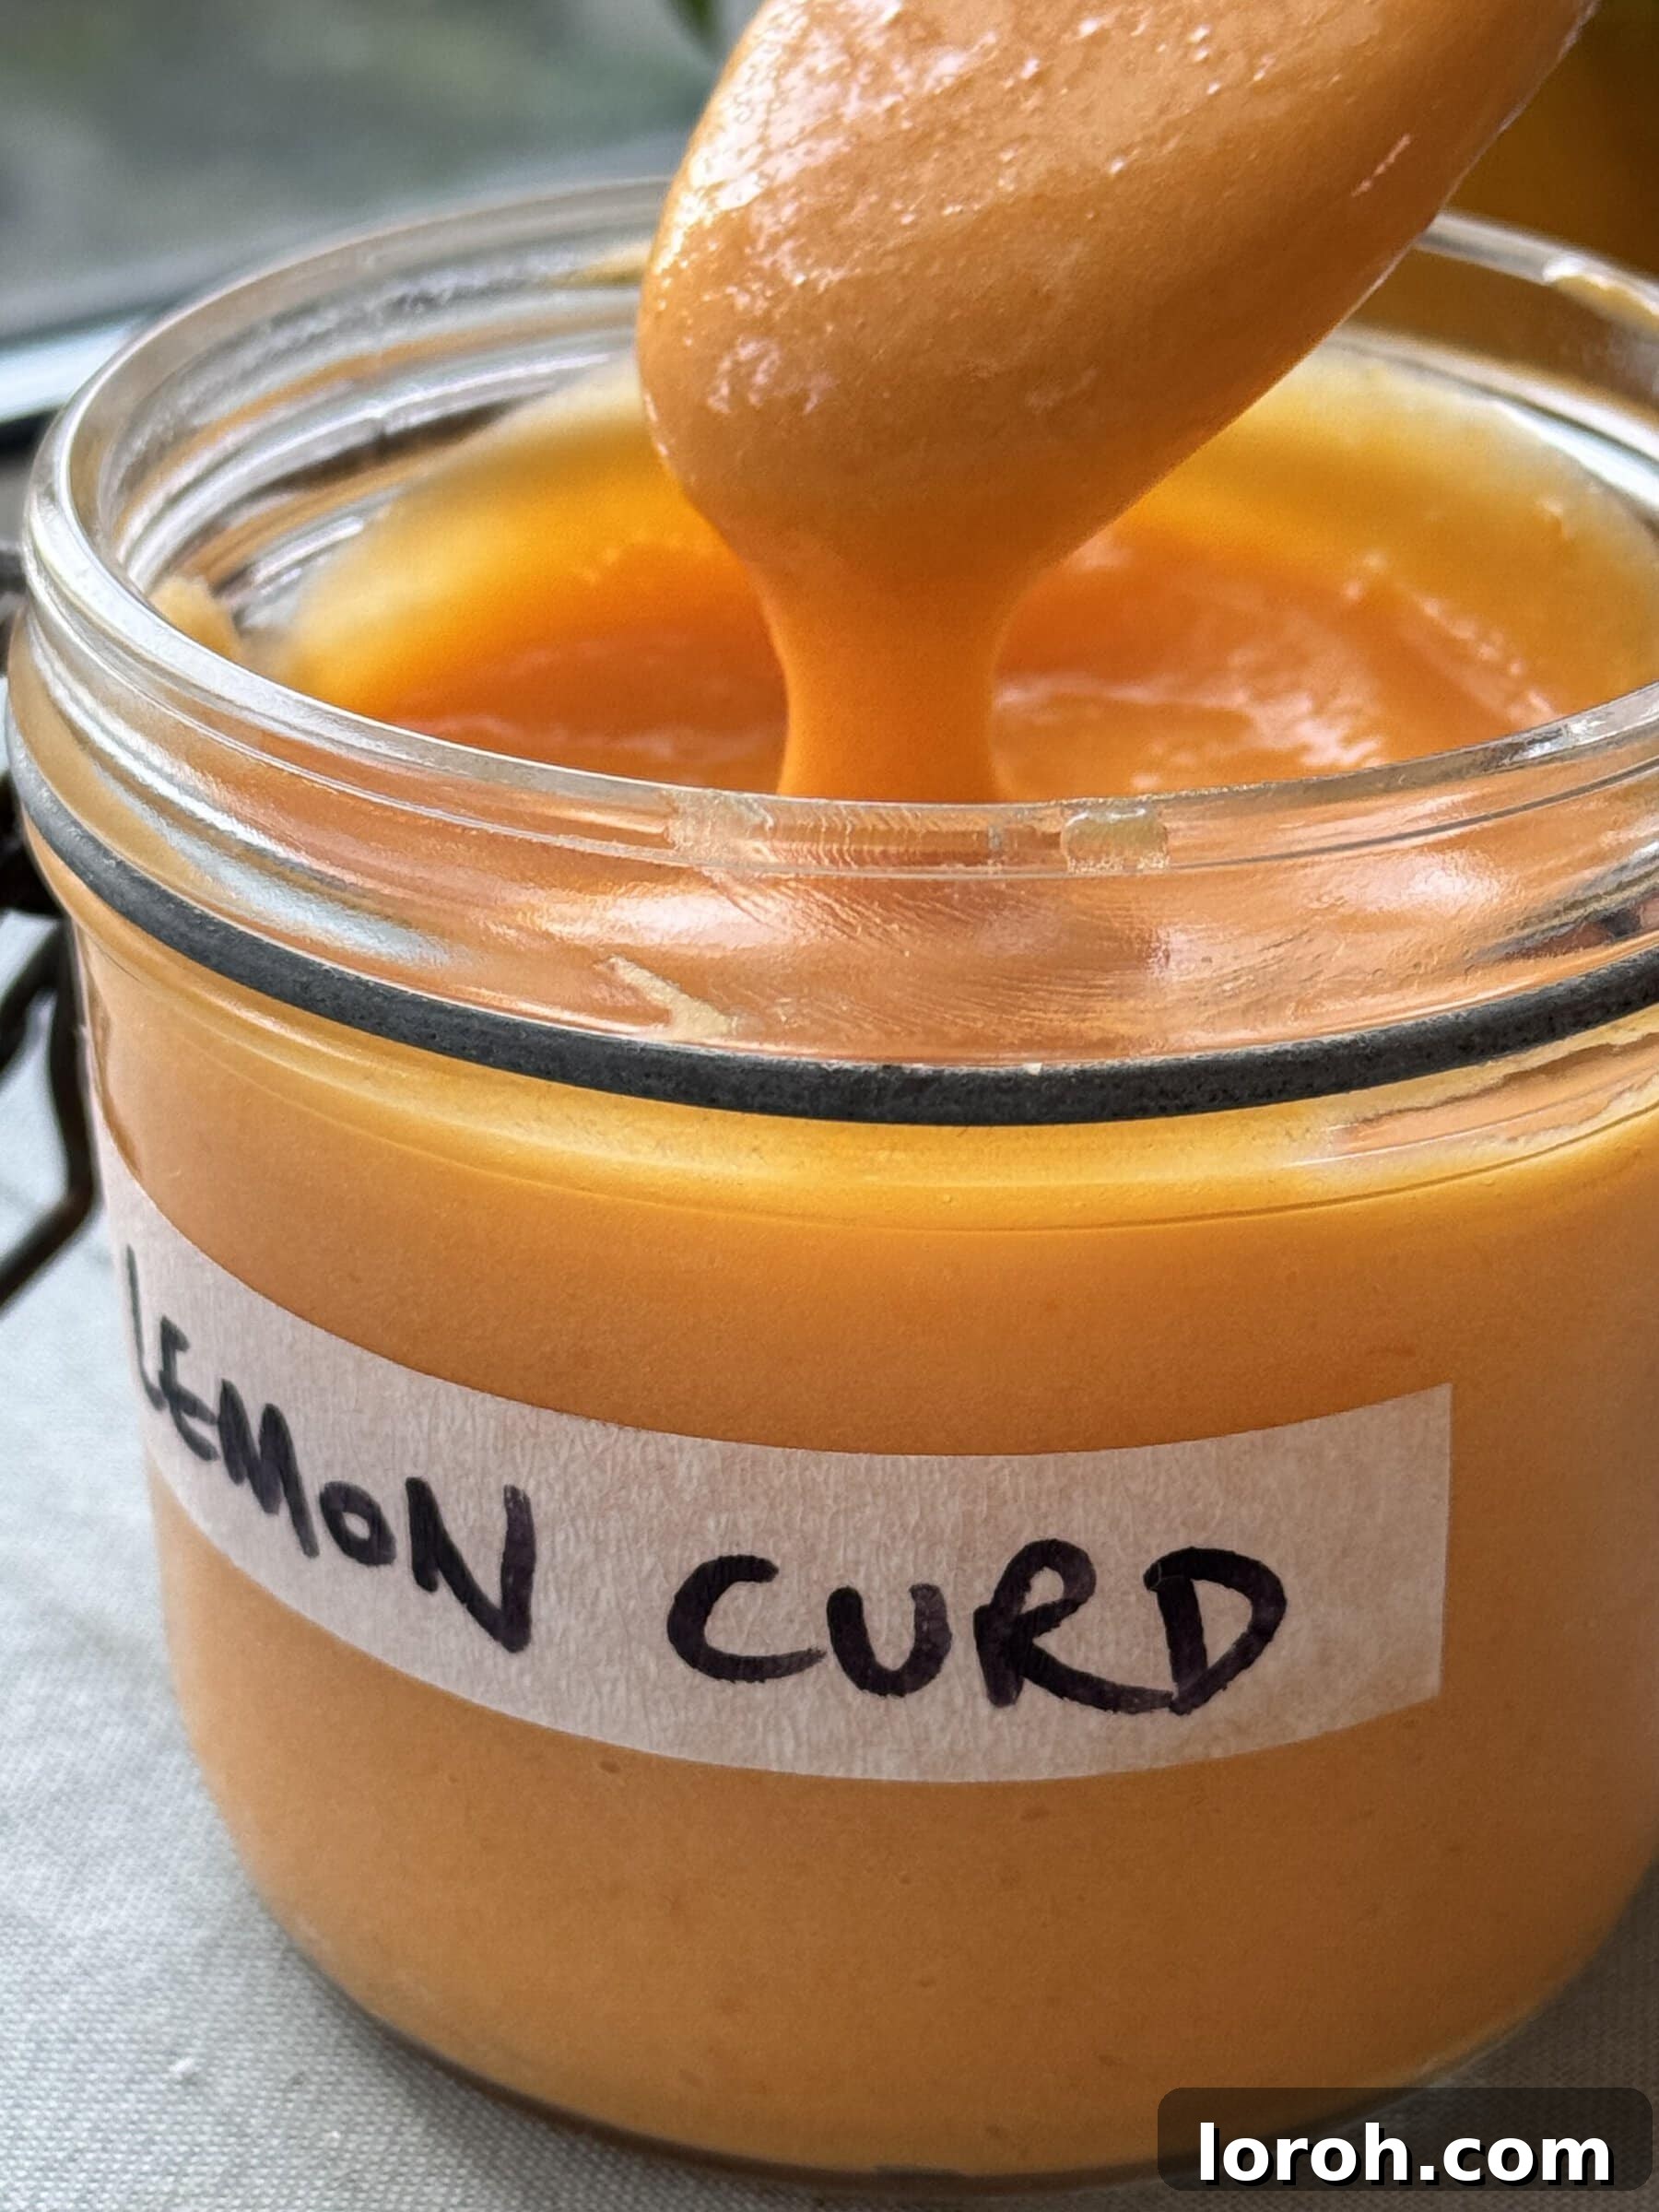
Key Ingredients for Your Perfect Lemon Curd
Achieving a truly exceptional lemon curd relies on a few high-quality, fresh ingredients. Each component plays a vital and distinct role in creating the iconic flavour, luxurious texture, and appealing vibrancy of this beloved spread. While the full, precise measurements can be found in the detailed recipe card at the bottom of the post, understanding the specific function of each ingredient will help you appreciate the delightful magic of this simple preparation and guide your choices for the best results.
- Caster Sugar (Superfine Sugar): This finely granulated sugar is absolutely essential not only for sweetening the curd, perfectly balancing the intense acidity of the lemons, but also for contributing significantly to the curd’s smooth, silky texture. Its fine crystals dissolve readily and completely into the egg mixture during the initial whisking, which is crucial for preventing a grainy finish in the final product. It also helps in preventing the egg yolks from setting too firm, ensuring that desirable custard-like consistency. For the best, most consistent results, always stick to caster sugar, often labelled as “superfine sugar” in North America, as its solubility ensures it integrates seamlessly into the mixture. Golden caster sugar can also be used for a slightly caramelised flavour and deeper hue.
- Fresh Lemons (Zest and Juice): The undeniable star of the show! You will require both the intensely aromatic zest and the tangy juice from fresh, vibrant lemons. The zest, which is the colourful outer layer of the lemon peel, is packed with incredibly fragrant essential oils that provide the deep, complex lemony flavour that defines the curd. Always remember to zest your lemons before juicing them to maximise the amount of flavourful oils you extract. Use good quality, unwaxed or organic lemons whenever possible for the purest and most authentic taste, as the zest is a crucial flavour component.
- Large Egg Yolks: These are the primary thickening agents responsible for lemon curd’s characteristic richness, luxurious creaminess, and luscious mouthfeel. Using only the yolks (and reserving the egg whites for other delightful creations like meringues, pavlovas, or even a frittata) ensures a truly smooth, custard-like texture without the added stiffness or rubberiness that whole eggs can sometimes impart. For superior flavour, a beautiful golden colour, and excellent texture, opt for large, fresh, free-range eggs, ideally those with a vibrant, deep yellow yolk colour. If you’re in the UK, look for eggs stamped with the British Lion mark, known for their quality. Ensure your egg yolks are at room temperature before you begin, as this allows for better emulsion and a smoother overall curd.
- Unsalted Butter: Butter is strategically introduced at the very end of the cooking process to add an incredible amount of luxurious richness, a beautiful sheen, and a wonderfully smooth, velvety finish to the curd. Using unsalted butter is paramount as it gives you complete control over the salt levels in your recipe, which is important for meticulously balancing the overall flavour profile and enhancing the lemon’s brightness. Always use a high-quality, proper dairy butter for the best results; avoid baking spreads, margarines, or low-fat alternatives, as these can significantly alter the texture, consistency, and ultimate taste of your homemade lemon curd. Cutting the butter into small, cold cubes will ensure it melts quickly and incorporates smoothly into the warm curd, preventing any separation.
- Pinch of Salt (Optional, but Recommended): While not explicitly listed as a main ingredient in some recipes, a tiny pinch of fine salt (e.g., sea salt) can work wonders to enhance and round out the flavours of your lemon curd. Salt acts as a flavour enhancer, subtly amplifying the sweetness of the sugar and the tartness of the lemon, preventing the curd from tasting flat. Add it with the butter at the end to ensure it dissolves fully.
Get Creative: Lemon Curd Substitutions and Variations
While the classic lemon curd is undeniably a masterpiece of flavour and texture, this recipe offers a fantastic foundation for culinary experimentation and adaptation. Don’t hesitate to adjust ingredients to suit your personal preferences or what you happen to have available in your pantry. Even more excitingly, you can explore entirely new flavour profiles by simply swapping the citrus! Here are some popular substitutions and exciting variations to inspire your next batch and add a twist to this beloved classic:
- Explore Other Citrus Fruits: The fundamental technique for making lemon curd can be beautifully and successfully applied to a variety of other citrus fruits, opening up a delightful world of new flavours and possibilities.
- Lime Curd: For an even sharper, more intensely aromatic, and vibrantly green spread, simply swap the lemons for an equal amount of fresh limes (both zest and juice). This is particularly exceptional when paired with tropical desserts, as a filling for a classic key lime tart, or even just spread on a buttery biscuit.
- Orange Curd: If your palate leans towards a milder, sweeter, and more fragrant curd, substitute the lemons with fresh, juicy oranges. This makes a wonderfully delightful spread for toast, a lovely and lighter filling for cakes, or a sweet accompaniment to crepes. Even mandarins or clementines can be used for a particularly sweet and delicate flavour profile, offering a nuanced taste.
- Grapefruit Curd: For those who appreciate a slightly bitter, sophisticated, and complex tang, grapefruit curd is a truly wonderful and intriguing alternative. It’s fantastic enjoyed on its own with a spoon, or wonderfully paired with richer flavours like dark chocolate or roasted fruits. Ensure you use pink or red grapefruits for a beautiful colour.
- Mixed Citrus Curd: Why choose just one? Combine the zest and juice of two or three different citrus fruits, such as lemon, lime, and orange, for a complex and layered flavour profile that is uniquely delicious. Adjust sugar levels as needed, as some citrus fruits are sweeter than others.
- Alternative Sugar Choices: The type of sugar you choose can subtly impact both the flavour and the final appearance of your curd.
- Golden Caster Sugar: This will work perfectly well as a direct substitute for white caster sugar and will impart a slightly more caramelised, rich note to your curd, giving it a beautiful and deeper golden hue. Be aware that this will naturally result in a darker colour than a traditional, pale yellow lemon curd, but the flavour is exquisite.
- Granulated Sugar (Regular White Sugar): While caster sugar (or superfine sugar) is always preferred for its superior ability to dissolve quickly and smoothly, regular granulated sugar can also be successfully used. If using granulated sugar, just ensure you whisk it even more thoroughly and patiently with the egg yolks and zest at the beginning to help it dissolve completely. This extra whisking will help prevent any potential grittiness in the final product.
- Dairy-Free Option: For those with dietary restrictions or preferences, it is entirely possible to create a wonderfully delicious and rich dairy-free lemon curd. Simply substitute the unsalted dairy butter with a high-quality dairy-free butter alternative. It is highly recommended to look for block-style dairy-free butter (often found in the baking aisle) rather than a spreadable variety in a tub, as these tend to have a better fat content and will yield a creamier, more stable, and more luscious curd. The preparation process remains exactly the same, ensuring a rich and tangy result without any dairy.
Step-by-Step Guide: How to Make Easy Lemon Curd at Home
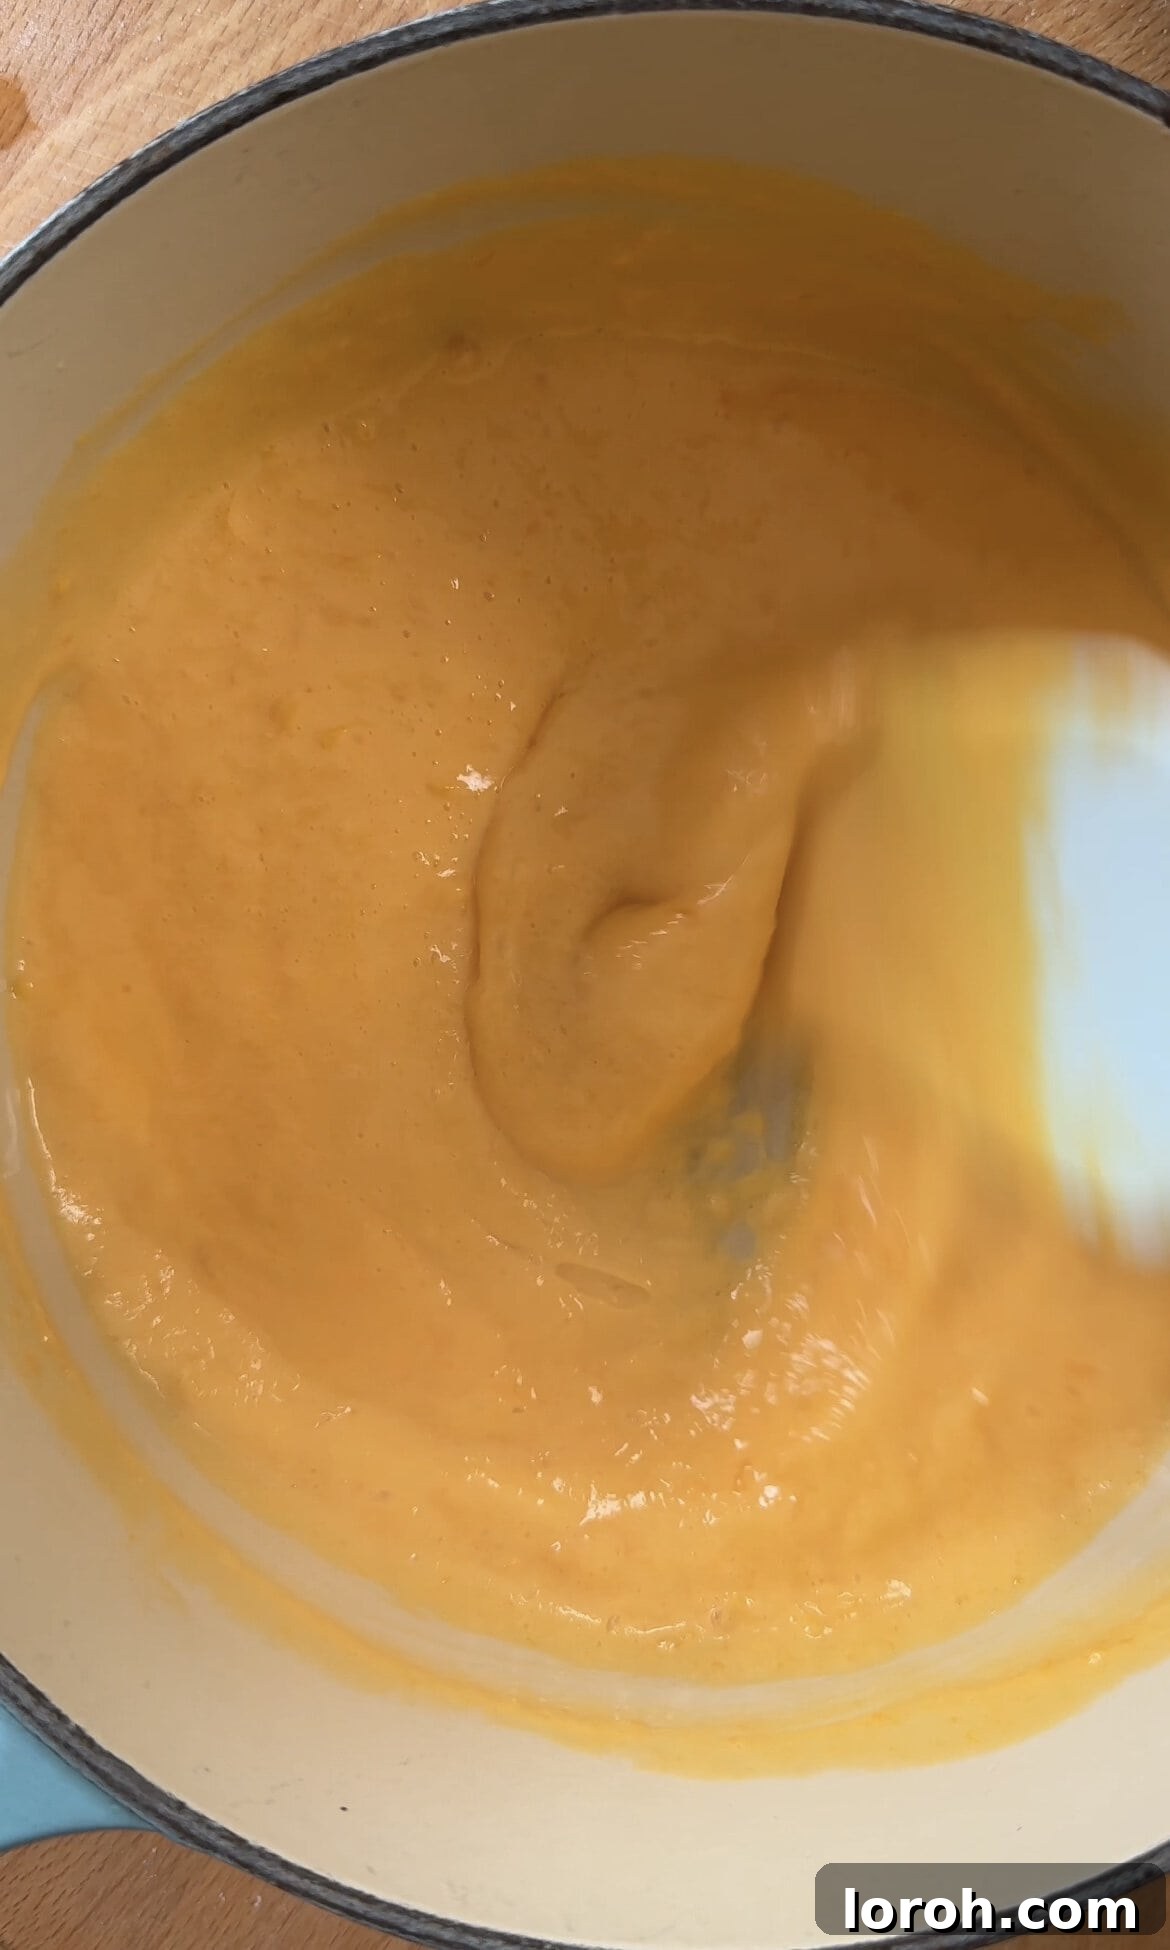
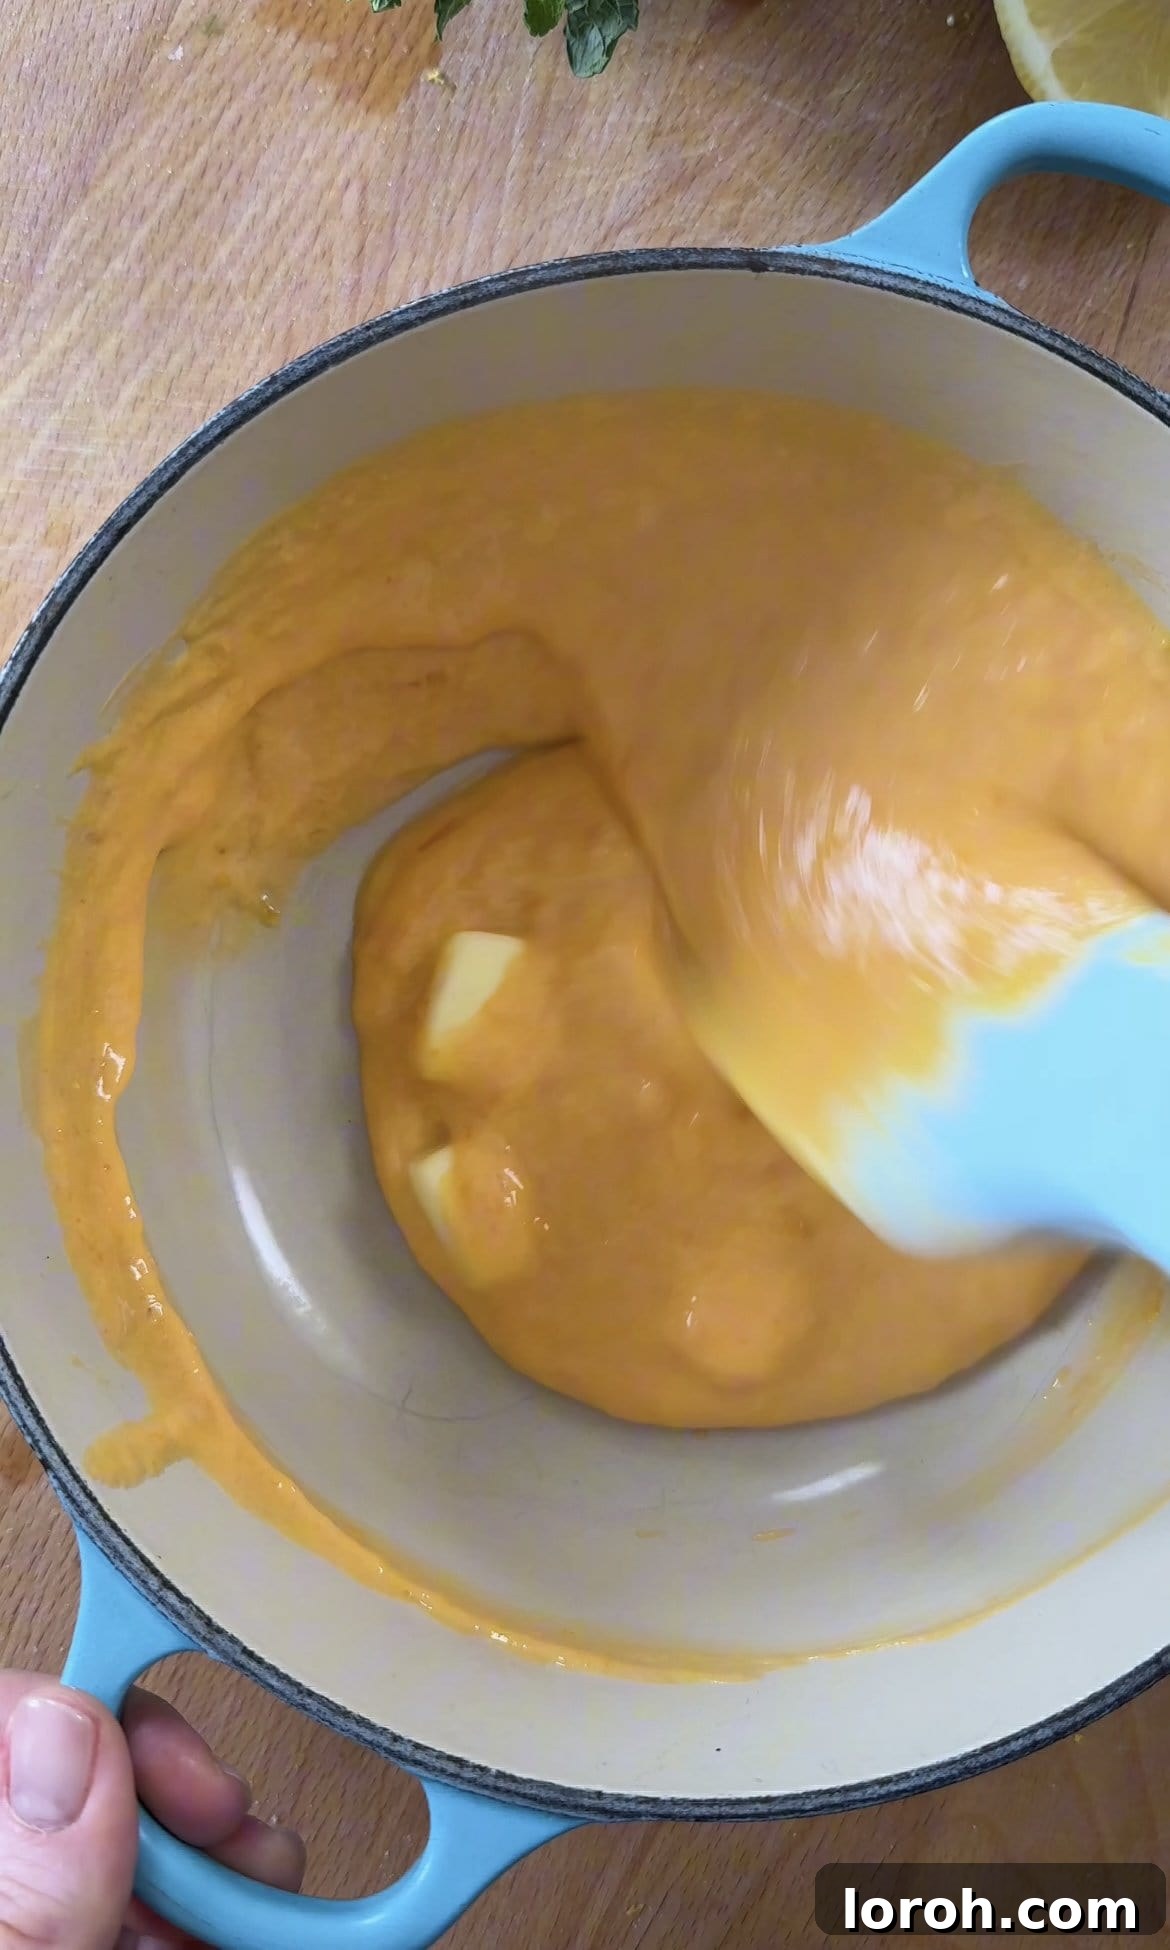
Creating this rich, tangy, and vibrant lemon curd is a truly rewarding experience, and we’ve broken it down into simple, easy-to-follow steps to ensure your success. While the full printable recipe card with precise measurements and ingredient quantities is conveniently located at the bottom of this page, this visual and detailed guide will walk you through each stage of the process, ensuring a perfect batch even for novice bakers. Remember, the key to a flawless curd is always patience and the judicious use of gentle heat!

Expert Cooking Tips for Flawless Homemade Lemon Curd
Making lemon curd is a delicate and rewarding culinary art, but with these insider tips, you’ll not only achieve perfection every time but also understand the ‘why’ behind each crucial step. These pointers are designed to address common pitfalls, enhance the overall flavour, and ensure the optimal texture of your homemade creation.
- Embrace Metal-Free Equipment for Pure Flavour: This tip is worth repeating for its profound impact on the final taste. The inherent acidity of lemon juice is quite reactive, and it can react with certain metals (especially aluminum, and sometimes even stainless steel), leading to a subtle but distinctly unpleasant metallic aftertaste in your delicate curd. To safeguard the pure, bright, and unadulterated flavour of your lemon curd, always commit to using non-reactive kitchenware throughout the entire process. This means thoughtfully selecting glass or ceramic bowls for all your mixing tasks, opting for a heat-resistant silicone spatula or whisk instead of traditional metal ones, and for the cooking stage, ideally using an enamel-coated saucepan or a well-seasoned cast-iron pan. This seemingly minor switch in equipment makes a surprisingly noticeable difference to the delicate and nuanced flavour profile of your curd.
- The Art of Gentle Heating: Patience Prevents Scrambling: The absolute biggest fear and most common pitfall when making any custard-based dessert like curd is the dreaded scrambling of the eggs. To emphatically avoid this, it is paramount to maintain a consistently low and very gentle heat throughout the entire cooking process. If you’re employing a double boiler setup (which is highly recommended for beginners), ensure the water in the pan underneath is just gently simmering, not aggressively boiling. Continuous stirring is truly your best friend here, as it ensures even heat distribution across the entire mixture and crucially prevents any single part of the curd from overheating or sticking to the bottom of the pan. If, by chance, you do notice any initial signs of scrambling (e.g., small, white lumps forming), immediately remove the pan from the heat and vigorously whisk for a minute or two. As a last-resort troubleshooting method, quickly pour the curd through a very fine-mesh sieve set over a clean bowl, pushing it through with the back of a spoon to remove any cooked bits and salvage the smooth texture.
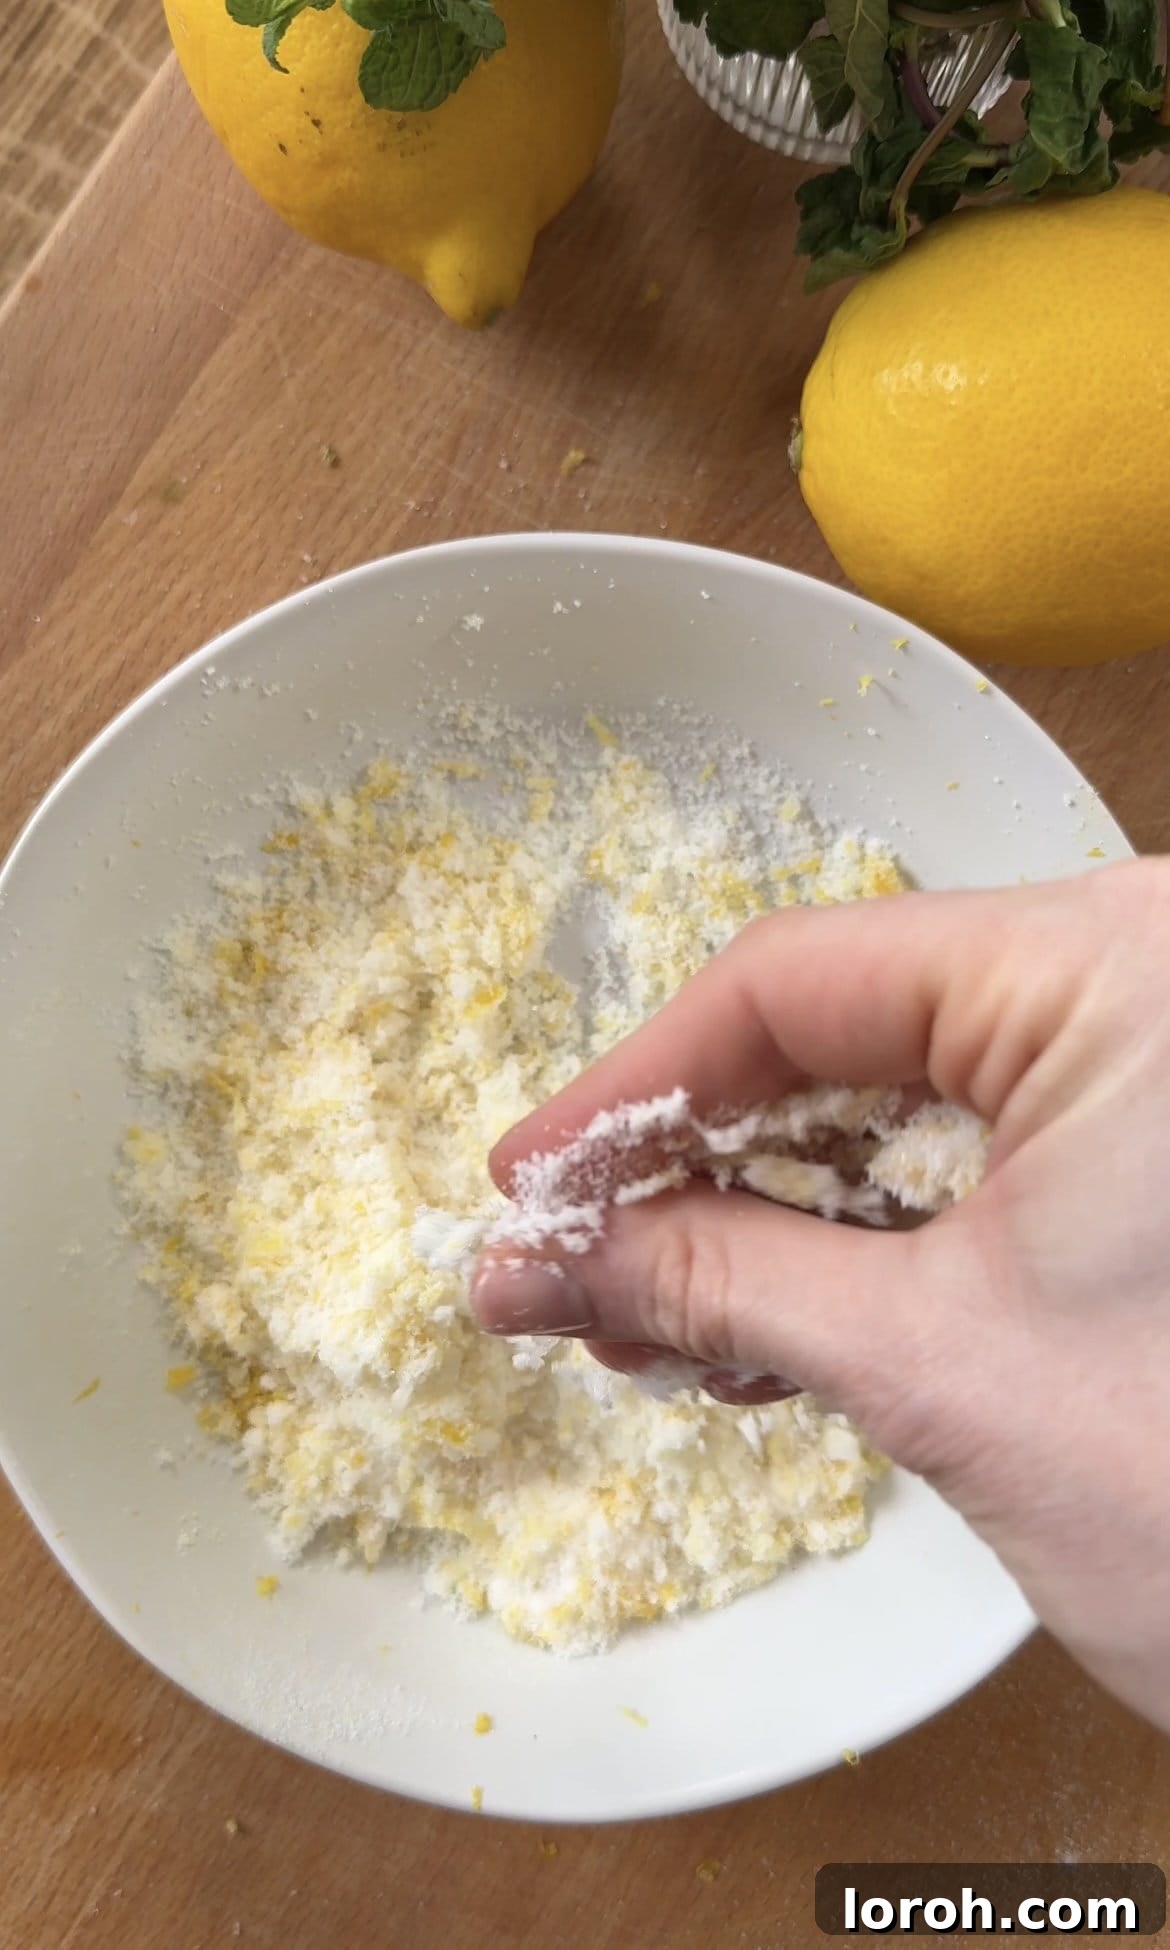
- Maximise Zest Flavour with Your Fingertips: Don’t just mindlessly toss the lemon zest into the sugar and mix with a spoon; take a deliberate moment to truly work it in. By using your clean fingertips to rub the caster sugar and finely grated lemon zest together, you actively and effectively release the vibrant, fragrant essential oils that are beautifully trapped within the zest. This simple yet highly effective technique significantly intensifies the pure lemon flavour and aromatic depth in your curd, making it wonderfully aromatic, incredibly bright, and truly standout from other versions.
- The Secret to Silky Smoothness: Strain Your Curd: While technically an optional step, straining the finished lemon curd through a fine-mesh sieve is highly, highly recommended for achieving that coveted, impeccably silky-smooth, and utterly luxurious texture. This step efficiently removes any tiny, minuscule fragments of cooked egg yolk, any small lumps that might have formed, or larger pieces of zest that might have made their way into the mixture, ensuring an impeccably smooth and professional-looking final product. If you have one available, a plastic mesh sieve is often preferred over a metal one for this specific task, again, to avoid any potential metallic reaction, especially if the curd is still warm.
- Prevent Skin Formation: Cover Directly: As your hot lemon curd begins to cool, an unsightly ‘skin’ can rapidly form on its exposed surface. This skin, if not prevented, can lead to an undesirable lumpy texture once the curd is mixed or stirred later. To effectively prevent this, cover the surface of the warm curd directly with clingfilm (plastic wrap). Press the film gently but firmly onto the entire surface of the curd, ensuring there are absolutely no air pockets between the film and the curd. This method traps moisture and keeps the curd perfectly smooth and unblemished. Even if a skin does manage to form, don’t worry too much; the taste won’t be spoiled, but for aesthetic perfection and optimal texture, direct covering is the absolute key.
Frequently Asked Questions About Homemade Lemon Curd
Here are some of the most common questions people ask about making, using, and understanding homemade lemon curd:
How does lemon curd set without gelatine or similar thickening agents?
The fascinating magic behind lemon curd’s natural thickening lies entirely in a delicate yet powerful chemical reaction that occurs between the egg yolks and the lemon juice, assisted by gentle heat. In essence, the acidity of the lemon juice acts as a catalyst, denaturing the proteins present within the egg yolks. This denaturation causes the egg proteins to unfold from their natural structure and then, as the mixture is gently and gradually heated, they begin to re-bond with one another, creating a strong, stable, and intricate network. This protein network then traps the liquid, resulting in the beautifully thick, creamy, and spoon-coating texture we associate with perfectly set lemon curd, all without the need for any artificial thickeners like gelatine or cornstarch. It’s a testament to the power of natural ingredients working in harmony.
What are the best uses for homemade lemon curd?
The versatility of homemade lemon curd is truly astounding and extends far beyond just basic dessert fillings! It is the undeniable star in many classic preparations such as a towering lemon meringue pie, an elegant lemon meringue tart, or as a vibrant layer in a creamy lemon meringue cheesecake. Beyond these, consider it a luxurious and bright filling for delicate mini fruit tartlets, a zesty spread on warm classic pancakes, fluffy waffles, or even just simple, crusty toast. It can also be generously layered between sponges to create an exquisite white chocolate and lemon cake, swirled into creamy yogurt or overnight oats, or simply dolloped on your morning porridge for a wonderfully bright and invigorating start to the day. For a simple yet elegant dessert, serve it chilled with fresh berries, a scattering of shortbread crumbs, and a spoonful of lightly whipped cream.
What can I make with the leftover egg whites from this recipe?
Since this delightful lemon curd recipe primarily utilises only egg yolks, you’ll naturally find yourself with a surplus of leftover egg whites – absolutely do not let them go to waste! They are perfectly suited for making a batch of light, crisp, and airy lemon meringues, which happen to pair absolutely wonderfully with your freshly made lemon curd. Other fantastic and delicious options for using up those egg whites include creating a stunning and impressive pear and chocolate pavlova, a rich and decadent chocolate mousse, or even light and delicate financiers. For a savoury option, egg whites can be used in omelettes, frittatas, or egg white scrambles. If you’re not ready to use them immediately, egg whites freeze exceptionally well; simply store them in an airtight container or freezer bag for up to a few months, then thaw them completely in the refrigerator when you are ready to use them in your next culinary project.
Why did my lemon curd turn out too thin?
A thin or runny lemon curd is a common issue, and several factors can contribute to it. The most prevalent reasons are insufficient cooking time or inadequate heat during the thickening stage. The curd needs to reach a specific temperature (generally between 170-175°F or 77-80°C) for the egg proteins to fully coagulate and set properly. If the heat is too low or the cooking time is cut short, the proteins simply won’t have enough time or energy to bind effectively. Another common reason could be using too much liquid (lemon juice) relative to the number of egg yolks; precision in measurement is crucial. Finally, ensure your egg yolks are fresh and of a good ‘large’ size, as they are the primary thickening agents. If your curd is still too thin, you can try gently reheating it over very low heat, stirring constantly, for a few more minutes until it reaches the desired consistency. Be cautious not to overcook or scramble the eggs.
Can I make this lemon curd with bottled lemon juice instead of fresh?
While you can technically use bottled lemon juice as a substitute in a pinch, for the absolute best flavour, most vibrant taste, and a truly superior homemade lemon curd, fresh lemon juice is highly recommended and always preferred. Bottled juices often lack the bright, complex, and nuanced acidity found in freshly squeezed lemons, and they can sometimes contain preservatives or added sugars that alter the flavour profile. Crucially, bottled lemon juice completely lacks the fresh lemon zest, which provides a significant amount of the curd’s aromatic intensity and depth of flavour. If you absolutely must use bottled juice, choose one that is 100% pure lemon juice with no added ingredients. However, be prepared for a less intense, less complex, and perhaps slightly less fresh flavour profile compared to a curd made with freshly zested and juiced lemons.
Storage & Freezing Instructions for Homemade Lemon Curd
Proper storage is absolutely key to extending the life and maintaining the exquisite quality of your delicious homemade lemon curd. Here’s how to store it safely and effectively, ensuring you can enjoy its vibrant flavour for as long as possible:
How can I store fresh lemon curd?
Once your lemon curd has finished cooking and has been strained (if you chose to do so), transfer it immediately into clean, thoroughly sterilised glass jars. It’s important to fill the jars while the curd is still warm. Allow the curd to cool completely at room temperature on your countertop. Once the jars are cool to the touch, seal them tightly with their lids. Your homemade lemon curd can then be safely stored in the refrigerator for up to one week. For optimal freshness and to prevent the absorption of other fridge odours, always ensure it’s kept in an airtight container. While one week is the standard recommendation, some experienced bakers suggest it can last even longer; always trust your senses – if it still looks vibrant, smells fresh, and tastes delicious, it’s likely still perfectly fine to enjoy!
Can I freeze lemon curd?
Absolutely, yes! Lemon curd freezes beautifully, making it a fantastic component for meal prep or future baking projects. To freeze, first ensure that your lemon curd has cooled down completely to room temperature. Then, transfer it to an airtight, freezer-safe container, making sure to leave a small amount of headspace at the top to allow for any slight expansion during freezing. Alternatively, you can use heavy-duty freezer bags, pressing out as much air as possible before sealing. You can safely freeze homemade lemon curd for up to one month without any significant loss of quality, flavour, or texture. When you’re ready to use it, simply transfer the frozen curd to the refrigerator and allow it to defrost fully, typically overnight. Once thawed, give it a good whisk or stir before using, as some minor separation might occur, which is entirely normal and easily rectified.
Can I make lemon curd ahead of time?
Yes, making lemon curd ahead of time is one of its greatest advantages and a fantastic time-saving strategy for any busy baker or home cook! It’s a perfect make-ahead recipe for preparing components of larger baking projects or simply ensuring you have a delicious spread ready whenever inspiration strikes. As mentioned, it keeps exceptionally well in the refrigerator for at least a week, and often even longer under proper conditions. Preparing it in advance not only allows the flavours to meld and deepen slightly, enhancing its complexity, but also ensures you have a ready supply of this vibrant, tangy spread whenever you need it. Simply pull a jar from the fridge and use it as needed, whether for baking, elevating your breakfast, or simply enjoying an impromptu sweet treat.
Delightful Pairings: Other Recipes You Might Enjoy
Now that you’ve confidently mastered the art of making homemade lemon curd, you’ll undoubtedly be looking for even more delicious ways to use it or other satisfying baking projects to explore. Here are some fantastic recipes that either perfectly complement your fresh lemon curd or offer similar rewarding culinary experiences:
- For the ultimate indulgent breakfast or brunch experience, generously serve your vibrant lemon curd with my fluffy British pancakes or the delicate, miniature Dutch Poffertjes – a truly irresistible combination!
- Your homemade lemon curd is also an absolute dream spread on these light and airy easy classic scones, adding a bright, zesty contrast to the rich clotted cream and jam.
- If you’re seeking other impressive yet approachable desserts that are sure to wow, my comforting Apple Crumble Cheesecake or the tropical delight of the White Chocolate & Passionfruit Cheesecake are equally delicious and satisfying options.
- For another easy and charming baking adventure, try the rustic charm of a Cherry Clafoutis – it’s simple to prepare and always a delightful crowd-pleaser, especially when fresh cherries are in season.
More Zesty & Sweet Inspirations from Our Kitchen
Easy Dessert Recipes
Classic Lemon Meringues
Easy Baking Recipes
Luscious White Chocolate and Raspberry Cake
Puddings & Cheesecakes
Decadent Lemon Meringue Cheesecake
Easy Dessert Recipes
Timeless Lemon Meringue Tart
Share Your Lemon Curd Success and Feedback!
If you’ve enthusiastically made this homemade lemon curd recipe and absolutely loved the vibrant, tangy results, I would be utterly thrilled and truly grateful if you could take a moment to leave a review in the comments section below! I genuinely love hearing what you thought of the recipe, any creative changes or personal twists you made, and the wonderful stories behind what inspired you to try my creations. Your feedback not only helps other home bakers but also deeply encourages me.
Additionally, if you share a photo of your beautiful, tangy lemon curd or any delicious dish you made with it on Instagram, please remember to tag me @desertislanddishes. It truly makes my entire day to see you making and enjoying my culinary creations! Happy baking!
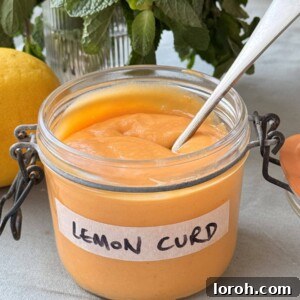
Easy Homemade Lemon Curd
By: Margie Nomura
Tangy, creamy, and irresistibly delicious, this lemon curd recipe is a kitchen classic that’s incredibly simple to master at home. Once you’ve tasted the vibrant homemade version, you’ll never settle for store-bought again!
- Prep Time: 5 minutes
- Cook Time: 15 minutes
- Total Time: 20 minutes
- Servings: Approximately 10 servings (or about 250-300ml / 1 cup)
Ingredients
- 100 g (approximately 1/2 cup) caster sugar (superfine sugar)
- Zest of 2 large lemons
- 5 large egg yolks, at room temperature
- 80 ml (approximately 1/3 cup) fresh lemon juice (from the 2 zested lemons)
- 60 g (approximately 1/4 cup) unsalted butter, diced into small pieces
- Pinch of fine salt (optional, but recommended for flavour enhancement)
Instructions
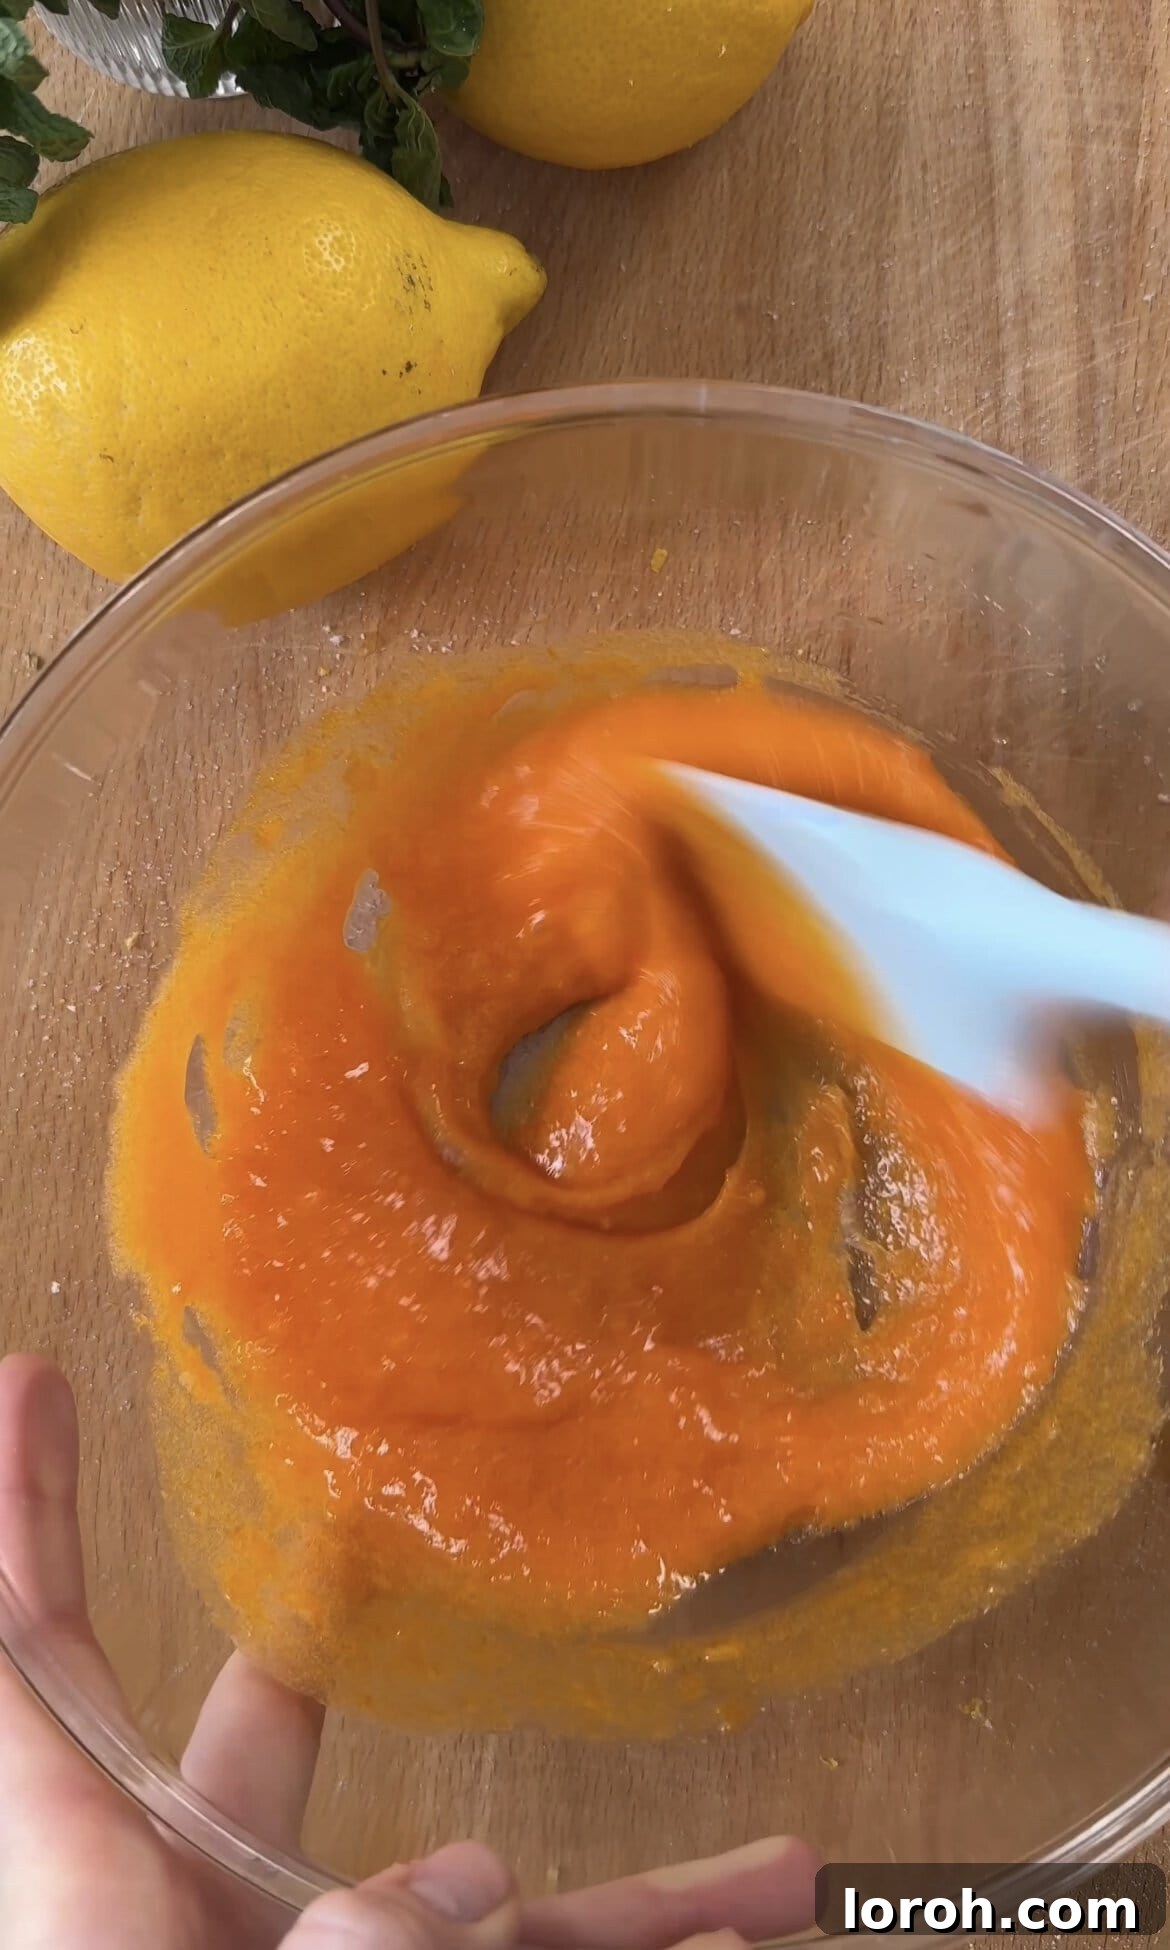
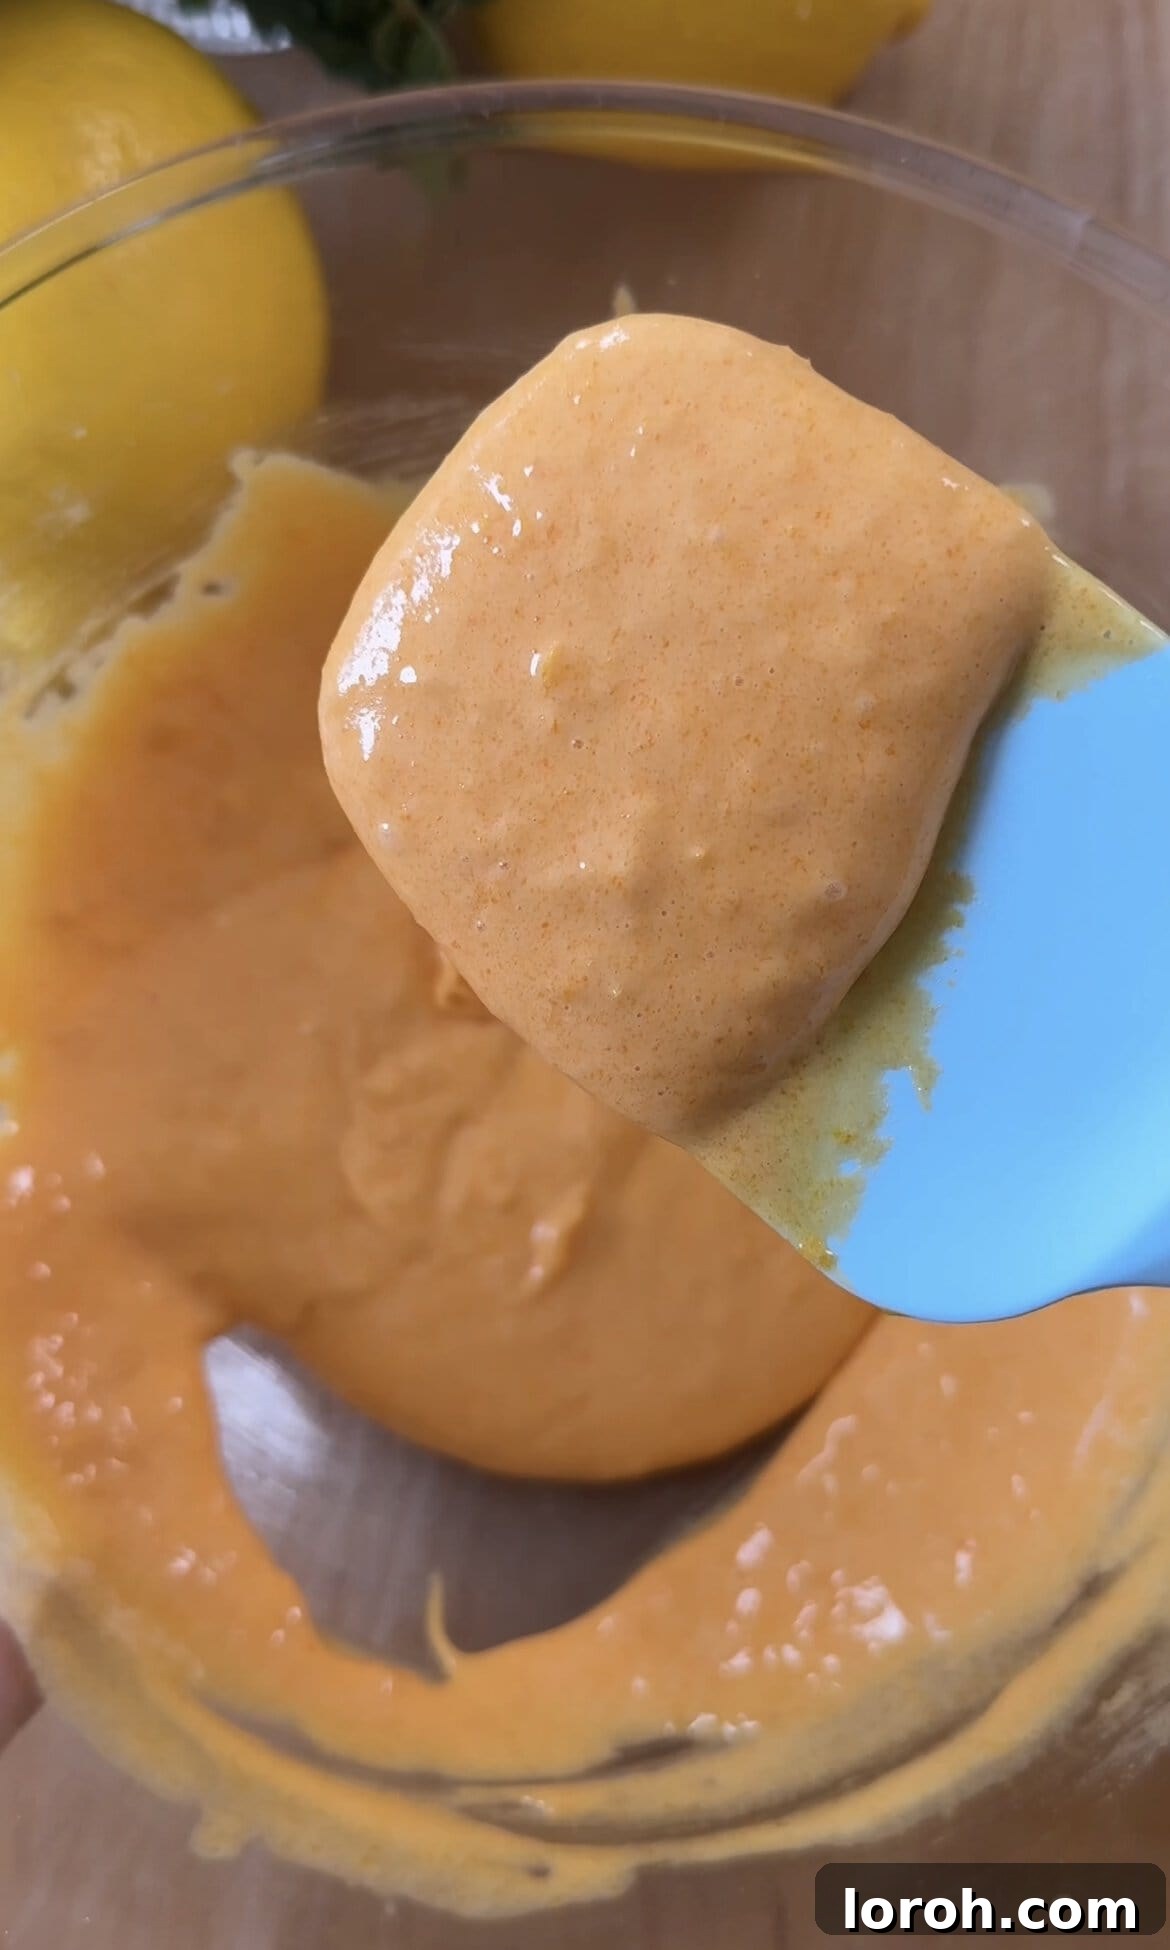
- In a large, heat-proof glass or ceramic bowl, combine the caster sugar and lemon zest. Use your fingertips to rub them together thoroughly until the sugar is fragrant, slightly damp, and clumpy from the infused lemon oil. Add the room temperature egg yolks and whisk vigorously with a rubber spatula or silicone whisk until the mixture is pale yellow, thick, and slightly foamy.
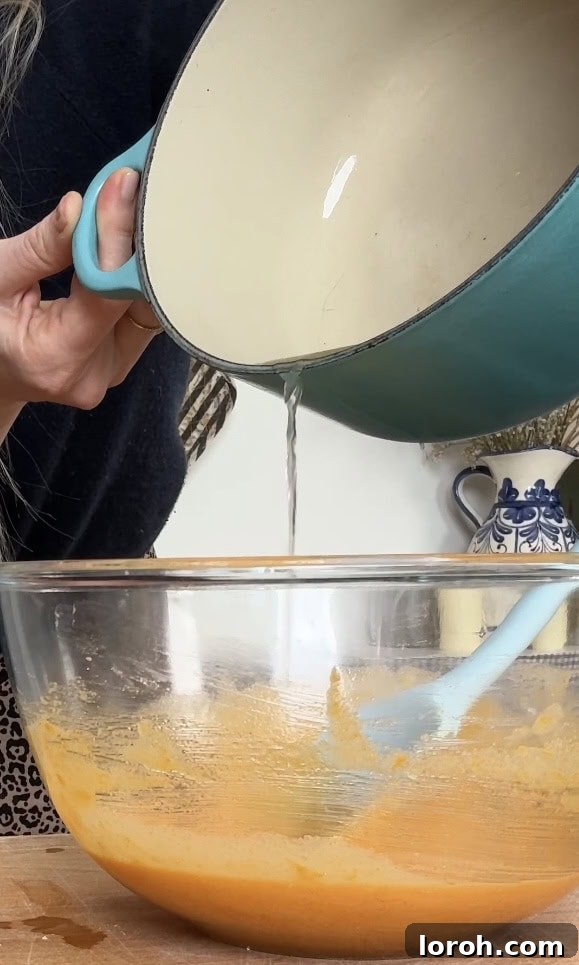
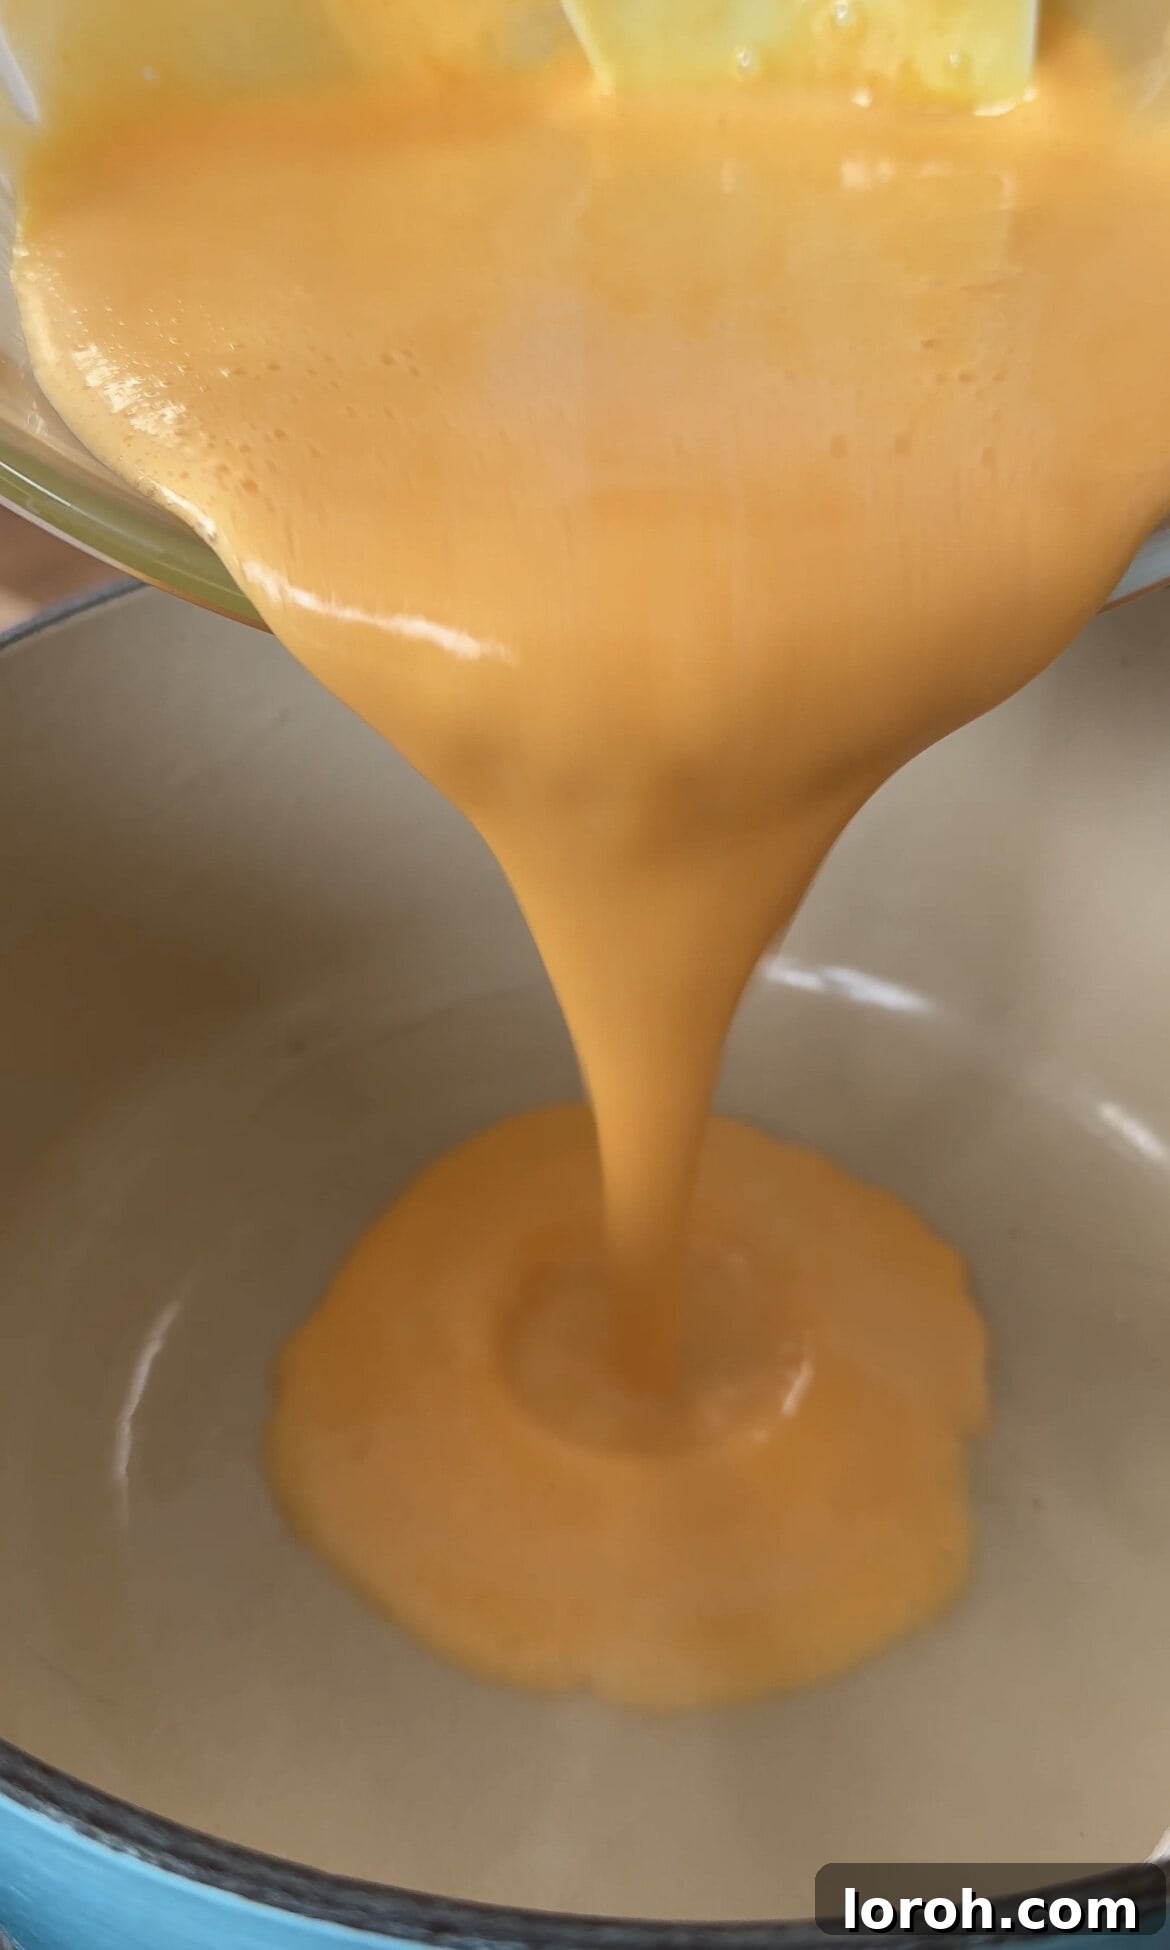
- In a separate large saucepan (preferably non-metal like enamel or cast iron), gently heat the fresh lemon juice over medium-high heat until it just comes to a gentle boil. Immediately remove from heat. Gradually and slowly pour the hot lemon juice over the foamy lemon-sugar egg yolks, whisking constantly and vigorously to temper the eggs and prevent scrambling. Continue whisking until all the lemon juice is fully and smoothly incorporated.
- Return the entire lemon-egg mixture to the clean saucepan. Place the saucepan over very low heat. Cook, stirring constantly with a silicone whisk or rubber spatula, ensuring you scrape the bottom and sides of the pan. Continue cooking until the curd visibly thickens enough to generously coat the back of a spoon (when you draw a line with your finger across the spoon, it should remain clear). This typically takes around 5-8 minutes. It is crucial to maintain a gentle, low heat and constant stirring to prevent the eggs from scrambling.
- Once the curd has thickened to the desired consistency, immediately remove the pan from the heat. Gradually add the diced unsalted butter and the pinch of salt, stirring continuously until the butter is completely melted and smoothly incorporated into the warm curd. This step adds richness, shine, and a velvety texture.
- For an extra silky-smooth lemon curd, optional but highly recommended: strain the warm curd through a fine-mesh sieve (preferably plastic) into a clean, sterilised glass jar or bowl. This removes any small lumps or larger pieces of zest. Allow the curd to cool completely at room temperature before covering it tightly and chilling thoroughly in the refrigerator until ready to use. As it chills, it will continue to firm up to the perfect spreadable consistency.
Notes and Troubleshooting Tips
- For a visual step-by-step guide with photos, please refer to the detailed instructions further up the page.
- Storage: Store the cooled homemade lemon curd in an airtight, sterilised jar in the refrigerator for up to 1 week. Ensure the lid is tight to maintain freshness and prevent flavour absorption.
- Freezing: You can successfully freeze cooled lemon curd for up to 1 month. Transfer it to an airtight freezer-safe container or heavy-duty freezer bag, leaving a little headspace. Thaw completely in the refrigerator overnight before use. Stir well after thawing.
- Equipment Recommendation: Always avoid using metal kitchen equipment (especially aluminum bowls, whisks, or pans) when making lemon curd. The acidity of the lemon can react with metal, imparting an undesirable metallic taste to your delicate curd. Opt for glass, ceramic, silicone, or enamel instead.
- Crucial Heat Control: The most important tip for perfect lemon curd is to always use gentle, low heat and stir continuously throughout the cooking process. High heat or intermittent stirring will lead to scrambled eggs instead of a smooth, luscious curd.
- Maximising Zest Flavour: Rubbing the lemon zest vigorously with the sugar using your fingertips is a simple yet incredibly effective technique to release the fragrant essential oils, significantly intensifying the lemon flavour in your curd.
- Achieving Silky Texture: Straining the warm curd through a fine-mesh sieve (a plastic one is ideal) is a highly recommended step to ensure an impeccably smooth and professional-looking finish, free of any tiny egg bits or larger zest pieces.
- Preventing a ‘Skin’: To avoid a thick skin from forming on the surface of your cooling lemon curd, press clingfilm (plastic wrap) directly onto the surface of the warm curd, ensuring there are no air bubbles trapped underneath. This keeps the curd beautifully smooth.
- Troubleshooting Thin Curd: If your curd appears too thin after cooling, it likely wasn’t cooked long enough or at a sufficient gentle heat. You can gently reheat it over very low heat, stirring constantly, for a few more minutes until it thickens further. Be very careful not to overheat.
Nutrition Information (Approximate per serving)
Serving Size: 30g
- Calories: 119 kcal
- Carbohydrates: 13g
- Protein: 2g
- Fat: 7g
- Saturated Fat: 4g
- Polyunsaturated Fat: 1g
- Monounsaturated Fat: 2g
- Trans Fat: 0.2g
- Cholesterol: 110mg
- Sodium: 6mg
- Potassium: 50mg
- Fiber: 1g
- Sugar: 11g
- Vitamin A: 285 IU
- Vitamin C: 15mg
- Calcium: 19mg
- Iron: 0.4mg
Please note: Nutrition information is automatically calculated and should only be used as an approximation. Exact values may vary based on specific ingredients and preparation methods.
Loved this recipe? Leave a comment below and share your experience!