
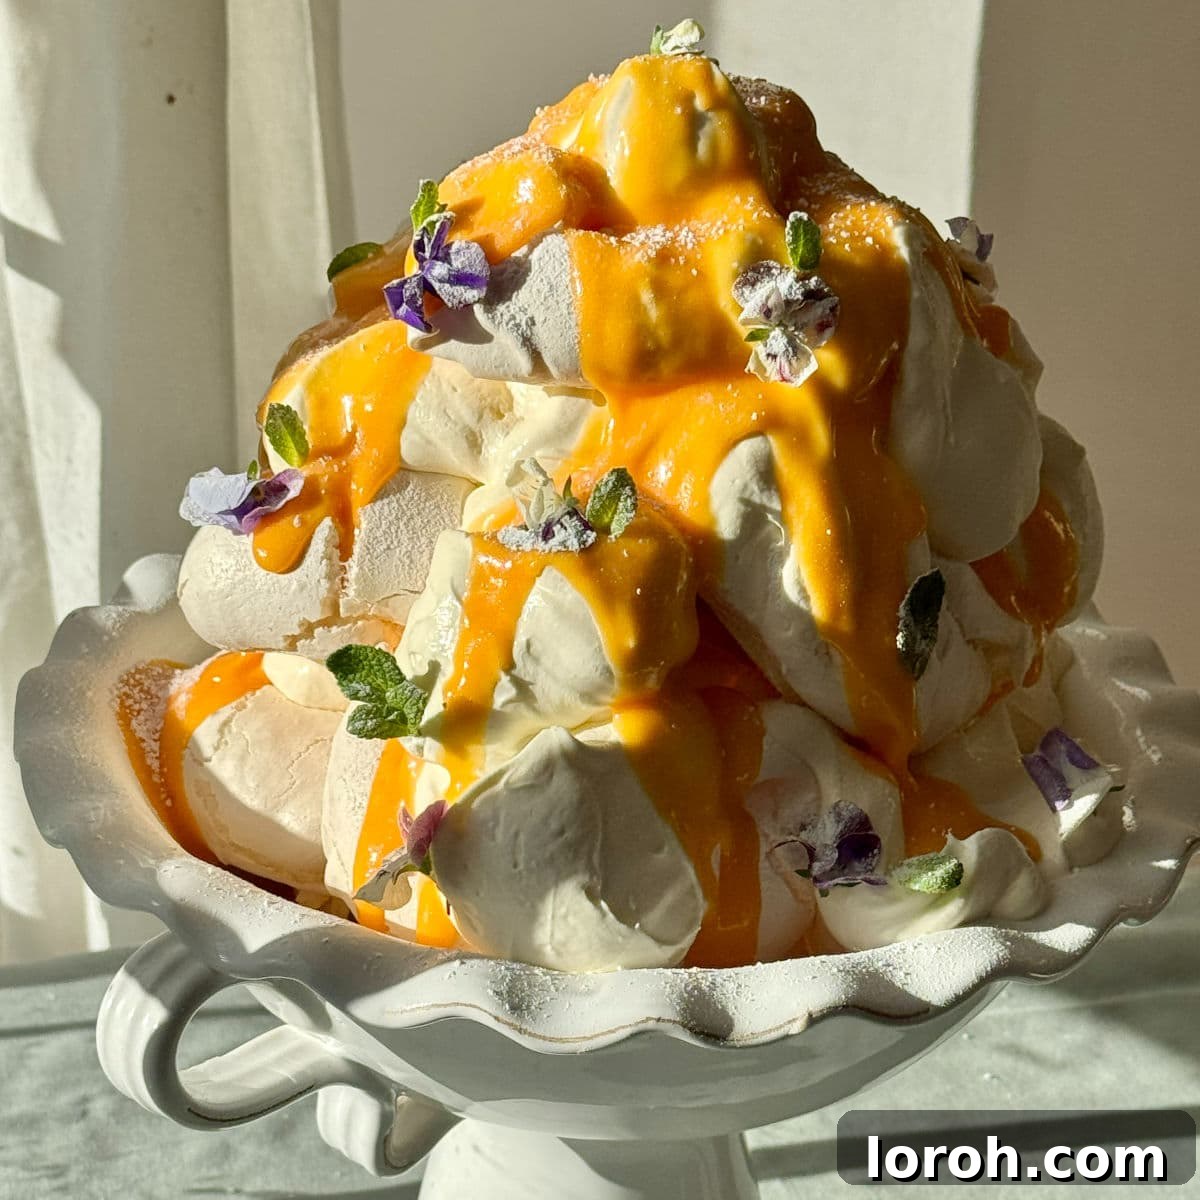
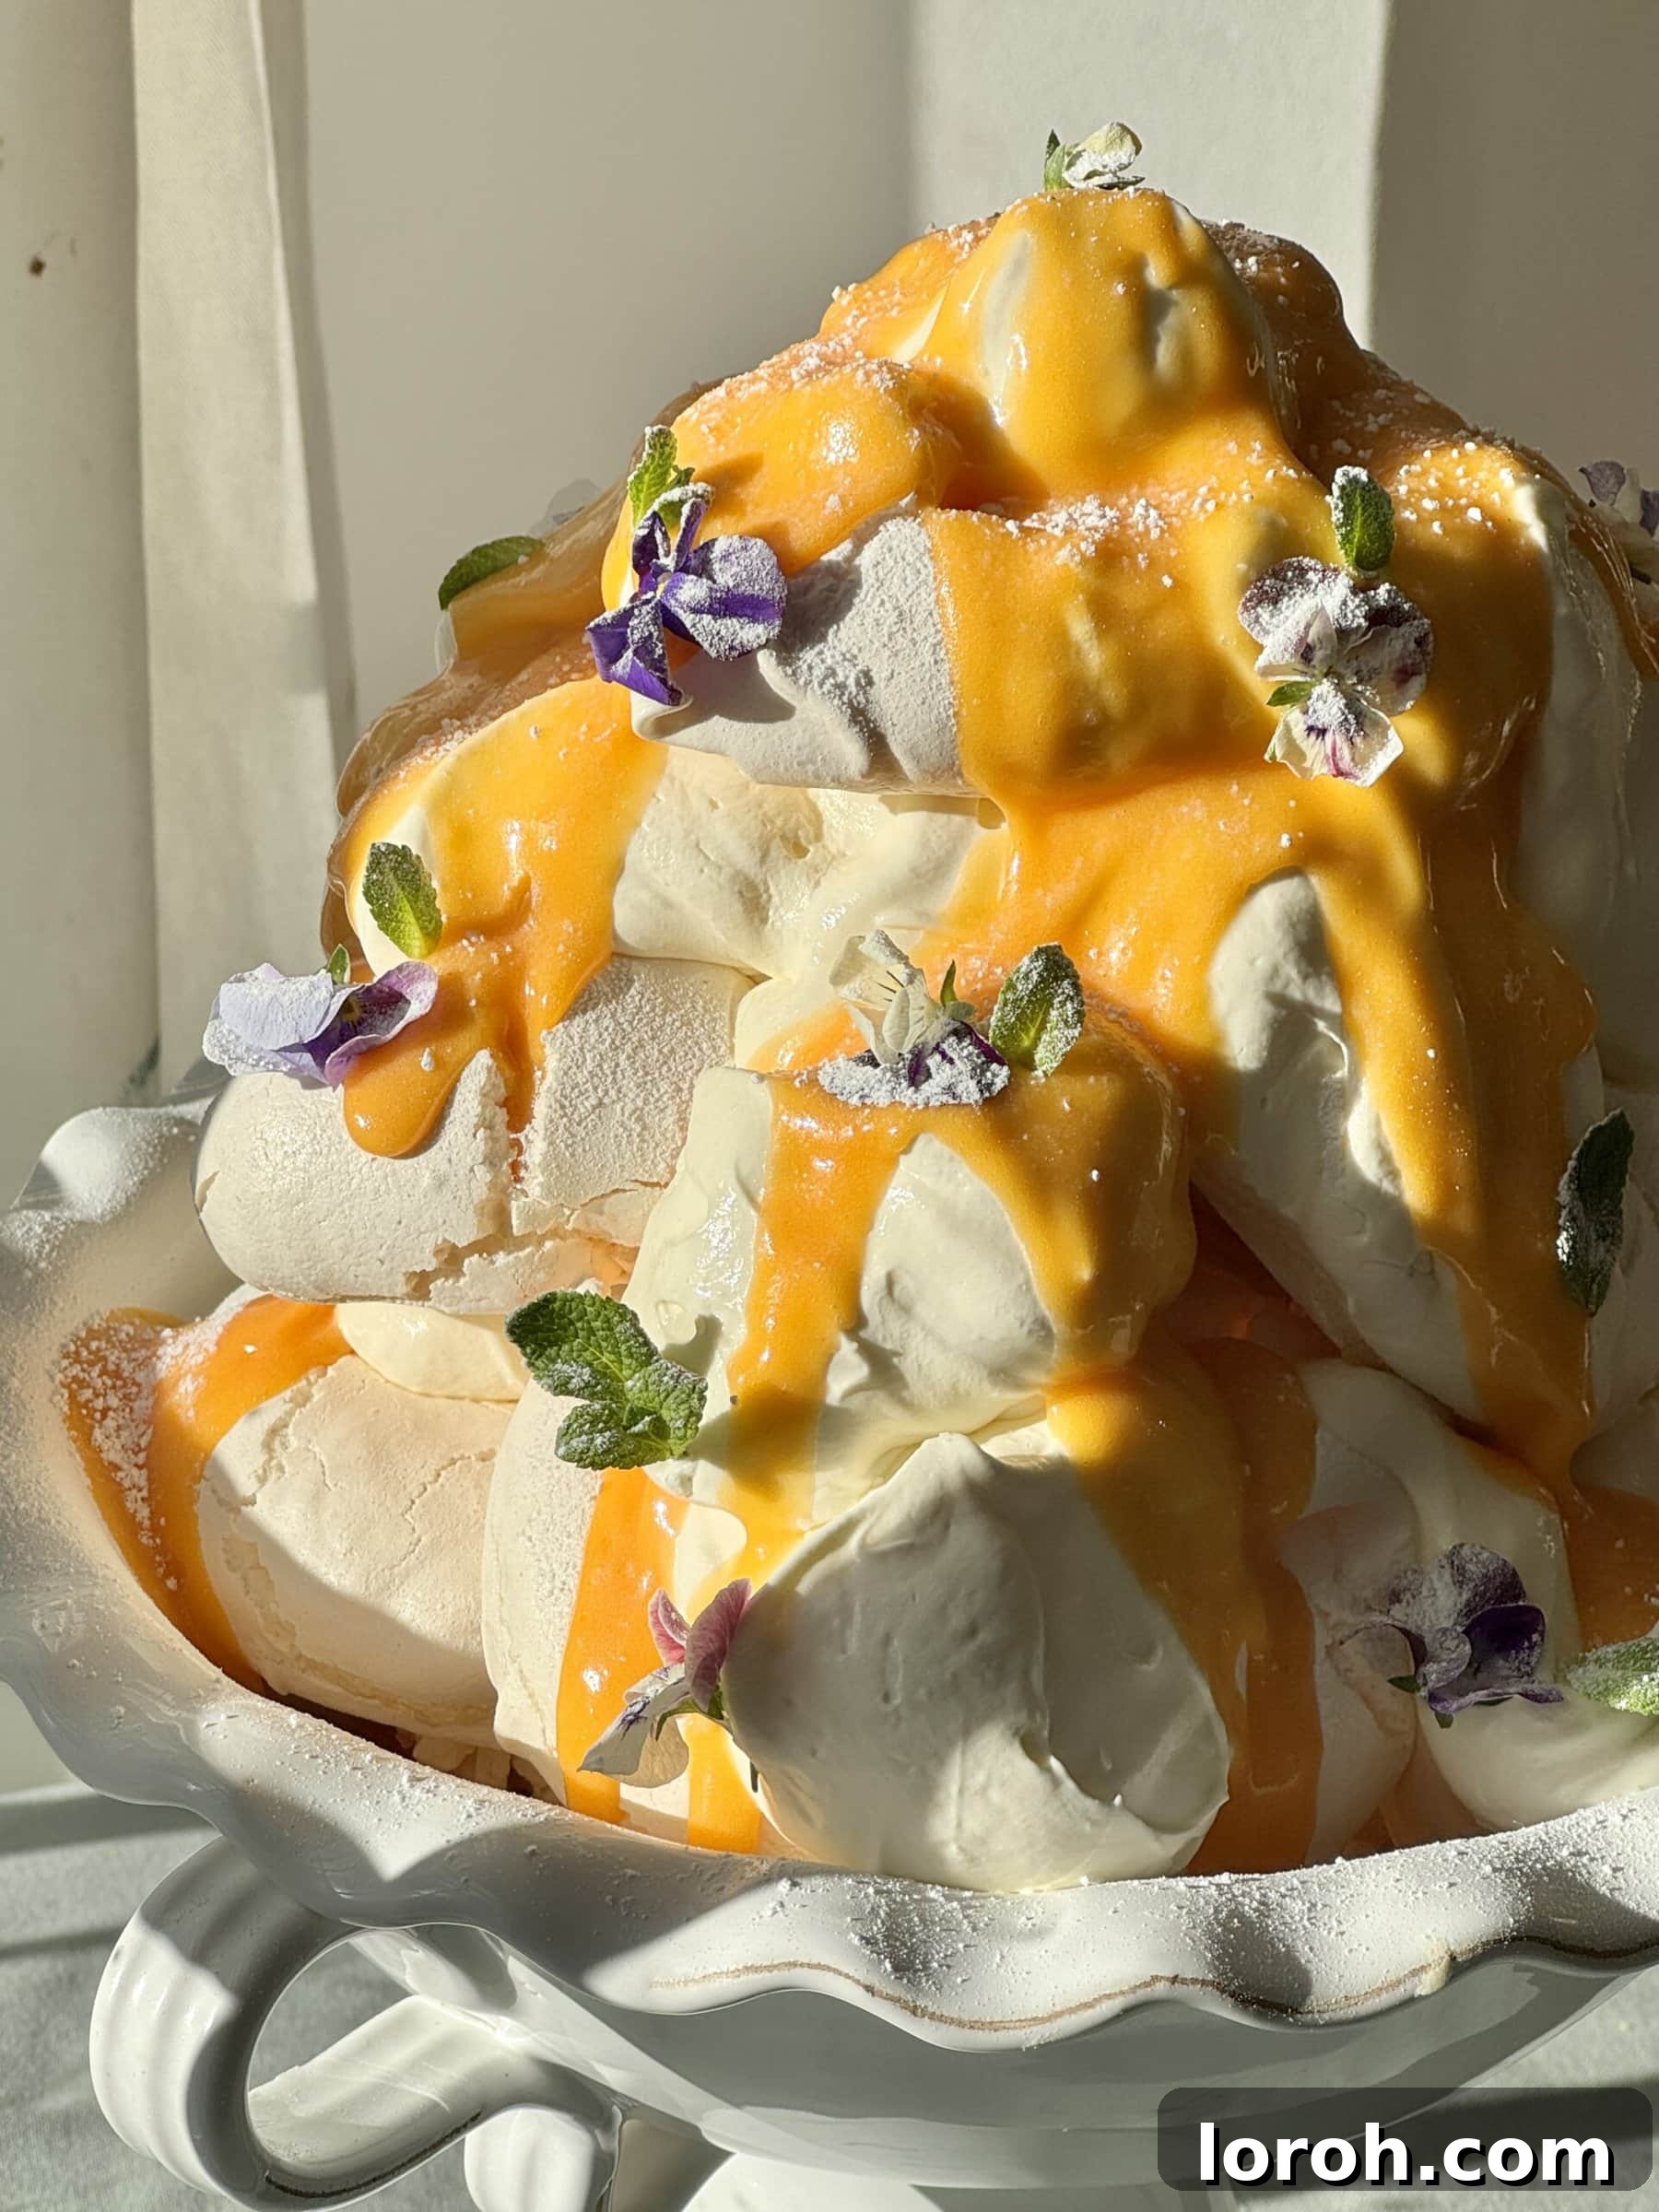
These delicate and delightful lemon meringues are far more than just a dessert; they are a vibrant celebration of citrus and cloud-like sweetness, meticulously crafted to elevate any special occasion. Each individual meringue promises a truly irresistible texture – a beautifully crisp, shell-like exterior that gracefully gives way to a gloriously chewy, melt-in-your-mouth interior. Infused throughout with bright, aromatic lemon zest, they deliver a zesty kick that perfectly balances their inherent sweetness. We love to serve them generously topped with billows of lightly whipped cream, spoonfuls of luscious, tangy homemade lemon curd, and a scattering of fresh, juicy seasonal berries, all artfully piled into a magnificent, edible tower. This stunning presentation makes them an absolute crowd-pleaser and a truly unforgettable sweet treat that will leave a lasting impression.
It’s common for many home bakers to feel a sense of intimidation when contemplating the art of meringue making. This apprehension is truly a shame, as meringues are such a remarkably versatile, elegant, and ultimately rewarding dessert to create. If there’s one pivotal lesson you take away from this recipe today, I sincerely hope it is this: creating perfect meringues is far from a scary endeavor! For those who are embarking on their meringue-making journey for the first time, or perhaps those looking to bolster their confidence in the kitchen, this recipe provides the absolute ideal starting point. With its clear, straightforward instructions and invaluable insider tips, you will be well on your way to mastering this fundamental baking technique. Once you’ve successfully created these delightful homemade lemon meringues, you’ll feel empowered and perfectly ready to tackle more intricate and advanced creations, such as our exquisite lemon meringue tart, with newfound skill and expertise.
Table of Contents
- Top Tips for Perfect Meringues
- Why You Will Adore This Lemon Meringue Recipe
- Essential Ingredients for Your Zesty Lemon Meringues
- Creative Substitutions and Delightful Variations
- Step-by-Step: How to Make Irresistible Lemon Meringues
- Crafting Your Own Zesty Homemade Lemon Curd
- Expert Baking Tips for Meringue Success
- Understanding Meringues: A Brief Culinary Overview
- Frequently Asked Questions About Lemon Meringues
- More Lemon & Sweet Dessert Recipes to Savor
- Printable Lemon Meringues Recipe Card
Top Tips for Achieving Perfect Meringues Every Time
Creating truly beautiful and stable meringues might seem like a delicate dance, but with these crucial tips, you’ll achieve perfection consistently. Understanding the ‘why’ behind each step is key to consistent success and avoiding common pitfalls.
- Ensure Your Bowl is Impeccably Clean and Dry: This is unequivocally the most vital step in meringue making. Any minuscule trace of fat (from residual oil, egg yolk, or even natural oils from your hands) or moisture in your mixing bowl or on your whisk attachments will act as a saboteur. These contaminants prevent the egg whites from whipping up into a stable, voluminous foam. My preferred method for ensuring a pristine bowl is to first rub the inside thoroughly with a halved lemon; the citric acid helps to cut through any invisible fat residues. Following this, wash the bowl with hot soapy water and then dry it meticulously with a clean tea towel or a fresh piece of kitchen paper until it is absolutely spotless and bone-dry.
- Separate Eggs Carefully, One at a Time: To avoid a potential catastrophe that could ruin your entire batch, always separate your eggs individually into a smaller, separate bowl before transferring the egg white to your main mixing bowl. This precautionary step is your insurance policy. Should a yolk accidentally break and contaminate an egg white, you’ll only sacrifice that single egg and not the whole lot, saving you both time and ingredients. Only once you’re absolutely certain the egg white is completely free of any yolk, transfer it to your main, clean mixing bowl.
- Add Sugar Slowly and Gradually: Patience truly is a virtue when crafting meringues, particularly during the sugar incorporation phase. The sugar’s role extends beyond mere sweetness; it is crucial for stabilizing the whipped egg whites, transforming them from a fragile foam into a robust, shiny, and structurally sound meringue. Adding the sugar too quickly can shock the delicate egg white proteins, causing them to collapse and preventing them from forming strong, stable air bubbles. The correct technique involves adding the sugar one spoonful at a time, allowing each addition ample time to fully dissolve and incorporate into the egg whites before the next spoonful is added. This gradual, methodical process builds a strong, glossy, and stable foam that will hold its shape beautifully and result in consistently light, airy, and delightfully fluffy lemon meringues with the perfect balance of crispness and chewiness.
- Cool Meringues Slowly Inside the Oven: Just as patience is paramount during the preparation, it is equally important during the cooling phase. Rapid cooling can cause baked meringues to crack, weep (release syrupy liquid), or become disappointingly soft. To maintain their delicate, ethereal structure and achieve that highly desirable crisp exterior coupled with a delightfully tender and chewy interior, it is crucial to let your baked lemon meringues cool *slowly* within the turned-off oven. Leave them in the oven with the door slightly ajar (or fully closed if your oven retains heat well) for at least 30 minutes, or even longer, depending on your oven and desired texture. This gentle, gradual cooling prevents thermal shock and allows them to dry out properly, resulting in perfectly stable, pristine, and beautifully textured meringues. While they cool, you’ll have ample time to prepare your homemade lemon curd – a fantastic and flavorful way to utilize those leftover egg yolks!
Why This Lemon Meringue Recipe Will Become Your Favorite Dessert
Beyond their simply stunning appearance, these homemade lemon meringues offer a multitude of compelling reasons why they will quickly become a cherished favorite in your baking repertoire:
- An Effortlessly Impressive Dessert: These meringues strike that rare and perfect balance between looking incredibly sophisticated and being surprisingly straightforward to make. They are an ideal choice for any special occasion, a formal dinner party, or any gathering where you aspire to serve a dessert that truly wows your guests without demanding hours of complicated preparation. Their elegance belies their ease!
- Perfect for Strategic Make-Ahead Preparation: Planning for events just became significantly less stressful! The beauty of this dessert lies in its components’ ability to be prepared in advance. The crisp meringue nests, the vibrant lemon curd, and even the whipped cream (if prepared just before final assembly) can all be made ahead of time. This invaluable flexibility allows for stress-free assembly on the day of your event, granting you more precious time to relax and enjoy the company of your guests. Furthermore, we’ll share some clever fuss-free shortcuts to further streamline your baking journey.
- A Symphony of Unforgettable Flavor and Texture: Prepare your senses for a truly delightful culinary experience with every single bite. Imagine the pure, delicate sweetness and satisfying, ethereal crunch of the meringue, immediately followed by the intense, bright zestiness and smooth creaminess of the lemon curd. This is all perfectly complemented by the rich, airy creamy lightness of freshly whipped cream and the delightful burst of fresh, vibrant fruity berries. It’s a harmonious combination that artfully satisfies every sweet and tangy craving.
- An Excellent Opportunity to Master New Baking Skills: This recipe offers more than just a delicious outcome; it’s a fantastic and practical learning experience. You’ll unlock the secrets to crafting the perfect French meringue, a fundamental and highly versatile technique in the world of baking. Simultaneously, you’ll master the art of making a vibrant, silky-smooth homemade lemon curd from scratch. These foundational skills will undoubtedly serve you well and empower you in countless other baking adventures.
- Simple Ingredients, Exceptional Results: Believe it or not, you only need a remarkably short list of just 5 basic ingredients to create the exquisite meringue nests, with only a few more easy-to-find items required for the luxurious toppings. This ingredient simplicity ensures that anyone, regardless of extensive culinary experience, can create these elegant treats without needing an overly extensive or specialized pantry. It’s proof that extraordinary flavors often blossom from humble beginnings.
Essential Ingredients for Your Zesty Lemon Meringues
The full, detailed recipe, including precise measurements for both the meringues and the optional homemade lemon curd, can be found in the comprehensive printable recipe card towards the very end of this post. Simply scroll down to access all the specifics!
For the Meringue Nests:
- Large Eggs: For optimal results, always choose free-range, large eggs. This recipe specifically calls for only the egg whites, which should ideally be at room temperature to ensure they achieve maximum volume when whipped.
- Caster Sugar: Fine granulated sugar, also known as superfine sugar, is absolutely crucial for meringues. Its delicate texture ensures it dissolves quickly and evenly into the egg whites, which is essential for creating a stable, glossy, and beautifully smooth meringue foam.
- Fresh Lemons: You will be utilizing both the intensely aromatic zest and the bright, distinctly acidic juice of fresh lemons. The zest contributes an incredible depth of pure citrus flavor throughout the meringue, while the juice plays a vital role in stabilizing the meringue structure.
- Cornflour (Cornstarch): This seemingly small addition plays a surprisingly significant and beneficial role! Cornflour actively helps to stabilize the egg whites, substantially reducing the chance of your meringues weeping (releasing syrupy liquid during or after baking) and making them considerably more robust. It also contributes significantly to that highly desirable crisp-yet-chewy texture and can help prevent the egg whites from drying out or overcooking in the oven.
- Pinch of Flaky Sea Salt: A tiny, judicious pinch of flaky sea salt works wonders. It not only subtly enhances the overall flavor profile of the meringue but also aids the egg whites in whipping up more efficiently and achieving better volume.
For the Optional Toppings:
- Whipped Cream: A generous dollop of lightly whipped double cream or whipping cream provides a luxurious, velvety contrast to the crisp, airy meringue. For an extra layer of flavor and aroma, feel free to infuse it with a touch of icing sugar, a few drops of high-quality vanilla bean paste, or a splash of pure vanilla extract.
- Lemon Curd: While a premium-quality store-bought lemon curd offers convenience, the experience of making your own homemade lemon curd is incredibly rewarding and truly elevates the entire dessert to another level. Its vibrant, tangy sweetness is the absolute perfect complement to the delicate meringue.
- Fresh Berries: A colorful and varied assortment of fresh berries, such as plump raspberries, elegantly sliced strawberries, juicy blueberries, or tart blackberries, provides a delightful burst of fresh, fruity flavor. They also contribute a beautiful visual appeal, adding essential freshness and a slight tartness that expertly cuts through the richness of the cream and curd.
Creative Substitutions and Delightful Variations for Your Lemon Meringues
While the classic lemon meringue is undeniably divine and utterly satisfying, this versatile recipe is wonderfully adaptable. Don’t hesitate to experiment with these creative ideas to tailor the dessert precisely to your personal taste preferences or to utilize ingredients you might already have on hand.
- Exploring Sugar Alternatives: While fine caster sugar is ideal for its rapid dissolving properties, you can certainly use golden caster sugar if that’s what you have available. Be aware that this alternative sugar might impart a slightly darker, more caramel-like hue and a subtly richer flavor to both your meringues and your lemon curd, adding an interesting layer of visual and flavor complexity. The key is to ensure any sugar used is fine enough to dissolve completely into the egg whites for a smooth meringue.
- Beyond Traditional Lemon Curd: Although these are inherently lemon meringues, the “curd” element offers a fantastic opportunity for culinary creativity and customization. Instead of lemon, why not explore other enticing citrus delights? A vibrant orange curd, a delicately sweet lime curd, or even a mixed citrus curd would be equally delicious and provide unique flavor profiles. For a completely different taste sensation, consider incorporating your favorite fruit jams or homemade fruit compotes. A rich raspberry, a juicy blackberry, or even a mixed berry compote would provide a beautiful tart counterpoint to the sweet meringue, creating an exciting contrast.
- A Bounty of Fresh Fruit Choices: We particularly adore the timeless pairing of mixed berries with lemon meringues, which always feels fresh and delightful. Plump raspberries, elegantly sliced strawberries, sweet pitted cherries, juicy blueberries, and tart blackberries all work exceptionally well, adding bursts of flavor and color. For a more exotic and tropical twist, venture into finely diced mango, sweet pineapple chunks, soft papaya, or the vibrant, tangy seeds of fresh passion fruit. These tropical fruits offer an invigorating burst of freshness and a delightful textural contrast that complements the meringue beautifully.
- Luscious Fruit Coulis as a Drizzle: For an extra touch of sophistication and an additional layer of flavor, consider drizzling your finished lemon meringues with a vibrant homemade fruit coulis. The options here are truly limitless! When fresh berries are out of season, I frequently turn to frozen berries to whip up a quick and incredibly delicious coulis – they’re super handy for various recipes, including my frozen berries with hot white chocolate sauce. A rich, fragrant passion fruit coulis is utterly divine, especially if you’re a devoted fan of my white chocolate and passion fruit cheesecake, as it brings an irresistible tropical aroma and tangy sweetness to the dessert.
- Flavored Whipped Cream Enhancements: Elevate your simple whipped cream by infusing it with subtle, complementary flavors. A delicate touch of vanilla extract, a hint of almond extract, or even a sophisticated dash of rosewater can add a unique and elegant twist. For a truly lemon-centric dessert experience, gently fold some of your freshly made homemade lemon curd into the whipped cream as it reaches soft peaks, creating a delightful and tangy lemon-flavored cream that perfectly enhances the meringue.
- Mini Meringue Kisses for Delicate Bites: For a more dainty and delicate presentation, or for a charming tea party spread, you can easily pipe smaller meringue “kisses” or tiny swirls onto your baking sheet. These bite-sized delights bake up beautifully crisp and are perfect for afternoon tea or as an elegant garnish for other desserts. They can also be charmingly sandwiched together with a little dollop of whipped cream or lemon curd for delightful, two-bite treats.
Step-by-Step Guide: Crafting Your Perfect Lemon Meringues
This comprehensive, detailed guide will walk you through every stage of making and assembling these beautiful lemon meringues. For precise ingredient quantities and a full, printable recipe card, please refer to the dedicated section at the very bottom of this page.
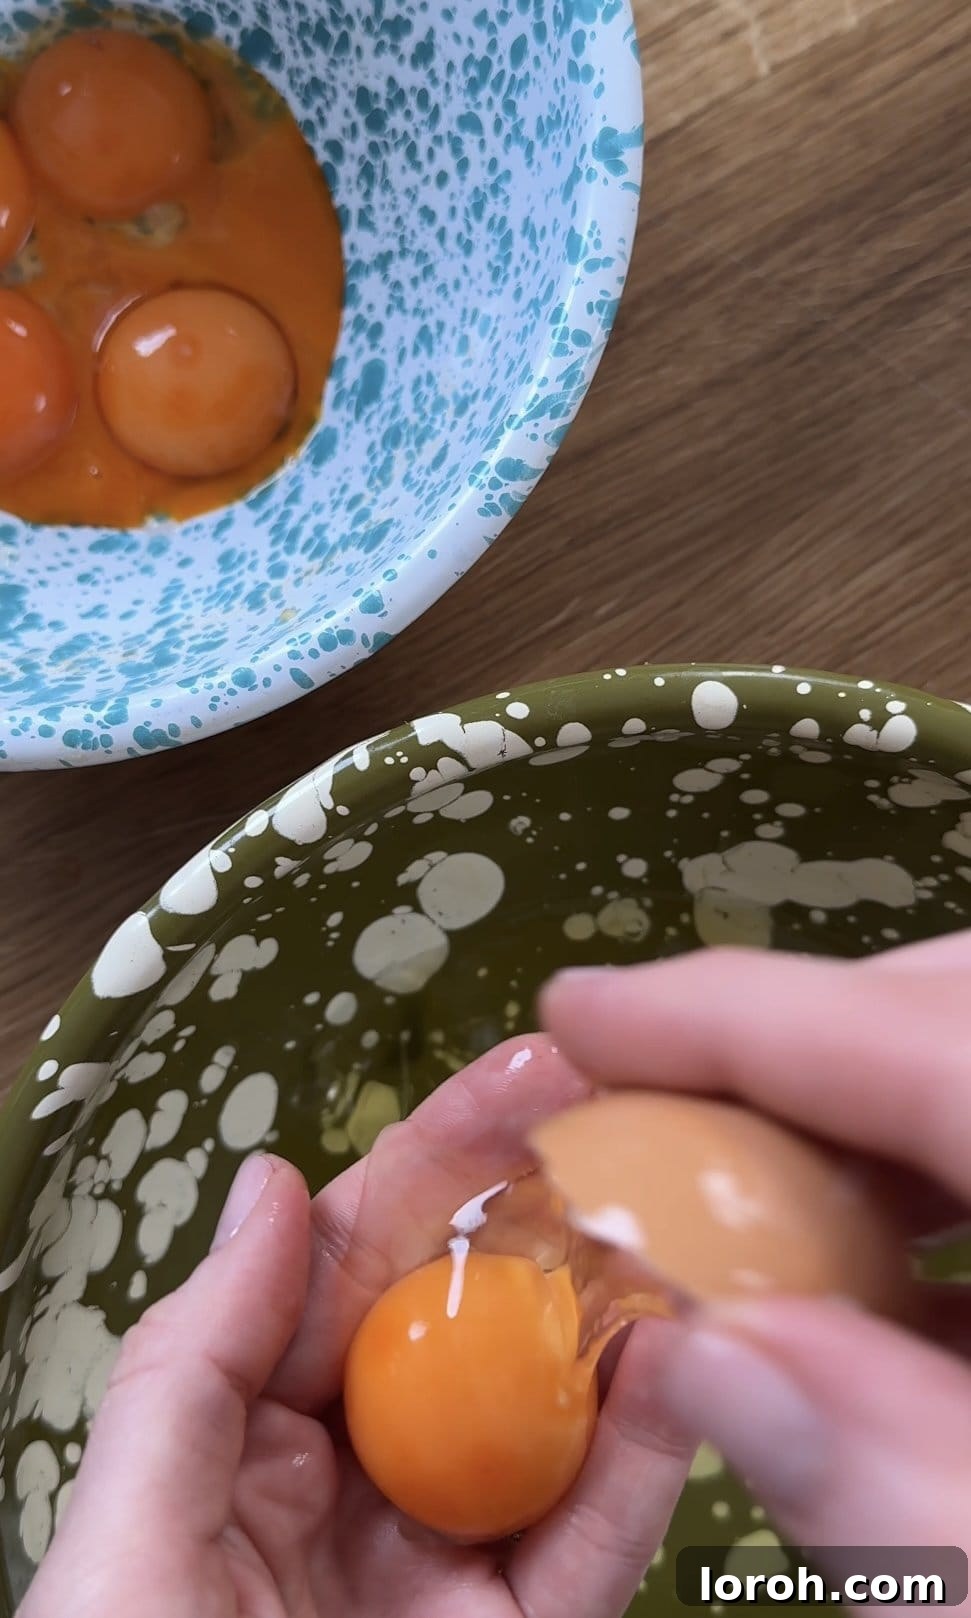
STEP ONE: Prepare Your Workspace and Eggs. Begin by preheating your oven to 180ºC (350ºF) for conventional ovens or 160ºC (325ºF) for fan/convection ovens. Line two large baking sheets with non-stick baking paper, ensuring they are ready for your meringues. Very carefully separate the egg whites from the yolks, placing the whites into your impeccably clean and completely dry stand mixer bowl. Remember, even a tiny drop of egg yolk (which contains fat) can prevent your egg whites from whipping properly!
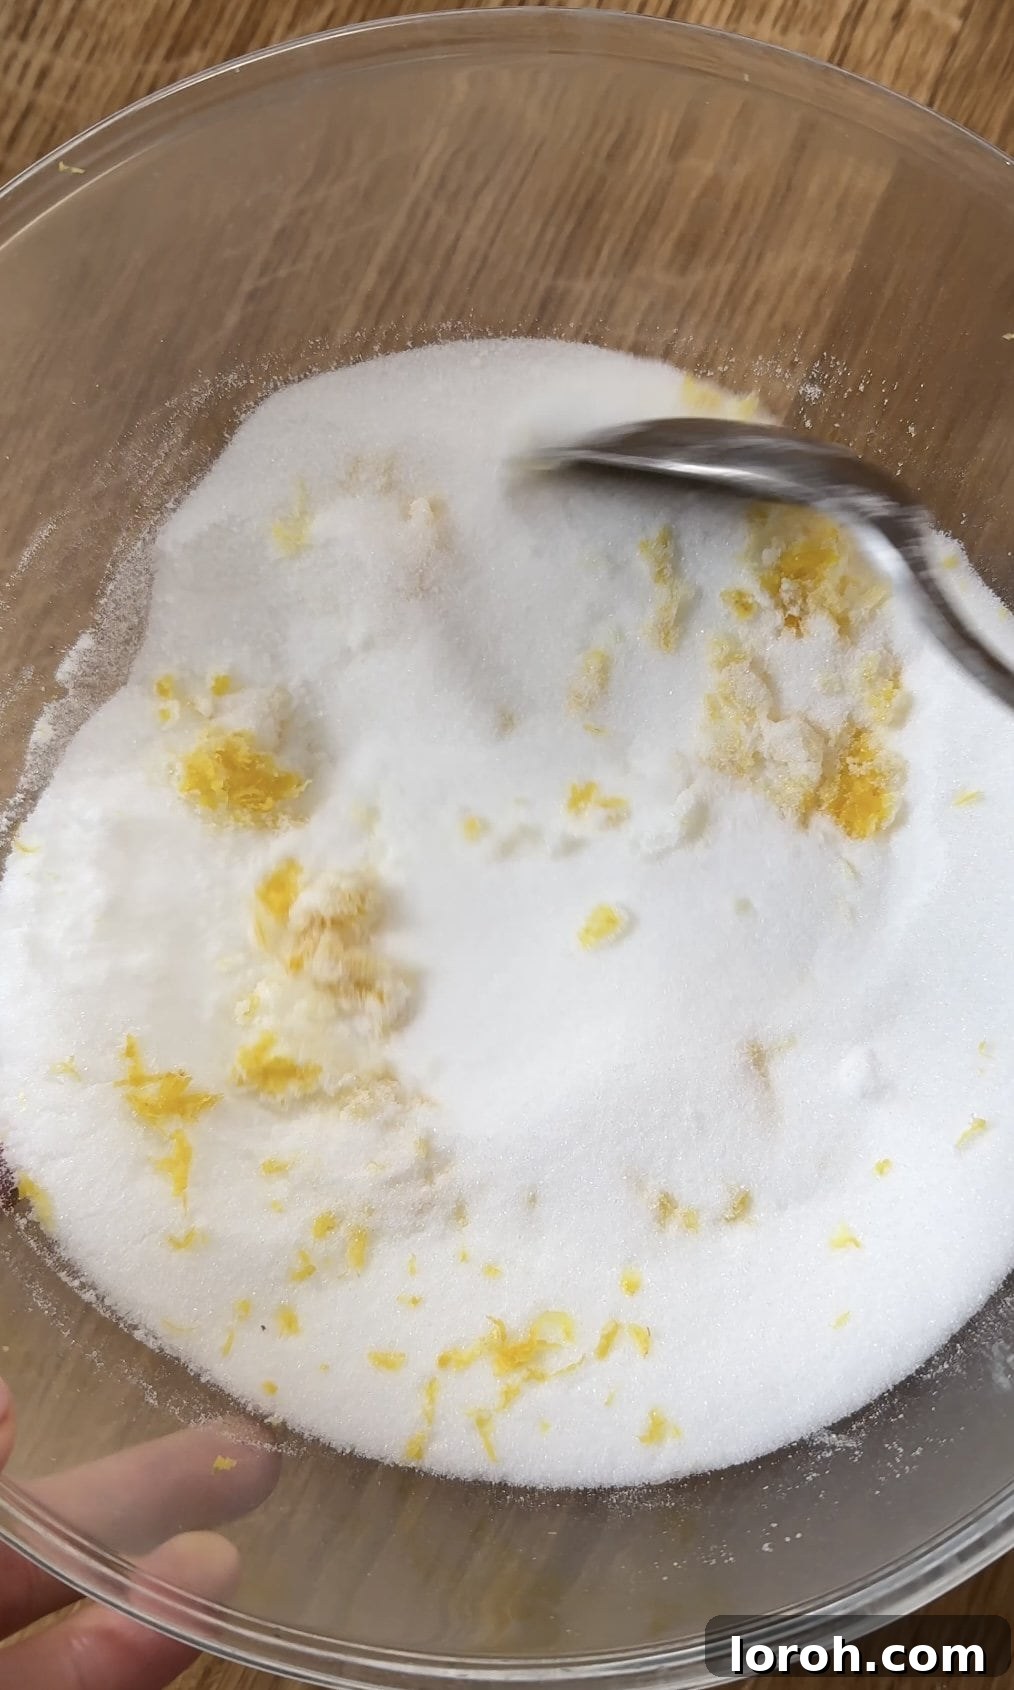
STEP TWO: Infuse the Sugar and Begin Whisking Egg Whites. In a separate small bowl, combine the caster sugar with the finely grated lemon zest. Use your fingertips to gently, but thoroughly, rub the zest into the sugar; this action releases the aromatic citrus oils, making your meringues incredibly fragrant and distinctly zesty. Add a generous pinch of flaky sea salt to the egg whites in your stand mixer. Begin whisking on a low speed until the egg whites become foamy and bubbly (this usually takes about 1-2 minutes). Then, gradually increase the speed to medium and continue whisking until soft peaks form – the mixture will turn opaque white and hold a gentle peak that droops slightly when the whisk is lifted (approximately 3-4 minutes).
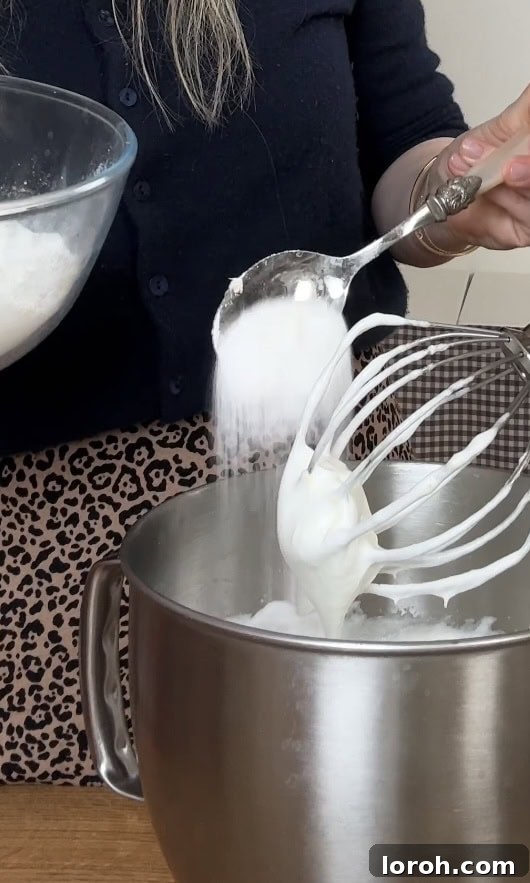
STEP THREE: Gradually Incorporate Sugar for Stability. Increase the mixer speed to medium-high. Now, begin the crucial step of adding the lemon-infused sugar, one spoonful at a time. This gradual addition is absolutely critical for achieving a stable, robust meringue; it is imperative to ensure that each spoonful is completely whisked into the egg whites and fully dissolved before you add the next. This methodical and patient approach allows the sugar to properly stabilize the egg white proteins, preventing the meringue from collapsing and ensuring a sturdy structure.
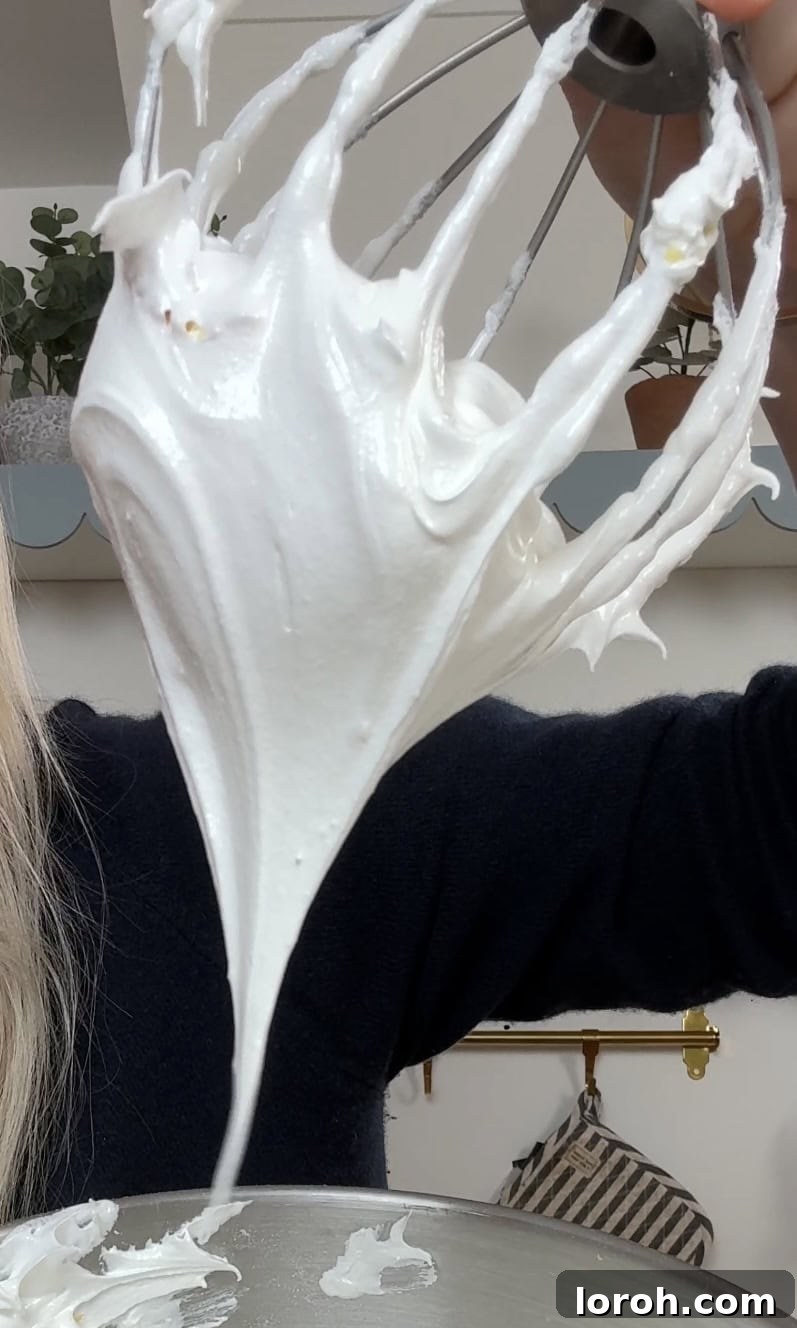
STEP FOUR: Achieve Stiff, Glossy Peaks. Continue whisking the meringue until all the sugar has been incorporated and the mixture is incredibly smooth, brilliantly glossy, and forms very stiff, unyielding peaks. A reliable test for proper consistency is to carefully turn the mixing bowl upside down; the meringue should adhere firmly to the bowl and not fall out. This entire process, from adding the first spoonful of sugar until stiff peaks are achieved, typically takes about 5 minutes, depending on the power of your stand mixer.
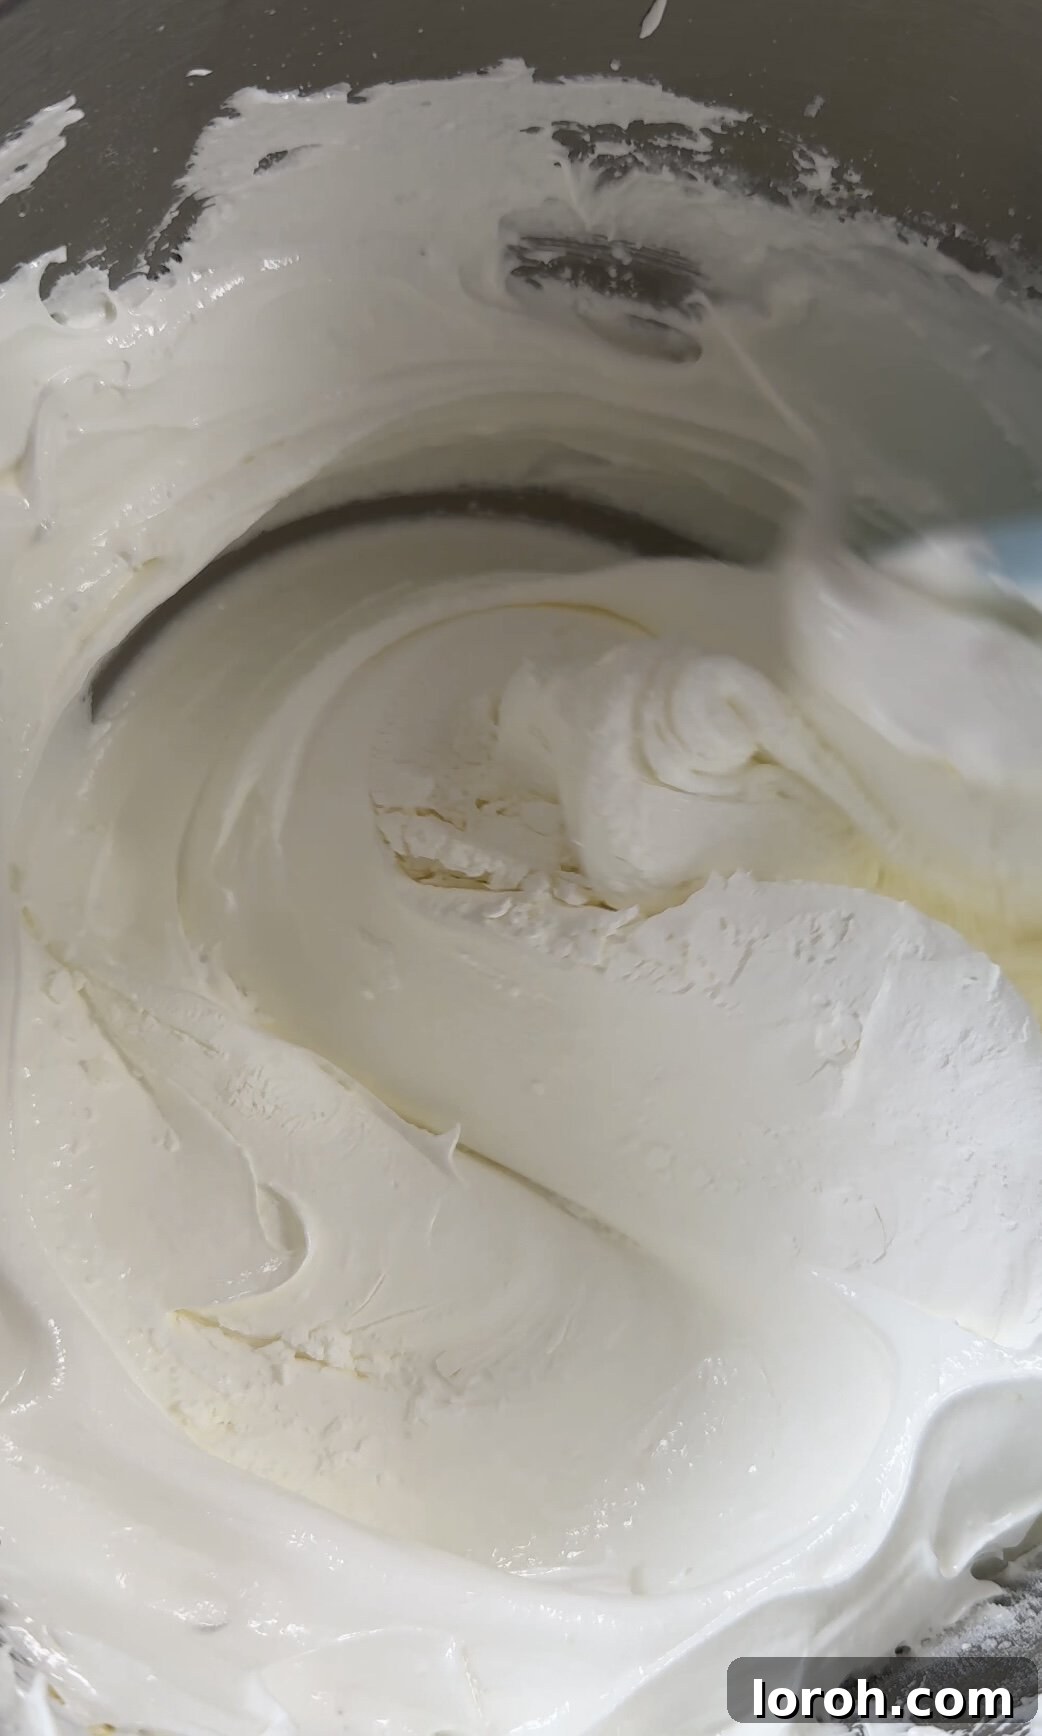
STEP FIVE: Fold in Cornflour and Lemon Juice. Carefully sieve the cornflour evenly over the prepared meringue mixture, then drizzle in the measured 10ml of fresh lemon juice. Using a rubber spatula, very gently fold these final ingredients into the meringue. It is crucial to be careful at this stage not to deflate the precious air you’ve worked so hard to incorporate. Fold just until everything is combined and no visible streaks of cornflour remain.
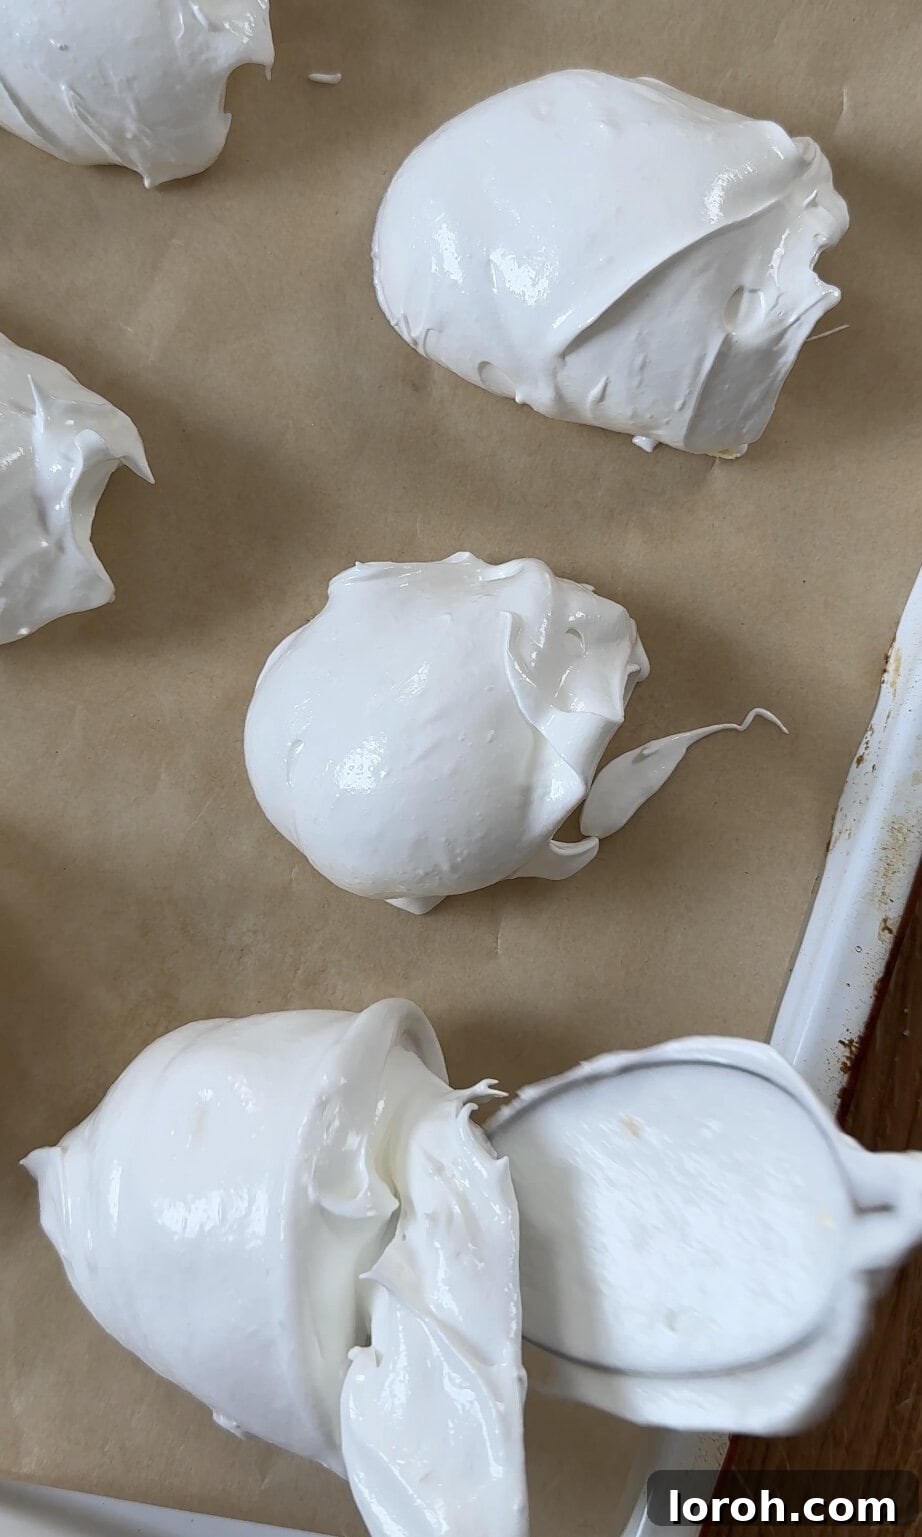
STEP SIX: Form Meringue Nests. For stability during baking, lift the non-stick baking paper slightly from your baking sheets and dab a tiny bit of meringue underneath each corner; this acts as an adhesive to prevent the paper from slipping. Using two spoons, carefully scoop equal-sized mounds of the meringue mixture onto the prepared baking sheets, ensuring they are spaced well apart to allow for proper airflow. You should yield approximately 12 perfectly sized meringue nests from this recipe.
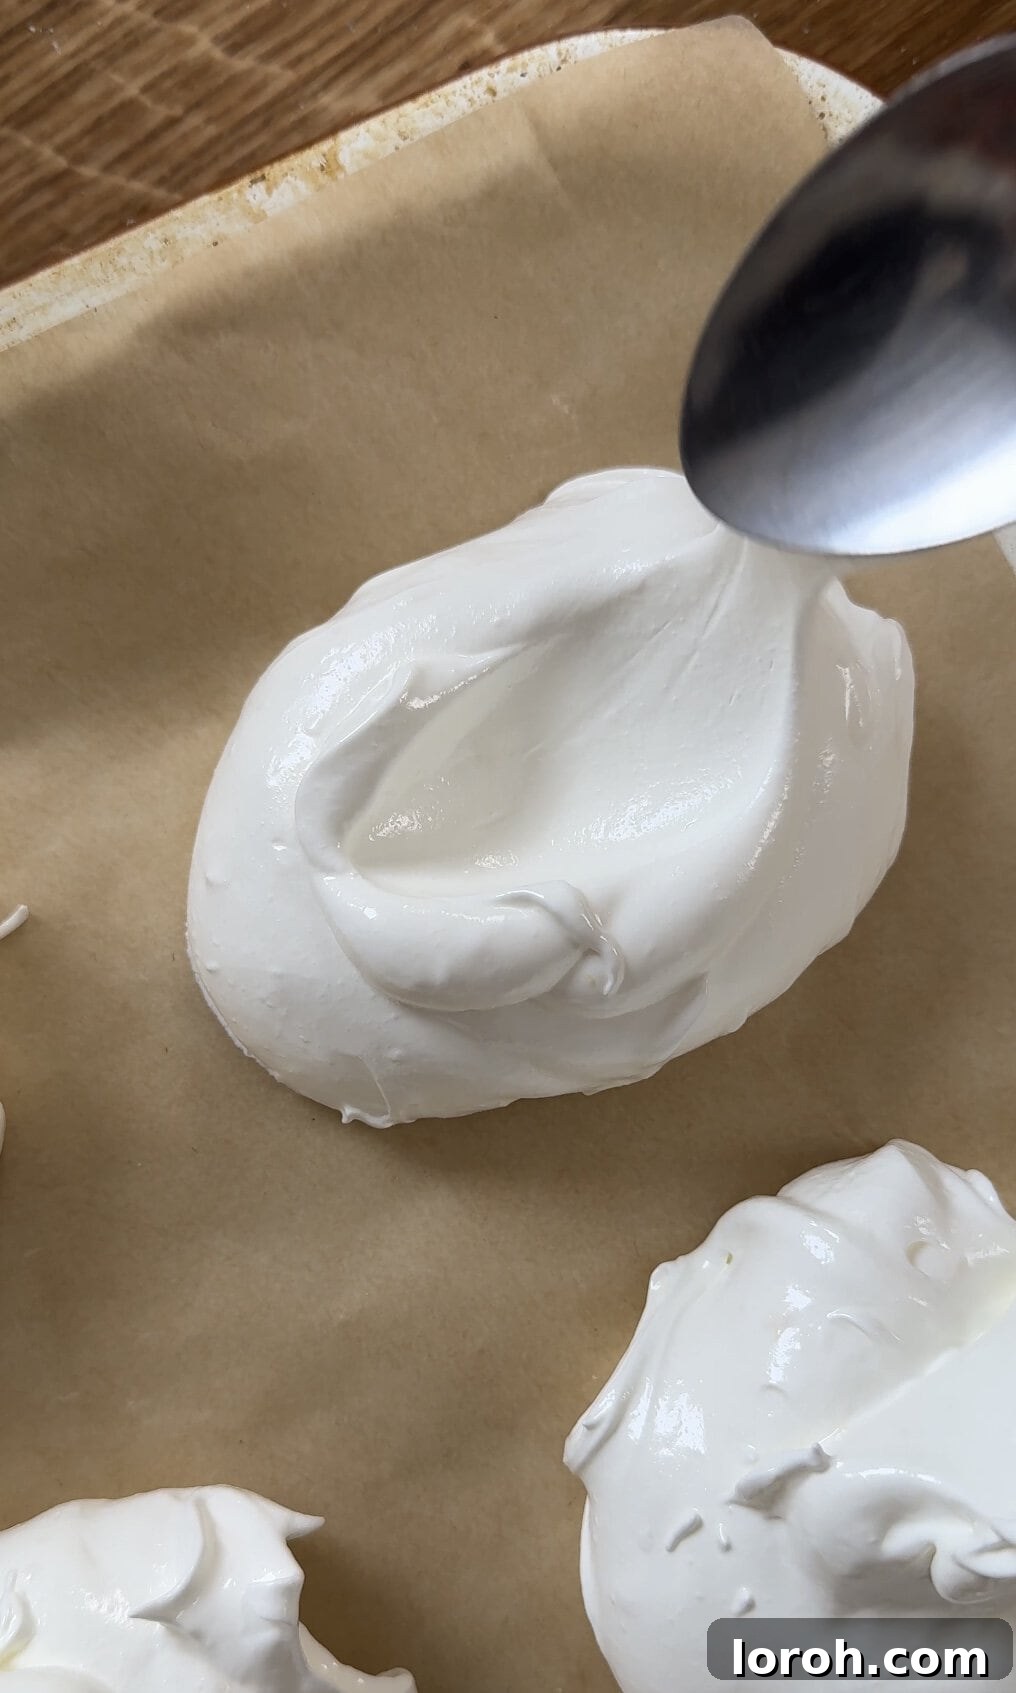
STEP SEVEN: Create Indentations for Filling. With the back of a spoon, gently make a small, shallow indentation or “nest” in the center of each meringue mound. This thoughtful detail creates the perfect little pocket, designed to hold your glorious lemon curd, luscious whipped cream, and other delicious toppings once the meringues are beautifully baked and cooled.
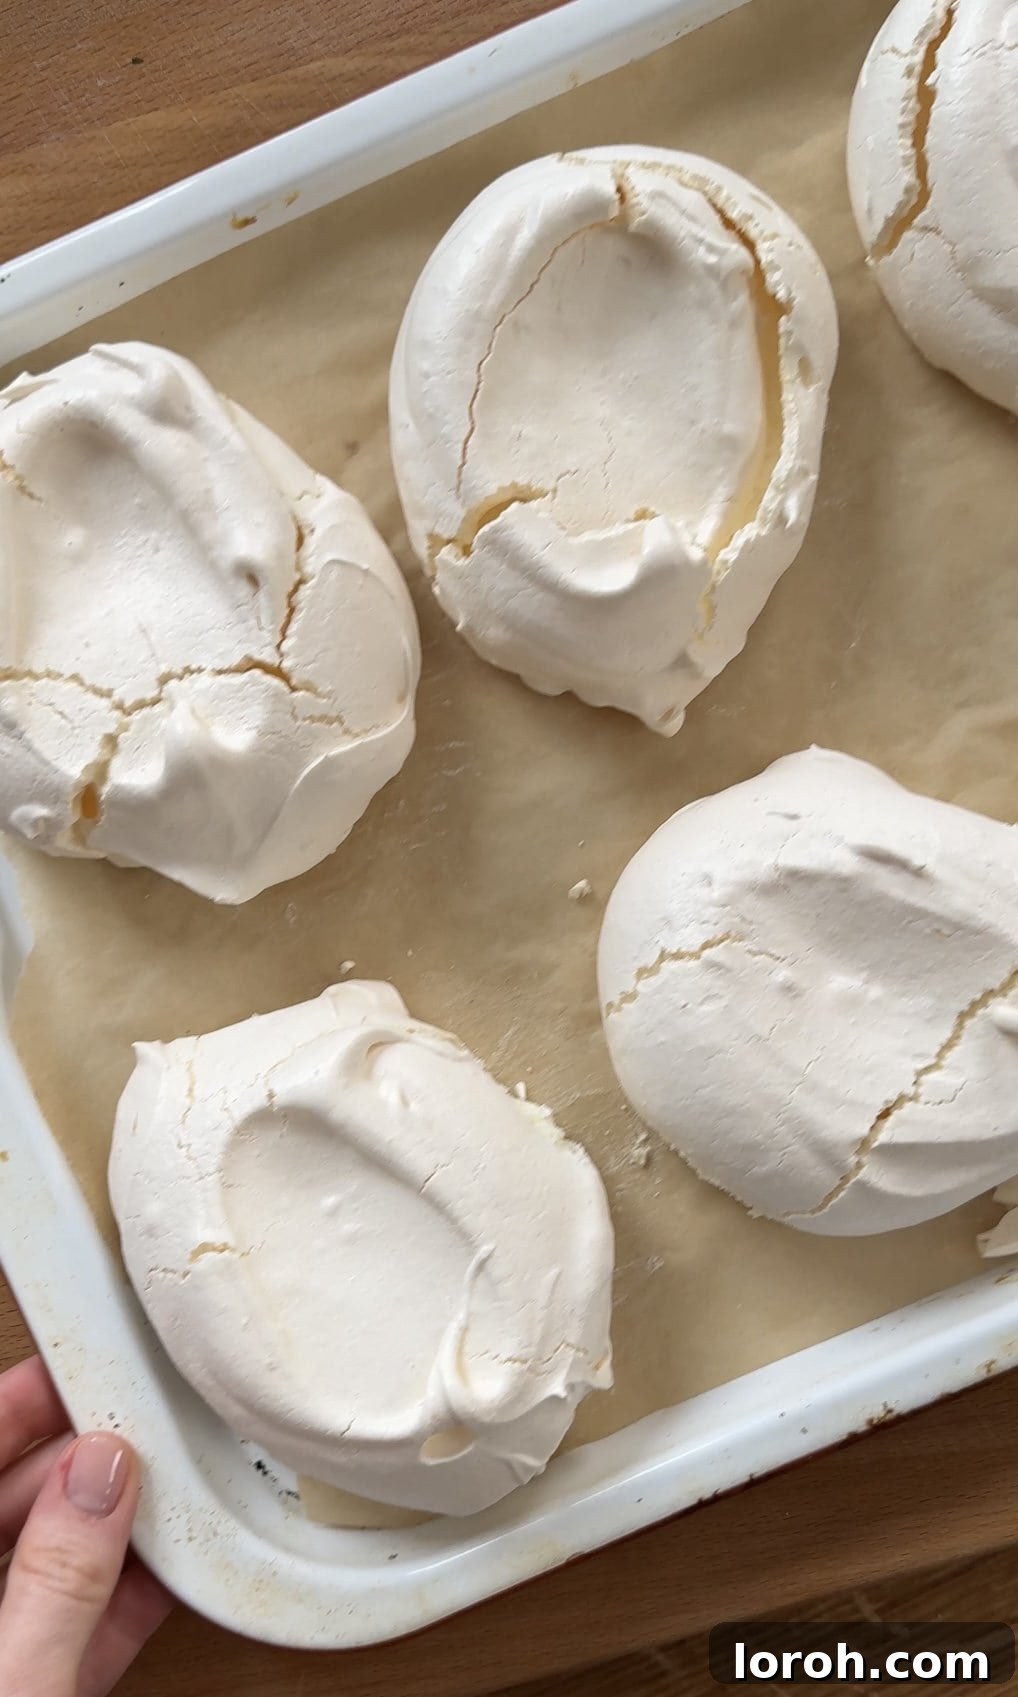
STEP EIGHT: Bake and Slowly Cool for Perfect Texture. Carefully place the baking trays into your preheated oven. Immediately reduce the oven temperature to 150ºC (300ºF) for conventional ovens or 130ºC (275ºF) for fan/convection ovens, and bake for 30 minutes. After 30 minutes, turn off the oven completely. Crucially, leave the meringues inside with the oven door slightly ajar (or fully closed, if your oven retains heat well) for an additional 30 minutes to 1 hour. This extended, slow cooling process is absolutely essential for achieving meringues that are wonderfully crisp on the outside yet delightfully chewy within, and it effectively prevents them from cracking or deflating.
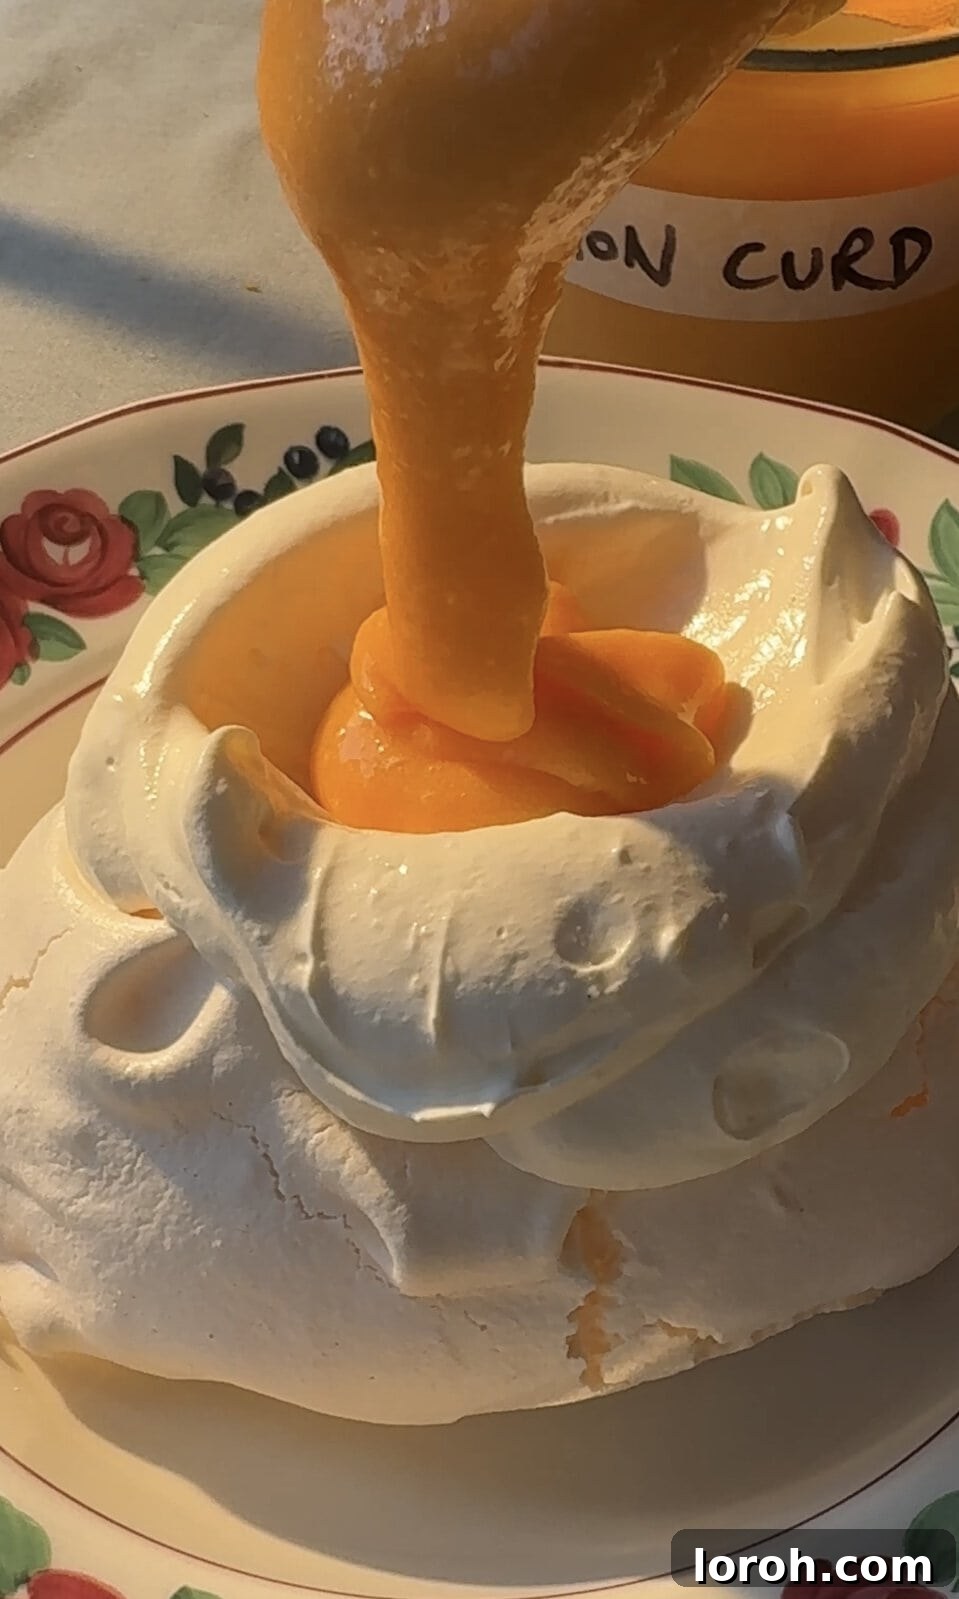
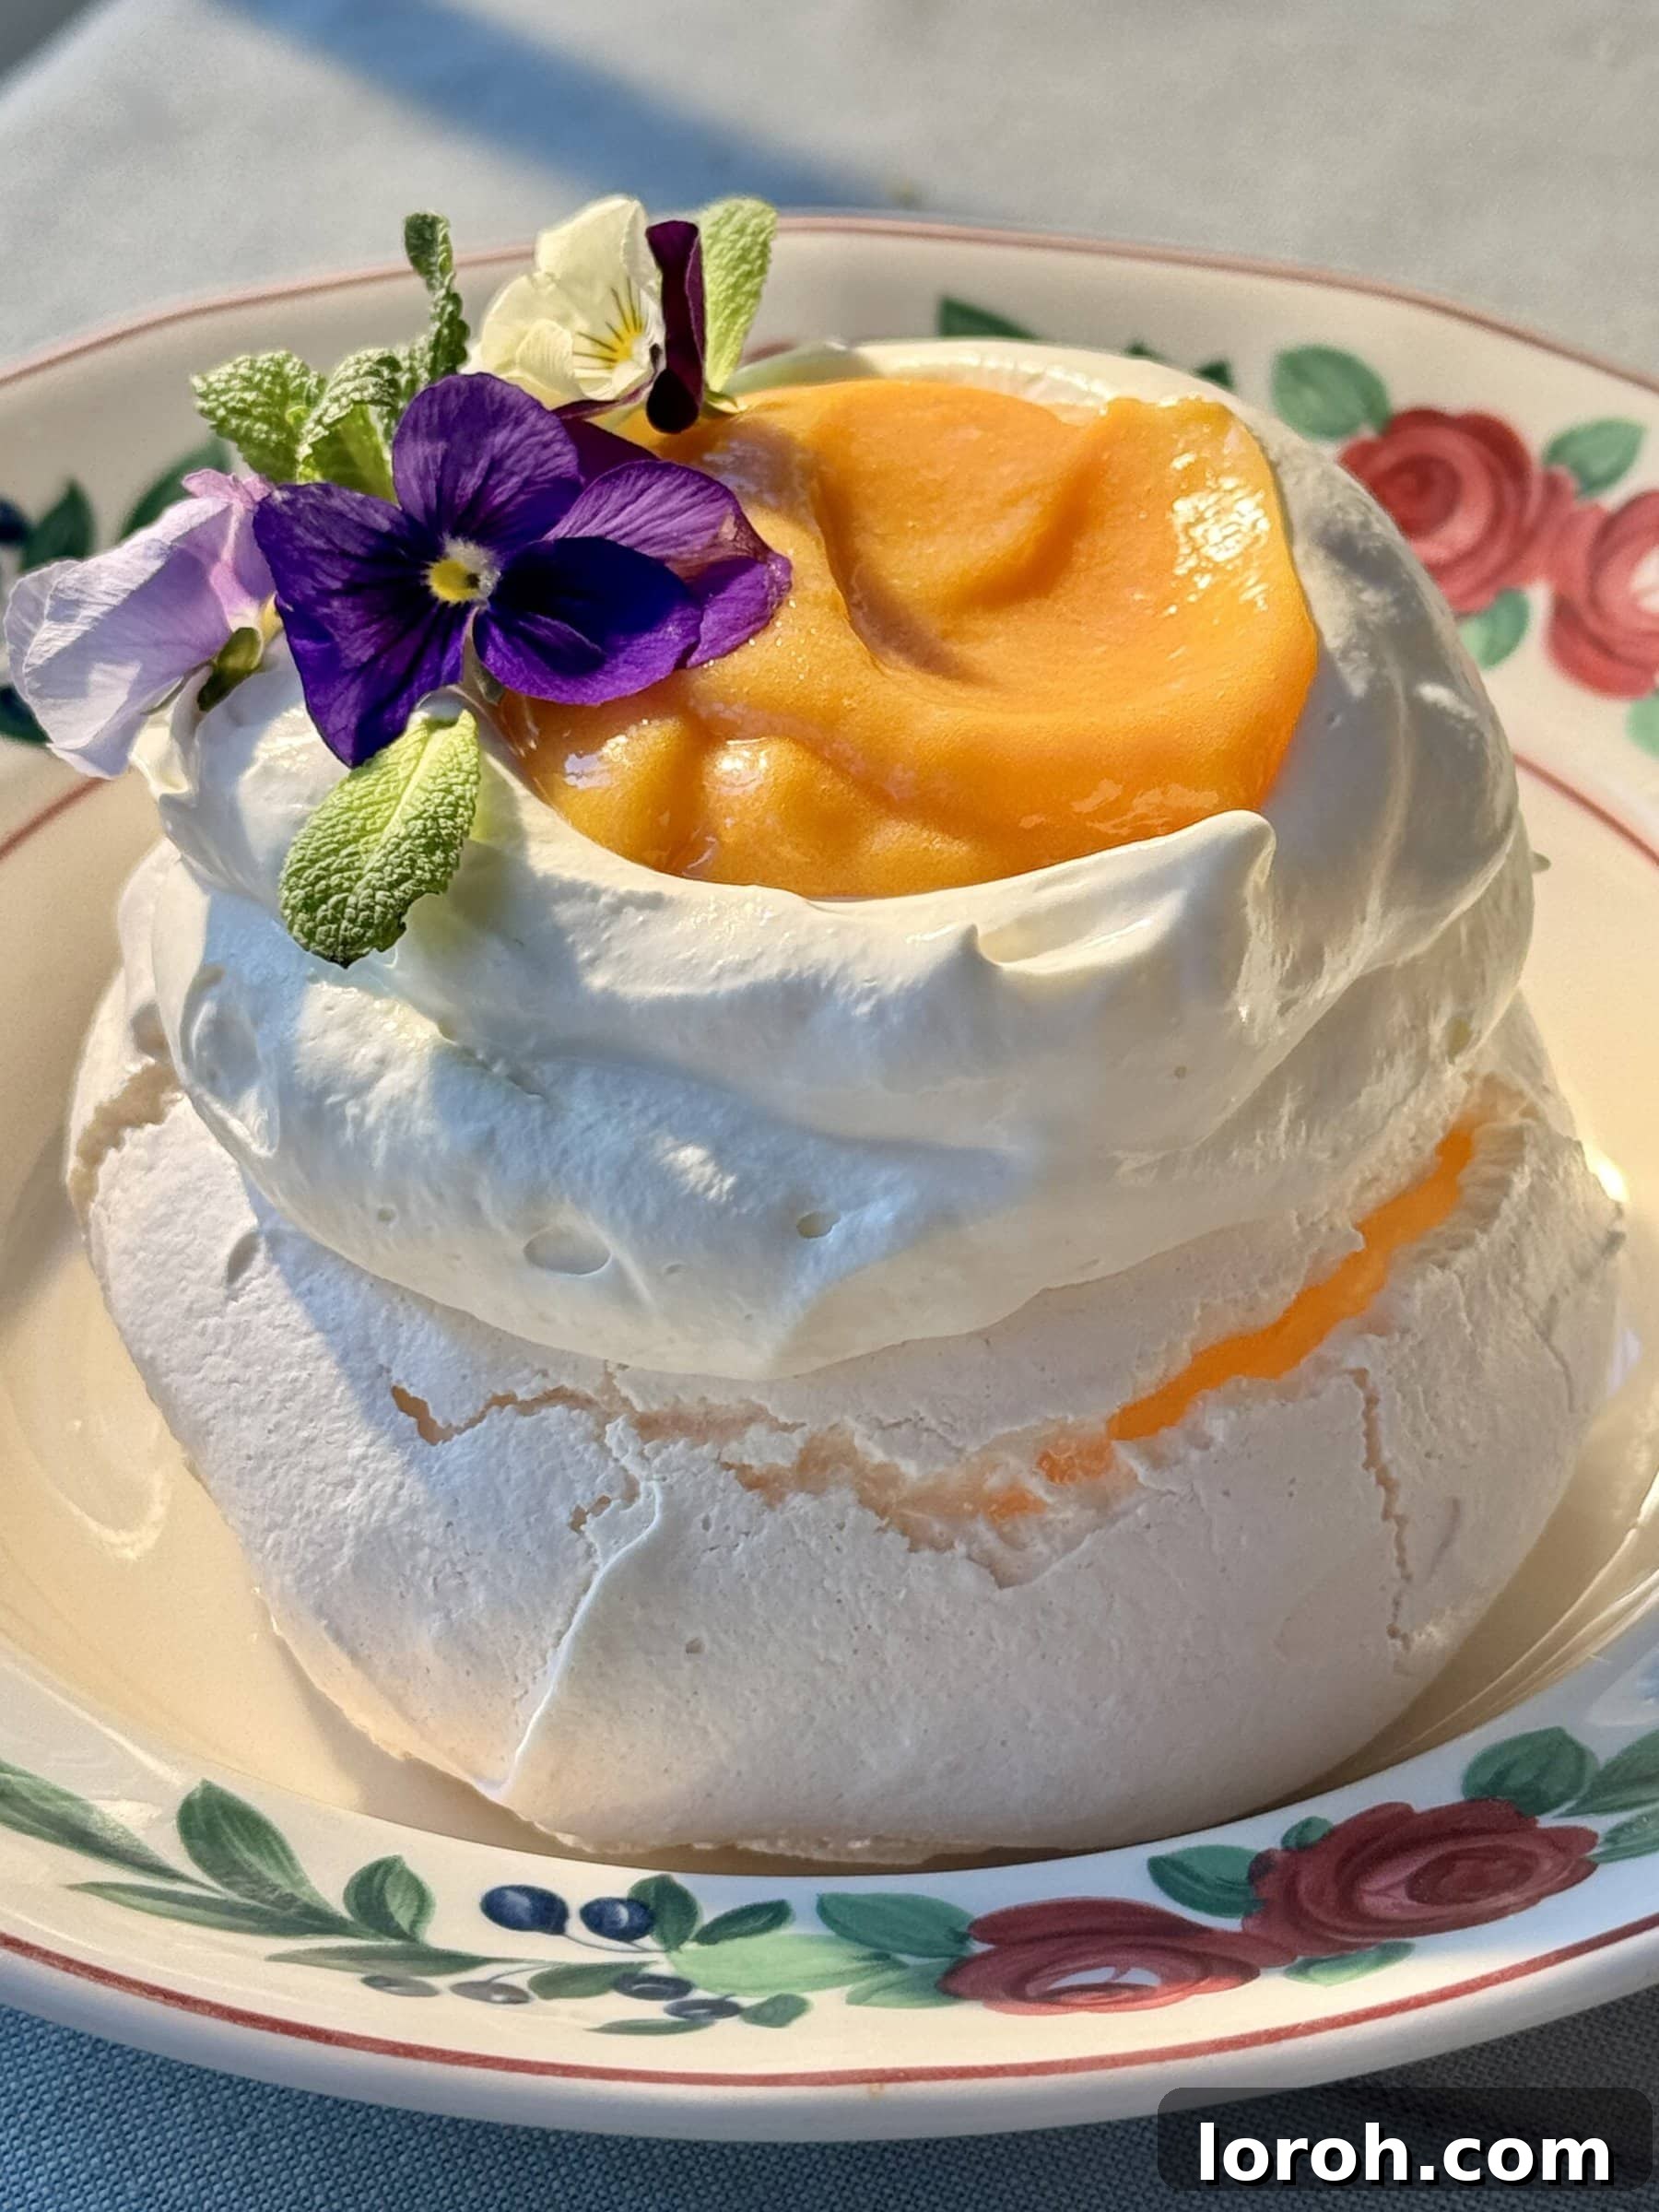
STEP NINE: Assemble Individual Servings. Once the meringues are completely cooled to room temperature, gently transfer them to individual serving plates. Top each delicate meringue nest with generous dollops of lightly whipped cream, followed by a spoonful of the vibrant, zesty lemon curd (whether homemade or a good quality store-bought option), and finally, a colorful scattering of fresh, seasonal fruit. This method creates elegant, portioned desserts perfect for a refined presentation.
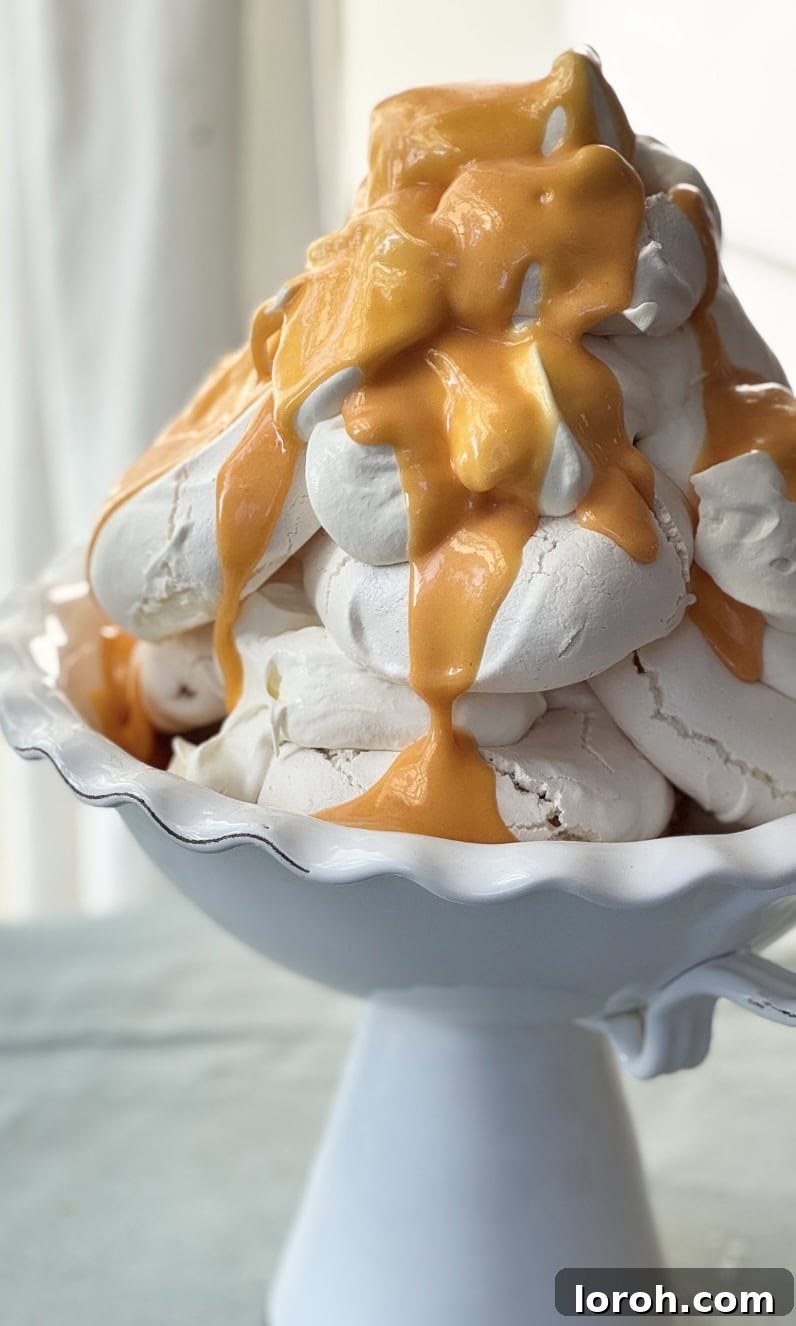
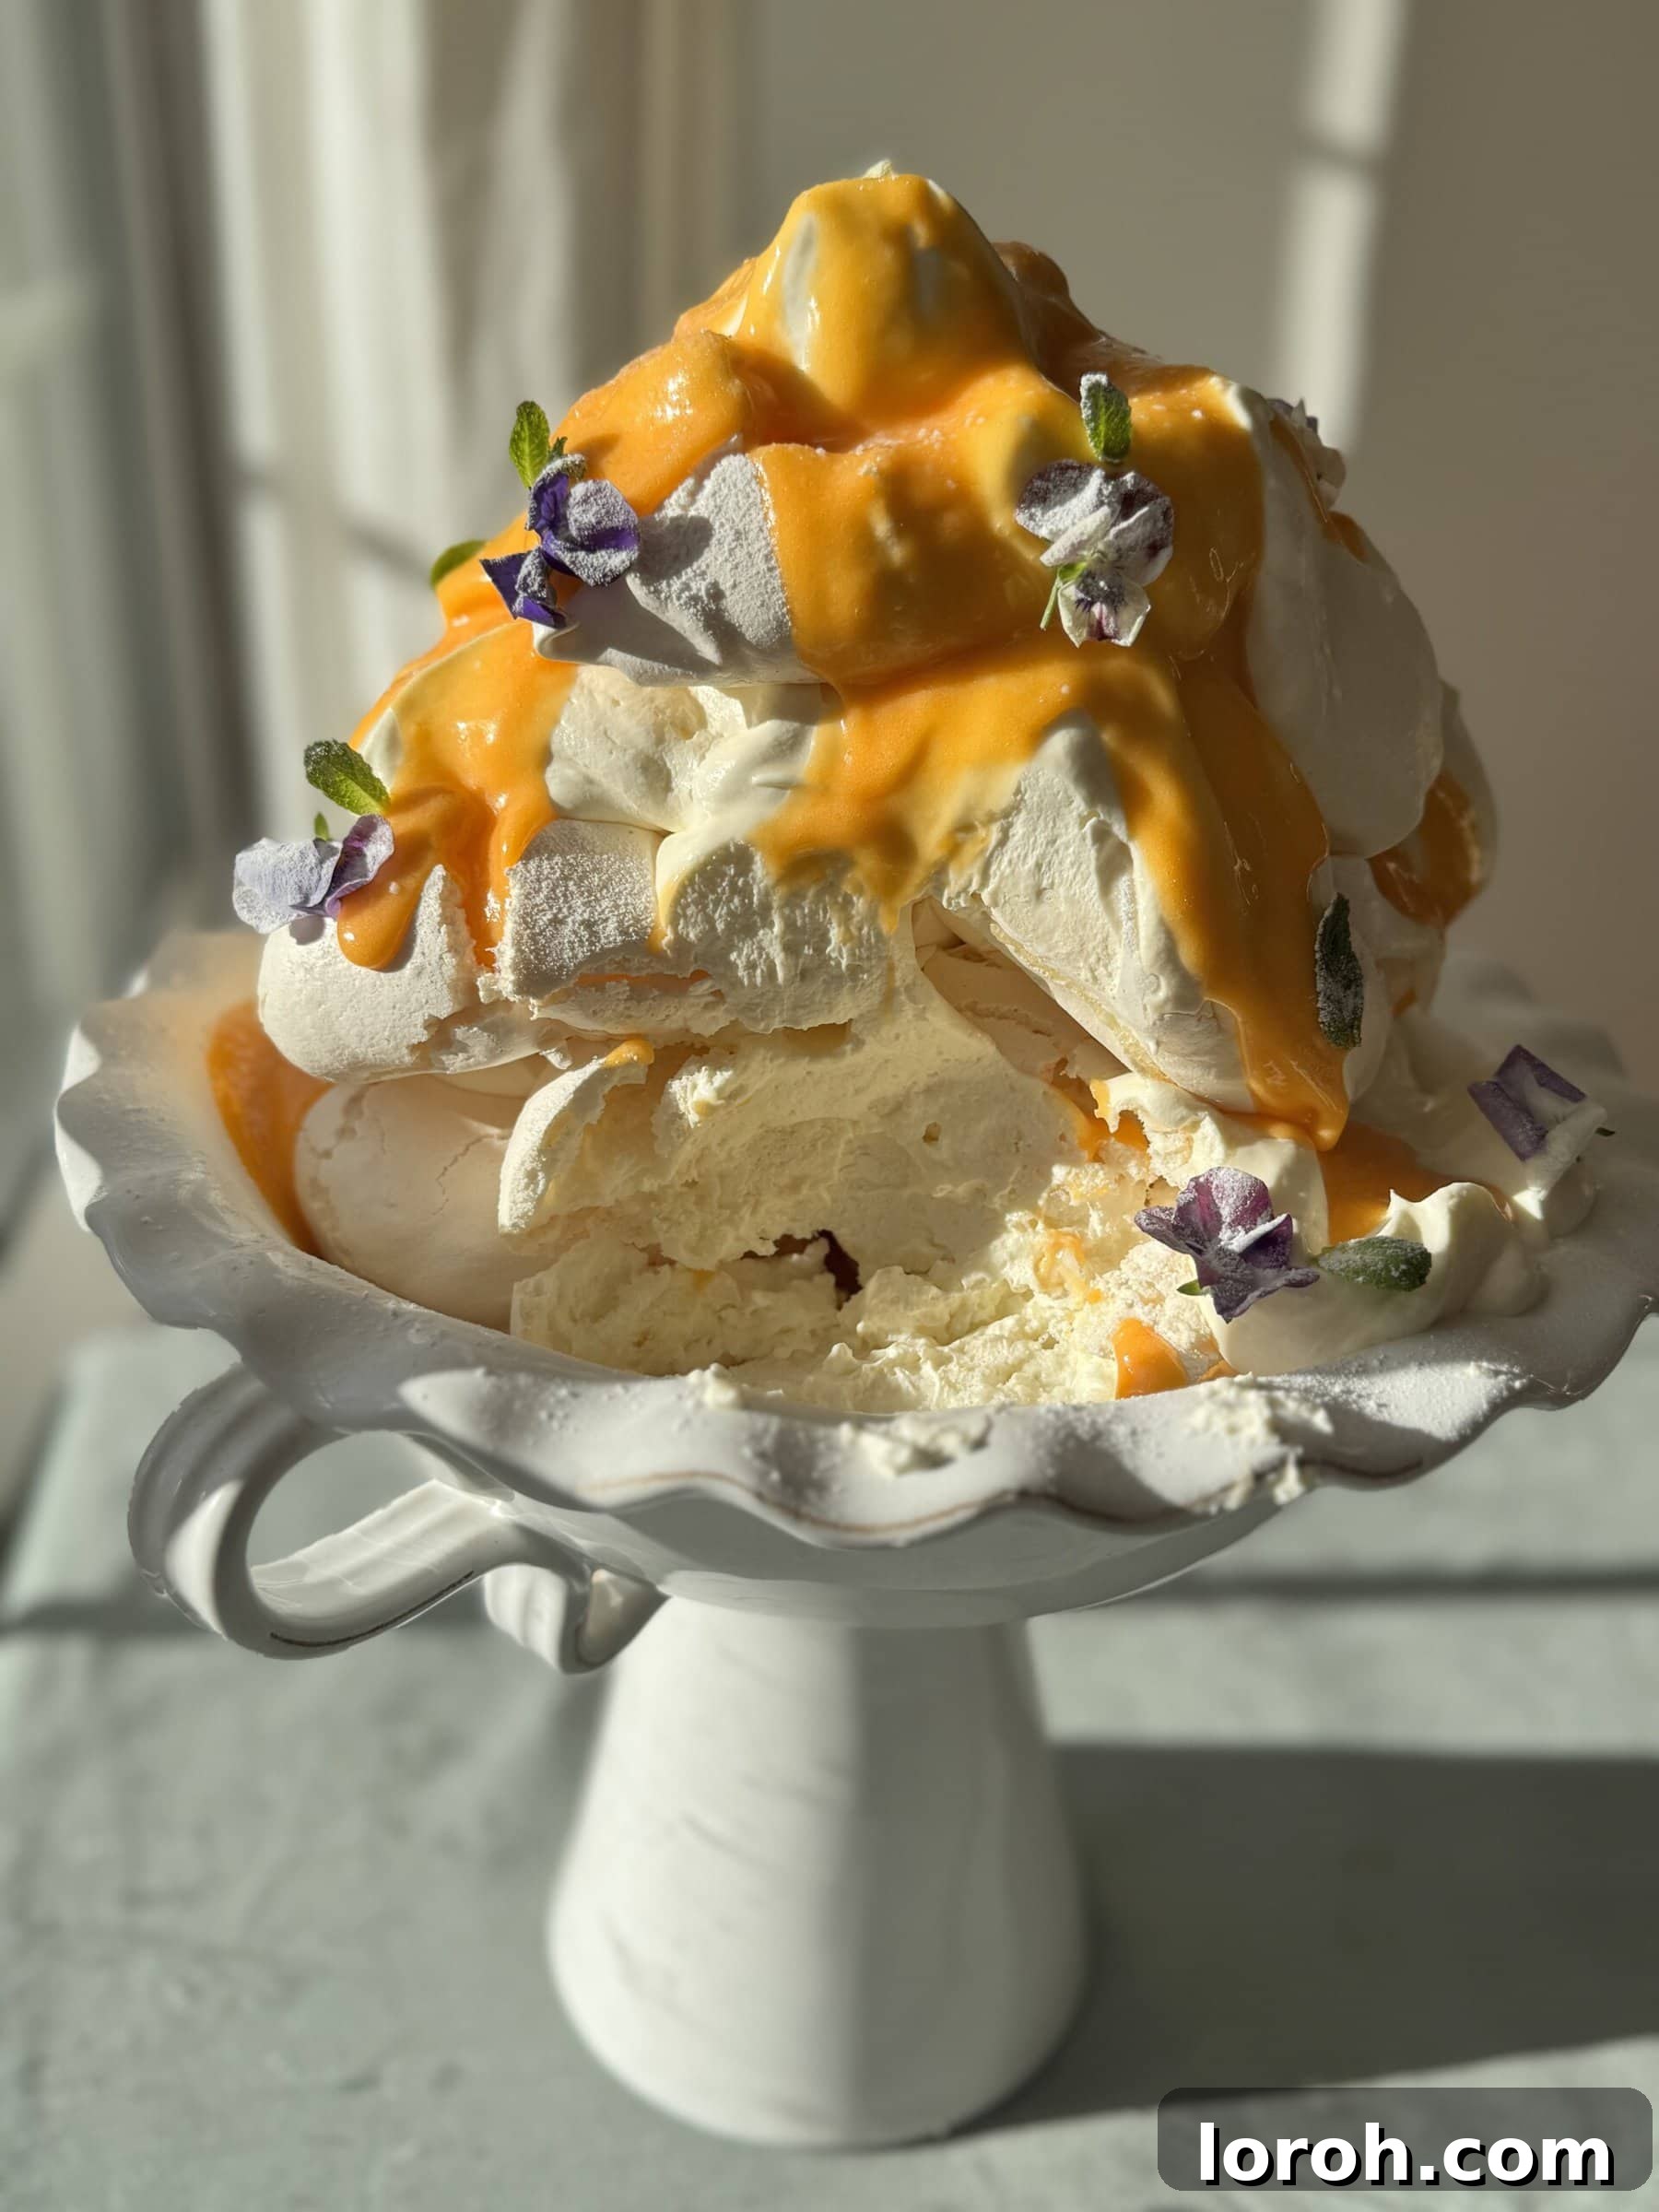
STEP TEN: Build a Showstopping Meringue Tower. For a truly spectacular and memorable presentation that will impress any guest, arrange your cooled meringues in a glorious, multi-tiered tower on a large serving platter. Carefully dollop generous spoonfuls of whipped cream between the layers and over the top, then artfully drizzle with plenty of your luscious lemon curd. Finish this magnificent creation with a flourish of fresh, vibrant berries and perhaps a few delicate edible flowers for an extra touch of elegance. Serve immediately and savor every exquisite bite!
Crafting Your Own Zesty Homemade Lemon Curd
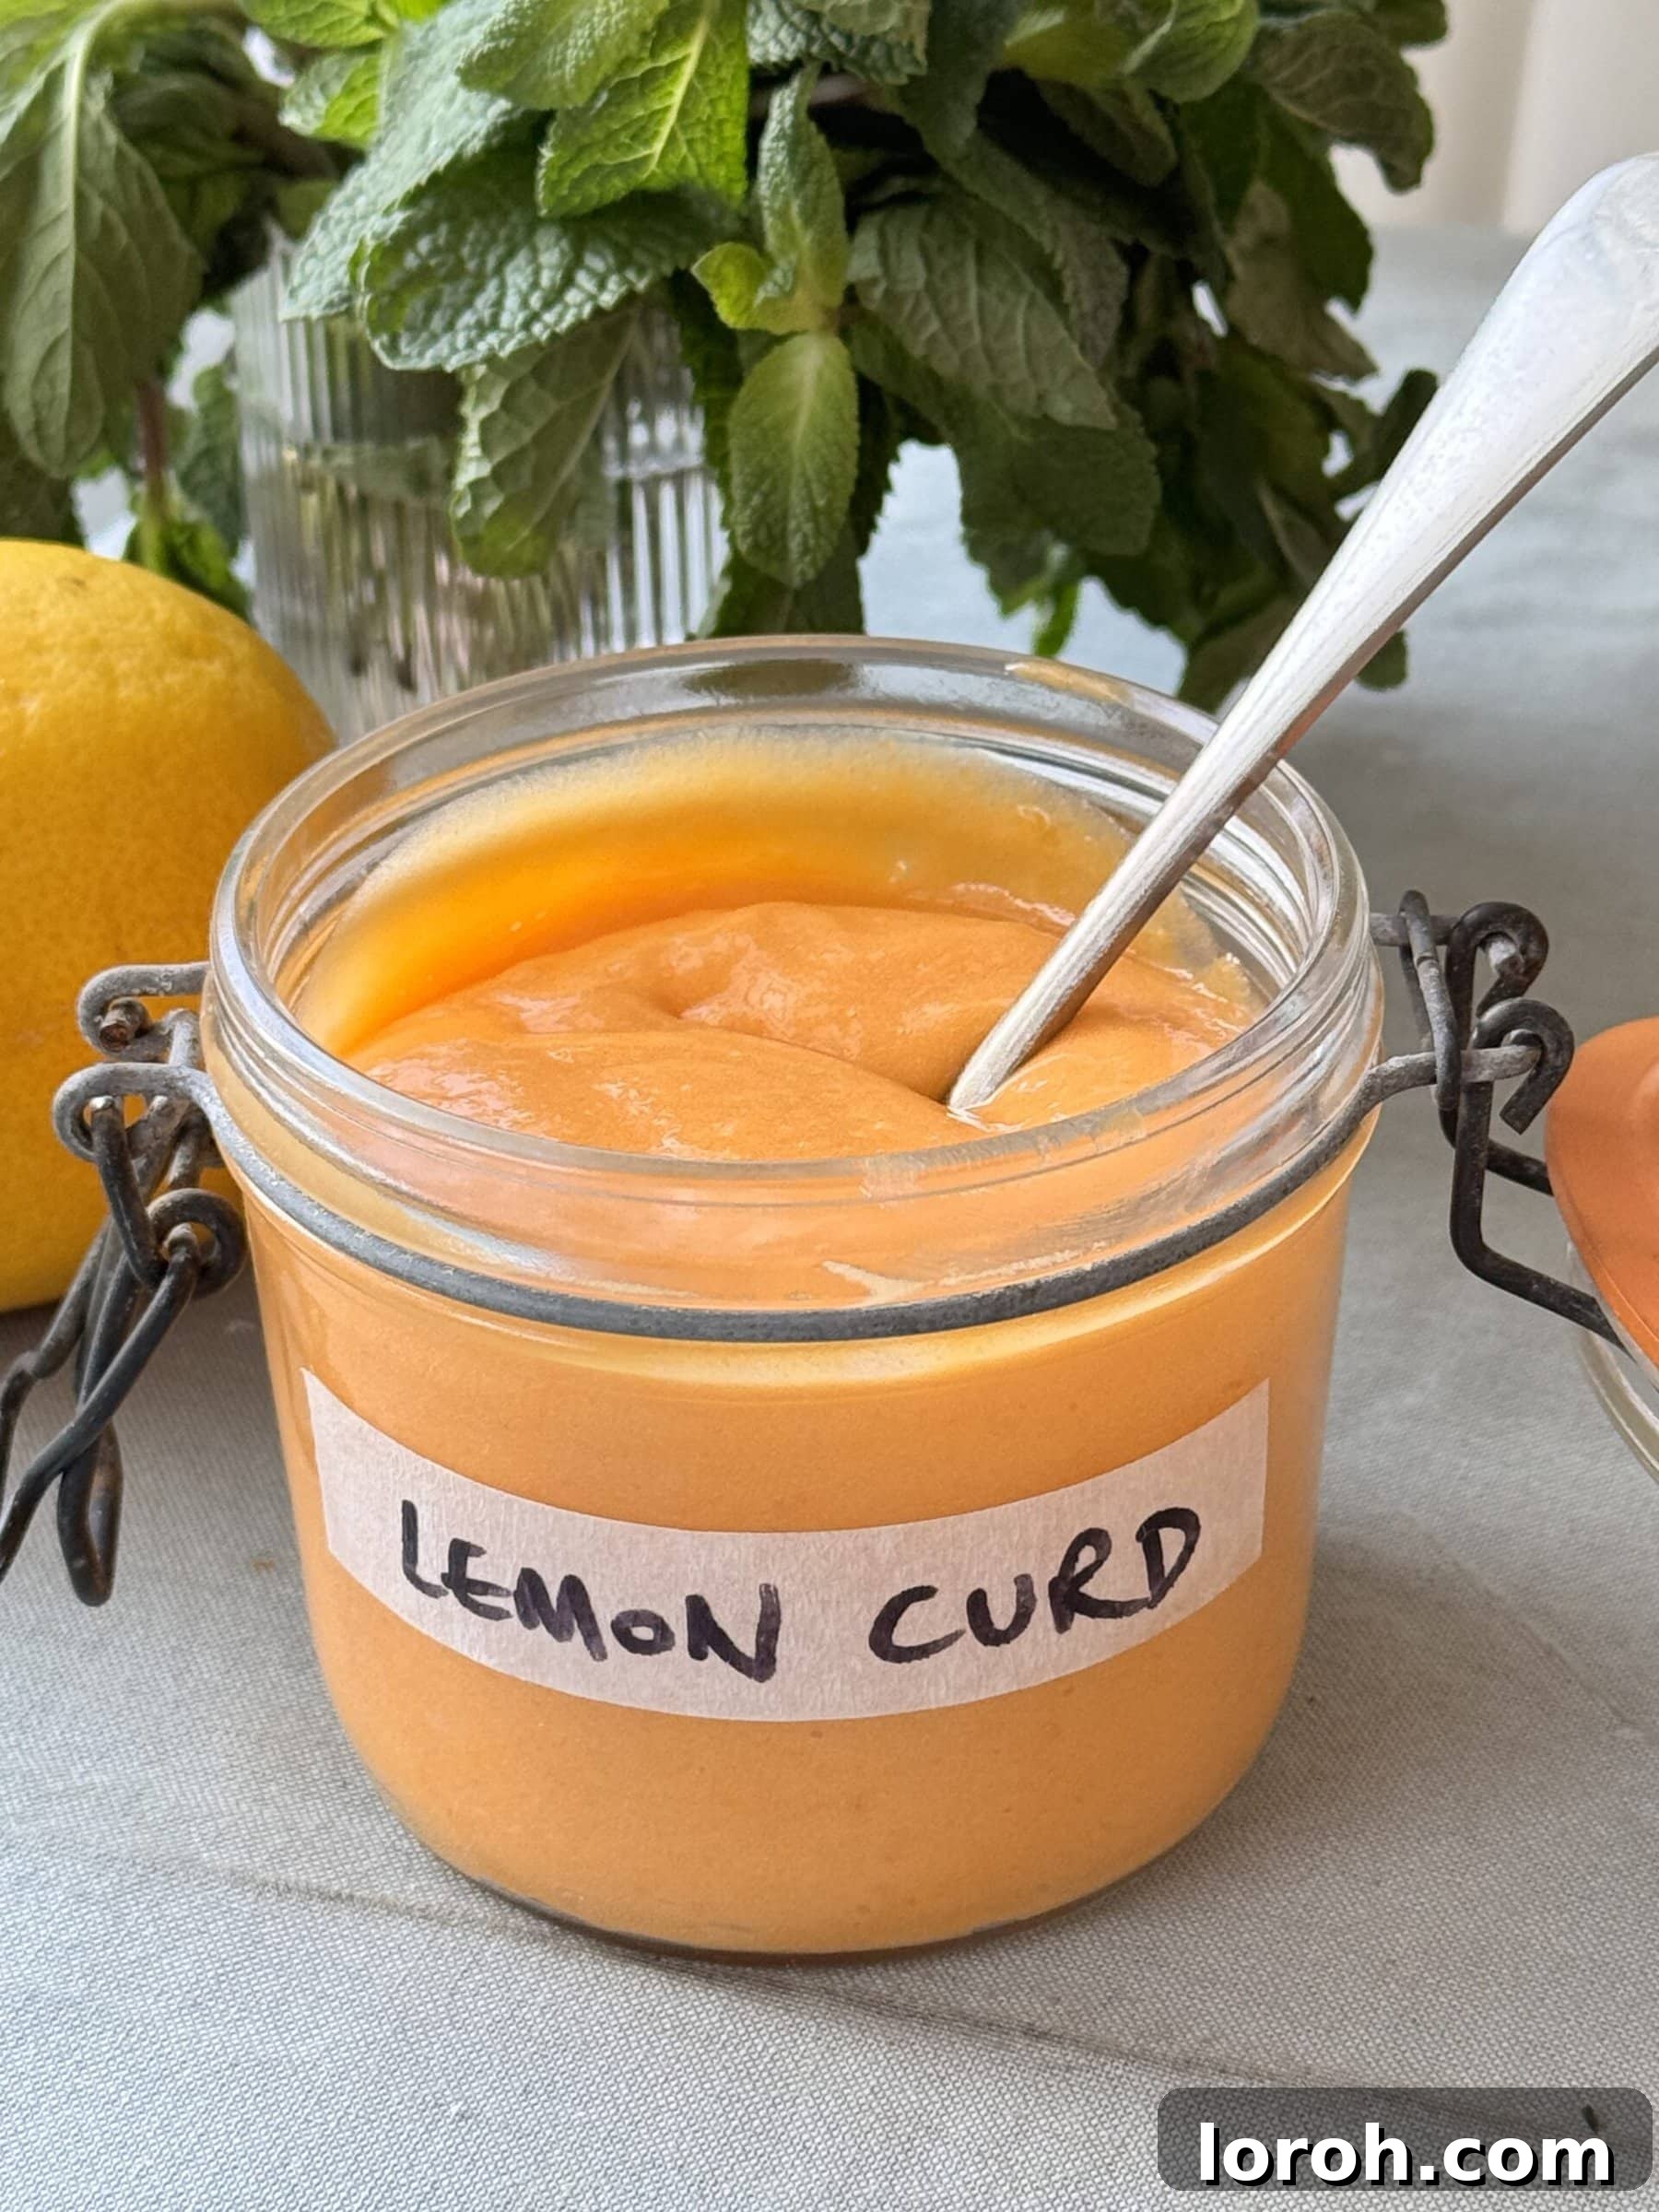
A truly exceptional lemon meringue dessert is simply incomplete without a generous dollop of bright, tangy, and silky-smooth homemade lemon curd. While high-quality store-bought options offer convenience, the experience of making your own version from scratch is incredibly satisfying and yields a superior depth of flavor and luscious texture that cannot be matched. It’s also a brilliant and resourceful way to utilize those leftover egg yolks from your meringue making! For a dedicated, comprehensive tutorial with even more in-depth tips and a step-by-step photographic guide, please refer to our full lemon curd guide. However, for your immediate convenience and to perfectly accompany your meringues, here’s how to whip up a batch:
Ingredients for Homemade Lemon Curd:
- 100 g caster sugar
- Zest of 2 large lemons (finely grated for maximum flavor release)
- 5 large egg yolks (ensure they are at room temperature for best emulsification)
- 80 ml fresh lemon juice (strained to remove any seeds or pulp)
- 60 g unsalted butter, diced into small, cold pieces (this helps it melt evenly)
Method for Homemade Lemon Curd:
- Prepare Lemon Sugar Infusion: In a large heat-proof glass or ceramic bowl (it’s crucial to avoid metal bowls, especially aluminum, as they can react with the lemon’s acidity and impart an undesirable metallic taste to your curd), combine the caster sugar and the finely grated zest of two large lemons. Using your fingertips, vigorously rub the lemon zest into the sugar. This action mechanically releases the potent citrus oils from the zest, thoroughly infusing the sugar with an intense lemon aroma and creating a clumpy, highly fragrant mixture.
- Whisk Egg Yolks: Add the room temperature egg yolks to the lemon sugar mixture. Using a rubber spatula or a silicone whisk (again, avoiding metal), whisk the mixture vigorously until it becomes notably pale in color, slightly thickened in consistency, and light and foamy on the surface. This initial whisking helps to properly emulsify the yolks and sugar, creating a smooth base.
- Gently Heat Lemon Juice: In a medium saucepan (ideally stainless steel, enamel, or cast iron – avoiding reactive metals), gently heat the 80ml of fresh lemon juice over medium-high heat. Bring it just to a very gentle simmer, where you see small bubbles forming around the edges, but crucially, do not allow it to boil rapidly or aggressively.
- Temper the Yolks with Hot Juice: Remove the hot lemon juice from the heat. Gradually, in a very slow and steady stream, pour a small amount of the hot lemon juice into the foamy egg yolk mixture, whisking constantly and rapidly all the while. Continue adding the remaining hot lemon juice in small, slow increments, always whisking vigorously, until all the hot liquid has been smoothly incorporated. This critical process, known as tempering, slowly and safely raises the temperature of the egg yolks, preventing them from scrambling when they are later exposed to direct heat.
- Cook the Curd to Perfection: Transfer the tempered lemon-egg mixture back into the clean saucepan. Place it over a very low heat. Cook the curd, stirring constantly and patiently with your rubber spatula or silicone whisk. The absolute key here is gentle, continuous stirring to prevent the bottom from cooking too quickly and scrambling the eggs. Continue to cook until the mixture thickens enough to visibly coat the back of your spoon – when you draw a clean line with your finger across the back of the spoon, it should leave a clear, distinct trail without the curd running back into it. This process usually takes around 5-8 minutes. It is paramount that you do NOT let the mixture boil at any point, as this will inevitably lead to an undesirable scrambled egg texture!
- Incorporate the Butter for Richness: Once the lemon curd has reached the desired luscious thickness and texture, immediately remove the saucepan from the heat. Add the diced, cold unsalted butter, one small piece at a time, stirring continuously until each piece is fully melted and smoothly incorporated into the curd. The butter is essential for adding rich flavor, a beautiful gloss, and that signature silky-smooth texture to your finished curd.
- Cool and Chill: Pour the freshly made lemon curd into a clean, sterilized glass jar or an airtight container. Allow it to cool completely to room temperature before covering it tightly and chilling it thoroughly in the refrigerator. The curd will continue to thicken and set further as it cools. It can be stored beautifully in the fridge for up to one week, ready to brighten your meringues and countless other delightful desserts!
Expert Baking Tips for Meringue Success
Beyond the core instructions outlined in the recipe, these additional expert tips will help you avoid common pitfalls and ensure your lemon meringues turn out perfectly every single time, showcasing your newfound baking prowess.
- Meticulous Egg Separation is Non-Negotiable: As emphasized previously, this step cannot be overstated. Always separate eggs individually into a small, separate bowl. The smallest speck of egg yolk (which contains fat) will act as a potent inhibitor, preventing egg whites from whipping up into stiff, voluminous peaks. If a yolk accidentally breaks and contaminates an egg white, set that egg aside for another use (such as making the lemon curd!) and start with a fresh egg to ensure your meringue success.
- Room Temperature Egg Whites are Your Secret Weapon: While it might seem like a minor detail, using room temperature egg whites is highly recommended and offers a distinct advantage. Egg whites at room temperature have a lower surface tension compared to cold egg whites, allowing them to whip up significantly faster, achieve a greater volume, and create a more stable, airy foam that is less prone to collapsing.
- The Cardinal Rule: A Spotlessly Clean, Dry Bowl: This rule bears repeating because it is absolutely fundamental! Any residual fat (even invisible smears from previous cooking or handling) or moisture in your mixing bowl or on your whisk attachments will catastrophically prevent your egg whites from aerating properly. Wiping your bowl with half a lemon and then meticulously drying it is a tried-and-true method to ensure a pristine environment for your delicate meringue.
- Exploring Meringue Kisses and Nests: This recipe primarily focuses on crafting elegant, medium-sized meringue nests, which are perfect for filling with delightful toppings. However, for smaller, more delicate treats or for use as garnishes, you can easily pipe small swirls or dollops onto the baking sheet to create charming “meringue kisses.” These dainty bites will bake similarly, aiming for crispness throughout, and are wonderful when sandwiched with a little cream or curd. You can even experiment with different piping nozzles to create distinct shapes for a fancier presentation.
- The Paramount Importance of Slow Cooling: To achieve that quintessential perfect balance of a crisp, shatter-like exterior and a tender, delightfully chewy interior, slow cooling is absolutely non-negotiable. Turning off the oven and allowing the meringues to gradually cool inside (with the door ajar) enables them to slowly dry out and stabilize without cracking, shrinking, or becoming soft and sticky. Resist the strong urge to open the oven door immediately after baking!
- Maintain Gentle Heat for Lemon Curd: When you are cooking your homemade lemon curd, always remember this golden rule: gentle heat and constant, patient stirring are your best friends. Applying high heat or allowing the curd to sit without continuous stirring will inevitably lead to the eggs scrambling, resulting in an unappetizing “lemon scrambled egg” texture rather than the desired smooth, luscious curd. Keep the heat consistently low and stir patiently until the curd visibly thickens to the correct consistency.
- Avoid Metal Equipment for Lemon Curd: When preparing your lemon curd, it is strongly advised to use non-reactive kitchen equipment. Metal bowls and whisks, particularly those made from aluminum, can react with the lemon’s high acidity. This reaction can impart an undesirable metallic taste to your delicate curd or even cause it to develop an unappealing greenish hue. Instead, opt for glass or ceramic bowls and utilize silicone or plastic spatulas and whisks. For the saucepan, a high-quality stainless steel, enamel-coated, or cast iron pot is ideal.
- Exercise Caution: Do Not Over-Whip Your Cream: When preparing your whipped cream for topping, it’s essential to keep a very close eye on it. Whip it just until it forms soft to medium peaks – it should be light and airy but still hold its shape. Over-whipping can quickly lead to a grainy, curdled texture, and if you continue past that point, you’ll regrettably end up with butter! A delicate, airy cream provides the perfect textural and flavor complement to the light meringue.
Understanding Meringues: A Brief Culinary Summary
Meringue, at its very heart, is a magical and deceptively simple culinary creation born from just two fundamental ingredients: egg whites and sugar. Yet, the subtle variations in technique and method give rise to distinctly different types of meringues, each possessing its own unique characteristics, levels of stability, and ideal culinary applications. The three primary types that you will most commonly encounter in the world of baking are:
- French Meringue: This is arguably the most common and widely recognized, as well as the simplest form of meringue to prepare, and it is precisely the technique we utilize for these delightful lemon meringues. Its preparation involves whisking egg whites until they reach soft peaks, then gradually incorporating granulated sugar while continuing to whisk vigorously until the mixture becomes stiff, glossy, and holds its shape firmly. French meringue is celebrated for its light, airy, and sometimes slightly rustic texture. It is frequently baked to create crisp shells, pavlova bases, or used as a beautiful, airy topping for pies that will undergo further baking.
- Italian Meringue: Renowned for its exceptional stability, incredibly smooth texture, and brilliant, glossy finish, Italian meringue is created through a distinct method. It involves slowly pouring a hot sugar syrup (heated to a precise, high temperature) into vigorously whisked egg whites. The hot syrup serves a dual purpose: it not only cooks the egg whites, making them safe to eat without further baking, but also creates an incredibly stable, dense, and marshmallow-like foam. This meringue is highly favored by professional bakers and patisseries for its beautiful sheen and robust, firm structure, making it perfect for elegantly decorating cakes, piping intricate designs, or incorporating into light mousses and stable buttercreams, such as those found in my exquisite lemon meringue cheesecake.
- Swiss Meringue: Falling elegantly between French and Italian meringues in terms of both its stability and complexity, Swiss meringue involves a unique preparation method. Here, egg whites and sugar are gently heated together over a bain-marie (a double boiler set over a pan of gently simmering water) while continuously whisking, until the sugar completely dissolves and the mixture reaches a specific warm temperature (typically around 60°C / 140°F). Once heated, the mixture is removed from the heat and whisked vigorously, usually with an electric mixer, until it cools down completely and forms stiff, beautifully silky, and glossy peaks. Swiss meringue boasts a wonderfully smooth, dense, and luxurious texture, making it an excellent and highly stable choice for buttercreams (like in my delectable white chocolate and raspberry cake), frostings, or as a reliable base for delicate macarons.
Frequently Asked Questions About Lemon Meringues
How can I best serve these homemade lemon meringues?
These delicate lemon meringues are incredibly versatile and offer several delightful ways to serve them, catering to different occasions and preferences. For a simple yet undeniably elegant presentation, top each cooled meringue nest with a generous dollop of freshly whipped cream, a spoonful of vibrant lemon curd (whether homemade for superior flavor or a good quality store-bought option for convenience), and a colorful scattering of fresh, juicy berries or finely diced tropical fruit. This creates individual, picture-perfect desserts. For a truly showstopping dessert that is guaranteed to impress any guest and become a memorable centerpiece, arrange the meringues in a glorious, multi-layered tower. Carefully dollop generous amounts of whipped cream between each layer and over the top, then artfully drizzle with plenty of your luscious lemon curd. Finish this magnificent creation with additional fresh fruit and perhaps a sprinkle of lemon zest or a few edible flowers for an extra touch of sophistication. It’s an effortless way to create a truly memorable sweet spectacle!
Why is lemon juice added to lemon meringues?
The addition of a small amount of lemon juice to meringue is a clever and strategic trick widely employed by experienced bakers to significantly enhance its stability. Lemon juice is inherently acidic, and this acidity plays a crucial scientific role in denaturing the proteins present in the egg whites. This process allows the egg white proteins to form stronger, more rigid bonds when they are vigorously whipped. The ultimate result is a more stable, robust meringue that is considerably less prone to collapsing, weeping (releasing syrupy liquid during or after baking), or breaking apart. It also contributes to achieving that highly desirable crisp exterior and delightfully chewy interior, making the meringue more resilient and reliable throughout the baking and cooling process.
What else can I do with leftover lemon curd?
Homemade lemon curd is a truly delicious and versatile asset to have readily available in your refrigerator, and there are countless delightful ways to enjoy any leftovers! Beyond its perfect pairing with meringues, it’s absolutely divine simply spread on warm toast, fluffy crumpets, or freshly baked scones for an elevated breakfast or afternoon treat. For a quick and refreshing dessert, swirl a generous spoonful through plain Greek yogurt and top with crunchy granola. It also pairs wonderfully with classic British pancakes or served alongside my no-measure, easy-to-make French “gâteau au yaourt”. Get creative and use it as a vibrant filling for tarts, layer cakes, cupcakes, or even as a tangy, sweet drizzle over vanilla ice cream. Its bright, zesty flavor makes it an incredibly versatile ingredient for both sophisticated baking projects and everyday indulgence.
What can I make with the leftover egg yolks from these lemon meringues?
Making meringues often leaves you with a welcome bounty of egg yolks, and thankfully, there are many incredibly delicious and resourceful ways to put them to excellent use, spanning both sweet and savory culinary creations! The most obvious and perhaps most popular sweet option is to make a rich, creamy homemade custard. This provides the perfect excuse to whip up complementary desserts like a classic blackberry crumble or my comforting peach cobbler with cake mix. On the savory side, egg yolks are absolutely essential for creating incredibly rich, velvety pasta sauces, such as my indulgent buttery lemon pasta or an authentic carbonara with guanciale (and don’t forget my unique twist, the udon carbonara!). They are also the star ingredient in classic French sauces like luxurious mayonnaise or silky hollandaise sauce. If you can’t use them immediately, egg yolks can be successfully frozen for future use. To do this, whisk them lightly and add a tiny pinch of salt (for savory future uses) or sugar (for sweet future uses) per four yolks. Then, freeze them in a well-sealed airtight container for up to three months. The salt or sugar helps prevent them from becoming too gel-like or rubbery when thawed, ensuring they remain perfectly usable for your next culinary adventure.
More Delightful Lemon & Sweet Dessert Recipes You Might Enjoy
If the bright, invigorating, and zesty flavors of these homemade lemon meringues have utterly captivated your palate, then you are truly in for a treat with these other exquisite citrus-infused and wonderfully sweet creations from our kitchen. Expand your repertoire of irresistible desserts and discover new favorites!
Puddings
Lemon Meringue Cheesecake
Easy Baking Recipes
Lemon Loaf Cake
Easy Dessert Recipes
Easy Homemade Marshmallows
Easy Baking Recipes
One Bowl Lemon Curd Cake
If you’ve tried this delightful Lemon Meringues recipe or any other wonderful culinary creation from our site, please don’t hesitate to share your experience by leaving a comment below! We absolutely love hearing from you and celebrating your baking successes and culinary adventures!
Printable Recipe: Classic Lemon Meringues

Lemon Meringues
By: Margie Nomura
These delicate lemon meringues are the perfect dessert for a special occasion. Imagine sweet meringues, with a crisp outside and irresistibly chewy inside, topped with whipped cream, zesty lemon curd and fruity berries. So good.
Prep Time: 20 mins
Cook Time: 1 hr
Total Time: 1 hr 20 mins
Servings: 12 meringue nests
Ingredients
For the meringue nests:
- 8 large egg whites, at room temperature
- Pinch of flaky sea salt
- 500 g caster sugar
- Zest of 1 large lemon, plus 10ml lemon juice
- 2 tsp cornflour
For the lemon curd (optional, but highly recommended):
- 100 g caster sugar
- Zest of 2 large lemons
- 5 large egg yolks, at room temperature
- 80 ml lemon juice
- 60 g unsalted butter, diced
To serve (optional, for assembly):
- Lemon curd (homemade or good quality shop-bought)
- Lightly whipped cream (you will need around 600ml double or whipping cream)
- Fresh fruit (e.g., raspberries, sliced strawberries, blueberries, or diced tropical fruit)
Instructions
- Preheat the oven to 180ºC (350ºF) / 160ºC (325ºF) Fan. Line 2 large baking sheets with non-stick baking paper and set aside.
- Place the egg whites into the bowl of a stand mixer, ensuring it is spotlessly clean and dry. Add a generous pinch of flaky sea salt. Whisk on a low speed until foamy, then gradually increase the speed to medium and continue to whisk until soft peaks form (this will take about 3-4 minutes).
- Meanwhile, in a separate bowl, mix together the caster sugar and lemon zest using your fingertips (this releases citrus oils in the zest which makes it more zingy).
- Increase the speed of the mixer to medium-high, then gradually add the lemon sugar a spoonful at a time. Make sure that each spoonful is completely whisked in and dissolved before adding the next. Continue until all the sugar has been added and you have a smooth and shiny meringue that holds its shape when turned upside down. This should take about 5 minutes.
- Sieve in the cornflour and drizzle in the 10ml lemon juice. Gently fold to combine, being careful not to deflate the meringue.
- Lift the non-stick baking paper up from the baking sheets and dab a tiny bit of meringue on the corners, then recover with the non-stick baking paper (this helps stop it from slipping).
- Using 2 spoons, scoop equal-sized mounds of the meringue, spaced well apart, onto the prepared baking sheets (you should have around 12). Use the back of a spoon to make a little indentation into the centre of each meringue (this will create a nest to add your lemon curd).
- Place the trays into the preheated oven, then immediately reduce the temperature to 150ºC (300ºF) / 130ºC (275ºF) Fan and bake for 30 minutes. After baking, turn the oven off completely and leave the meringues inside for another 30 minutes to 1 hour (with the door slightly ajar if desired). Then remove from the oven and leave to cool completely at room temperature (they should be crisp on the outside but deliciously chewy on the inside).
- (Optional Lemon Curd Instructions – if making homemade): In a large heat-proof glass or ceramic bowl, mix together the 100g caster sugar and zest of 2 large lemons using your fingertips. Rub together until clumpy and totally mixed. Add the 5 large egg yolks and, using a rubber spatula or silicone whisk, whisk until thickened, pale and slightly foamy.
- (Optional Lemon Curd Instructions): In a large saucepan, heat the 80ml lemon juice over medium-high heat until it just comes to a boil. Remove from the heat and gradually pour over the foamy lemon-sugar egg yolks, whisking constantly until all the lemon juice has been added.
- (Optional Lemon Curd Instructions): Return the lemon-egg mixture to the saucepan and cook over low heat, stirring constantly until thickened enough to coat the back of a spoon – this should take around 5-8 minutes. Make sure you keep it over a gentle, low heat and stir constantly; if you leave it or let it boil, you will end up with a peculiar lemon scrambled egg yolk situation (not what we are looking for!).
- (Optional Lemon Curd Instructions): Once it has thickened, remove from the heat and gradually add the diced 60g unsalted butter, stirring to ensure it is fully melted and incorporated. Pour into a clean jar and leave to cool completely before covering and chilling in the fridge.
- To serve: Once meringues are completely cool, place them onto a serving plate and top with generous dollops of lightly whipped cream, a spoonful of lemon curd, and fresh fruit. Alternatively, for a showstopping dessert, build them into a tower, dollop over the cream before generously drizzling over the lemon curd. Enjoy immediately!
Notes
- For a helpful step-by-step photographic guide on making the meringues, please scroll up in the article.
- To store: Undecorated meringue nests can be made ahead of time and stored in a sealed, airtight container at cool room temperature for up to 2 weeks. Homemade lemon curd can be stored securely in an airtight container in the fridge for up to 1 week. Once decorated with cream and fruit, these lemon meringues are best eaten as soon as possible, as the moisture from the toppings can cause them to soften.
- To reheat: Both meringues and lemon curd are traditionally served at room temperature, so there is no need for reheating.
- To freeze: You can successfully freeze the plain, undecorated meringues in an airtight container, layered with non-stick baking paper to prevent sticking, for up to 1 month. Take care when defrosting to ensure they do not absorb any moisture, which will soften their crisp exterior. I suggest removing them from their containers and placing them on wire racks until completely thawed (this usually takes around an hour) and using them as soon as possible afterward. Homemade lemon curd can also be frozen for up to 1 month; ensure it is fully defrosted in the fridge before using.
- Clean, dry bowl: This is a critical point. It is paramount to make sure your mixing bowl and whisk attachments are completely clean and bone-dry before you add the egg whites. Any minuscule traces of liquid or fat will prevent them from whipping up correctly.
- Piping Technique: If you prefer a more uniform and decorative shape, you can transfer the meringue mixture into a large piping bag fitted with a nozzle of your choice (e.g., a star tip). Then, pipe approximately 12 mounds onto the prepared baking sheets. Use the back of a spoon to gently flatten and make a slight dent on the surface, creating the perfect pocket to hold your lemon curd.
- Metal-free equipment for curd: When making the lemon curd, it is strongly advised to try and avoid using metal kitchen equipment, particularly reactive metals like aluminum. These can impart an undesirable metallic taste to your delicate curd. Opt for glass, ceramic, or enamel bowls and use silicone or plastic spatulas/whisks.
- Whipped cream care: When preparing the cream for topping, take care to whip the cream just to medium peaks for the best texture and stability in decoration – if you over-whip, it will quickly become grainy and eventually split, resulting in something akin to butter.
- Flavored whipped cream: For an extra layer of flavor, you can add a couple of drops of vanilla extract or vanilla bean paste to the whipped cream as it forms soft peaks. Alternatively, create a delicious lemon-infused whipped cream by gently swirling some of your homemade lemon curd through the cream as it reaches the soft peak stage.
Nutrition (Approximate)
Serving: 1 lemon meringue (plain, without toppings)
- Calories: 172 kcal
- Carbohydrates: 42g
- Protein: 2g
- Fat: 0.2g
- Sodium: 34mg
- Potassium: 34mg
- Fiber: 0.01g
- Sugar: 42g
- Vitamin A: 0.1 IU
- Vitamin C: 0.3mg
- Calcium: 2mg
- Iron: 0.04mg
Nutrition information is automatically calculated and should only be used as a general approximation. Actual values may vary based on ingredients and preparation methods.
Did you try this amazing Lemon Meringues recipe? We’d love to hear from you! Please leave a comment below and let us know how it went!