
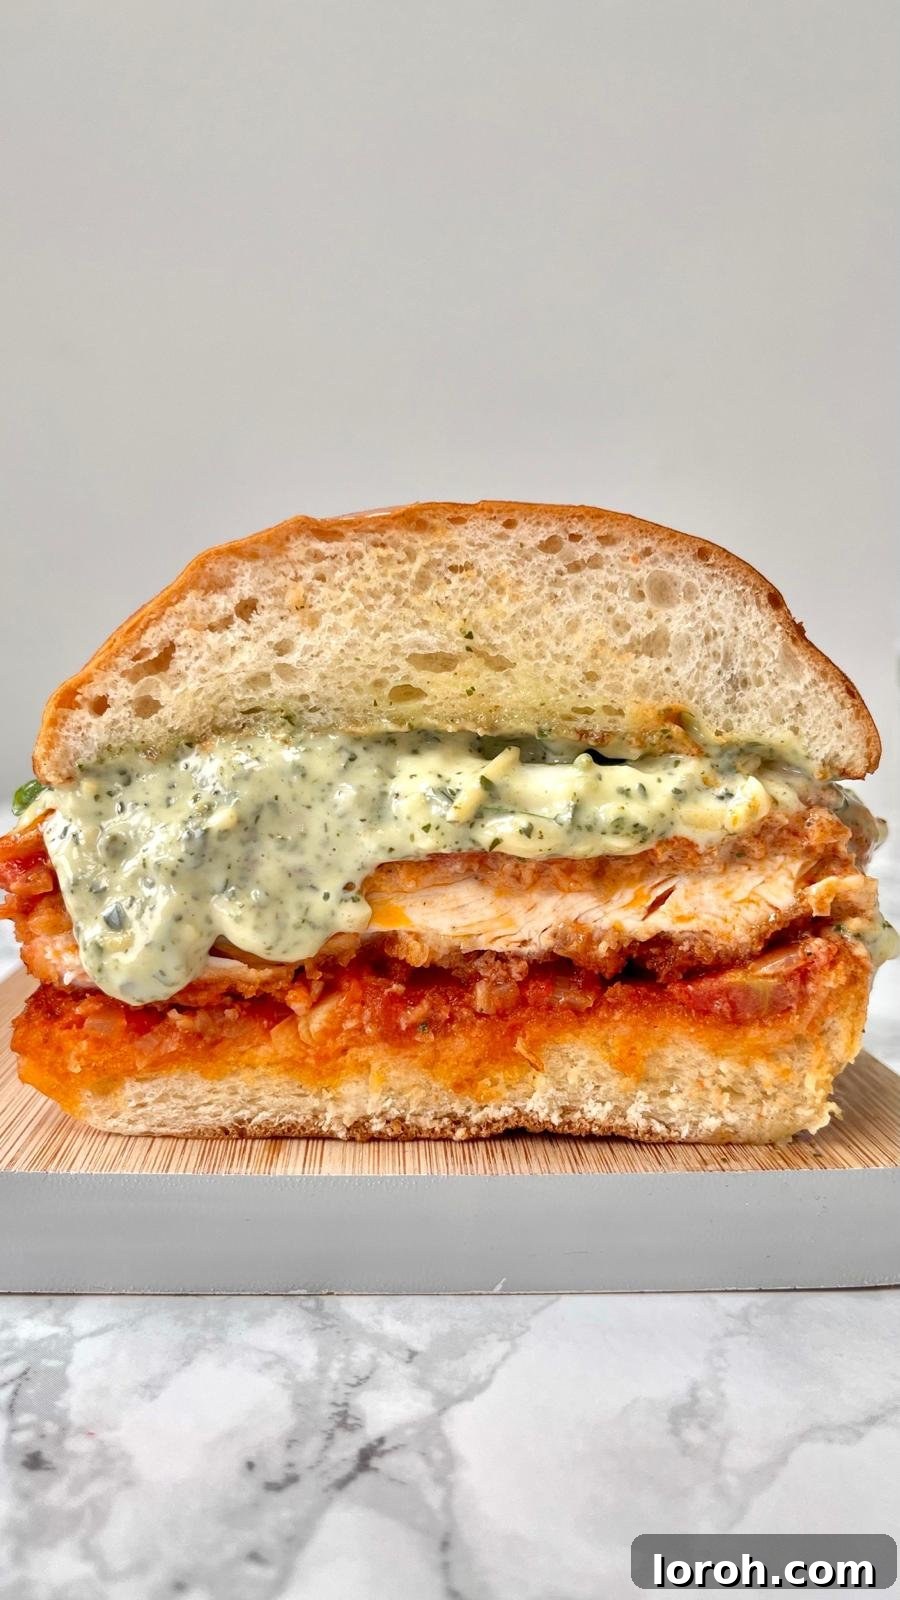
Prepare to elevate your sandwich game with what we believe is the Ultimate Chicken Parmesan Sandwich. This isn’t just any sandwich; it’s a symphony of textures and flavors designed to deliver pure culinary bliss. Imagine biting into a perfectly crispy chicken cutlet, generously smothered in a rich, slow-simmered homemade tomato sauce, blanketed with luscious melted mozzarella cheese, and nestled in a soft, lightly toasted brioche bun, all brought together with a vibrant, garlicky pesto mayonnaise. It’s a masterpiece of comfort food that promises to be an unforgettable meal.
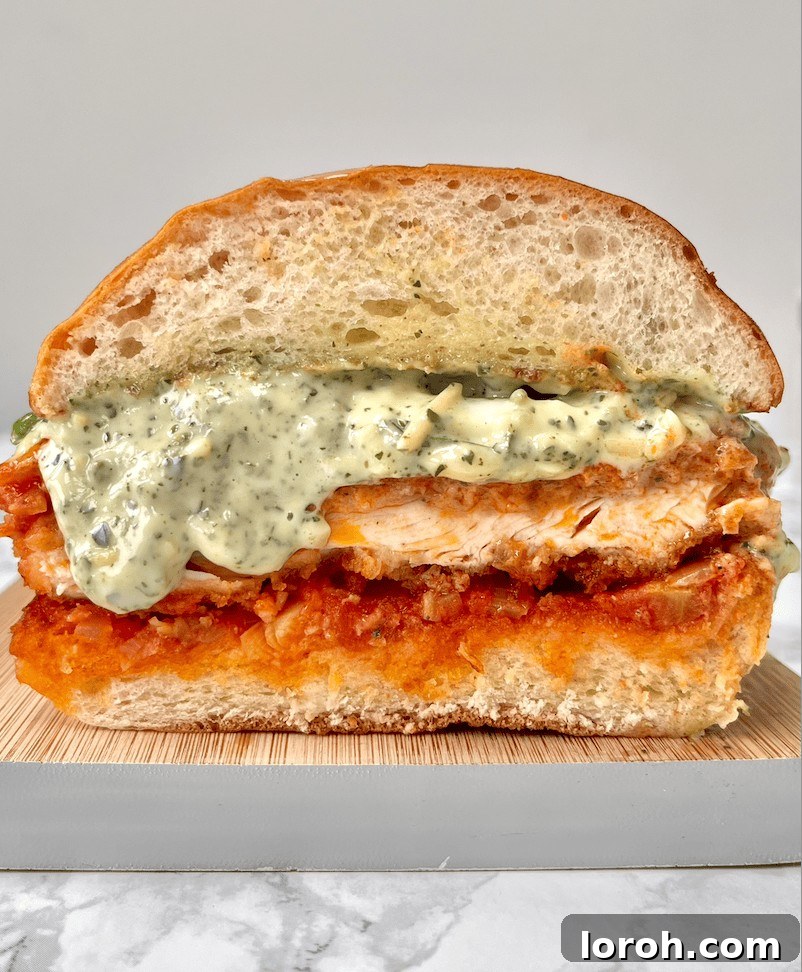
While this delightful creation isn’t your average “quick bite,” and might even venture into gourmet burger territory with its substantial fillings, rest assured it’s worth every moment spent crafting it. This is a meal for those occasions when you crave something unapologetically indulgent and truly satisfying. It’s an invitation to slow down, put on your favorite music, and enjoy the therapeutic process of cooking with a refreshing drink in hand. These are the recipes we cherish – not overly complicated or meticulous, but requiring a bit of time and passion. The payoff? A sandwich so incredibly delicious, you’ll be adding it to your regular rotation. (However, if you’re in a pinch for time, my classic Chicken Mayo Sandwich is always a fantastic quick option).
Table of Contents
- Why You’ll Love This Ultimate Chicken Parm Sandwich
- Essential Ingredients for Your Perfect Parm
- Creative Substitutions & Delicious Variations
- Step-by-Step Guide: Crafting Your Chicken Parmesan Sandwich
- Step 1: Mastering the Homemade Tomato Sauce
- Step 2: Preparing and Breading the Crispy Chicken Cutlet
- Step 3: Assembling Your Gourmet Chicken Parm Sandwich
- Expert Cooking Tips for the Best Results
- Frequently Asked Questions About Chicken Parm Sandwiches
- More Irresistible Sandwich Recipes You’ll Love
- Detailed Chicken Parmesan Sandwich Recipe Card
Why You’ll Love This Ultimate Chicken Parm Sandwich
This isn’t just another recipe; it’s an experience waiting to happen. Here’s why this Chicken Parmesan Sandwich will quickly become a favorite:
- It is so unbelievably delicious, it transcends ordinary meals. The rich combination of flavors and textures will have you dreaming of your next bite.
- The classic pairing of crispy chicken, vibrant homemade tomato sauce, and gooey melted mozzarella is a testament to timeless Italian-American comfort food. Each component perfectly complements the other, creating a truly harmonious flavor profile.
- It’s perfect for feeding a crowd. While it feels gourmet, the individual components can be prepared in batches, allowing everyone to customize and build their own spectacular sandwich, making it ideal for gatherings and entertaining.
- The unique addition of garlicky pesto mayonnaise takes this sandwich to another level. Its fresh, herbaceous, and savory notes cut through the richness of the cheese and sauce, adding an irresistible zest and depth of flavor that is simply packed with personality.
- It’s a fantastic way to enjoy a substantial, satisfying meal that feels incredibly special without being overly complicated. It’s an act of self-care and a delight for the taste buds.
Essential Ingredients for Your Perfect Parm
For precise measurements and a printable version of the recipe, please refer to the comprehensive recipe card at the bottom of this page.
To create this culinary masterpiece, high-quality ingredients are key:
- Fresh Pesto: Whether you opt for a vibrant homemade pesto or a good quality store-bought version (ideally from the chilled section for superior freshness), it’s crucial for our signature pesto mayonnaise. Homemade pesto, with its bright basil, nutty pine nuts, and pungent garlic, truly makes a difference. You can find my recipe for homemade basil pesto here.
- Mayonnaise: Use your favorite brand or, if you’re feeling ambitious, whip up your own creamy homemade mayonnaise. It forms the perfect base for blending with pesto, creating a rich, flavorful spread that’s also fantastic as a dip for chips or vegetables.
- Chicken Breasts: Select boneless, skinless chicken breasts. The secret to a tender, evenly cooked cutlet lies in preparing them properly. It’s essential to butterfly them and then pound them very thin with a rolling pin or meat mallet before breading to ensure quick, even cooking and maximum crispiness.
- Parmesan Cheese: A generous grating of fresh Parmesan cheese delivers a delicious umami depth and salty kick. Avoid pre-grated varieties, which often contain anti-caking agents and lack the robust flavor of freshly grated cheese. For a sharper, saltier alternative, Pecorino Romano would also work beautifully.
- Homemade Tomato Sauce: A quick, flavorful tomato sauce made with aromatic onion, garlic, and quality tinned chopped tomatoes is the heart of this sandwich. While a good store-bought jarred sauce can be a shortcut, always choose one with a high percentage of tomatoes and minimal added sugar for the best authentic flavor. Our recipe highlights how easy it is to make a truly delicious sauce from scratch.
- Panko Breadcrumbs: These Japanese-style breadcrumbs are a game-changer for achieving an unparalleled crispy coating. Their larger, flakier texture absorbs less oil, resulting in a lighter, crunchier crust compared to traditional breadcrumbs.
- Brioche Buns: The soft, slightly sweet, and buttery brioche bun perfectly cradles the rich fillings. Lightly toasting them adds another layer of texture and prevents them from becoming soggy.
Creative Substitutions & Delicious Variations
Feel free to customize your Chicken Parmesan Sandwich to suit your taste and what you have on hand:
- Brioche Buns Alternatives: While brioche adds a delightful richness, you can easily swap them for plain baps, classic sesame seed buns, or even a sturdy sliced focaccia or ciabatta rolls for a heartier bite. The key is a bun that can hold up to the delicious fillings.
- Mozzarella Options: Beyond fresh mozzarella slices, consider using mozzarella pearls for scattered pockets of melt, provolone for a sharper, nuttier flavor, or even burrata for an incredibly creamy, luxurious texture. If using burrata, I recommend adding it at the very end, just before serving, as its natural ooziness doesn’t require grilling. Experiment with other good melting cheeses like gruyere for a unique twist.
- Panko Breadcrumb Alternatives: If panko breadcrumbs are unavailable, standard breadcrumbs will still provide a delicious coating. While they might not yield quite the same level of ethereal crispiness, the chicken will still be wonderfully flavorful and satisfying. For extra crunch with regular breadcrumbs, you might consider a double breading.
- Spice It Up: For those who love a bit of heat, add a pinch of red pepper flakes to your tomato sauce as it simmers, or a dash of hot sauce to your pesto mayonnaise.
- Add More Veggies: Roasted red bell peppers, sautéed mushrooms, or caramelized onions can be layered into the sandwich for added depth and texture.
- Herbs: Experiment with different fresh herbs. Besides basil, fresh oregano or a sprinkle of chopped parsley can enhance the flavors in the sauce or as a garnish.
Step-by-Step Guide: Crafting Your Chicken Parmesan Sandwich
This is a visual and simplified guide. For complete, detailed instructions and ingredient quantities, please refer to the full recipe card at the bottom of the page.
Step 1: Mastering the Homemade Tomato Sauce
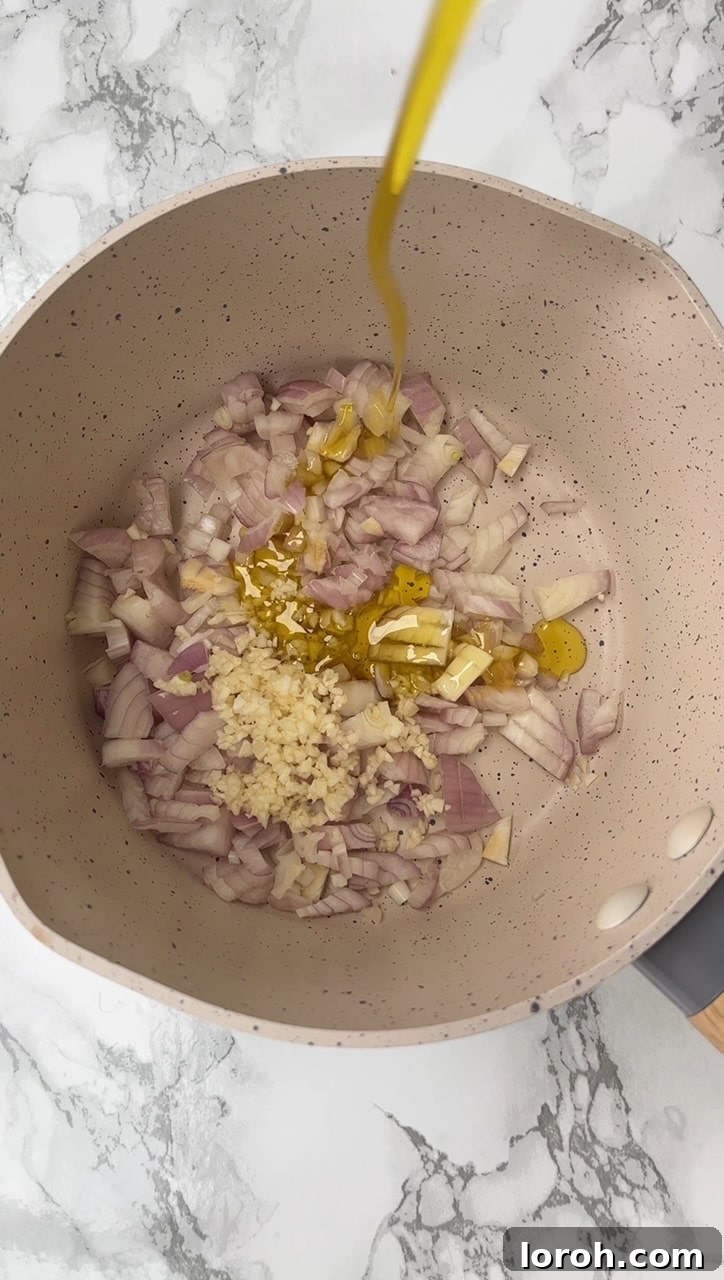
ONE: Begin by heating a generous drizzle of olive oil in a medium-sized non-stick saucepan over a medium heat. Add your finely chopped onion, season it well with salt and pepper, and sauté for approximately 10 minutes. Stir occasionally until the onion turns translucent and beautifully softened, releasing its sweet aromas. This slow sautéing is key to building a rich flavor base.
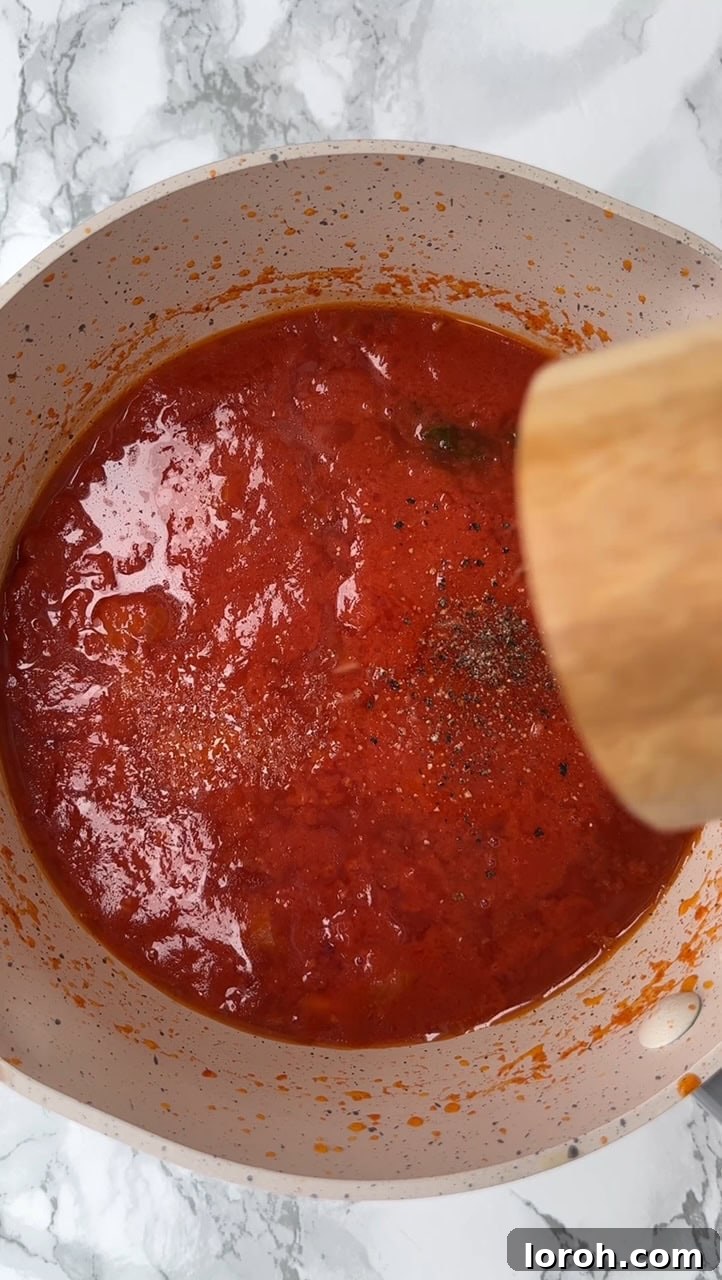
TWO: Introduce the crushed garlic to the saucepan and cook for just 30 seconds until fragrant, being careful not to burn it. Next, add the tinned chopped tomatoes, a splash of balsamic vinegar (which adds a wonderful depth and subtle sweetness), and the basil stalks. Bring the sauce to a gentle simmer, then reduce the heat to low and let it cook for about 15 minutes, or until it has thickened and reduced to a rich consistency. Taste and adjust seasoning with salt and pepper as needed.
Step 2: Preparing and Breading the Crispy Chicken Cutlet
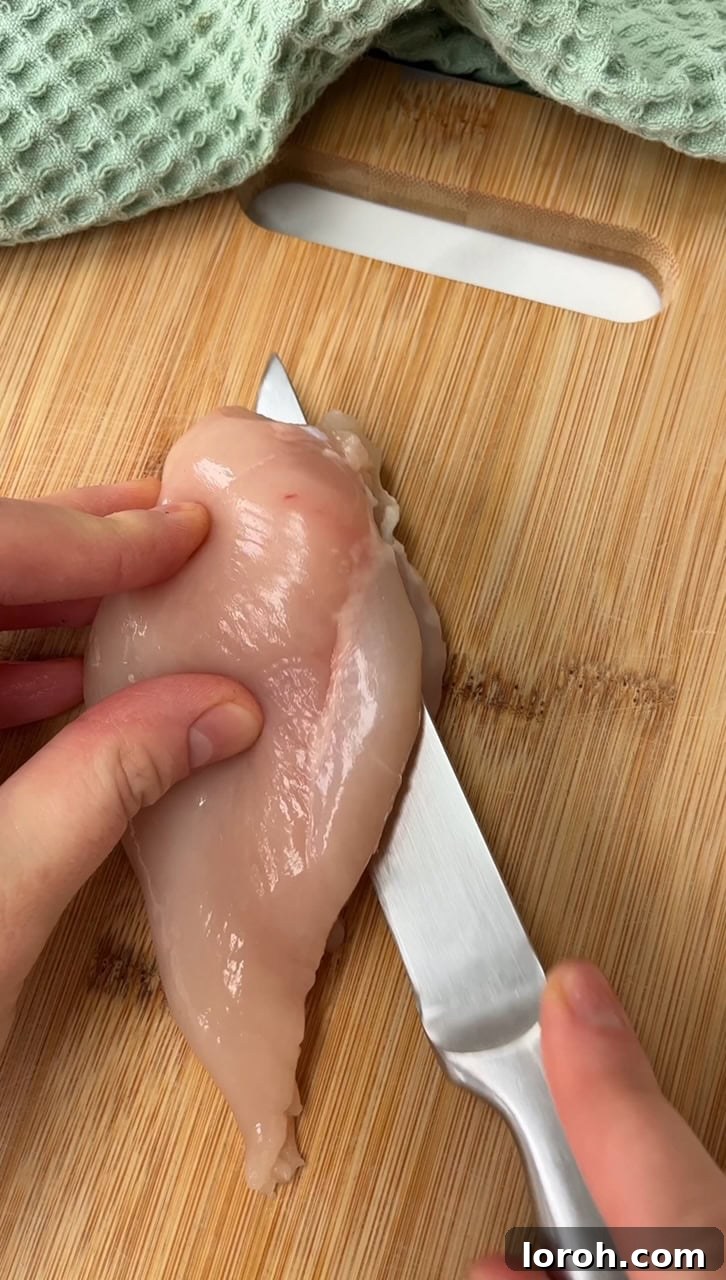
THREE: To prepare the chicken, place a chicken breast flat on a cutting board. Hold it firmly with one hand and, using a sharp knife, carefully slice horizontally into the thickest part of the breast, but do not cut all the way through. Open it up like a book to reveal a butterflied chicken breast, resembling a heart shape. This technique creates a larger, thinner piece perfect for cutlets.
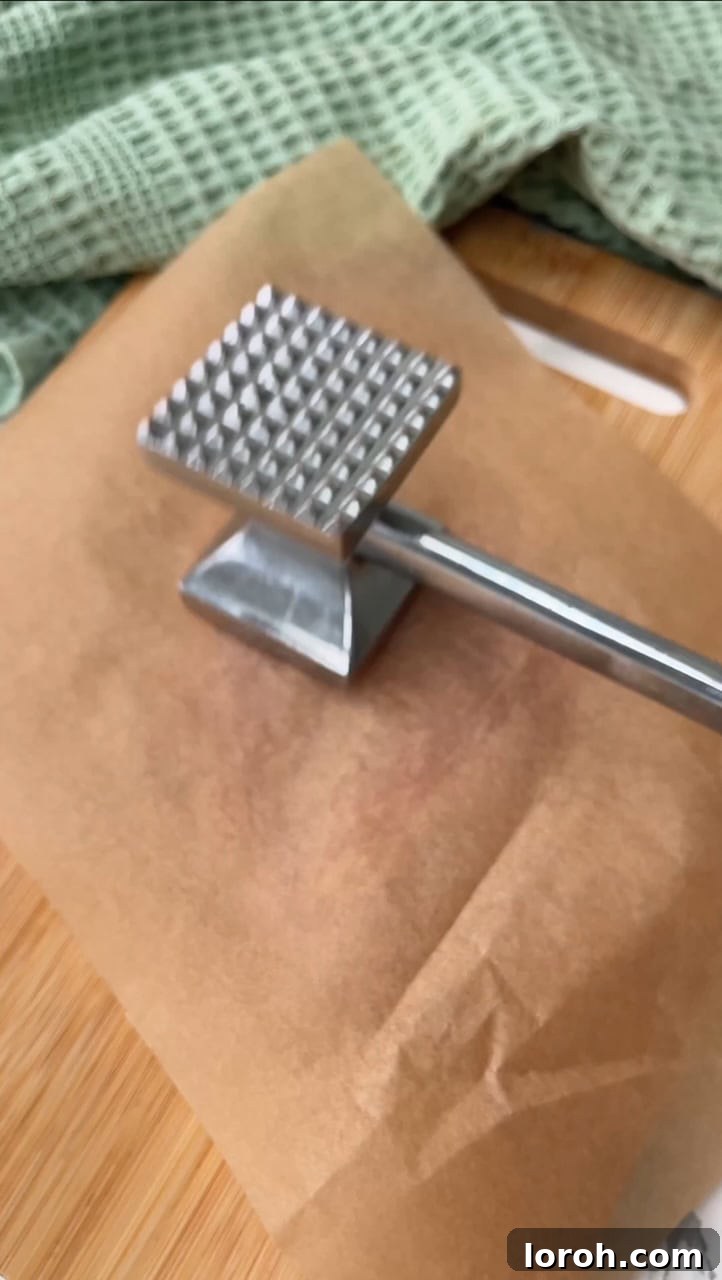
FOUR: Cover the butterflied chicken breast with a sheet of parchment paper or plastic wrap. Using a meat mallet, the flat side of a heavy rolling pin, or even a sturdy wine bottle, pound the chicken evenly until it reaches a consistent thickness of about 1-2 cm. This ensures the chicken cooks quickly and evenly, becoming beautifully tender.
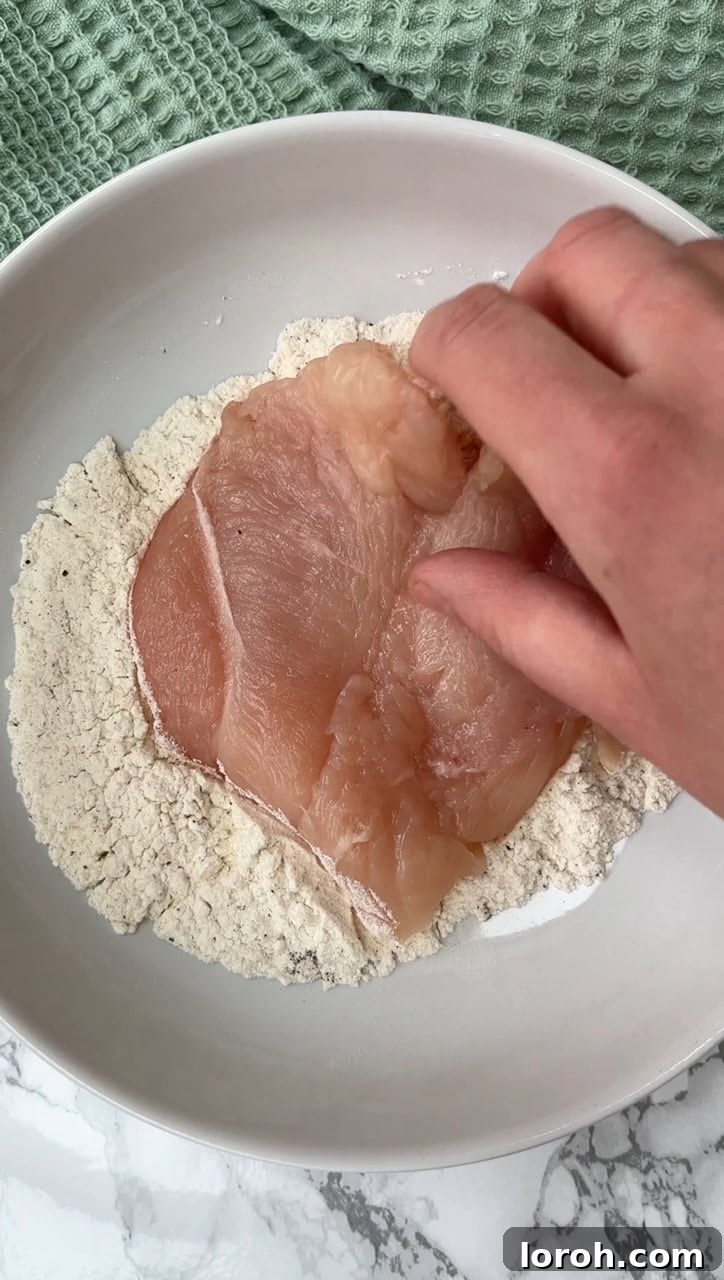
FIVE: Set up a breading station with three shallow dishes. In the first, place the plain flour and season it generously with salt and pepper. Dredge the pounded chicken breast in the seasoned flour, ensuring it’s completely coated on both sides. This layer helps the egg adhere properly.
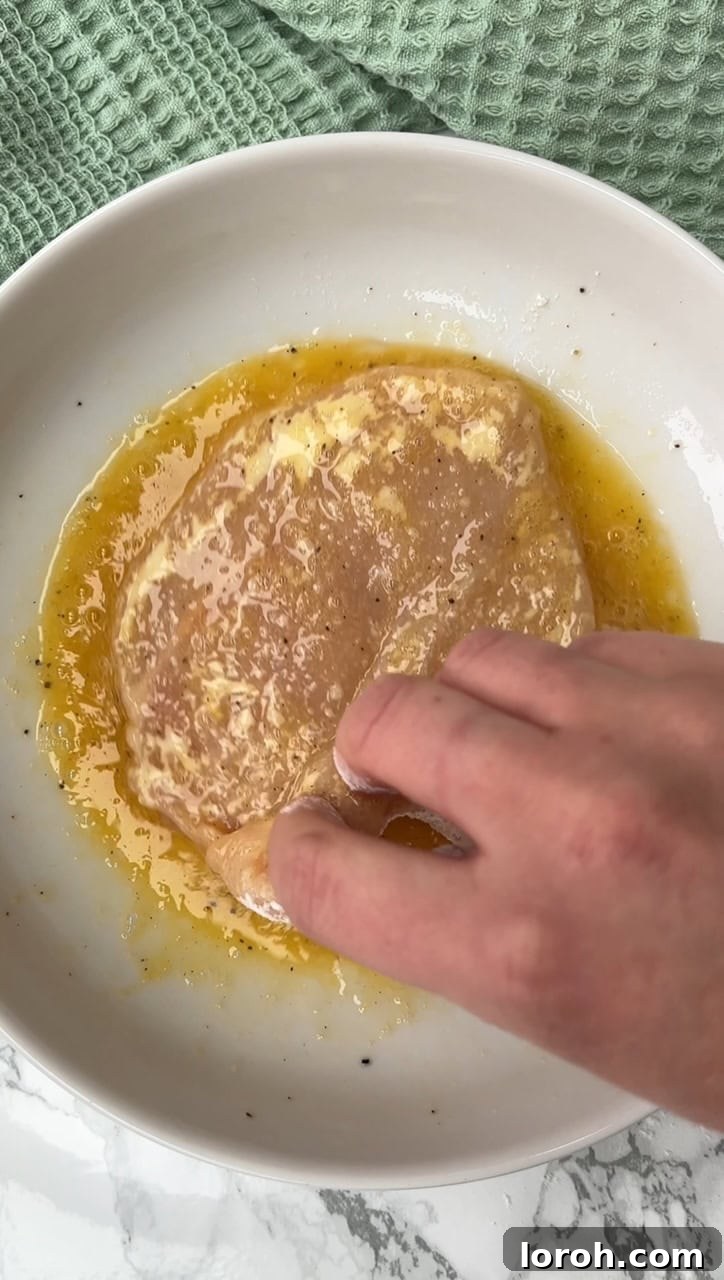
SIX: In the second dish, crack and whisk the large eggs, seasoning them lightly. Dip the flour-coated chicken breast into the beaten egg, allowing any excess to drip off. The egg acts as the glue for your crispy breading.
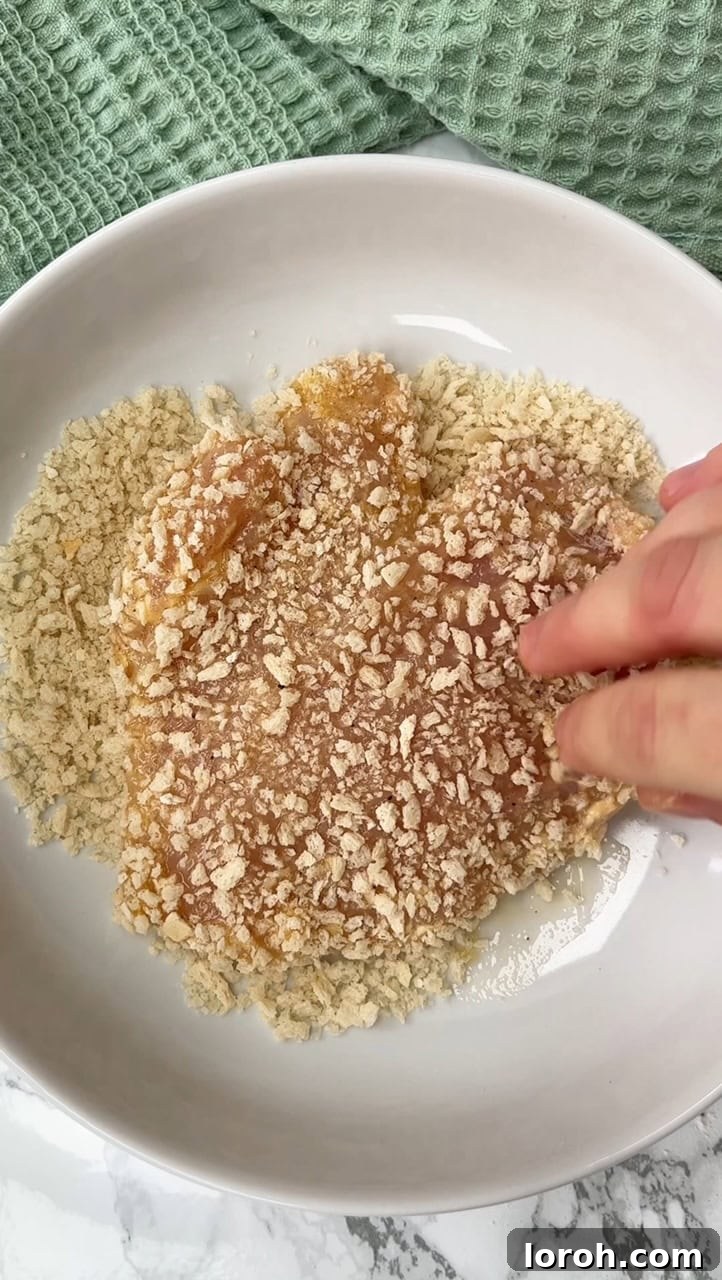
SEVEN: In the third dish, spread out the panko breadcrumbs, seasoned with salt and pepper. Place the egg-dipped chicken into the breadcrumbs and gently press firmly on both sides to ensure the breadcrumbs adhere completely and create a thick, even coating. This packing step is crucial for ultimate crispiness.
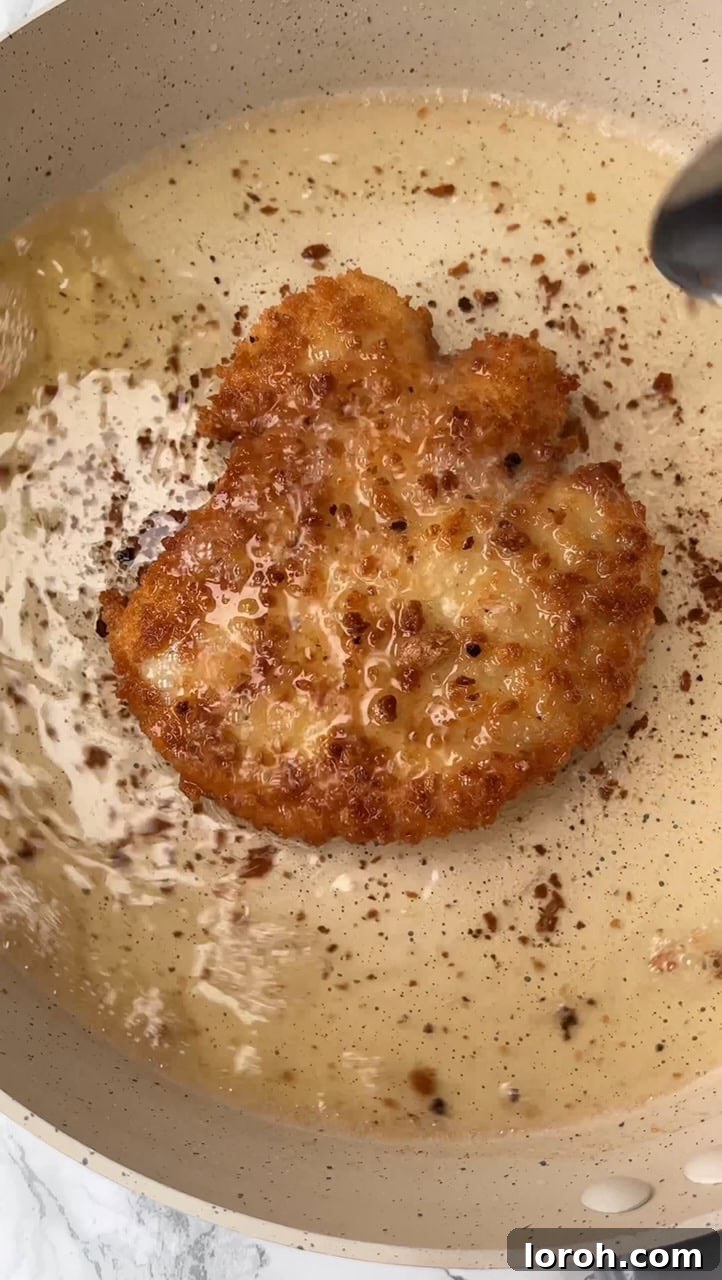
EIGHT: Heat a generous amount of vegetable oil in a medium-sized non-stick frying pan over medium-high heat. Once the oil is hot (a sprinkle of breadcrumbs should sizzle immediately), carefully place the breaded chicken breast into the pan. Fry for about 5 minutes per side, or until golden brown, crispy, and cooked through (ensure there’s no pink in the center). Spoon hot oil over the top of the chicken as it fries to promote even browning and crispiness.
Step 3: Assembling Your Gourmet Chicken Parm Sandwich
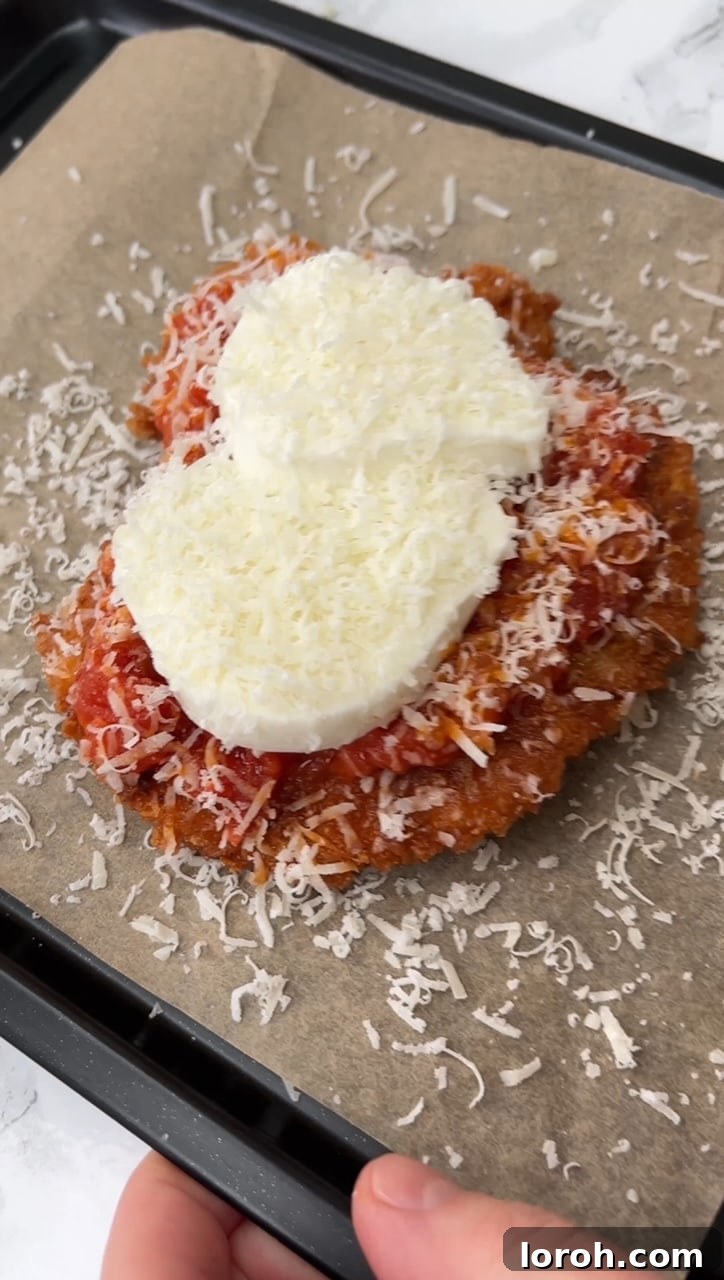
NINE: Preheat your grill (broiler) to medium-high. Place the perfectly fried chicken breasts onto a baking sheet. Top each cutlet with a generous spoonful of your rich homemade tomato sauce, a few slices of fresh mozzarella, and a sprinkle of grated Parmesan cheese. Slide the baking sheet under the grill for just a couple of minutes, or until the mozzarella is beautifully melted, gooey, and bubbling with golden edges. Keep a close eye on it to prevent burning.
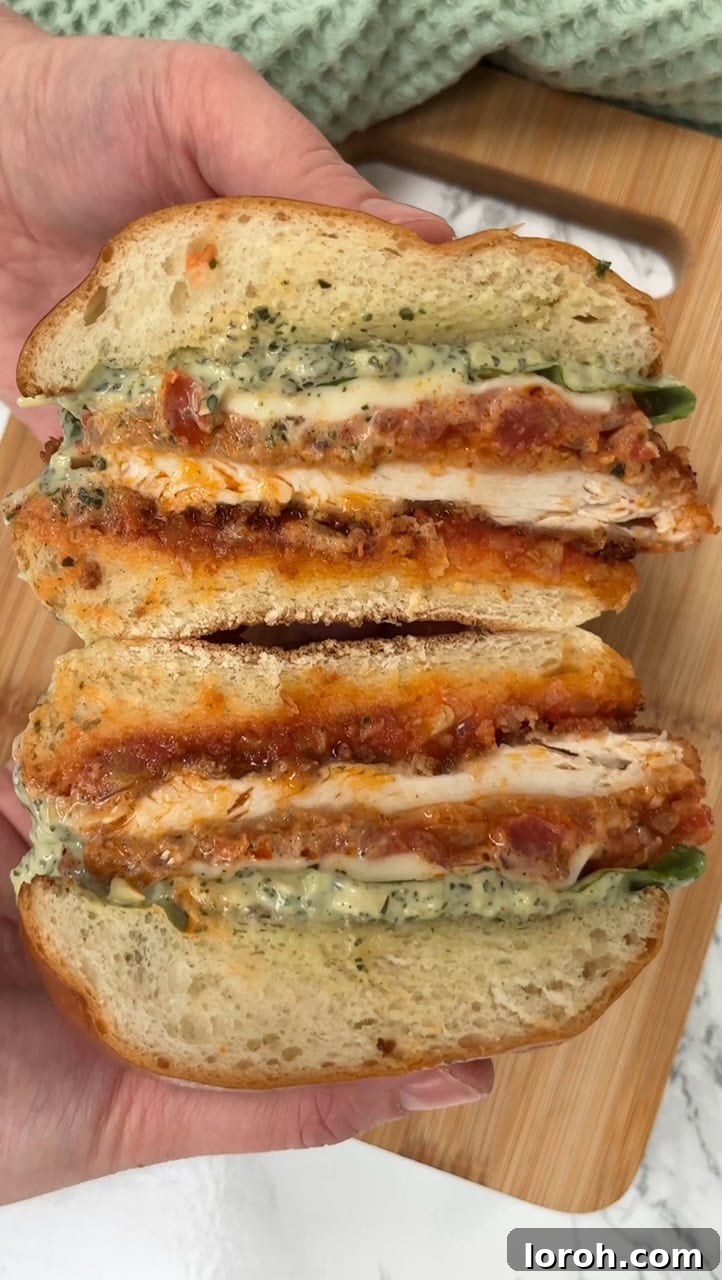
TEN: While the cheese melts, prepare your pesto mayonnaise by combining the fresh pesto with the mayonnaise in a small bowl. Lightly toast your brioche buns until golden and fragrant. To assemble your ultimate sandwich, spread a spoonful of the tomato sauce onto the bottom half of each toasted bun. Carefully place the cheesy, saucy chicken cutlet on top, then garnish with a few fresh basil leaves. Dollop a generous tablespoon of the vibrant pesto mayonnaise onto the top bun, place it onto the chicken, and serve immediately. Enjoy every glorious bite!
Expert Cooking Tips for the Best Results
Achieving the perfect Chicken Parmesan Sandwich is easier with these insider tips:
- Homemade Pesto Perfection: While store-bought works, making your own pesto truly elevates the flavor. The most renowned version, ‘Pesto alla Genovese,’ combines fresh basil, garlic, pine nuts, high-quality extra virgin olive oil, Parmesan, and sometimes a touch of lemon. For detailed guidance, check out my recipe for homemade basil pesto.
- Choosing Your Mozzarella: For the best melt and gooey factor, ideally use a fresh ball of mozzarella, torn or sliced. Alternatively, a block of low-moisture mozzarella, freshly grated, works well. Avoid pre-shredded mozzarella if possible, as it often contains starches that inhibit optimal melting and gooeyness.
- The Secret to Extra Crispy Chicken: For an even crispier coating, consider a double breading. After the first round of flour, egg, and panko, dip the chicken back into the egg and then once more into the panko, pressing firmly. This creates a thicker, more protective and crunchy crust.
- Optimal Frying Temperature: Maintaining the correct oil temperature is vital. If the oil isn’t hot enough, the breading will absorb too much oil and become greasy; too hot, and the breading will burn before the chicken cooks through. Aim for around 350-375°F (175-190°C). If you don’t have a thermometer, test with a tiny piece of breading – it should sizzle and brown quickly but not instantly burn.
- Serving Immediately is Key: To prevent the delicious brioche bun from becoming soggy, it’s best to assemble and serve these sandwiches immediately. The warmth of the chicken and sauce, combined with the freshly toasted bun and cool pesto mayo, is an experience best enjoyed right away.
- Make-Ahead Strategy: While immediate assembly is best, you can prepare components in advance. The tomato sauce can be made up to 4 days ahead and stored in the fridge. The pesto mayo can also be mixed a day in advance. You can even bread the chicken a day before and keep it well-covered in the fridge; just ensure you remove it 20-30 minutes before frying to bring it closer to room temperature for even cooking.
Frequently Asked Questions About Chicken Parm Sandwiches
Panko breadcrumbs are a type of Japanese breadcrumb known for their distinctively light, airy, and flaky texture. Made from crustless white bread, they are ground into larger, jagged flakes compared to traditional breadcrumbs. This unique structure prevents them from absorbing as much oil during frying, resulting in an exceptionally crispy and less greasy coating. They are a go-to for dishes like Tonkatsu and Katsu Chicken, but are also perfect for adding crunch to my Crispy Chicken with Tomatoes, Basil and Cannellini Beans or my Four Cheese Macaroni Cheese with Panko Breadcrumbs.
It’s common to have some of our delicious homemade tomato sauce leftover, which is never a problem! It freezes beautifully for up to 3 months. Beyond making another round of these incredible Chicken Parmesan Sandwiches, it’s perfect stirred through pasta for a simple and satisfying weeknight supper. You can also use it as a flavorful base for a pizza topping, like my Margherita Pizza Flatbread. It would also pair wonderfully with my roasted red bell pepper sauce for added complexity.
Yes, you absolutely can bake the chicken, though it requires a slight adjustment to achieve a similar level of crispiness. First, to ensure a crispy texture, lightly pan-fry your panko breadcrumbs in a little oil until they turn crisp and golden, then let them cool completely. Do not skip this step, or your baked chicken won’t be as crunchy. Proceed with the flour, egg, and pre-fried breadcrumb coating as described in the recipe. Then, bake the chicken in a preheated oven at 200°C Fan (approximately 400°F) for 10-12 minutes until it begins to crisp. Flip the chicken, and bake for another 10 minutes, or until it is golden, crispy, and cooked thoroughly with no pink inside.
This is a truly substantial and satisfying sandwich, often considered a complete meal on its own. However, if you’d like a side, a light and refreshing option such as a simple cherry tomato and basil salad, or a handful of your favorite crisps (chips) makes a perfect accompaniment without overpowering the main event.
Not at all! The chicken parm cutlet with its rich sauce and melted cheese is incredibly versatile. You can certainly serve it in the classic Chicken Parmigiana style, alongside a bed of pasta (like spaghetti or penne), creamy mashed potatoes, or a vibrant side of seasonal steamed vegetables or a fresh green salad. It’s a fantastic dish regardless of how you present it.
For optimal freshness and to prevent sogginess, it’s best to store the components separately if you anticipate leftovers. Cooked chicken cutlets can be kept in an airtight container in the fridge for up to 2 days. The leftover pesto mayonnaise and tomato sauce will last for up to 4 days when stored in separate airtight containers in the refrigerator. Reassemble when ready to eat!
Yes, easily! For a gluten-free version, simply substitute the plain flour with a gluten-free all-purpose flour blend and use gluten-free panko breadcrumbs. Many excellent gluten-free brioche-style buns are also available in most supermarkets. Ensure your pesto and any store-bought sauces are also certified gluten-free.
More Irresistible Sandwich Recipes You’ll Love
If you’ve fallen in love with this Chicken Parmesan Sandwich, you’re in for a treat with these other sensational sandwich creations from my kitchen:
Try my Ultimate Steak Sandwich for a hearty, savory experience, or my vibrant Chicken Caesar Sandwich. For something truly unique, my Goat’s Cheese, Apricot Jam & Ham Sandwich offers a delightful sweet and savory contrast. Don’t miss the fresh flavors of my Prosciutto, Tomato, Mozzarella Sandwich, the summery Grilled Peach & Burrata Ciabatta, or the luxurious Mortadella, Burrata and Pesto Sandwich – all true classics! And if your love for chicken parm extends beyond sandwiches, my Chicken Parm Pasta is an absolute must-try.
Explore More Delicious Sandwich Ideas
Sandwiches
Stanley Tucci’s Favourite Sandwich
Recipes
Roast Chicken, Bacon And Pesto Sandwich
Recipes
Egg Salad Sandwich
Recipes
Tomato Sandwich
If you tried this Ultimate Chicken Parm Sandwich or any other recipe on our site, please do leave a comment below and let us know how it turned out! Your feedback means the world to us.
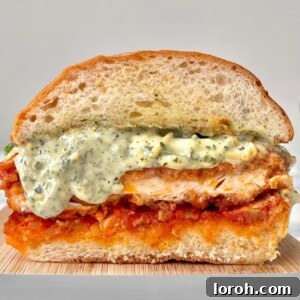
Chicken Parmesan Sandwich
Margie
Experience the ultimate comfort food with this gourmet Chicken Parmesan Sandwich. Crispy chicken, rich homemade tomato sauce, melted mozzarella, and a unique pesto mayo all come together in a soft brioche bun for an unforgettable meal.
20 mins
30 mins
50 mins
2 servings
Ingredients
For the Tomato Sauce:
- Drizzle olive oil
- 1 medium red onion, finely chopped
- Salt and freshly ground black pepper, to taste
- 2 garlic cloves, crushed
- 400 g tin chopped tomatoes (approx. 14 oz)
- 1 tsp balsamic vinegar
- Handful of fresh basil, stalks and leaves separated (reserve leaves for garnish)
For the Pesto Mayonnaise:
- 1 heaped tbsp fresh pesto
- 2 tbsp mayonnaise
For the Chicken Cutlets & Assembly:
- 2 chicken breasts
- 80 g plain flour (approx. 2/3 cup)
- 2 large eggs, beaten
- 120 g panko breadcrumbs (approx. 1 1/3 cups)
- Vegetable oil, for frying
- 125 g mozzarella ball, drained and sliced (approx. 4.5 oz)
- 100 g Parmesan, grated (approx. 1 cup)
- 2 brioche buns, halved and lightly toasted
Instructions
- Make the Tomato Sauce: Heat a generous drizzle of olive oil in a medium non-stick saucepan over medium heat. Add the finely chopped onion, season well, and sauté for about 10 minutes, stirring occasionally, until softened and translucent.
- Add the crushed garlic and cook for 30 seconds until fragrant. Stir in the chopped tomatoes, balsamic vinegar, and basil stalks. Bring to a simmer, then reduce the heat to low and cook for about 15 minutes, or until the sauce has reduced and thickened. Season to taste with salt and pepper. Remove basil stalks before serving.
- Prepare the Chicken: Meanwhile, prepare the chicken breasts. Place each breast on a cutting board, hold it firmly, and carefully slice horizontally into the thickest part to butterfly it, without cutting all the way through. Open it up.
- Cover the butterflied chicken breast with parchment paper or plastic wrap and pound it out with a meat mallet or rolling pin to an even thickness of about 1-2 cm (approx. 0.5-0.75 inches).
- Bread the Chicken: Set up your breading station: place the seasoned plain flour in one shallow dish, the seasoned beaten eggs in a second, and the seasoned panko breadcrumbs in a third.
- Dredge one chicken breast in the flour, coating both sides. Dip it into the beaten egg, ensuring both sides are covered. Finally, place it in the panko breadcrumbs and gently press to ensure a thick, even coating. Repeat with the second chicken breast.
- Cook the Chicken: Preheat your grill (broiler) to medium-high. Heat a generous amount of vegetable oil in a medium non-stick frying pan over medium-high heat.
- Carefully place the breaded chicken breasts into the hot oil. Fry for about 5 minutes per side, or until golden brown, crispy, and thoroughly cooked through (check for no pink in the center). Spoon hot oil over the chicken as it fries for even browning.
- Melt the Cheese: Transfer the fried chicken breasts onto a baking sheet. Top each with a spoonful of the homemade tomato sauce, a few slices of fresh mozzarella, and a sprinkle of grated Parmesan.
- Place the baking sheet under the preheated grill for 1-2 minutes, or until the mozzarella is melted, gooey, and lightly golden. Watch carefully to prevent burning.
- Prepare Pesto Mayonnaise & Buns: While the cheese melts, mix the fresh pesto with the mayonnaise in a small bowl. Lightly toast the brioche buns until golden and fragrant.
- Assemble the Sandwich: To assemble, spread a spoonful of tomato sauce over the bottom half of each toasted brioche bun. Place a cheesy chicken cutlet on top, then garnish with fresh basil leaves. Spread a tablespoon of the pesto mayonnaise onto the top bun, place it on the chicken, and serve immediately. Enjoy your gourmet creation!
Notes
To store: For best results with leftovers, keep all components separate. Leftover cooked chicken can be stored in an airtight container in the fridge for up to 2 days. Pesto mayo and tomato sauce last up to 4 days in airtight containers in the fridge.
To reheat: Reheat leftover chicken in an air fryer at 180°C (350°F) for 5-10 minutes until piping hot and crispy, or in an oven at 180°C (350°F) for 10-15 minutes. Cover with foil if cheese is already on to prevent burning. Reheat tomato sauce in the microwave or on the stove until bubbling.
To freeze: Tomato sauce freezes beautifully for up to 3 months. Cooked and breaded chicken can also be frozen for up to 3 months in an airtight container with greaseproof paper between layers. Thaw overnight in the fridge, then reheat as above.
Make ahead: The tomato sauce can be made up to 4 days in advance. Pesto mayo can be mixed a day ahead. Chicken can be breaded a day ahead and refrigerated; bring to room temperature for 20-30 minutes before frying.
Baking instead of frying: For a baked version, first lightly fry panko breadcrumbs until golden, then cool. Bread chicken as usual with these pre-fried panko. Bake at 200°C Fan (400°F) for 10-12 minutes, flip, then bake for another 10 minutes until golden and cooked through.
Serving: This sandwich is best served immediately to enjoy the crisp chicken and warm, gooey cheese without the bun becoming soggy.
Loved this recipe? Share your thoughts!
We’d be thrilled to hear how your Chicken Parmesan Sandwich turned out. Leave a comment below and let us know!