
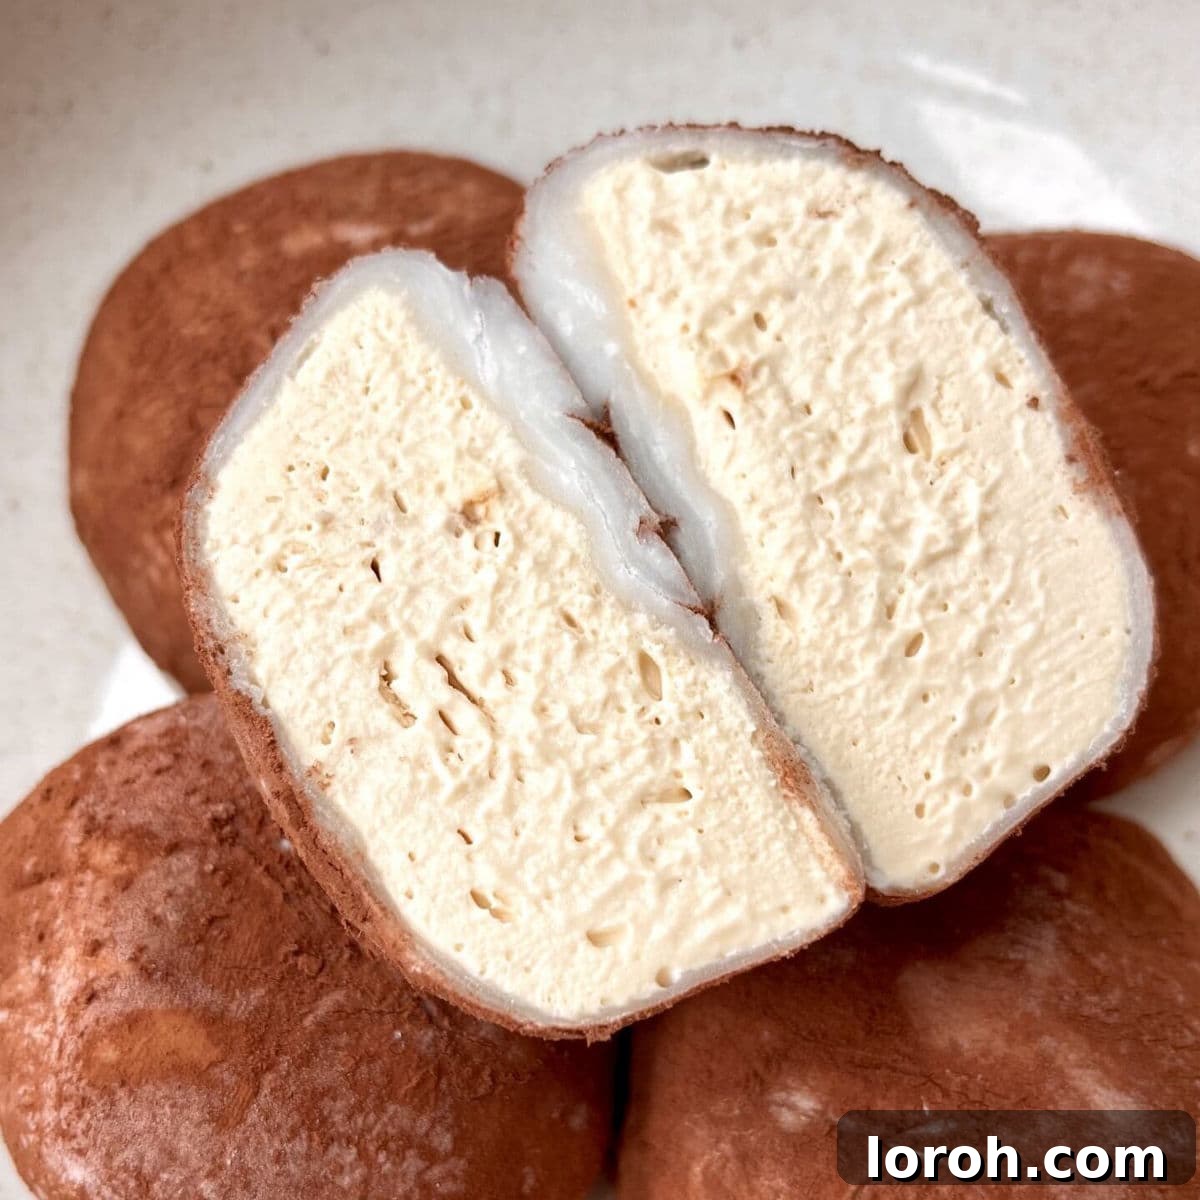
Tiramisu Ice Cream Mochi Bites: Your New Favorite Homemade Dessert
Get ready to fall in love with your new favorite dessert obsession: Tiramisu Ice CreamMochi Bites! These delightful little spheres of joy are surprisingly easy to make at home and offer an exquisite blend of textures and flavors. Imagine a soft, chewy mochi shell perfectly encasing a scoop of rich, creamy coffee and chocolate-infused ice cream, all dusted with a hint of cocoa. They’re the ultimate sweet escape at the end of a long day, or an impressive, unique treat to share at your next dinner party. Trust us, everyone will be asking for the recipe!
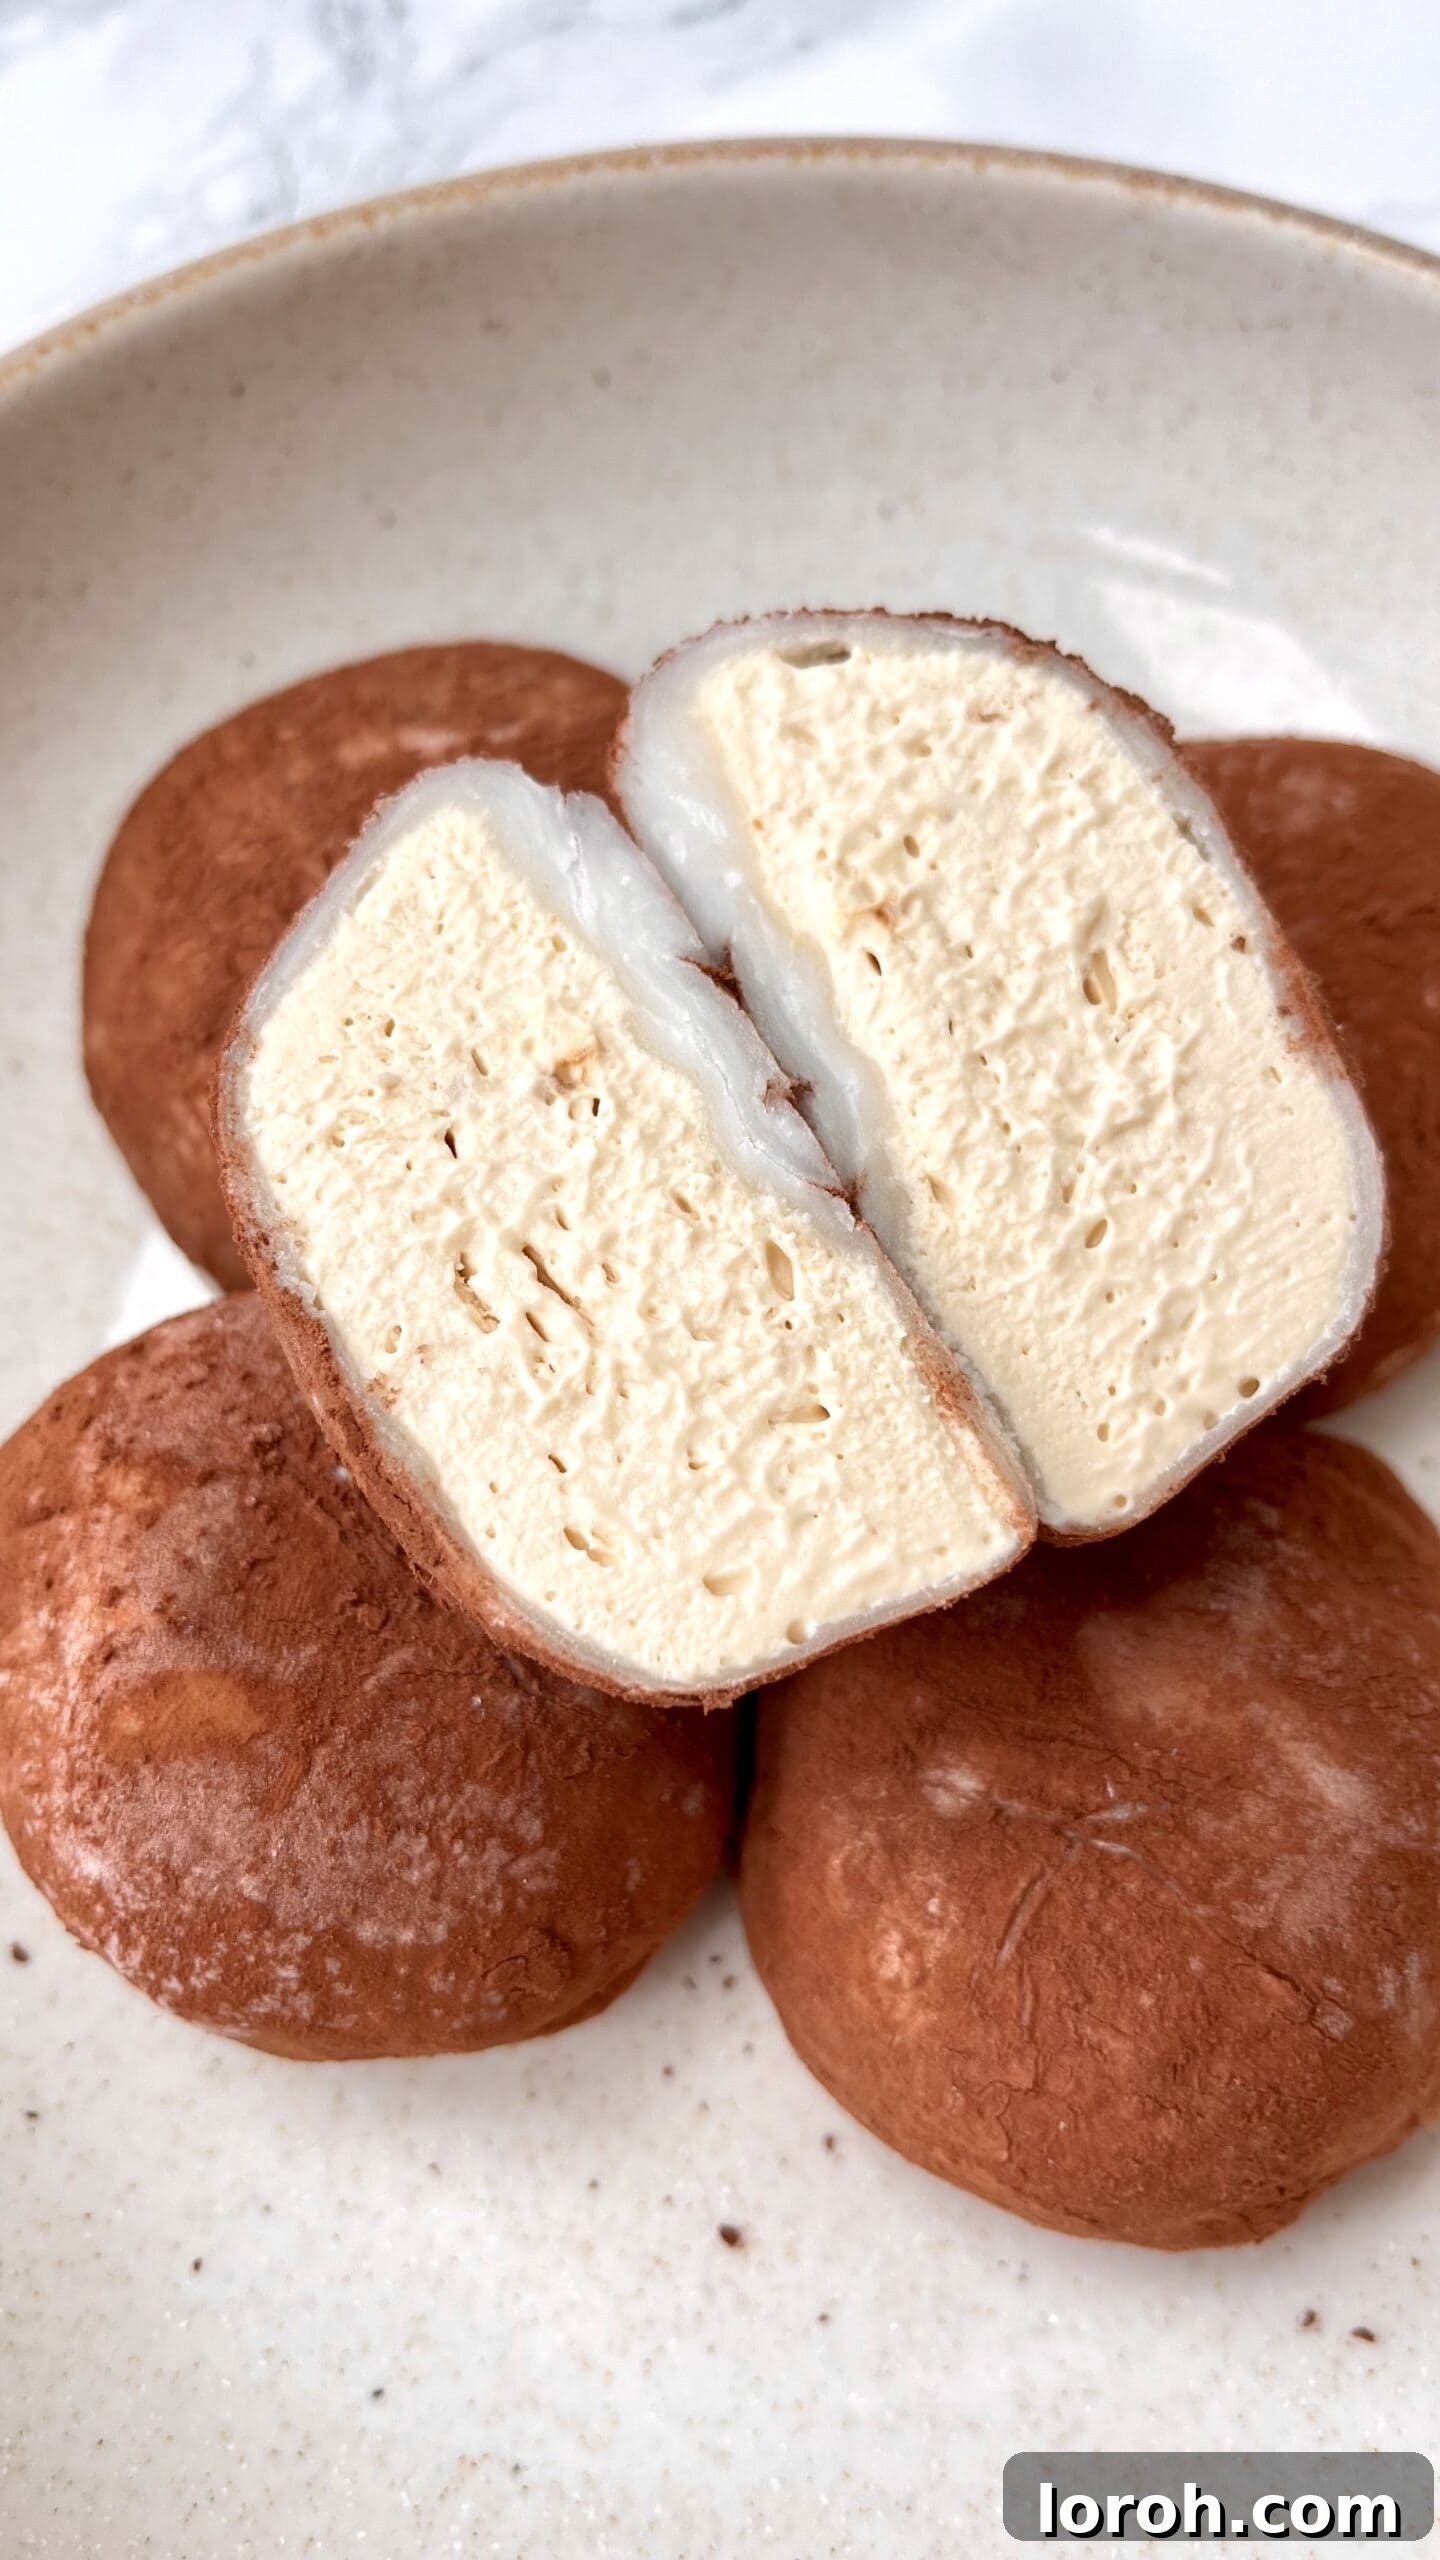
While mochi can be crafted in countless delicious forms and flavors, our current obsession centers around these Tiramisu-inspired ice cream mochi. The harmonious marriage of coffee and chocolate creates a sophisticated flavor profile that truly captures the essence of a classic tiramisu, but in a fun, bite-sized format. And the best part? The homemade no-churn ice cream is a dream to prepare, and the mochi dough comes together with simple ingredients you can easily find. Let’s dive into making these irresistible treats!
Table of Contents
- Why You’ll Adore This Tiramisu Mochi Recipe
- Essential Ingredients for Perfect Mochi
- Substitutions & Creative Variations
- Step-by-Step Guide: Crafting Your Mochi Bites
- Expert Cooking Tips for Mochi Success
- Frequently Asked Questions (FAQ)
- More Tiramisu & Dessert Recipes You’ll Love
- Tiramisu Ice Cream Mochi Bites Recipe Card
Why You’ll Adore This Tiramisu Mochi Recipe
If you’re looking for a dessert that combines unique textures, sophisticated flavors, and surprising simplicity, these Tiramisu Ice Cream Mochi Bites are precisely what you need. Here’s why they’re destined to become a staple in your freezer:
- Effortlessly Simple to Master: Don’t let the unique appearance of mochi intimidate you! The frozen ice cream core makes handling the mochi dough incredibly easy. Unlike traditional mochi, which can be tricky to shape, the firm frozen ice cream balls provide a stable base, making the wrapping process nearly foolproof. This recipe is perfect for beginners and seasoned bakers alike.
- Irresistible Flavor Fusion: The combination of rich coffee and indulgent chocolate creates a classic tiramisu profile that’s both comforting and exciting. Each bite delivers a sophisticated dance of flavors – the bittersweet cocoa, the aromatic coffee, and the sweet, creamy ice cream. It’s a harmonious blend that satisfies the deepest dessert cravings without being overly heavy.
- Delightful Texture Contrast: Prepare your palate for an extraordinary sensory experience! The delicate chewiness of the mochi dough perfectly complements the soft, melting consistency of the homemade ice cream. This unique interplay of textures sets mochi bites apart from any other dessert, offering a truly memorable culinary adventure.
- The Perfect Bite-Sized Indulgence: These aren’t just desserts; they’re perfectly portioned treats. Their small size makes them ideal for a light, sweet finish after dinner, a refreshing afternoon snack, or a sophisticated addition to a dessert platter. They offer just enough sweetness to satisfy without leaving you feeling overly full or guilty.
- A Crowd-Pleaser for Any Occasion: Whether you’re hosting a lavish dinner party or simply enjoying a quiet evening at home, these mochi bites are guaranteed to impress. Their unique charm and delicious taste make them a fantastic conversation starter and a memorable dessert that guests will rave about. Plus, they can be made ahead of time, freeing you up to enjoy your event!

Essential Ingredients for Perfect Mochi
Crafting these Tiramisu Ice Cream Mochi Bites requires a handful of key ingredients, each playing a crucial role in achieving the perfect flavor and texture. Pay attention to the quality and type of each component for the best results.
For precise measurements and the complete recipe, please refer to the detailed recipe card at the end of this article.
For the Creamy No-Churn Ice Cream:
Sweetened Condensed Milk: This ingredient is the secret to our incredibly creamy, no-churn ice cream base. Brands like Carnation are widely available and reliable. Its high sugar content is essential because it lowers the freezing point, preventing the ice cream from becoming rock-solid and icy. This ensures a beautifully soft and scoopable texture straight from the freezer.
Double Cream (Heavy Cream): Also known as heavy cream in North America, this ingredient is whipped to create a light and airy base for the ice cream. When combined with condensed milk, it forms a rich, smooth, and stable ice cream without the need for an ice cream maker. Ensure your cream is very cold for optimal whipping results.
Instant Coffee Powder: To infuse our ice cream with that characteristic tiramisu coffee flavor, instant coffee powder is your go-to. It dissolves completely, ensuring a smooth ice cream base free of grittiness. Avoid using coffee grounds, as they will not dissolve and will leave an unpleasant texture. Choose a good quality instant coffee for a more pronounced and authentic flavor.
Vanilla Extract: A touch of vanilla extract rounds out the flavors, adding warmth and depth to the coffee and chocolate notes. Opt for pure vanilla extract for the best taste.
For the Chewy Mochi Dough:
Glutinous Rice Flour (Mochiko): This is arguably the most critical ingredient for the mochi dough. Despite its name, “glutinous” refers to the sticky, chewy texture it creates, not to gluten content (it’s naturally gluten-free!). It’s made from short-grain sweet rice that has been finely milled. You can often find it in Asian supermarkets, specialty stores, or conveniently purchase it online (e.g., on Amazon). Do not substitute with regular all-purpose flour or even regular rice flour, as they lack the starch necessary to achieve the unique chewy, stretchy consistency of mochi.
Caster Sugar: Fine granulated sugar, or caster sugar, is used to sweeten the mochi dough and contribute to its pliable texture. It dissolves easily, resulting in a smooth dough.
Water: Plain tap water is all you need to hydrate the dough. The amount is crucial for achieving the correct consistency.
Cornstarch (for dusting): This is your best friend when working with sticky mochi dough. Generously dusting your work surface, hands, and the dough itself with cornstarch prevents sticking and makes the dough much easier to handle and shape around the ice cream.
Cocoa Powder (for rolling): A final dusting of cocoa powder after assembly gives these mochi bites their classic tiramisu finish, adding a beautiful color and a hint of bittersweet chocolate flavor. Ensure you use unsweetened cocoa powder.
Substitutions & Creative Variations
While the Tiramisu Ice Cream Mochi Bites are undeniably delicious, part of the fun of homemade desserts is the ability to customize them. Here are some exciting ideas for substitutions and variations to inspire your culinary creativity:
Mochi Bites Flavor Ideas:
- Classic Vanilla: For a simpler, yet equally delightful experience, omit the coffee and cocoa powder. Instead, enhance the ice cream with a good quality vanilla bean paste or extra vanilla extract. Dust the finished mochi with powdered sugar for an elegant touch.
- Zesty Lemon: Add a refreshing twist by incorporating a dash of lemon extract or finely grated lemon zest into the ice cream base. This bright, citrusy flavor pairs beautifully with the chewy mochi. If using lemon, consider dusting with powdered sugar instead of cocoa.
- Vibrant Matcha: For a popular Japanese flavor, dissolve a tablespoon or two of ceremonial-grade matcha powder into a small amount of warm milk or water before incorporating it into the ice cream. Matcha mochi is a delightful treat, and you can even add matcha powder to the mochi dough for a greener, more intense flavor.
- Fruity Delights: Substitute the coffee powder with fruit purees (like strawberry, mango, or raspberry) or fruit extracts. Ensure the puree isn’t too watery, or it may affect the ice cream’s consistency. These often pair wonderfully with a dusting of powdered sugar.
- Nutty Indulgence: Swirl in some finely crushed pistachios, almonds, or hazelnuts into the ice cream base. A hint of almond extract could also be added for a marzipan-like flavor.
- Chocolate Lover’s Dream: For an extra chocolatey treat, you could add some chocolate chips or finely chopped chocolate to the ice cream, or even melt chocolate and drizzle it over the finished mochi bites before freezing.
- Seasonal Flavors: Think pumpkin spice in autumn, peppermint in winter, or coconut and lime in summer. The possibilities are endless!
Ice Cream Hacks:
Store-Bought Ice Cream: If you’re short on time or prefer a specific flavor, you can absolutely use pre-made ice cream from the supermarket. Simply soften your chosen ice cream slightly (just enough to work with), scoop it into golf-ball-sized portions, reshape them, and re-freeze until firm. Once solid, proceed with the mochi dough recipe as written and mold the dough around your frozen ice cream balls. This significantly speeds up the process and opens up a world of flavor combinations from your local grocery store!
Dairy-Free Options: For a dairy-free version, use a full-fat coconut cream (chilled, only the thick cream part) for the no-churn ice cream base and a dairy-free sweetened condensed milk alternative. Ensure your mochi dough ingredients are naturally dairy-free (which they usually are).
Topping & Garnish Ideas:
- Beyond cocoa powder, consider dusting with powdered sugar, cinnamon, or even finely crushed nuts.
- A light drizzle of chocolate sauce or caramel can elevate the presentation and flavor.
- Serve with a side of fresh berries for a refreshing contrast.
Step-by-Step Guide: Crafting Your Mochi Bites
This visual, step-by-step guide will walk you through the process, ensuring you achieve perfect Tiramisu Ice Cream Mochi Bites. For full ingredient quantities and precise instructions, please consult the recipe card below.
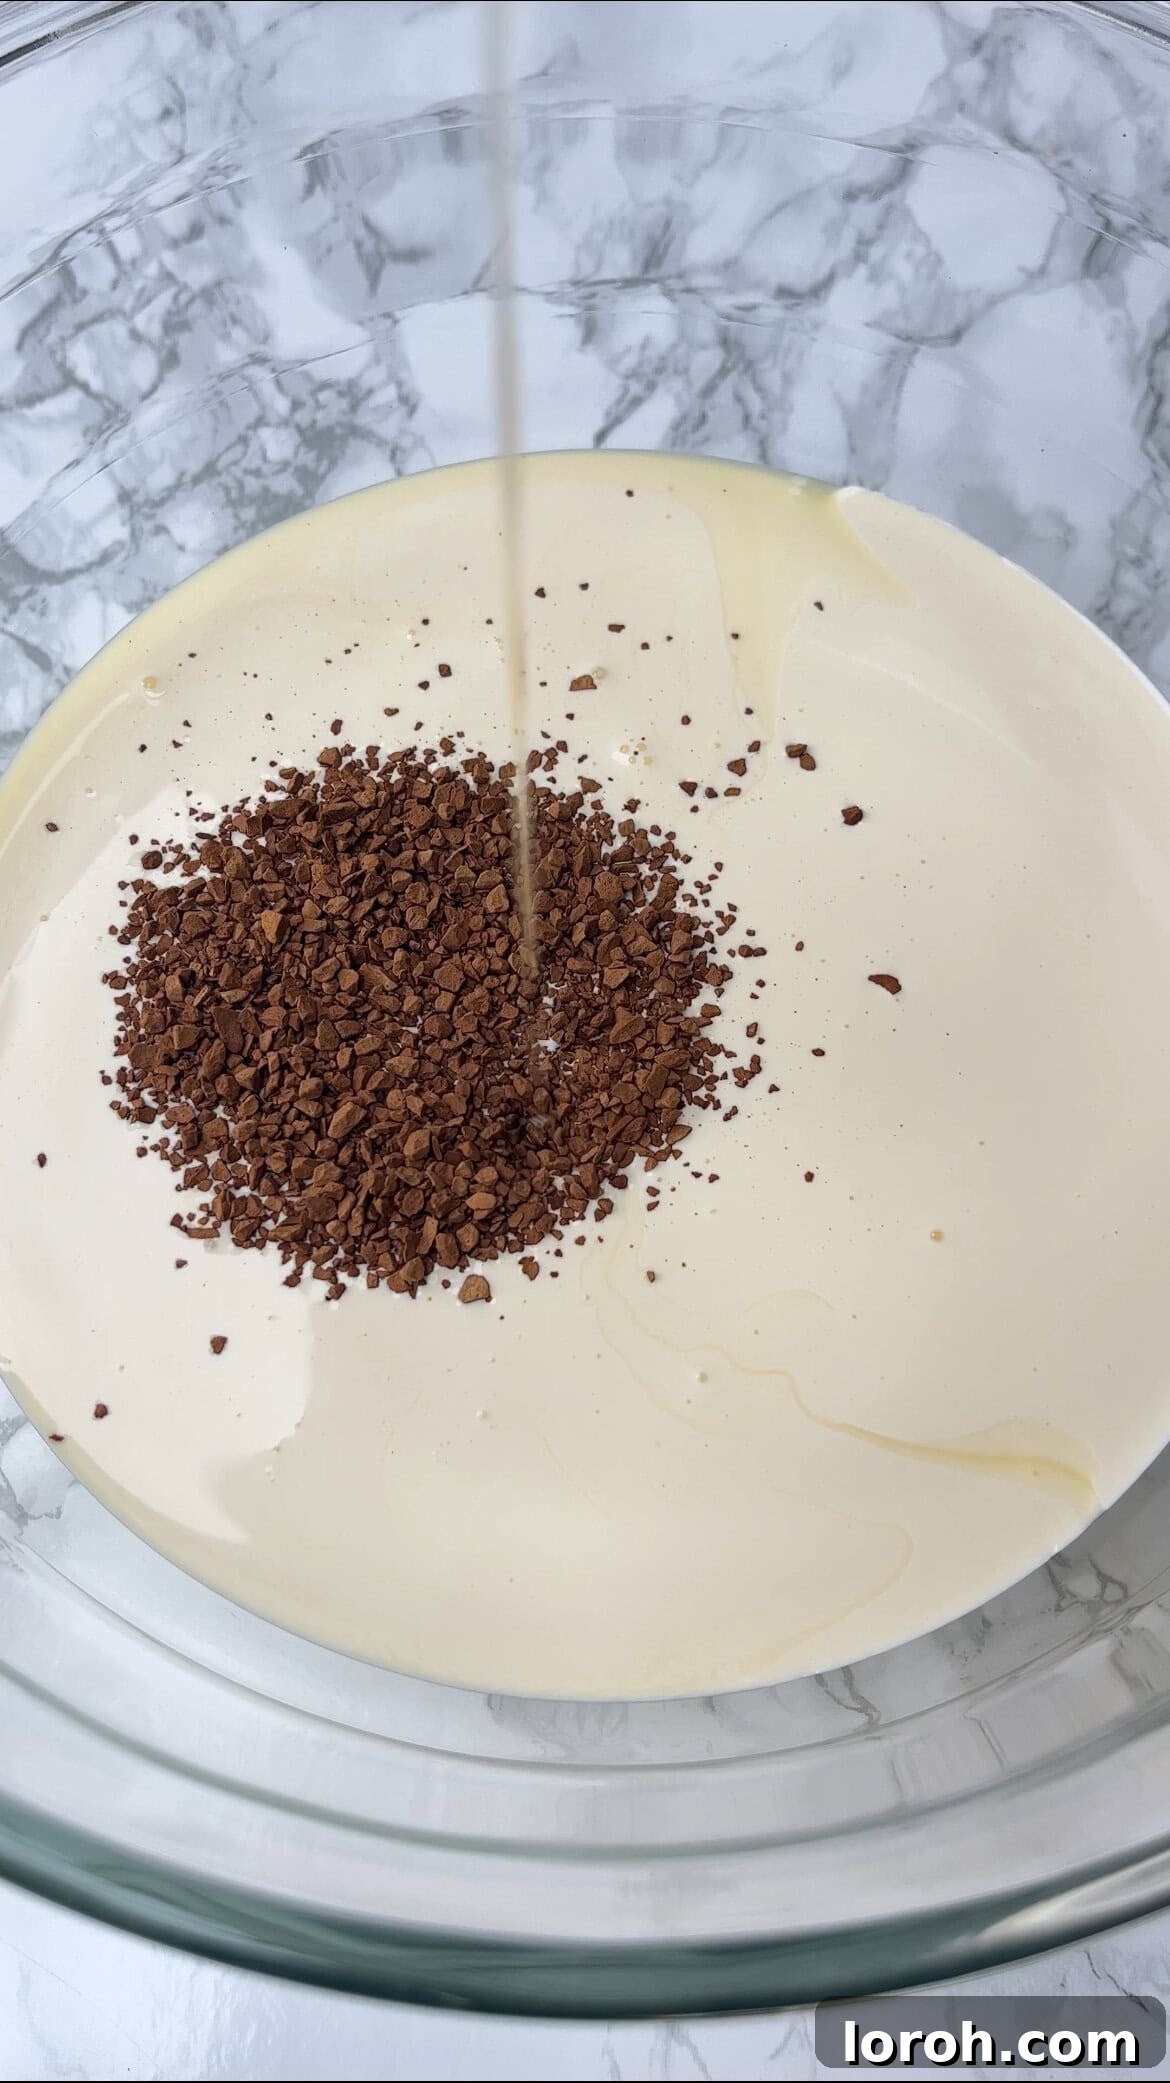
STEP ONE: Prepare the Ice Cream Base
In a large mixing bowl, combine the condensed milk, cold double cream, instant coffee powder, and vanilla extract. Ensure your cream is well-chilled for optimal whipping. This mixture forms the base of your rich, no-churn tiramisu ice cream.
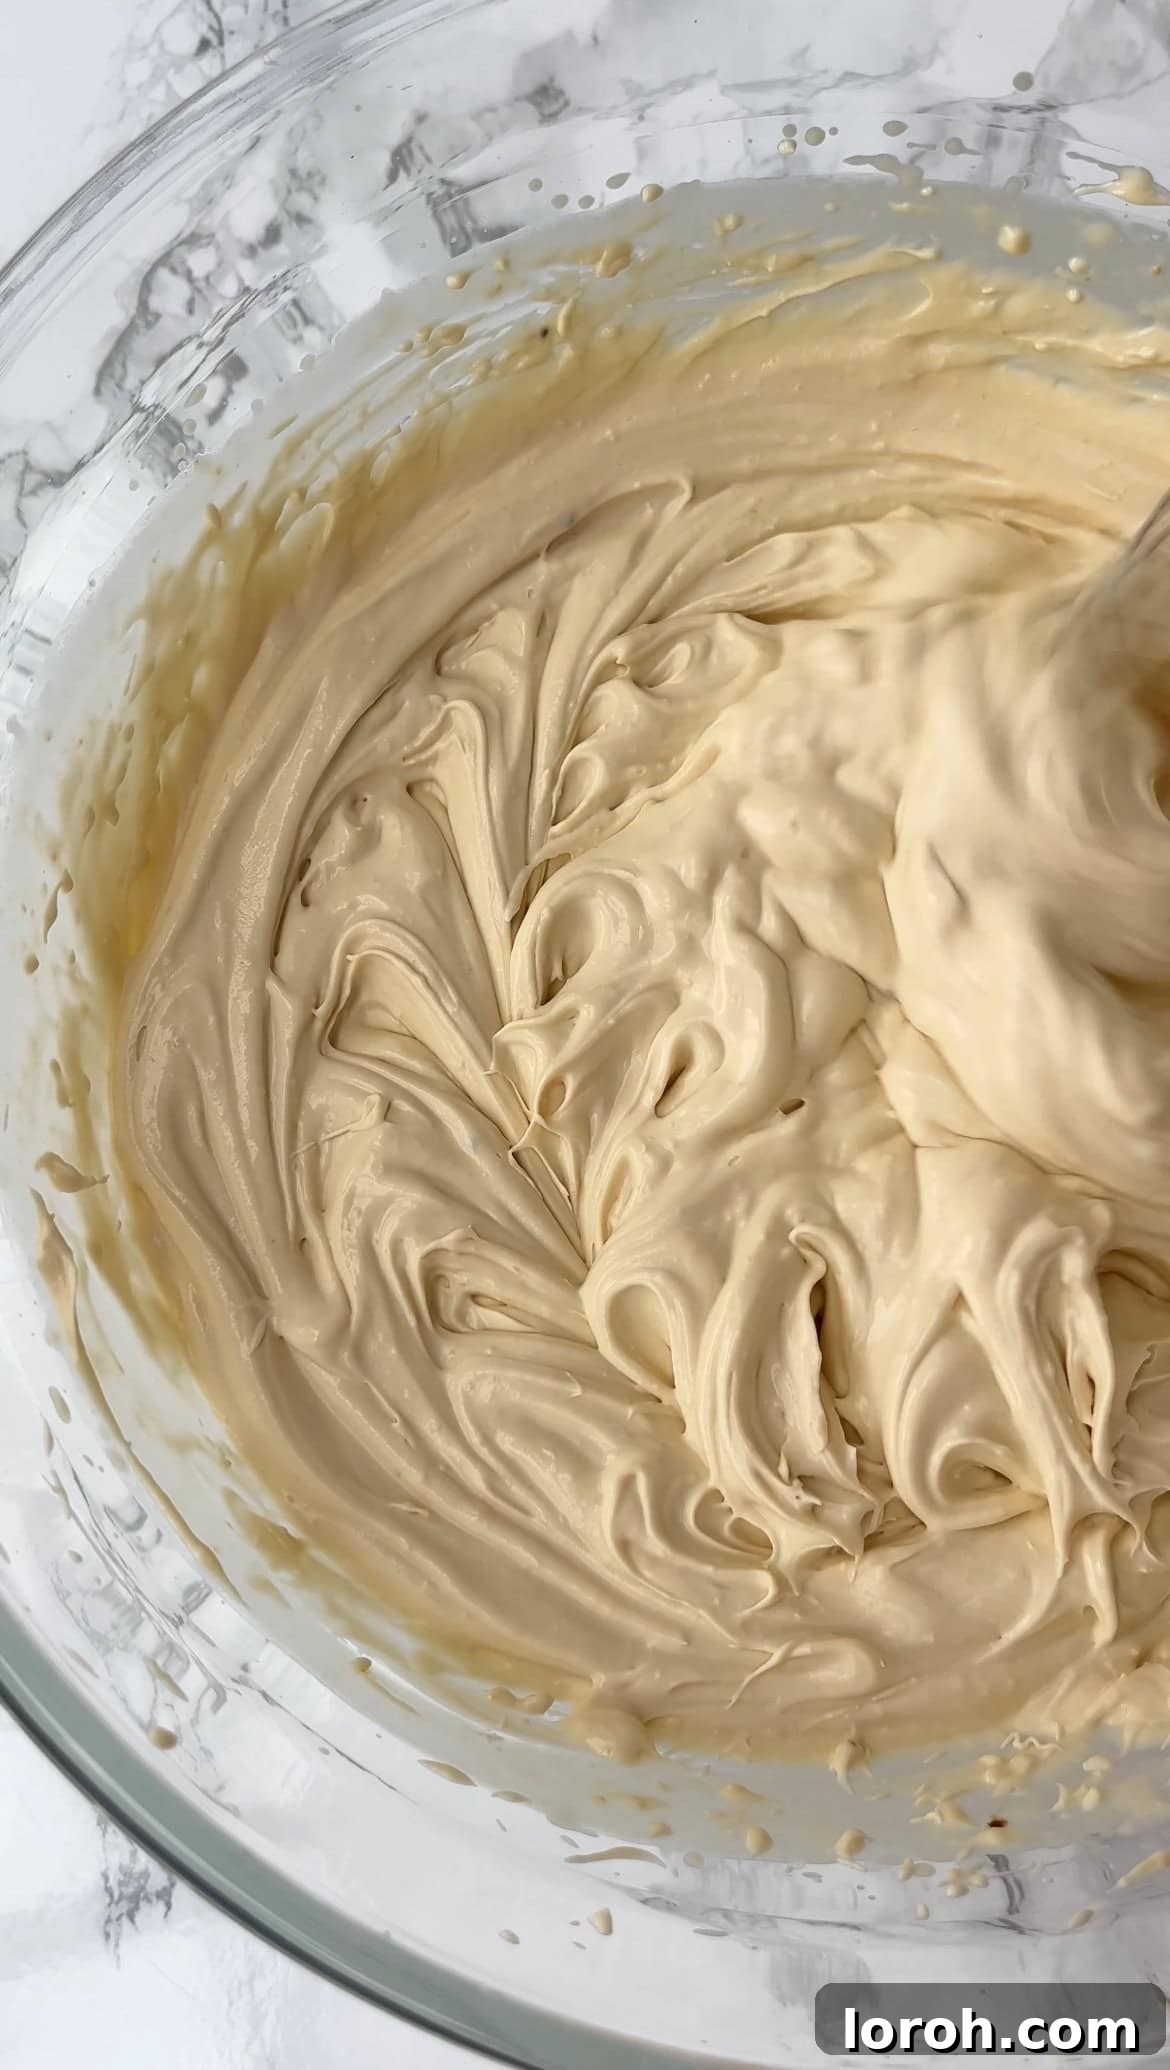
STEP TWO: Whip Until Thick
Using an electric whisk (or a stand mixer with a whisk attachment), beat all the ingredients together on medium-high speed. Continue whisking until the mixture becomes thick, stiff, and holds soft peaks. The consistency should resemble a fluffy mousse. Be careful not to over-whisk, as this can curdle the cream.
STEP THREE: Freeze Ice Cream Balls
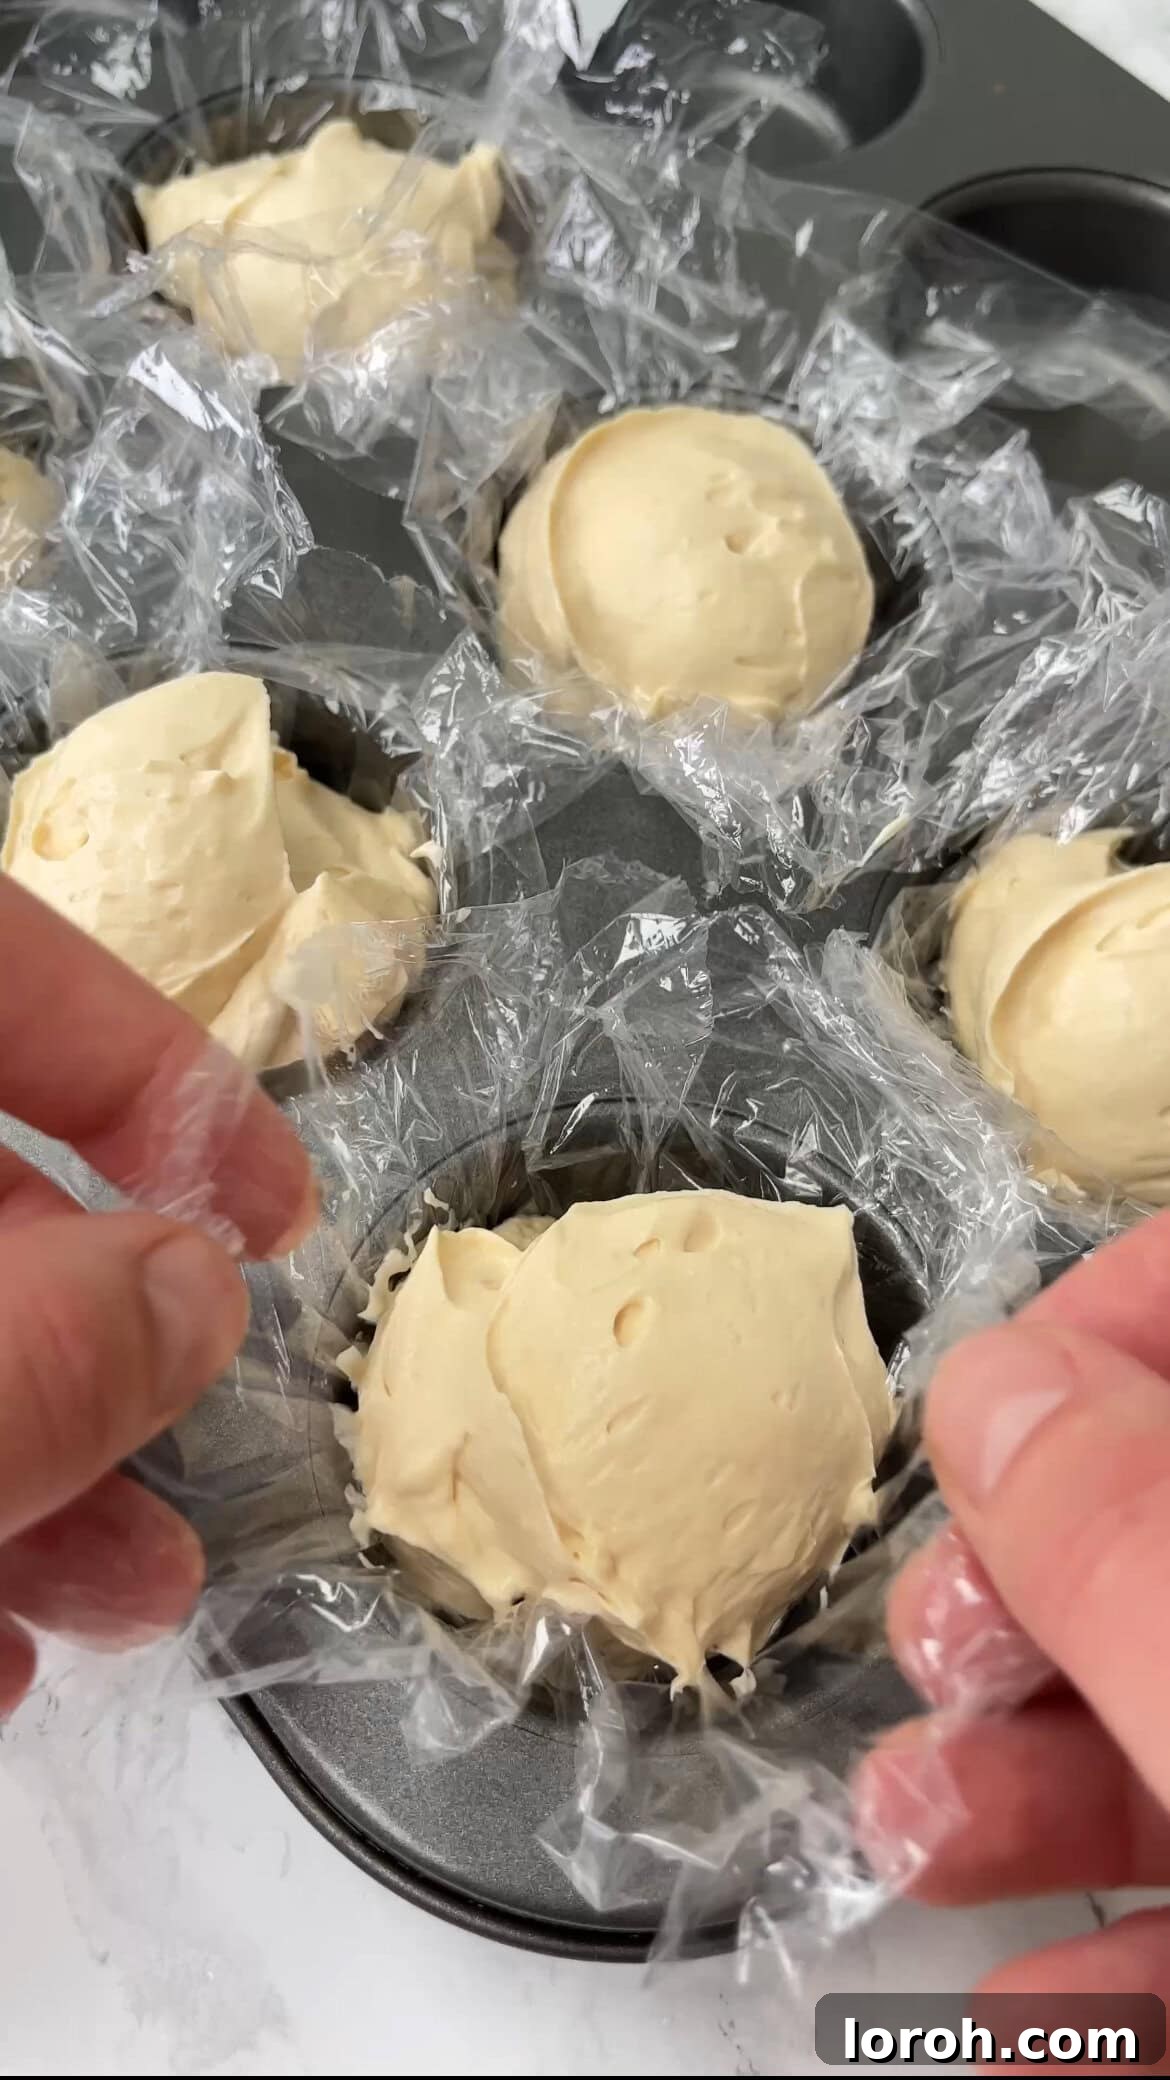
Using an ice cream scoop (or two spoons), carefully scoop dollops of the whipped ice cream mixture onto a parchment-lined baking tray. Alternatively, you can use a muffin tin lined with cling film or cupcake cases for uniform shaping. Aim for balls approximately the size of a golf ball. Repeat until you have 8 small balls. Place the tray in the freezer for 3-4 hours, or until the ice cream balls are completely firm and solid. This step is crucial for easy handling later.
STEP FOUR: Begin Mochi Dough Preparation
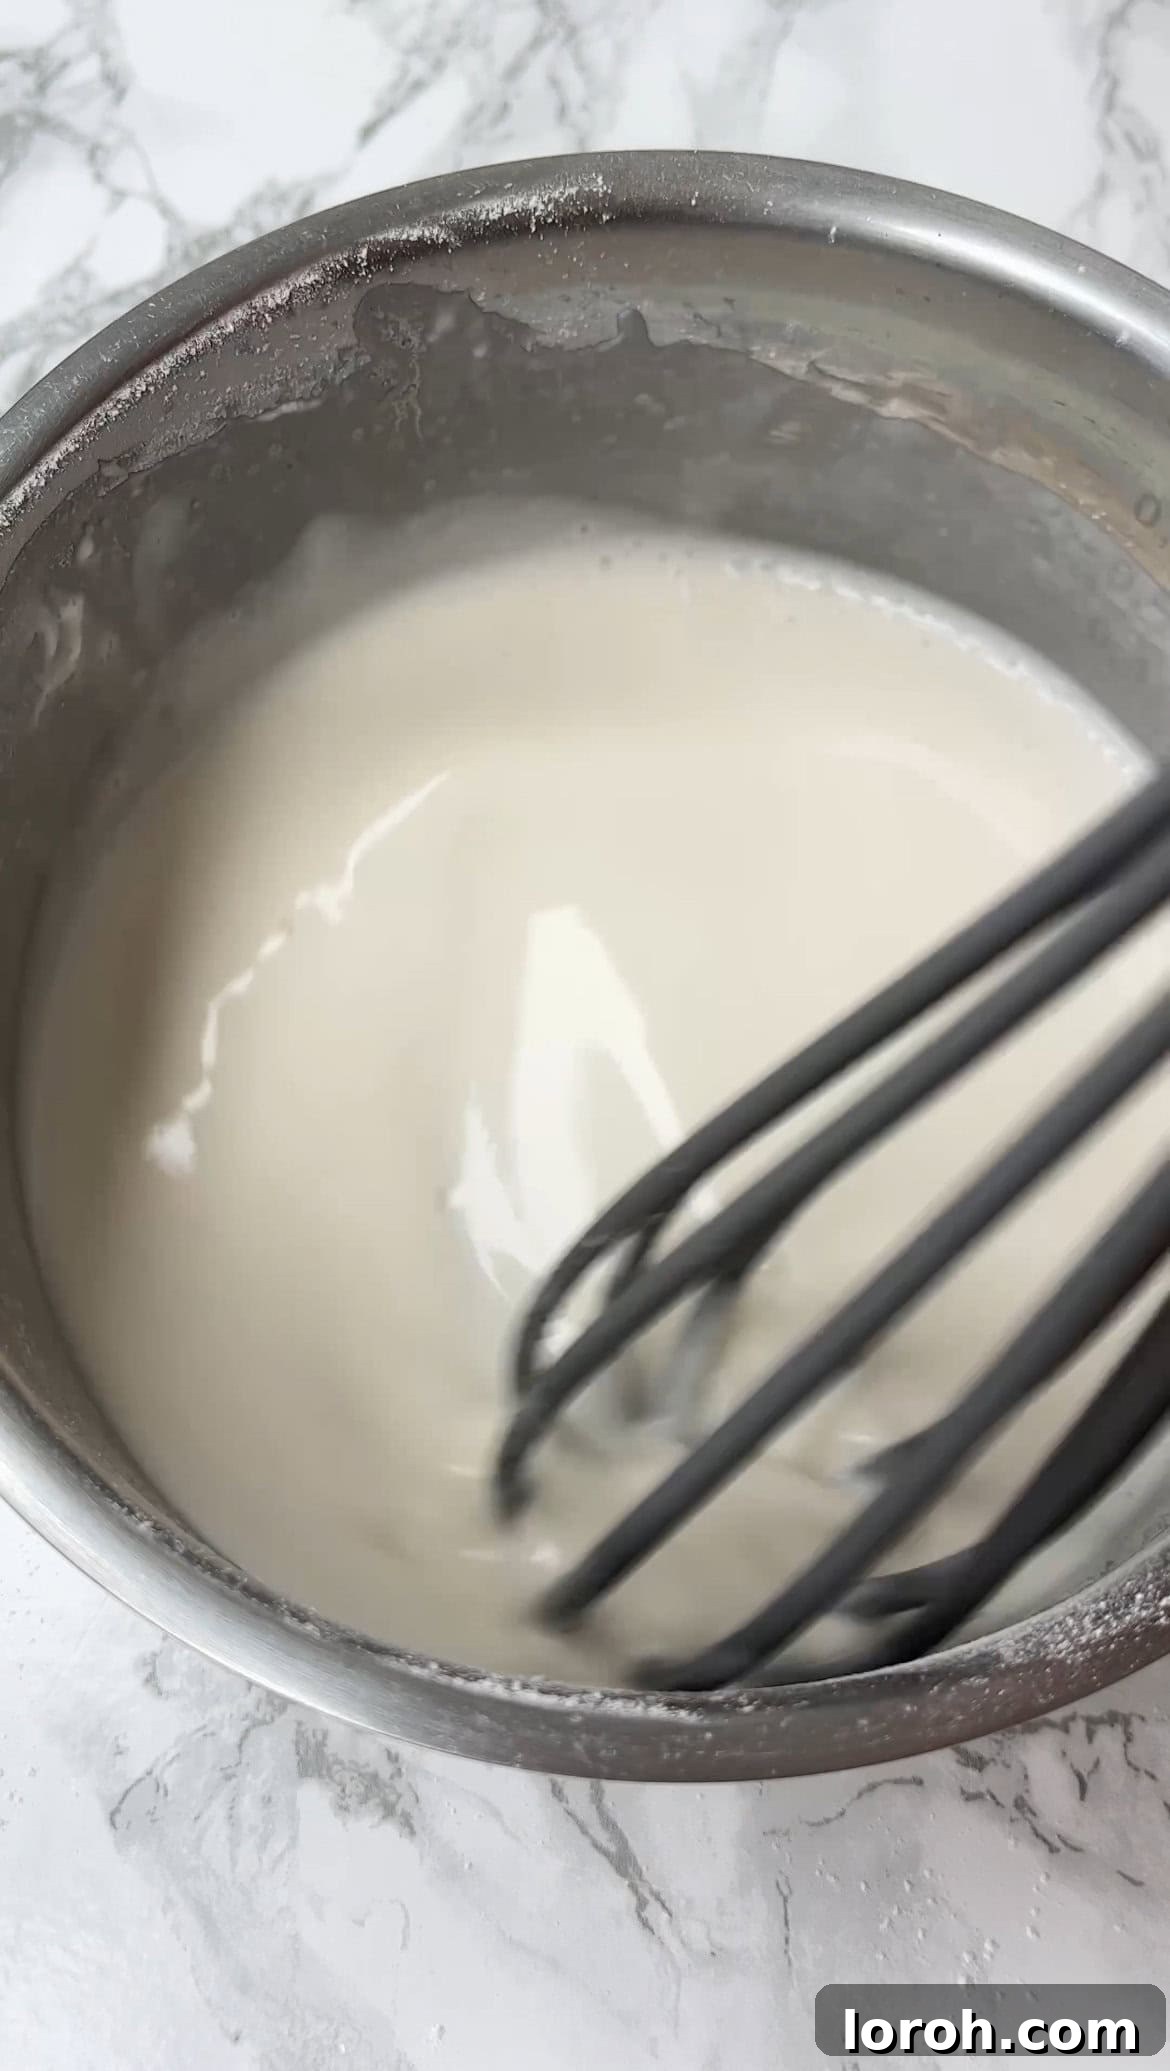
In a separate bowl, thoroughly mix the glutinous rice flour and caster sugar. Set aside. Next, pour 100ml of water into a saucepan and place it over high heat. Once the water begins to warm, add the dry flour and sugar mixture to the saucepan. Stir immediately and continuously to combine. At this stage, the mixture will appear quite runny and watery, but don’t worry – this is normal!
STEP FIVE: Cook the Mochi Dough
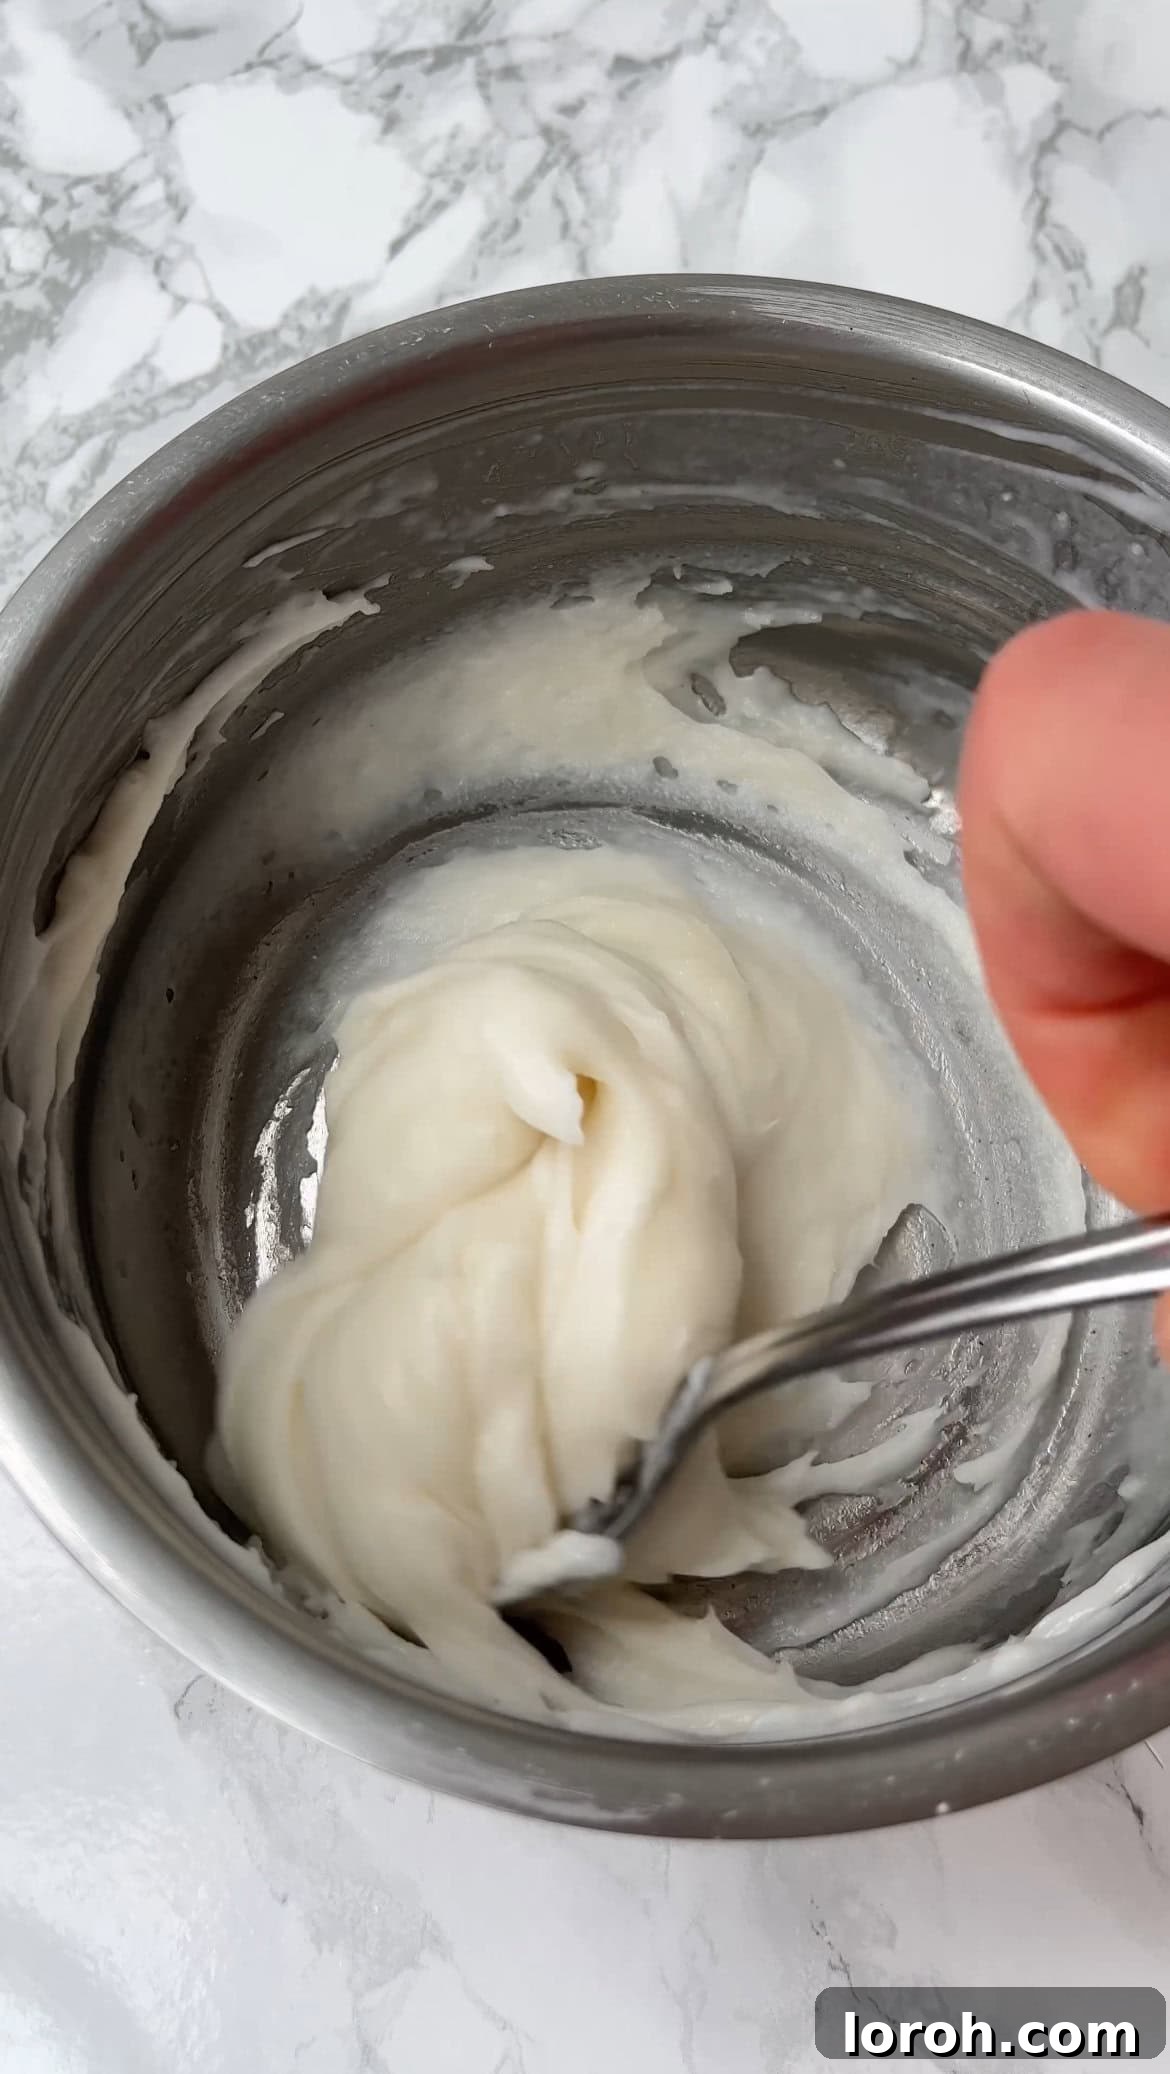
Continue stirring the mixture constantly. Initially, lumps may form, but resist the urge to panic; they will smooth out with consistent stirring. As the mixture heats, it will gradually thicken and come together into a single, cohesive mass. Once this happens, reduce the heat to medium and continue to push and fold the dough around the pan with your wooden spoon or spatula. If it seems too dry or stiff, add a tiny splash more water (about half a teaspoon at a time). Keep stirring and working the dough until it becomes somewhat translucent, very sticky, and slightly firm to the touch. This cooking process is crucial for developing the characteristic chewy texture and ensuring the starch is fully cooked.
STEP SIX: Prepare the Mochi Wrappers
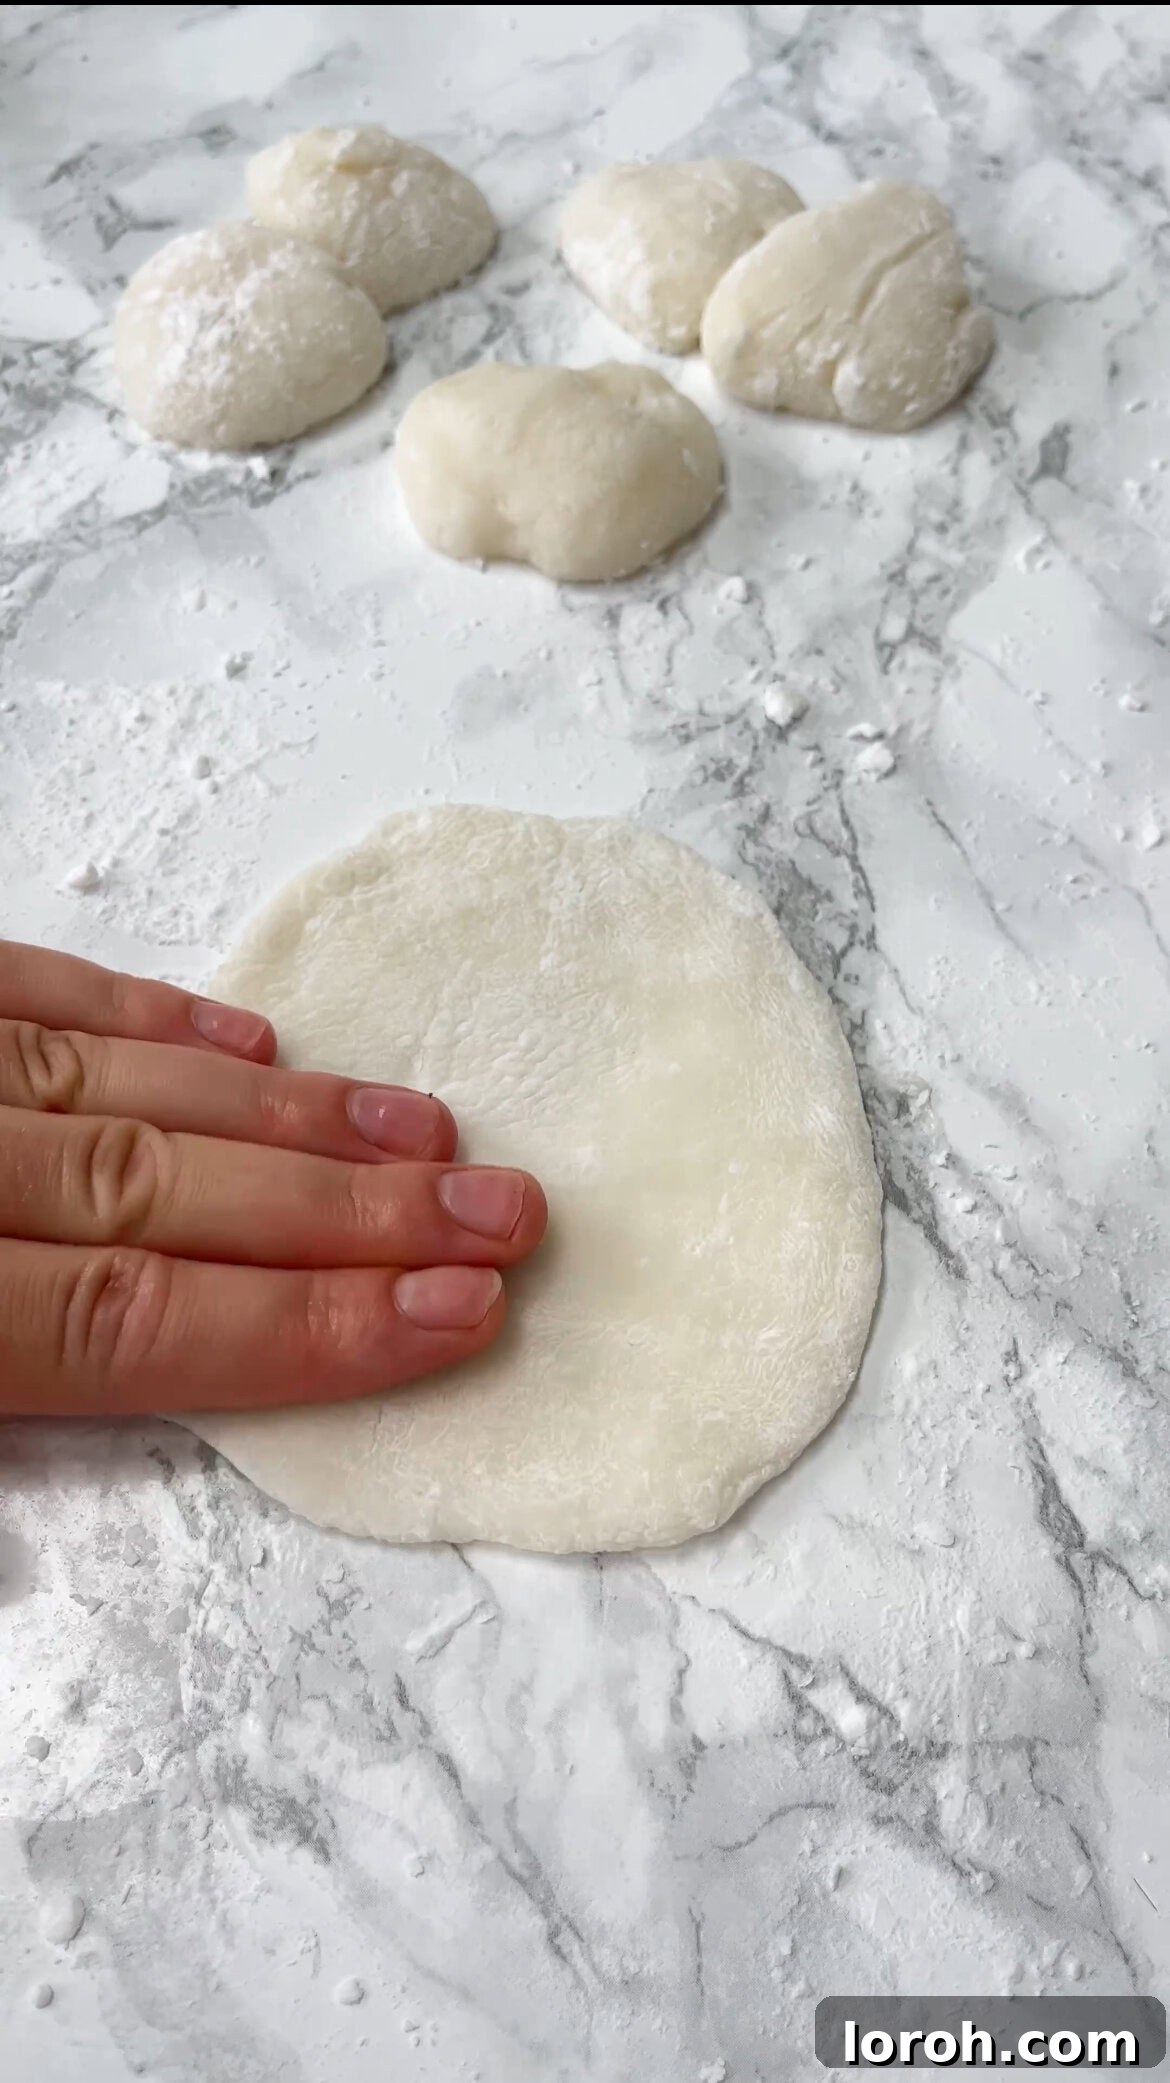
Generously dust your clean work surface (a cutting board or silicone mat works well) with cornstarch. Carefully transfer the hot mochi dough from the pan onto the prepared surface using a wooden spoon or silicone spatula. Be extremely cautious, as the dough will be VERY sticky and incredibly hot. Allow it to cool down to room temperature before attempting to handle it with your hands. Once cooled enough to touch, sprinkle a little more cornstarch over the dough and onto your hands. Divide the dough into 8 equal pieces. Flatten each piece with your hand into a circular disc, aiming for a thin, even thickness.
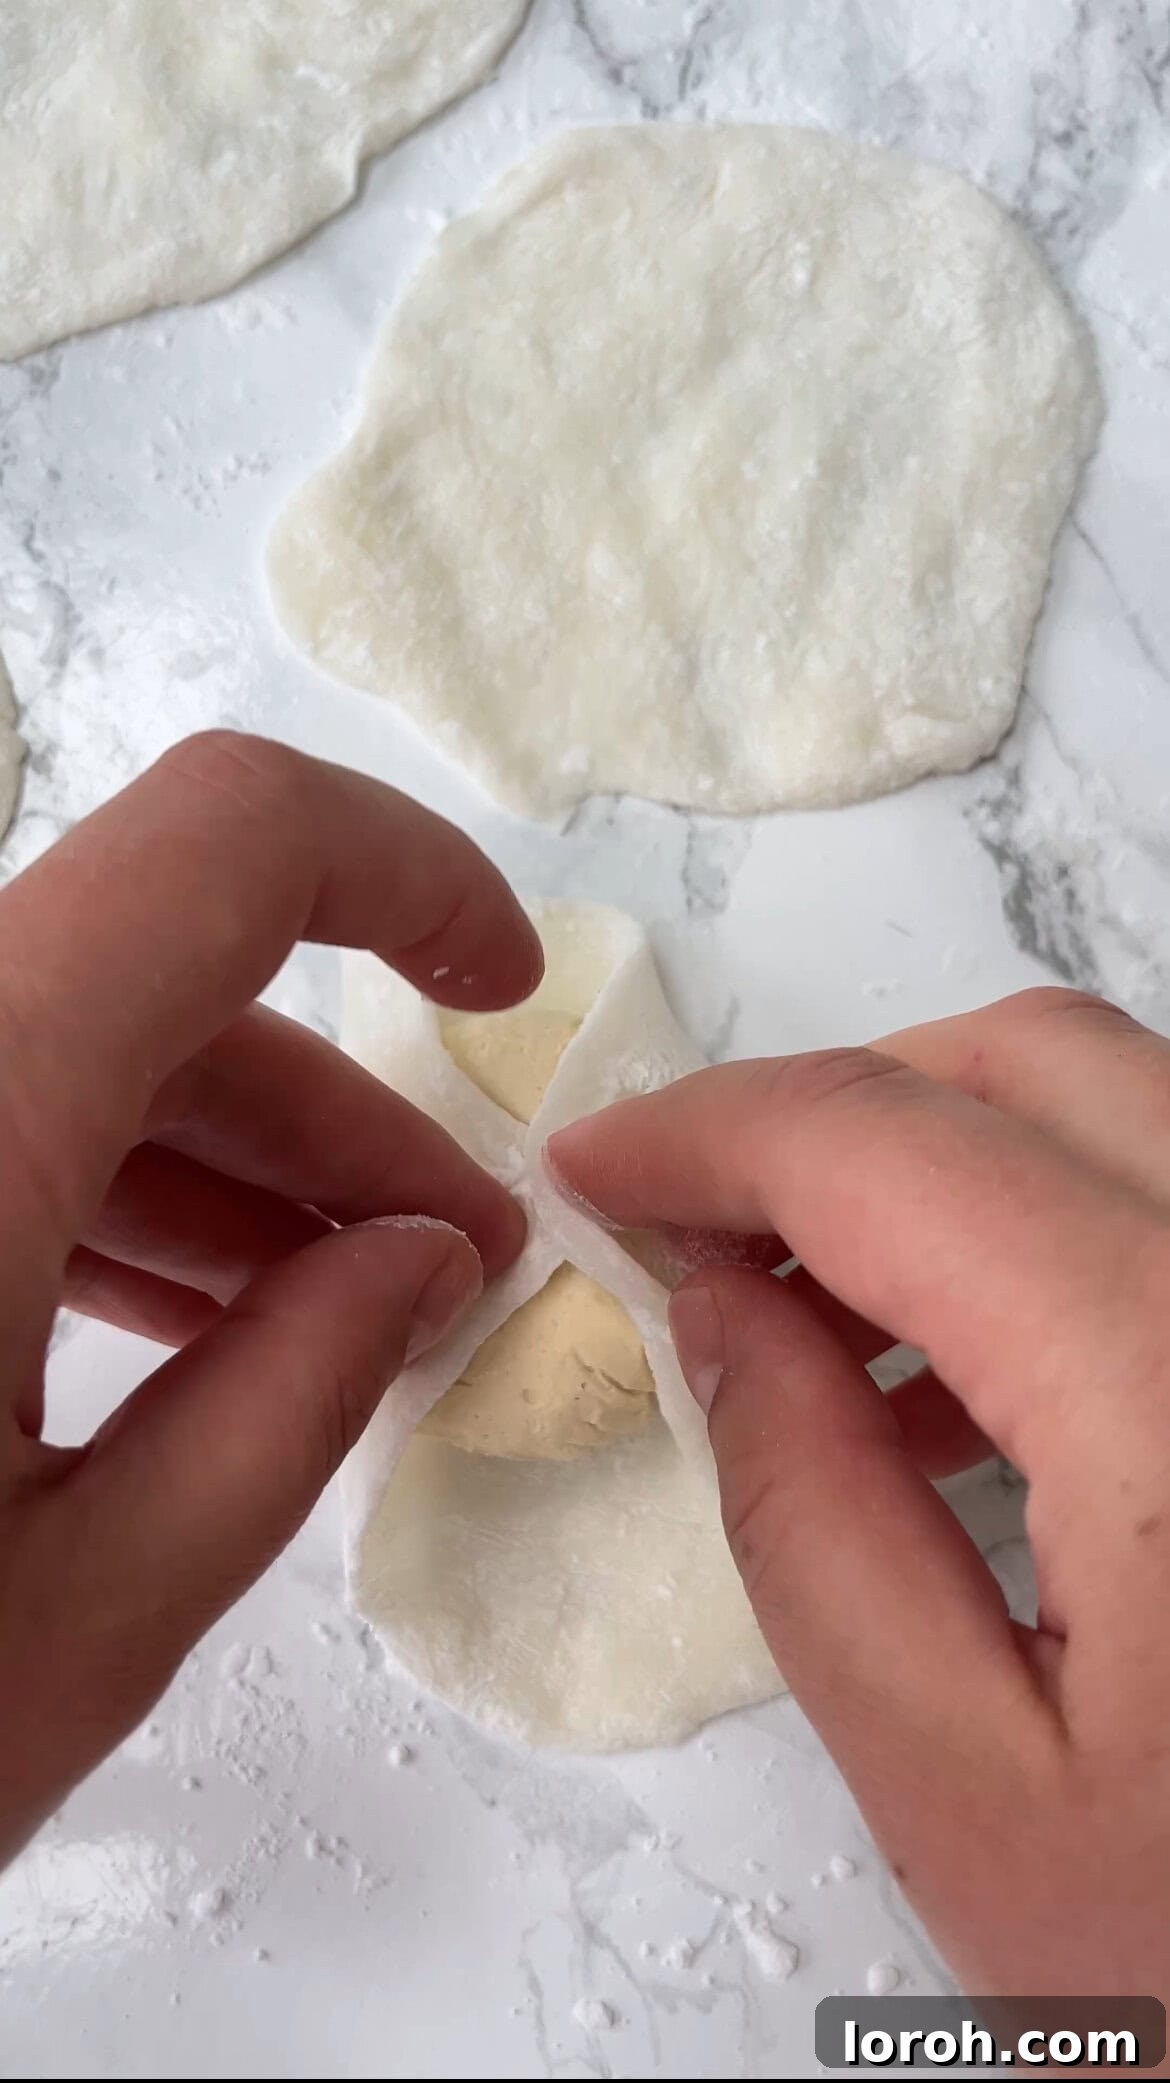
STEP SEVEN: Assemble Your Mochi Bites
Working quickly, retrieve one frozen ice cream ball from the freezer. Place it in the center of one flattened mochi dough disc. Gently but firmly bring the edges of the mochi dough up and around the ice cream ball, carefully pinching and sealing them closed at the top. Use your fingers to gently shape the wrapped mochi into a smooth, round ball. Ensure there are no visible seams or holes where the ice cream could leak out. If the dough gets too sticky, lightly dust your fingers with more cornstarch.
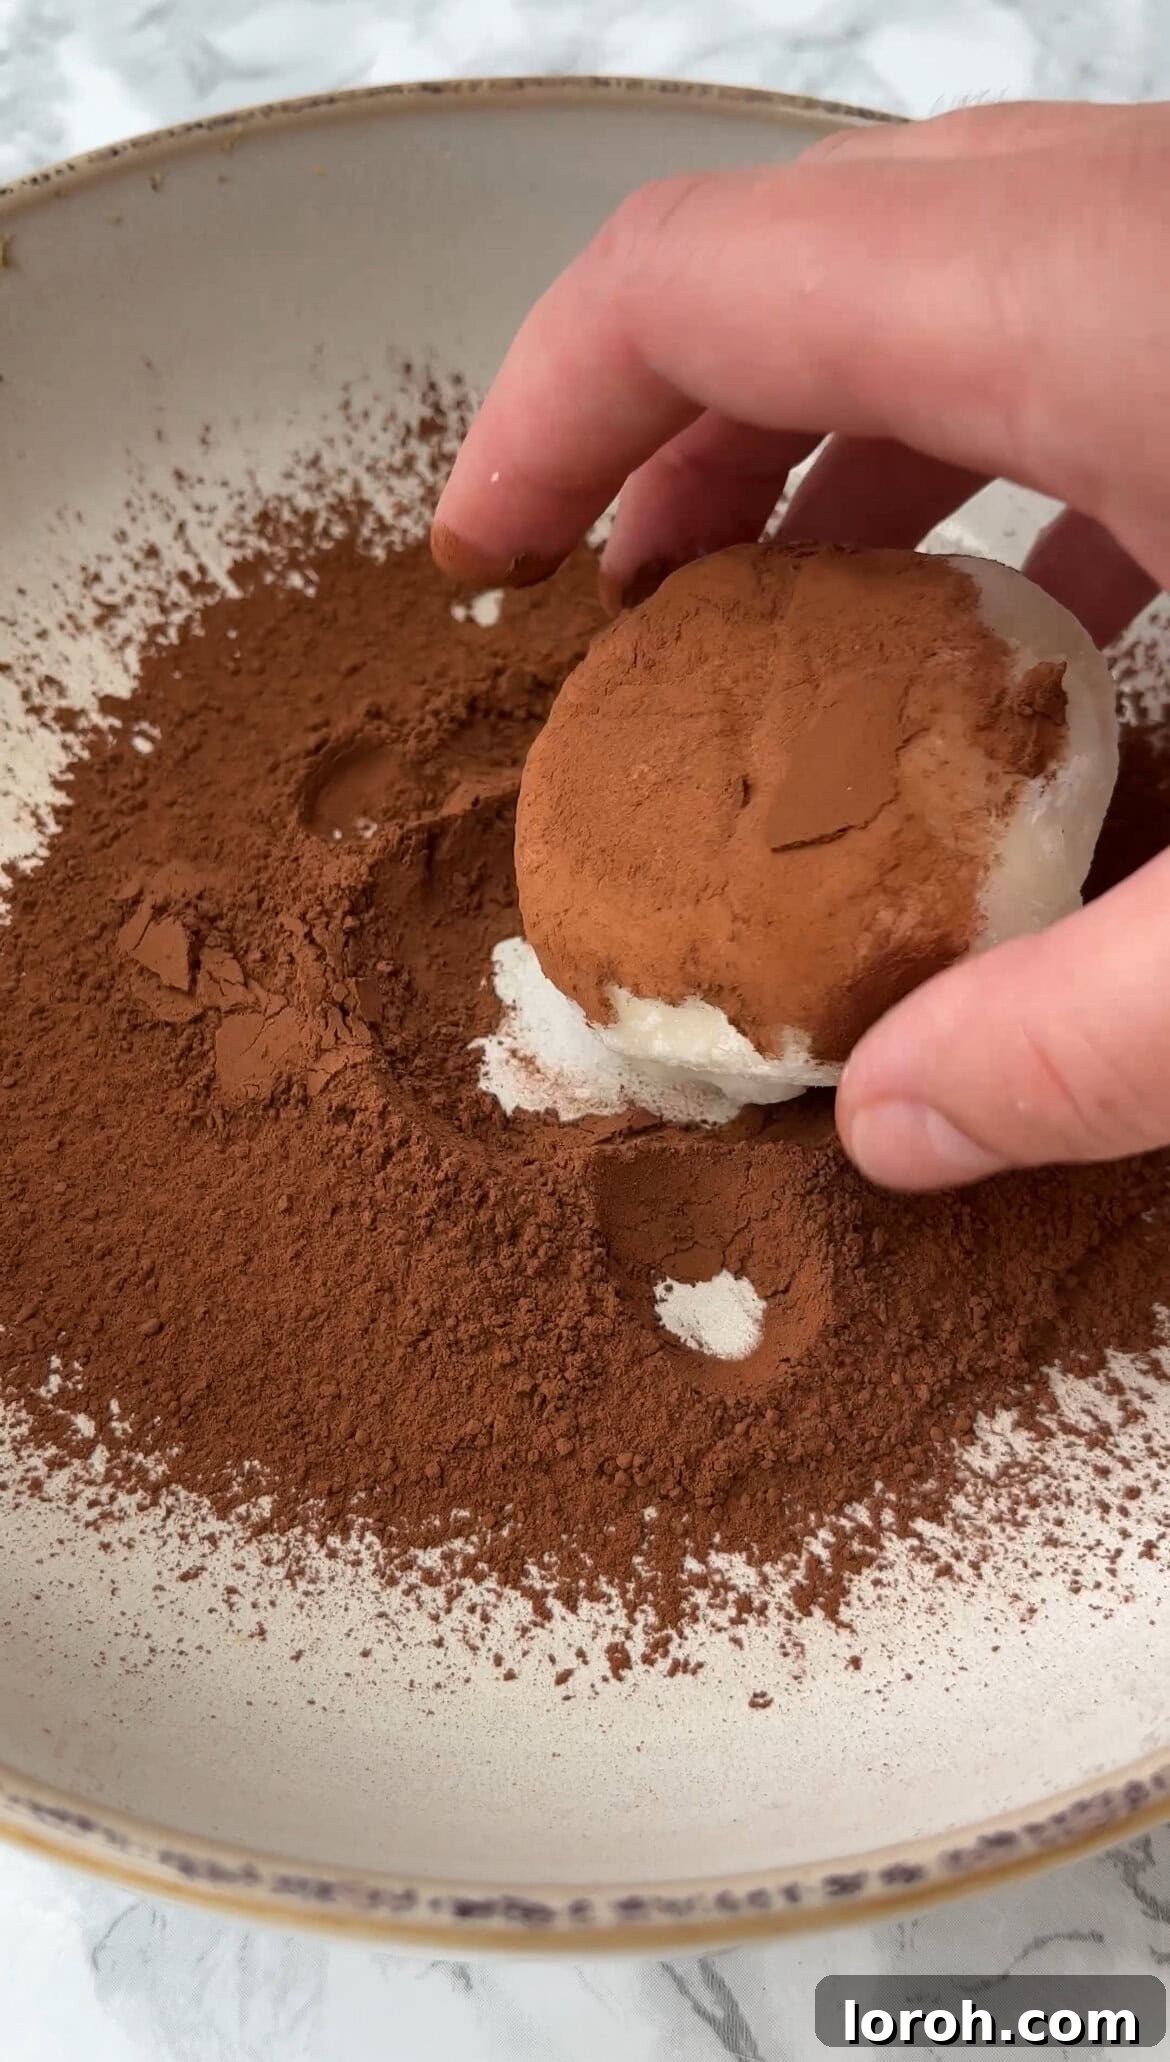
STEP EIGHT: Dust and Freeze
Once each mochi bite is perfectly sealed, gently roll it in a shallow dish of cocoa powder, ensuring it’s evenly coated. This adds the final touch of tiramisu flavor and a beautiful finish. Place the finished mochi bites back onto a parchment-lined tray or airtight container. Return them to the freezer for another 3-4 hours to firm up completely. Once frozen, they can be stored in an airtight container for enjoyment whenever a craving strikes!
Expert Cooking Tips for Mochi Success
Making mochi might seem daunting at first, but with a few insider tips, you’ll be crafting perfect, chewy bites like a pro. These pointers will help you navigate common challenges and ensure a delicious outcome every time:
- Embrace the Cornstarch: Cornflour (or cornstarch) is your absolute best friend when working with mochi dough. This dough is naturally very sticky due to the glutinous rice flour, so don’t be shy about dusting your work surface, your hands, and even the dough itself generously. This creates a barrier that prevents sticking and makes the dough much easier to handle, flatten, and wrap. Keep a small bowl of cornstarch nearby for easy access.
- Maintain Cool Hands: When it comes to handling the cooled mochi dough, try to keep your hands as cool as possible. Warm hands can increase the stickiness of the dough, making it harder to work with. If your hands get too warm, take a quick break, rinse them with cold water, and re-dust with cornstarch.
- Patience is Key When Cooking the Dough: The mochi dough cooking process is crucial. It starts watery, becomes lumpy, then smooths out. Don’t stop stirring! Continuously stir the mixture over medium heat. You’re looking for specific visual cues: the dough will transform from a liquid to a thick, translucent, sticky, and slightly firm mass. This transformation can take several minutes. Thoroughly cooking the dough ensures it’s digestible and achieves that iconic chewy texture. Undercooked mochi can be bland and overly sticky.
- Mastering Moisture Control: The consistency of your mochi dough is paramount.
- If your mochi dough is too sticky after cooking: This might indicate slight undercooking or too much moisture. While it’s still warm, you can try incorporating a tiny bit more glutinous rice flour (about half a teaspoon at a time) by kneading it in gently on a cornstarch-dusted surface. However, be careful not to add too much, as this can make it brittle.
- If your mochi dough feels too dry or stiff: This usually means it’s slightly overcooked or needs more hydration. While cooking, if it seems too thick, add a small splash of water (a teaspoon at a time) and continue stirring until it reaches the desired translucent, sticky, and pliable consistency.
- Ensure Ice Cream is Rock Solid: Before you even think about wrapping, make sure your ice cream balls are frozen solid. This firm core makes the mochi wrapping process significantly easier and prevents the ice cream from melting too quickly as you work.
- Work Quickly During Assembly: Once the mochi dough is ready and the ice cream is frozen, assemble the mochi bites relatively quickly. The warmth from your hands can soften the dough, and the frozen ice cream will start to melt. If you find the ice cream softening too much, pop it back into the freezer for a few minutes.
- Optimal Serving Temperature: Mochi bites are best enjoyed after letting them sit at room temperature for about 10-15 minutes after removing them from the freezer. This allows the mochi dough to soften to its ideal chewy consistency and the ice cream to become perfectly creamy, making them easier and more pleasant to bite into.
- Storage: Store your finished mochi bites in an airtight container in the freezer for up to 3 months. Lay them in a single layer or separate layers with parchment paper to prevent sticking.
Frequently Asked Questions (FAQ)
Mochi is a traditional Japanese rice cake made from mochigome, a short-grain glutinous rice. This rice is pounded into a paste and then molded into various shapes. While traditionally eaten fresh or grilled, the concept of ice cream mochi, where a frozen core is enveloped by the chewy dough, has gained immense popularity worldwide, largely thanks to innovations like Little Moons.
No, it is highly recommended that you do not substitute glutinous rice flour (also known as mochiko) for any other type of flour. The unique “glutinous” property of this specific flour is what gives mochi its characteristic stretchy, chewy, and tender texture. Using regular all-purpose flour, plain rice flour, or any other flour will not yield the same results; you’ll likely end up with a strange, dry, or crumbly dough that lacks the essential elasticity of traditional mochi.
Absolutely, yes! Using store-bought ice cream is a fantastic shortcut if you’re short on time or have a particular favorite flavor in mind. Simply scoop the desired ice cream into individual, golf-ball-sized portions. You might need to use your hands (lightly floured with cornstarch, or just cool and slightly damp) to quickly shape them into perfect spheres. Once shaped, re-freeze these ice cream balls until they are completely solid and firm. Then, proceed with the mochi dough preparation and assembly steps as outlined in the recipe.
Mochi dough can become brittle even after being initially sticky if it’s either underhydrated during the cooking process or if too much flour (especially cornstarch) is added after the dough is cooked. The key is balance: ensure the dough is cooked long enough to become translucent and truly pliable with adequate moisture, and then only use enough cornstarch for handling without incorporating excess into the dough itself. Adding too much “dry” flour after cooking can dry out the dough, causing it to lose its elasticity and become brittle once cooled.
Yes, despite the name “glutinous,” glutinous rice flour (mochiko) is naturally gluten-free. The term “glutinous” refers to its sticky, glue-like texture when cooked, not to the presence of dietary gluten. It’s an excellent option for those with gluten sensitivities or celiac disease.
When stored in an airtight container in the freezer, your homemade Tiramisu Ice Cream Mochi Bites will retain their quality for up to 3 months. For the best taste and texture, try to consume them within 1-2 months. Remember to always allow them to sit at room temperature for 10-15 minutes before enjoying for optimal chewiness and creamy ice cream.
You’ll need a large mixing bowl and an electric whisk (or stand mixer) for the ice cream. For the mochi, a non-stick saucepan, a wooden spoon or silicone spatula for stirring, and a clean work surface (like a cutting board or silicone mat) are essential. An ice cream scoop, parchment paper, and an airtight container for freezing will also be very helpful.
More Tiramisu & Dessert Recipes You’ll Love
If you’ve fallen in love with the flavors of tiramisu through these delightful mochi bites, you’re in for a treat! My passion for this Italian classic extends to many other variations. Dive into my collection of tiramisu-inspired desserts and other sweet treats:
- This Banana Tiramisu offers a delightful tropical twist on the original.
- For a richer, more decadent experience, try my Dark Chocolate and Malt Tiramisu.
- My famous Pistachio Tiramisu is a vibrant and flavorful showstopper.
- If you prefer bite-sized pleasures, these Tiramisu Cookies are incredibly delicious and simple to whip up.
- For an ultimate dessert showstopper, my Tiramisu Tres Leches Sponge Cake takes indulgence to the next level.
And if you’re craving more delightful ice cream creations or easy baking recipes, explore these:
Easy Dessert Recipes
Ice Cream with Baileys
Easy Dessert Recipes
Homemade Honeycomb Ice Cream
Easy Baking Recipes
Tiramisu Cookies
Easy Dessert Recipes
Speculoos Tiramisu
We hope you enjoy making and savoring these delightful Tiramisu Ice Cream Mochi Bites! If you try this recipe or any other on our site, we would absolutely love to hear from you. Please take a moment to leave a comment and let us know how your homemade mochi adventure went!
Tiramisu Ice Cream Mochi Bites
Rate Recipe
Print Recipe
Ingredients
For the ice cream:
- 397 g condensed milk
- 600 ml double cream
- 1 tsp instant coffee powder
- ½ tsp vanilla extract
For the dough:
- 60 g glutinous rice flour
- 30 g caster sugar
- 100 ml water
- Cornstarch for rolling the dough
- Cocoa powder for rolling the mochi in
Instructions
- For the ice cream, whisk all the ingredients together with an electric whisk until thick and stiff (soft peaks).
- Use an ice cream scoop (or spoon) to scoop dollops of ice cream onto a parchment-lined baking tray, or you can use a muffin tin lined with cling film or cupcake cases. You want them to be about the size of a golf ball. Repeat until you have 8 small balls. Freeze to firm up for 3-4 hours.
- Mix the glutinous rice flour and sugar in a bowl.
- Fill a saucepan with 100ml of water and then turn the heat on high.
- Add the dry ingredients to the water. Stir to combine. The mixture should be runny and watery.
- Keep stirring, there will be lumps but don’t panic, it will come together.
- Once you have one mass, turn the heat to medium, and push it around the pan. Add a splash more water and keep stirring.
- Once the mixture is a bit translucent, sticky, and slightly firm, it’s done.
- Sprinkle your worktop with cornstarch.
- Transfer the mochi to the board with a wooden spoon. It will be VERY sticky and stretchy. It will be very hot at this point so be careful and wait until it comes down to room temp so you can handle it.
- Sprinkle it with a little cornflour. Divide into 8 pieces and flatten with your hand and then wrap around a ball of ice cream, pinching closed with your fingers and shaping into a ball shape.
- Roll each ball in cocoa powder.
- Freeze to firm up for 3-4 hours and take out of the freezer to enjoy whenever you want.
Notes
To store: store in the freezer for up to 3 months in an airtight container. When ready to eat, remove from the freezer and leave at room temperature for 10-15 minutes. This softens them enough so you can bite into them!
Glutinous rice flour: I buy this on Amazon but Asian supermarkets will also stock it. Some larger supermarkets may carry it in their international foods aisle.
Nutrition
Nutrition information is automatically calculated, so should only be used as an approximation. It can vary based on specific ingredients and preparation methods.
Like this recipe? Leave a comment below!
Your feedback helps us and other home cooks discover new favorites.