

Irresistibly Chewy Mini Egg Cookies: The Ultimate Easter Treat
As Easter approaches, there’s one treat that consistently captures our hearts and taste buds: **Mini Egg Cookies**. Imagine sinking your teeth into a perfectly baked cookie – delightfully sweet, incredibly soft, and wonderfully chewy. This isn’t just any cookie; it’s a celebration of Easter, generously studded with molten pockets of rich milk and creamy white chocolate chunks, and, of course, a delightful crunch from an abundance of crushed Cadbury Mini Eggs. Each bite offers an exquisite symphony of textures and flavors that will undoubtedly make these cookies a cherished tradition in your household.

For many, Easter simply isn’t complete without the iconic Cadbury Mini Eggs. Their distinctive crispy, candy-coated shells give way to a smooth, creamy milk chocolate center, creating an experience so addictive, you’ll wish they were available all year round. Beyond enjoying them straight from the packet, Mini Eggs are a fantastic ingredient to incorporate into your Easter baking. They elevate classic desserts, turning them into festive showstoppers – just like in my popular mini egg cheesecake recipe, and especially in these show-stopping Mini Egg Cookies.
While an optional chilling period for the cookie dough can enhance their thickness and chewiness, these Mini Egg Cookies are designed to be delicious even if you’re short on time. They bake up beautifully thick and tender regardless. For an extra touch of indulgence, serve them warm straight from the oven, perhaps with a generous scoop of velvety vanilla ice cream, a luxurious drizzle of chocolate sauce, and an additional sprinkle of crushed Mini Eggs for an ultimate dessert experience. These cookies are more than just a sweet treat; they’re a moment of pure joy, perfect for sharing with loved ones during the holiday season.
Table of Contents
- Why You Will Love These Mini Egg Cookies
- Essential Ingredients for Mini Egg Cookies
- Substitutions and Creative Variations
- Step-by-Step Guide to Baking Mini Egg Cookies
- Expert Baking Tips for Perfect Mini Egg Cookies
- The Great Chill Debate: To Chill or Not to Chill Your Cookie Dough
- The Ultimate Chocolate Dilemma: Chunks vs. Chips
- Frequently Asked Questions About Mini Egg Cookies
- Other Delightful Recipes You Might Enjoy
- Mini Egg Cookies Recipe Card
Why You Will Love These Mini Egg Cookies
These Mini Egg Cookies aren’t just another cookie recipe; they’re a delightful experience tailored for joy, ease, and incredible flavor. Here’s why they’re destined to become your new favorite Easter bake, and likely a go-to treat all year round:
- Effortlessly Easy to Make: Forget complicated baking techniques. This recipe is designed with simplicity in mind, making it perfect for bakers of all skill levels, from beginners to seasoned pros. It’s an ideal project for a relaxing Easter afternoon, requiring minimal effort for maximum deliciousness. The straightforward steps ensure a stress-free baking experience every time.
- Perfect for Planning Ahead: Life gets busy, but your cookie cravings don’t have to wait! The cookie dough is incredibly versatile and can be prepared in advance. You can chill it in the refrigerator for up to three days or freeze individual cookie dough balls for several months. This means you’ll always have a ready-to-bake stash for unexpected guests, spontaneous treats, or when that irresistible cookie craving strikes.
- A Symphony of Flavor and Texture: Prepare your senses for an unforgettable culinary journey. Each bite of these Mini Egg Cookies delivers a harmonious blend of textures and tastes. You’ll experience the tender, buttery softness of the cookie, contrasted with delightful pockets of gooey, melted chocolate chunks. And, of course, the star of the show: the satisfying, crunchy explosion of colorful mini eggs, perfectly complemented by those coveted slightly crispy edges. It’s a textural masterpiece!
- Incredibly Versatile for Any Occasion: While Mini Eggs make these cookies quintessential for Easter, the base recipe is wonderfully adaptable. You can easily switch out the chocolate varieties, experimenting with different types of chocolate chunks or adding other seasonal candies and mix-ins. This flexibility allows you to enjoy a variation of these delectable cookies throughout the entire year, catering to any holiday or personal preference.
- Simply Irresistible: Let’s be honest, some cookies just call your name, and these are those cookies. The combination of sweet dough, rich chocolate, and crunchy Mini Eggs creates an aroma and taste that is truly hard to resist. They’re bound to disappear quickly from any platter!
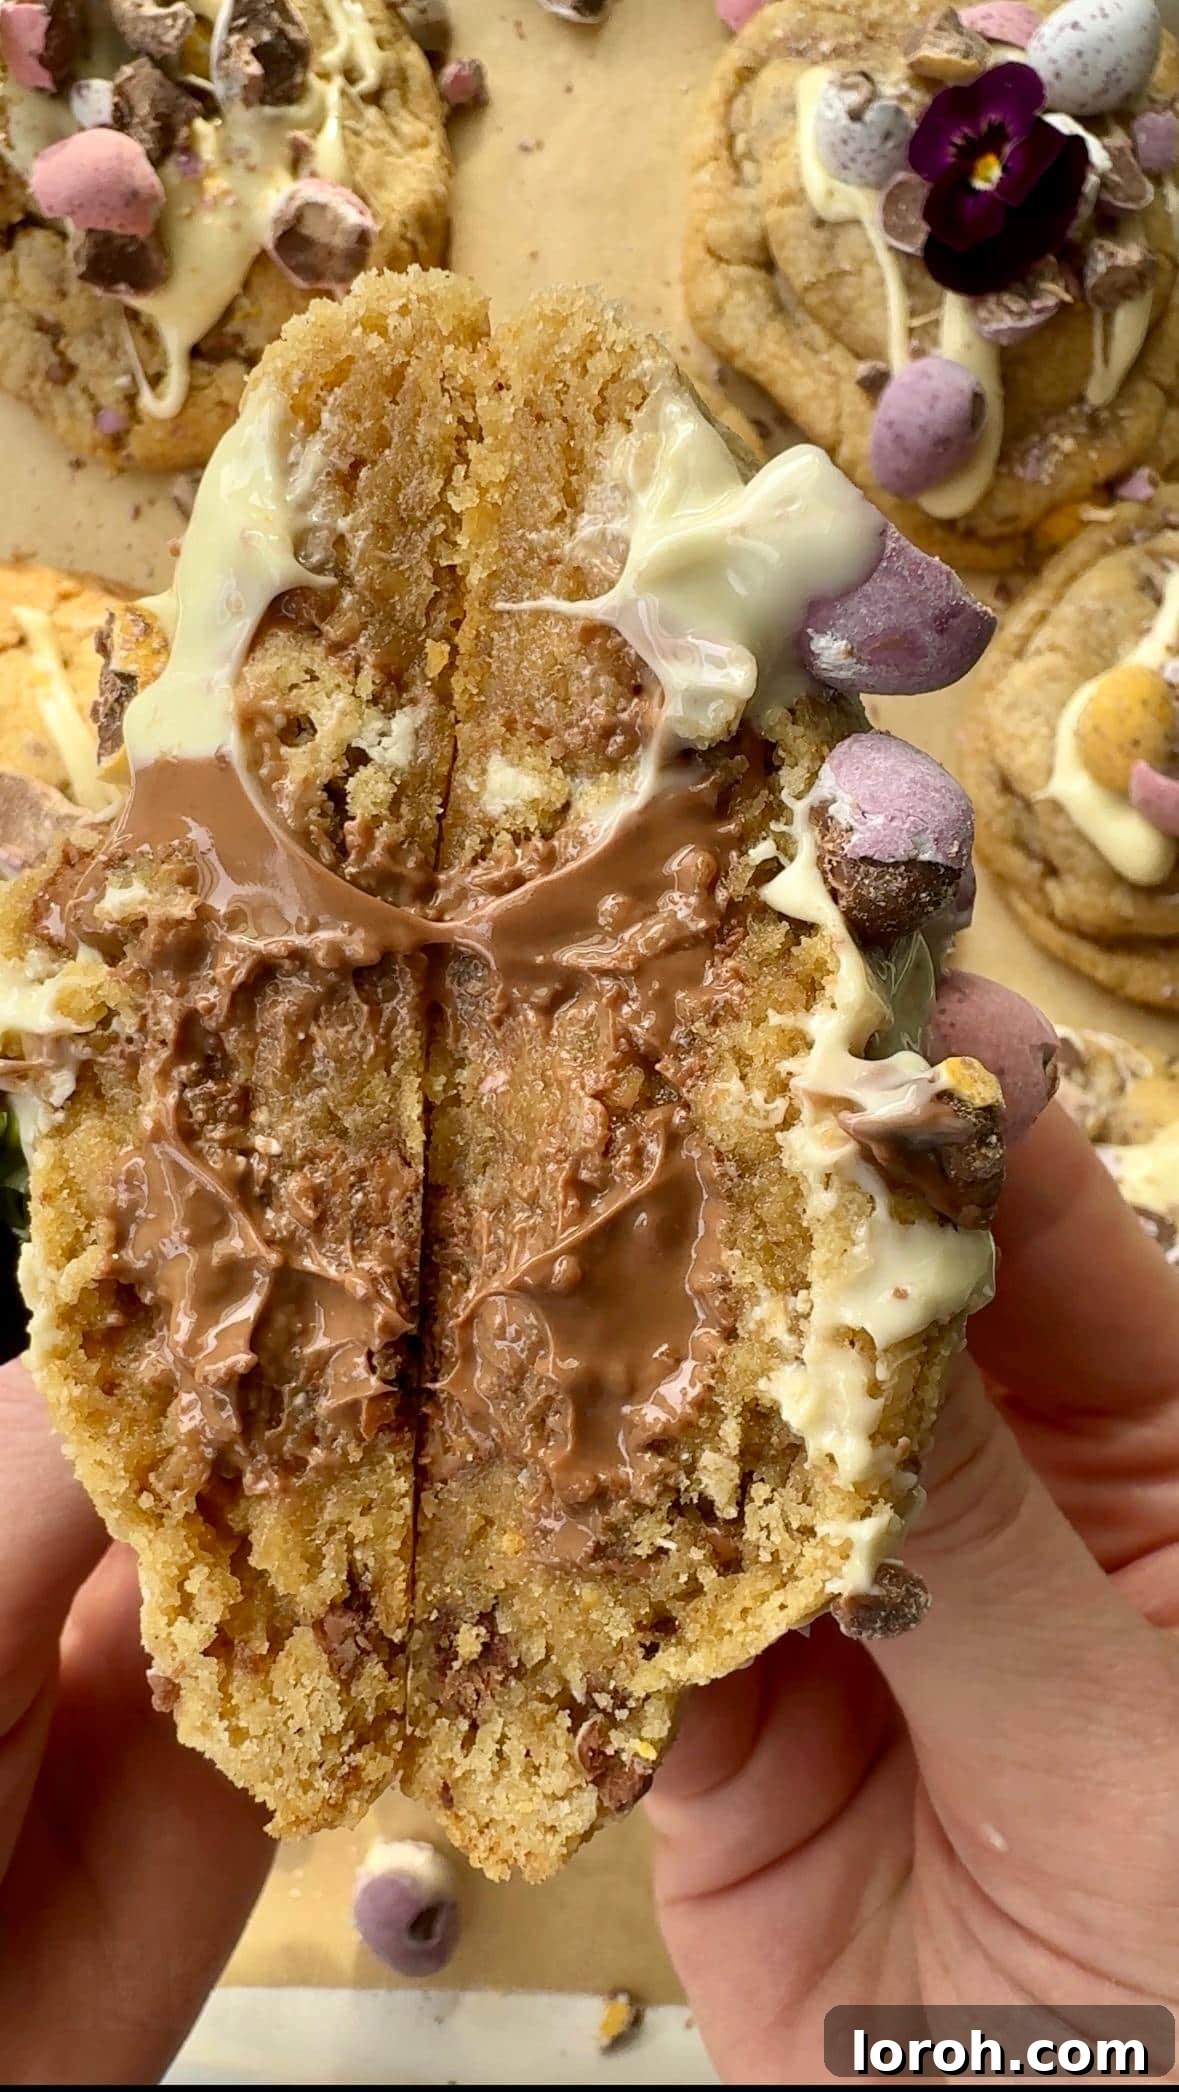
Essential Ingredients for Mini Egg Cookies
For precise measurements and detailed instructions, please refer to the complete printable recipe card located at the very bottom of this post!
Crafting the perfect Mini Egg Cookie relies on a few key ingredients, each playing a crucial role in achieving that sought-after texture and flavor:
- Soft Light Brown Sugar: This isn’t just for sweetness; it’s a cornerstone for cookie texture. Light brown sugar contributes a deep, caramel-like molasses flavor that enhances the overall richness of the cookie. More importantly, its moisture content helps create a wonderfully soft and chewy cookie dough, ensuring your baked cookies remain tender. While you could use dark brown sugar, be aware that it will result in a more intensely flavored and darker cookie.
- Caster Sugar (Superfine Sugar): Often overlooked, caster sugar (also known as superfine sugar) is vital for achieving the perfect balance. It adds a clean sweetness to the dough and, when combined with the brown sugar, is key to developing those desirable slightly crispy edges that perfectly complement the soft, chewy interior of your Mini Egg Cookies.
- Unsalted Butter: The foundation of any great cookie. Ensure your butter is softened to room temperature, which allows it to cream properly with the sugars, creating a light and airy base for your dough. Unsalted butter gives you control over the overall saltiness of the cookies.
- Large Egg: The binder that brings everything together. A large egg adds moisture, helps with the structure, and contributes to the richness of the cookie dough, ensuring a well-formed and cohesive texture.
- Vanilla Extract: A touch of high-quality vanilla extract elevates all the other flavors in the cookie, adding warmth and depth to the overall profile. Don’t skip this!
- Plain Flour (All-Purpose Flour): This is the structural backbone of your Mini Egg Cookies. Plain or all-purpose flour provides the necessary gluten development to form a stable yet tender cookie dough. Proper measurement is key here – too much flour can lead to dry, crumbly cookies.
- Baking Powder & Bicarbonate of Soda (Baking Soda): These leavening agents work in tandem to give your cookies their perfect lift and chewy texture. Baking powder provides initial rise, while bicarbonate of soda reacts with the acidic brown sugar to create a tender crumb and help with browning.
- Pinch of Flaky Sea Salt: A little salt goes a long way in balancing the sweetness of the sugars and chocolates, enhancing all the flavors in the cookie. Flaky sea salt adds a subtle burst of saltiness that cuts through the richness beautifully.
- High-Quality Chocolate (Milk & White, chopped): Ditch the chocolate chips for this recipe! I highly recommend using good-quality bars of milk chocolate and white chocolate, roughly chopped into varying sizes. This ensures a superior melt, creating luscious, gooey pockets of chocolate throughout the cookies that chips simply can’t replicate. The combination of milk and white chocolate offers a delightful flavor contrast.
- Cadbury Mini Eggs: The undisputed stars! These delicious milk chocolate eggs, encased in their delicate, sweet, and crunchy candy shells, are what truly define these Easter cookies. They provide both an iconic flavor and an incredible textural contrast. If Cadbury Mini Eggs aren’t readily available in your region, don’t worry – check the “Substitutions and Variations” section below for excellent alternatives that will still make fantastic cookies.
Substitutions and Creative Variations
While our Mini Egg Cookies are perfect as is, they also offer incredible flexibility for customisation, allowing you to tailor them to your taste, dietary needs, or even seasonal themes. Here are some fantastic ways to switch things up:
Enhanced Flavor Options:
- Brown Butter Base: For an elevated, sophisticated flavor profile, consider using brown butter as the foundation for your cookie dough. Browning the butter adds a rich, nutty depth that complements the chocolate and mini eggs beautifully. You can find a detailed guide on how to make brown butter in my recipe for triple chocolate chunk cookies – it’s a game-changer!
- Nutty Additions: Fold in a handful of chopped toasted pecans, walnuts, or almonds for an extra layer of crunch and earthy flavor that pairs wonderfully with chocolate.
- Extract Enhancements: Beyond vanilla, consider adding a hint of almond extract for a marzipan-like note, or a touch of coffee extract to intensify the chocolate flavor. A swirl of orange zest can also brighten up the Easter theme.
Sugar Alternatives:
- Granulated Sugar: If you don’t have golden caster sugar, regular granulated sugar will work perfectly fine. The texture might be slightly different, but the cookies will still be delicious.
- Golden Caster Sugar: This sugar offers a slightly richer, more caramel-like flavor than white caster sugar and is an excellent substitute for either.
Chocolate Exploration:
- Custom Chocolate Ratios: The beauty of using chopped chocolate bars is that you are in complete control of the ratio. While I’ve suggested a mix of milk and white chocolate for these Mini Egg Cookies, feel free to adjust to your heart’s desire. Love dark chocolate? Increase its quantity! Prefer an all-milk or all-white chocolate cookie? Go for it! A mix of all three (milk, white, and dark) creates a ‘triple chocolate’ experience that is truly divine.
- Chocolate Type: Any good-quality chocolate bar will work wonders. Experiment with different cocoa percentages in dark chocolate, or try a flavored white chocolate (like caramel white chocolate) for an interesting twist.
Mini Egg Alternatives & Year-Round Fun:
While Cadbury Mini Eggs are the star of this particular show, the versatility of the cookie base allows for endless possibilities, making these cookies enjoyable beyond the Easter season. If Mini Eggs aren’t available, or you simply want to try something new, here are some fantastic ideas:
- Classic Candy Coated Chocolates: Crush up other popular candy-coated chocolates like Maltesers (for a malty crunch), M&M’s (for vibrant colors and a classic chocolate taste), Smarties, or Galaxy Minstrels. These all add a similar textural contrast and pop of color.
- Other Small Chocolates: Simply add extra chopped milk, dark, or white chocolate chunks for a classic, rich cookie.
- Easter Themed (Beyond Mini Eggs): To maintain an Easter theme with a different twist, explore other small Easter chocolates available during the season. Options like Terry’s Chocolate Orange Mini Eggs, Lindt Milk Chocolate Mini Eggs, or various mini egg versions from brands like Reese’s, Oreo, Aero, Daim, and Kit Kat would all make fantastic additions, each bringing its unique flavor profile to your Mini Egg Cookies.
Step-by-Step Guide to Baking Mini Egg Cookies
This visual guide offers a quick overview of the baking process. For the full, detailed recipe with exact measurements and comprehensive instructions, please scroll down to the printable recipe card at the bottom of the page.
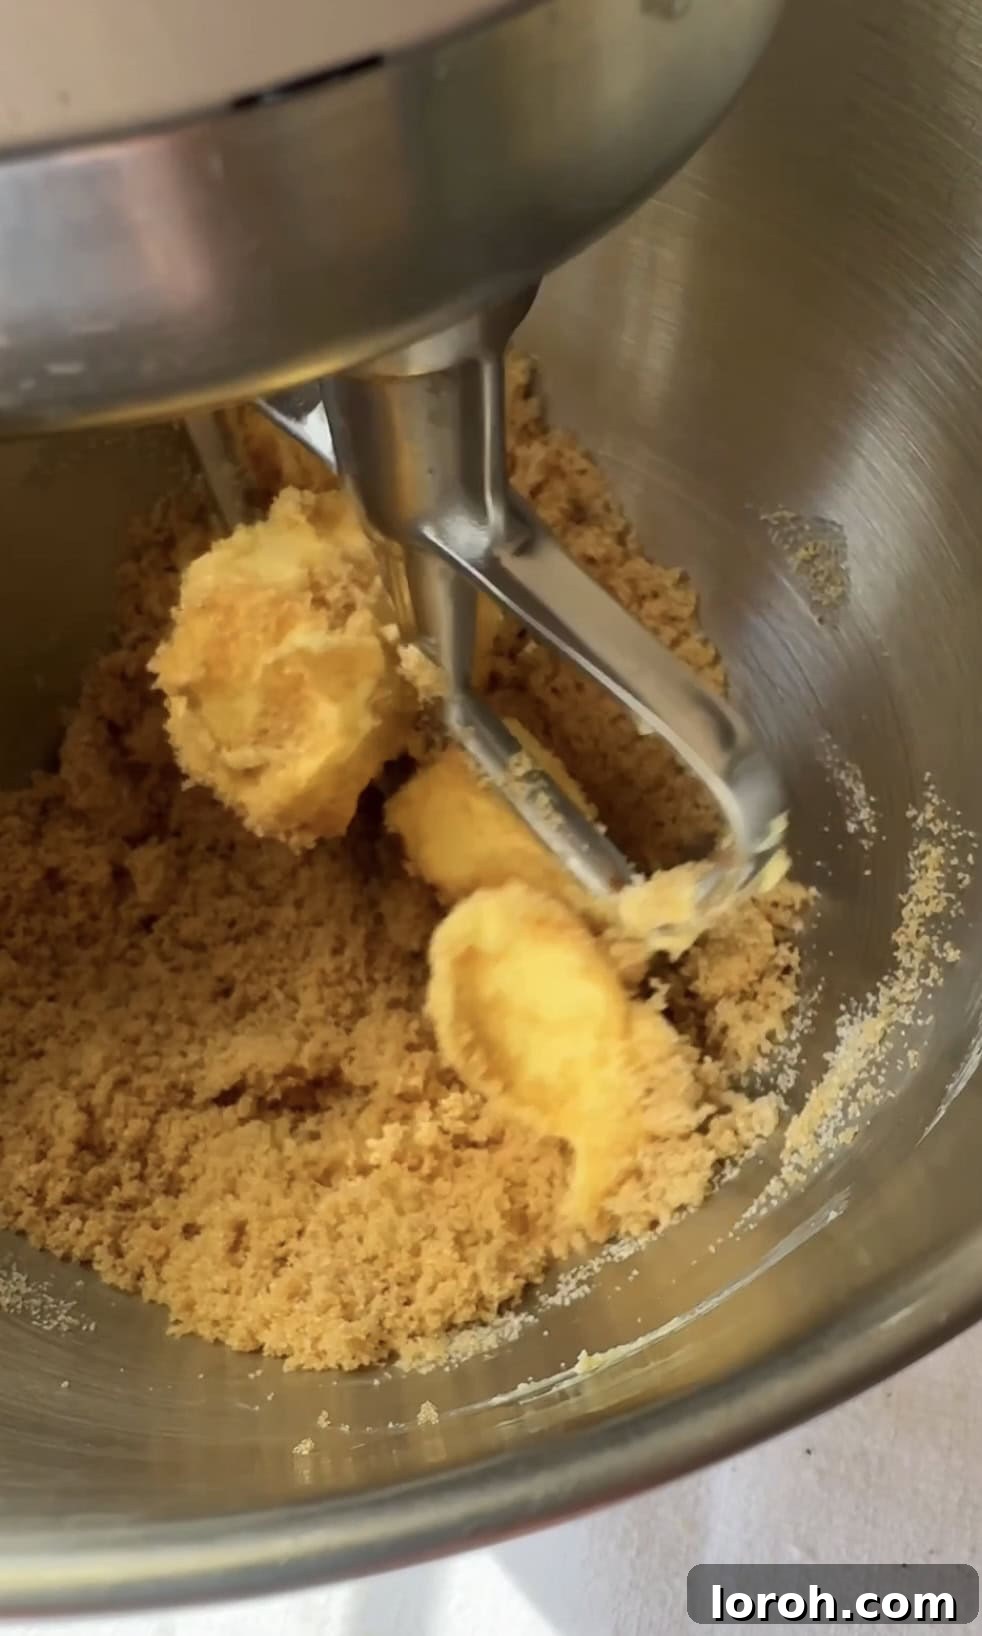
ONE: Begin by preheating your oven to 180°C/160°C Fan (350°F). Line two baking sheets with non-stick baking paper to prevent sticking and ensure easy cleanup, then set them aside. In a large mixing bowl, combine the softened unsalted butter with the soft light brown sugar and golden caster sugar. Beat these ingredients together until the mixture becomes wonderfully creamy, light, and fluffy. This creaming process incorporates air, which is crucial for a tender cookie.
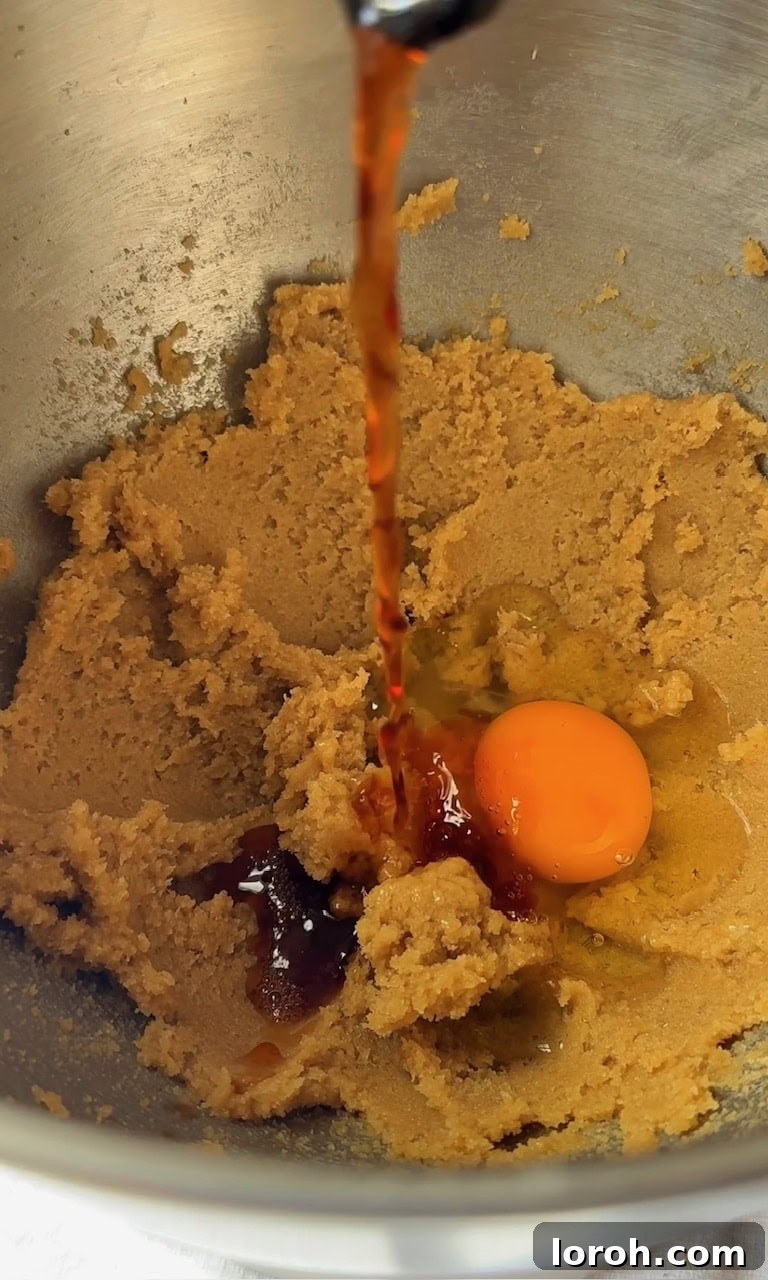
TWO: Once your butter and sugars are perfectly creamed, crack in the large egg and add the vanilla extract. Beat the mixture again, ensuring all the ingredients are thoroughly combined. Scrape down the sides of the bowl to incorporate everything evenly, resulting in a smooth and cohesive wet mixture ready for the dry ingredients.
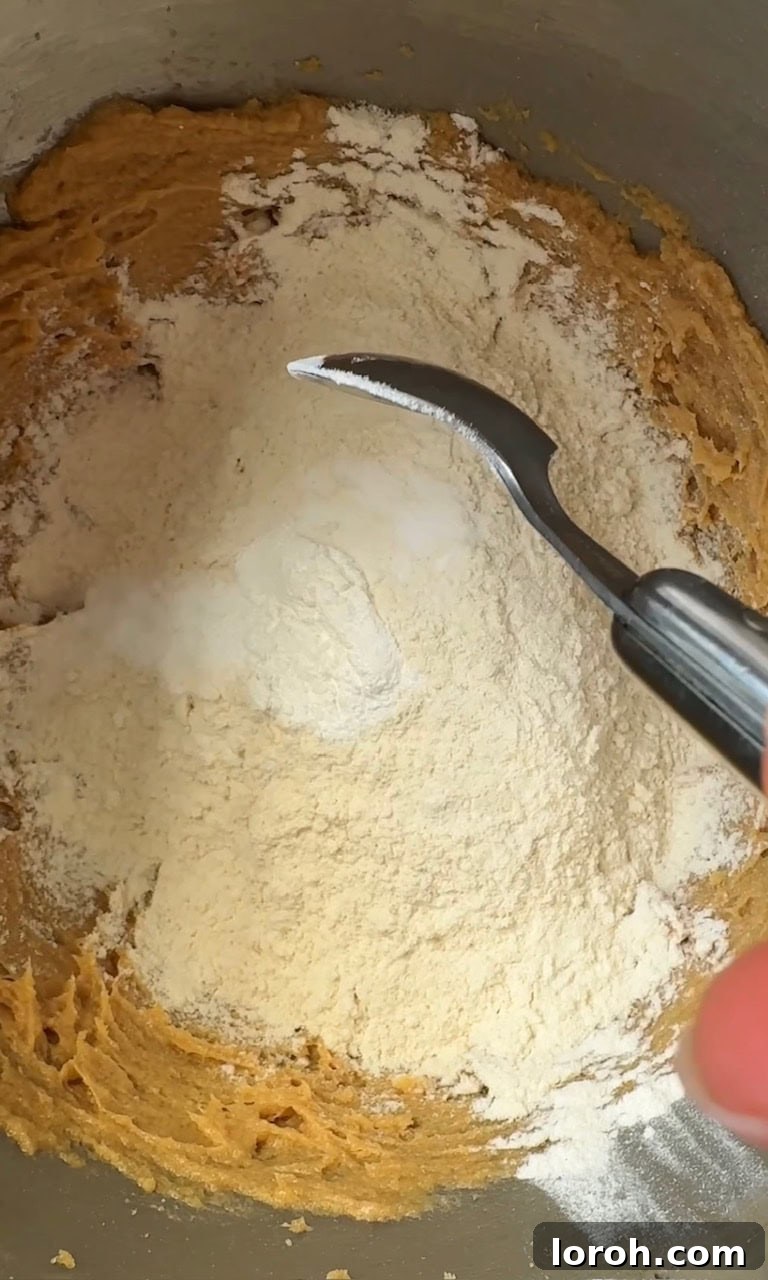
THREE: Into the wet mixture, sift the plain flour, baking powder, bicarbonate of soda, and a pinch of flaky sea salt. Sifting helps prevent lumps and ensures even distribution of the leavening agents. Mix these dry ingredients into the wet mixture using a spatula or on low speed with your mixer until they are just combined and a smooth dough forms. Be careful not to overmix, as this can develop too much gluten and result in tough cookies.
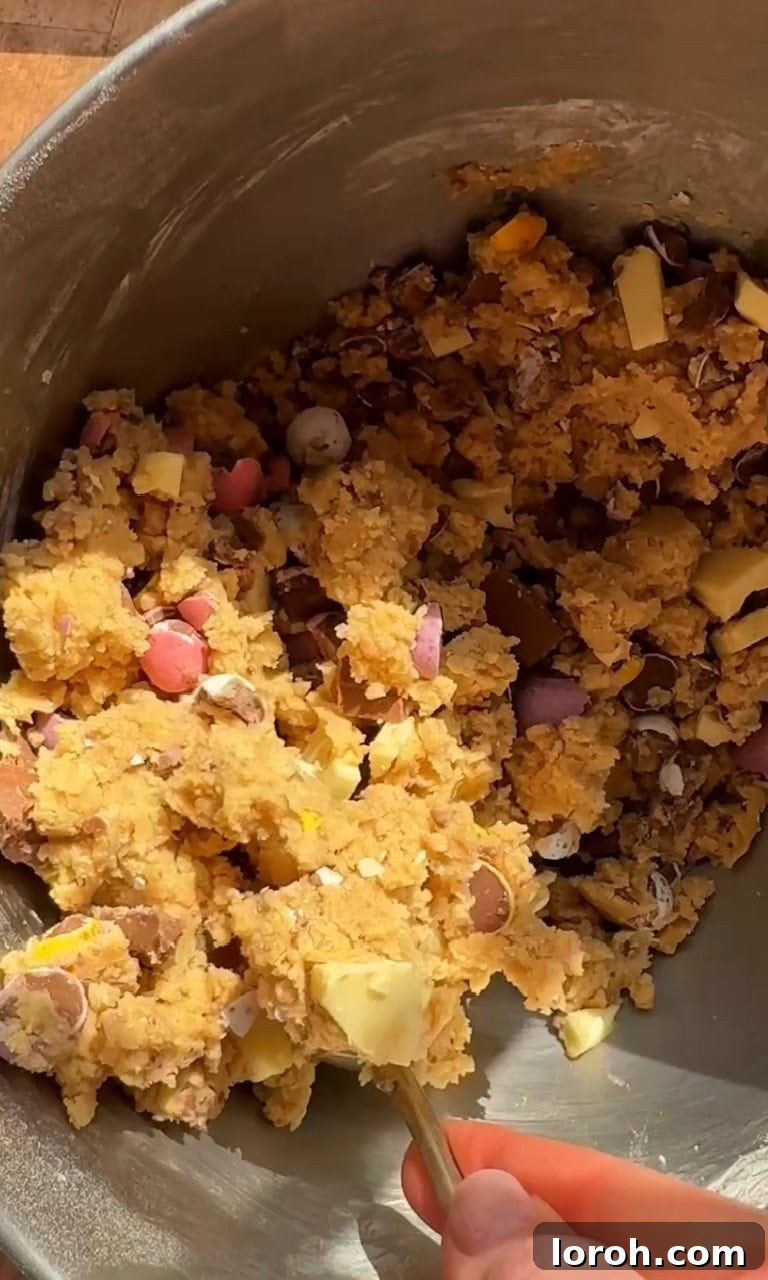
FOUR: Now for the stars of the show! Add your roughly chopped milk and white chocolate chunks, along with the crushed mini eggs, to the cookie dough. Gently fold them in using a spatula until they are evenly distributed throughout the dough. You want every bite to have a generous amount of chocolate and crunchy mini eggs.
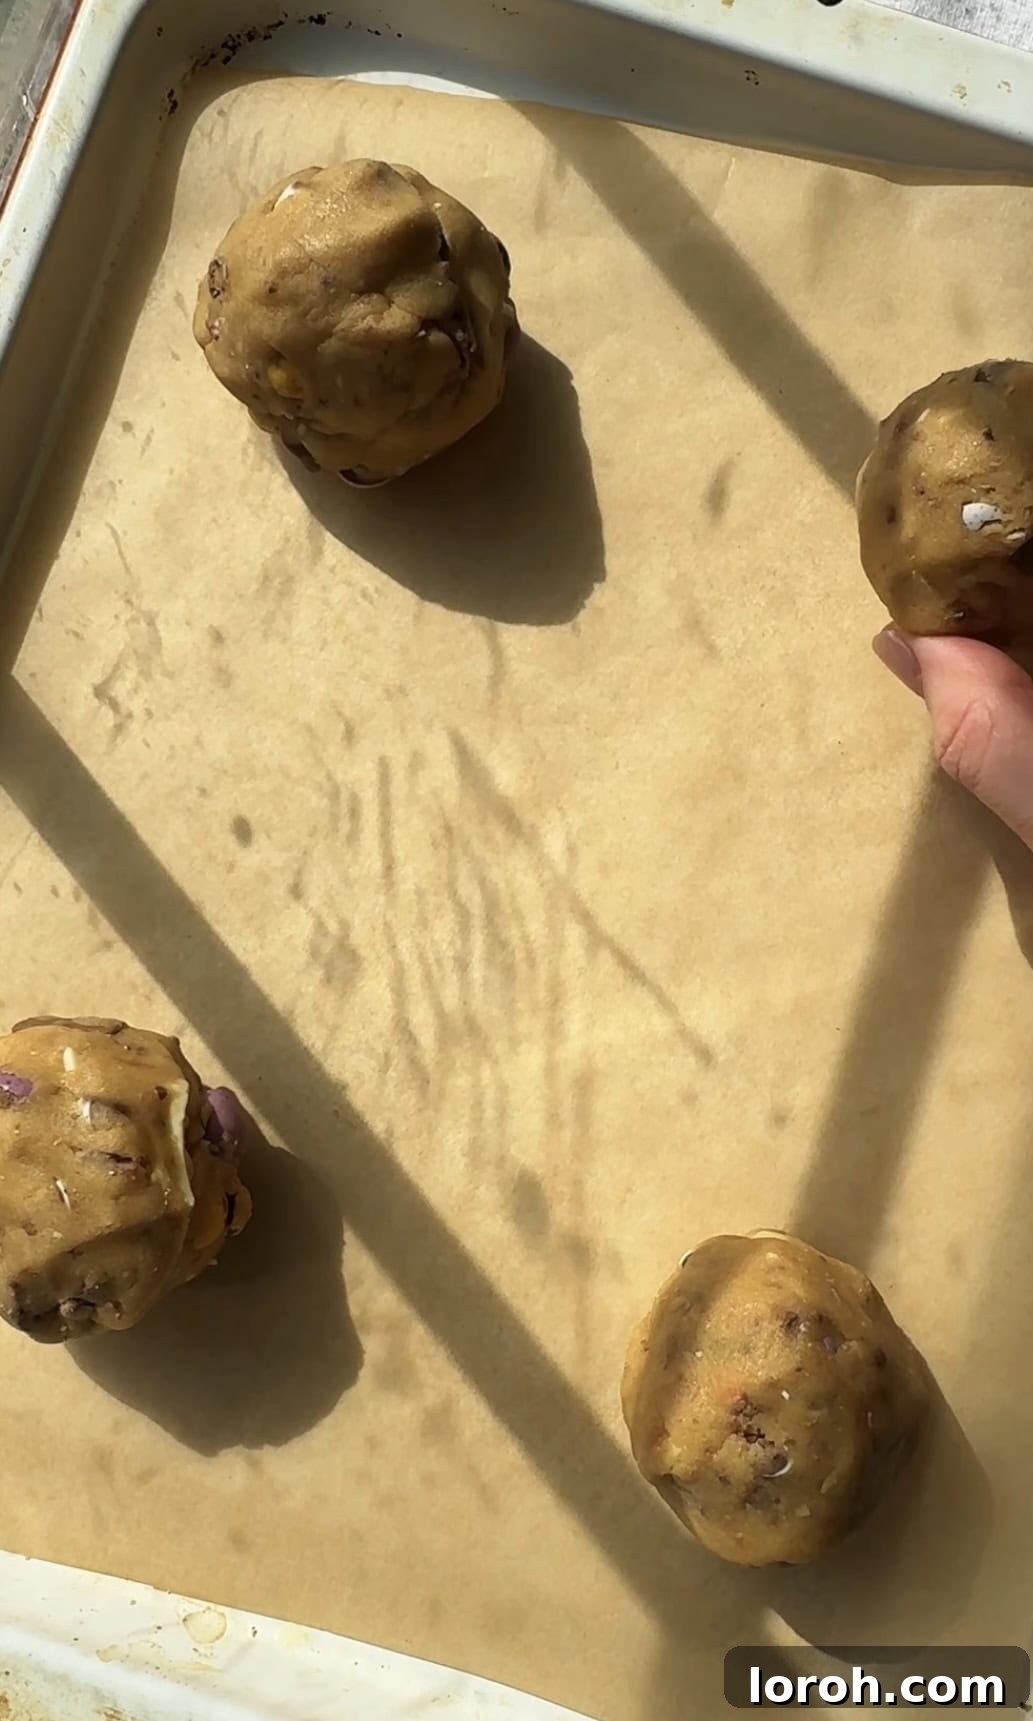
FIVE: Using an ice cream scoop (approximately 3-4 tablespoons per scoop), portion the cookie dough into about 9 equal-sized balls. Gently roll them with your hands to create neat spheres. Place these dough balls roughly 5 cm (2 inches) apart on your prepared baking sheets, ensuring they have plenty of space to spread during baking. If time allows, chilling the dough at this stage can significantly improve the cookies’ texture and prevent excessive spreading.
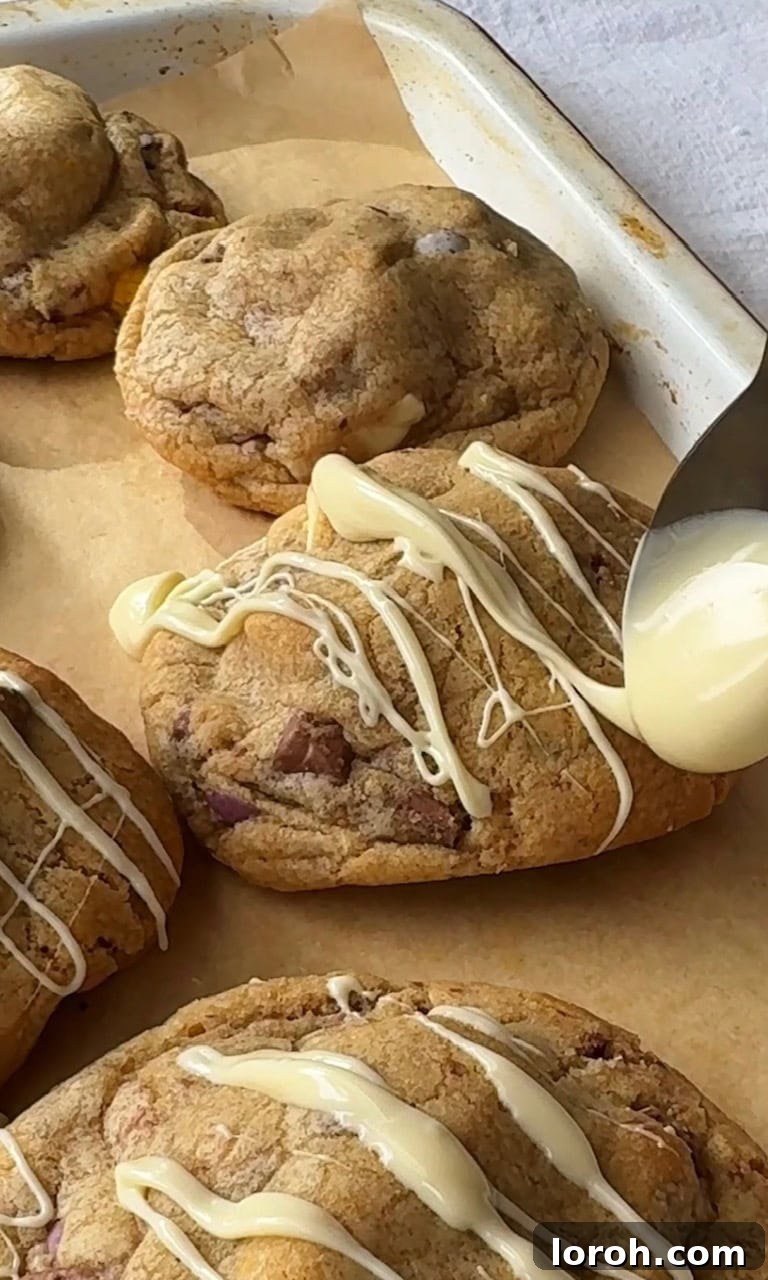
SIX: Bake the cookies for approximately 12 minutes, or until their edges turn a delicate golden-brown, but their centers still appear slightly puffy and wonderfully gooey. They might look slightly underdone, but trust the process – they will continue to set and firm up as they cool on the baking sheets. Once cooled slightly, I love to add a decorative touch by drizzling them with extra melted white chocolate, making them even more visually appealing and delicious.
Expert Baking Tips for Perfect Mini Egg Cookies
Achieving bakery-quality Mini Egg Cookies at home is easier than you think with these expert tips. Pay attention to these small details, and you’ll be rewarded with a batch of perfectly textured, incredibly flavorful cookies every time:
- The Importance of Softened Butter: This is a non-negotiable step. Ensure your unsalted butter is genuinely softened to room temperature, but not melted. If it’s too cold, it won’t cream properly with the sugars, leading to a dense cookie. If it’s melted, the cookie dough will be greasy and the cookies will spread excessively. Proper creaming creates air pockets, which contribute to a light and chewy texture.
- Mindful Dough Mixing: When combining the dry ingredients with the wet, mix only until they are just incorporated and a smooth dough forms. Overmixing develops the gluten in the flour too much, resulting in cookies that are tough and cakey rather than soft and chewy. A gentle touch ensures the desired tender texture.
- Adequate Spacing on Baking Sheets: Cookies love to spread, especially these generously filled Mini Egg Cookies! Always leave ample space (at least 5 cm or 2 inches) between each dough ball on your prepared baking sheets. Crowding them will cause them to merge into one giant, irregular cookie, and they won’t bake evenly. If you have limited space, bake in batches.
- The Patience of Cooling: This is arguably the hardest part, but crucial for the perfect texture. As tempting as it is to devour them straight from the oven, allow the cookies to cool on the baking sheets for at least 10-15 minutes before transferring them to a wire rack or digging in. During this cooling period, the centers continue to set and firm up, transitioning from gooey to that ideal chewy consistency we all crave. Patience truly makes these Mini Egg Cookies perfect!
- Don’t Overbake: When the edges are lightly golden and the centers still look a little soft and puffy, they are ready to come out of the oven. They will continue to bake and set as they cool. Overbaking leads to dry, crunchy cookies, and we’re aiming for soft and chewy!
- Oven Temperature Accuracy: Ensure your oven thermostat is accurate. An oven that runs too hot or too cold can significantly affect the bake time and spread of your cookies. Consider using an oven thermometer for best results.
- Uniform Cookie Size: Using an ice cream scoop helps ensure all your cookies are roughly the same size. This leads to even baking, meaning all your Mini Egg Cookies will be perfectly done at the same time.
The Great Chill Debate: To Chill or Not to Chill Your Cookie Dough
The question of whether to chill cookie dough is a hot topic among bakers, and for these Mini Egg Cookies, it’s a decision that can subtly influence the final outcome. While not strictly mandatory, opting to chill your cookie dough offers several compelling benefits that can elevate your cookies from simply delicious to truly exceptional.
Why Chilling is Recommended (When Time Allows):
- Enhanced Flavor Development: Chilling the dough allows the flour to fully hydrate and the sugars to absorb moisture more evenly. This process deepens the flavors, particularly the notes from the brown sugar and vanilla, resulting in a more complex and nuanced cookie. It’s like marinating your ingredients for a richer taste.
- Reduced Spreading: Cold butter melts slower in the oven. This means the cookie dough holds its shape longer before spreading, leading to thicker, chewier cookies with a more desirable texture. A quick 30-minute blast in the freezer can achieve a similar effect if you’re in a hurry, solidifying the butter and significantly reducing spread.
- Improved Texture: Chilled dough yields a chewier interior and more even browning on the edges. The slower melt of the butter and gradual baking process contribute to a more consistent texture throughout the cookie.
Chilling Options:
- Short Chill (30 minutes to 1 hour): Even a brief chill can make a noticeable difference in preventing excessive spread and improving texture.
- Overnight Chill (8-24 hours): For the absolute best results in flavor and texture, chilling the dough overnight is ideal. You can prepare the dough the night before and bake fresh cookies in the morning.
- Freezer Blast (30 minutes): If you’re short on time but still want some of the benefits of chilling, shaping the dough balls and popping them in the freezer for 30 minutes before baking is a great compromise.
Baking Without Chilling:
While chilling is beneficial, don’t despair if you don’t have the time! You can absolutely bake the cookie dough straight away. Your Mini Egg Cookies will still be incredibly tasty, though they might spread a little more and have a slightly more rustic, thinner appearance. They might not be as perfectly thick and chewy, but they will still be sweet, chocolatey, and packed with Mini Eggs – a treat no one will complain about!
If you’re still concerned about spread or prefer a different format, you might consider my chocolate chip cookie bars. You can easily adapt that recipe by swapping some of the chopped chocolate for crushed Mini Eggs, creating a delicious cookie bar that removes any worries about individual cookie spreading.
The Ultimate Chocolate Dilemma: Chunks vs. Chips
When it comes to baking truly exceptional cookies, the choice of chocolate might seem minor, but it makes a world of difference. For these Mini Egg Cookies, and indeed for most of my cookie and brownie recipes, I strongly advocate for using good-quality bars of chocolate, roughly chopped into varying sizes, rather than pre-made chocolate chips. This preference isn’t just a quirky baker’s whim; it’s rooted in science and results in a dramatically superior eating experience.
Why Chopped Chocolate Reigns Supreme:
- Superior Melt and Gooey Pockets: The primary reason to choose chopped chocolate is its melting quality. High-quality chocolate bars are formulated to melt smoothly and completely, creating luscious, molten pockets of chocolate throughout your cookie. When these cookies come out of the oven, those gooey, warm pools of chocolate are simply irresistible.
- No Stabilizers, Pure Chocolate Bliss: Standard chocolate chips are often designed with stabilizers (like added waxes or a higher melting point chocolate) to help them maintain their shape during baking. While this keeps them looking neat, it prevents them from melting into that delightful, gooey consistency we crave in a perfect cookie. They tend to hold their form, resulting in distinct chips rather than molten rivers of chocolate.
- Varied Texture and Visual Appeal: When you chop a chocolate bar, you naturally get pieces of different sizes – from fine shards to chunky morsels. This variety adds exciting textural dynamics to each bite, offering pockets of intense chocolate flavor alongside more subtle streaks. It also creates a more rustic and appealing aesthetic, showcasing the homemade quality of your Mini Egg Cookies.
- Enhanced Flavor: Generally, chocolate bars designed for eating or baking (especially good quality ones) have a richer, more complex flavor profile than many mass-produced chocolate chips. Using them ensures a deeper, more satisfying chocolate taste in your cookies.
This commitment to chopped chocolate is something I carry across many of my recipes, including my decadent triple chocolate brownies and my light and fluffy chocolate chunk muffins. Once you experience the difference that gooey, melted chopped chocolate makes in your Mini Egg Cookies, I promise you’ll never want to go back to mere chips!

Frequently Asked Questions About Mini Egg Cookies
While it’s not strictly essential for a delicious cookie, chilling the dough is highly recommended if you have the time. Chilling allows the flavors to meld and mature, the butter to firm up, and the flour to fully hydrate, resulting in a thicker, chewier cookie with less spread and more even browning. Even a quick 30-minute blast in the freezer can make a difference. However, if you’re in a hurry, baking them unchilled will still yield wonderfully soft and sweet cookies!
Ideally, yes, using both types of sugar provides the best results for these Mini Egg Cookies. Soft light brown sugar is essential for adding moisture, chewiness, and a delightful toffee-like flavor. Golden caster sugar, on the other hand, contributes to the cookie’s structure and helps create those coveted slightly crispy edges that contrast beautifully with the soft interior. While you can substitute with one type if necessary, using both will give you the most balanced and perfect cookie texture.
Absolutely! While Cadbury Mini Eggs are the star of this recipe and perfect for Easter, the cookie base is incredibly versatile. You can substitute the Mini Eggs and chocolate chunks with almost any other chocolate or candy you like. Think M&M’s, chopped Snickers, Smarties, or even other seasonal chocolates. Just ensure the quantity remains roughly the same as specified for the Mini Eggs/chocolate chunks to maintain the proper dough consistency. This allows you to enjoy these amazing cookies all year round!
For optimal freshness and flavor, these Mini Egg Cookies are truly best enjoyed on the day they are made, especially while still warm and gooey. However, any leftover cookies can be stored in an airtight container at room temperature for up to 5 days. To recapture some of their initial warmth and gooiness, you can briefly reheat them in the microwave for 10-15 seconds.
Yes, these cookies are fantastic for making ahead! You can prepare the cookie dough up to 3 days in advance. Simply cover the bowl tightly with plastic wrap or transfer the shaped dough balls to an airtight container and chill them in the fridge. For longer storage, the dough freezes beautifully. I recommend shaping the dough into individual balls, freezing them on a baking sheet until solid, then transferring them to a freezer-safe bag or container. When you’re ready to bake, you can bake them directly from frozen; just add an extra 2-4 minutes to the baking time to ensure they are fully cooked through.
Other Delightful Recipes You Might Enjoy
If you’ve fallen in love with the irresistible chewiness and chocolatey goodness of these Mini Egg Cookies, you’re in for a treat! Our kitchen is brimming with more delicious recipes that are sure to satisfy your sweet tooth and expand your baking repertoire. Don’t miss out on these other fantastic bakes:
- For another easy, crowd-pleasing cookie experience, try my chocolate chip cookie bars – they’re perfect for sharing and simple to make.
- If you’re a purist who appreciates a good cookie without the bells and whistles, my chocolate chipless cookies offer a delightful, buttery bite.
- For a truly decadent, no-fuss dessert, my no-bake chocolate cheesecake is always a hit.
- Or, for a cozy treat, warm up with my delightful hot chocolate bombs.
- If you can’t get enough chocolate, these rich chocolate brownie cookies deliver intense flavor in every bite.
Easy Dessert Recipes
Homemade Honeycomb Ice Cream
Easy Baking Recipes
Biscoff Blondies
Easy Baking Recipes
Tiramisu Cookies
Easy Baking Recipes
Chocolate Mud Cake with Malted Whipped Cream
If you tried these amazing Mini Egg Cookies or any other recipe from our site, we would absolutely love to hear from you! Please take a moment to leave a comment and let us know how your baking adventure went!

Mini Egg Cookies
Rate Recipe
Print Recipe
Ingredients
- 125 g unsalted butter, softened
- 180 g soft light brown sugar
- 20 g golden caster sugar
- 1 large egg, beaten
- 1 tsp vanilla extract
- 310 g plain flour
- 1 tsp baking powder
- 1 tsp bicarbonate of soda
- Pinch of flaky sea salt
- 50 g good-quality white chocolate, chopped
- 50 g good-quality milk chocolate, chopped
- 150 g mini eggs, chopped (or bashed with a rolling pin)
To serve: optional
- Melted white chocolate
- Mini eggs, whole or crushed
Instructions
-
Preheat your oven to 180°C (160°C Fan / 350°F). Prepare two large baking sheets by lining them with non-stick baking paper; set aside.
-
In a generously sized mixing bowl, combine the softened unsalted butter with the soft light brown sugar and golden caster sugar. Beat these ingredients together until the mixture is light, creamy, and fluffy. This can be done using a stand mixer fitted with a paddle attachment, an electric whisk, or simply with a sturdy wooden spoon and some elbow grease.
-
Add the large beaten egg and the vanilla extract to the creamed mixture. Continue to beat until everything is well combined and smooth.
-
Sift in the plain flour, baking powder, bicarbonate of soda, and a pinch of flaky sea salt. Mix gently until the ingredients are just combined and a smooth cookie dough forms. Be careful not to overmix, as this can make your cookies tough.
-
Stir in the chopped good-quality chocolate (milk and white) and the crushed Mini Eggs. Fold them through the dough until they are evenly distributed, ensuring every cookie will have plenty of delicious mix-ins.
-
Using an ice cream scoop (approx. 3-4 tbsp per scoop), portion the cookie dough into about 9 equal-sized balls. Roll them lightly with your hands to create neat spheres and place them approximately 5 cm (2 inches) apart on the prepared baking sheets. (I recommend placing 5 balls on one sheet and 4 on the other to give them ample room to spread). Optional Chill: If you have the time, chilling your cookie dough at this stage for at least 1 hour (or up to overnight in the fridge) will significantly improve the texture, leading to thicker, chewier cookies with a richer flavor. If you’re short on time, a 30-minute blast in the freezer is a great compromise. However, if time truly doesn’t allow, you can bake them straight away – they will still be utterly delicious!
-
Bake for approximately 12 minutes, or until the edges are lightly golden-brown and the centers still look slightly puffy and wonderfully gooey. Remember, they will continue to set and firm up as they cool on the baking sheets, so avoid overbaking.
-
Allow the cookies to cool on the baking sheets for at least 15 minutes before handling or eating. This crucial cooling period allows them to firm up to that perfect chewy texture. While delicious warm, patience is rewarded here!
-
To serve (optional): Drizzle the cooled cookies with a little extra melted white chocolate and sprinkle with additional whole or crushed Mini Eggs for an extra festive touch.
Notes
To store cookie dough: You can prepare the cookie dough up to 3 days in advance. Simply cover the bowl containing the dough tightly with plastic wrap or transfer the shaped dough balls into an airtight container and refrigerate.
To store baked cookies: The baked Mini Egg Cookies are undeniably at their best when served warm on the day they are made. However, any leftovers will keep well in an airtight container at room temperature for up to 5 days.
To reheat baked cookies: To bring back that warm, gooey center, reheat individual cookies in the microwave for 10-15 second bursts until warm and the chocolate is melted. Alternatively, you can pop them into a preheated oven or air fryer at 170°C (340°F) for 2-3 minutes.
To freeze cookie dough: For longer storage, the cookie dough freezes exceptionally well. Shape the dough into individual balls and freeze them solid on a baking sheet before transferring to a freezer-safe bag or container. You can then bake them directly from frozen; just add an additional 2-4 minutes to the baking time (total bake time will be approximately 13-16 minutes). Alternatively, shape the chilled dough into a log, wrap it tightly, and freeze. When ready to use, defrost the log in the fridge before slicing and baking.
To freeze baked cookies: Baked Mini Egg Cookies can also be frozen for up to 3 months. Once completely cooled, store them in a freezer-safe airtight container or bag. Defrost at room temperature, or reheat as described above for a warm treat.
Chocolate chunks vs. chocolate chips: For the ultimate gooey chocolate experience, always opt for good-quality chocolate bars chopped into chunks rather than chocolate chips. Chips contain stabilizers that prevent them from melting as lusciously.
Chilling benefits: if you have extra time, chilling the dough for at least 1 hour (or overnight) will lead to thicker, chewier cookies with more depth of flavor. However, if you’re in a rush, feel free to skip this step; your Mini Egg Cookies will still be incredibly delicious!
Bake what you need: You don’t have to bake all the cookies at once! This recipe is perfect for baking in batches. If you’ve frozen the dough balls, you can take out just a few at a time for a fresh, warm cookie whenever the craving hits. Bake frozen dough balls for 13-16 minutes until golden brown.
Nutrition
Nutrition information is automatically calculated, so should only be used as an approximation.