
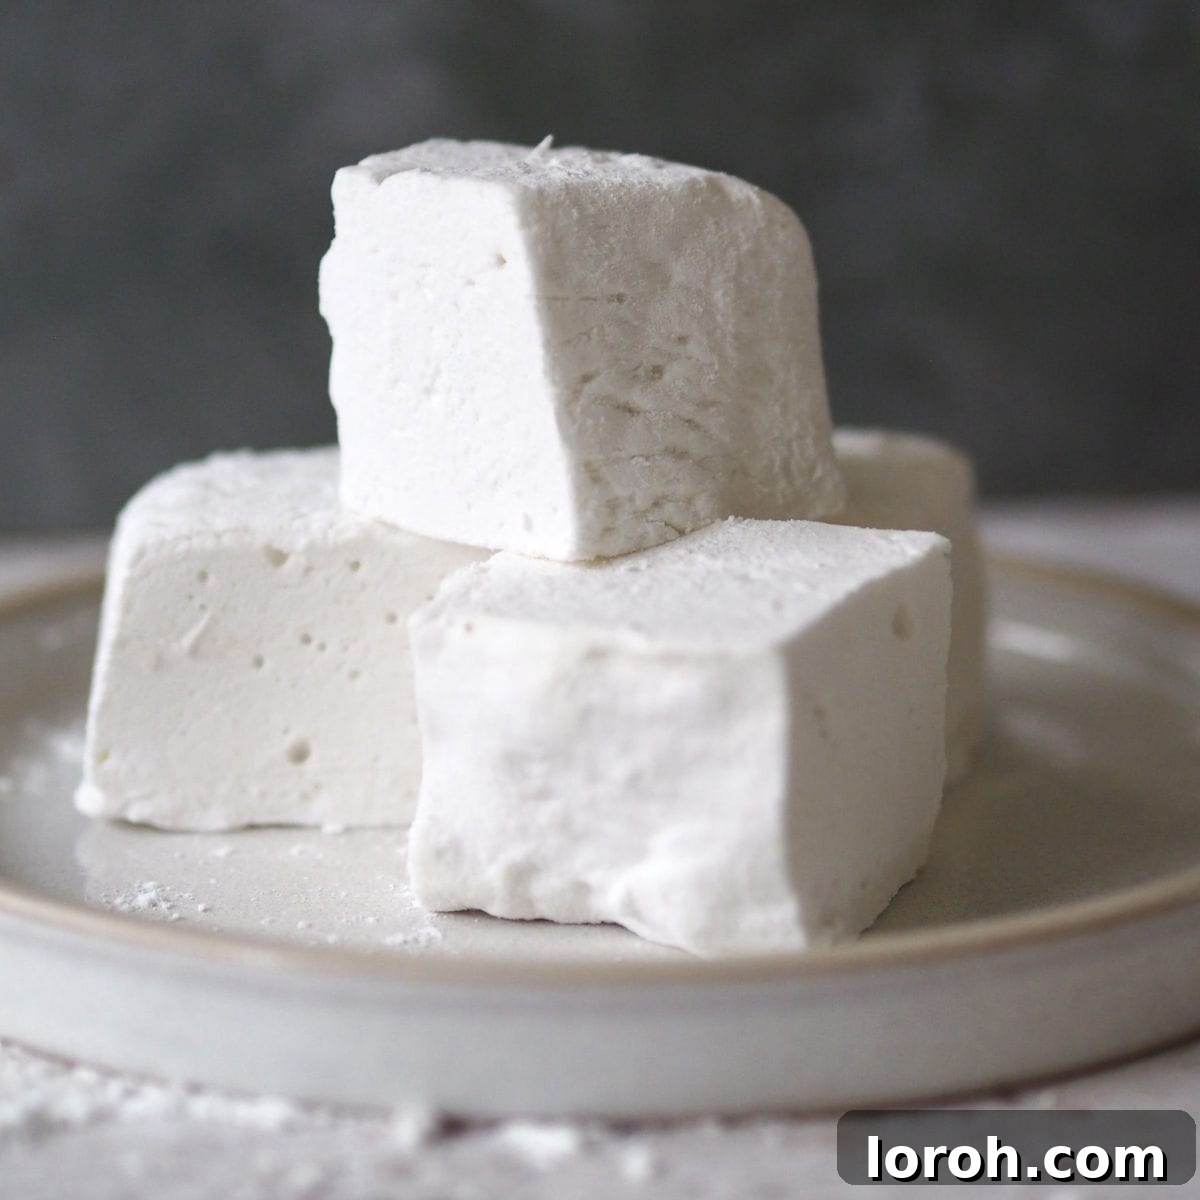
Easy Homemade Marshmallows: Your Comprehensive Guide to Fluffy Perfection
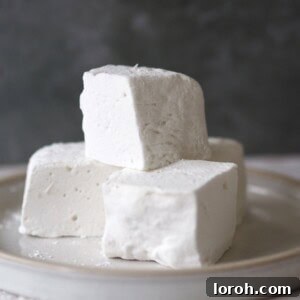
Embark on a delightful culinary adventure with these easy homemade marshmallows! Often perceived as a gourmet challenge, crafting marshmallows from scratch is surprisingly straightforward and incredibly rewarding. If your only experience with marshmallows comes from the dense, sometimes bland, and overly sweet store-bought varieties, prepare for a true revelation. Homemade marshmallows boast an unparalleled soft, airy, and fluffy texture, coupled with a perfectly balanced sweetness that is utterly delicious and far from cloying. This delightful contrast in texture and fresh flavor is astonishing, often converting even the staunchest marshmallow skeptics. Their ethereal lightness and delicate sweetness are a world apart, making them an irresistible treat you’ll be eager to create again and again.
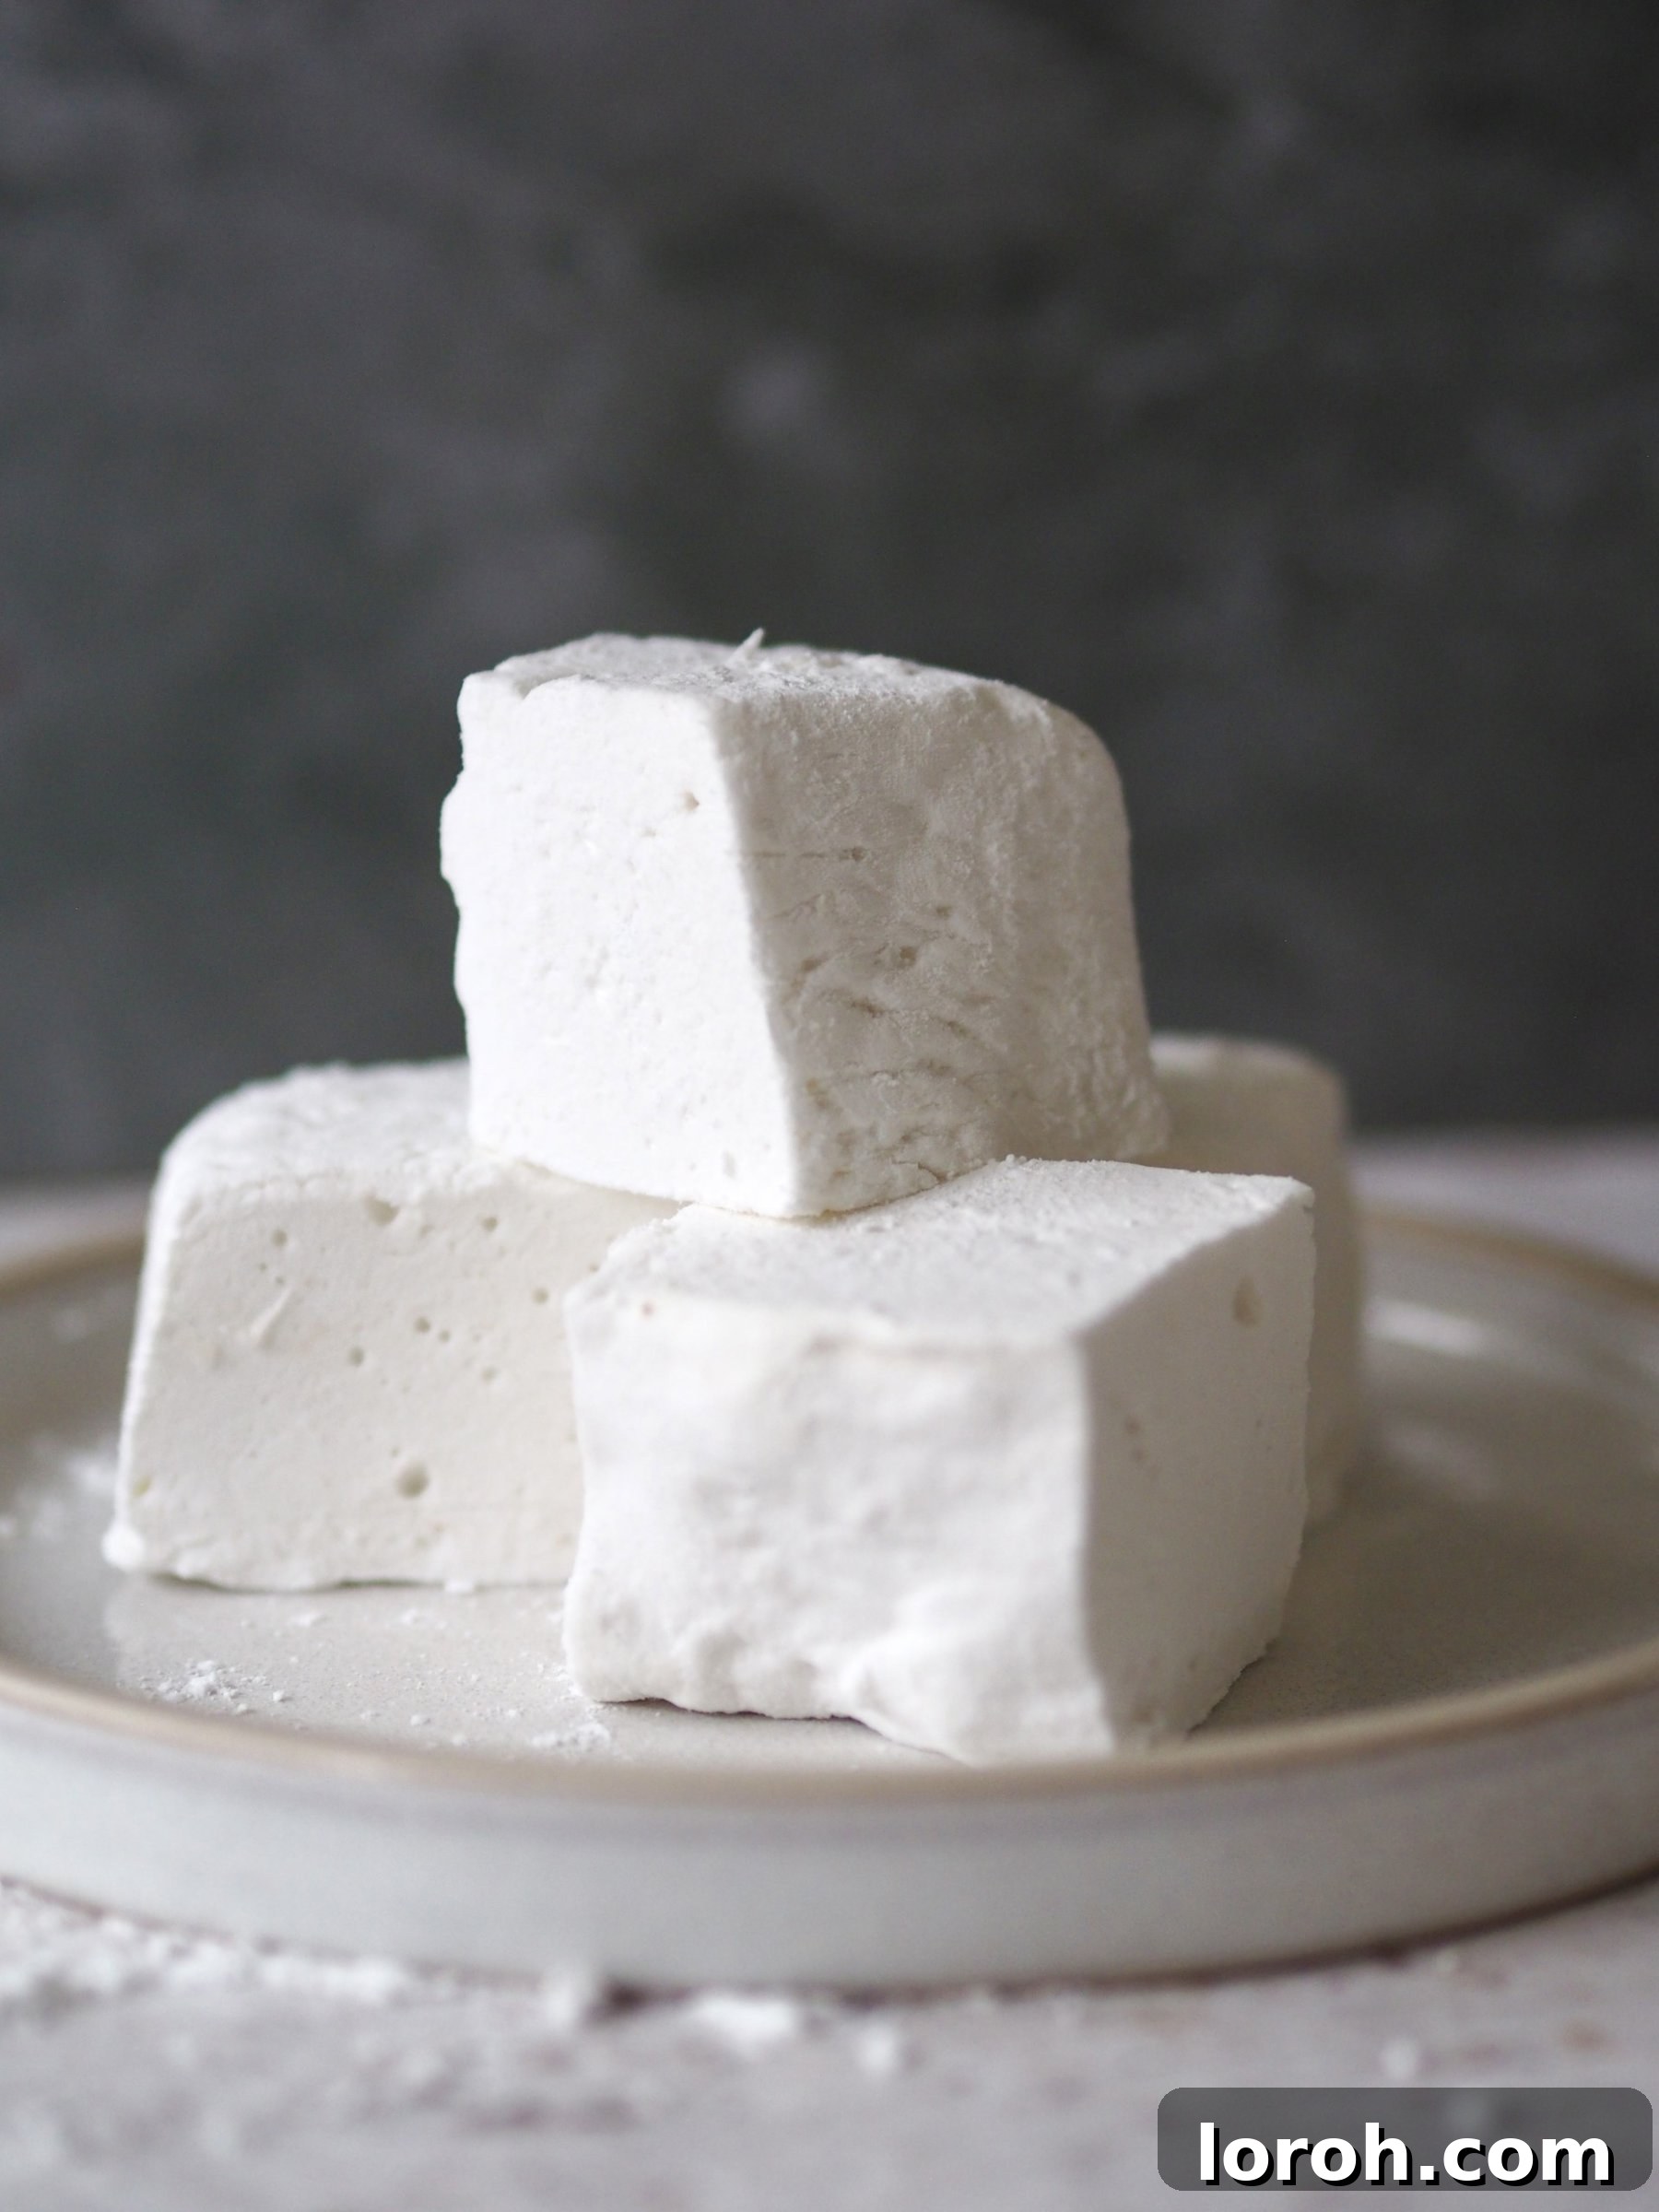
The reputation of marshmallows for being sickly sweet and cloying is entirely dispelled when you taste a homemade version. These aren’t the chewy, rubbery confections you might be used to. Instead, homemade marshmallows are light, wonderfully springy, and sweet – but never overpoweringly so. The process is remarkably simple: you only need to grease a container, whip up the mixture, and then allow it to set. That’s the extent of the hands-on work! The magic unfolds with minimal fuss, leaving you with a batch of delightful confections that taste like they came from a high-end patisserie. Whether enjoyed on their own, floating in a steaming mug of rich hot chocolate, or as a component in a more elaborate dessert, these marshmallows are a game-changer. For an exciting variation, consider our homemade chocolate marshmallows, which are just as simple to make and equally delicious.
Table of Contents
- Why You Will Love This Easy Homemade Marshmallow Recipe
- The Essential Ingredients for Fluffy Marshmallows
- What is Liquid Glucose and Why It Matters?
- Substitutions and Flavor Variations to Personalize Your Marshmallows
- Step-by-Step Guide: How to Make Easy Homemade Marshmallows
- Expert Cooking Tips for Perfect Homemade Marshmallows
- Making Marshmallows Without a Sugar Thermometer: The Cold Water Method
- How to Make Luscious Raspberry Marshmallows
- Frequently Asked Questions About Homemade Marshmallows
- Other Delightful Recipes You Might Enjoy
- Easy Homemade Marshmallows Recipe Card
Why You Will Love This Easy Homemade Marshmallow Recipe
Embarking on the journey to create your own marshmallows might seem intricate, but once you try this simplified recipe, you’ll quickly understand why it’s a beloved favorite among home bakers. Here are just a few compelling reasons why you’ll adore these homemade sweet treats and add them to your regular baking repertoire:
- They are unequivocally and demonstrably superior to any shop-bought marshmallows you’ve ever tasted. Picture beautifully sweet, incredibly soft, and delightfully light bites of pure deliciousness that melt in your mouth. The profound difference in texture and fresh, nuanced flavor compared to commercial varieties is truly astonishing, making them an indulgence beyond compare.
- These gourmet-quality marshmallows make for the perfect thoughtful and impressive homemade gift. Pack them elegantly in cellophane bags or a decorative box, and you have a personalized present that’s sure to delight friends, family, and colleagues. Furthermore, they offer remarkable convenience as you can make them up to 3 weeks in advance, making them an ideal preparation for festive holiday seasons, special occasions, or party favors without last-minute stress.
- The versatility of homemade marshmallows is truly boundless! Use them in countless creative ways to elevate your everyday desserts and special occasion treats. Envision perfectly gooey s’mores, expertly toasted over a backyard fire pit, adding an ethereal cloud of sweetness atop a rich, steaming mug of hot chocolate, or contributing a delightful chewiness and lightness to an indulgent rocky road. They are also fantastic for baking into chewy brownies, garnishing vibrant cupcakes, or simply enjoying as a delightful, satisfying snack on their own.
- This recipe utilizes straightforward, readily accessible ingredients and a simple, step-by-step process. This proves conclusively that making gourmet-quality marshmallows right in your own kitchen is genuinely easy, enjoyable, and produces consistently excellent results. It’s a wonderful way to impress without extensive effort.
The Essential Ingredients for Fluffy Marshmallows
For precise measurements and detailed step-by-step instructions, please refer to the comprehensive printable recipe card located conveniently at the bottom of this post.
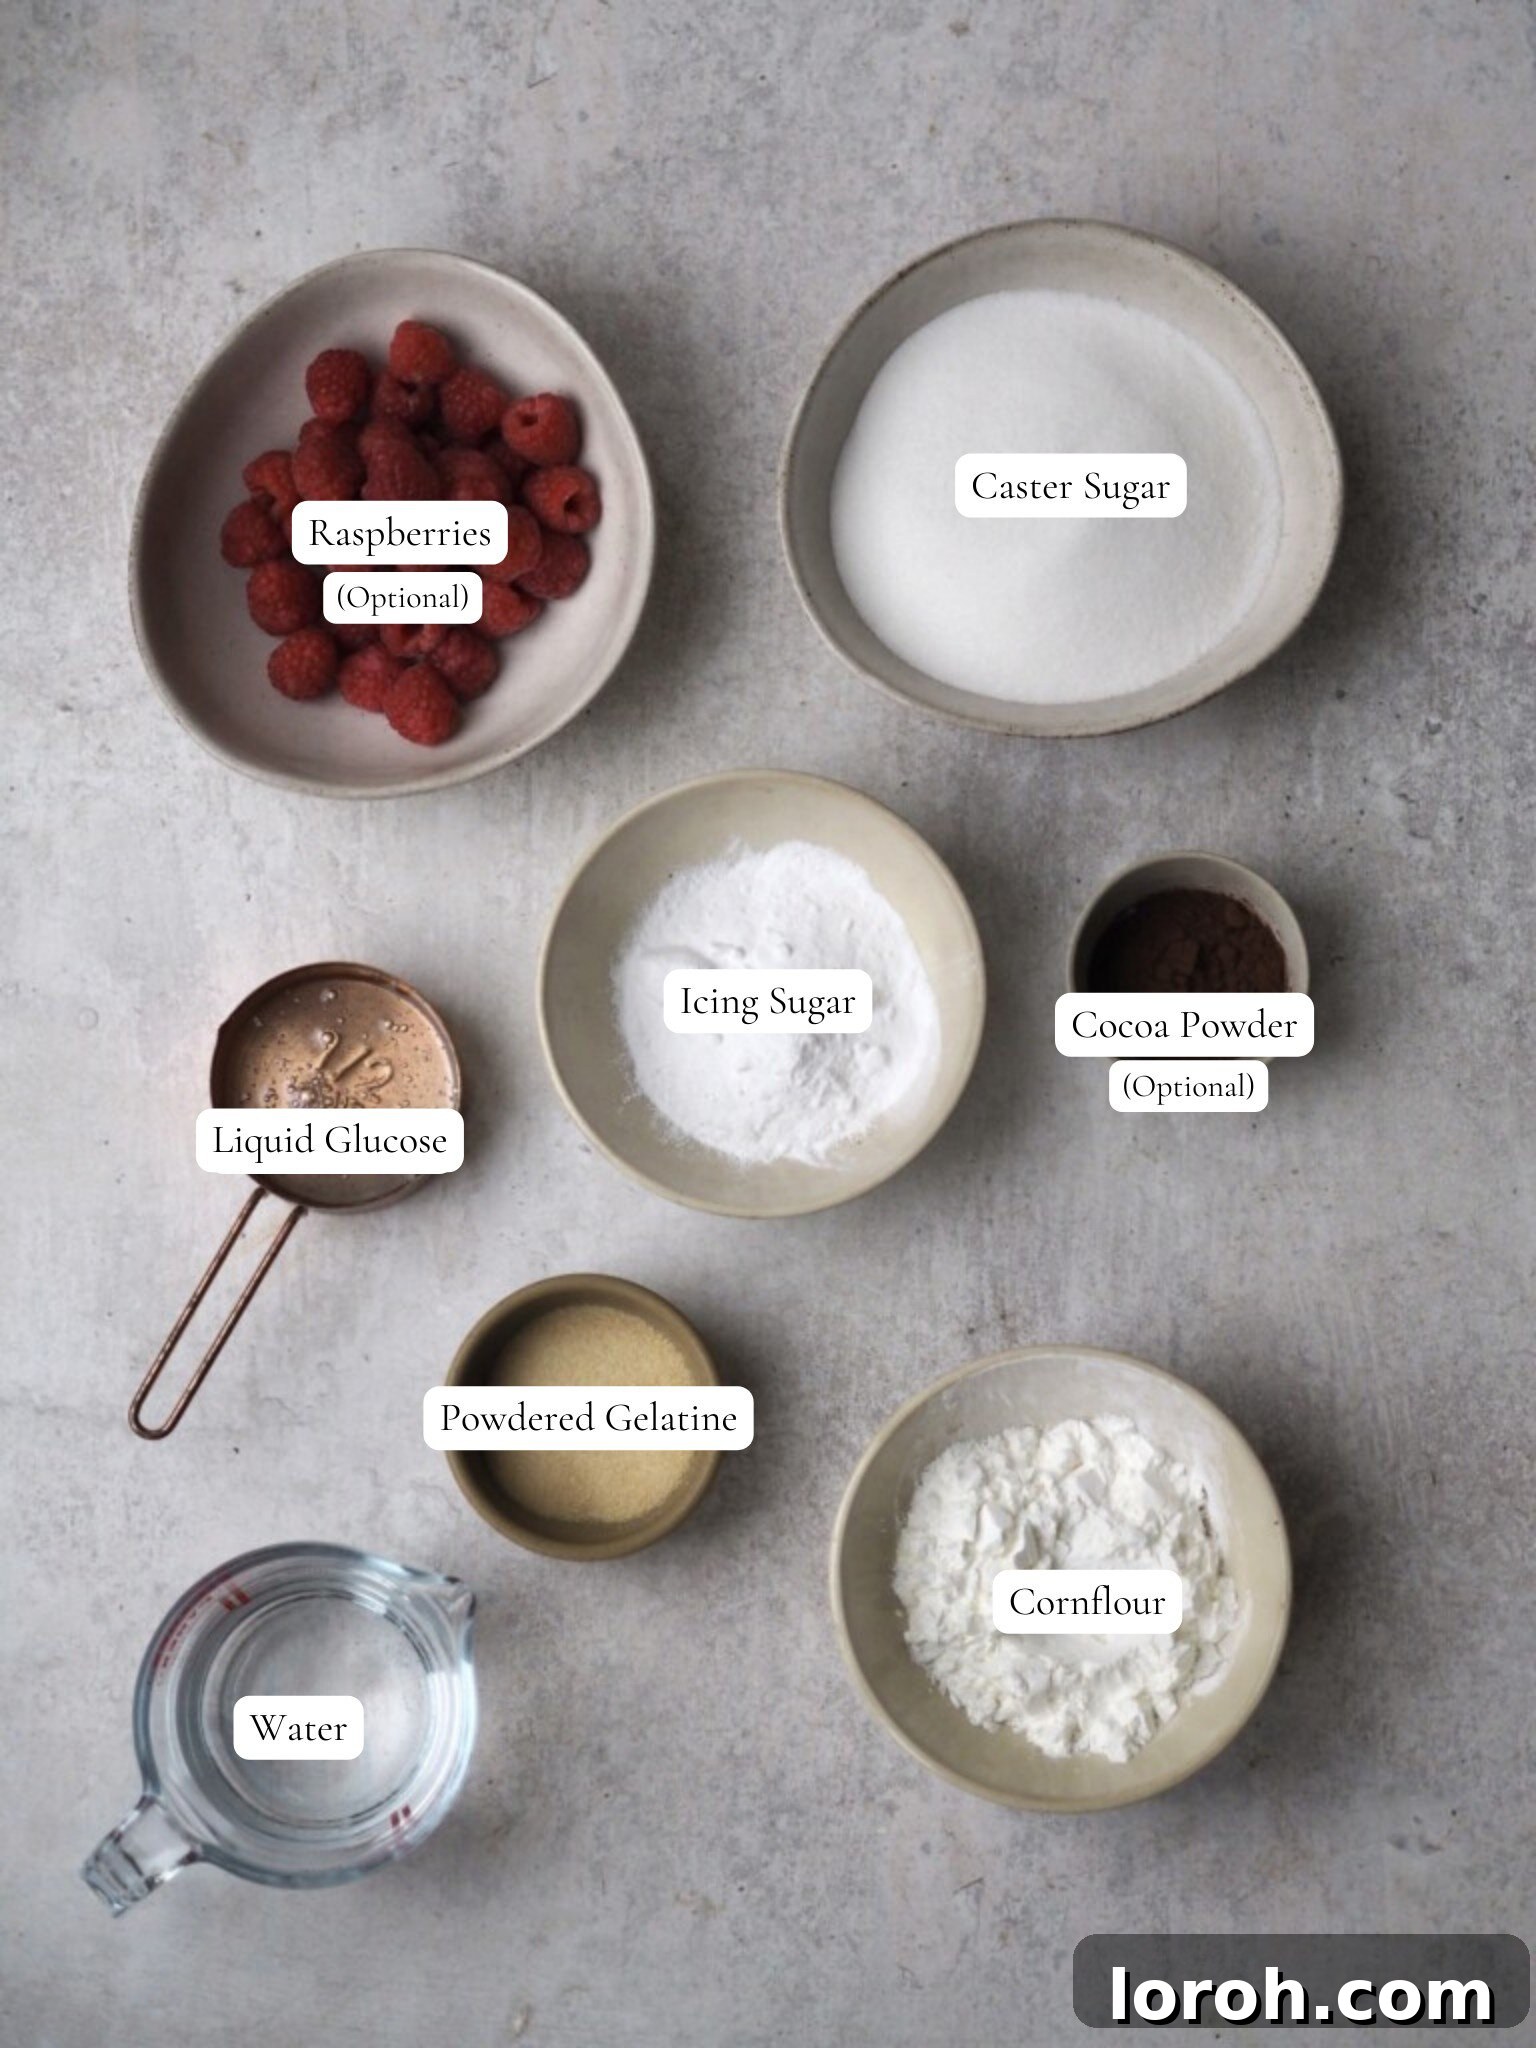
Crafting truly exceptional marshmallows from scratch relies on a few core ingredients, each playing a critical and distinct role in achieving that signature fluffy texture, delicate sweetness, and perfect structure:
- Powdered Gelatine: This is the absolute cornerstone ingredient, the key protein responsible for transforming your liquid marshmallow mixture into those perfectly firm yet delightfully bouncy cubes. Gelatine provides the essential structural matrix that allows the whipped sugar syrup to hold its shape. Ensuring your gelatine is properly bloomed (hydrated) before mixing is paramount for the final texture; skipping this step can result in rubbery or unset marshmallows.
- Liquid Glucose: Often heralded as the “secret ingredient” among confectioners, liquid glucose is critical for achieving the ideal marshmallow consistency. Its primary function is to prevent sugar crystallization, which can make your marshmallows grainy, brittle, or hard. Beyond preventing crystallization, it significantly contributes to the incredibly soft, delightfully chewy, and characteristically bouncy texture that truly distinguishes homemade marshmallows from their store-bought counterparts. Do not be tempted to omit this ingredient for optimal results.
- Caster Sugar: This finely granulated sugar forms the crucial basis of our sugar syrup. Its fine crystals dissolve quickly and evenly when heated with water, contributing to a smooth, clear syrup without a gritty texture. While standard white caster sugar yields classic pristine white marshmallows, you can experiment with golden caster sugar for a slightly darker hue and a subtle, delightful caramel undertone. Granulated sugar can also be used effectively if caster sugar is unavailable, though it may take slightly longer to dissolve.
- Water: This simple yet vital component is used to rehydrate (bloom) the powdered gelatine and to dissolve the caster sugar, forming the essential sugar syrup. The precise amount of water is important for achieving the correct consistency of the syrup before it reaches its target temperature.
- Cornflour (Cornstarch) & Icing Sugar (Powdered Sugar): This synergistic blend of two fine powders is absolutely essential for dusting your marshmallows once they are cut. This protective coating serves multiple vital functions: it prevents the inherently sticky marshmallow pieces from adhering to each other, to your hands, and to their storage container, while simultaneously imparting that classic, velvety finish and preventing moisture absorption.
What is Liquid Glucose and Why It Matters?
Liquid glucose is a thick, clear, and highly viscous syrup typically produced from the hydrolysis of starch, most commonly corn starch or maize starch. It is often interchangeably referred to as corn syrup or glucose syrup, though there can be nuanced regional distinctions and specific processing differences. Essentially, all corn syrup is a type of glucose syrup, but not all glucose syrups are exclusively derived from corn (some may originate from wheat, potatoes, or other starches). For the purpose of this marshmallow recipe, these terms are largely equivalent, but explicitly seeking “liquid glucose” will generally yield the most consistent and optimal results for achieving that perfect soft, chewy, and bouncy texture.
This indispensable ingredient is widely utilized in both professional and home baking and confectionery for several critical reasons. In the context of marshmallows, its primary role is as an anti-crystallization agent. It effectively prevents the sugar in the syrup from recrystallizing into granular bits, which would otherwise result in a grainy or brittle marshmallow texture. Beyond preventing crystallization, liquid glucose significantly contributes to the desired chewy, elastic, and smooth consistency, elevating your homemade marshmallows far beyond mass-produced versions. Its benefits extend beyond marshmallows; it is invaluable in icings, jams, candies, nougats, and even some baked goods, where it adds moisture, improves texture, and helps to extend shelf life.
You might be curious if you can produce liquid glucose at home, but given the precision required in its production, it is significantly easier, more reliable, and yields a superior product to purchase it commercially. In the UK, liquid glucose is readily available in the baking section of most large supermarkets, with reputable brands such as Dr. Oetker Liquid Glucose being a popular and accessible choice. If local availability is an issue, ordering it online is a convenient and dependable option. While its texture and viscosity are somewhat similar to golden syrup, it’s crucial to note that liquid glucose is clear and possesses a neutral flavor, unlike golden syrup, which has a distinct caramel taste and amber color that would alter the flavor profile of your marshmallows.
It’s important not to confuse liquid glucose with high-fructose corn syrup (HFCS), which is a distinct product primarily used in commercial food production and not typically found in home kitchens for baking purposes. For all your home confectionery needs, liquid glucose or standard corn syrup (not high-fructose) is precisely what you require. Its inclusion in this recipe is a guarantee for marshmallows that are not only profoundly delicious but also possess that coveted professional-grade, airy-yet-chewy texture.

Substitutions and Flavor Variations to Personalize Your Marshmallows
One of the most exciting aspects of making marshmallows at home is the endless array of possibilities for customization. Don’t hesitate to get creative and personalize your treats with these delightful substitution and flavor variation ideas:
- Vibrant Fruit Flavors: While the recipe specifically details how to make luscious raspberry marshmallows, the potential for fruit infusions is virtually limitless. You can effortlessly swap raspberries for a variety of other berries like sweet strawberries, tart blackberries, juicy blueberries, or even chopped cherries to create distinctly flavored and beautifully colored marshmallows. If you value convenience, high-quality, shop-bought fruit purées (ensure they are thick and concentrated for the best flavor impact) can be used as a convenient alternative to homemade ones.
- Classic Vanilla Bean Perfection: For a universally loved and comforting flavor, infuse your plain marshmallows with the rich aroma of premium vanilla. Simply mix in a good quality vanilla extract (preferably pure vanilla) or, for a more intense, complex flavor and the beautiful visual appeal of tiny black flecks, use vanilla bean paste after the marshmallow mixture has been fully whipped. The amount can be adjusted to your personal preference, typically starting with 1-2 teaspoons.
- Vibrant Food Colouring: Add an enchanting and festive touch to your marshmallows by incorporating a few drops of food coloring. This is an excellent idea for themed parties, seasonal holiday treats, or simply to match a specific color scheme for a special event. Gel food colorings are highly recommended over liquid drops, as they are far more concentrated and will not thin out the marshmallow mixture, ensuring vibrant hues. Add them during the final stages of the whipping process for even distribution.
- Bright Citrus Zest: For a wonderfully bright and zesty twist, finely grate the zest of fresh lemons, limes, or oranges directly into the marshmallow mixture during the final stages of whisking. This addition provides a refreshing burst of aromatic flavor that harmonizes beautifully with the inherent sweetness of the marshmallow base, creating a sophisticated treat.
- Decadent Chocolate Swirls or Chips: For chocolate lovers, lightly fold in a quantity of melted and slightly cooled chocolate (whether white, milk, or dark, depending on your preference) into a portion of your marshmallow mixture just before carefully pouring it into the prepared pan. This technique creates stunning chocolate swirls and adds an extra layer of rich flavor. Alternatively, you can gently fold in mini chocolate chips for textural contrast.
- Warm Spiced Delights: For autumnal or holiday-themed marshmallows, incorporate warming spices such as ground cinnamon, nutmeg, ginger, allspice, or a ready-made pumpkin pie spice blend. These can be added either to the sugar syrup during its cooking phase or gently folded into the marshmallow mixture during the whipping process, creating wonderfully aromatic treats.
- Using Gelatin Sheets Instead of Powder: If you prefer working with gelatin sheets (also known as gelatin leaves), they can easily be substituted for powdered gelatin in this recipe. To do so, replace the 8 teaspoons (approximately 24g) of powdered gelatin with 12 standard gelatin sheets/leaves. First, soften the gelatin sheets by submerging them in a bowl of cold water for 5-10 minutes until they become pliable. Once softened, squeeze out all excess water from the sheets, then dissolve them completely in the 4 tablespoons of cold water specified for the powdered gelatin. Once dissolved, proceed with the recipe as instructed from step ONE.
Step-by-Step Guide: How to Make Easy Homemade Marshmallows
Follow this comprehensive step-by-step guide with detailed explanations to create perfect, fluffy homemade marshmallows. For exact measurements and a printable version, please refer to the full recipe card at the end of this post.
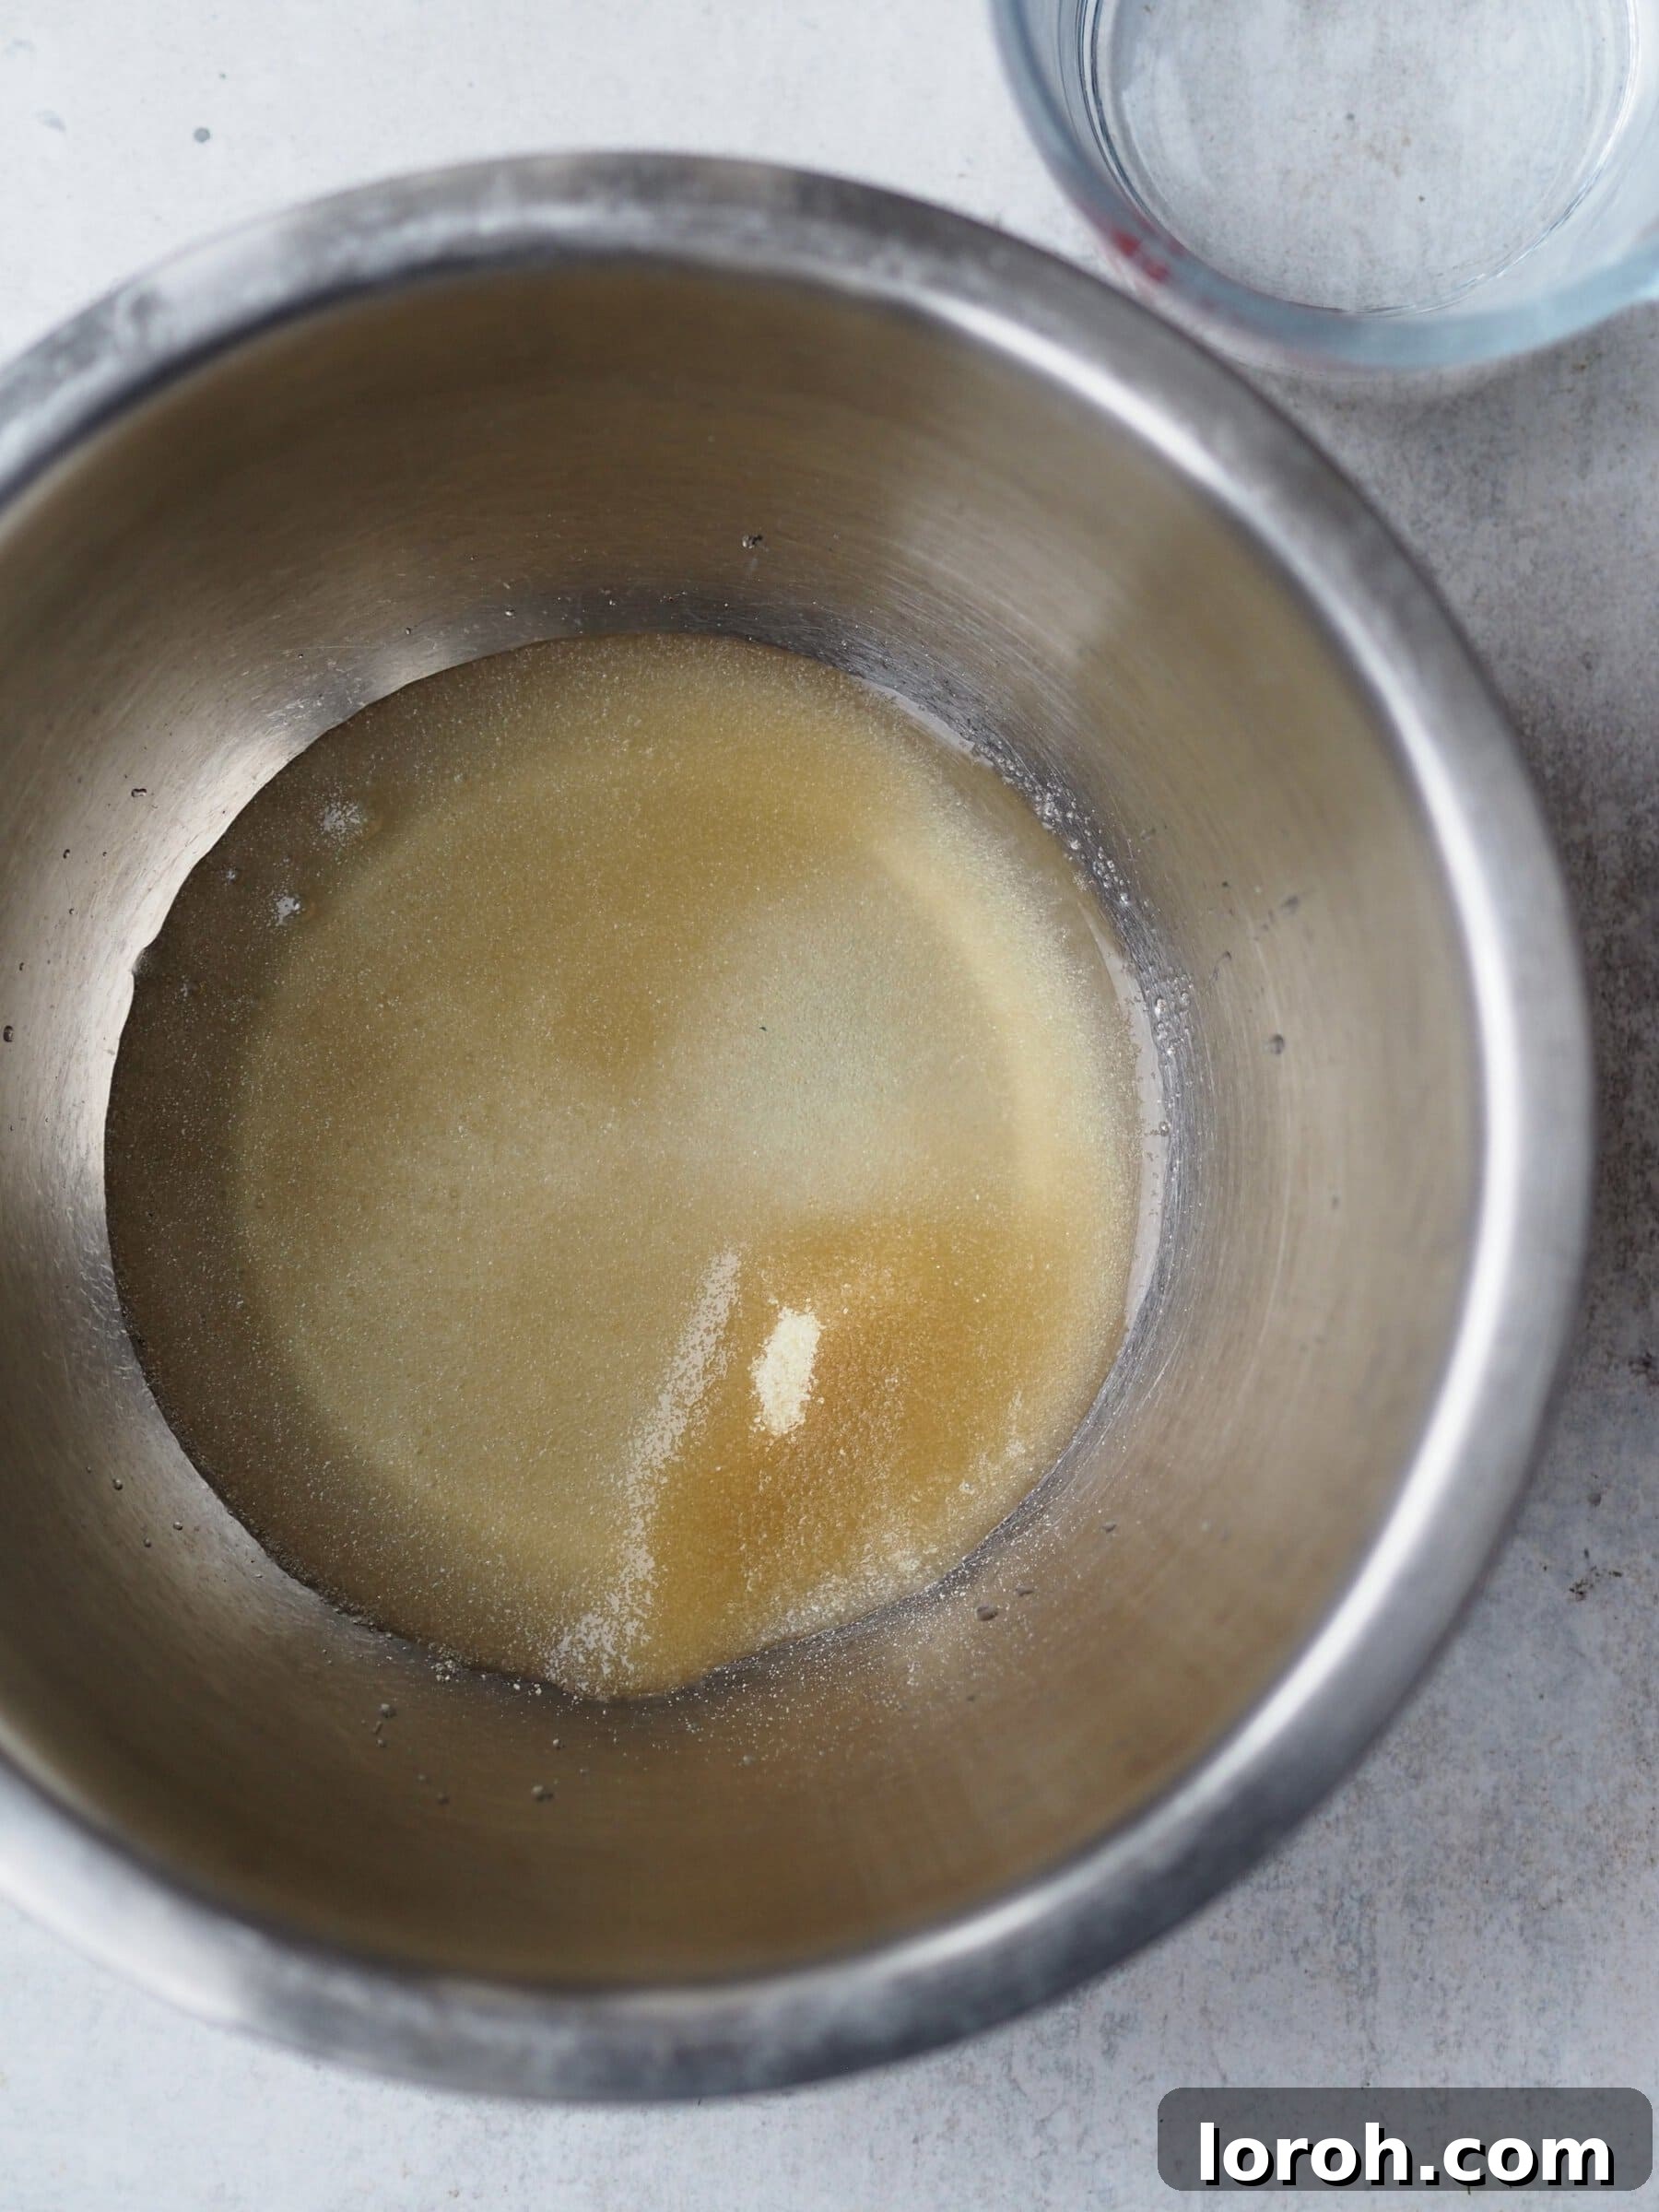
Step One: Prepare Your Pan and Bloom the Gelatine. Begin by thoroughly preparing your baking tin, which is a crucial step for preventing sticking. A 30x20cm rectangular tin is highly recommended. Generously grease the entire interior of the tin – bottom and all sides – with a thin, even layer of neutral-flavored vegetable oil, using clean fingers or a paper towel. In a separate bowl, mix together your icing sugar and cornflour (these will be used for dusting). Tip a generous amount of this combined dusting mixture into your well-greased tin, shaking it around gently to ensure the entire oiled surface is completely coated. Pour any excess dusting powder back into the bowl for later use. Next, place the powdered gelatine into a large heatproof bowl. This bowl should ideally be the bowl of a stand mixer, as it will greatly facilitate the subsequent whisking stage. Add 4 tablespoons of cold water to the gelatine and mix thoroughly with a fork until all the gelatine is hydrated and bloomed. Set this bowl aside to allow the gelatine to fully swell and soften.
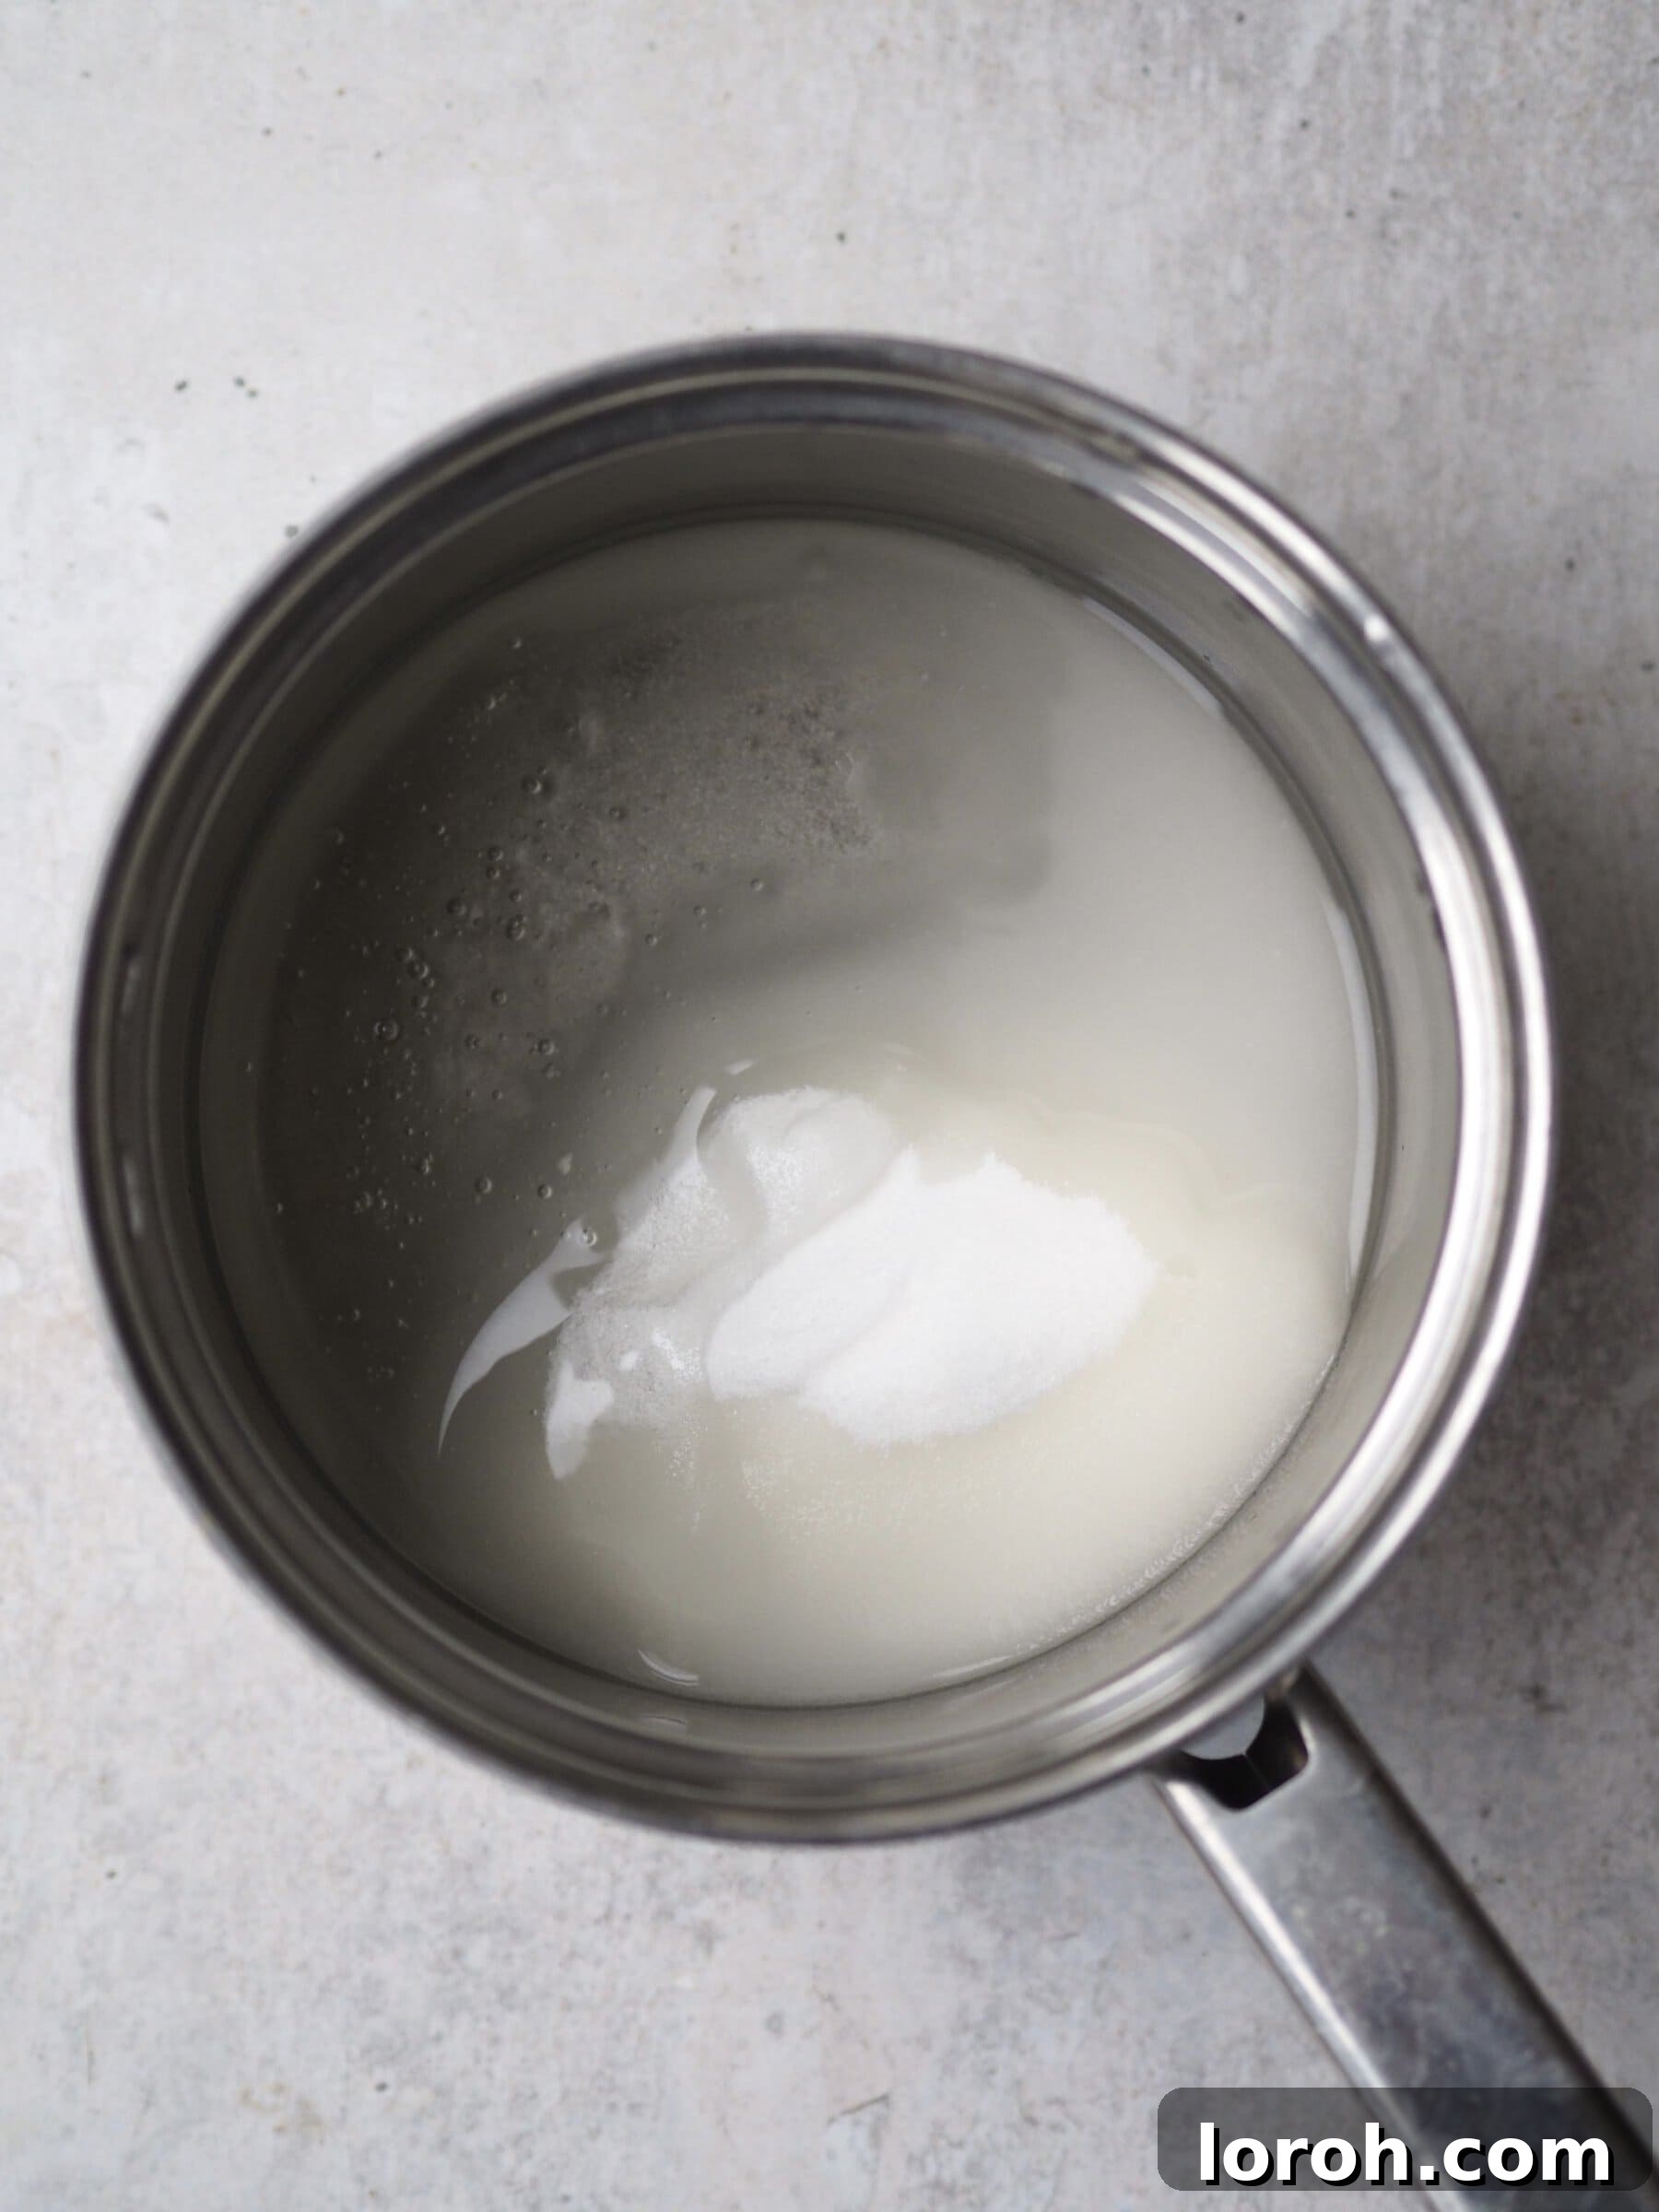
Step Two: Begin the Sugar Syrup Creation. In a large, heavy-bottomed saucepan, carefully combine the liquid glucose and caster sugar. Pour in 300ml of water. Place the saucepan over a medium heat setting on your hob. Stir the mixture gently but continuously until all the sugar crystals have completely dissolved in the water. This continuous stirring at the initial stage is critical to prevent any sugar crystals from forming on the sides of the pan, which could lead to crystallization of the entire syrup. Once the mixture begins to simmer, indicated by small bubbles forming around the edges and on the surface, you should stop stirring. Excessive stirring after this point can actually encourage premature sugar crystallization, resulting in a grainy or undesirable marshmallow texture. Allow the syrup to continue cooking undisturbed.
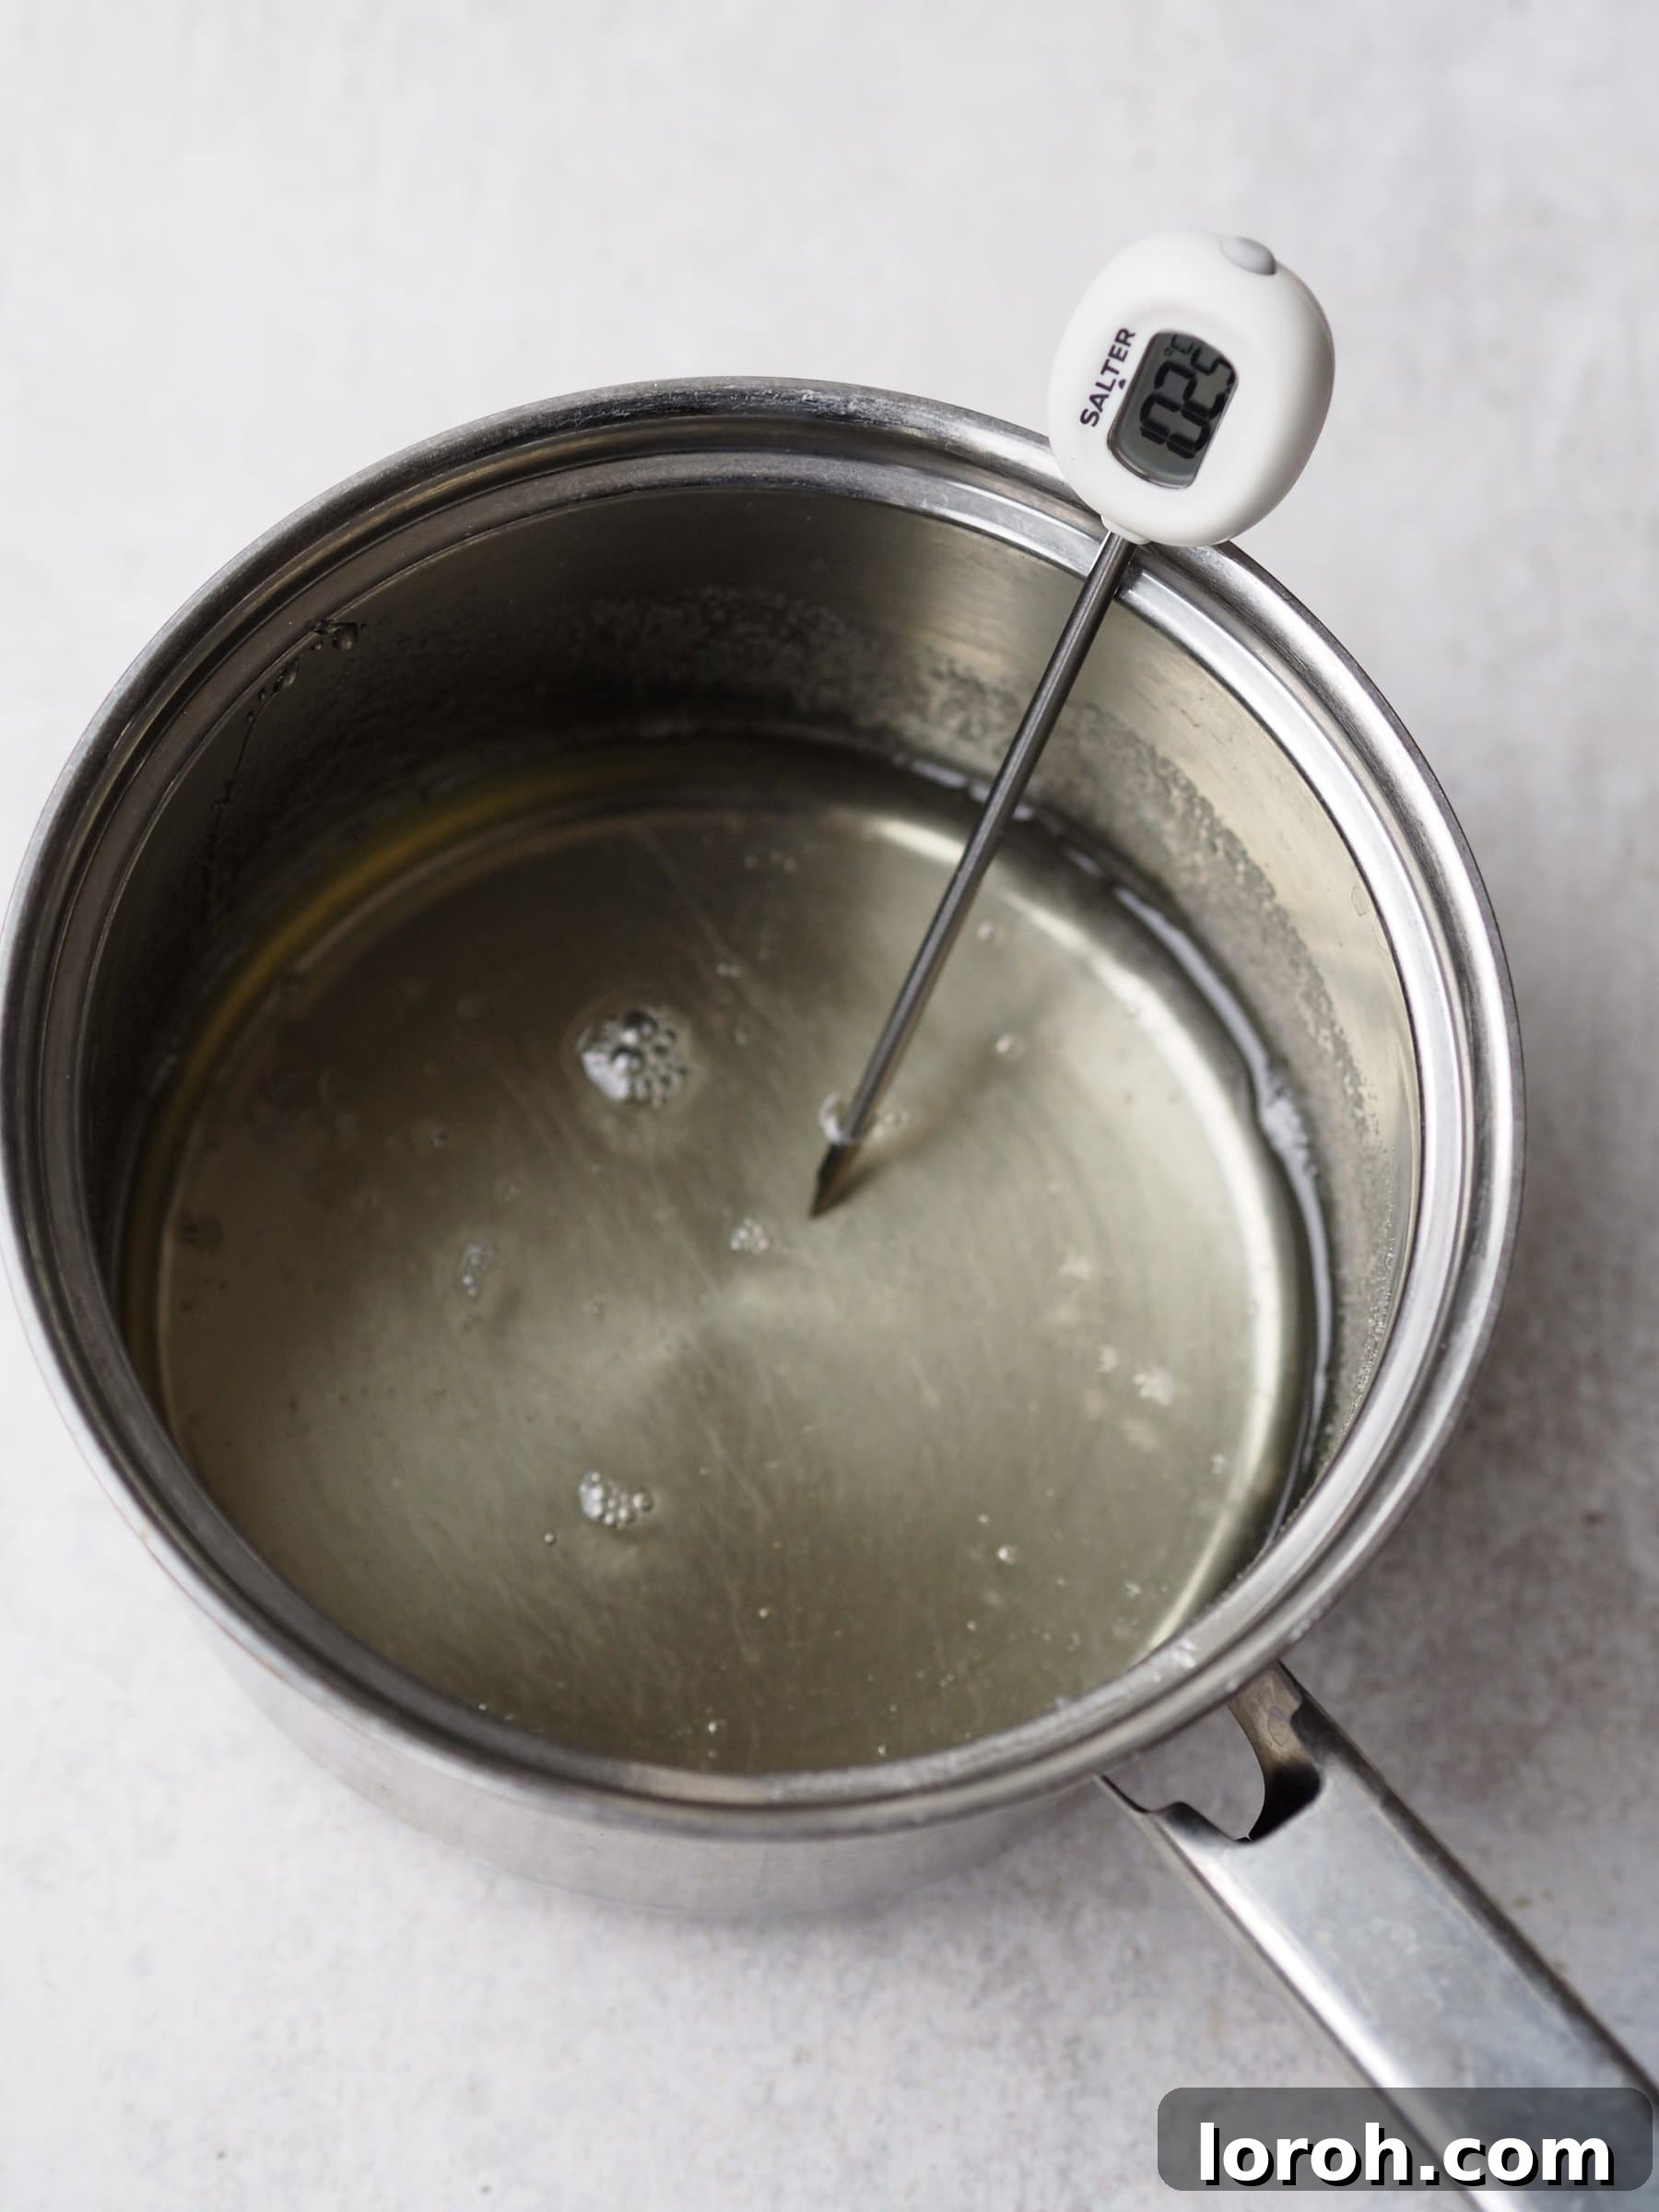
Step Three: Achieve the Precise Syrup Temperature. Continue to heat the sugar syrup over a steady medium-high heat. You may gently swirl the pan occasionally to ensure even heat distribution, but it’s important to resist the urge to stir with a spoon during this phase. This is where a reliable jam or candy thermometer becomes an absolutely indispensable tool. Carefully insert your thermometer into the simmering syrup, ensuring that the tip does not touch the bottom of the pan, as this can give an inaccurate reading. Monitor the temperature meticulously until the sugar syrup reaches precisely 115°C (equivalent to 239°F). At this critical stage, the liquid should appear perfectly clear and be bubbling actively. Exercise extreme caution when handling the saucepan at this point, as the sugar syrup will be incredibly hot and can cause severe burns if splashed.
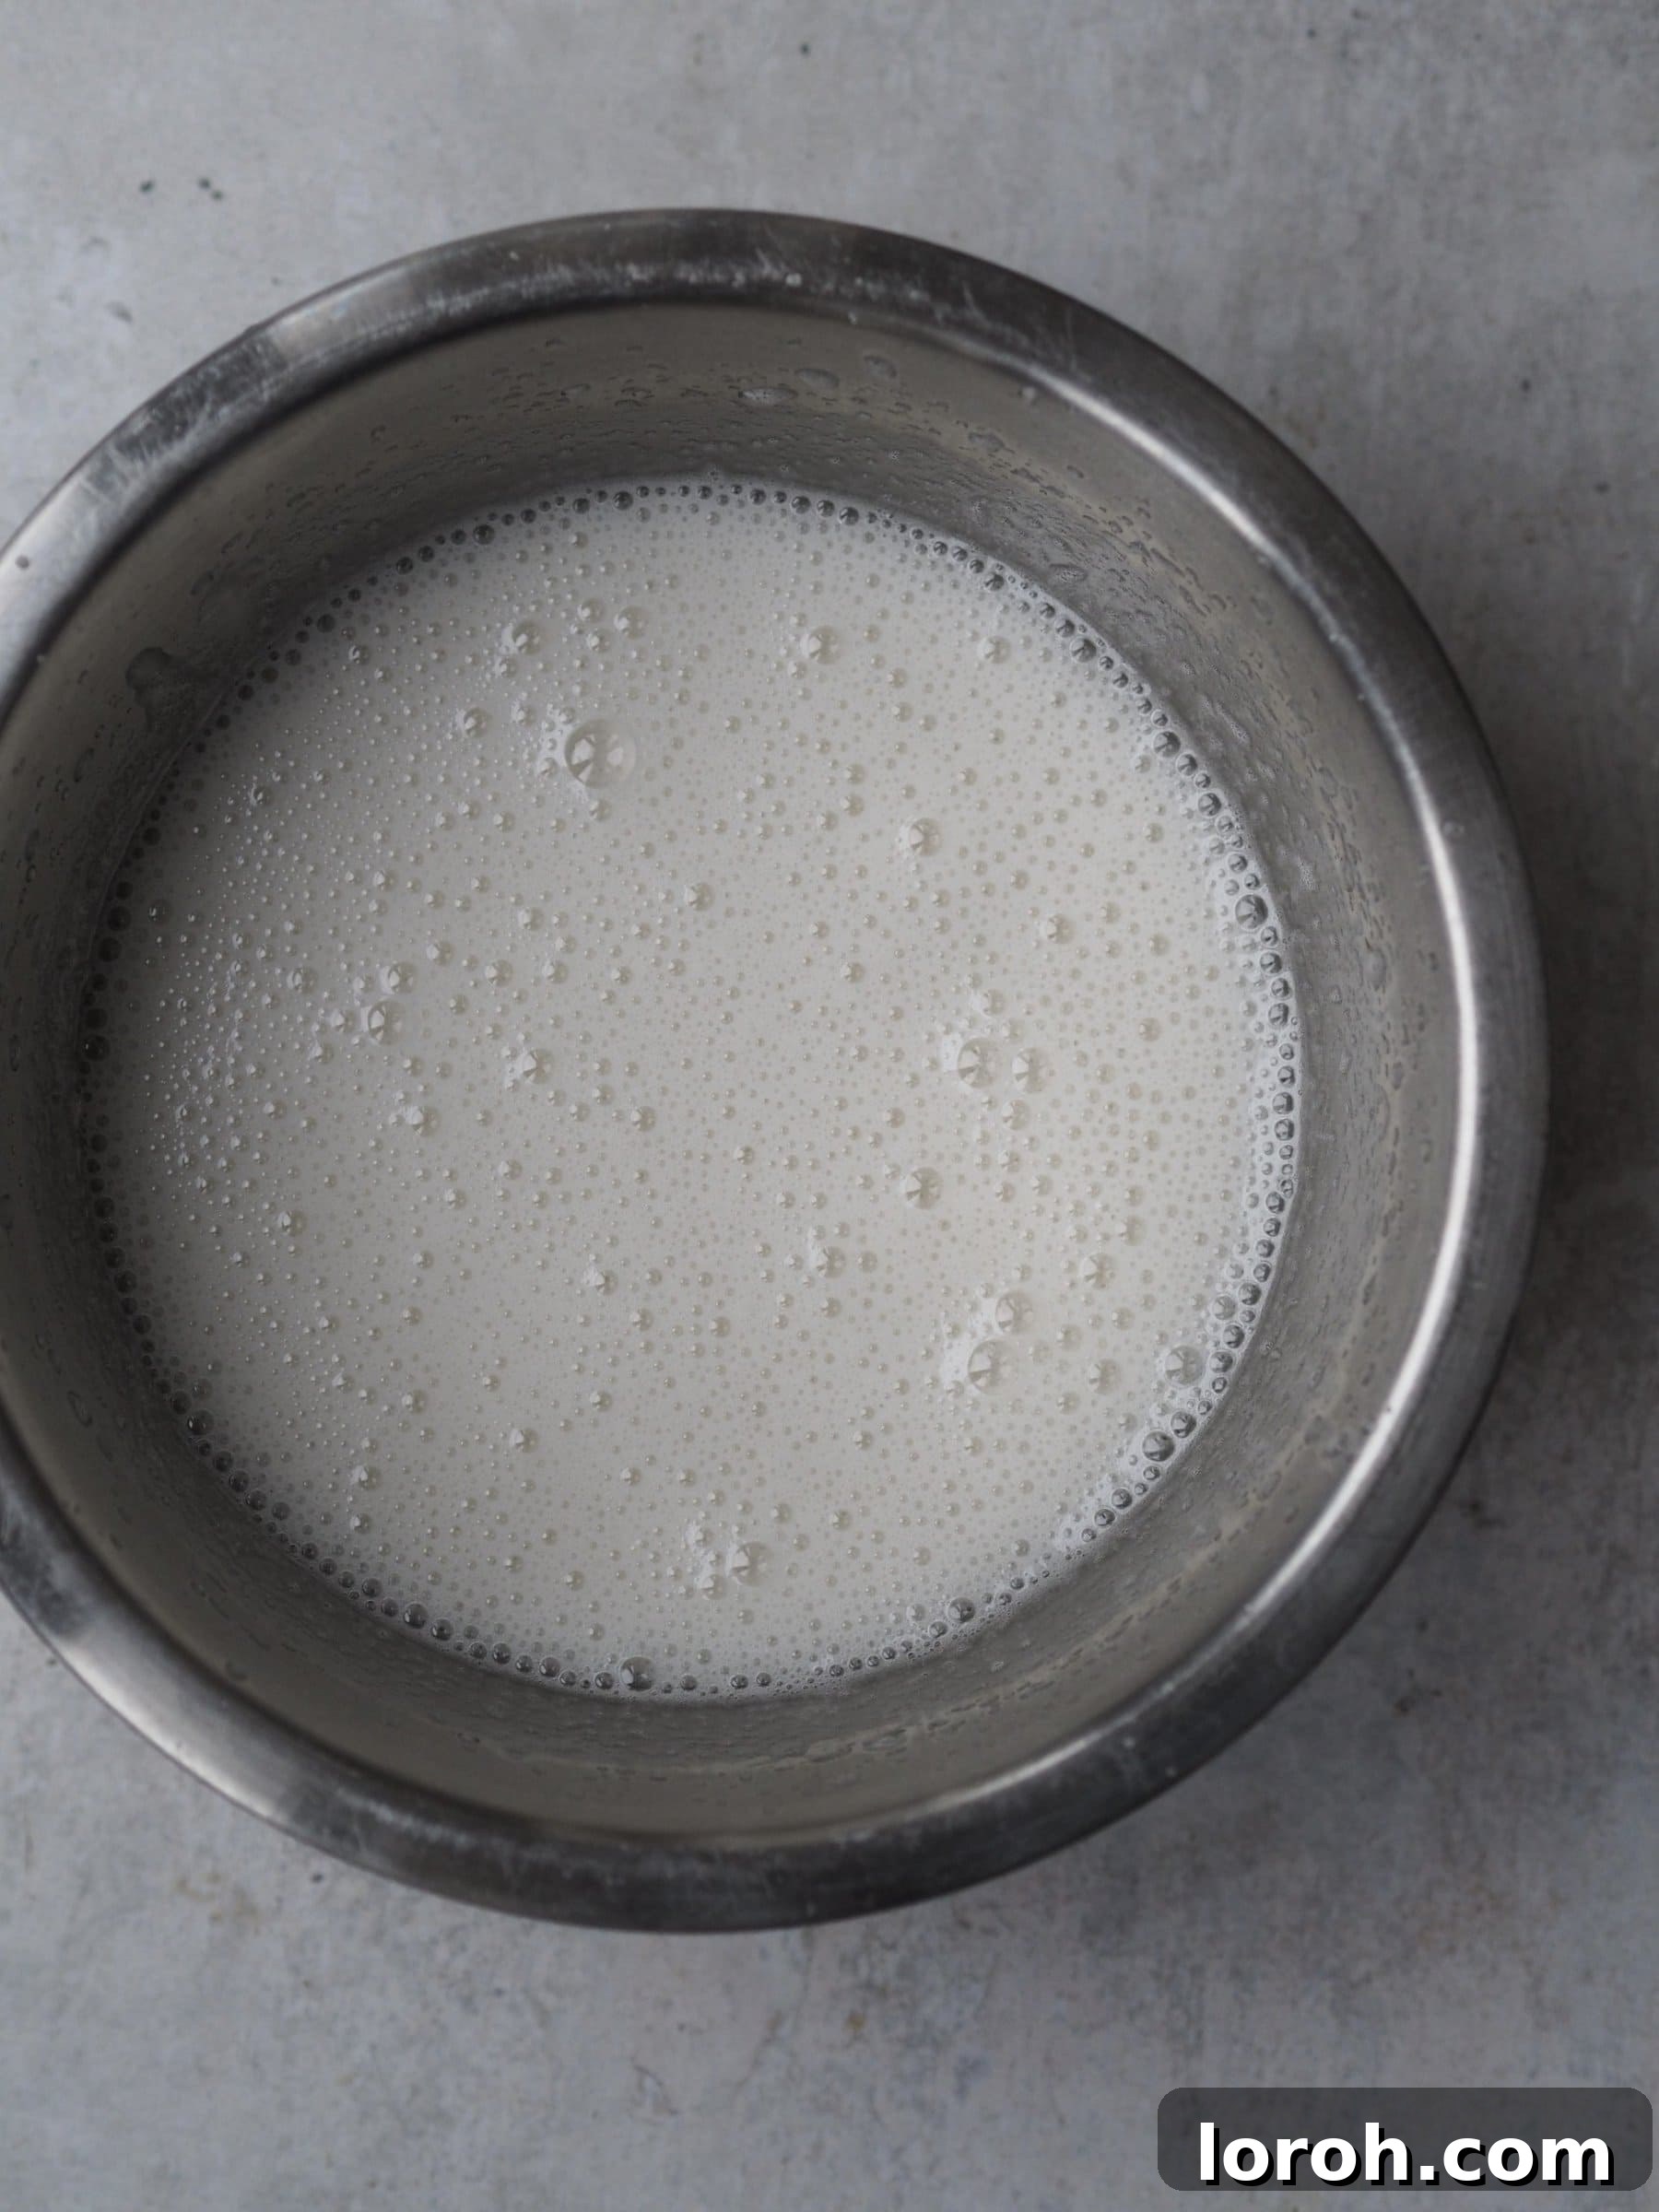
Step Four: Carefully Combine Syrup and Gelatine. As soon as your sugar syrup precisely hits 115°C, immediately and carefully remove the saucepan from the heat. Without delay, transfer it to the area where your stand mixer (or electric whisk) is ready with the bloomed gelatine. Begin whisking the gelatine mixture on a low speed using an electric whisk or, ideally, your stand mixer fitted with the whisk attachment. Very slowly and steadily, begin to drizzle the extremely hot sugar syrup into the gelatine mixture. This slow and controlled addition is absolutely crucial; it helps to gradually temper the gelatine and prevents it from seizing or becoming lumpy due to the sudden temperature change. Maintain continuous whisking throughout this entire process to ensure the syrup is smoothly and evenly incorporated into the gelatine. Be extremely careful to avoid splashing the hot syrup, as it is very dangerous.
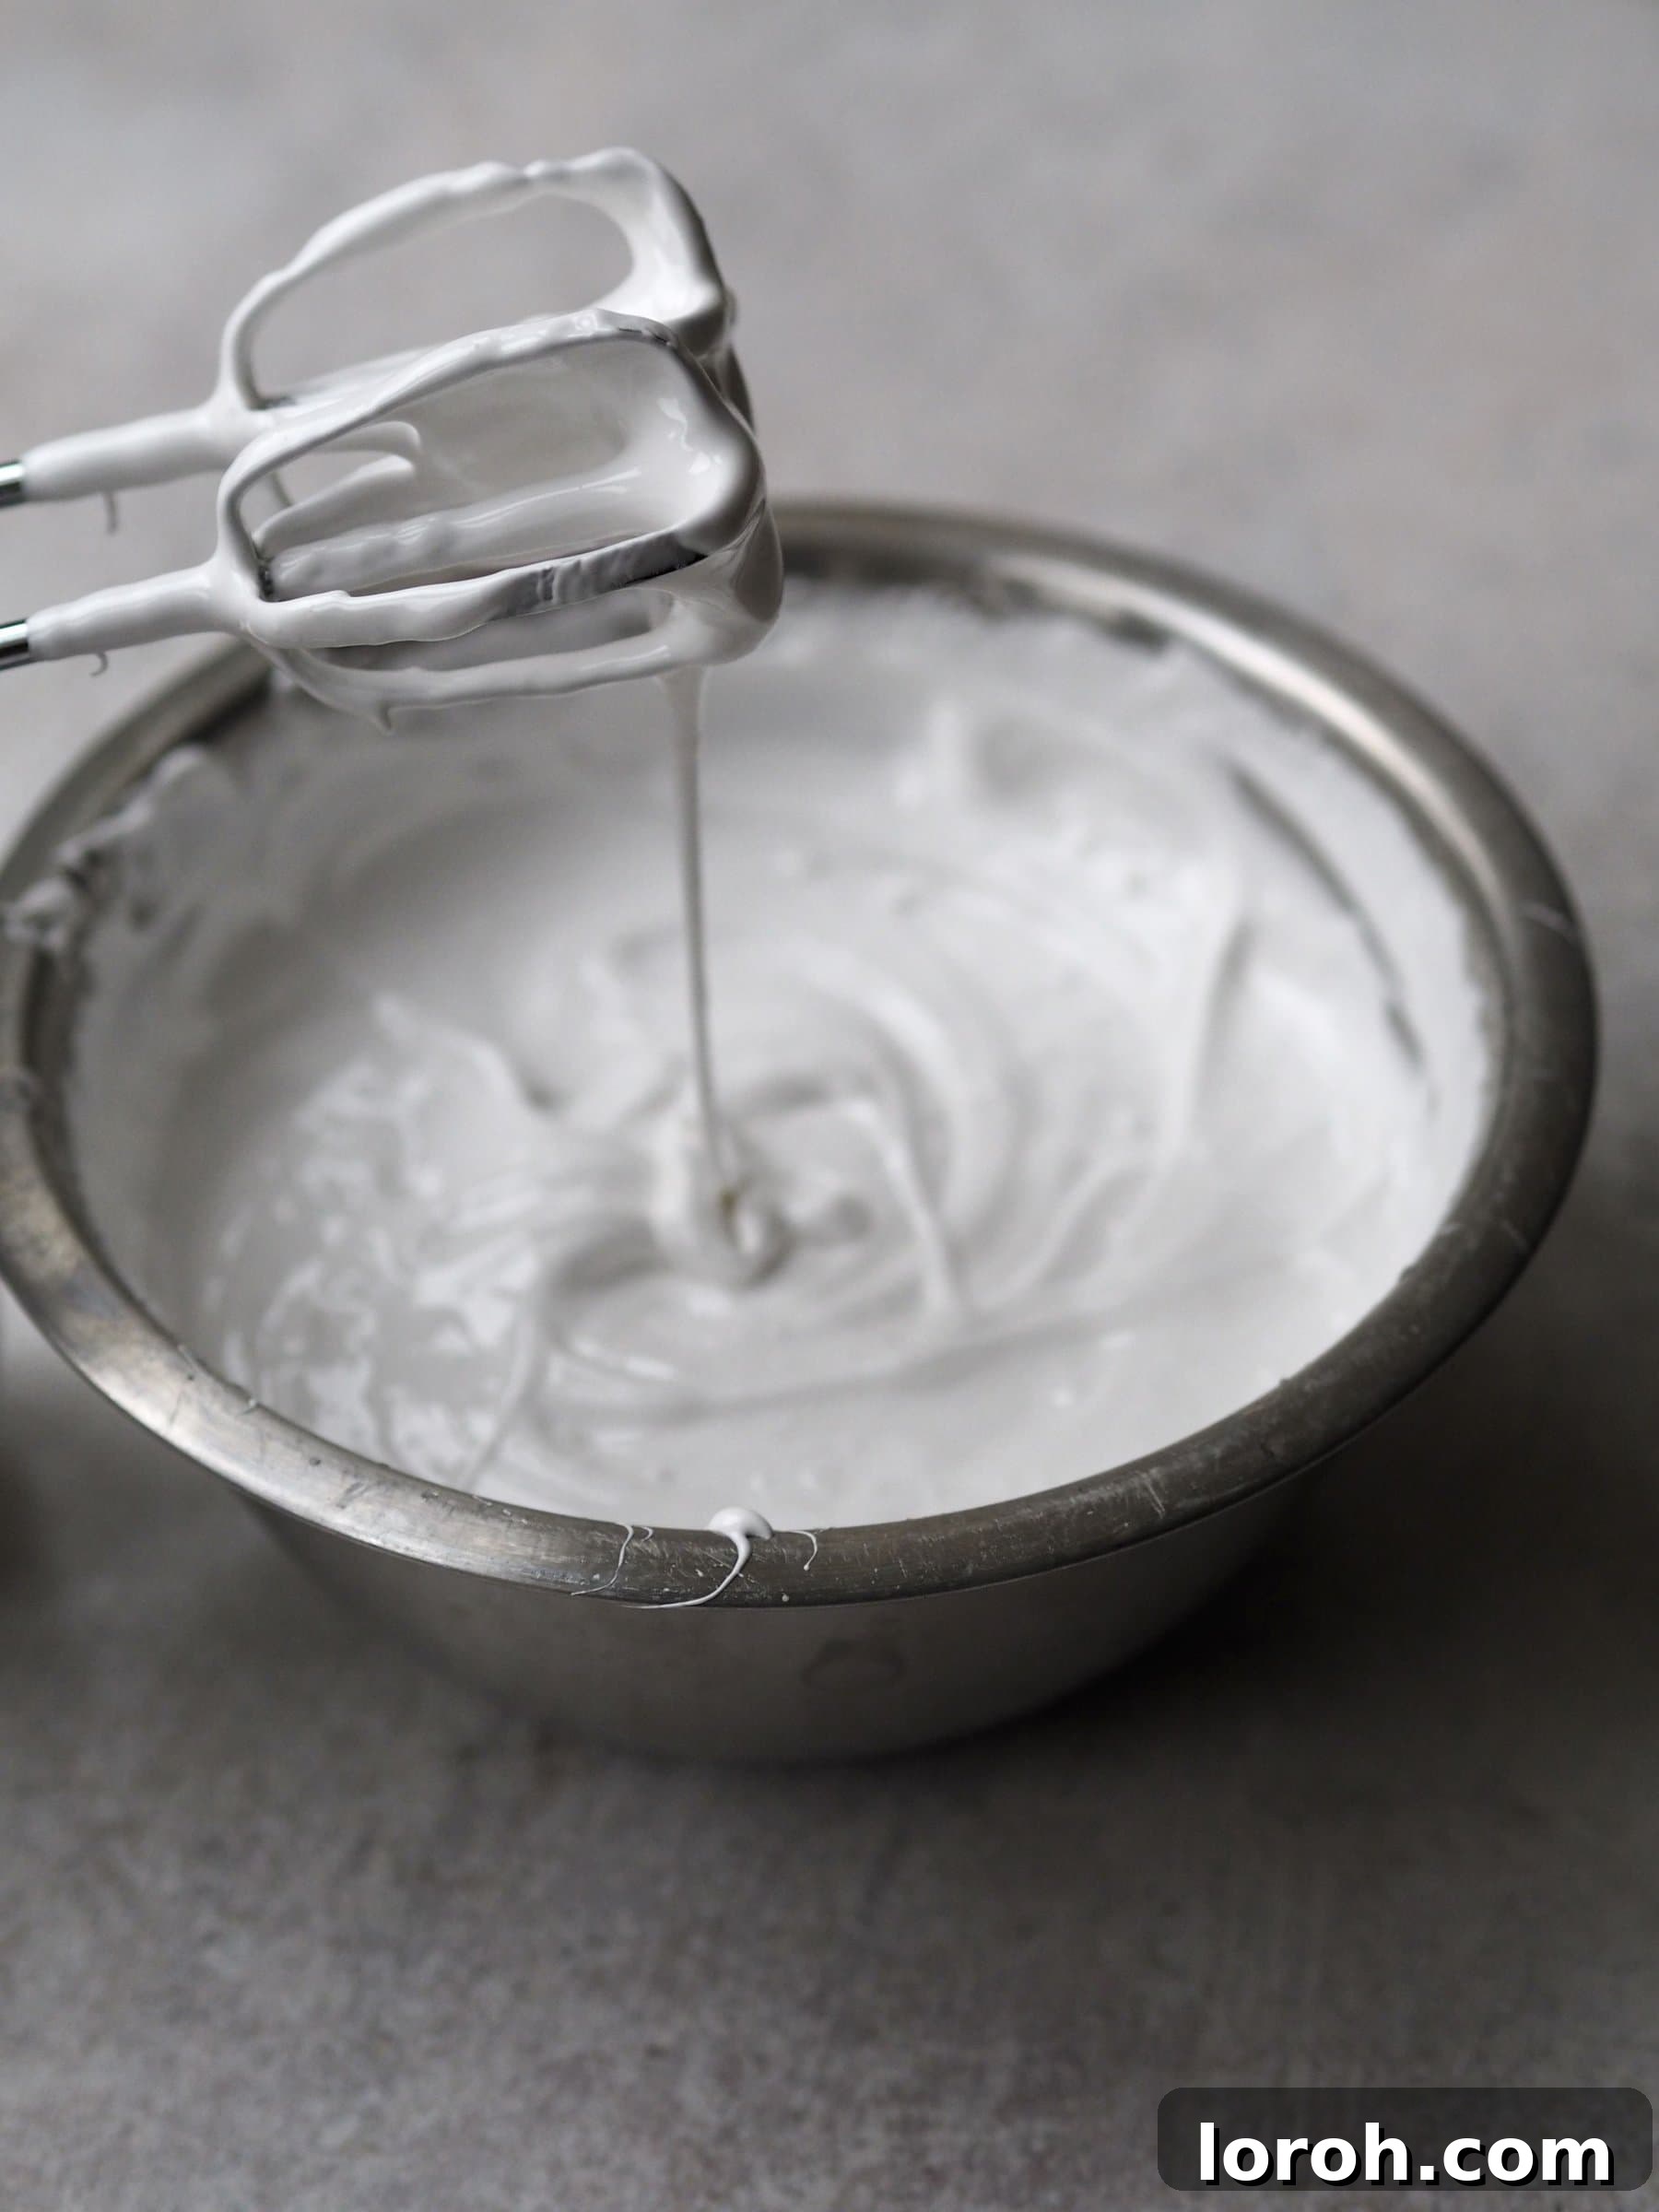
Step Five: Whip to Fluffy Perfection. Once every last drop of the hot sugar syrup has been added to the gelatine mixture, increase the whisking speed to medium-high. Continue to whisk vigorously and without interruption for a substantial period, typically between 12-14 minutes. During this remarkable transformation, the mixture will undergo significant changes: it will dramatically increase in volume, lighten considerably in color, and develop into a thick, glossy, opaque white, meringue-like texture that holds soft, billowy peaks when the whisk is lifted. Furthermore, the bowl of your mixer will noticeably cool down as air is incorporated. This extended whipping process is paramount; it incorporates a vast amount of air, which creates the characteristic light and airy texture, and also cools the mixture sufficiently for setting. Do not be tempted to cut this step short, even if the mixture appears “done” earlier.
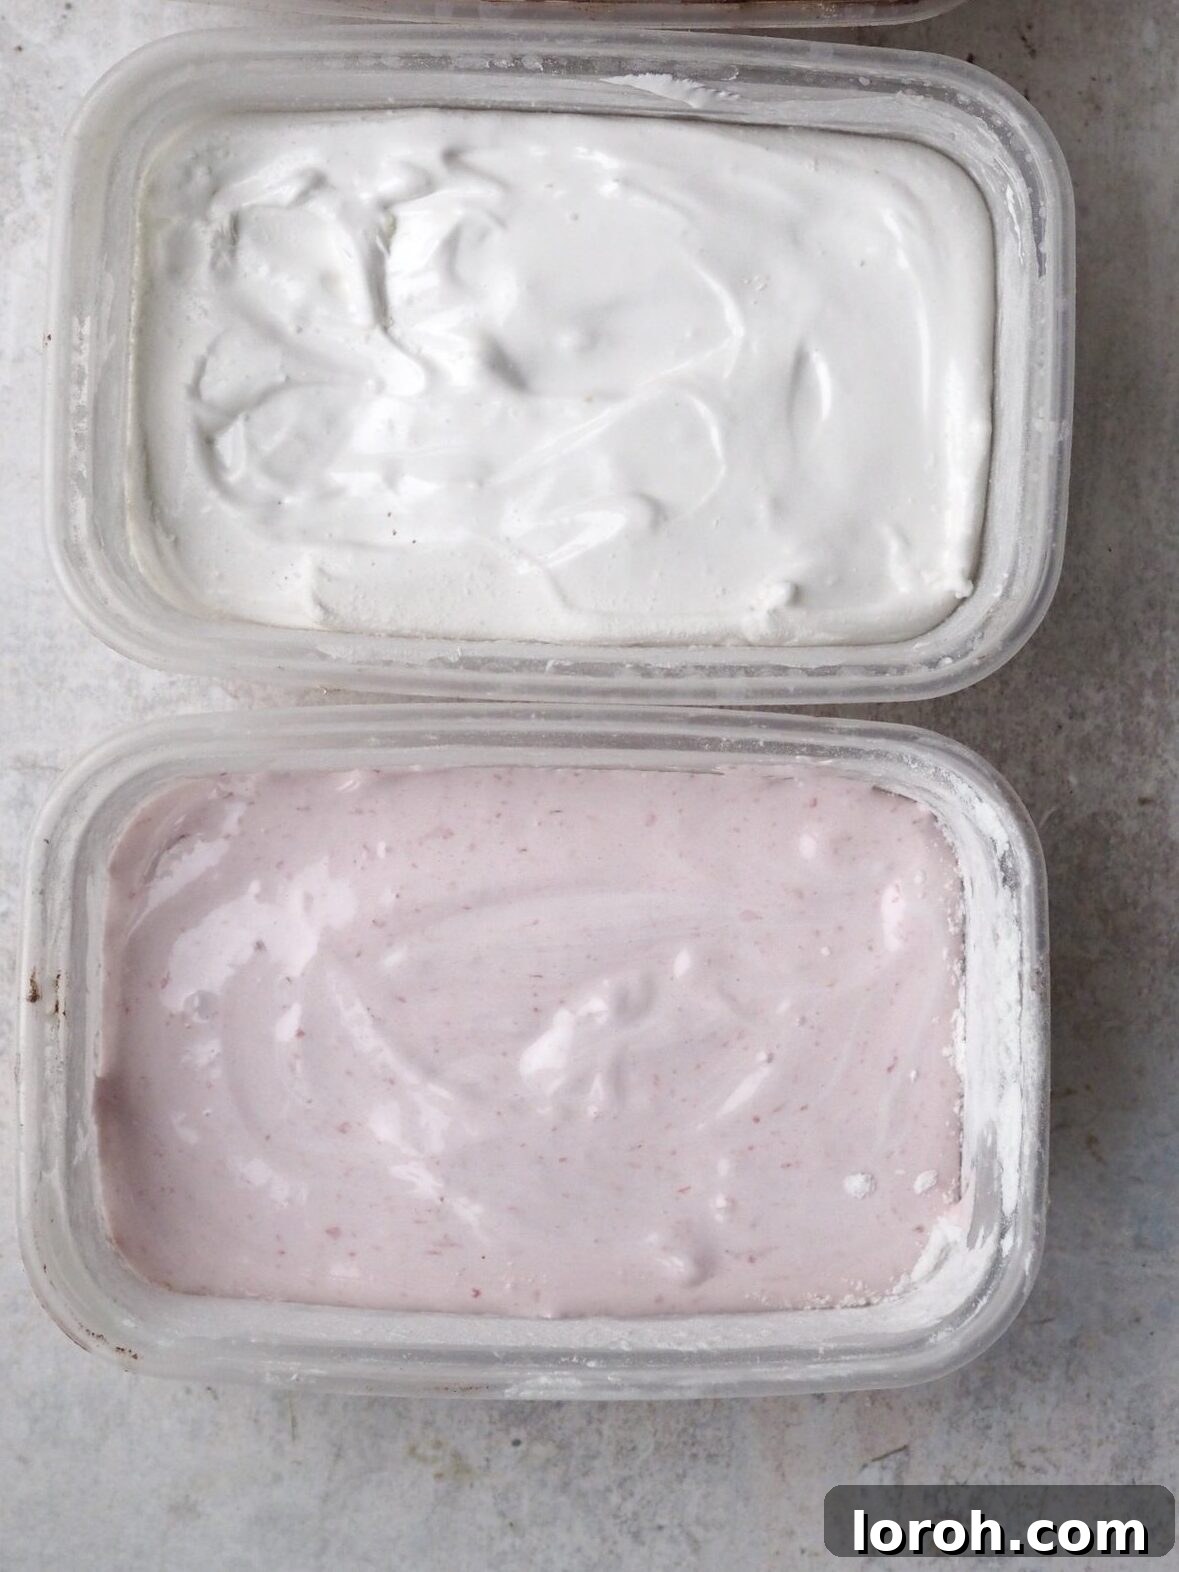
Step Six: Setting the Marshmallows. Immediately after the whisking is complete, and while the mixture is still pliable but thick, promptly spoon the marshmallow mixture into your previously well-greased and dusted tin. The mixture will be quite sticky and voluminous, so use a lightly oiled spatula or a palette knife to gently spread and smooth the top evenly across the entire surface of the tin. Work relatively quickly during this stage before the mixture begins to set too much. Once smoothed to your satisfaction, leave the tin undisturbed at room temperature for a minimum of 2 hours. For the best, most reliably firm results, it is highly recommended to allow the marshmallows to set overnight. Resist any temptation to move or touch them during this crucial setting period, as disturbance can affect the final texture.
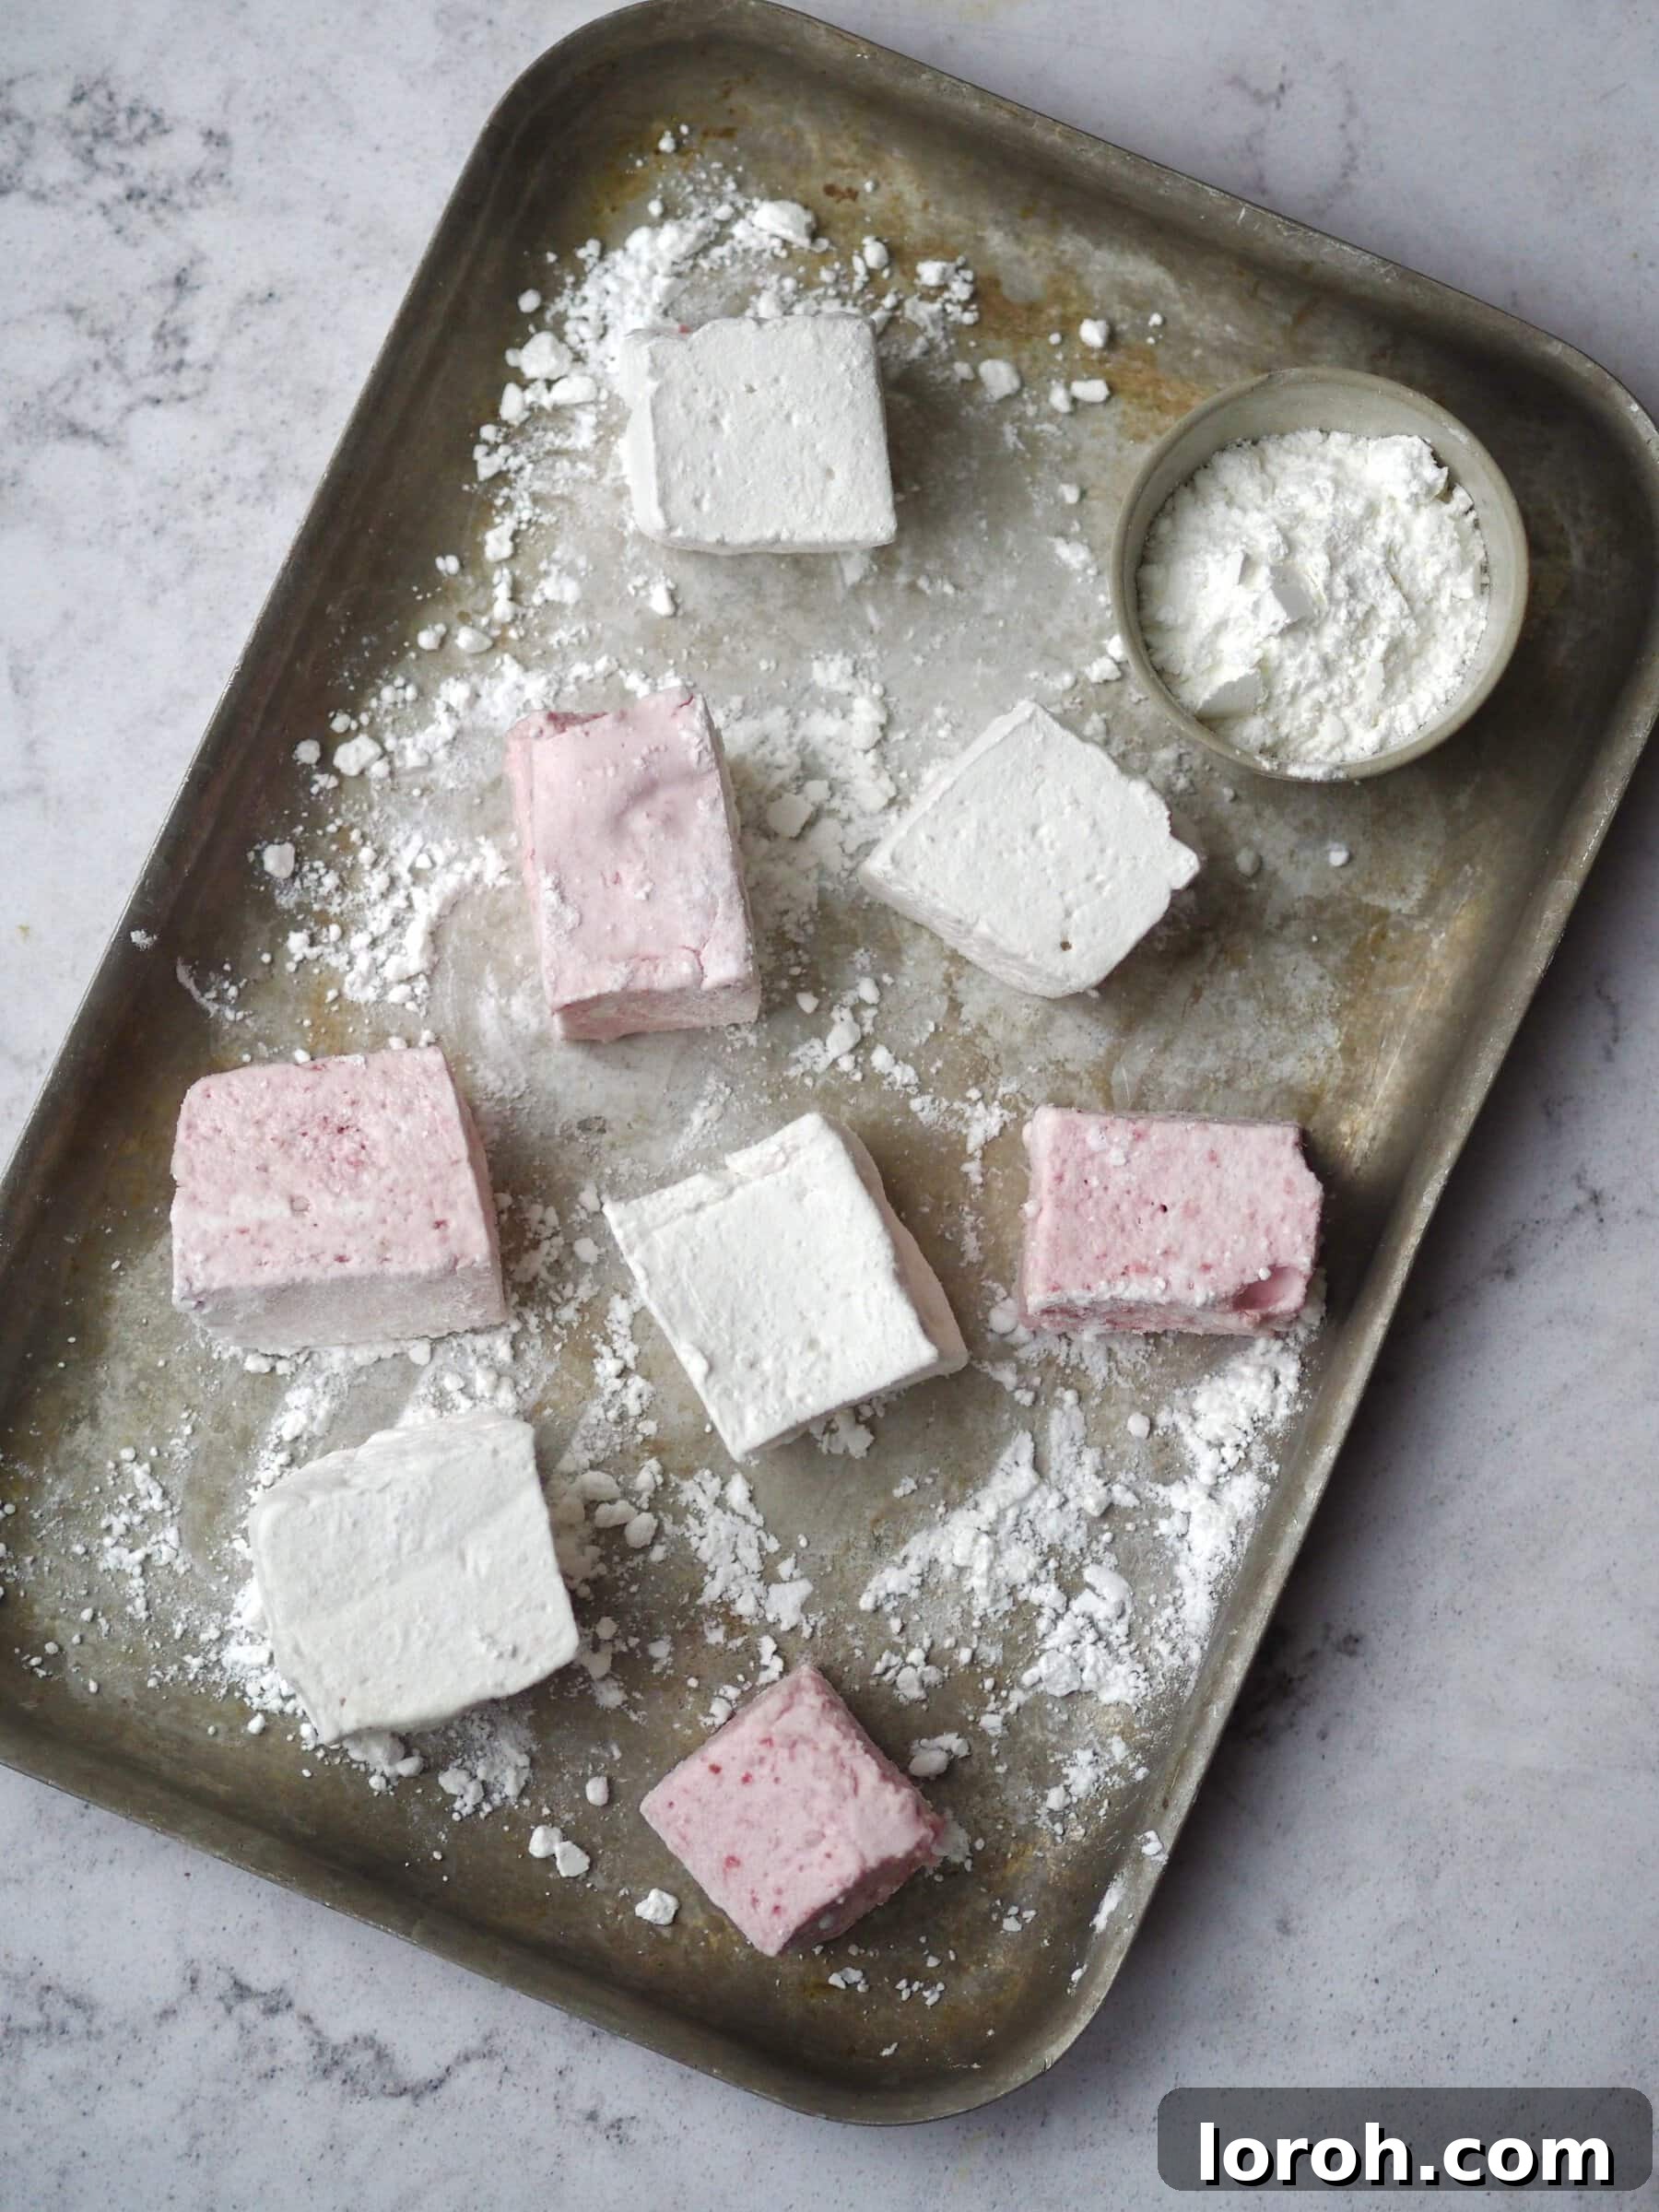
Step Seven: Cut and Liberally Dust. Once your marshmallow slab has fully set and is firm to the touch, generously dust a clean baking tray or a large cutting board with a fresh layer of your combined cornflour and icing sugar mixture. Carefully invert the entire marshmallow block onto this prepared surface. If the marshmallow resists coming out of the tin, gently pull away the edges of the marshmallow from the sides of the tin to help release it. Now, take a large, sharp knife and dust its blade generously with the same icing sugar and cornflour mix. This is vital because marshmallows are incredibly sticky, and a well-dusted knife prevents them from adhering and tearing. Alternatively, you can run the knife under very hot water and wipe it clean between each cut. Proceed to cut the marshmallow block into equal-sized cubes or your preferred shapes. As you cut each individual piece, immediately toss it in the bowl with more of the icing sugar & cornflour mixture, ensuring every single side is thoroughly and completely coated. This crucial dusting step prevents sticking, creates that classic marshmallow finish, and inhibits moisture absorption. Feel free to add more dusting powder as needed; it’s more about thorough coverage than an exact measurement.
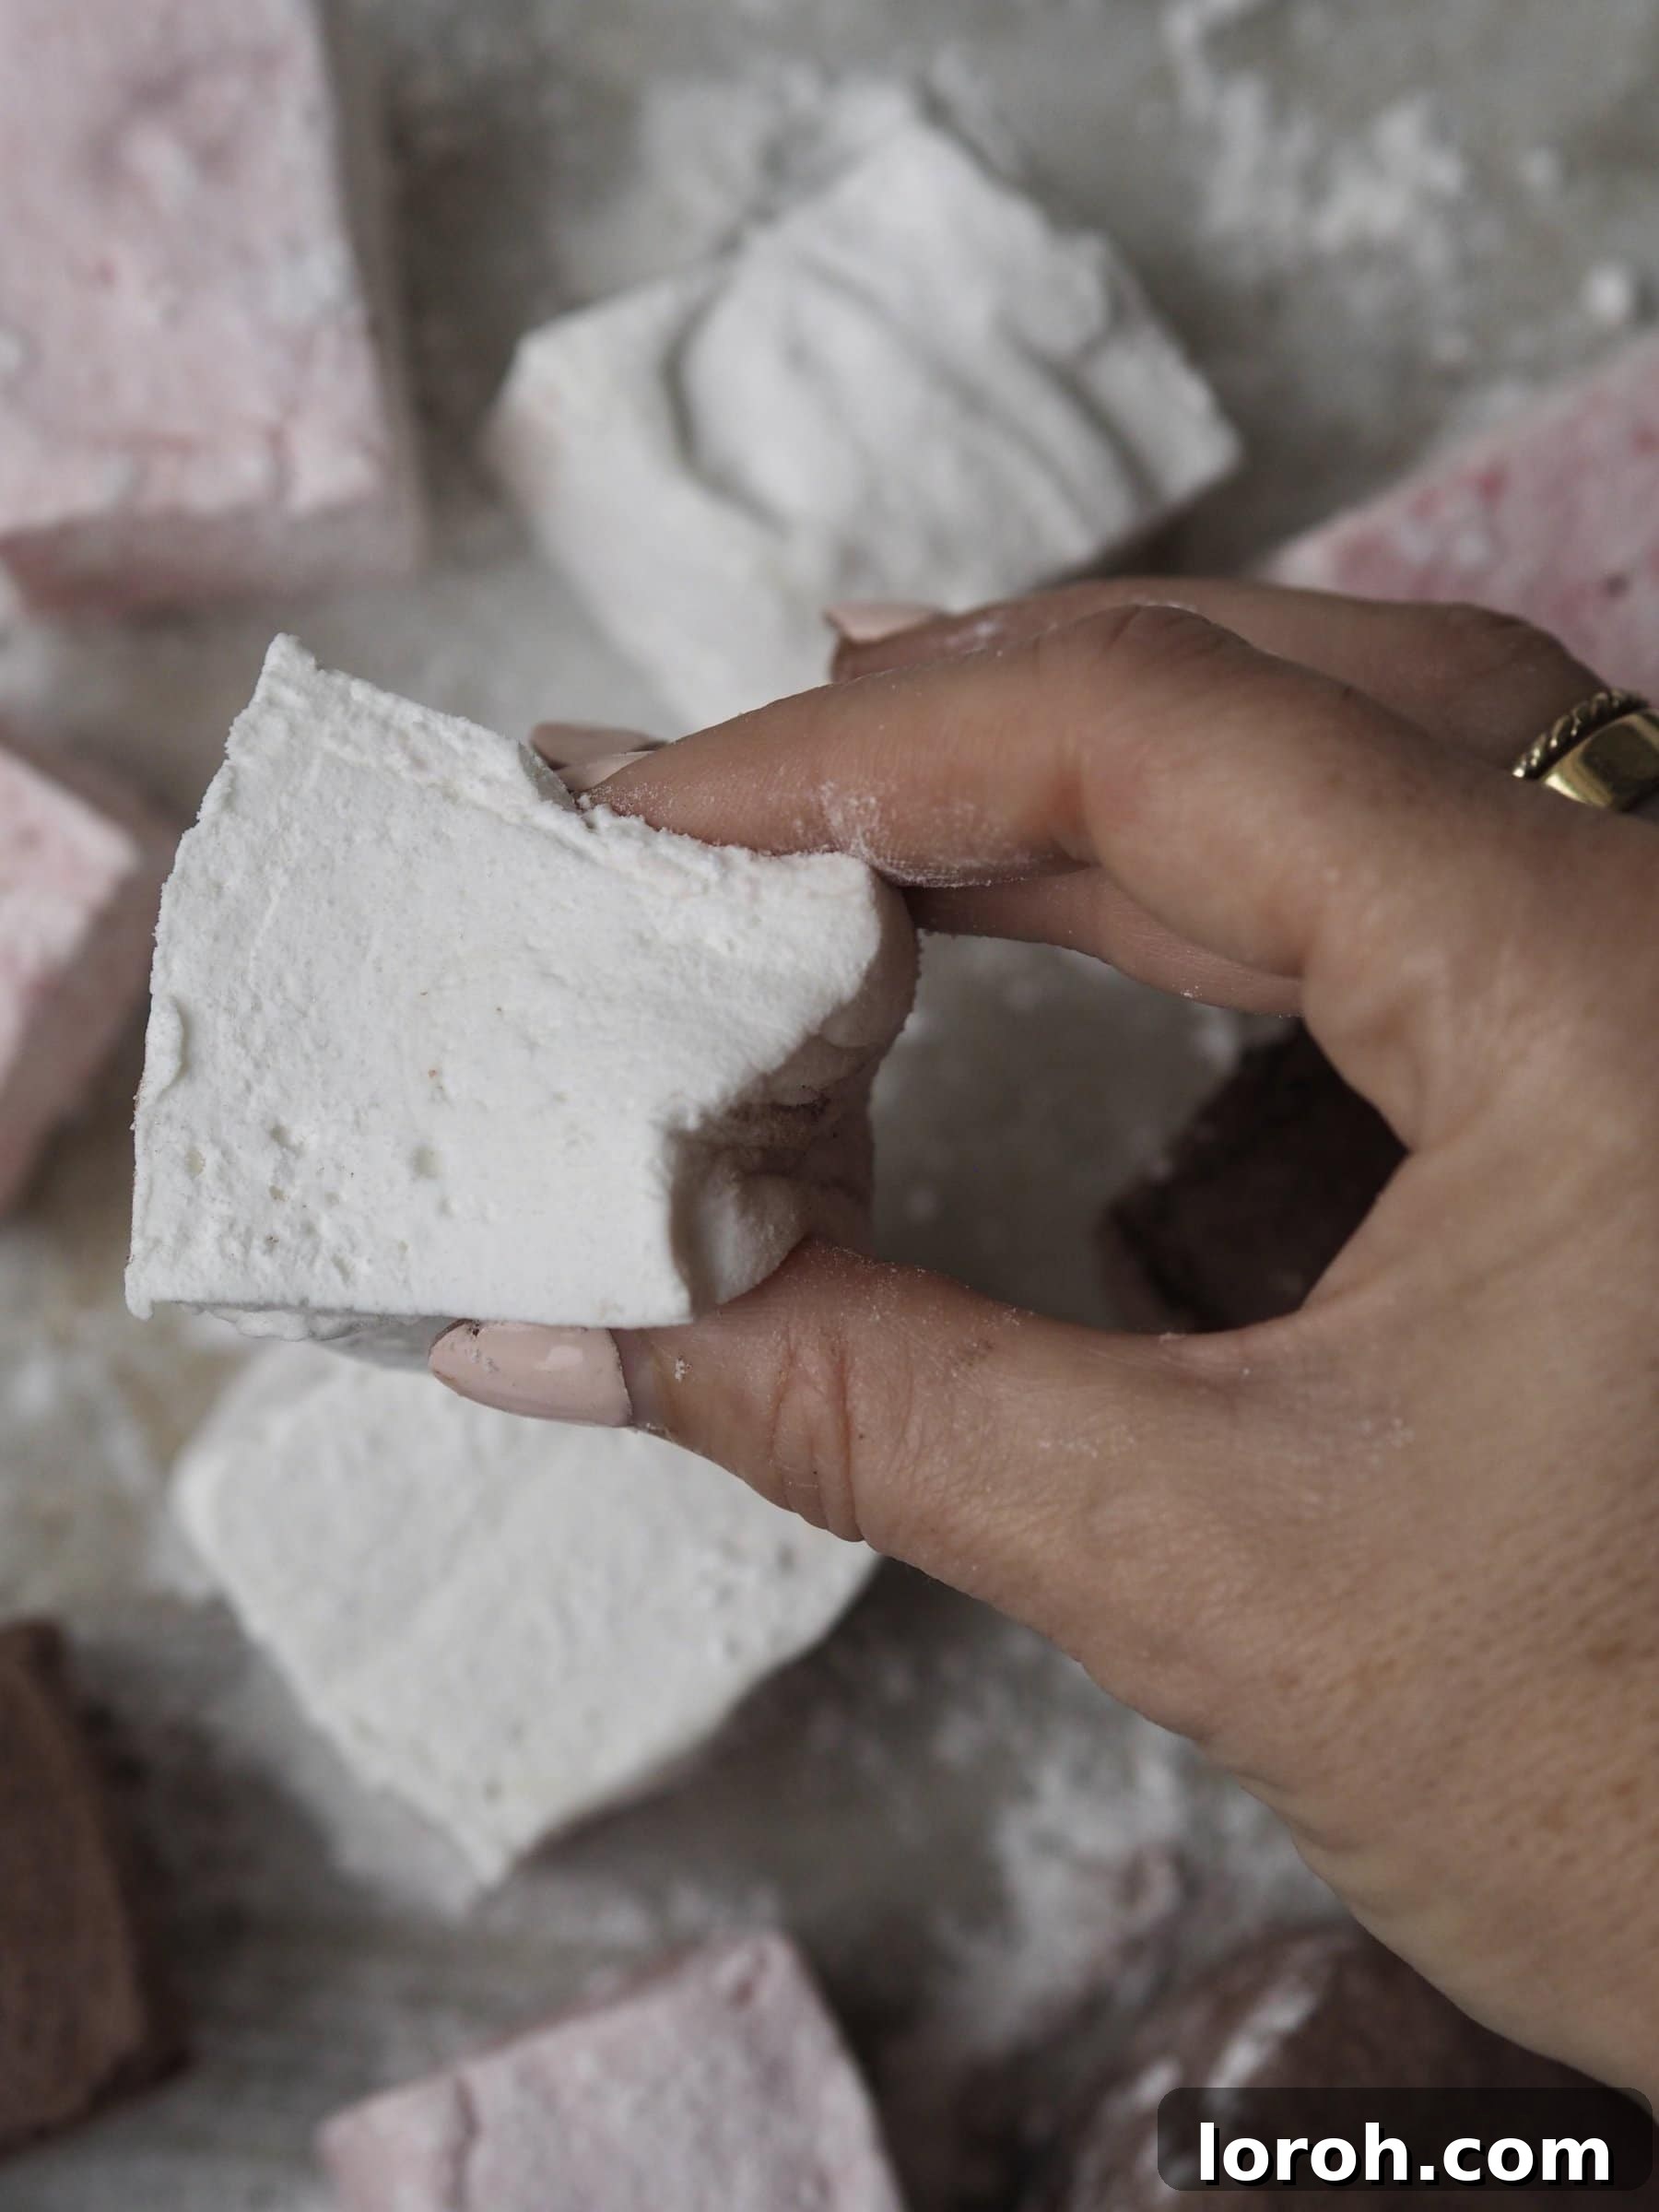
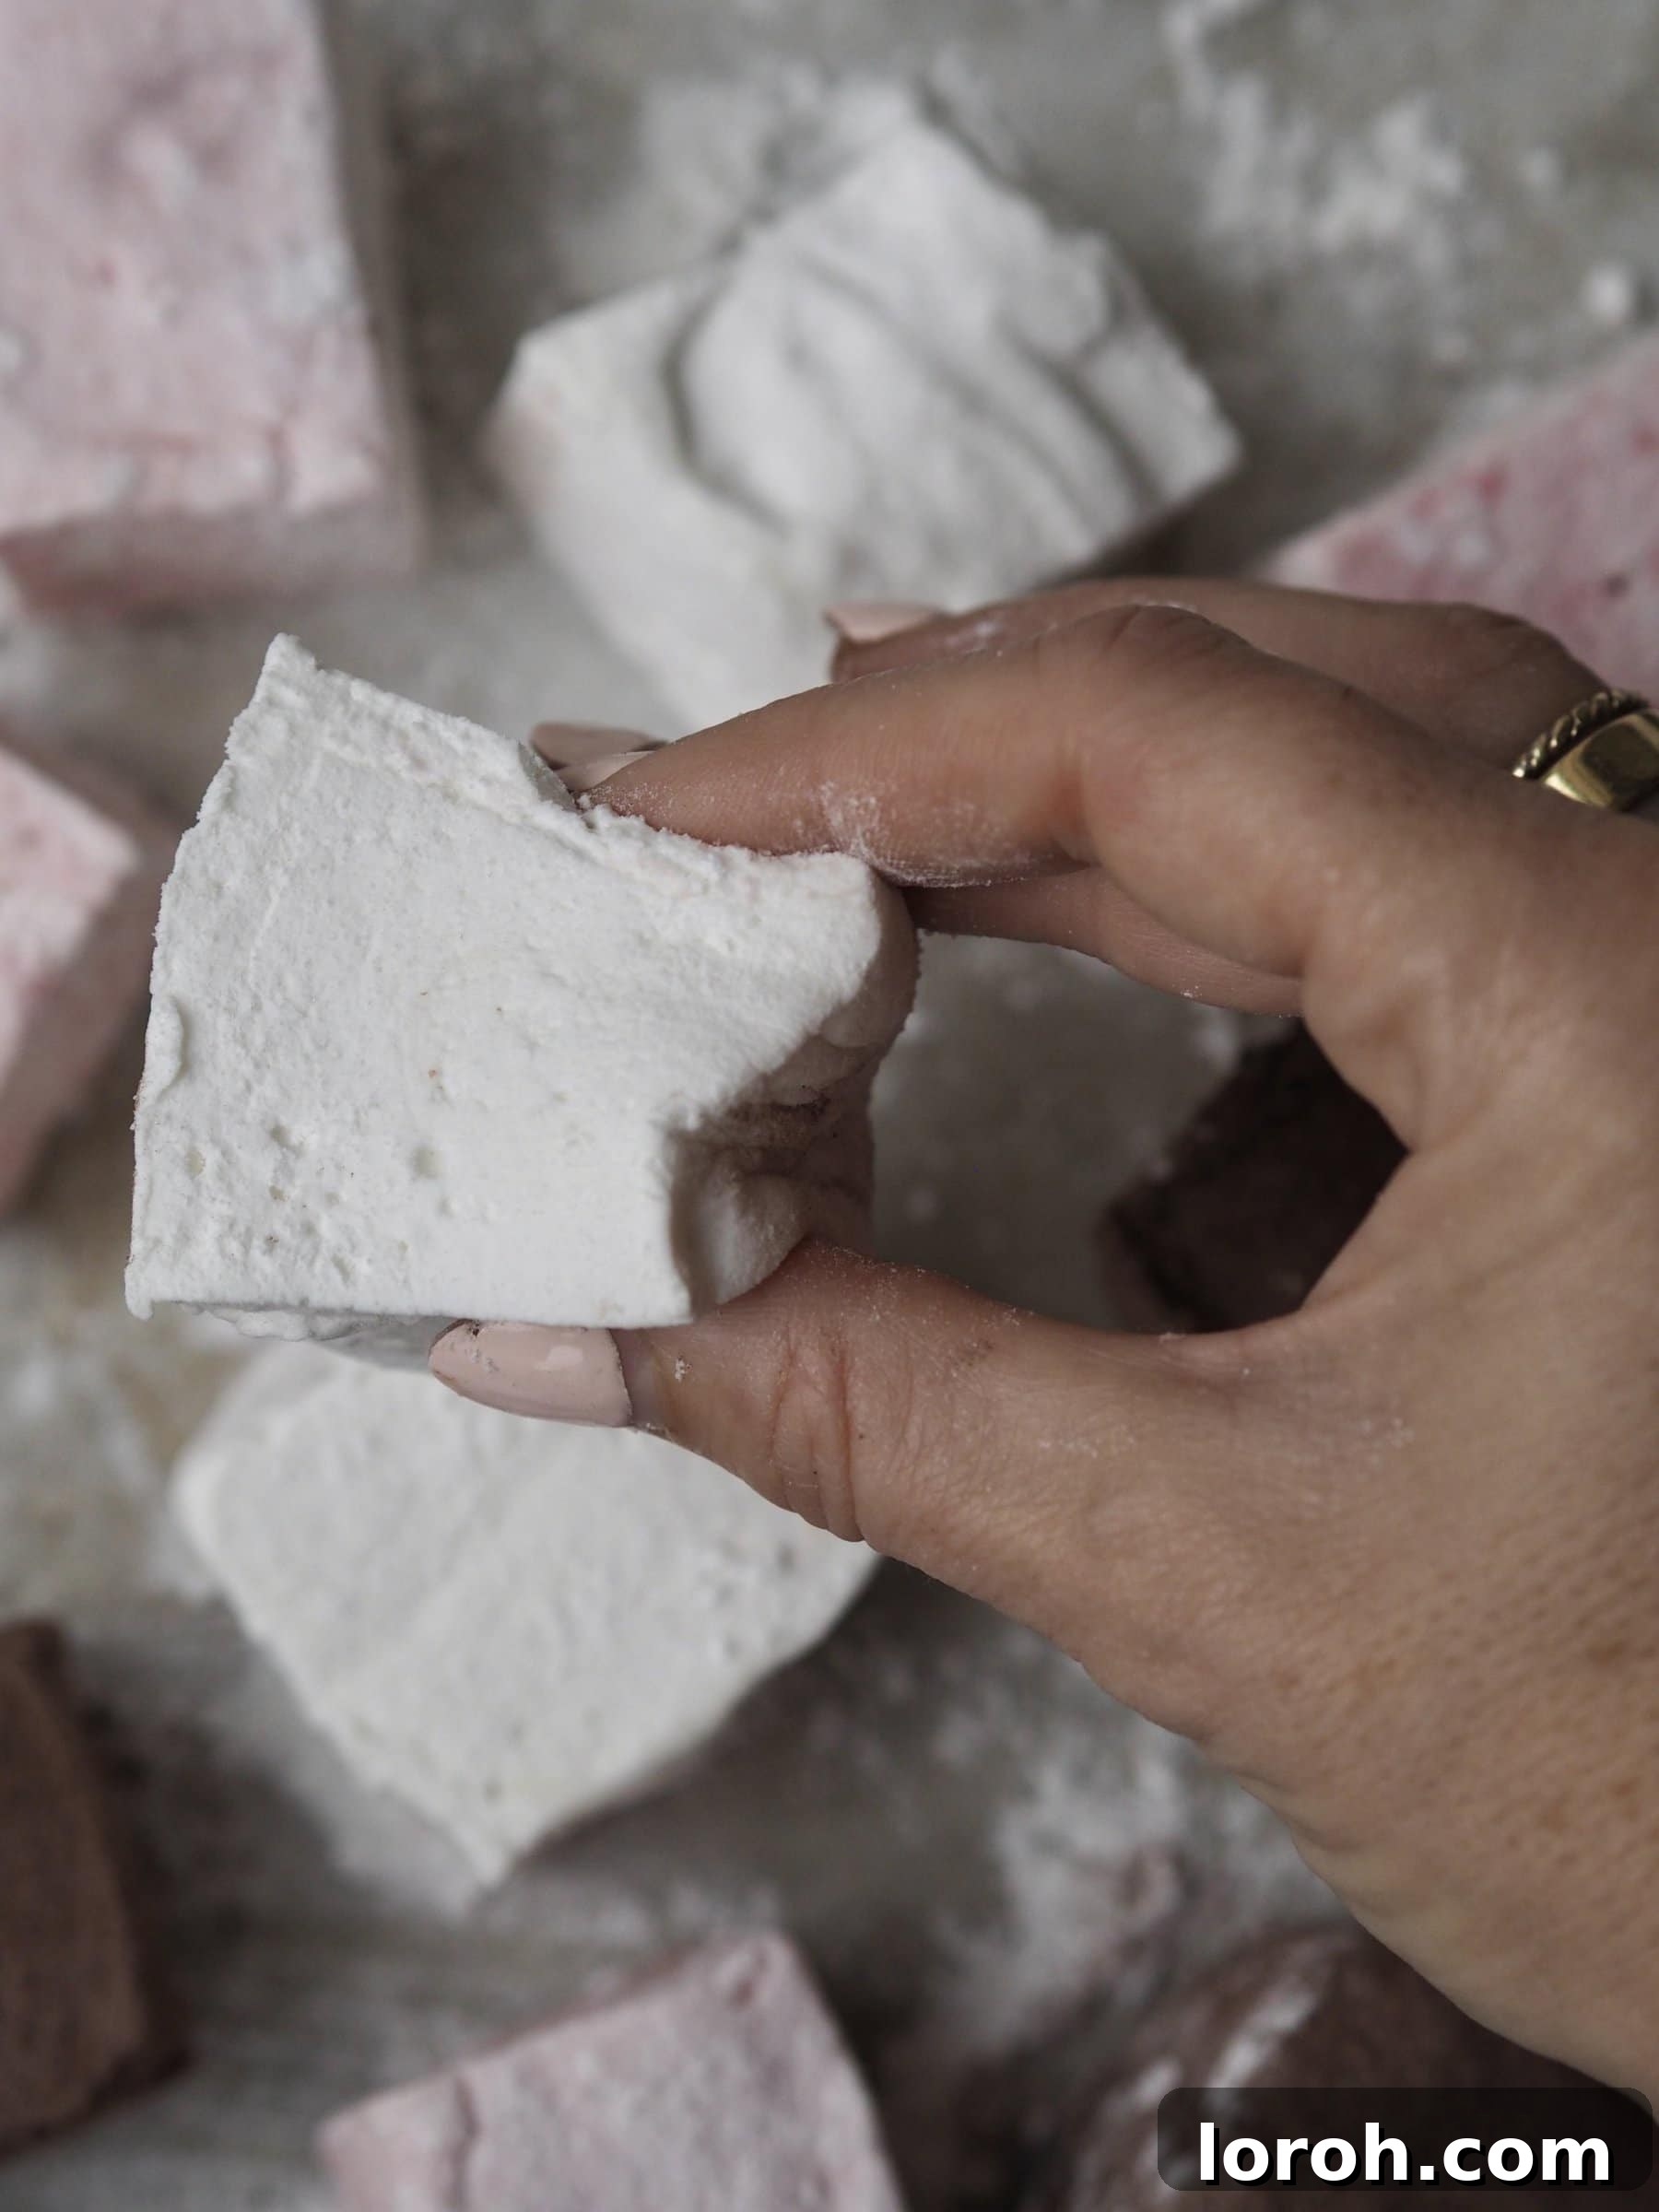
Step Eight: Savor Your Homemade Masterpiece! Once all your marshmallows are meticulously cut and thoroughly coated in the dusting mixture, they should no longer feel sticky to the touch. This is the triumphant moment you’ve diligently worked towards – take a moment to admire their beautifully fluffy, incredibly springy, and perfectly finished appearance! You have successfully created a batch of truly incredible homemade marshmallows that are ready to be savored. Store them correctly as advised, and enjoy them as a delightful snack, a luxurious addition to beverages, or as a key component in a variety of delicious desserts. Congratulations on your marshmallow-making success!
Expert Cooking Tips for Perfect Homemade Marshmallows
Achieving marshmallow perfection is entirely within your reach, especially with a few insider tips and careful attention to detail. Keep these expert cooking tips in mind to ensure your homemade treats turn out flawlessly, with that coveted light, airy, and chewy texture every single time:
- Preparing the Container – A Critical Step: Homemade marshmallows are inherently and intensely sticky. This means that preparing your baking tin or container is not just important, but absolutely crucial. You must make sure to grease your tin exceptionally well with a neutral-flavored vegetable oil, ensuring every square inch of the bottom and sides is thoroughly coated. Immediately after oiling, liberally dust the entire greased surface with a generous amount of the cornflour-icing sugar mixture. This creates a double-layer non-stick barrier that is essential for easy release. Don’t be shy with the dusting powder! Equally, before storing your cut marshmallows, ensure they are liberally coated on all sides; otherwise, they will inevitably stick together.
- Customizing Marshmallow Sizes and Depth: You have complete creative control over the final size and thickness of your marshmallows. For shallower, wider marshmallows, you can opt for a larger rectangular or square tupperware container. Conversely, for deeper, more substantial marshmallows, use a narrower or smaller tin. Once the marshmallow slab has fully set, you can easily choose how big or small to make your individual marshmallow cubes or rectangles, tailoring them to your specific use or preference.
- The Invaluable Role of a Sugar Thermometer: While it is technically possible to make marshmallows without one (and we provide a method below), we would highly recommend investing in a reliable sugar or jam thermometer. This tool provides invaluable precision, ensuring your sugar syrup reaches the exact temperature required for the correct consistency and setting properties. It’s a relatively inexpensive investment that will not only guarantee success with marshmallows but also elevate your skills for other confectionery and candy-making endeavors.
- Dust Your Knife for Clean Cuts: Before you begin the cutting process for your set marshmallows, it is imperative to dust your large, sharp knife generously with the cornflour-icing sugar mix. This simple step is vital for preventing the sticky marshmallow from adhering to the blade, which allows you to create beautifully clean, neat, and professional-looking cubes of marshmallow. Re-dust the knife as needed between cuts, or for an alternative method, briefly run the knife under very hot water and wipe it completely dry between each cut.
- Optimal Storage for Longevity: Once your homemade marshmallows are cut and thoroughly dusted, they will keep beautifully for an extended period. Store them in an airtight container in a cool, dry place, away from any direct sunlight or sources of heat and humidity. If you plan to stack them in layers within the container, it’s a good practice to place a piece of greaseproof paper (parchment paper) between each layer to provide an extra barrier against sticking. Avoid refrigerating marshmallows, as the humid environment of a fridge can cause them to become sticky and compromise their delicate, airy texture. They typically maintain their best quality for up to 3 weeks.
- Humidity Is Your Enemy: Marshmallows are hygroscopic, meaning they readily absorb moisture from the surrounding air. High humidity can quickly turn your perfectly fluffy marshmallows into a sticky mess. Try to make marshmallows on a dry day, if possible, and always ensure they are stored in a truly airtight environment to protect them from moisture.
- Don’t Rush the Whipping Process: The specified long whisking time (12-14 minutes) is not merely about achieving volume; it plays a critical dual role. It thoroughly incorporates air into the mixture, creating that essential light, airy texture, and perhaps equally important, it allows the hot mixture to cool down sufficiently. Do not be tempted to cut this step short, even if the mixture appears visually “done” earlier, as proper cooling and aeration are key to the final bouncy consistency.
Making Marshmallows Without a Sugar Thermometer: The Cold Water Method
While a sugar thermometer undeniably offers the highest level of accuracy and is strongly recommended for consistent results, it is indeed possible to make marshmallows without one. This method, known as the “cold water test,” is a traditional technique that requires a bit more practice and keen observation to master. If you don’t own a sugar thermometer, here’s how to rely on your senses:
- As your sugar syrup simmers and bubbles actively on the stovetop, keep a small bowl of very cold water (ideally with some ice cubes) readily available right next to your cooking station.
- After about 5-7 minutes of simmering, and then every 1-2 minutes thereafter, carefully take a very small amount of the sugar syrup (just a drop or two) on a clean spoon.
- Immediately drop this tiny amount of hot syrup into your bowl of cold water. Observe its behavior carefully.
- Early Stage – Thread or Soft: If the sugar syrup dissolves completely into the water, or forms a very weak, shapeless, sticky thread that doesn’t hold together, it’s still too early, and the syrup has not yet reached the desired temperature. Continue cooking.
- Soft Ball Stage – The Perfect Point: The ideal stage for marshmallows is the “soft ball” stage, which corresponds to approximately 115-118°C (239-244°F). When you drop the syrup into the cold water at this stage, it should immediately coalesce and form a distinct, firm yet pliable ball that you can easily pick up with your fingers. This ball should hold its shape when you gently press it, but it should still be soft and easily squishable between your thumb and forefinger, without dissolving. This is precisely the moment to remove your syrup from the heat!
- Too Far – Firm or Hard Ball: If, upon dropping the syrup into the cold water, it forms a hard, brittle ball that is difficult to flatten or becomes very rigid and resistant to shaping, it means the syrup has cooked for too long and has reached the “firm ball” or “hard ball” stage. Marshmallows made from syrup at this overly high temperature will likely be dense, overly stiff, and potentially hard. If this occurs, you can attempt to rescue it by carefully adding a splash (a tablespoon or two) of hot water to the pan to slightly lower the temperature, then stir gently and quickly try the cold water test again to catch it at the correct soft-ball stage.
This cold water method demands quick action, keen observation, and good judgment, so pay very close attention to how the syrup reacts in the cold water. With a little practice, you’ll become adept at identifying the perfect soft-ball stage every time!
How to Make Luscious Raspberry Marshmallows
Infusing your marshmallows with a vibrant, fruity flavor is a fantastic way to elevate this classic treat and add a delightful twist. Raspberry marshmallows are particularly charming, offering a wonderful balance of sweet and tart that is irresistible. Here’s how you can easily incorporate fresh raspberry purée into your homemade marshmallow recipe to create these luscious pink delights:
- Follow the main marshmallow recipe precisely as outlined in steps 1 through 5. This includes the crucial whisking process described in step 5, which results in a thick, glossy, white, meringue-like mixture.
- Once you have completed step 5, and immediately after the final whipping, gently but quickly fold your prepared raspberry purée through the marshmallow mix. Aim for an even distribution of color and flavor without overmixing or deflating the airy mixture too much.
- Promptly spoon the raspberry-infused marshmallow mixture into your already prepared tin (which should be well-greased and thoroughly dusted with the cornflour-icing sugar blend). Use a lightly oiled spatula or palette knife to gently spread and smooth the top evenly.
- Allow the raspberry marshmallows to set at room temperature for a minimum of 2 hours, or ideally overnight, just as you would with the plain version, to ensure they are fully firm.
- Once the raspberry marshmallows are completely set, proceed with step 7 (the cutting and dusting process) from the main recipe instructions.
To Make Your Own Raspberry Purée:
For the freshest and most intense raspberry flavor, making your own purée is a simple and rewarding process:
- Take 400g of fresh or good quality frozen raspberries and gently tip them into a small saucepan.
- Add 2 tablespoons of caster sugar and a small splash (approximately 1-2 tablespoons) of water to the saucepan.
- Place the saucepan over a low-medium heat on your hob and bring the mixture to a gentle simmer, stirring occasionally to prevent sticking.
- Continue to cook the raspberries, stirring frequently, for about 5-10 minutes, or until the raspberries have completely broken down, softened, and the mixture has thickened into a rich, pulpy purée.
- If you desire a perfectly smooth purée without seeds, carefully press the cooked raspberries through a fine-mesh sieve using the back of a spoon. Discard the seeds.
- Allow the raspberry purée to cool completely to room temperature before gently folding it into your whipped marshmallow mixture. This cooling step is essential to prevent it from affecting the marshmallow’s texture.
This method ensures your raspberry marshmallows are bursting with natural fruit flavor and display a beautiful, inviting pink hue, making them an even more special treat.
Frequently Asked Questions About Homemade Marshmallows
Generally, yes, these terms are often used interchangeably, particularly in home baking and confectionery. All corn syrup is indeed a type of glucose syrup, as it’s derived from corn starch. However, not all glucose syrups are exclusively derived from corn; some can be made from other starches like wheat or potatoes, depending on the region and manufacturer. For the purpose of this marshmallow recipe, if you can only find corn syrup, it will work just as effectively as liquid glucose or glucose syrup. The critical characteristic is that it’s a clear, neutral-flavored viscous syrup that helps prevent sugar crystallization and provides elasticity to the final product.
Yes, these two terms refer to the exact same product. They are thick, clear, viscous syrups that are primarily used in confectionery to add chewiness, prevent sugar from recrystallizing, and maintain moisture in various sweet treats. You can use either term interchangeably when shopping for this ingredient.
Yes, it is certainly possible to make delicious vegan marshmallows! However, this particular recipe, being traditional, uses animal-derived gelatine, making it unsuitable for a vegan diet. To create vegan marshmallows, you would need to substitute gelatine with a suitable plant-based gelling agent such as agar-agar powder. It’s important to note that agar-agar behaves differently than gelatine; it often requires boiling in a liquid to activate its setting properties and can yield a slightly different texture, typically firmer. While it achieves a similar firming effect, it’s not a direct 1:1 swap in terms of method or exact final texture, so a dedicated vegan marshmallow recipe using agar-agar would be required for optimal results.
There are a few common culprits when marshmallows lack their characteristic fluffiness. The most critical factor is often the precise temperature of the sugar syrup. If the syrup is heated too high (significantly above 115-118°C / 239-244°F), the sugar will firm up excessively, resulting in a dense, hard, or rubbery marshmallow instead of a light, airy one. This is precisely why a sugar thermometer is invaluable for ensuring accuracy. Another common reason could be insufficient whisking time; the mixture needs to be whipped for the full 12-14 minutes to incorporate enough air and cool down properly, creating that signature voluminous texture. Lastly, if your gelatine wasn’t properly bloomed (hydrated) or fully dissolved, it might not provide adequate structural support for fluffiness.
Absolutely, homemade marshmallows freeze exceptionally well! To freeze them, first ensure they are thoroughly coated in the cornflour and icing sugar mixture and completely set. For best results, arrange them in a single layer on a baking sheet and freeze until they are solid. Once frozen solid, transfer them to an airtight freezer-safe container or bag. They will maintain their quality in the freezer for up to 3 months. When you’re ready to enjoy them, simply thaw them at room temperature for a few hours. Given that they typically keep well for several weeks at room temperature, you might not always need to freeze them, but it’s an excellent option for longer storage or for preparing larger batches in advance.
Proper storage is paramount to keeping your homemade marshmallows fresh, fluffy, and most importantly, non-sticky. After cutting, ensure each individual marshmallow piece is generously and thoroughly coated on all sides with a mixture of icing sugar and cornflour. Store them in an airtight container at room temperature, in a cool, dry place away from any direct sunlight, heat, or humidity. If you need to stack multiple layers of marshmallows within the container, place a sheet of greaseproof paper (parchment paper) between each layer to provide an extra barrier and prevent any potential sticking. It’s generally advised to avoid refrigerating marshmallows, as the humid environment of a fridge can cause them to absorb moisture, become sticky, and compromise their delicate texture.
Homemade marshmallows are incredibly versatile and can elevate a wide array of sweet applications! Beyond the beloved classics like hot chocolate and gooey s’mores, try incorporating them into rocky road bars for added chewiness, adding them to brownies or cookies before baking for a delightful molten center, or using them as a luxurious topping for sweet potato casserole. You can also lightly toast them and add them to fruit salads for a smoky sweetness, use them to make gourmet rice crispy treats, dip them in melted chocolate and decorate them for marshmallow pops, or even use them as charming edible decorations for cakes and cupcakes. Their soft, airy texture makes them a fantastic and adaptable ingredient in virtually any sweet creation.
Other Delightful Recipes You Might Enjoy
If you’ve thoroughly enjoyed the process of making these easy homemade marshmallows and are eager for more sweet culinary adventures, we’re confident you’ll love exploring some of our other cherished recipes. Here are a few recommendations from our collection to satisfy your craving for delicious homemade desserts and baked goods:
- My Tiramisu Coffee and Chocolate Mochi offer a uniquely delightful and intriguing dessert experience. They are perfect to have stored conveniently in the freezer for when a sudden sweet craving strikes, combining classic Italian flavors with an irresistible chewy mochi texture.
- For a quick and utterly satisfying treat, don’t miss out on my incredibly quick, easy, and undeniably delicious Sfingi Doughnuts. These light and airy ricotta doughnuts come together with minimal effort and are a true indulgence.
- If you’re in search of a perfect chocolate fix in a smaller, more manageable size, my Brownie Bites are an absolute must-try – rich, fudgy, and perfectly portioned for individual enjoyment.
- And for a truly show-stopping yet surprisingly simple dessert that’s sure to impress, our Nutella Puff Pastry Star is an elegant and indulgent treat that’s incredibly easy to assemble with stunning results.
- If you loved the idea of flavored marshmallows, be sure to try our dedicated recipe for Homemade Chocolate Marshmallows for another rich and satisfying variation.
Easy Baking Recipes
Dark Chocolate and White Chocolate Brownies
Easy Dessert Recipes
Homemade Chocolate Marshmallows
Easy Baking Recipes
Soft & Chewy Chocolate Chipless Cookies
Easy Baking Recipes
Banana Bread Bars
We truly hope you enjoy trying these delightful recipes and expanding your baking repertoire! If you tried this easy homemade marshmallow recipe or any other recipe from our site, please do take a moment to leave a comment and let us know how it went. Your valuable feedback helps us continue to create and share delicious and inspiring content for everyone!
Easy Homemade Marshmallows Recipe Card
These sweet, soft, and unbelievably fluffy homemade marshmallows are an absolute delight to make and enjoy. Perfect as a standalone sweet treat, they also excel as a luxurious and elegant topping for a steaming mug of rich hot chocolate or incorporated into various desserts. This detailed recipe simplifies the entire process, ensuring perfectly airy, chewy, and delicious results every single time.
Recipe Details
- Author: Margie
- Prep Time: 20 minutes
- Cook Time: 20 minutes
- Chilling Time: 2 hours (minimum)
- Total Time: Approximately 2 hours 40 minutes
- Servings: Yields approximately 30 marshmallows (depending on cut size)
Ingredients
- 2 tbsp vegetable oil (for greasing the tin, roughly)
- 8 tsp powdered gelatine (approximately 24g), plus 4 tbsp cold water (for blooming the gelatine)
- 280 g liquid glucose
- 460 g caster sugar
- 300 ml water
- 4 tbsp cornflour (cornstarch), for dusting
- 120 g icing (powdered) sugar, for dusting
Instructions
- Prepare Your Tin: First, thoroughly grease your chosen baking tin (a 30x20cm rectangular tin is highly recommended for optimal depth) with vegetable oil, using clean fingers or a paper towel to ensure every surface is evenly coated. In a separate bowl, mix the icing sugar and cornflour together. Then, generously dust the entire greased tin with a portion of this mixture, shuffling it around until the bottom and sides are fully coated. Pour any excess dusting mixture into a separate bowl; this will be used later.
- Bloom the Gelatine: Place the powdered gelatine into a large heatproof bowl (ideally the bowl of a stand mixer, which will be used with a whisk attachment). Add the 4 tablespoons of cold water and mix well with a fork until the gelatine is thoroughly combined and bloomed. Set this bowl aside to allow the gelatine to fully hydrate and soften.
- Prepare the Sugar Syrup: In a large, heavy-bottomed saucepan, combine the liquid glucose and caster sugar. Pour in 300ml of water. Place the saucepan over a medium heat and stir gently but continuously until all the sugar crystals have completely dissolved in the water. Once the mixture begins to simmer (small bubbles forming), stop stirring.
- Heat to Temperature: Continue to heat the sugar syrup over a medium-high heat, gently swirling the pan occasionally. Use a reliable jam or candy thermometer to monitor the temperature precisely until the sugar syrup reaches 115°C (239°F). The liquid should be clear and actively bubbling at this stage. Handle the pan with extreme caution as the syrup will be incredibly hot.
- Combine Syrup and Gelatine: Immediately remove the pan from the heat. Carefully and slowly drizzle the extremely hot sugar syrup into the bloomed gelatine mixture while continuously whisking with an electric whisk or a stand mixer fitted with the whisk attachment. This slow addition and constant whisking are crucial for smooth incorporation and to properly temper the gelatine.
- Whip to Fluffy Perfection: Once all the sugar syrup has been incorporated, increase the whisking speed to medium-high. Continue to whisk vigorously for a further 12-14 minutes. The mixture will lighten in color, dramatically increase in volume, and develop into a thick, glossy, white, meringue-like consistency that holds soft peaks. The mixing bowl should also cool down significantly.
- Set the Marshmallows: Immediately spoon the whipped marshmallow mixture into your previously prepared, greased, and dusted tin. Use a lightly oiled spatula or palette knife to gently spread and smooth the top evenly across the surface. Leave the tin undisturbed at room temperature to set for at least 2 hours, or ideally overnight, until the marshmallow slab is firm.
- Cut and Dust: Once fully set, generously dust a clean baking tray or large cutting board with a fresh layer of your combined cornflour and icing sugar mixture. Carefully invert the marshmallow block onto this prepared surface. Dust a large, sharp knife with the same sugar-cornflour mixture (or run it under very hot water and wipe it clean between cuts). Cut the marshmallow block into equal-sized cubes or your desired shapes. As you cut each piece, immediately toss it in the bowl with more of the icing sugar & cornflour mixture, ensuring all sides are thoroughly coated. They should no longer feel sticky to the touch. Add more dusting powder as needed for full coverage.
Notes
- For more detailed step-by-step instructions and visual references, please refer to the ‘Step-by-Step Guide’ section above.
- Storage: Ensure each individual marshmallow is liberally coated in the icing sugar-cornflour mix to prevent them from sticking together in the container. Store them in an airtight container in a cool, dry place. If stacking in layers, interleave with greaseproof paper to avoid any sticking. They will keep beautifully for up to 3 weeks.
- Freezing: Marshmallows can be frozen in an airtight container for up to 3 months. Thaw them at room temperature before enjoying. Given their excellent shelf life at room temperature, freezing may not always be necessary.
- Make Ahead: These homemade marshmallows keep exceptionally well in an airtight container in a cool, dry place for up to 3 weeks, making them perfect for preparing in advance for events or gifts.
- Custom Sizes: You have full control over the marshmallow size. Adjust the dimensions of your baking tin to alter the depth of the marshmallow slab. Once set, you can cut them into jumbo, standard, or mini marshmallows according to your preference.
- Making Without a Sugar Thermometer: If you do not have a sugar thermometer, please scroll up to the ‘Making Marshmallows Without a Sugar Thermometer’ section above for detailed instructions on how to use the traditional cold water method.
- Gelatin Sheets Substitution: To use gelatin sheets instead of powder, substitute the 8 teaspoons (approximately 24g) of powdered gelatin with 12 standard gelatin sheets/leaves. Soften the sheets in cold water, squeeze out all excess water, and then dissolve them in the 4 tablespoons of cold water as instructed for the powder. Proceed with the recipe from there.
Nutrition Information (Approximate)
Nutrition information is automatically calculated and should only be used as an approximation.
- Serving Size: 1 marshmallow
- Calories: Approximately 89 kcal
- Carbohydrates: Approximately 22 g
- Protein: Approximately 1 g
- Fat: Approximately 0.1 g
- Saturated Fat: Approximately 0.001 g
- Monounsaturated Fat: Approximately 0.001 g
- Sodium: Approximately 9 mg
- Potassium: Approximately 1 mg
- Sugar: Approximately 22 g
- Calcium: Approximately 2 mg
- Iron: Approximately 0.02 mg
Did you enjoy making and tasting this delightful homemade marshmallow recipe? We would love to hear your feedback! Please feel free to leave a comment or rate the recipe below to share your experience with us and fellow bakers!