
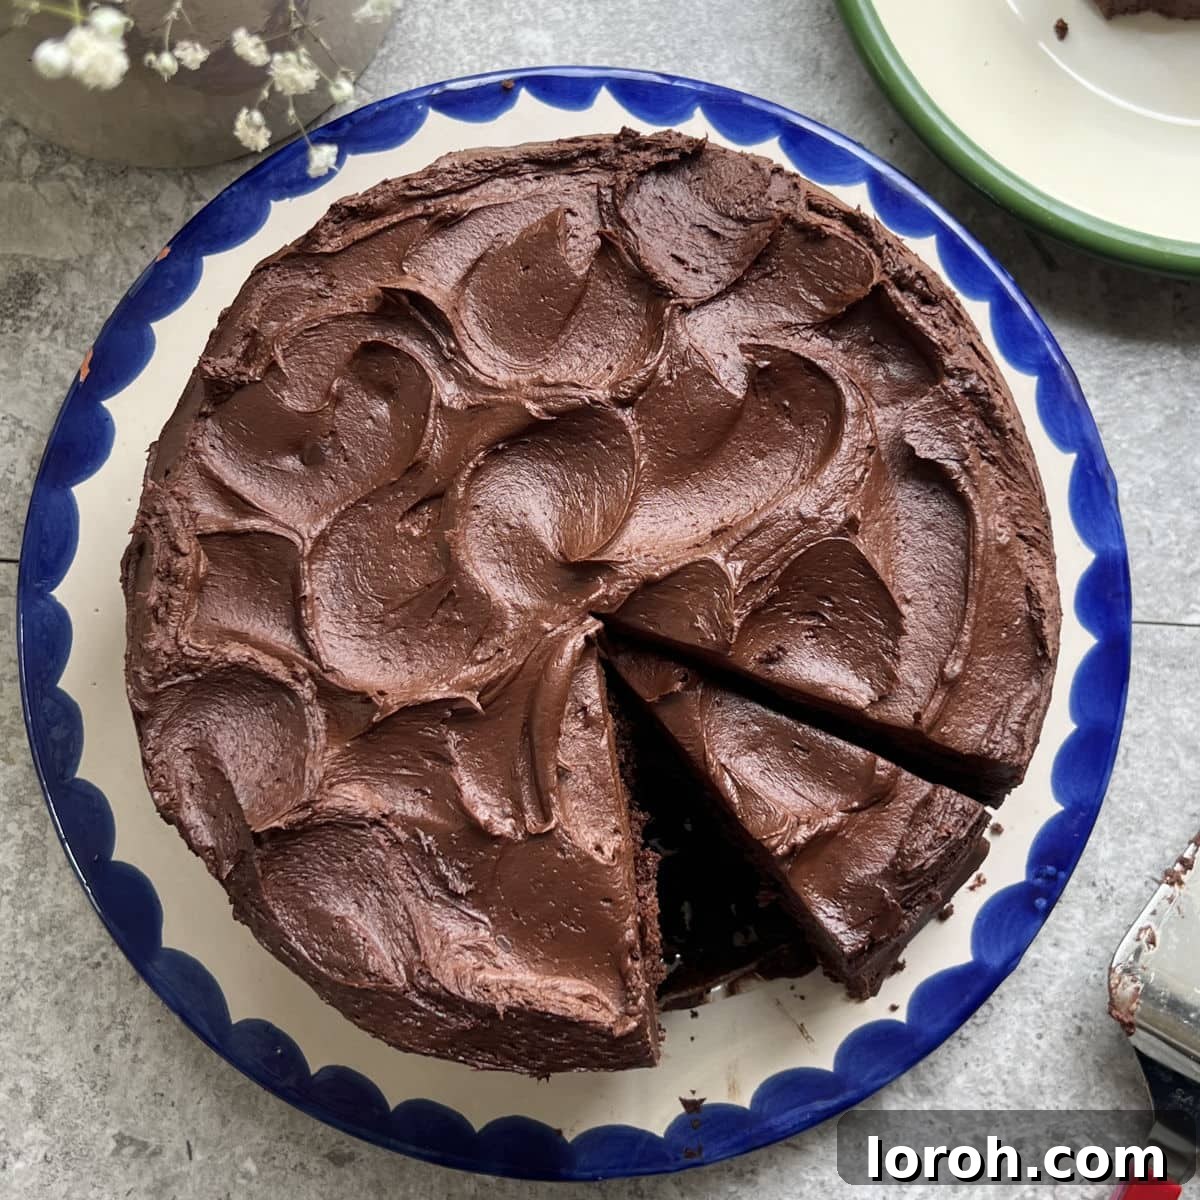
Matilda’s Chocolate Cake: A Legendary Recipe for the Ultimate Indulgence
For anyone who has delved into the whimsical world of Roald Dahl’s “Matilda,” either through the beloved book or its iconic film adaptation, the image of Matilda’s Chocolate Cake is instantly recognizable. It’s not just any cake; it’s the towering, magnificently glossy, dark chocolate creation that the unfortunate Bruce Bogtrotter is famously (or infamously) compelled to devour in front of his schoolmates. This scene, etched deep into the collective memory of childhoods, forever cemented this cake as one of the most famous and desired desserts in cinematic history.
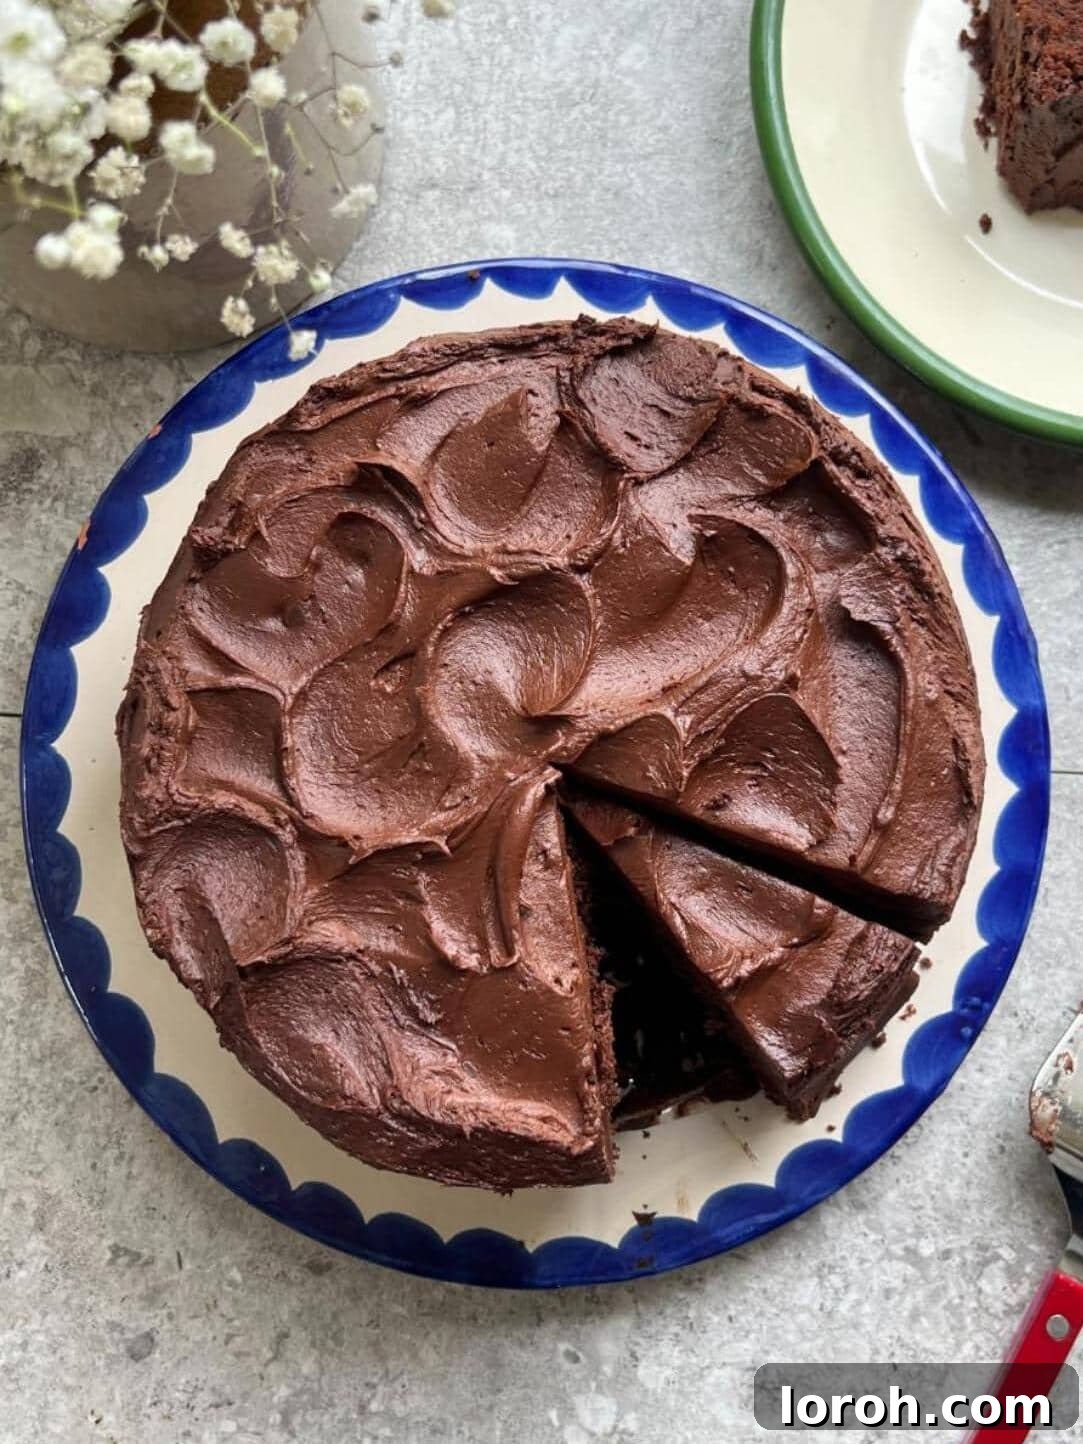
This meticulously crafted recipe aims to bring that very same magic and dramatic flair directly into your kitchen. Prepare to bake a truly unforgettable chocolate masterpiece: three sumptuously moist layers of rich chocolate sponge, generously sandwiched and enveloped in a velvety, intensely flavored dark chocolate ganache. This isn’t just a dessert; it’s an event. It’s indulgent, visually stunning, and absolutely guaranteed to be the star attraction at any gathering or celebration.
The secret to achieving the cake’s unparalleled moistness lies in a seemingly simple yet crucial ingredient: hot water added directly to the batter. While you might initially be surprised by the sheer volume of boiling water and how much it thins out the mixture, trust the process. As the cake bakes, this technique works wonders, blooming the cocoa powder to unleash its deepest chocolate notes and creating an incredibly tender, decadent crumb that simply melts in your mouth. This unique approach is the cornerstone of my recipe for the ultimate chocolate cake, one that truly captures the rich essence and dramatic appeal of the cake from Matilda’s story.
Beyond its iconic status, this cake promises a truly exceptional sensory experience. The aroma of baking chocolate will fill your home, building anticipation for the moment you slice into its rich layers. Each bite offers a symphony of textures and flavors: the dense, moist crumb of the sponge perfectly complemented by the smooth, slightly firm yet yielding ganache. It’s a taste of pure nostalgia, a delightful journey back to childhood fantasies, but elevated with sophisticated technique and premium ingredients. Whether you’re recreating a beloved movie moment or simply seeking the perfect chocolate cake, this recipe is designed to exceed all expectations.
Table of Contents
- Why You Will Adore This Recipe
- Key Ingredients for Matilda’s Chocolate Cake
- Substitutions and Creative Variations
- Here’s How to Craft Matilda’s Chocolate Cake: A Step-by-Step Guide
- Expert Baking and Ganache Tips
- Frequently Asked Questions
- Other Decadent Recipes You Might Enjoy
- Matilda’s Chocolate Cake: The Full Recipe
Why You Will Adore This Recipe
In a world of countless chocolate cake recipes, many claim to be “Matilda’s Chocolate Cake” but often fall short with shortcuts or simplified versions. This recipe, however, is the authentic experience, designed for true chocolate aficionados and those who want to recreate the iconic treat in all its glory. Here’s why this particular rendition stands out:
- Authentic Triple-Layer Design: Unlike many recipes that opt for a single-layer or a less impressive two-layer cake, our version embraces the true spirit of the film’s towering creation. We go all in with a dramatic triple-layer sponge, providing both impressive height and an irresistible visual impact that commands attention on any dessert table. This multi-layered structure ensures a generous ratio of moist cake to rich ganache in every single slice.
- Easy-to-Follow Step-by-Step Guidance: Despite its grand appearance, this recipe is crafted with accessibility in mind. Each stage, from preparing the batter to assembling the final decadent layers, is broken down into clear, concise instructions, making it achievable for bakers of all skill levels. You’ll feel confident creating this showstopper.
- Luxurious Dark Chocolate Ganache, Not Buttercream: For the ultimate richness and the iconic glossy finish, we opt for a silky dark chocolate ganache rather than traditional buttercream. This choice provides a deep, intense chocolate flavor that perfectly complements the cake, along with a smooth, sophisticated texture and a beautiful sheen that truly captures the essence of the cake Bruce Bogtrotter faced. The ganache also offers a less sweet, more refined chocolate experience.
- Super-Moist Crumb, Every Time: The hallmark of an exceptional chocolate cake is its moisture. Thanks to the innovative use of boiling water in the batter, this cake boasts an unbelievably moist, tender, and melt-in-your-mouth crumb. The hot water doesn’t just thin the batter; it ‘blooms’ the cocoa powder, intensifying the chocolate flavor and contributing to the cake’s unique, almost fudgy texture. This ensures a decadent experience that is never dry or crumbly.
- A Touch of Culinary Magic: There’s something truly special about bringing a piece of cinematic history to life in your own kitchen. This recipe offers more than just a cake; it’s an experience, a conversation starter, and a delicious homage to a beloved story.
Key Ingredients for Matilda’s Chocolate Cake
The complete list of ingredients with precise measurements can be found in the printable recipe card at the very bottom of this post. Simply scroll down to access it!
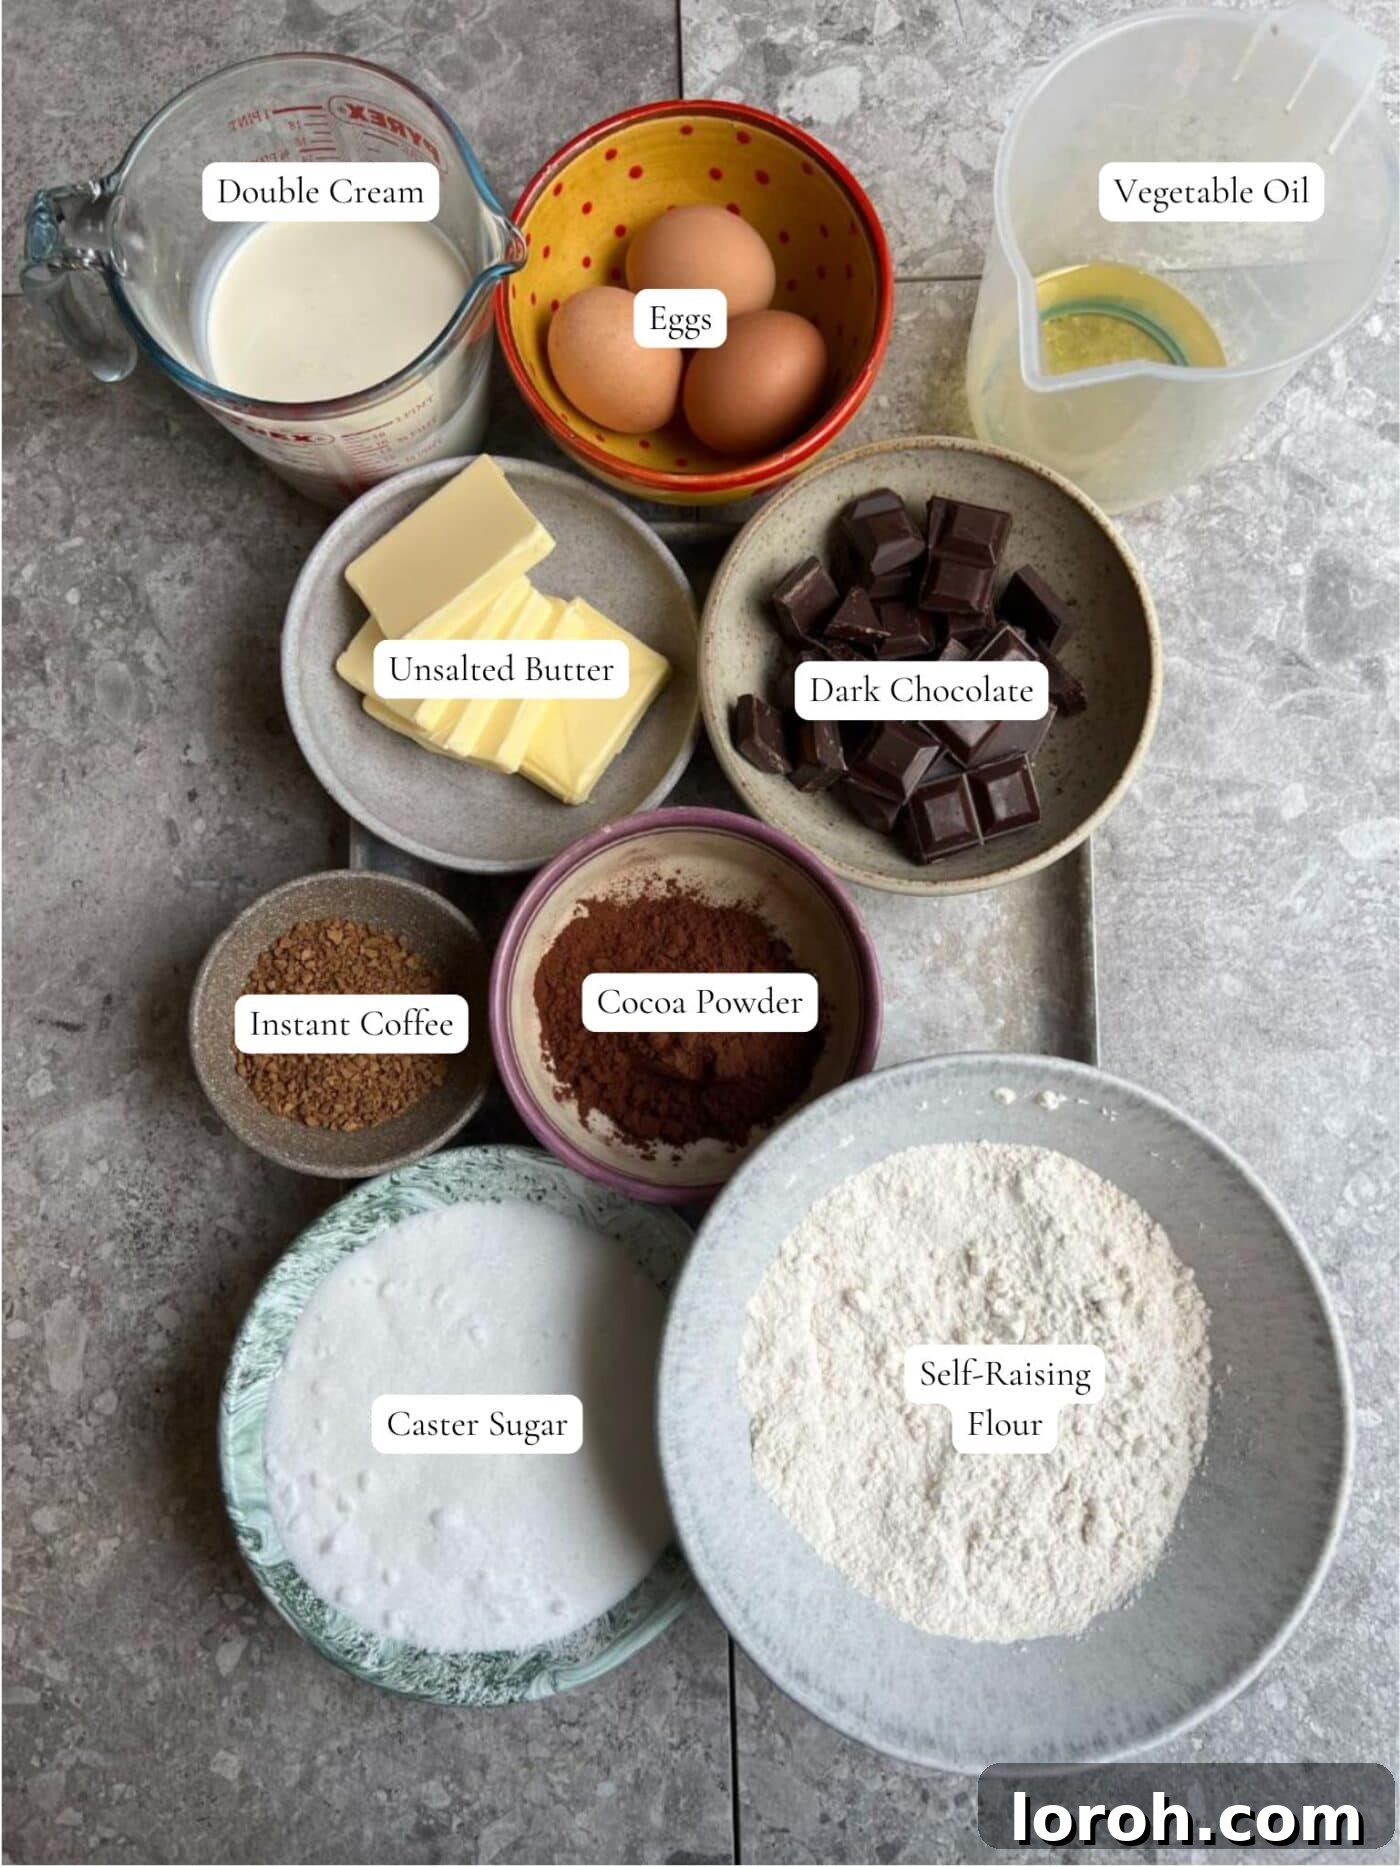
Crafting a truly legendary chocolate cake requires attention to each ingredient. Here’s a closer look at the stars of our recipe:
Dark Chocolate (for the Sponge and Ganache): This is the soul of our cake. Opt for a high-quality dark chocolate with at least 70% cocoa solids for a deep, complex flavor that isn’t overly sweet. A good quality chocolate will melt smoothly and contribute significantly to both the cake’s richness and the ganache’s luxurious texture. Avoid using chocolate chips for melting as they contain stabilizers and don’t melt as smoothly.
Unsalted Butter (softened): Butter adds richness, flavor, and tenderness to the cake. Ensuring it’s softened to room temperature is crucial for proper creaming with sugar, which incorporates air and results in a lighter, more even crumb.
Vegetable Oil: Alongside the butter, a neutral-flavored vegetable oil (like canola, sunflower, or grapeseed oil) is key to the cake’s ultra-moist crumb. Oil stays liquid at room temperature, contributing to a cake that remains moist and tender for days, unlike butter which solidifies and can make cakes denser when chilled.
Caster Sugar: This fine-grained sugar dissolves quickly and creates a tender crumb. It provides the perfect balance of sweetness to the rich dark chocolate without overpowering it.
Large Eggs: Eggs act as binders, provide structure, add moisture, and contribute to the cake’s richness. Ensure they are at room temperature for better emulsification with the other ingredients, leading to a smoother batter.
Unsweetened Cocoa Powder: Use a good-quality Dutch-process or natural cocoa for the best results. Dutch-process cocoa (alkalized) offers a darker color and a smoother, less bitter chocolate flavor. Natural cocoa (non-alkalized) is lighter in color and has a sharper, more intense chocolate taste. Either will work beautifully, but Dutch-process is often favored for its rich hue and classic chocolate cake flavor.
Self-Raising Flour (or Self-Rising Flour in the US): This flour contains a leavening agent (baking powder) and salt already mixed in. It’s essential for the cake’s rise and tender texture. If you can’t find self-raising flour, you can easily make your own by adding baking powder and a pinch of salt to plain (all-purpose) flour.
Boiling Water: This is our secret ingredient! When poured into the batter, it blooms the cocoa powder, intensifying its flavor. It also thins the batter significantly, which contributes to the incredibly moist, almost pudding-like texture of the finished cake. Don’t be alarmed by the thinness – it’s completely normal and desired.
Instant Coffee Granules: While optional, coffee is a phenomenal flavor enhancer for chocolate. It doesn’t make the cake taste like coffee; instead, it deepens and amplifies the chocolate notes, making them richer and more pronounced. Dissolve it in the boiling water for even distribution.
Double Cream (or Heavy Cream in some parts of the world): This high-fat cream is crucial for making the luscious dark chocolate ganache. Its fat content creates a smooth, stable, and incredibly rich frosting that sets beautifully with a gorgeous sheen. Look for cream with at least 35% fat for best results.
A Pinch of Salt: Salt is a flavor booster in both the cake and the ganache, balancing the sweetness and enhancing the deep chocolate notes. It’s a small addition that makes a big difference.
Substitutions and Creative Variations
While this recipe is perfect as written, it’s also versatile enough to accommodate dietary needs or adventurous culinary spirits. Here are some trusted substitutions and exciting variations to make Matilda’s Chocolate Cake uniquely yours:
Vegetable Oil: Any neutral-flavored oil will work beautifully in this recipe. Good choices include sunflower oil, canola oil, grapeseed oil, or even a light olive oil (though be mindful of its flavor profile). The key is a liquid fat that contributes to moisture without imparting a strong taste.
Self-Raising Flour: If self-raising flour (known as self-rising flour in the US) is unavailable in your region, you can easily create your own. For every 1 cup (about 120g) of all-purpose (plain) flour, whisk in 1 ½ teaspoons of baking powder and ¼ teaspoon of fine salt. For this recipe’s 225g of self-raising flour, you would use 225g all-purpose flour mixed with approximately 2 ¼ teaspoons of baking powder and ½ teaspoon of salt.
Coffee: We highly encourage the addition of coffee for its incredible ability to enhance and deepen the chocolate flavor without making the cake taste overtly like coffee. However, if you are making this cake for young children or prefer to avoid caffeine, simply skip the instant coffee granules and add the specified amount of boiling water directly to the cake batter. The cake will still be wonderfully rich and moist.
Chocolate Orange Twist: For a delightful citrusy counterpoint to the rich chocolate, add the freshly zested peel of one large orange to the ganache as it cools. The vibrant notes of orange perfectly complement the dark chocolate, creating a sophisticated and familiar flavor pairing.
Mint Chocolate Sensation: Incorporate a few drops of high-quality peppermint extract into the ganache for a refreshing mint chocolate experience. Start with a small amount and taste as you go, adding more until you reach your desired intensity.
Spicy Chocolate: For an intriguing warmth, add a pinch of chili powder or cayenne pepper to the cocoa powder mixture in the cake batter. This subtle heat will beautifully amplify the chocolate notes.
Nutty Crunch: Fold in a cup of chopped toasted nuts (such as walnuts, pecans, or hazelnuts) into the cake batter for added texture and flavor. Alternatively, sprinkle them between the ganache layers or on top of the finished cake.
Raspberry Delight: A layer of fresh raspberries or a thin spread of raspberry jam between the cake layers before applying ganache can introduce a wonderful tartness and fruity brightness.
Extra Chocolatey: If you’re a true chocolate fiend, consider adding a handful of mini chocolate chips or chopped chocolate chunks to the cake batter for pockets of melted chocolate goodness.
Salted Caramel Swirl: For an indulgent twist, drizzle a homemade or high-quality store-bought salted caramel sauce between the cake layers, over the ganache, or even swirled into the ganache itself before spreading.
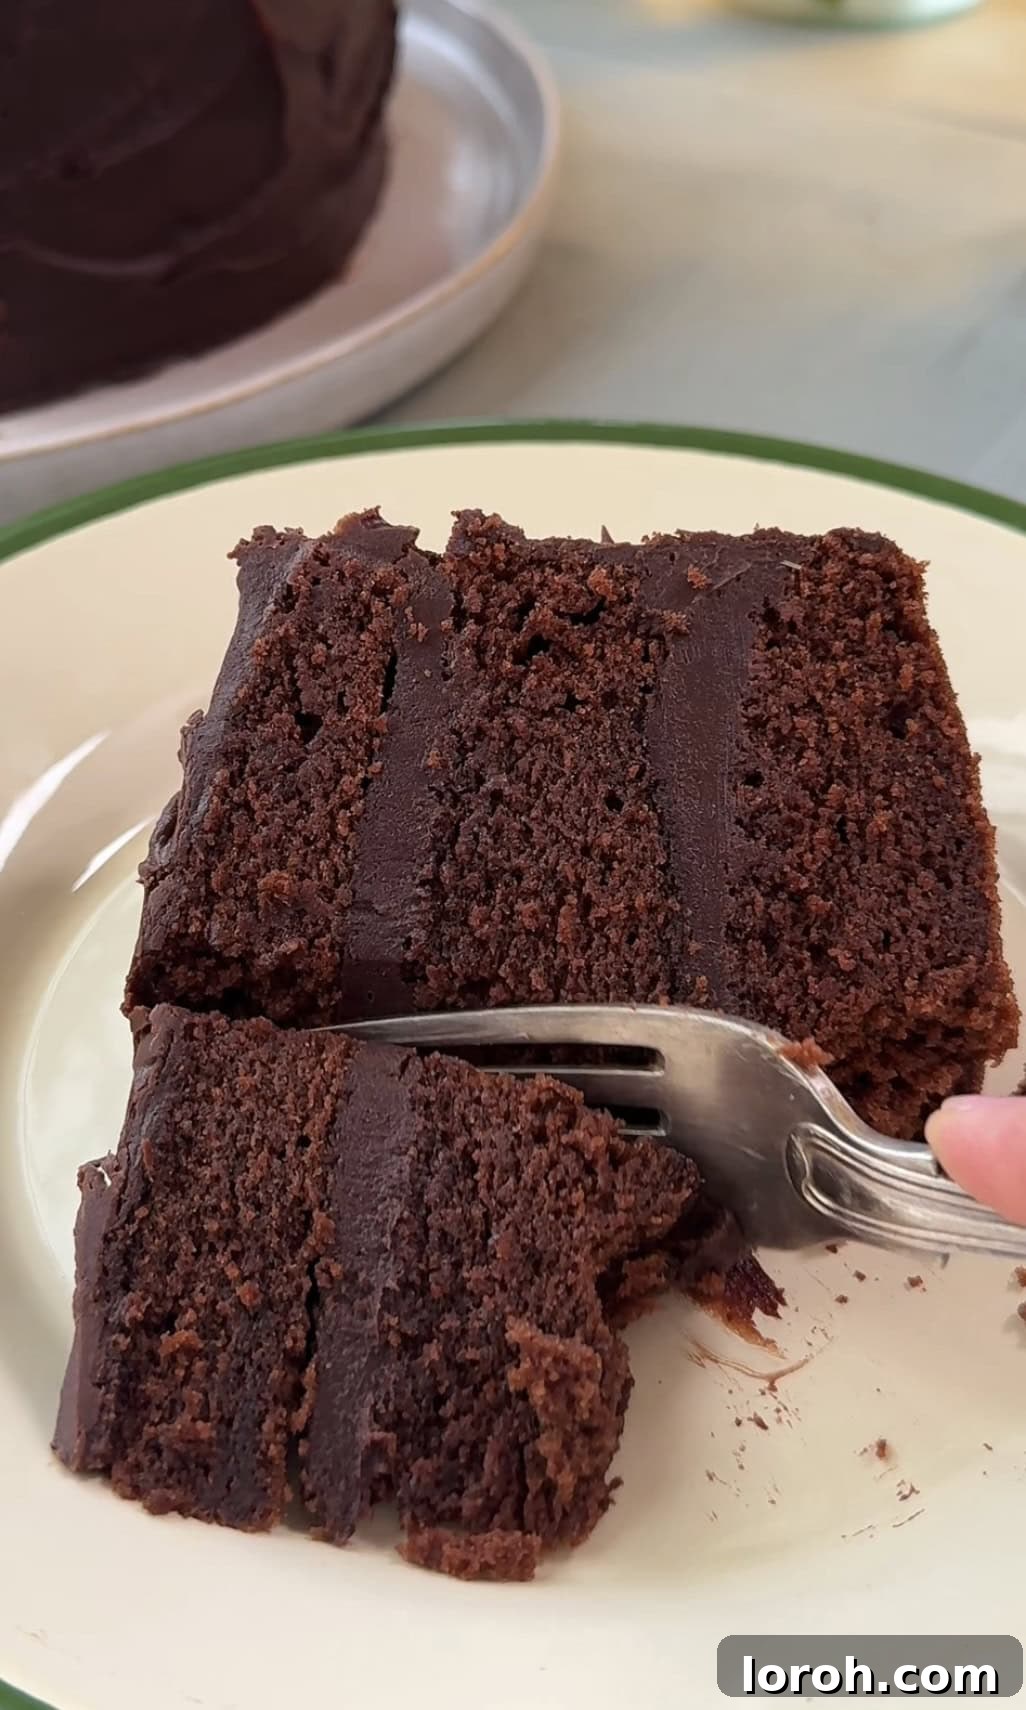
Here’s How to Craft Matilda’s Chocolate Cake: A Step-by-Step Guide
This visual guide provides an overview of the process. For detailed instructions, precise measurements, and crucial tips, please refer to the comprehensive recipe card at the bottom of this page.
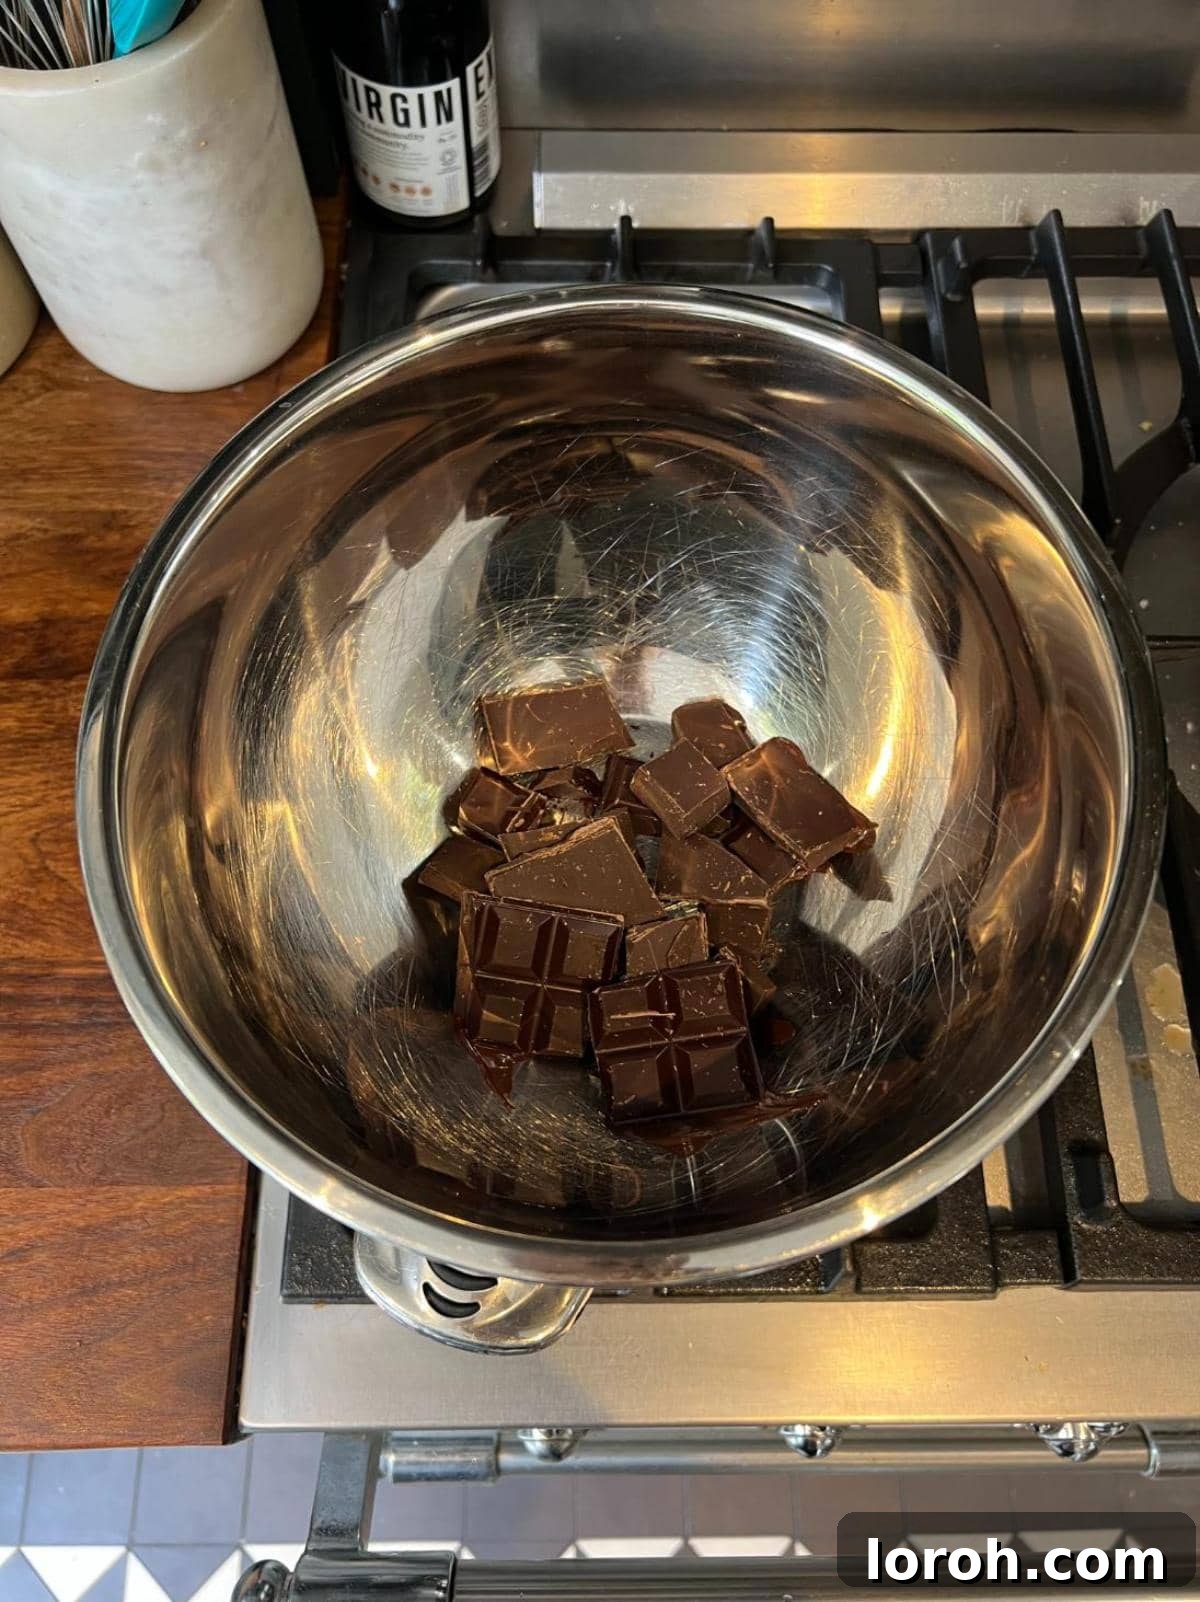
STEP ONE: Prepare Your Baking Environment. Begin by preheating your oven to 170°C fan (which is 190°C conventional, 375°F, or Gas Mark 5). This ensures the oven is at the correct temperature for even baking from the moment your cakes go in. Next, prepare three 18cm (7-inch) round cake tins. Grease each tin thoroughly with butter or a baking spray, then line the bottoms with baking parchment. This prevents sticking and ensures your beautiful cake layers release easily. Finally, melt your dark chocolate for the cake batter over a Bain Marie (a double boiler) or in short bursts in the microwave, stirring until smooth. Set it aside to cool slightly, as you don’t want to add hot chocolate to your egg mixture.
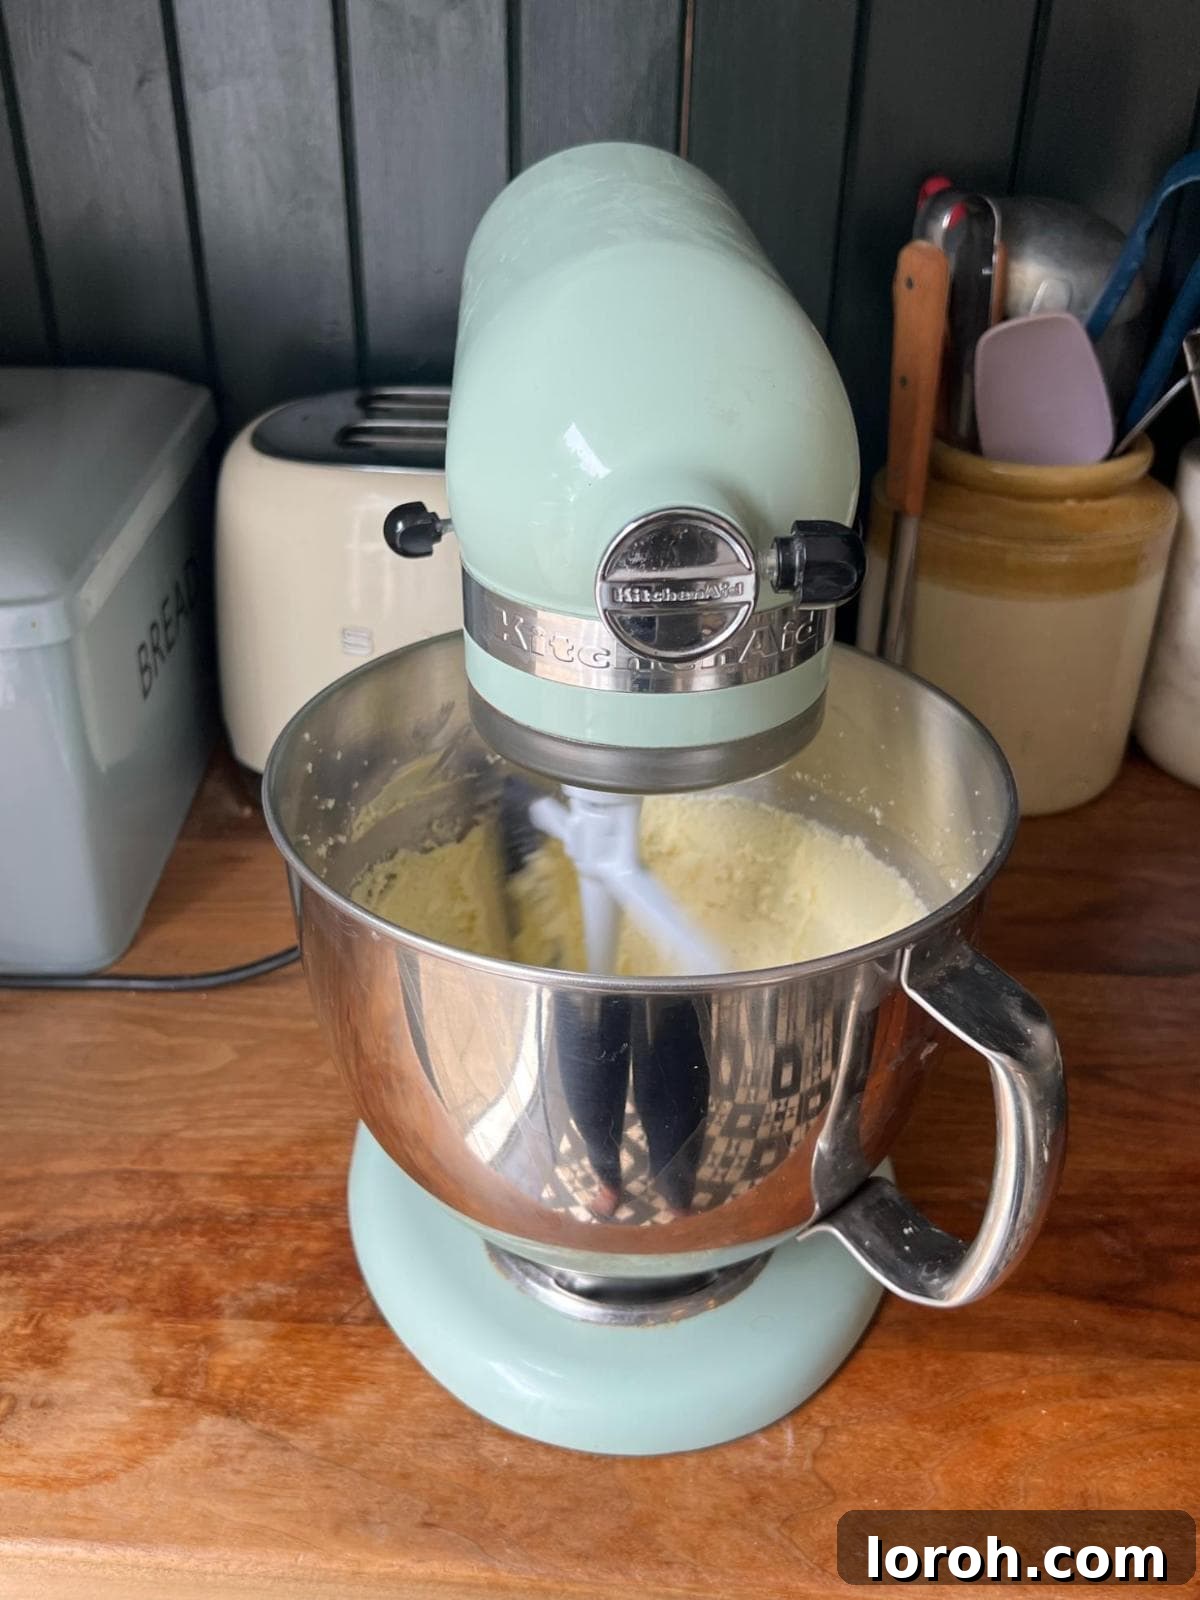
STEP TWO: Cream the Butter and Sugar. In the bowl of a stand mixer fitted with the paddle attachment (or using a large bowl and a handheld electric whisk), combine the softened unsalted butter and caster sugar. Beat these two ingredients together on medium-high speed for approximately 2 minutes. Continue mixing until the mixture becomes light, fluffy, and pale in color. This creaming process is vital as it incorporates air, which contributes to the cake’s tender texture and helps it rise beautifully.
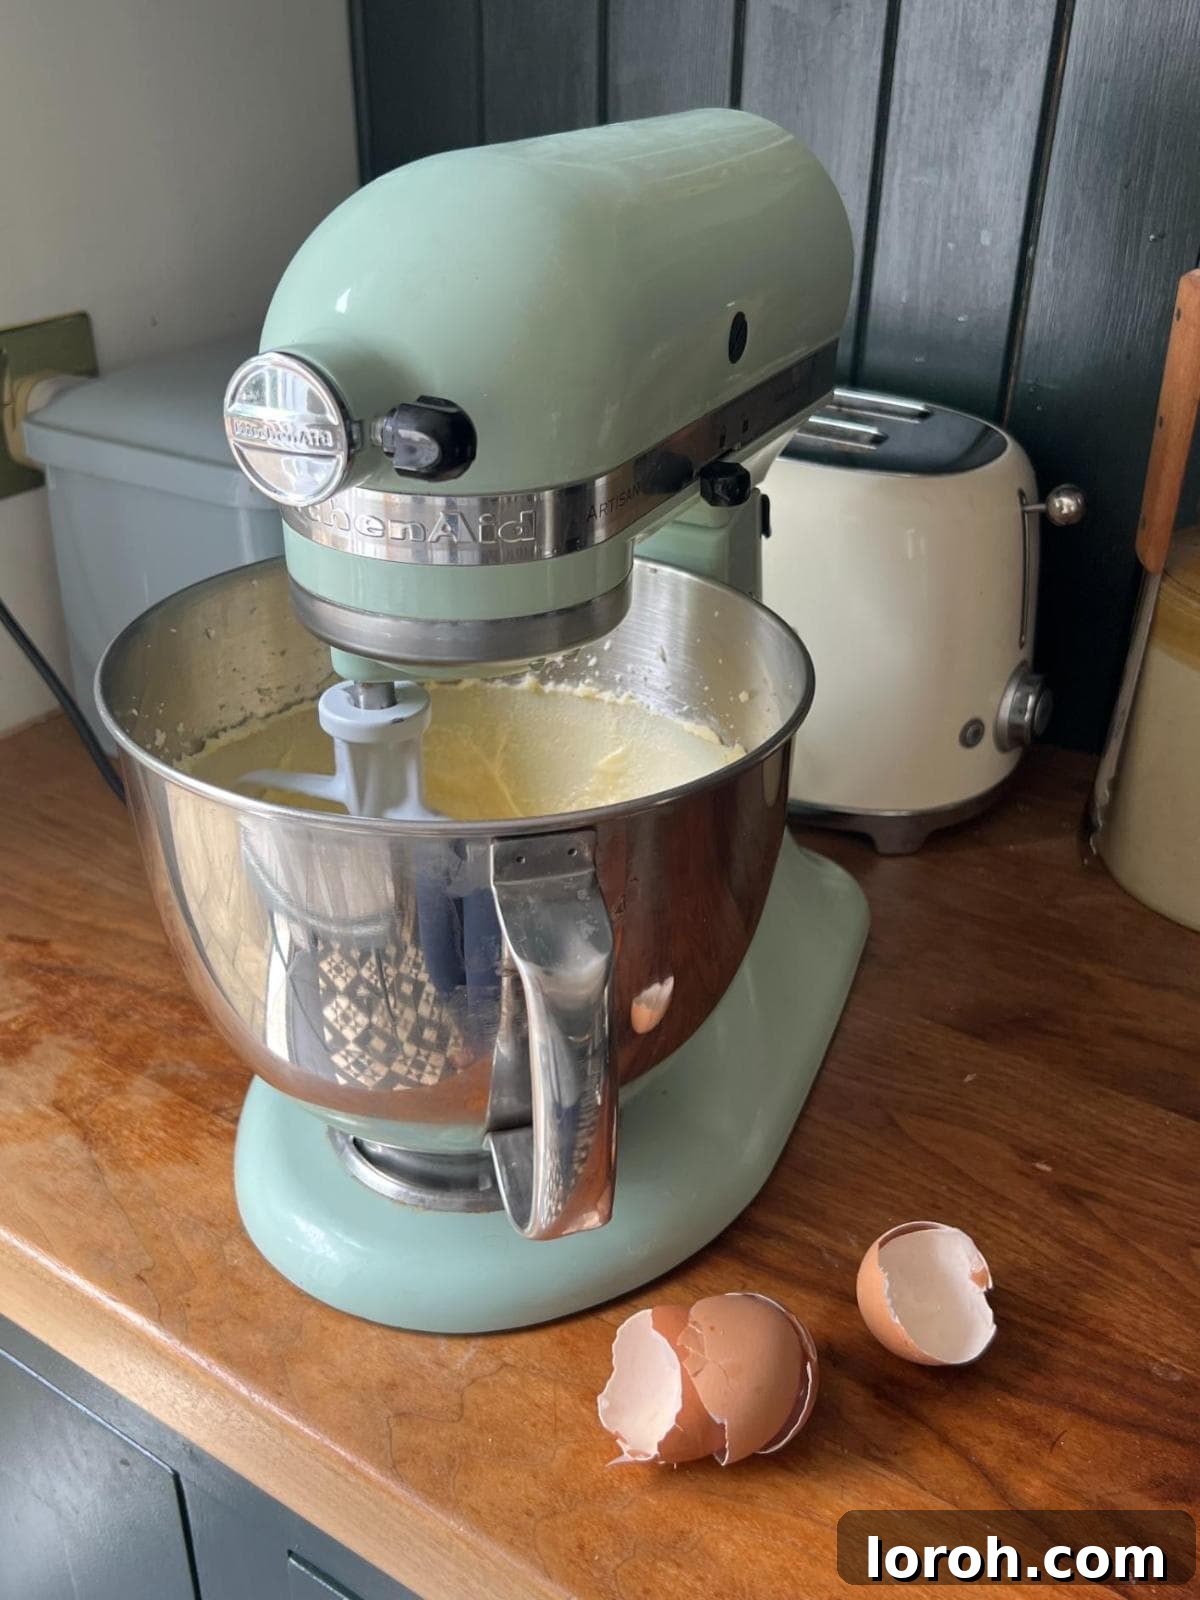
STEP THREE: Incorporate Wet and Dry Ingredients. Gradually add the large eggs to the creamed butter and sugar mixture, one at a time. Beat well after each addition, ensuring it is fully incorporated before adding the next. This prevents the mixture from curdling. Once the eggs are mixed in, pour in the slightly cooled melted dark chocolate and mix briefly on low speed until just combined. Then, slowly drizzle in the vegetable oil while the mixer is running, ensuring it’s fully integrated. Finally, sift the self-raising flour and unsweetened cocoa powder directly over the batter. Mix on low speed until just combined. Be careful not to overmix at this stage, as it can lead to a tough cake.
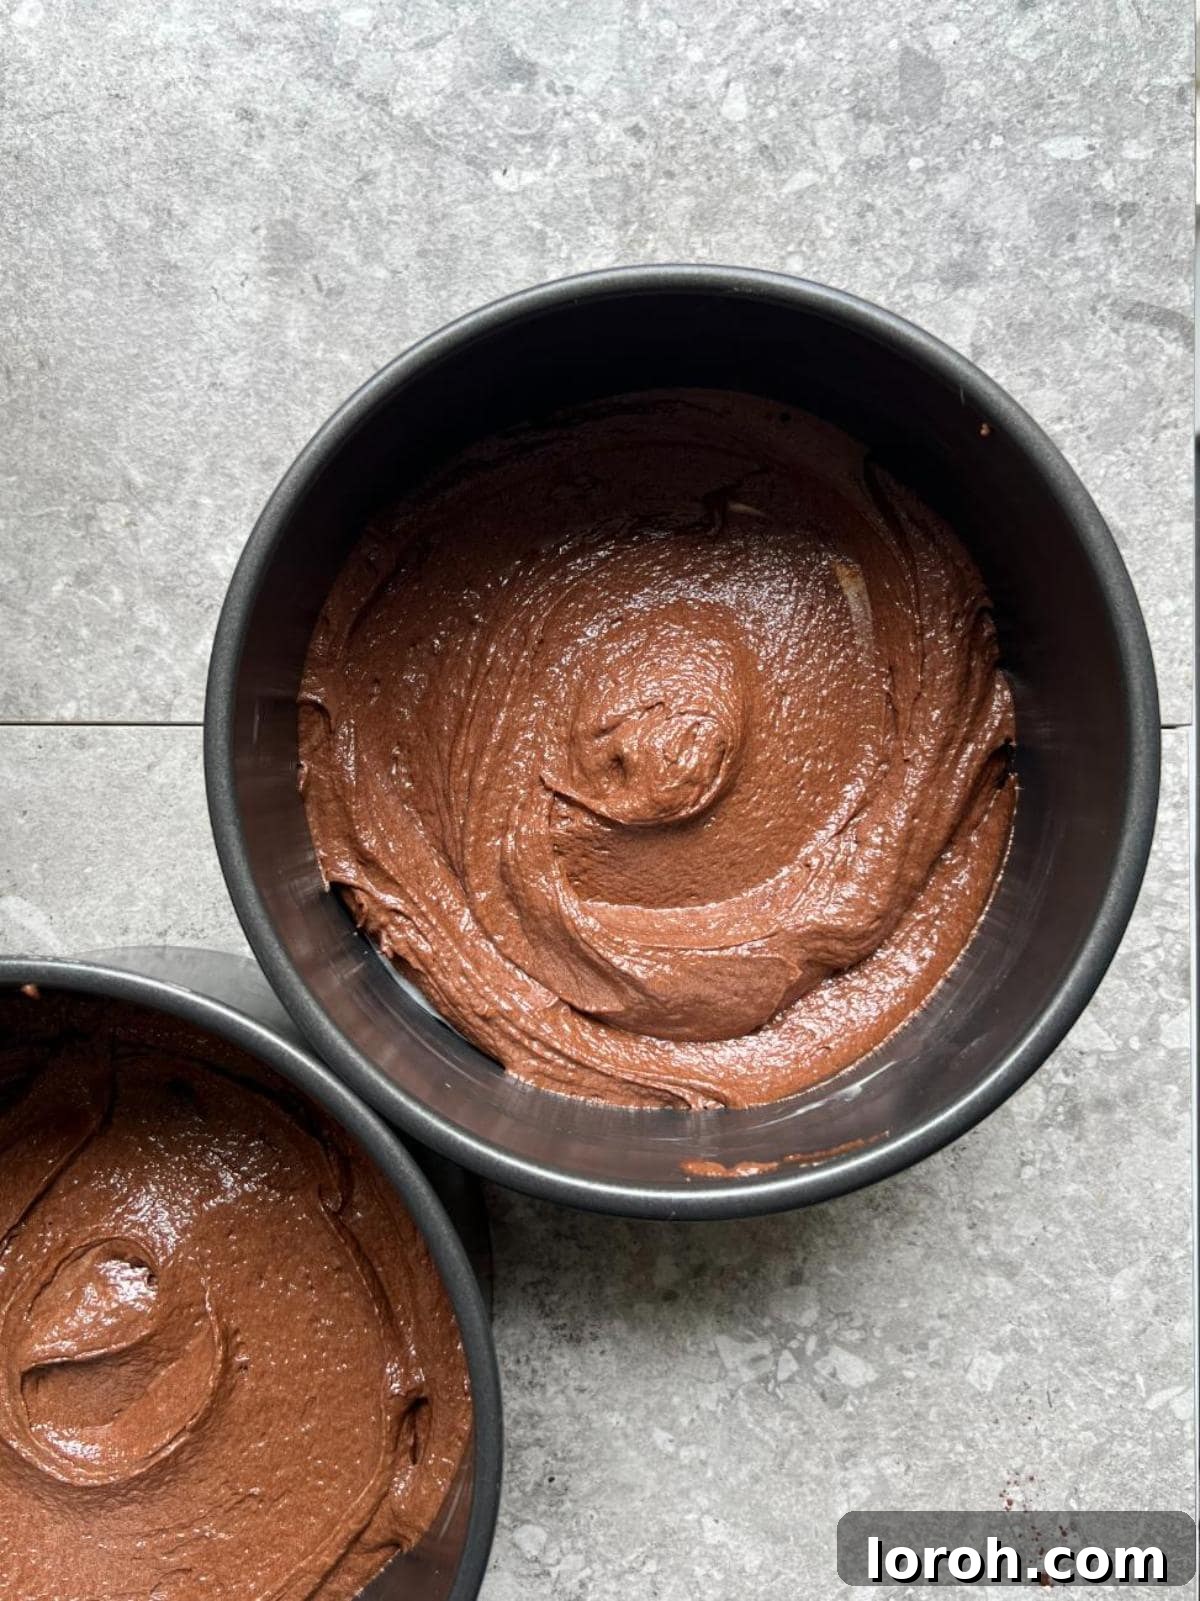
STEP FOUR: Add the Hot Liquid and Bake. In a heatproof jug, combine 350ml of freshly boiled water with the instant coffee granules (if using), stirring until the coffee is fully dissolved. With the mixer on low, slowly pour this hot liquid into the cake batter. Continue mixing until the batter is completely smooth and uniform. Don’t be alarmed if the batter appears very thin and watery – this is perfectly normal and a crucial step for achieving the cake’s incredible moisture. Divide the thinned batter evenly among your three prepared cake tins. Place them in the preheated oven and bake for 25-30 minutes, or until a wooden skewer inserted into the center of a cake comes out clean. Once baked, let the cakes cool in their tins for 10-15 minutes before inverting them onto a wire rack to cool completely.
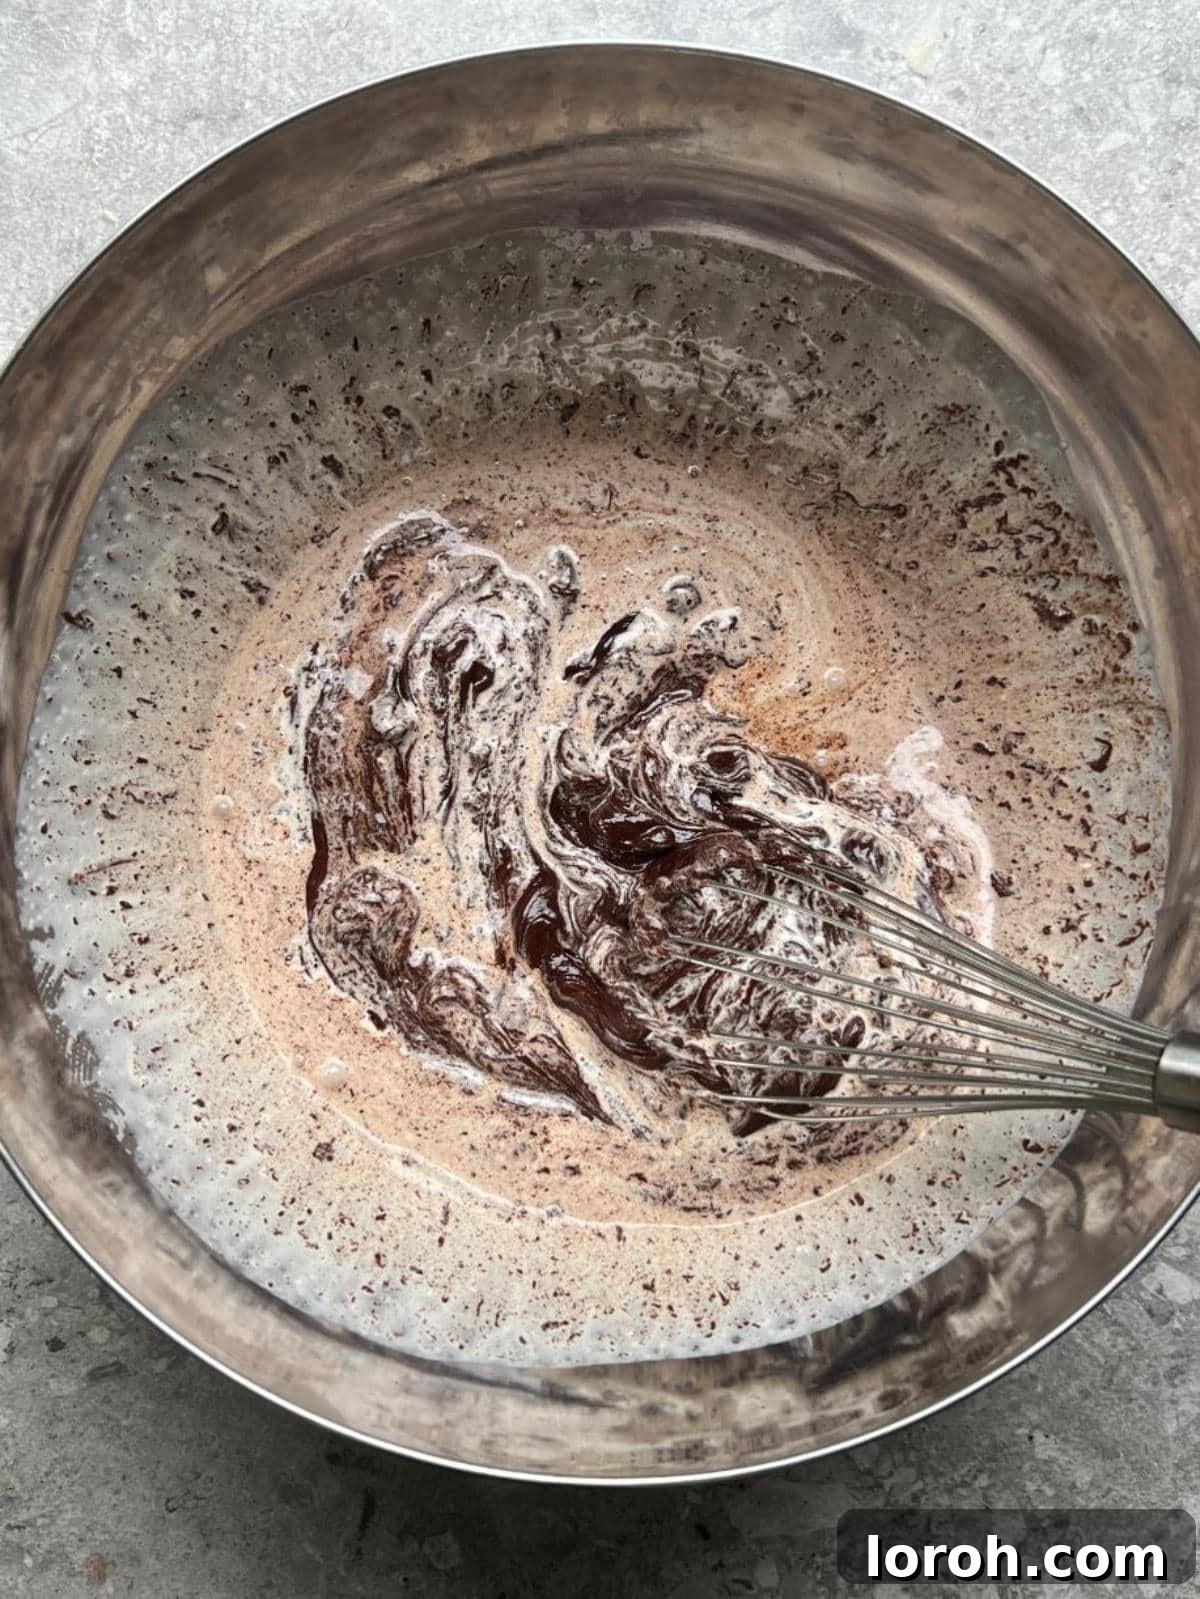
STEP FIVE: Begin the Ganache. While the cake layers are cooling, prepare your rich chocolate ganache. Start by finely chopping the dark chocolate. The finer the chop, the faster and more evenly it will melt. Place the chopped chocolate into a large, heatproof bowl. In a separate saucepan, gently heat the double cream over medium-low heat. Keep a very close eye on the cream, stirring occasionally, as it can quickly boil over. You want it to reach a gentle simmer, with small bubbles forming around the edges, but not a rolling boil.
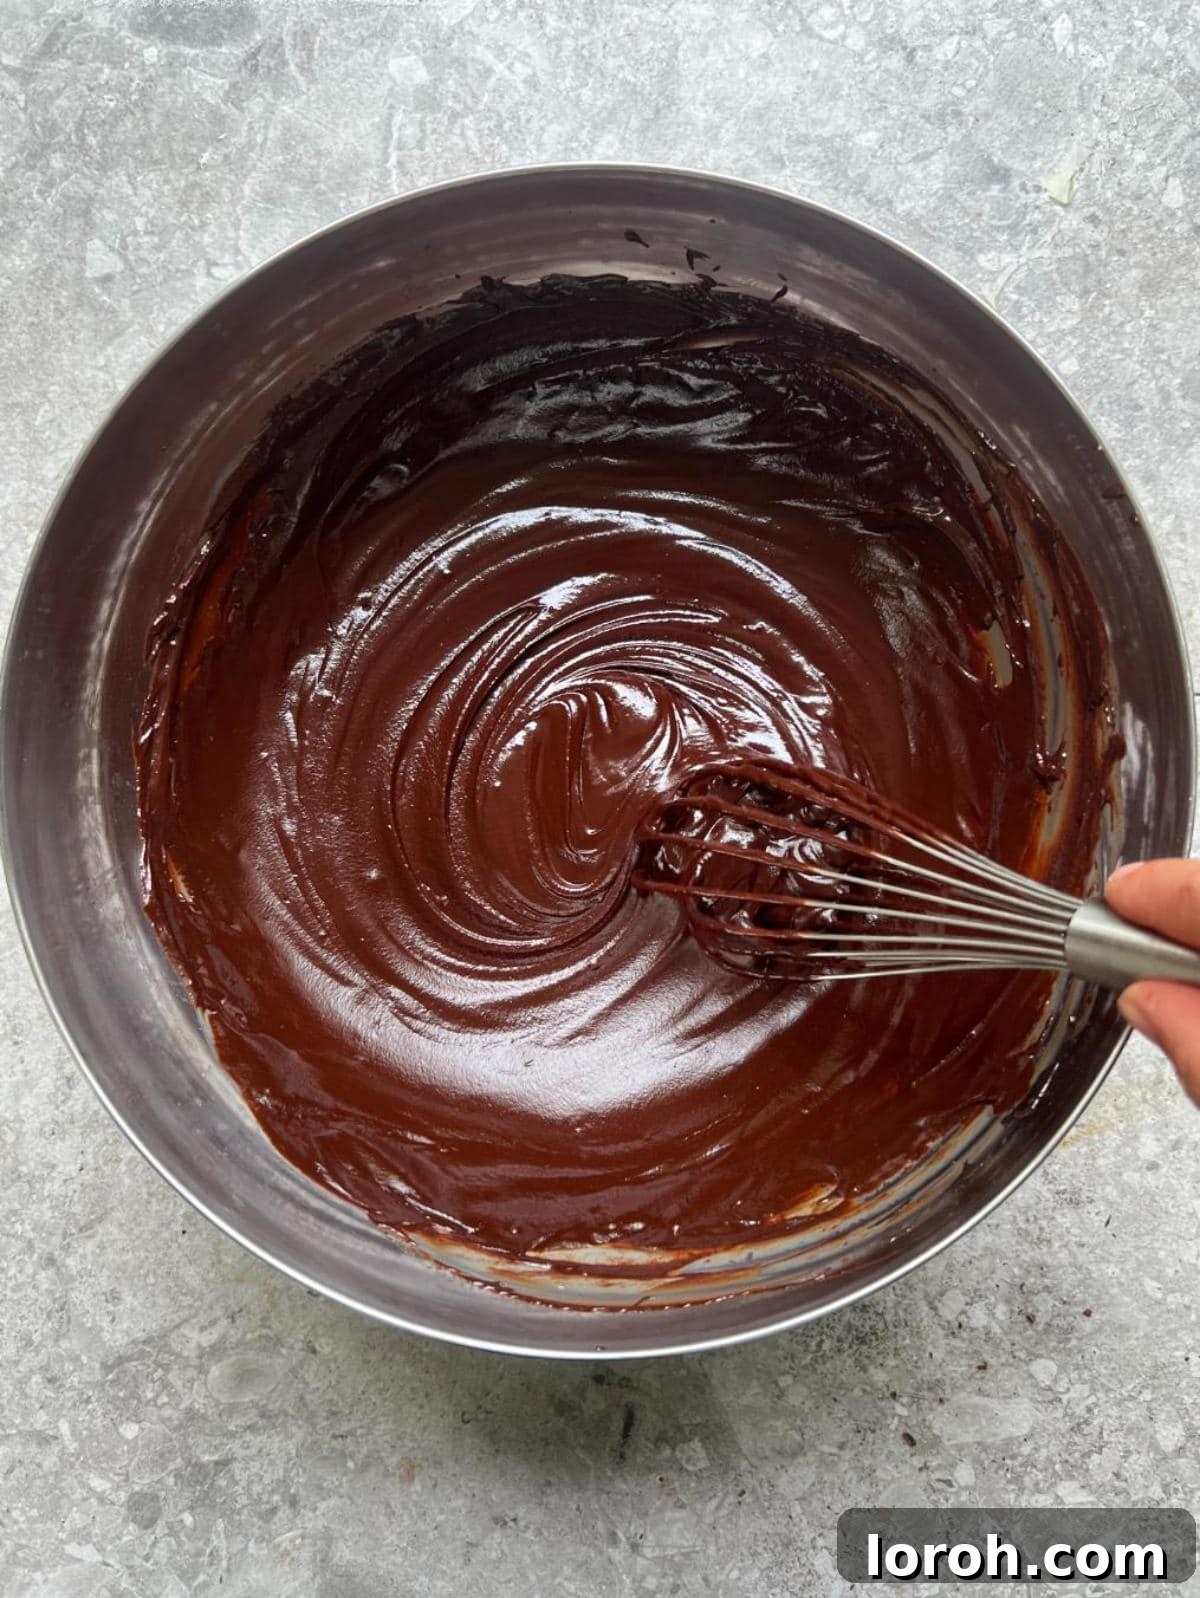
STEP SIX: Finish and Cool the Ganache. Once the cream is simmering, immediately pour it over the finely chopped chocolate in the heatproof bowl. Add a tiny pinch of salt (this enhances the chocolate flavor beautifully). Let the mixture sit undisturbed for about 1 minute. This crucial resting time allows the hot cream to melt the chocolate thoroughly. After a minute, gently whisk everything together, starting from the center and slowly expanding outwards, until the ganache is perfectly smooth, glossy, and free of any lumps. If a few stubborn lumps remain, you can gently place the bowl over a Bain Marie and whisk until smooth. Set the ganache aside at room temperature to cool and thicken to a spreadable consistency. This may take 30-60 minutes, depending on your ambient temperature. Do not put it in the fridge for too long, or it will become too hard to spread.
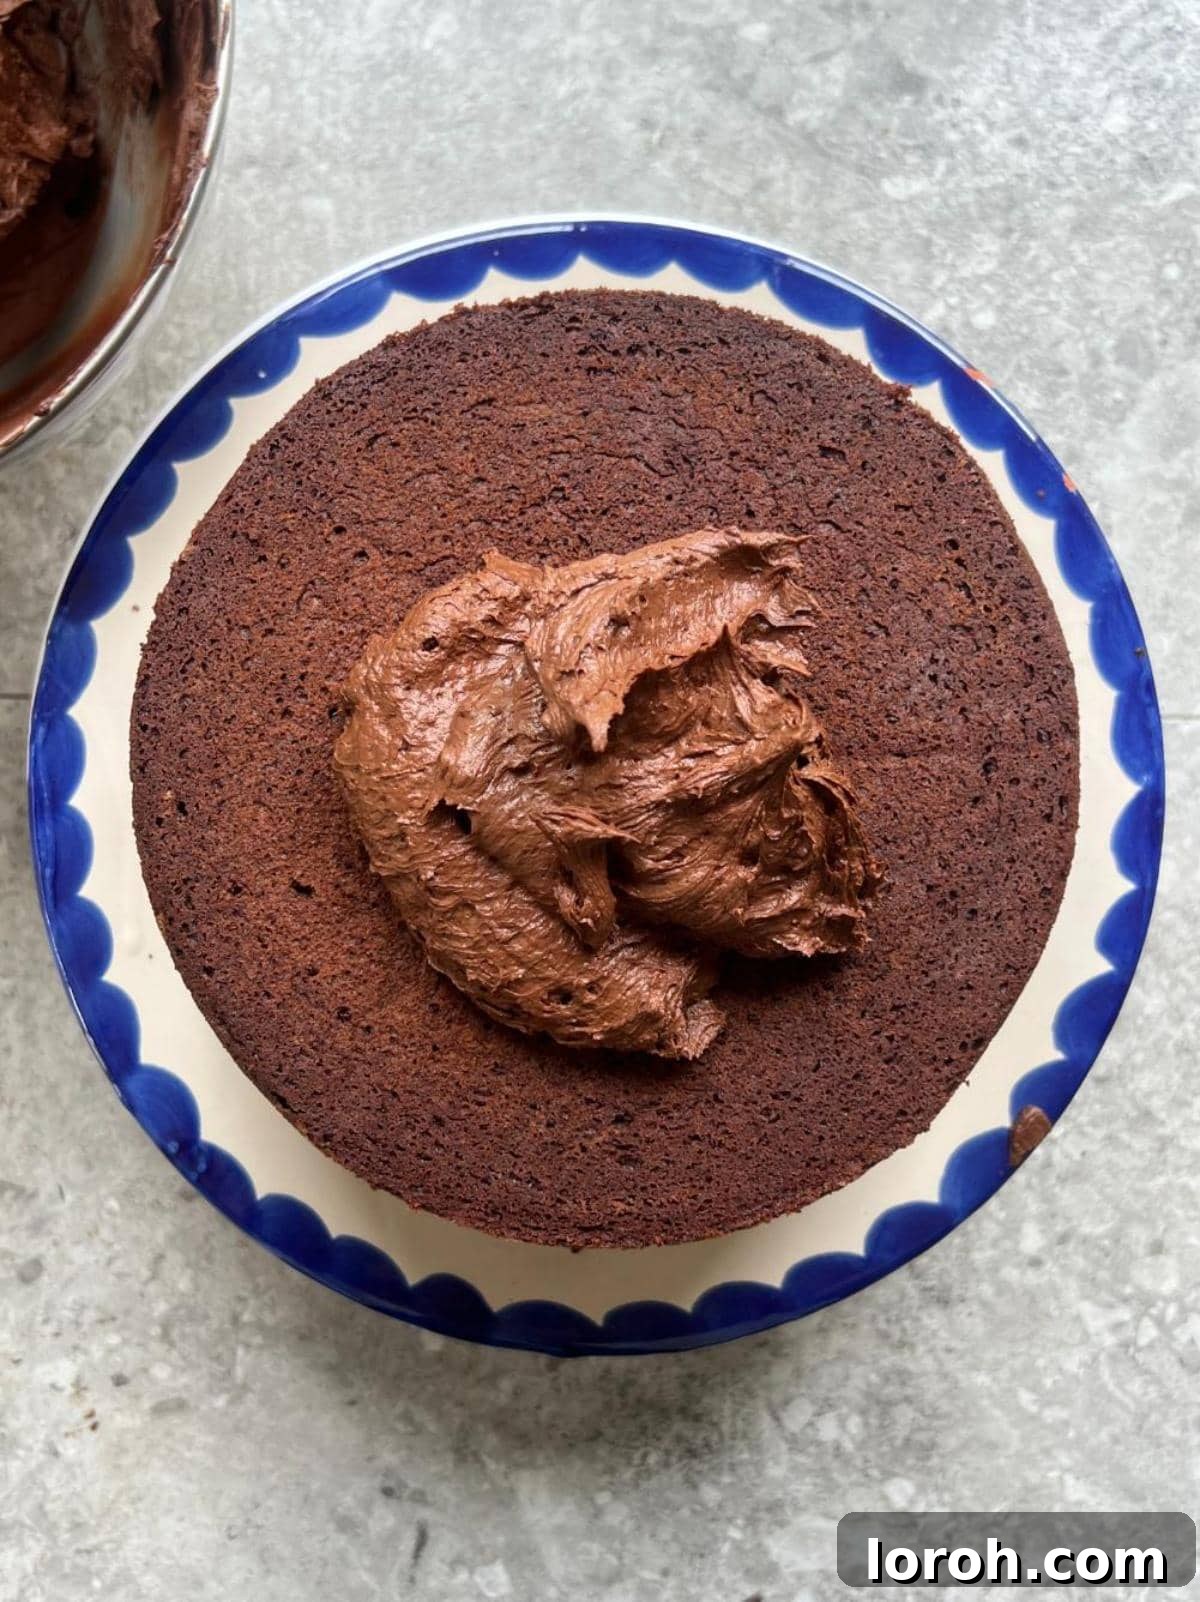
STEP SEVEN: Assemble the Base Layer. Once your cake layers are completely cool and your ganache has reached a spreadable consistency (thick enough to hold its shape but still pliable), it’s time to assemble your masterpiece. Carefully place the first cooled chocolate sponge layer onto your chosen serving plate or cake stand. Ensure it is centered and stable, as this forms the foundation of your towering cake.
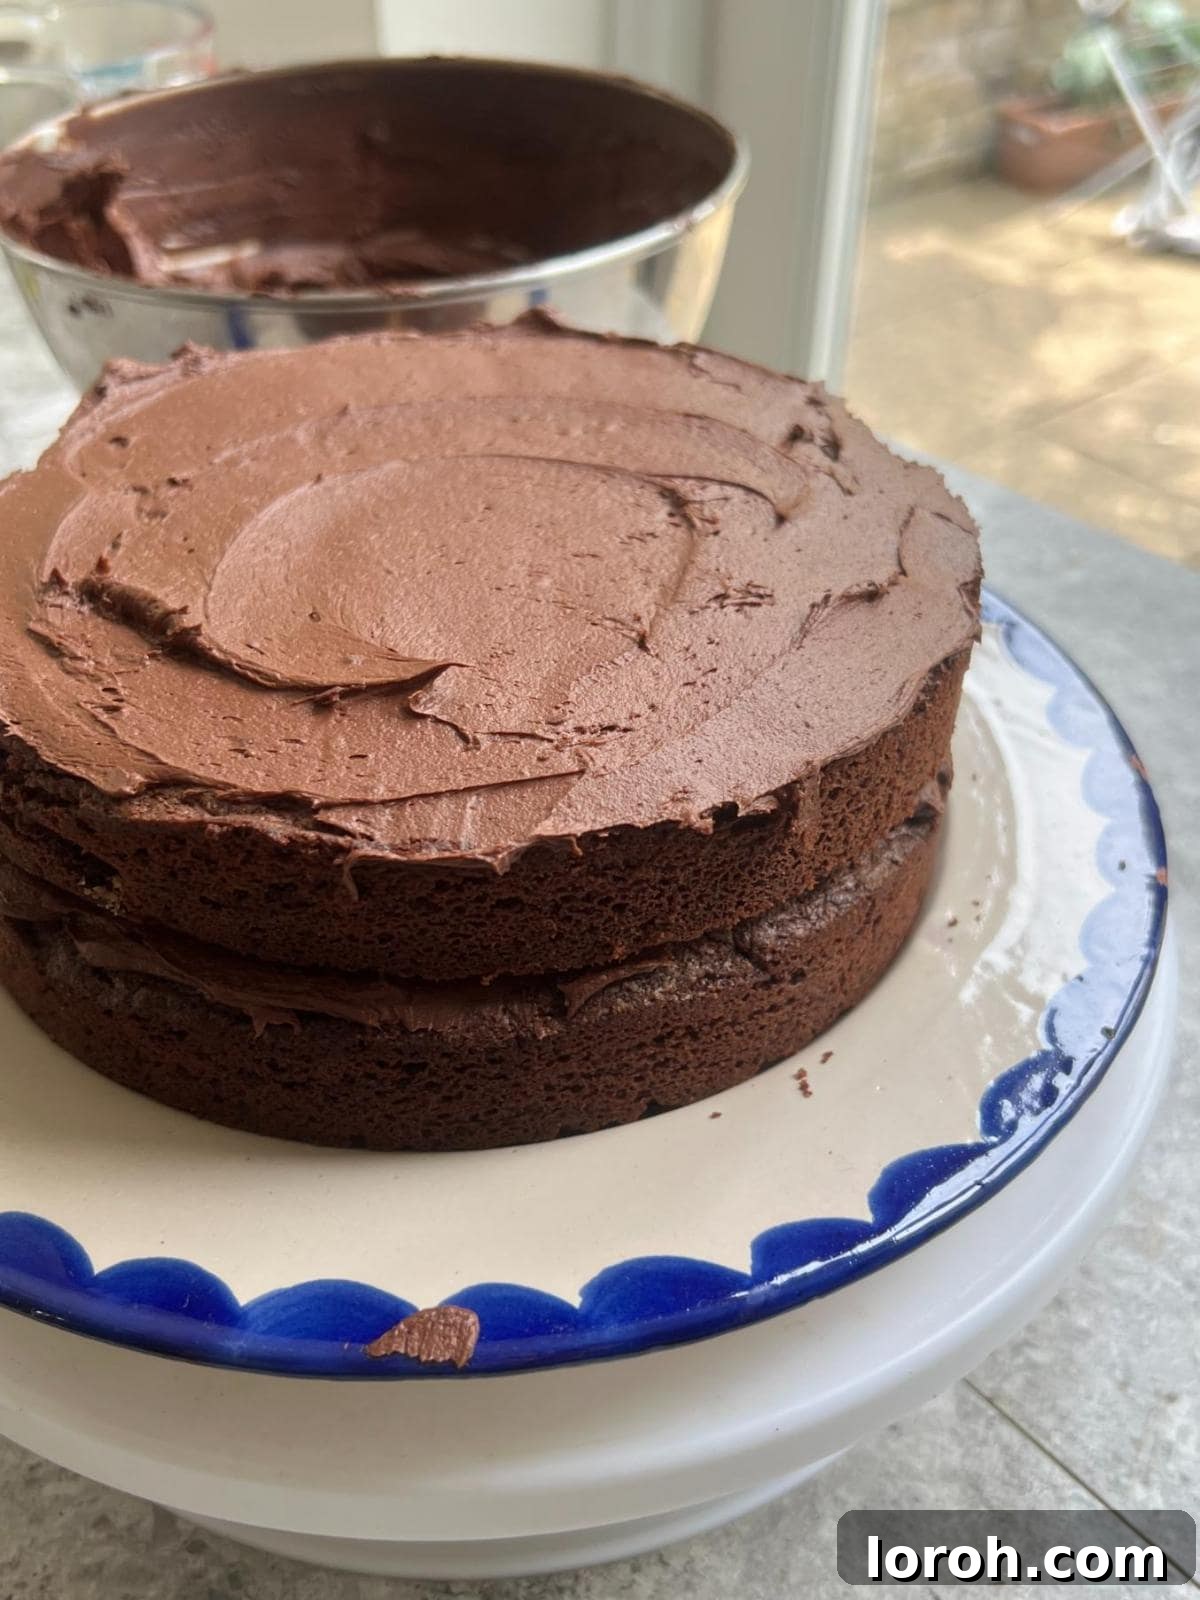
STEP EIGHT: Build the Layers. Generously spread a thick, even layer of the prepared chocolate ganache over the top of the first sponge. Use an offset spatula or the back of a spoon to ensure full coverage and a smooth finish. Carefully place the second sponge layer directly on top of the ganache. Repeat the process, spreading another thick layer of ganache. Finally, place the third and final sponge layer on top, creating a majestic, triple-layered cake ready for its grand finale.
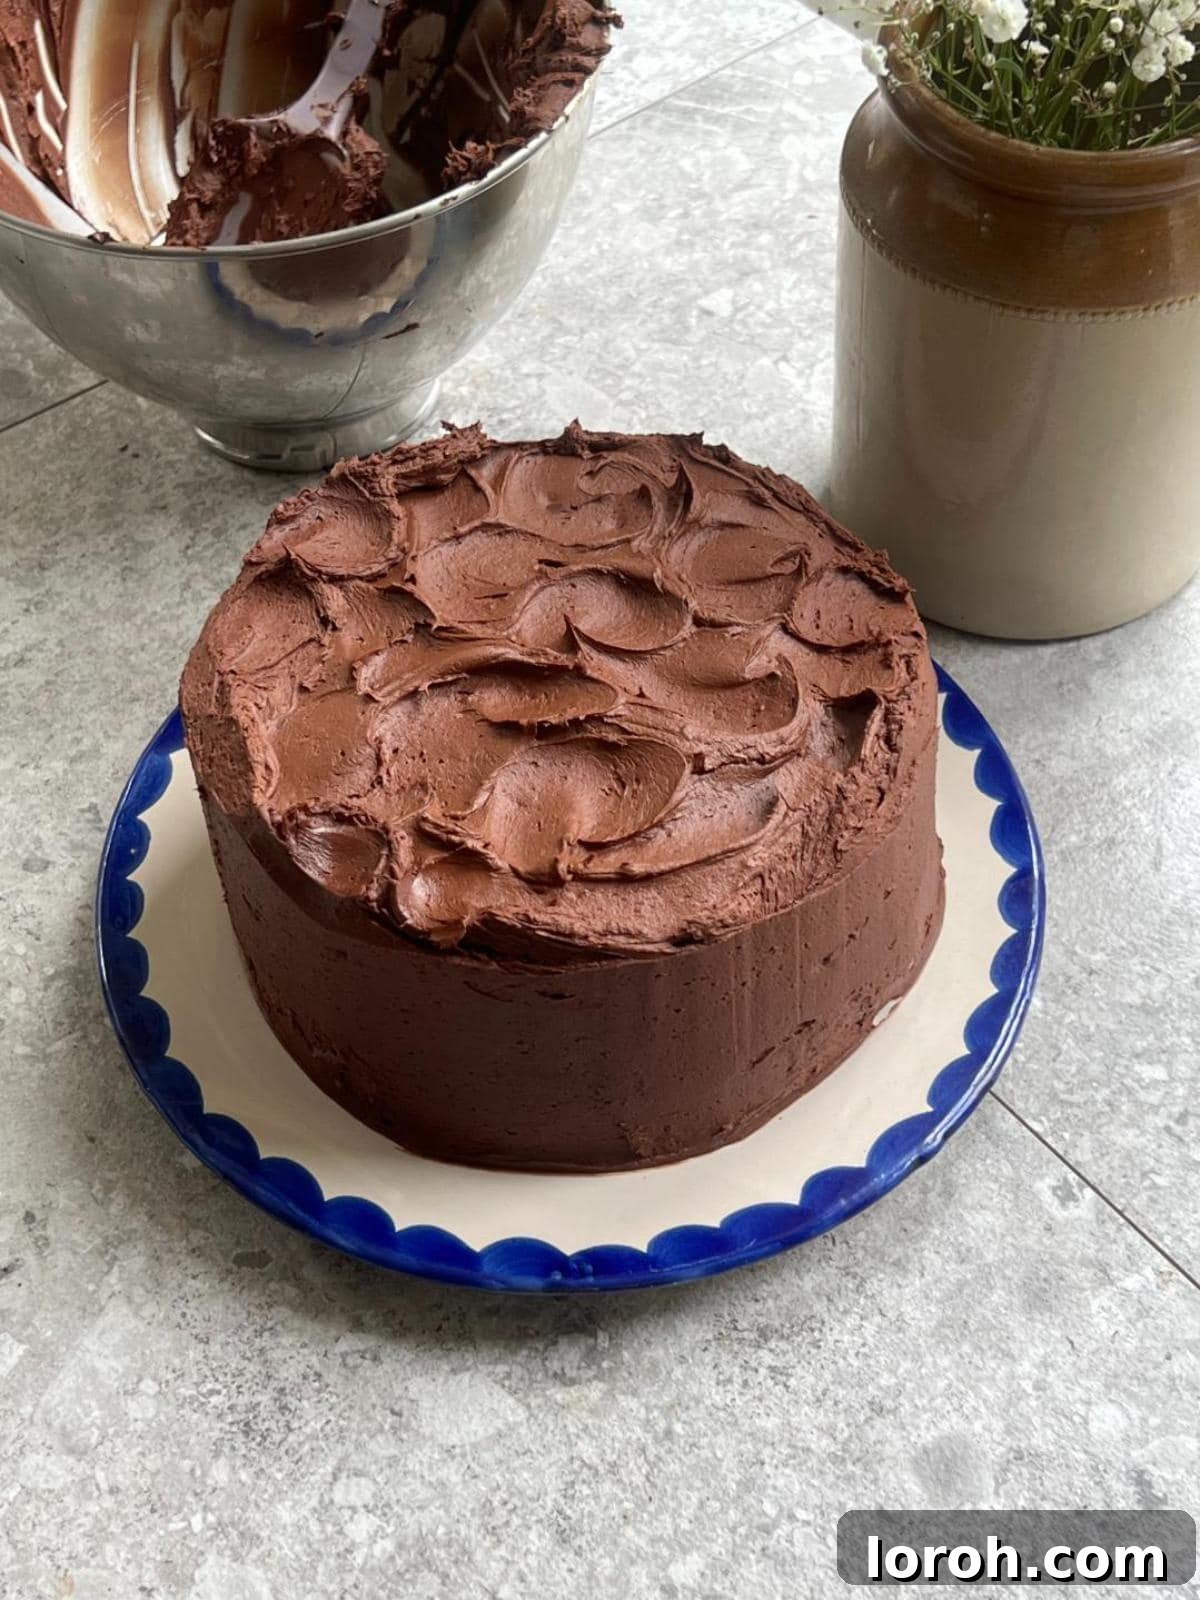
STEP NINE: The Grand Finale – Frosting and Decorating. With all layers stacked, it’s time to cover the entire cake with the remaining ganache. Apply a generous amount to the top and sides, then use a palette knife or offset spatula to smooth the sides and top for a neat, professional finish. For an extra touch of nostalgia reminiscent of the film, you can create rustic swirls or a more pronounced texture on top of the cake. Alternatively, for a sleek, modern look, achieve as smooth a finish as possible. You can also add chocolate curls, shavings, or a light dusting of cocoa powder for additional drama and elegance. Chill briefly if needed to set the ganache, then slice and serve!
Expert Baking and Ganache Tips
Achieving baking perfection, especially with a cake as iconic as Matilda’s, often comes down to a few key techniques and insights. Here are some expert tips to ensure your chocolate cake is nothing short of magnificent:
- Embrace Quality Chocolate: The flavor of your cake is only as good as the chocolate you use. Invest in high-quality dark chocolate with a cocoa content of at least 70% for both the cake batter and the ganache. This ensures a deep, rich, and complex chocolate flavor that truly shines. Avoid using melting wafers or chocolate chips for the ganache, as they often contain stabilizers that prevent them from melting into a perfectly smooth, glossy consistency.
- Don’t Undermine the Coffee: Even if you’re not a coffee drinker, please don’t skip the instant coffee granules in the cake batter. Coffee doesn’t impart a coffee flavor to the cake; instead, it acts as a magical enhancer, deepening and intensifying the natural notes of the cocoa powder. The result is a richer, more profound chocolate taste that is absolutely essential for this recipe. If you absolutely cannot consume coffee for any reason, simply substitute it with the same amount of boiling water.
- The Power of Room Temperature Ingredients: For the cake batter, ensure your butter and eggs are at room temperature. Softened butter creams beautifully with sugar, incorporating air for a light texture, and room temperature eggs emulsify much better with the other ingredients, leading to a smoother, more uniform batter and a finer crumb.
- Accurate Measurement is Key: Baking is a science. Use a digital kitchen scale to measure your dry ingredients (flour, cocoa, sugar) for the most accurate results. Measuring by weight is far more precise than volume, which can vary significantly depending on how ingredients are scooped.
- Mindful Mixing: Once you add the flour and cocoa powder, mix the batter only until the dry ingredients are just combined. Overmixing develops the gluten in the flour, which can lead to a tough, dense cake.
- Cool Cakes Completely: Resist the urge to frost warm cake layers. Doing so will cause your ganache to melt and slide right off. Allow the cake layers to cool completely on a wire rack before attempting to frost them. You can even wrap them tightly and chill them briefly in the fridge to make them easier to handle.
- Ganache Consistency is Crucial: The perfect ganache for frosting should be thick enough to hold its shape but still spreadable. If it’s too warm, it will be too runny; if it’s too cold, it will be too stiff. If your ganache becomes too firm, gently rewarm it over a Bain Marie for a few seconds, whisking until it reaches the desired consistency. If it’s too thin, let it sit longer at room temperature or chill briefly (5-10 minutes) in the fridge, stirring occasionally.
- Make Ahead for Convenience: This cake is an excellent candidate for advance preparation.
- Sponge Layers: The baked sponge layers can be prepared 1-2 days ahead of time. Once completely cooled, wrap each layer individually and tightly in baking parchment, then in cling film. Store them at room temperature until you’re ready to assemble the cake.
- Ganache: The ganache can also be made in advance. Prepare it as directed, then store it in an airtight container in the fridge for up to 48 hours. Before assembling, remove it from the fridge and allow it to come to room temperature. You may need to give it a good whisk or gently warm it over a Bain Marie to bring it back to a smooth, spreadable consistency.
Frequently Asked Questions
Yes, absolutely! This magnificent cake, often referred to as Bruce Bogtrotter’s cake, is quite freezer-friendly. For best results, it’s recommended to freeze the unfrosted sponge layers. Wrap each cooled layer individually and securely in baking parchment, followed by a layer of cling film (plastic wrap), then a final layer of aluminum foil to prevent freezer burn. They can be frozen for up to 3 months. Defrost the layers overnight at room temperature before frosting and assembling. While I prefer to make the ganache fresh for optimal texture and gloss, it can also be stored in an airtight container in the fridge for a few days. Just ensure you bring it back to room temperature and give it a good whisk to restore its spreadable consistency before using.
Ganache can split, appearing oily or grainy, usually due to overheating or a sudden change in temperature. The key to prevention is to heat the cream gently and ensure it doesn’t boil aggressively. Pour it over finely chopped chocolate, let it sit, then whisk gently. If your ganache does split, don’t despair! You can usually rescue it. Whisk in 1–2 tablespoons of warm milk (not hot) or room-temperature cream, very slowly, until the ganache comes back together and becomes smooth and cohesive. Another trick is to add a tiny amount of cold cream and whisk vigorously until it emulsifies.
Matilda’s Chocolate Cake is the legendary, intensely rich chocolate cake from Roald Dahl’s beloved book, Matilda, and immortalized in the 1996 film. It’s the formidable dessert that headmistress Miss Trunchbull forces student Bruce Bogtrotter to eat entirely, a scene that has become an iconic moment in children’s literature and cinema. Our recipe captures its essence: a gloriously dark, multi-layered chocolate sponge generously covered and filled with a decadent chocolate ganache, embodying its dramatic appearance and irresistible allure.
For the most authentic and nostalgic look, keep the decoration beautifully simple yet impactful. Focus on achieving a smooth, even layer of dark ganache around the sides of the cake. On top, use the back of a spoon or a small offset spatula to create characteristic rustic swirls, mimicking the slightly imperfect but charming finish seen in the film. You don’t need elaborate piping; the cake’s dramatic height and deep color are enough. For extra flair, you could add some homemade chocolate curls, chocolate shavings, or a light dusting of cocoa powder just before serving for added elegance and depth.
A dry cake can result from several factors. Most commonly, it’s due to overbaking, where the moisture evaporates from the cake. Ensure you bake for the minimum recommended time and test for doneness with a skewer. Another reason could be inaccurate ingredient measurements, particularly too much flour or not enough liquid. Using room temperature ingredients and not overmixing the batter also contribute to a moist crumb.
The assembled and frosted Matilda’s Chocolate Cake will keep beautifully in an airtight container at room temperature for up to 2 days. If you need to store it longer, it can be refrigerated for up to 3-4 days. For optimal flavor and texture when refrigerated, remember to remove the cake from the fridge about 20-30 minutes before serving to allow it to come closer to room temperature, which softens the ganache and enhances the cake’s moisture (unless it’s a very hot day where melting might be an issue).
Other Decadent Recipes You Might Enjoy
If you’ve savored the rich, indulgent experience of making and tasting Matilda’s Chocolate Cake, you’re undoubtedly a fan of truly delightful desserts. Here are a few other recipes from our collection that share that same commitment to flavor, texture, and pure baking joy:
For another deeply satisfying chocolate experience, you might also like my Classic Chocolate Fudge Cake, a dense and intensely chocolatey treat that’s perfect for any occasion. If you’re drawn to cakes with unique and comforting flavors, our S’mores Cake offers layers of graham cracker, toasted marshmallow, and chocolate, or try the rustic elegance of my Upside-Down Pear Fudge Cake. For something equally chocolatey but perhaps more portable and irresistibly fudgy, explore my recipe for the Best Ever Chocolate Brownies. And for a refreshing contrast, balancing out all that rich chocolate, you may also adore my zesty and incredibly easy Lemon Drizzle Cake.
Easy Baking Recipes
Irresistible Chocolate Chunk Muffins
Easy Baking Recipes
Decadent Triple Chocolate Chunk Cookies
Easy Baking Recipes
Rich Chocolate Mud Cake with Malted Whipped Cream
Puddings
Classic French Chocolate Mousse (Mousse au Chocolat)
If you tried and enjoyed this recipe for Matilda’s Chocolate Cake or any other delectable creation from our site, please don’t hesitate to leave a rating or comment below and let us know how your baking adventure went! Your feedback is always appreciated!
Matilda’s Chocolate Cake: The Definitive Recipe
Print Recipe
Ingredients
For the rich chocolate sponge layers:
- 200 g good quality dark chocolate (70% cocoa solids recommended)
- 150 g unsalted butter, softened to room temperature
- 90 g neutral vegetable oil (e.g., canola, sunflower, or grapeseed oil)
- 300 g caster sugar (superfine sugar)
- 3 large eggs, at room temperature
- 40 g unsweetened cocoa powder (Dutch-process preferred for darker color and smoother flavor)
- 225 g self-raising flour (or all-purpose flour + 2 ¼ tsp baking powder and ½ tsp salt)
- 350 ml boiling water
- 10 g instant coffee granules, dissolved in the boiling water (optional, but highly recommended for enhanced chocolate flavor)
- Small pinch of salt
For the luscious dark chocolate ganache:
- 600 g good quality dark chocolate (70% cocoa solids recommended), finely chopped
- 300 ml double cream (heavy cream, minimum 35% fat)
- Pinch of salt
Instructions
To make the moist chocolate cake layers:
-
Preheat your oven to 170°C fan (190°C conventional / 375°F / Gas Mark 5). Grease and line the bottoms of three 18cm (7-inch) round cake tins with baking parchment.
-
Melt the 200g dark chocolate for the sponge over a Bain Marie (double boiler) or in short bursts in the microwave. Stir until smooth, then set aside to cool slightly to room temperature.
-
In a stand mixer with a paddle attachment (or a large bowl with an electric whisk), beat the softened unsalted butter and caster sugar together for 2 minutes on medium-high speed. Continue until the mixture is light, fluffy, and pale in color. Add the large eggs, one at a time, beating well after each addition until fully incorporated.
-
Pour in the slightly cooled melted chocolate and mix briefly on low speed to combine. Slowly drizzle in the vegetable oil while mixing until fully integrated.
-
Sift the self-raising flour, unsweetened cocoa powder, and the small pinch of salt into the wet mixture. Mix on low speed until just combined. Be careful not to overmix.
-
In a jug, mix the 350ml boiling water with the instant coffee granules (if using). Slowly pour this hot liquid into the cake batter while mixing on low speed until the batter is smooth and uniform. It will appear very thin – this is completely normal and crucial for moisture.
-
Divide the thinned batter evenly between the three prepared cake tins. Bake for 25-30 minutes, or until a wooden skewer inserted into the center of a cake comes out clean. Let cool in the tins for 10-15 minutes before inverting onto a wire rack to cool completely.
For the rich chocolate ganache:
-
Finely chop the 600g dark chocolate for the ganache and place it in a large, heatproof bowl. In a saucepan, gently heat the 300ml double cream over medium-low heat until it reaches a gentle simmer, with small bubbles forming around the edges. Watch it carefully to prevent boiling over.
-
Once the cream is simmering, immediately pour it over the finely chopped chocolate in the bowl. Add a pinch of salt. Let the mixture sit undisturbed for 1 minute to allow the chocolate to melt. Then, gently whisk everything together, starting from the center and expanding outwards, until the ganache is perfectly smooth, glossy, and emulsified.
-
If you find the ganache still has small lumps of chocolate that won’t melt, you can gently place the bowl over a Bain Marie (without direct heat contact) and whisk until smooth. Set the ganache aside at room temperature to cool and thicken. This typically takes 30-60 minutes, depending on your kitchen’s temperature. It should be thick enough to hold its shape but still spreadable. Do not leave it in the fridge for too long, as it can harden very quickly and become difficult to work with.
To assemble the iconic cake:
-
Once both the cake layers and the ganache are completely cool and at the correct consistency, place one cooled sponge layer onto your chosen serving plate or cake stand.
-
Spread a generous, thick layer of the prepared ganache evenly over the top of the first sponge. Carefully place the second sponge layer on top, followed by another thick layer of ganache. Finally, position the third sponge layer on top.
-
Cover the entire assembled cake with the remaining ganache, using a palette knife or offset spatula to smooth the sides and top. For a truly nostalgic Matilda look, use the spatula to create characteristic rustic swirls on the top of the cake.
-
Serve immediately or chill briefly to set the ganache. Enjoy this legendary indulgence!
Notes
To store: The assembled and frosted cake will remain fresh and delicious in an airtight container at room temperature for up to 2 days. If you wish to extend its freshness, store it in the fridge for up to 3 days. When serving a refrigerated cake, remember to remove it from the fridge about 20 minutes beforehand. This allows the ganache and cake to lose their chill and return to a more tender, flavorful texture, unless it’s a very hot day where the ganache might melt too quickly.
To freeze: The unfrosted sponge layers freeze exceptionally well. Once completely cooled, wrap each cake layer individually in baking parchment, then tightly in cling film (plastic wrap), and finally in aluminum foil to prevent freezer burn. They can be frozen for up to 3 months. When ready to use, defrost the layers overnight at room temperature before proceeding with the frosting and assembly. While you can freeze ganache, for the best and smoothest results, I recommend making the ganache fresh. If you do freeze ganache, ensure it’s in an airtight container and allow it to thaw completely in the fridge, then bring it to room temperature and whisk vigorously before attempting to spread it.
Make ahead: Both the cake layers and ganache can be prepared in advance for a stress-free assembly day.
Sponge Layers: Bake the cake layers 1–2 days ahead. Once they are entirely cool, wrap them tightly in baking parchment and cling film, then store them at room temperature until you are ready to assemble the cake.
Ganache: The ganache can also be made up to 48 hours in advance. Prepare it as instructed, then store it in an airtight container in the fridge. Before using, bring it back to room temperature and give it a good whisk or gently rewarm over a Bain Marie until it reaches a smooth, spreadable consistency.
Coffee: The instant coffee granules are a flavor secret, enhancing the chocolate without imparting a coffee taste. However, if you are baking for children or prefer to avoid caffeine, you can simply omit the coffee granules and use 350ml of boiling water directly in the cake batter. The cake will still be wonderfully rich and moist.
Decoration idea: For an extra touch that evokes the spirit of Matilda, consider decorating the top of the cake with elegant chocolate curls, shavings, or a light dusting of high-quality cocoa powder for added visual appeal and texture.
Nutrition
Nutrition information is automatically calculated, so should only be used as an approximation.