
Easy Whipped Brown Butter: Transform Your Meals with This Luxurious Treat
Butter is undeniably a kitchen staple, adding rich flavor and moisture to countless dishes. But have you ever experienced the sheer delight of **whipped brown butter**? This isn’t just an upgrade; it’s a culinary revelation. Once you try this incredibly delicious, nutty, and creamy creation, you’ll find yourself making it on repeat. Brown butter, also known as beurre noisette, is a game-changer on its own, cooked gently until the milk solids toast, imparting a distinct, gorgeous nutty aroma and deep, caramel-like notes. It’s a secret ingredient that can elevate everything from a humble cookie dough to a sophisticated fish fillet, transforming the ordinary into something truly spectacular.
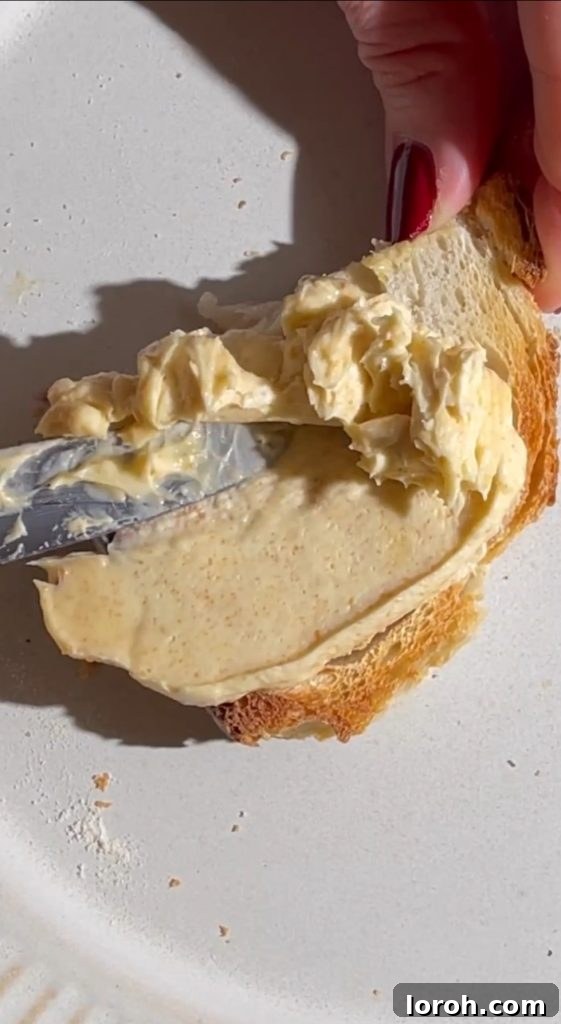
While brown butter is fantastic, taking that extra step to whip it introduces a whole new dimension of luxury. Whipping incorporates air, creating a remarkably thick, fluffy, and spreadable texture that melts exquisitely in your mouth. Imagine this velvety, nutty spread slathered generously on warm toast, fluffy pancakes, or your favorite freshly baked goods. It’s surprisingly easy to make, requires only a few basic ingredients, and takes less than 15 minutes of active time from start to finish. Let’s dive into the simple process of creating this magnificent whipped brown butter that will undoubtedly become your new favorite condiment.
The Magic of Brown Butter: A Flavor Transformation
Before we even get to whipping, understanding the fundamental process of browning butter is key. Brown butter is essentially butter that has been cooked past its melting point until the milk solids separate and caramelize. This caramelization, known as the Maillard reaction, is what gives brown butter its signature nutty, toasted flavor and enticing aroma. It’s a delicate process that requires attention, but the reward is a deeply complex flavor profile that regular butter simply can’t offer.
To brown butter, you’ll start by melting it over a gentle heat. As it melts, it will begin to foam. This foam is the water evaporating from the butter. Soon after, the butter will start to bubble more vigorously. Pay close attention during this stage. The milk solids, which appear as small white specks, will gradually sink to the bottom of the pan and begin to toast. You’ll notice them turning golden, then amber, and finally a rich brown. Simultaneously, a wonderful nutty aroma, reminiscent of toasted hazelnuts or caramel, will fill your kitchen. This is your cue!
Tips for Perfect Browning
- Choose a Light-Colored Pan: This makes it much easier to monitor the color of the milk solids and prevent burning. A stainless steel pan is ideal.
- Use Medium-Low Heat: Patience is key. Too high heat can burn the butter quickly before it develops full flavor.
- Stir Constantly: Stirring helps the butter brown evenly and prevents the milk solids from sticking and burning at the bottom of the pan.
- Smell and Sight are Your Guides: Rely on both the sweet, nutty fragrance and the visual change to a deep golden-brown color.
- Act Quickly to Stop Cooking: The moment your butter reaches that perfect amber-brown and smells wonderfully nutty, immediately remove it from the heat and pour it into a separate, cool bowl. Residual heat in the pan can quickly turn your perfectly browned butter into burnt butter, which has an unpleasant acrid taste.
Why Whip Your Brown Butter?
You might be wondering, if brown butter is already so good, why go through the extra step of whipping it? The answer lies in texture and versatility. Whipping the cooled brown butter infuses it with air, transforming its dense consistency into a light, airy, and incredibly creamy spread. This aeration makes it exceptionally easy to spread, melt, and incorporate into other dishes.
The velvety texture of whipped brown butter allows it to cling beautifully to toast, bread, and pastries, creating a luxurious mouthfeel. It also makes for an elegant presentation when dolloped onto dishes. The subtle nuttiness is amplified by the lightness, making each bite a truly indulgent experience. It’s a simple technique that elevates a fantastic ingredient to an extraordinary one, perfect for both everyday enjoyment and special occasions.
Essential Ingredients and Equipment
Creating this delightful whipped brown butter requires minimal ingredients and equipment, most of which you likely already have on hand.
Ingredients:
- Butter: The star of our show! You can use either salted or unsalted butter. For precise control over the final saltiness, I generally recommend using unsalted butter and adding salt to taste. However, if salted butter is what you have, feel free to use it; just be mindful when adding any additional salt. High-quality butter with a higher fat content (often labeled as European-style) can yield a richer, more flavorful brown butter, but any standard butter will work wonderfully.
- Flaky Sea Salt (Optional, but Recommended): A pinch of flaky sea salt, like Maldon, sprinkled over the finished whipped brown butter adds a delightful textural crunch and brightens its rich flavor.
- Optional Flavor Enhancements: While magnificent on its own, whipped brown butter is also a fantastic base for other flavors. Consider adding a splash of vanilla extract, a dash of maple syrup, or a small pinch of cinnamon for a sweet twist. For savory applications, a touch of roasted garlic, fresh herbs like sage or thyme, or even a hint of chili flake can be truly incredible.
Equipment:
- Heavy-Bottomed Saucepan or Skillet: A light-colored, heavy-bottomed pan is best for browning butter as it distributes heat evenly and allows you to clearly see the color change of the milk solids.
- Heatproof Bowl: For pouring the hot brown butter into to stop the cooking process.
- Whisk (Electric or Hand):
- Electric Whisk/Hand Mixer: Highly recommended. It significantly speeds up the whipping process, transforming the butter into a light and fluffy consistency in about 2-3 minutes. This saves a lot of arm strength!
- Hand Whisk: If you don’t have an electric whisk, a sturdy hand whisk will do the job, but be prepared for a good 5-7 minutes of continuous whipping to achieve the desired texture. It’s a fair amount of elbow grease, but entirely achievable.
- Rubber Spatula: Useful for scraping down the sides of the bowl during whipping and transferring the finished product.
- Ice Bath (Optional, but helpful): A larger bowl filled with ice and a little water, over which you can place your bowl of brown butter to speed up cooling.
Step-by-Step Instructions for Whipped Brown Butter
Easy Whipped Brown Butter
Margie
5 minutes
10 minutes
15 minutes
250
g whipped butter
Rate Recipe
Print Recipe
Ingredients
- 250 g unsalted butter
- pinch of Maldon sea salt
- Optional: a splash of vanilla extract, a dash of maple syrup, or a small pinch of cinnamon for sweet applications. For savory, consider roasted garlic, fresh herbs, or a touch of chili flake.
Instructions
-
Brown the Butter: Place the butter in a light-colored, heavy-bottomed saucepan over medium-low heat. Let it melt completely, then continue to cook, stirring occasionally. It will foam, then bubble. The milk solids will separate and begin to sink to the bottom. Keep a close eye on it as these solids start to turn golden, then amber-brown. You’ll notice a distinct nutty aroma, similar to toasted hazelnuts. This is your beurre noisette! Be confident but vigilant – there’s a fine line between perfectly browned and burnt butter. As soon as you achieve that rich, nutty fragrance and a beautiful deep golden color, proceed to the next step.
-
Cool the Butter: Immediately remove the pan from the heat to prevent further cooking. Carefully pour the hot brown butter into a clean, heatproof bowl. To cool it down quickly and ensure it solidifies properly for whipping, place this bowl over a larger bowl of ice and a little water (an ice bath). Alternatively, you can pop it into the fridge or freezer, stirring every 5-10 minutes, until it’s completely cooled and has a creamy, semi-solid consistency (like softened butter, but not completely hard). This cooling step is crucial for successful whipping.
-
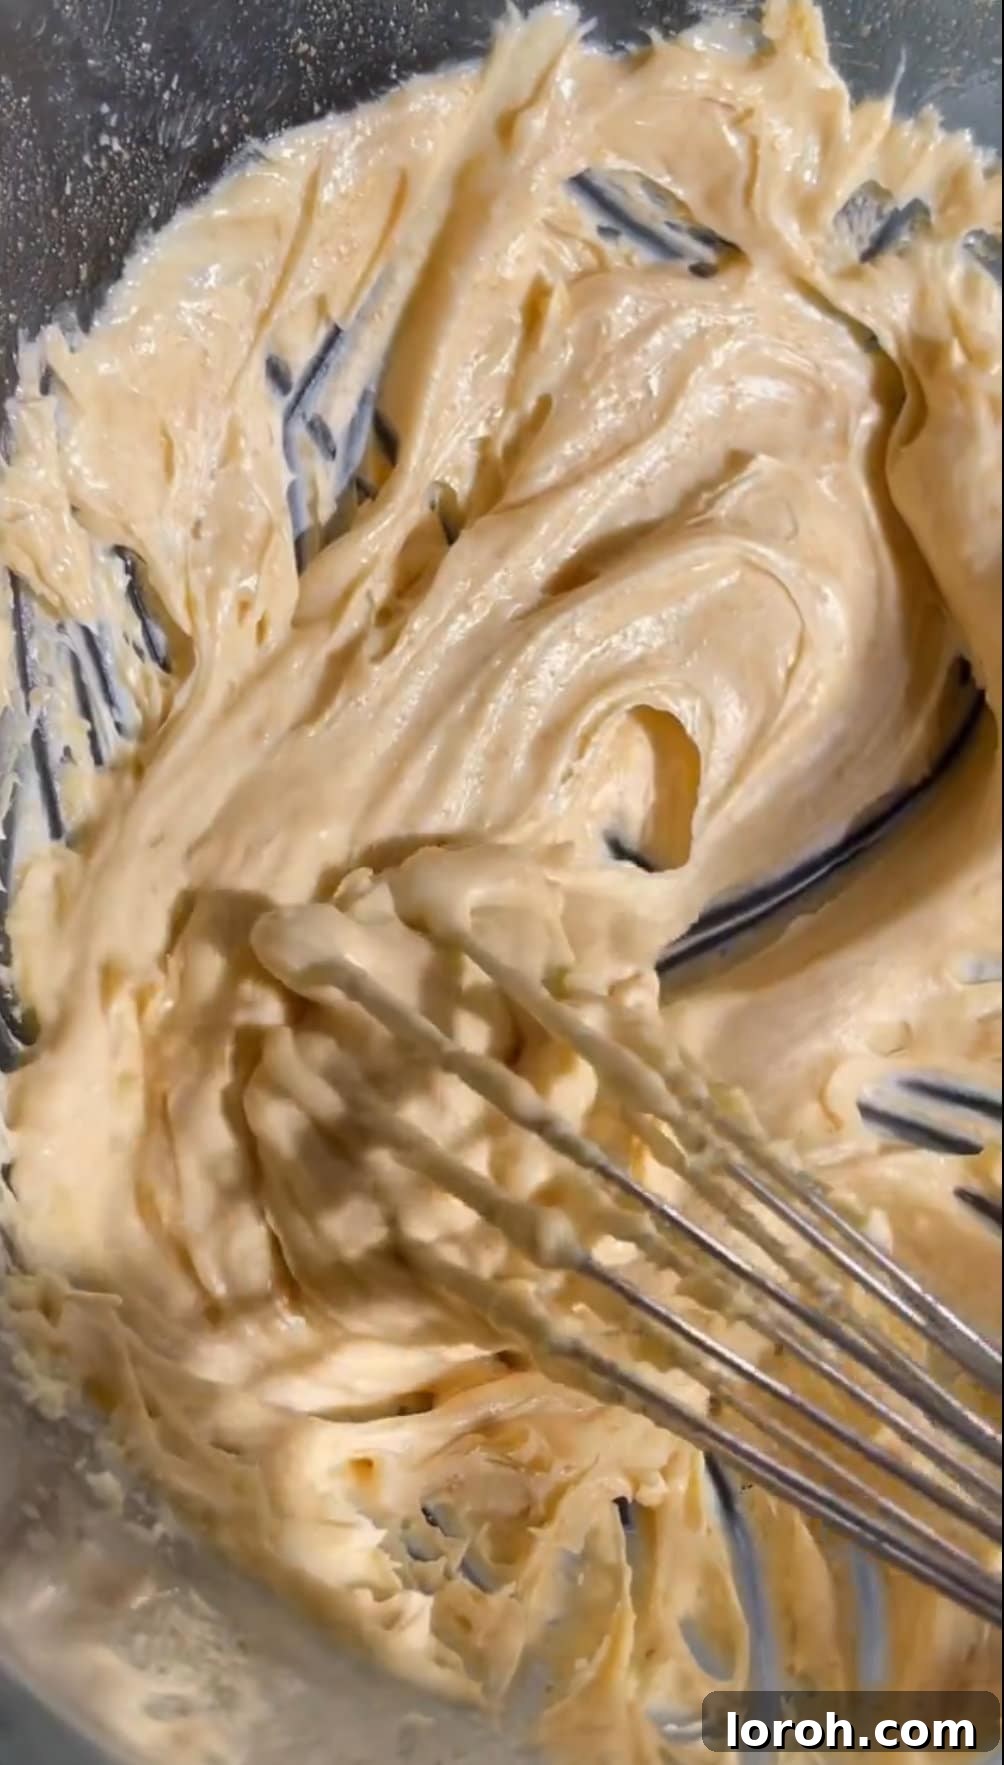
Whip the Brown Butter: Once cooled to a soft, spreadable consistency, it’s time to whip! Using an electric hand mixer or a stand mixer with the whisk attachment, beat the brown butter on medium-high speed for about 3-5 minutes. If using a hand whisk, this might take 5-7 minutes of vigorous whisking. Continue until the butter becomes noticeably lighter in color, very fluffy, and beautifully creamy and thick. It should hold soft peaks. If adding optional flavorings like vanilla or cinnamon, now is the time to incorporate them.
-
Serve and Enjoy: Transfer your glorious whipped brown butter to a serving dish. If desired, sprinkle a pinch of flaky Maldon sea salt over the top for an extra pop of flavor and texture. Serve immediately on warm toast, pancakes, waffles, hot cross buns, banana bread, or use it to elevate any sweet or savory dish.
Like this? Leave a comment below!
Troubleshooting Common Issues
While making whipped brown butter is straightforward, here are a few common hiccups and how to fix them:
- Burnt Butter: If your butter turns dark black and smells acrid, it’s unfortunately burnt and cannot be salvaged. Discard it and start fresh, paying closer attention to the heat and stirring.
- Butter Not Browning: Ensure your heat is consistent (medium-low) and be patient. It takes time for the milk solids to toast. If your pan is too thin, the heat might be uneven; try reducing the heat slightly and stirring more frequently.
- Butter Not Whipping Up: The most common reason for this is that the butter hasn’t been cooled sufficiently. It needs to be firm enough to hold some shape but still soft enough to be whipped (like room-temperature butter). If it’s too warm, it will remain liquid or oily. Pop it back in the fridge or over an ice bath until it firms up, then try whipping again.
- Separated Butter: If the butter seems to split into oily and solid parts, it’s likely too warm or was whipped too long while warm. Cool it down completely, then try re-whipping from a cooler temperature.
Storage and Shelf Life
Once made, whipped brown butter can be stored just like regular butter. Transfer it to an airtight container and keep it in the refrigerator for up to 1-2 weeks. You can also freeze it for longer storage, up to 3 months. If freezing, portion it into smaller amounts (e.g., in an ice cube tray) for easy defrosting. When ready to use, simply let it come to room temperature or gently warm it if you prefer a softer consistency.
Serving Suggestions for Whipped Brown Butter
The versatility of whipped brown butter is truly astounding. Its rich, nutty flavor and airy texture make it a perfect accompaniment for both sweet and savory dishes. Here are some ideas to inspire you:
Sweet Applications:
- Breakfast & Brunch: Spread generously on toast, bagels, croissants, brioche, pancakes, waffles, crumpets, or muffins.
- Baked Goods: A fantastic topping for banana bread, zucchini bread, pumpkin bread, or even a plain scone.
- Holiday Treats: Especially delightful on hot cross buns during Easter or alongside gingerbread and spiced cakes.
- Desserts: Dollop a spoonful onto warm apple pie, peach cobbler, or even a bowl of oatmeal for an extra layer of richness.
Savory Applications:
- Vegetables: Melted over steamed green beans, roasted carrots, corn on the cob, or asparagus.
- Proteins: Use it to baste pan-seared fish (like cod or salmon), chicken, or pork. The nutty notes complement white meats beautifully.
- Pasta: Toss with freshly cooked pasta, a sprinkle of Parmesan, and some fresh sage for a simple yet elegant dish.
- Potatoes: Swirl into mashed potatoes or melted over a baked potato.
- Bread: Serve alongside crusty bread or dinner rolls for an elevated bread course.
Remember, if you’ve added sweet flavorings like vanilla or maple syrup to your whipped brown butter, it’s generally best to reserve it for sweet applications. Similarly, for savory infusions like garlic or herbs, stick to savory dishes to avoid conflicting flavors.
Frequently Asked Questions About Whipped Brown Butter
Brown butter, also known as beurre noisette, is butter that has been gently melted and cooked until the milk solids separate and toast to a golden-brown color. This toasting process, called the Maillard reaction, imparts a wonderfully nutty, caramelized, and complex flavor to the butter, transforming its aroma and taste. It’s often used in baking and cooking to add depth of flavor.
Whipped brown butter is incredibly versatile and pairs well with both sweet and savory dishes. Its thick, creamy texture makes it perfect for spreading on warm toast, banana bread, hot cross buns, croissants, pancakes, and waffles. For savory options, you can melt it to baste fish or chicken, stir it into pasta with fresh herbs, or spread it on crusty bread. The possibilities are endless, but remember to match the butter’s added flavorings (e.g., vanilla for sweet, garlic for savory) to your dish.
Yes, you can absolutely make brown butter ahead of time. Once it’s cooled and solidified, you can store it in an airtight container in the refrigerator for up to two weeks. When you’re ready to whip it, simply let it come to a softened room temperature, then proceed with the whipping steps outlined in the recipe. This makes meal prep or entertaining much easier!
While the browning process changes the flavor and aroma of butter, it does not significantly alter its nutritional profile. Whipped brown butter contains the same fats and calories as regular butter. However, because it’s so rich and flavorful, a little goes a long way, which might lead to using less overall. It should be enjoyed as part of a balanced diet.
Other Recipes You May Like
If you’ve enjoyed this exploration of brown butter, here are some other recipes that feature its incredible flavor or offer complementary ideas:
Whipped Garlic Brown Butter
Garlic Butter Chicken Thighs
Brown Butter and Sage Gnocchi
Fluffy Banana Pancakes
Classic Crumpet Recipe
Conclusion: Elevate Your Culinary Game
Whipped brown butter is a simple yet incredibly impactful ingredient that every home cook should master. It transforms humble butter into a luxurious, flavorful spread that can elevate an everyday breakfast or add a gourmet touch to special meals. With its delightful nutty notes and irresistibly creamy texture, it’s a versatile ingredient that promises to bring joy to your kitchen and your palate. So, grab your butter, unleash your inner chef, and prepare to be amazed by the magic of homemade whipped brown butter!