
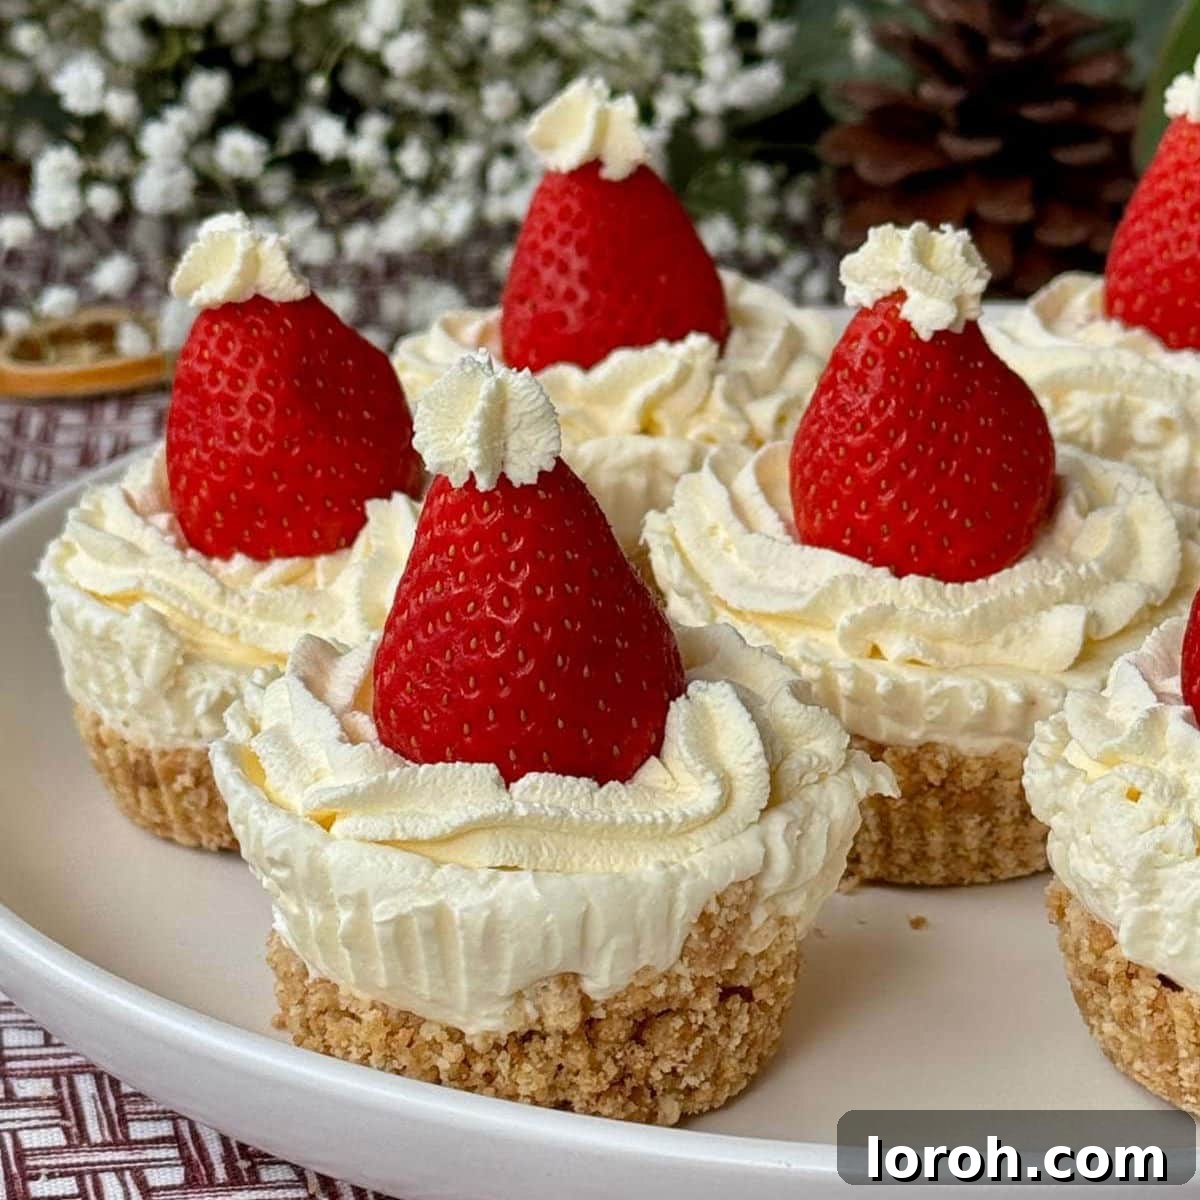
Easy No-Bake Mini Christmas Cheesecakes: Your Festive Holiday Treat!
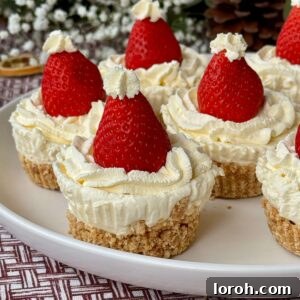
Step into the most wonderful time of the year with a dessert that’s as charming as it is delicious: these delightful Mini Christmas Cheesecakes. Imagine the perfect blend of a classic, velvety smooth cheesecake, reimagined with a touch of holiday magic. Each individual portion features a rich, buttery digestive biscuit base, a luscious vanilla cream cheese filling, and is crowned with a swirl of whipped cream and a juicy strawberry, artfully transformed into an adorable Santa hat. They are truly the epitome of festive cheer, promising to be a highlight at any holiday table.
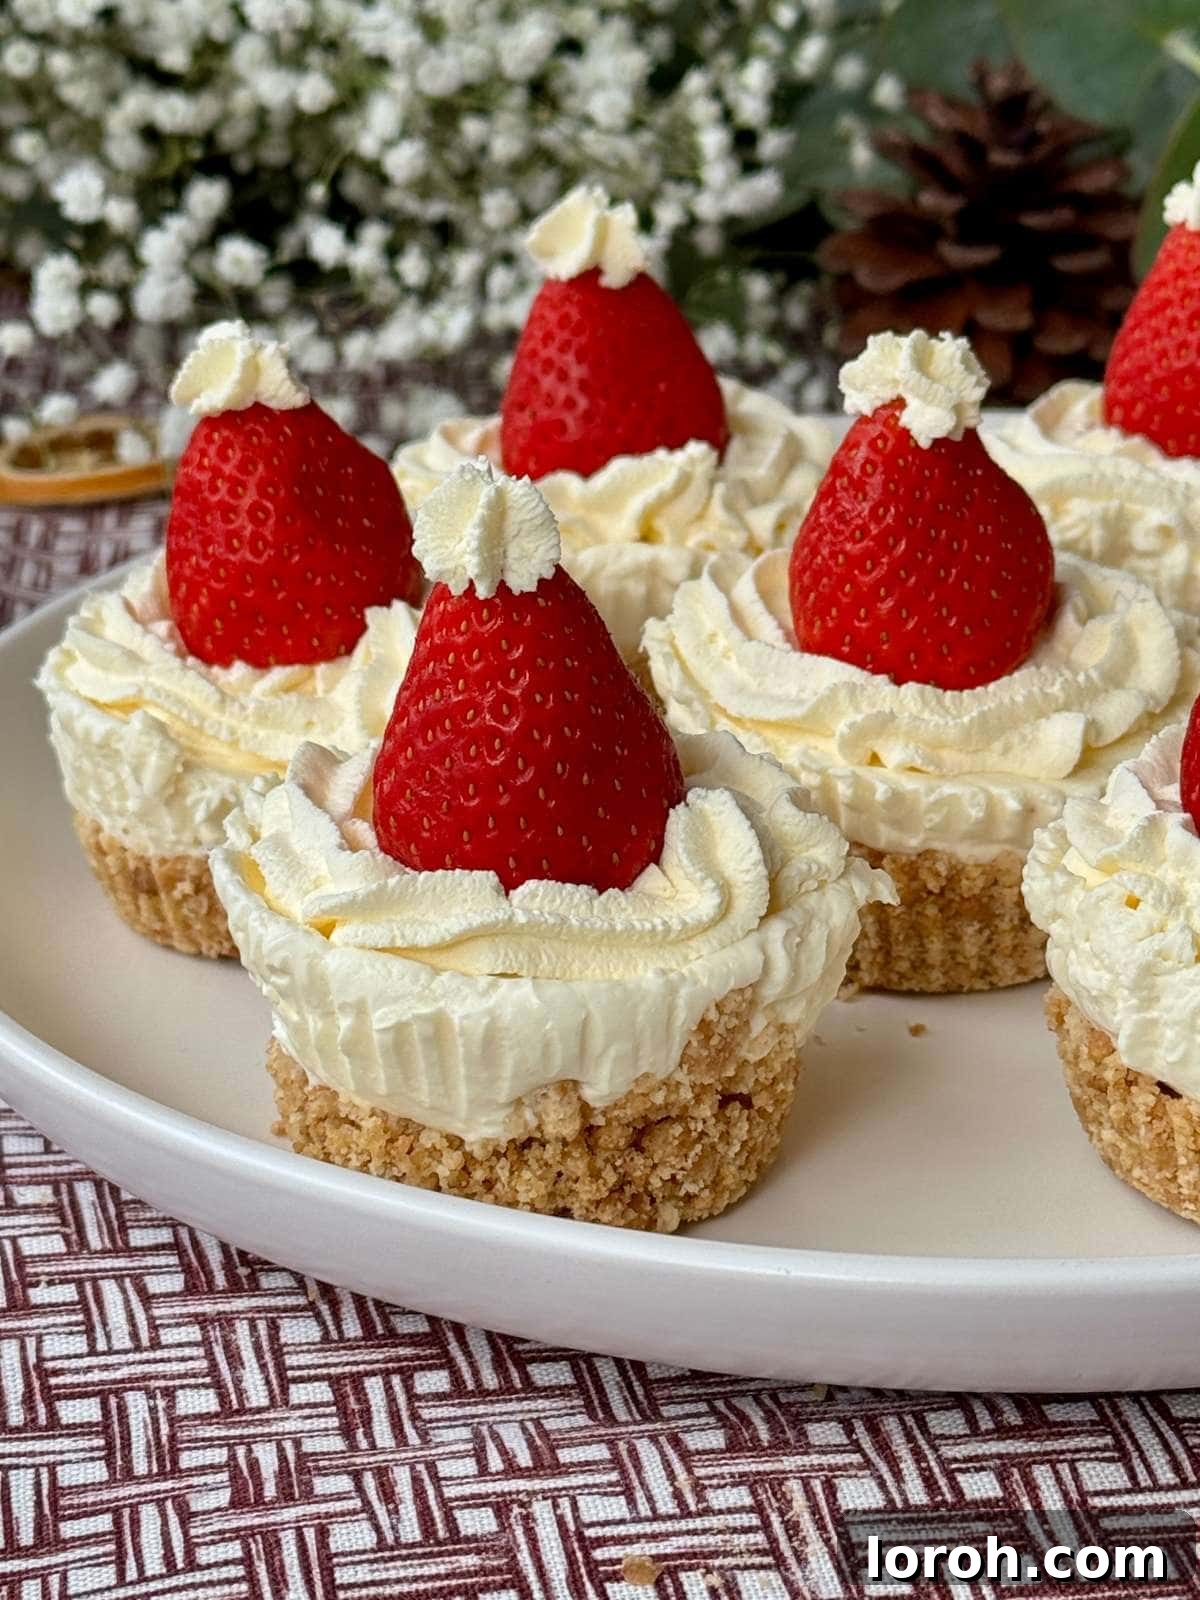
Forget the stress of oven baking this holiday season! These creamy, no-bake sensations are incredibly simple to make and ideal for everything from cozy family dinners to bustling festive parties. They offer a refreshing and lighter alternative to traditional heavy Christmas puddings, ensuring everyone saves room for dessert. If you’re passionate about festive baking (and no-baking!), these adorable mini cheesecakes are destined to become a beloved new tradition. For more imaginative holiday treats, you might also adore my Nutella Pull-Apart Star, or if you’re craving something different, consider my Chocolate Marshmallow S’mores Cake or Upside-Down Pear Fudge Cake.
Table of Contents
- Why You Will Love This Recipe
- Key Ingredients for Success
- Substitutions and Creative Variations
- How to Make Easy Christmas Cheesecakes: A Step-by-Step Guide
- Troubleshooting & Expert Tips for Perfect Cheesecakes
- Frequently Asked Questions
- Other Recipes You Might Enjoy
- Easy Christmas Cheesecakes Recipe Card
Why You Will Love This Recipe: Effortless Holiday Perfection
These individual Christmas cheesecakes are not just a dessert; they’re a festive experience designed for maximum enjoyment with minimal fuss. Here’s why they’ll quickly become your go-to holiday treat:
- No-Bake Bliss: Simple and Stress-Free. One of the biggest advantages of this recipe is that it requires absolutely no baking! This frees up valuable oven space during the busy holiday season, allowing you to focus on other culinary delights. It’s perfect for beginner bakers or anyone looking for a truly easy-to-follow recipe that still delivers impressive results. Say goodbye to cracked cheesecakes and hello to smooth, creamy perfection!
- Make-Ahead Friendly: Your Secret to Effortless Entertaining. Planning a holiday gathering can be hectic, but your dessert doesn’t have to add to the stress. These mini cheesecakes are ideal for preparing in advance. You can assemble them a day or two before your event, allowing them ample time to chill and set perfectly in the fridge. This means less work on the day of your party, giving you more time to relax and enjoy the festivities with your guests.
- Adorable Individual Portions: Perfect for Sharing. Serving desserts at parties has never been easier or more elegant. Each cheesecake is an individual portion, eliminating the need for slicing and messy plates. They’re perfectly sized for guests of all ages, including children, making them a fantastic addition to any family-friendly celebration. Their charming presentation also makes them wonderful for bringing to potlucks or as a thoughtful homemade gift.
- A Perfect Festive Treat: The Iconic Santa Hat Topping. What truly sets these cheesecakes apart is their delightful “Santa hat” topping. The vibrant red strawberry and snowy white whipped cream instantly evoke the joy and magic of Christmas. This fun and whimsical decoration makes them incredibly eye-catching and a guaranteed conversation starter, sure to bring smiles to everyone’s faces. They’re right up there with other festive favorites like my Xmas Pretzel Crack in terms of holiday charm!
Key Ingredients for Success: Crafting the Perfect Creamy Treat
The complete, detailed recipe with exact measurements can be found in the printable recipe card at the very bottom of this post – just scroll down!
Crafting these delectable mini cheesecakes requires a few key ingredients, each playing a vital role in achieving that signature creamy texture and rich flavor. Here’s a closer look at what you’ll need:
Cream Cheese: The Heart of the Cheesecake. This is the star of your filling! Always, and I mean *always*, opt for a full-fat cream cheese. Low-fat varieties simply do not have the necessary fat content to set properly, often resulting in a runny, disappointing cheesecake. Before using, ensure your cream cheese is at room temperature – this is crucial for a smooth, lump-free mixture – and drain off any excess liquid that might be present. I personally find Philadelphia Original to be consistently excellent for cheesecakes.
Caster Sugar (Superfine Sugar): For Sweetness and Smoothness. While granulated sugar can work in a pinch, caster sugar (also known as superfine sugar) is highly recommended for the cheesecake filling. Its finer granules dissolve much more easily and thoroughly into the cream cheese mixture, ensuring a perfectly smooth, silky texture without any grittiness. This contributes significantly to the luxurious mouthfeel of your cheesecakes.
Double Cream (Heavy Cream): For Luxurious Richness. This ingredient is essential for creating a light yet incredibly rich and stable cheesecake filling. In the UK, it’s known as ‘double cream,’ and in the US, it’s often referred to as ‘heavy cream’ or ‘heavy whipping cream.’ Make sure it’s very cold before whipping, as this will help it achieve stiff peaks quickly and efficiently, contributing to the firm set of your cheesecakes.
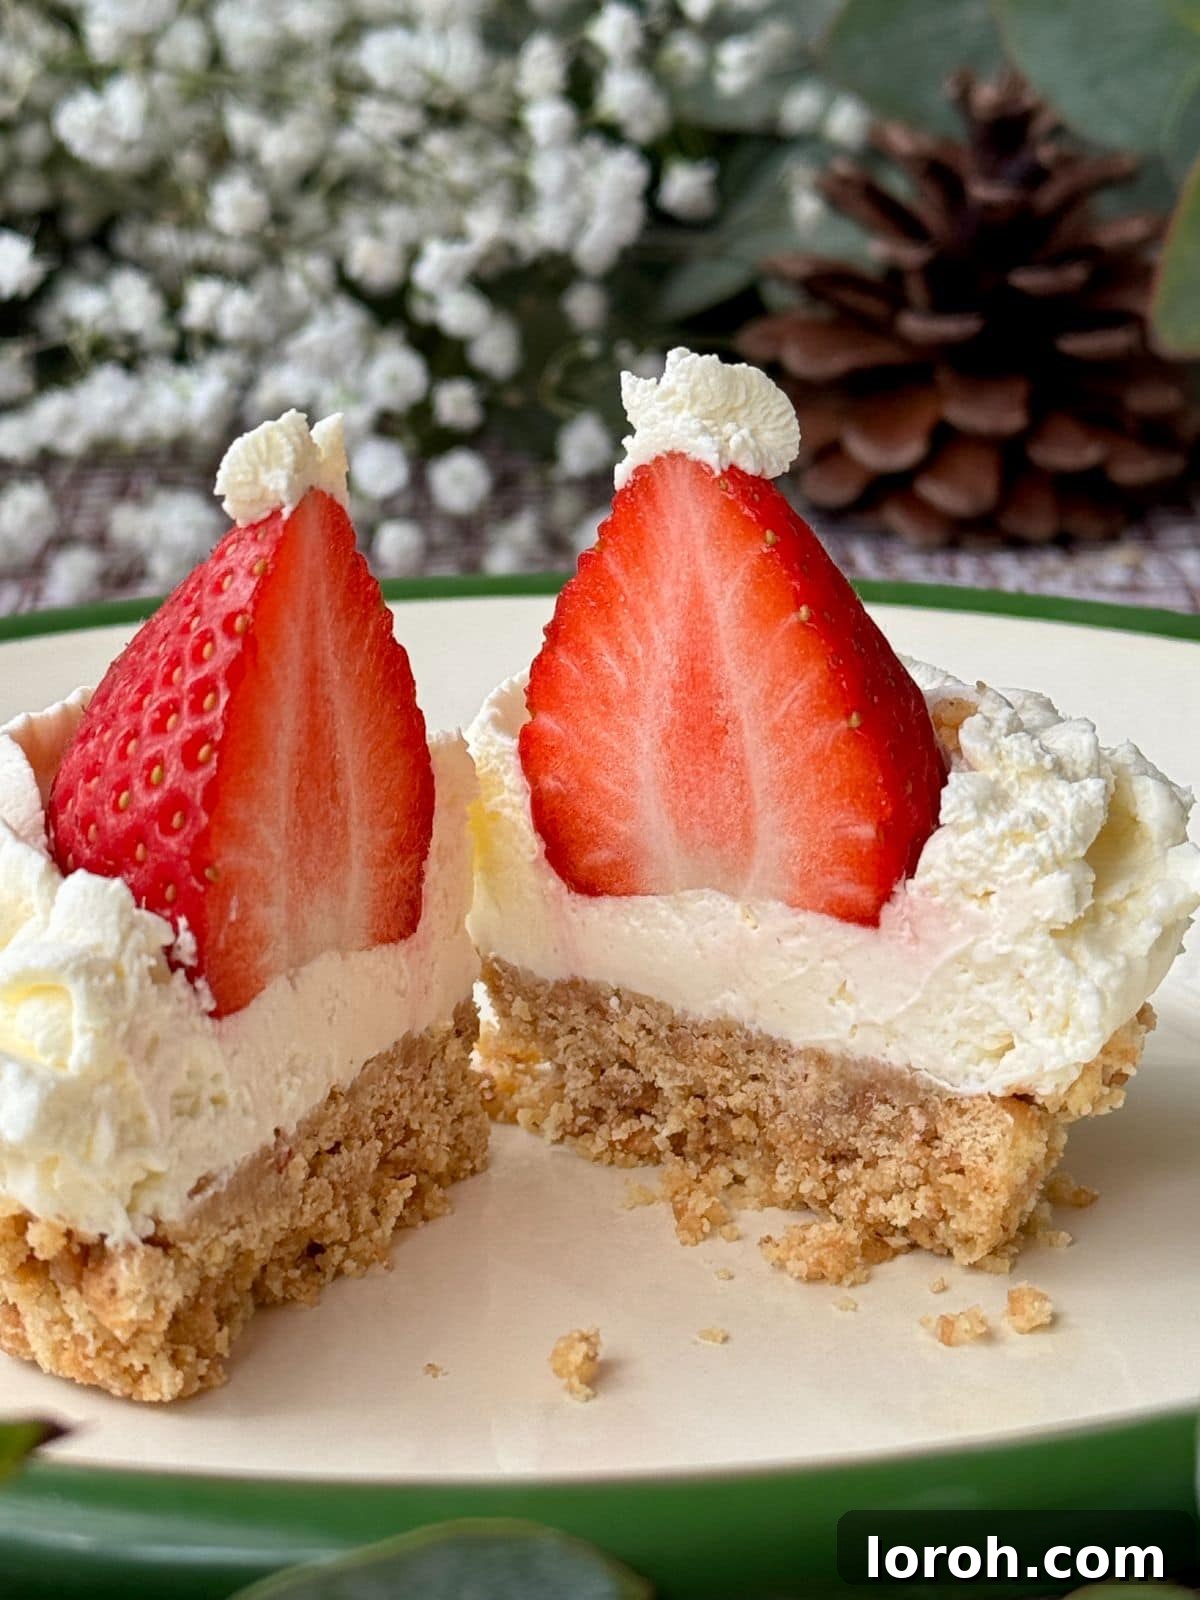
Strawberries: The Iconic Santa Hat Topping. Yes, I know strawberries aren’t typically in season during the Christmas months, but for these charming mini cheesecakes, I make a delightful exception! Their vibrant red color and natural shape are simply perfect for creating those adorable Santa hats. The visual appeal is undeniable. Of course, if you’re making these outside the festive season, in summer for instance when strawberries are at their peak, they’re still a fantastic choice for a fresh, fruity topping, regardless of the Santa hat theme. Just choose firm, bright red strawberries for the best effect.
Digestive Biscuits: The Classic Buttery Base. These are the traditional choice for a cheesecake base in many parts of the world, and for good reason. They provide a deliciously buttery, slightly sweet, and wonderfully crunchy foundation that perfectly complements the creamy filling. They’re easy to crush and form into a solid base. Ensure you have enough to create a firm layer for each mini cheesecake.
Unsalted Butter: The Binding Agent. Melted unsalted butter is crucial for binding the biscuit crumbs together, forming a sturdy and flavorful base. Using unsalted butter allows you to control the overall saltiness of your dessert. You’ll want just enough to achieve a “wet sand” consistency, ensuring the base holds its shape without being greasy.
Vanilla Extract: A Hint of Sweet Aroma. A good quality vanilla extract adds a beautiful aromatic depth to your cheesecake filling, enhancing the overall flavor profile without overpowering the other ingredients. Opt for pure vanilla extract for the best taste.
Substitutions and Creative Variations: Customize Your Cheesecakes
While the classic recipe is a winner, these mini Christmas cheesecakes are wonderfully versatile, allowing for numerous substitutions and creative variations to suit dietary needs or simply to explore new flavor profiles. Don’t be afraid to experiment!
Gluten-Free Version: Easy Adaptation. Making these cheesecakes gluten-free is incredibly straightforward. Simply swap out traditional digestive biscuits for your favorite brand of gluten-free biscuits. Many excellent options are available that will provide a similar buttery crumb. Always double-check the labels of all your other ingredients, such as vanilla extract, to ensure they are certified gluten-free if catering to strict dietary requirements.
Biscuit Base Bonanza: Explore Different Flavors. Digestive biscuits are a beloved classic for their buttery, slightly sweet profile, creating a perfect canvas for your cheesecake. However, changing the type of biscuit can introduce exciting new dimensions to your dessert:
- Use chocolate digestives for an indulgent, richer base that pairs wonderfully with the creamy vanilla filling, adding an extra layer of chocolatey goodness.
- Ginger nuts are a fantastic choice, especially for the festive season, bringing a wonderfully warming, spiced flavor. This works beautifully, much like in my White Chocolate and Passionfruit Cheesecake. The spicy kick of ginger is a delightful contrast to the sweet cream cheese.
- Lotus Biscoff biscuits are incredibly popular for their unique caramelized biscuit flavor. Using them will infuse your cheesecakes with a hint of warm spice and deep caramel notes, reminiscent of my Salted Caramel Cheesecake.
- Hobnobs are another great option, offering a lovely oaty texture and a slightly coarser crumb that adds a rustic touch and extra chewiness to the base.
Tip for Biscuit Bases: Adjusting Butter Quantity. Bear in mind that different biscuits have varying absorbency levels. Some might be drier than digestives, requiring a slight adjustment to the quantity of melted butter to achieve the perfect consistency. Start with the recommended amount, then slowly add 1-2 teaspoons more melted butter, mixing until the crumbs resemble “wet sand” – a consistency that holds together when squeezed but is still crumbly.
Mascarpone Magic: A Touch of Indulgence. For an even richer, slightly sweeter, and incredibly decadent cheesecake, you can swap a portion of the cream cheese for mascarpone. Mascarpone is an Italian cream cheese with a higher fat content and a milder, sweeter flavor compared to typical cream cheese. You can substitute half of the cream cheese with mascarpone for a noticeable difference, or for a truly indulgent experience, use all mascarpone. Just be aware that an all-mascarpone cheesecake will be very rich and might have a slightly softer set.
Flavor Enhancements for the Filling:
- Citrus Zest: Add a teaspoon of finely grated lemon or orange zest to the cream cheese mixture for a bright, refreshing counterpoint to the richness.
- Extracts: Beyond vanilla, try a dash of almond extract for a nutty flavor, or a hint of peppermint extract for a festive mint chocolate cheesecake twist (especially good with a chocolate biscuit base).
- Spices: A pinch of ground cinnamon, nutmeg, or even a tiny amount of mixed spice can add a cozy, festive warmth to the filling.
Topping Transformations:
- Other Berries: While strawberries are ideal for Santa hats, fresh raspberries or blueberries can provide different color palettes for other occasions. For a more “winter berry” feel, try sugared cranberries.
- Chocolate Delights: Drizzle with melted chocolate, sprinkle with chocolate curls or mini chocolate chips for extra indulgence.
- Festive Sprinkles: Add holiday-themed sprinkles or edible glitter for extra sparkle.
- Candy Canes: Crushed candy canes can add a refreshing minty crunch and a pop of red and white color.
How to Make Easy Christmas Cheesecakes: A Step-by-Step Guide
This is a visual, step-by-step guide to help you, but the full, detailed recipe with exact measurements is provided in the recipe card at the bottom of the page.
Creating these charming mini cheesecakes is a fun and straightforward process. Follow these easy steps to bring your festive dessert vision to life:
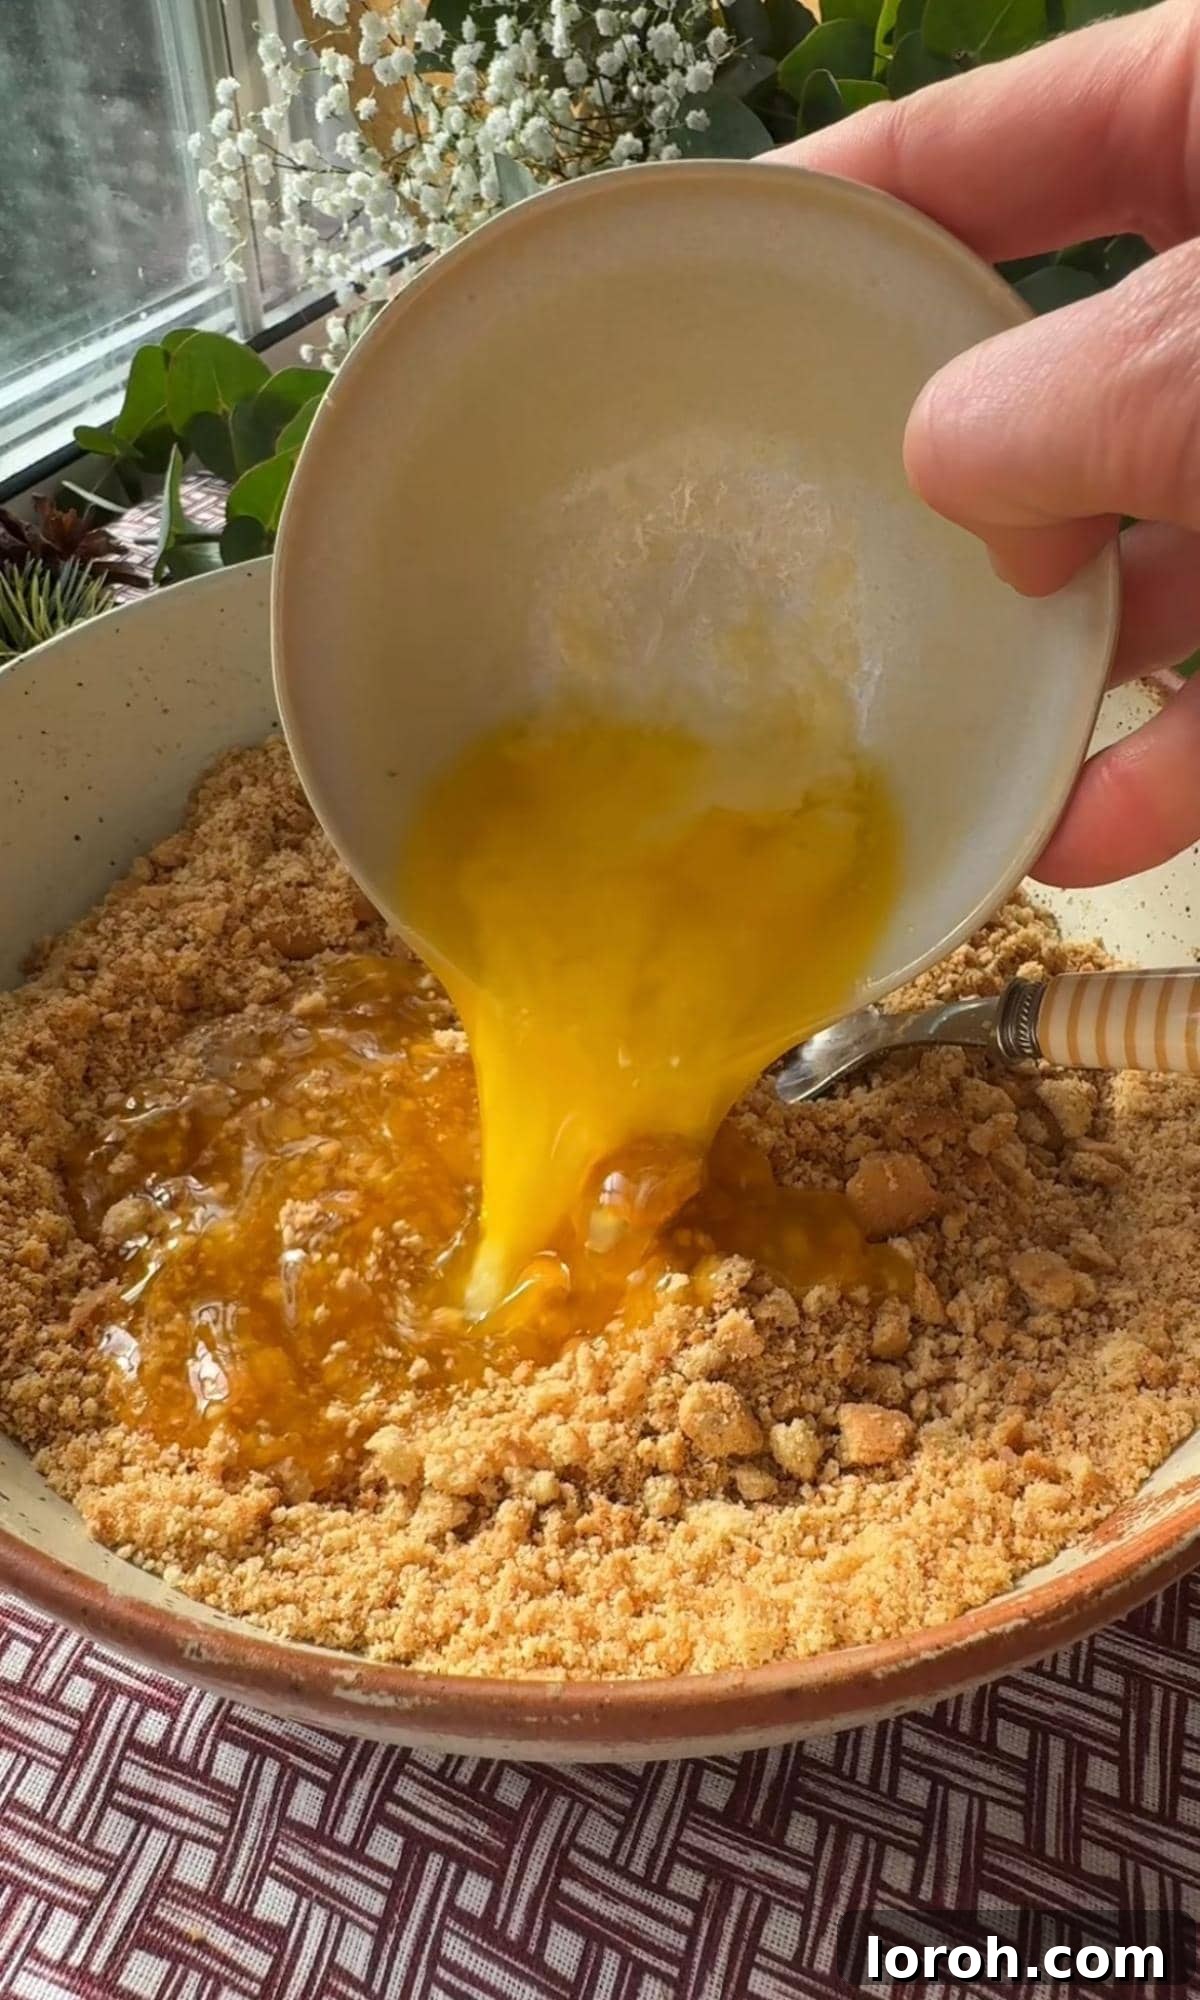
ONE: Prepare the Biscuit Base. Begin by crushing your digestive biscuits. Tip them into a food processor and blitz until you achieve fine, even crumbs. Alternatively, place the biscuits in a sturdy sandwich bag and crush them with a rolling pin. Once crumbed, add the melted unsalted butter to the food processor (or mixing bowl) and whizz again (or mix thoroughly) until the crumbs are evenly coated and resemble damp sand. This consistency is key for a firm base.
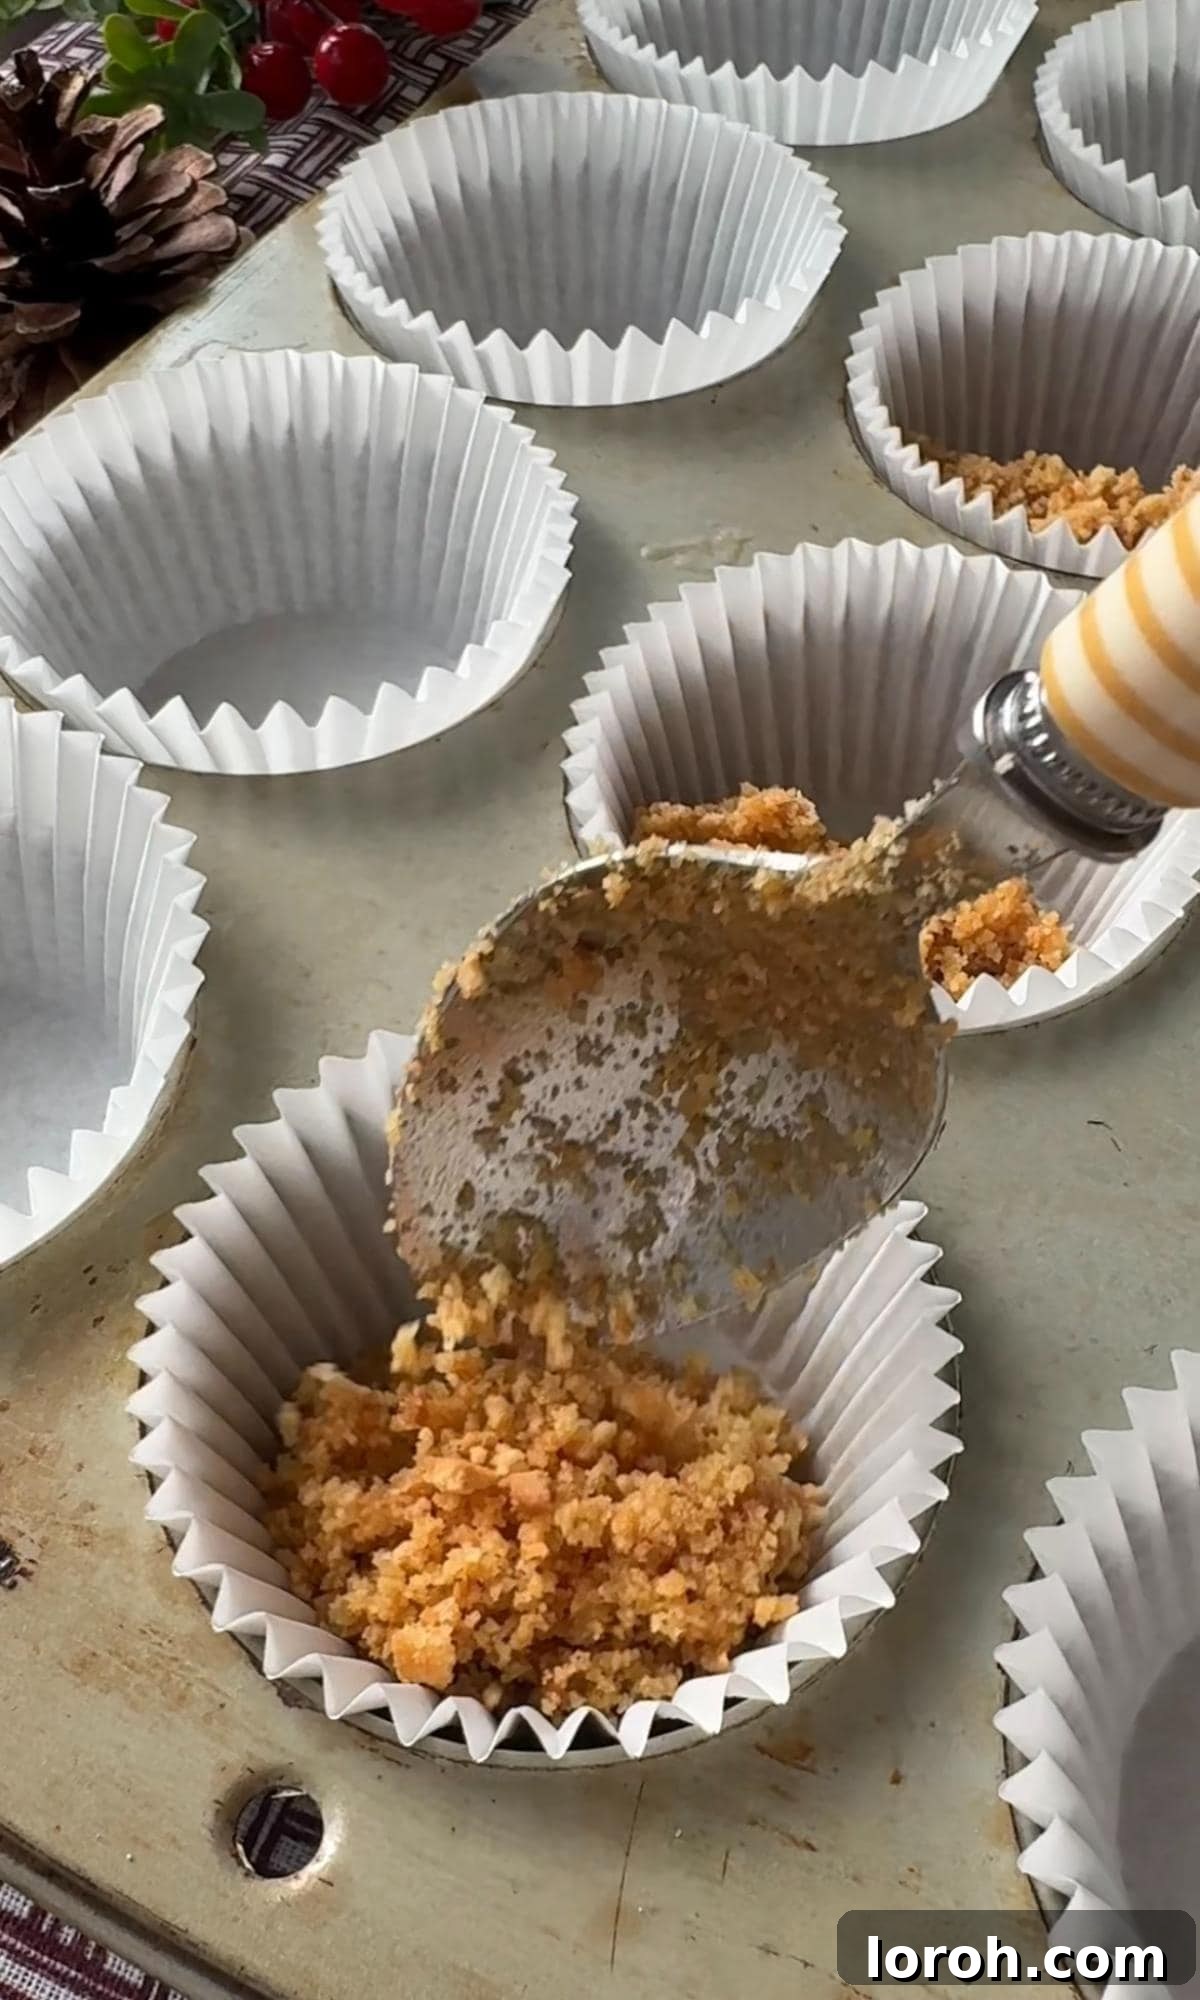
TWO: Form the Cheesecake Bases. Line a standard muffin tray with paper muffin cases. Carefully spoon an even amount of the buttery biscuit mixture into the bottom of each case. Using the back of a small glass or a spoon, firmly press the crumbs down to create a compact, even base. This step is vital for ensuring your cheesecakes hold their shape. Once pressed, place the tray in the fridge to chill while you prepare the filling, allowing the butter to solidify and firm up the base.
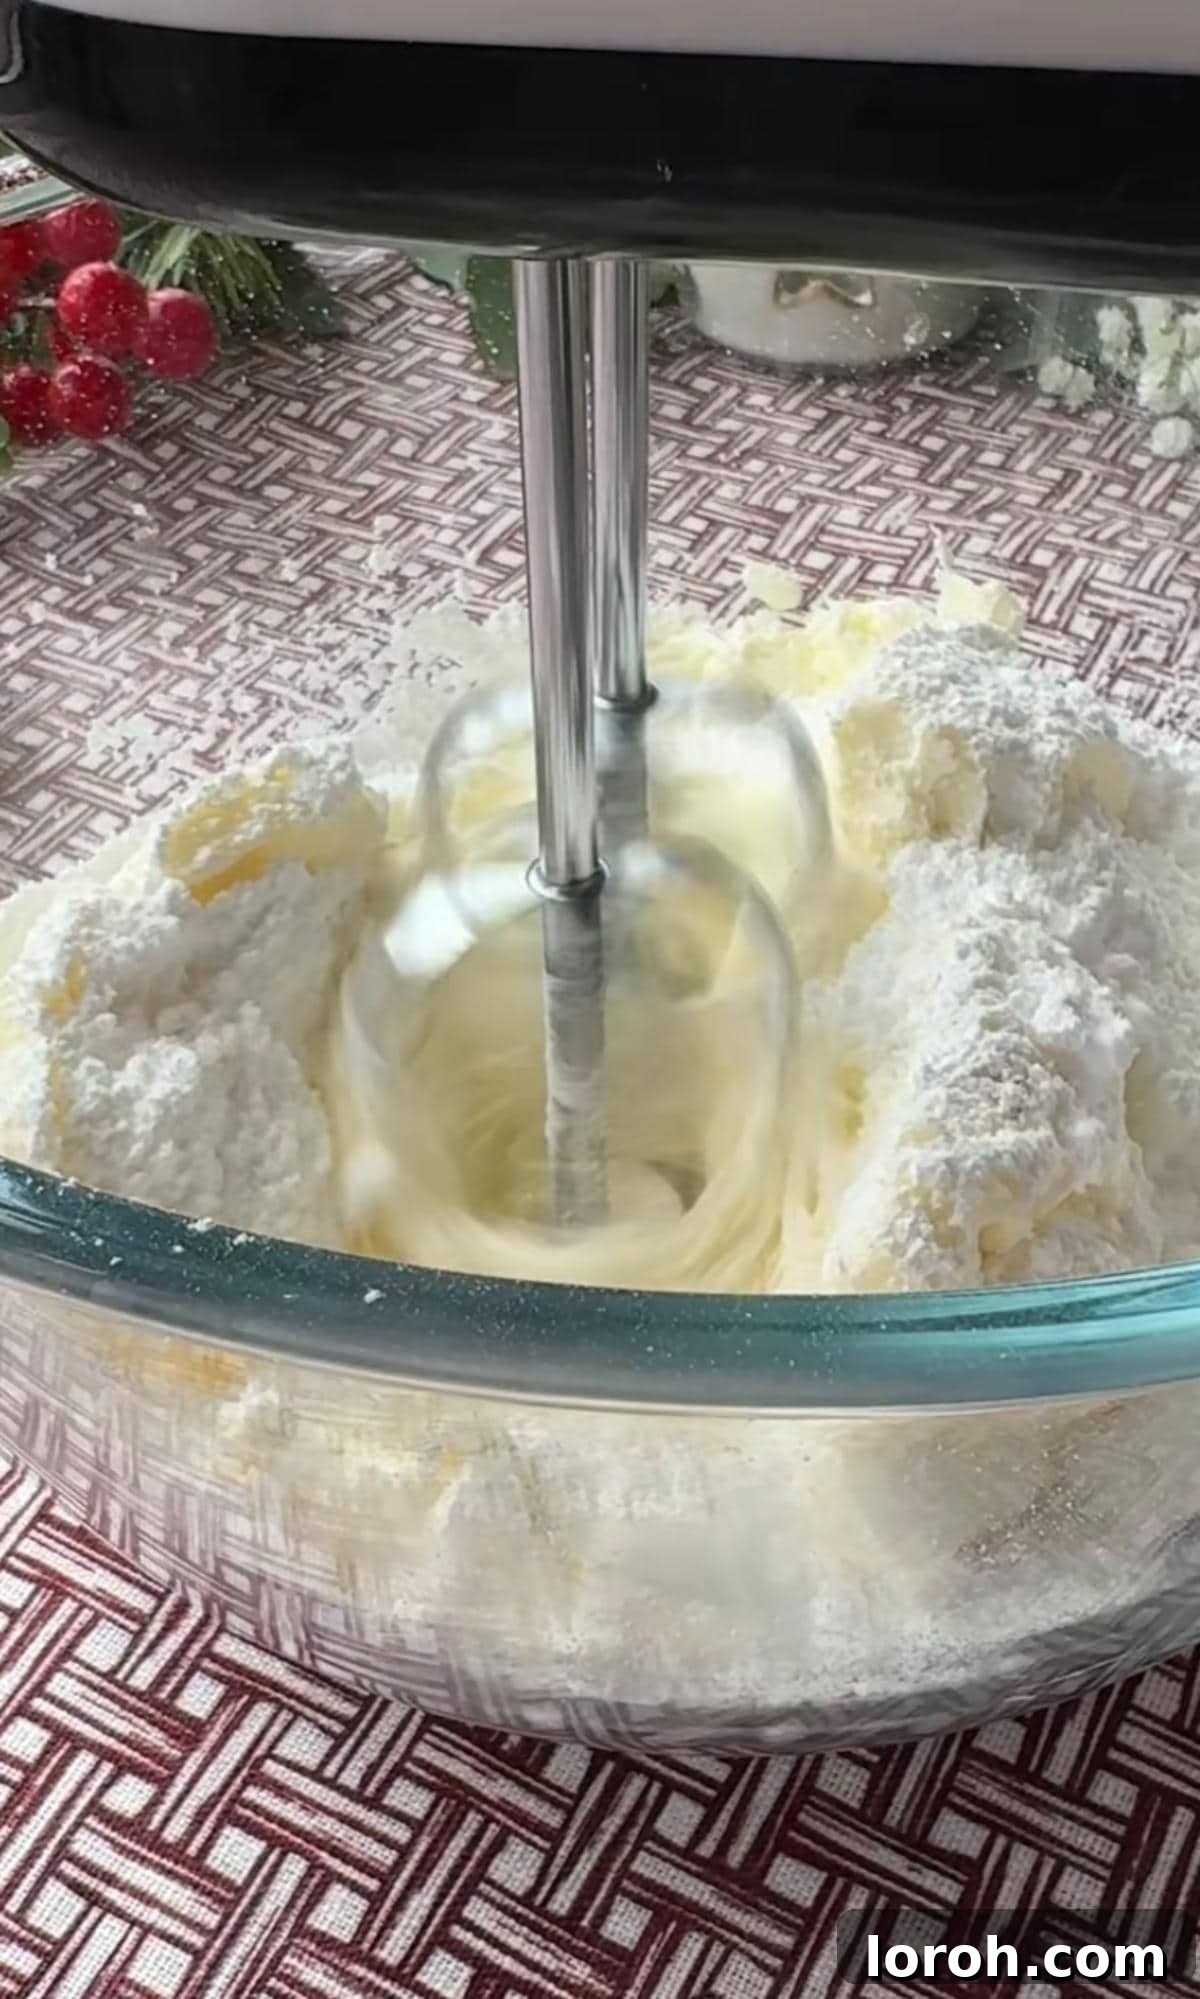
THREE: Prepare the Cream Cheese Mixture. In a large mixing bowl, add your softened, full-fat cream cheese. Sift the icing sugar directly into the bowl to prevent any lumps and ensure a silky-smooth filling. Add the vanilla extract. Using an electric whisk (or a stand mixer with the whisk attachment), beat the mixture together until it is thoroughly combined, smooth, and creamy. Ensure there are no visible lumps of cream cheese or sugar.
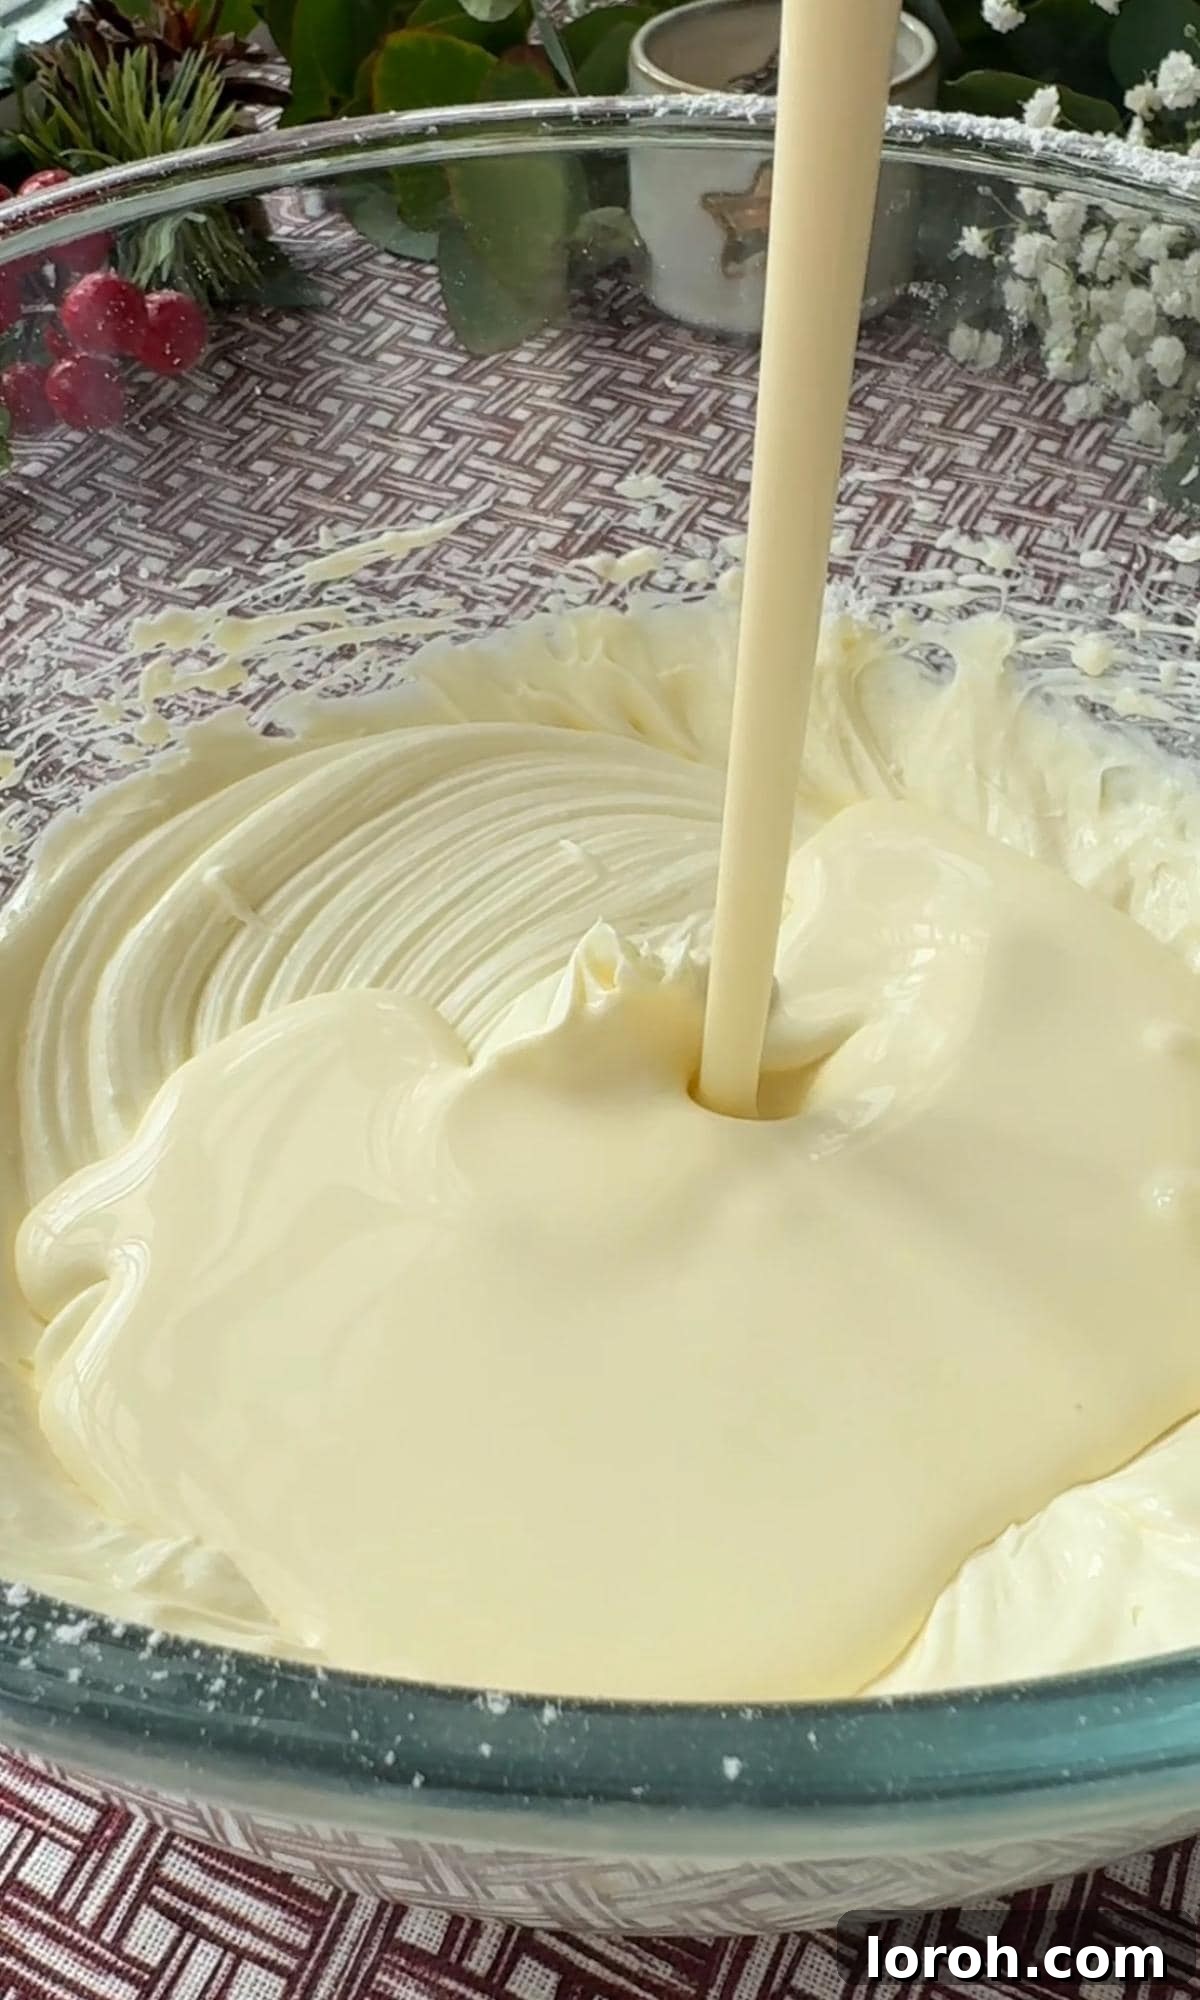
FOUR: Incorporate the Double Cream. Gently pour the cold double cream (or heavy cream) into the cream cheese mixture. It’s important that the cream is well-chilled, as this aids in achieving a stable, thick consistency. Combine it slowly at first, then increase speed as you whisk.
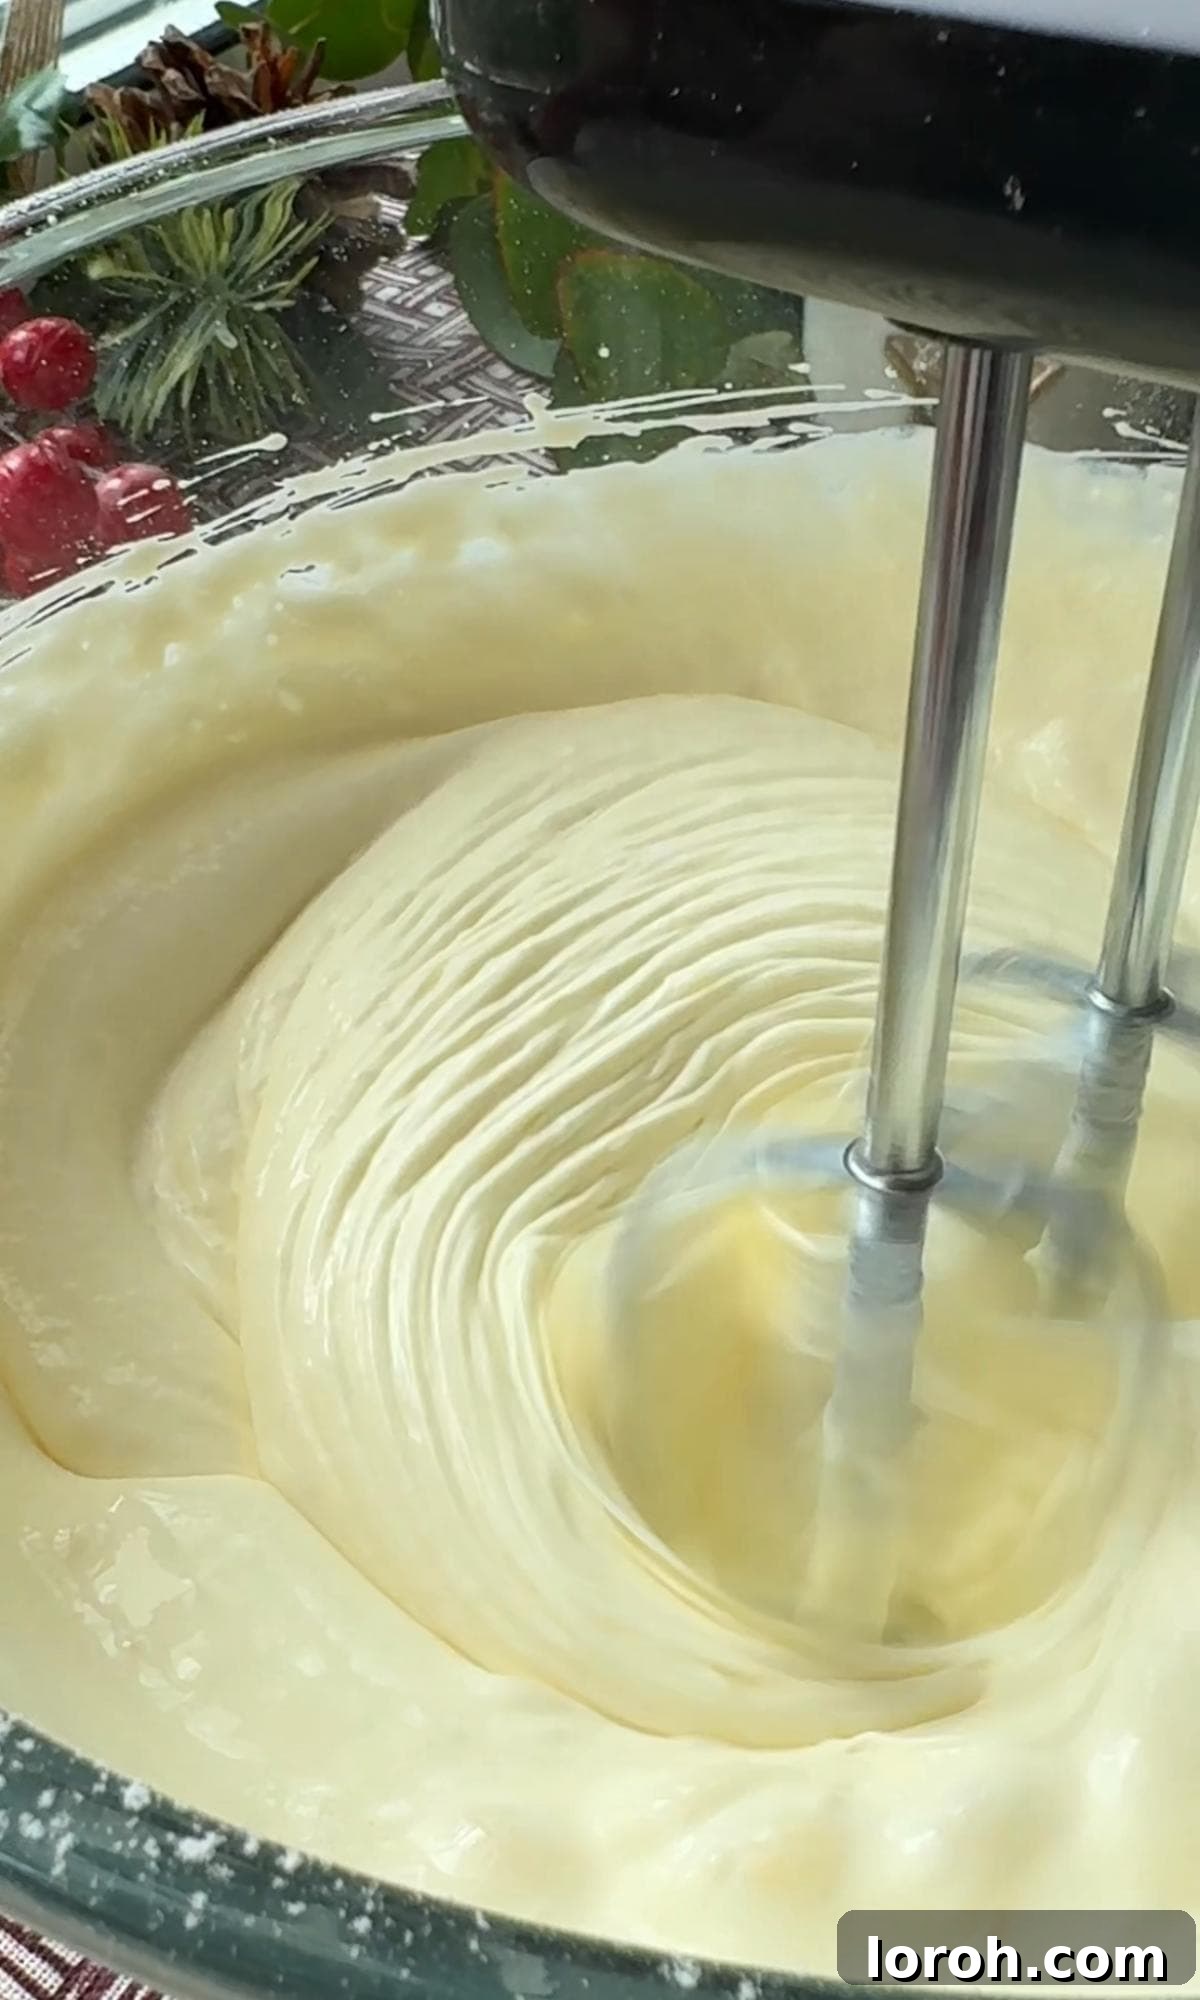
FIVE: Whisk to Thick Perfection. Continue whisking the mixture using your electric whisk. You’ll notice the mixture gradually thicken and become beautifully voluminous. Keep whisking until you achieve a lovely, stiff, and luscious cheesecake mix that holds its shape. Be careful not to overwhisk, as this can make the texture dense. Taste the mixture and add a touch more vanilla extract if you desire a stronger flavor.
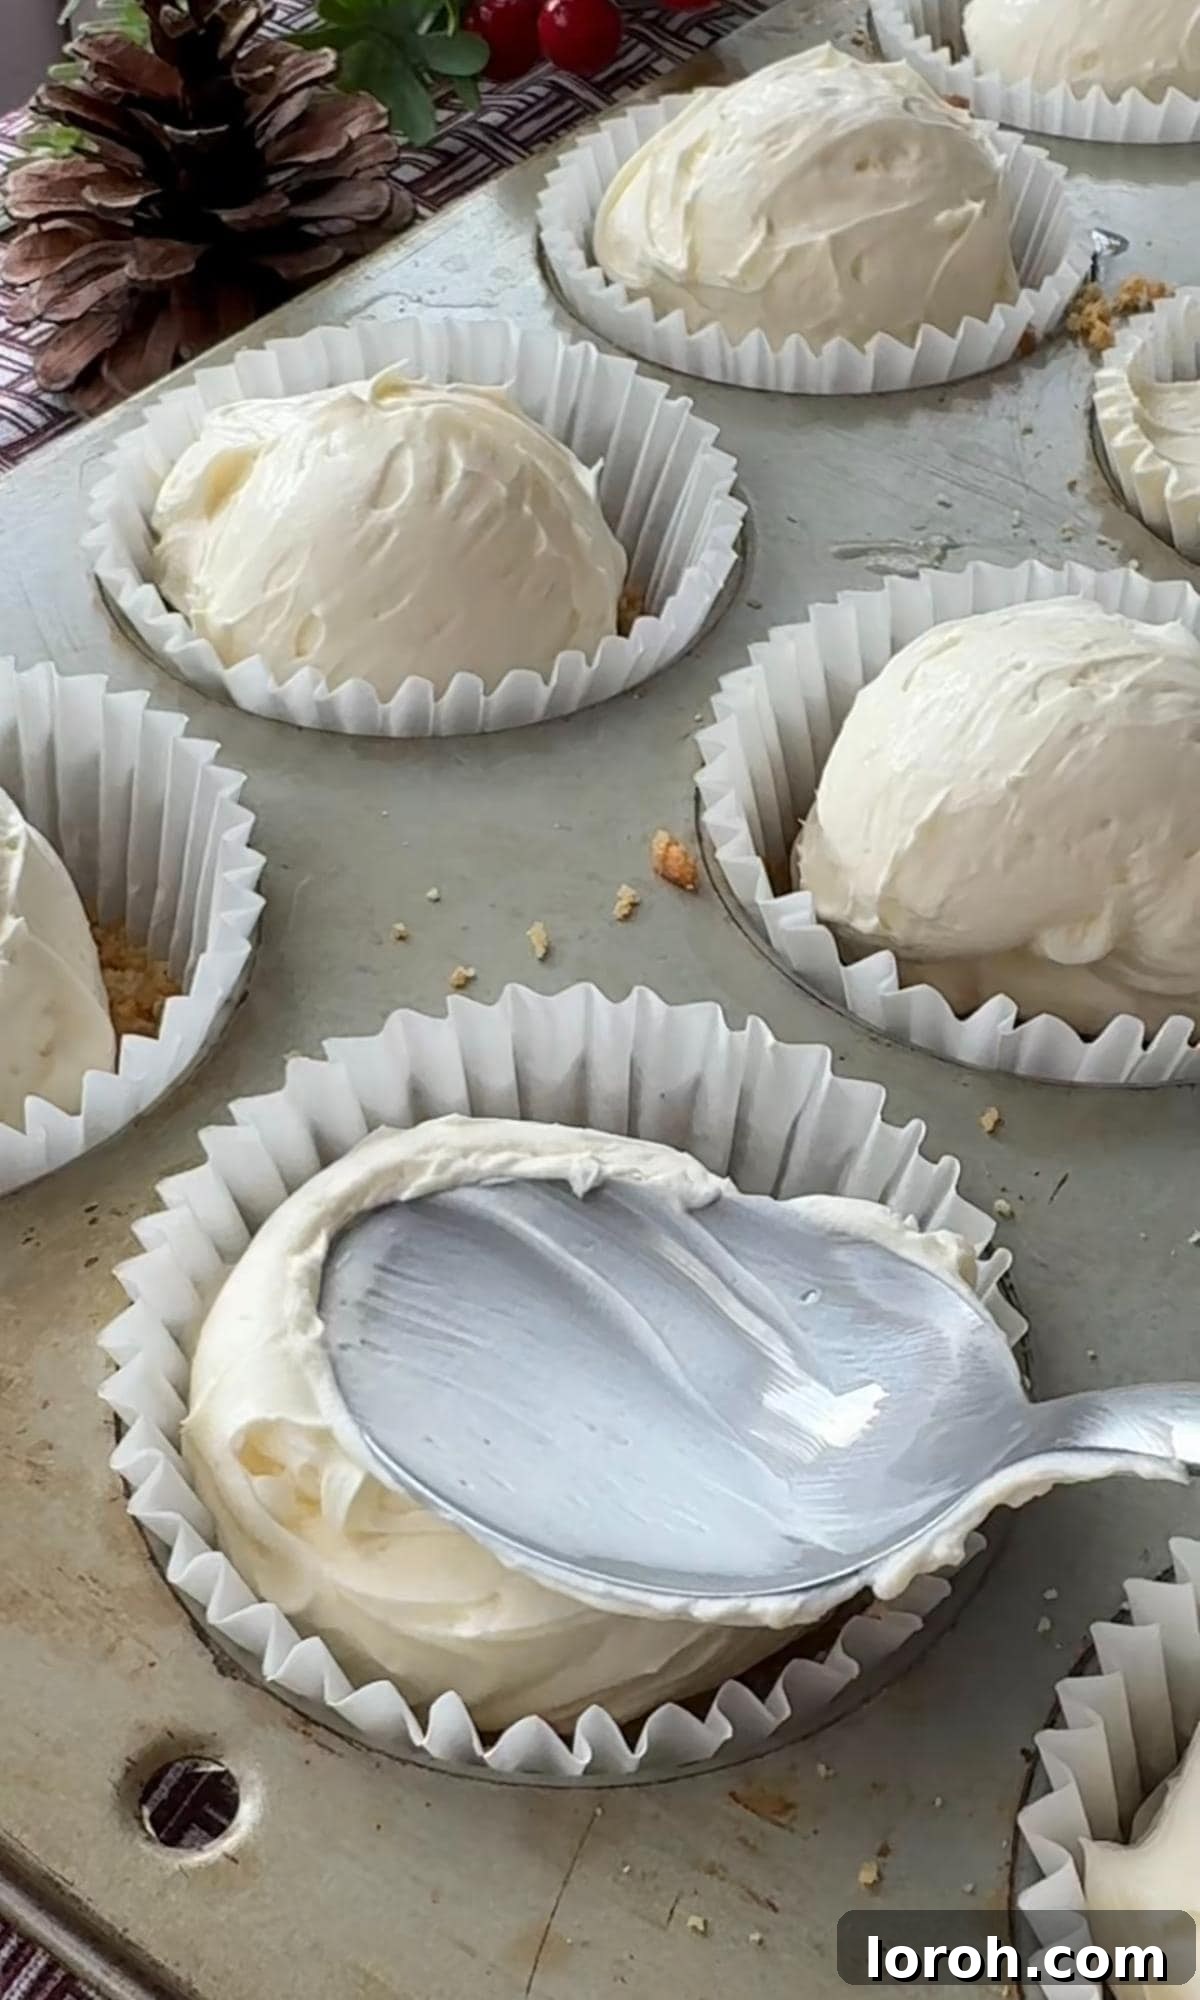
SIX: Fill and Chill. Spoon the thick cheesecake mixture evenly onto your chilled biscuit bases in the muffin cases. Use the back of a spoon, a small spatula, or a palette knife to gently spread and smooth the top layer, creating an even surface for each cheesecake. Once all cases are filled, cover the entire tray loosely with cling film to prevent any odors from the fridge affecting the taste. Place the tray in the refrigerator and chill for a minimum of 4 hours, or ideally, overnight, to allow the cheesecakes to set completely and firm up.
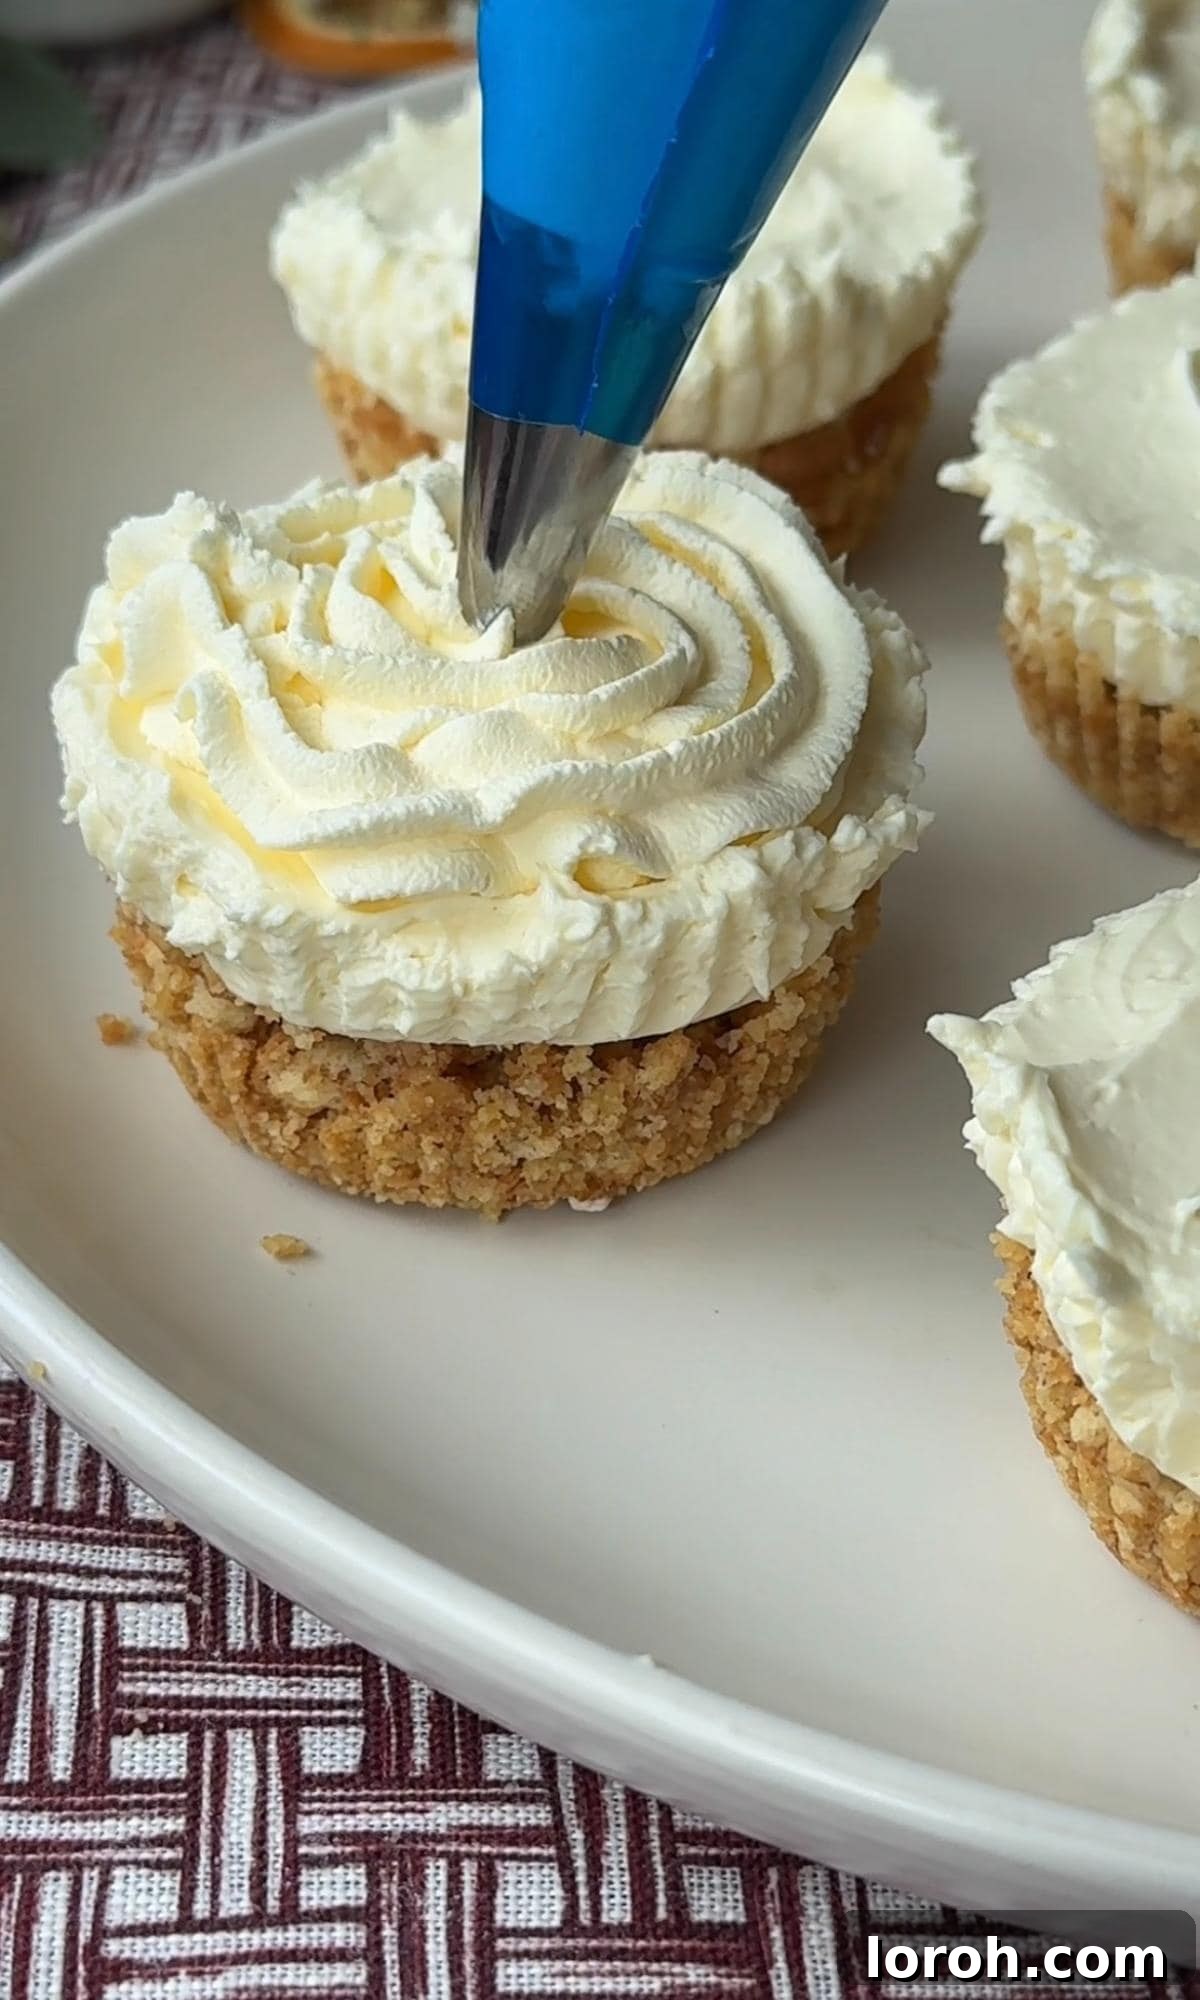
SEVEN: The First Layer of Festive Decoration. Once your cheesecakes are perfectly set and firm, carefully remove them from their muffin cases. This is best done by gently peeling away the paper liner. Place each cheesecake onto a flat serving plate or platter. Now for the fun part: spoon or pipe a generous swirl of freshly whipped cream onto the top of each cheesecake. This forms the soft, snowy base of your Santa hat.
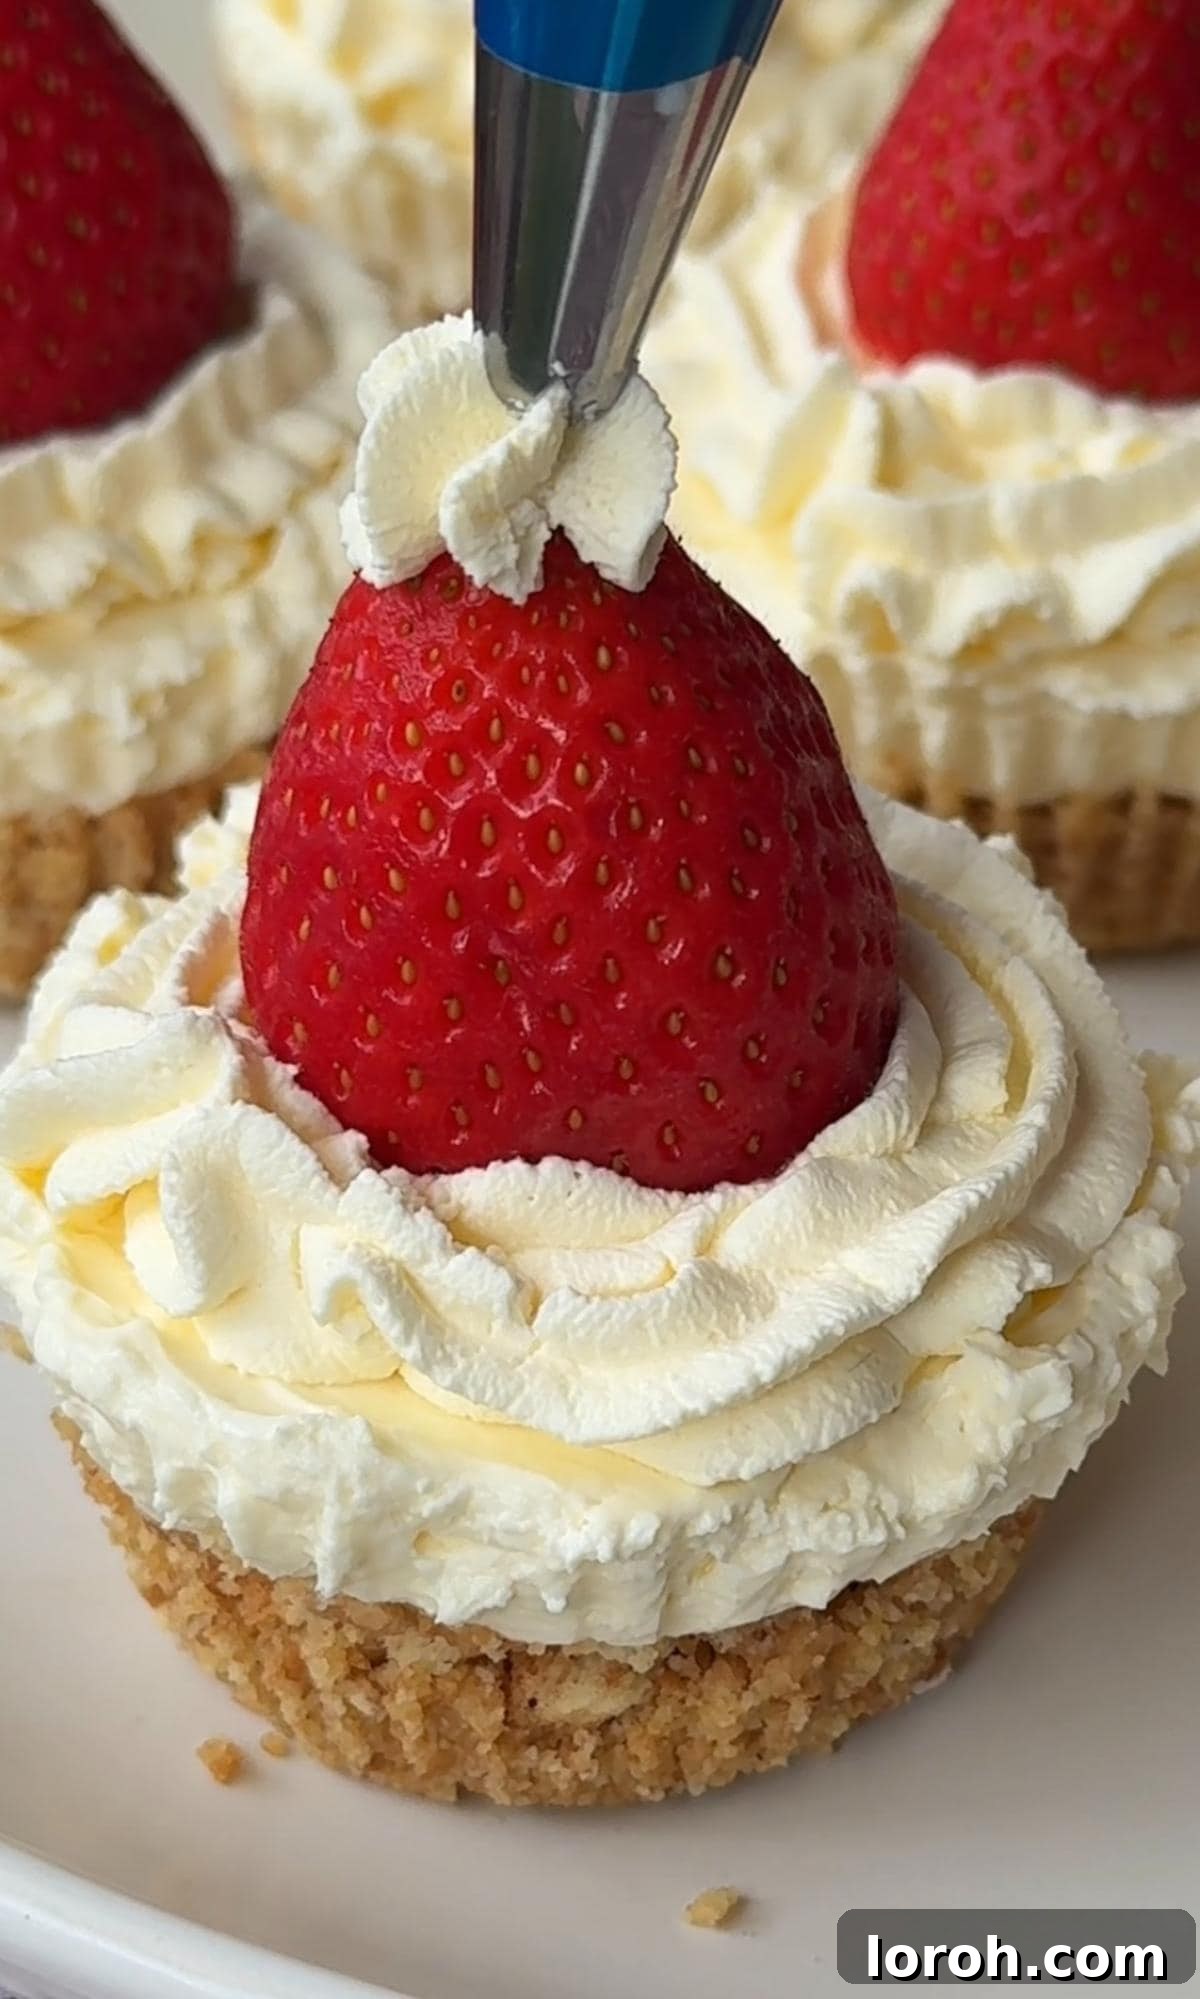
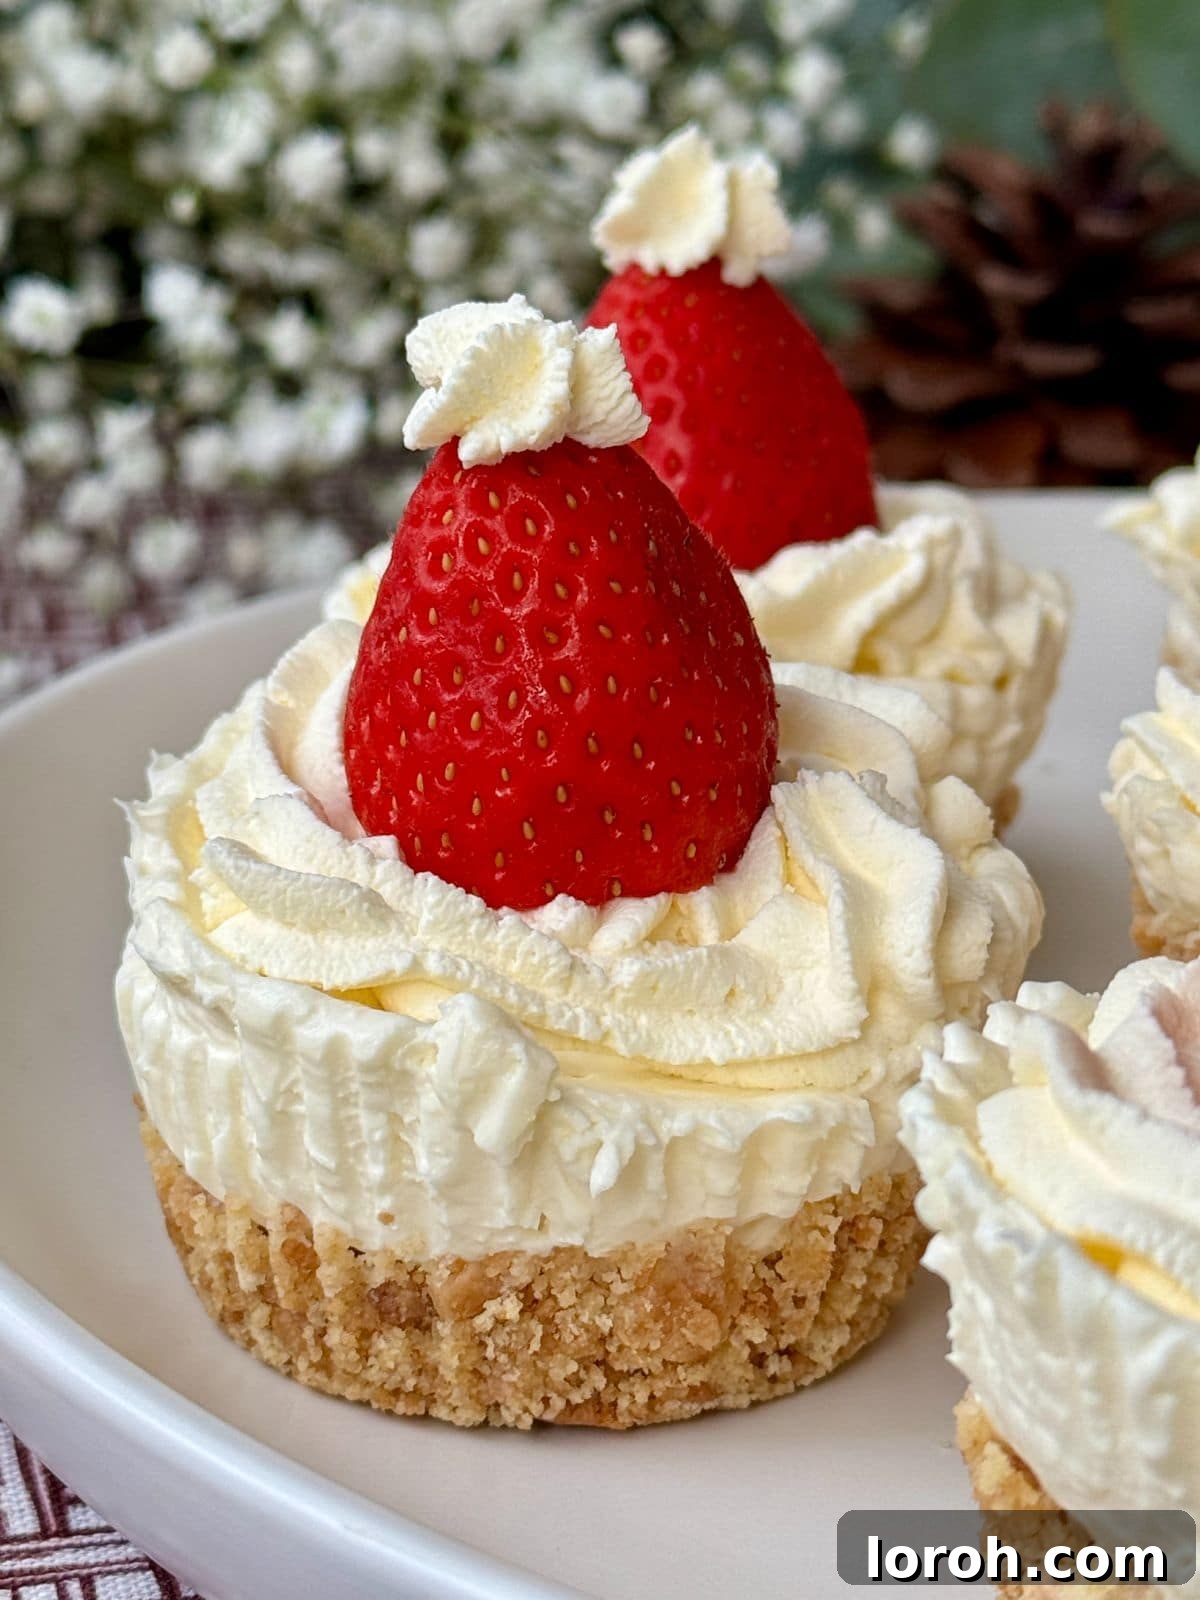
EIGHT: Complete the Santa Hats. To finish your adorable Santa hats, take a fresh, ripe strawberry and place it gently on top of the whipped cream swirl. This forms the main “hat.” For the final touch, pipe a tiny dot or a small swirl of whipped cream right on the very tip of the strawberry, mimicking the classic white pom-pom on Santa’s hat. Arrange your finished mini Christmas cheesecakes on a festive platter and watch them bring smiles to everyone’s faces!
Troubleshooting & Expert Tips for Perfect Cheesecakes
Even the simplest recipes can encounter small hiccups. Here’s a guide to common issues and how to resolve them, along with some extra tips for perfect results every time:
| Problem | Why it Happens | Quick Fix & Prevention |
|---|---|---|
| Filling too soft or runny | This usually occurs if the cream (double/heavy cream) wasn’t whipped enough to medium-stiff peaks, or if the cream cheese wasn’t at room temperature, making it harder to combine properly. Using low-fat cream cheese can also be a culprit. | Ensure your double cream is very cold before whipping. Whisk the cream cheese and cream mixture until it forms firm peaks and holds its shape well. Make sure cream cheese is softened. Chill the cheesecakes for longer, ideally overnight (8+ hours), for maximum firmness. Always use full-fat cream cheese. |
| Crumbly biscuit base | The base didn’t have enough melted butter to bind the crumbs, or it wasn’t compressed firmly enough into the muffin cases. | When preparing the base, ensure the biscuit crumbs are uniformly coated with melted butter and have a “wet sand” consistency. If it’s too dry, add 1-2 teaspoons more melted butter, mixing well. Crucially, press the base down very firmly into each muffin case using the back of a spoon or a small glass, ensuring it’s compact. Chilling the base before adding the filling also helps it set. |
| Watery topping or strawberries bleeding color | Strawberry juice can leach out onto the white cream, creating an unappealing watery or discolored patch, especially if decorated too far in advance. | Always pat the strawberries dry with a paper towel before placing them on the whipped cream. For best results, decorate the cheesecakes with whipped cream and strawberries just before serving, or at most, a few hours in advance. If making ahead for more than a day, add the toppings on the day of serving. |
How to Make a Buttery Biscuit Base Without a Food Processor:
No food processor? No problem! You can still easily create the perfect buttery biscuit base for your delicious Christmas cheesecakes with just a few simple kitchen tools:
- Simply place your chosen biscuits (digestives, ginger nuts, etc.) into a sturdy, sealable plastic sandwich bag.
- Using a rolling pin, bash the biscuits repeatedly until they are broken down into fine crumbs. Aim for a consistent texture, similar to fine sand.
- Next, tip the biscuit crumbs into a large mixing bowl. Pour in the melted butter and mix everything thoroughly with a spoon or your hands until the crumbs are evenly coated and have that desired “wet sand” consistency. Proceed with the recipe as normal from there!
Additional Expert Tips for Success:
- Room Temperature Cream Cheese is Key: For the smoothest, lump-free cheesecake filling, ensure your full-fat cream cheese is at room temperature before you start mixing. This allows it to blend seamlessly with the sugar and vanilla.
- Don’t Overwhip: While you want a thick, stable filling, be careful not to overwhisk the cream cheese and cream mixture. Overwhipping can lead to a dense or slightly grainy texture. Stop once firm peaks are achieved.
- Patience is a Virtue (Chilling Time): The chilling step is not optional! It’s absolutely crucial for allowing the cheesecake to set properly. Resist the urge to cut the chilling time short. An overnight chill truly yields the best results.
- Serving Presentation: For the cleanest presentation, remove the cheesecakes from their paper cases just before decorating. This keeps them looking neat and pristine.
Frequently Asked Questions About Mini Christmas Cheesecakes
Undecorated mini Christmas cheesecakes will last beautifully for up to 3 days when stored in an airtight container in the refrigerator. For the freshest look and taste, it’s best to whip the cream and add the strawberry Santa hats closer to the time of serving. The longer the strawberries sit on the cream, the higher the chance of their juices running onto the cheesecake.
There are a few common reasons why your cheesecakes might not have set. The most frequent culprit is that the cream cheese and double cream mixture wasn’t whipped sufficiently. It needs to be very thick and hold firm peaks to ensure a stable set. Using an electric whisk is highly recommended for achieving this consistency. Also, ensure you used full-fat cream cheese, as low-fat varieties often fail to set. Finally, insufficient chilling time is a common issue; these cheesecakes truly benefit from a long chill, ideally overnight, to become firm and perfectly sliceable (or in this case, perfectly scoopable!).
Absolutely! In fact, preparing these mini Christmas cheesecakes in advance is highly recommended. They actually benefit from an overnight chill, allowing the flavors to meld and the filling to achieve its optimal firmness. I love to prep the cheesecakes (without the whipped cream and strawberry toppings) the day before I plan to serve them. Then, on the morning of your event or just before serving, simply add the final decorative touches. Stored covered in the fridge, they will keep well for up to 3 days, much like my popular Chocolate Orange Mini Cheesecakes.
Yes, you can! These mini cheesecakes are freezer-friendly if frozen *undecorated*. Once the cheesecakes have fully set after chilling, gently remove them from their muffin cases. Wrap each cheesecake individually in cling film, then place them in an airtight freezer-safe container or bag. They can be stored in the freezer for up to 3 months. When you’re ready to serve, transfer them to the refrigerator to defrost for several hours or overnight, then decorate with fresh whipped cream and strawberries just before serving.
You’ll need a standard 12-hole muffin tray and paper muffin cases for individual portions. A food processor is highly recommended for quickly crushing biscuits, but a sturdy sandwich bag and a rolling pin work just as well. For the filling, an electric hand whisk or a stand mixer with a whisk attachment will make whipping the cream cheese and cream much easier and more efficient. You’ll also need a large mixing bowl, a spoon or spatula for smoothing, and cling film for chilling. For decoration, a piping bag with a star nozzle (or just a snipped corner of a Ziploc bag) for the cream can be helpful, though a spoon works fine too.
Other Festive Recipes You Might Enjoy
If you’ve fallen in love with this easy Christmas cheesecake recipe and are looking for more delightful dishes to brighten your holiday season, you’ll adore my other festive creations. Try my whimsical Nutella Puff Pastry Christmas Tree, the savory and beautiful Pesto and Cheese Puff Pastry Sun, or the comforting Ham & Cheese Pithivier. For another incredibly creamy dessert idea that’s perfect for winter, indulge in my Creamy Italian Custard Pudding.
Easy Dessert Recipes
Mini Egg Cheesecake
Puddings
Crème Brûlée Cheesecake
Easy Dessert Recipes
The Best Salted Caramel Cheesecake
Puddings
Apple Crumble Cheesecake
If you tried this recipe for Easy Mini Christmas Cheesecakes or any other festive recipe on the site, please do leave a rating or a comment below and let us know how it went. Your feedback is truly appreciated!
Easy Christmas Cheesecakes
Rate Recipe
Print Recipe
Ingredients
For the biscuit base:
- 150 g digestives
- 50 g unsalted butter, melted
For the cheesecake filling:
- 300 g full-fat soft cream cheese
- 50 g icing sugar
- About 1 tsp vanilla extract
- 150 ml double cream
For the topping:
- 150 ml double cream
- Strawberries, to top
Instructions
-
For the biscuit base: tip the digestive biscuits into a food processor and blitz into fine crumbs. Add the melted butter and whizz again until you have the desired crumbly consistency. It should resemble damp sand.
-
Line a muffin tray with muffin cases. Fill each case with a spoon of the biscuits and pack it down well. I like to use the bottom of a small glass or the back of a spoon. Cover and chill in the fridge whilst you make the filling.
-
For the cheesecake filling: put the cream cheese into a large bowl and sift in the icing sugar. Add the vanilla extract and whisk using an electric whisk until smooth. You can also do this using a stand mixer.
-
Pour in the double cream and continue to whisk until you have a lovely and thick cheesecake mix. Alternatively, you can whisk the cream to medium peaks separately, then gently fold through (I find the same bowl method saves on the washing up!). Taste and add a little more vanilla extract, if desired.
-
Spoon onto the chilled biscuit bases and use the back of a spoon, spatula or palette knife to spread in a smooth, even layer. Cover with cling film and chill in the fridge for at least 4 hours (ideally overnight) or until set.
-
Once the cheesecake has set, remove from the cases and set onto a flat plate. Gently spoon and swirl the whipped cream on top and top with a strawberry. Then pipe a little bit of cream on top of the strawberry to look like a Santa hat.
-
The video below will help with this recipe.
Video
Notes
To store: Once made, these cheesecakes will last for up to 3 days in the fridge when covered. Be aware that the longer they sit, the strawberry juices risk running onto the cheesecakes, so for best presentation, add toppings just before serving.
To freeze: You can easily freeze the undecorated cheesecakes for up to 3 months. Ensure they are individually wrapped tightly in cling film before freezing. Defrost them in the fridge overnight. Decorate with whipped cream and strawberries only when you are ready to serve.
Make ahead: Undecorated Christmas cheesecakes are the perfect make-ahead dessert. They actually benefit from an overnight set in the fridge. Prepare the bases and filling, chill overnight, then simply decorate with the whipped cream and strawberries before serving (or on the morning of your event). Once fully assembled, they will last for up to 3 days, covered in the fridge.
Nutrition
Nutrition information is automatically calculated, so should only be used as an approximation.